

Ever found yourself scratching your head over dessert ideas for a gathering? After countless soirees and potlucks, I've discovered that chocolate covered Oreos hit the sweet spot every time - they're straightforward, easy to make yet irresistibly decadent.
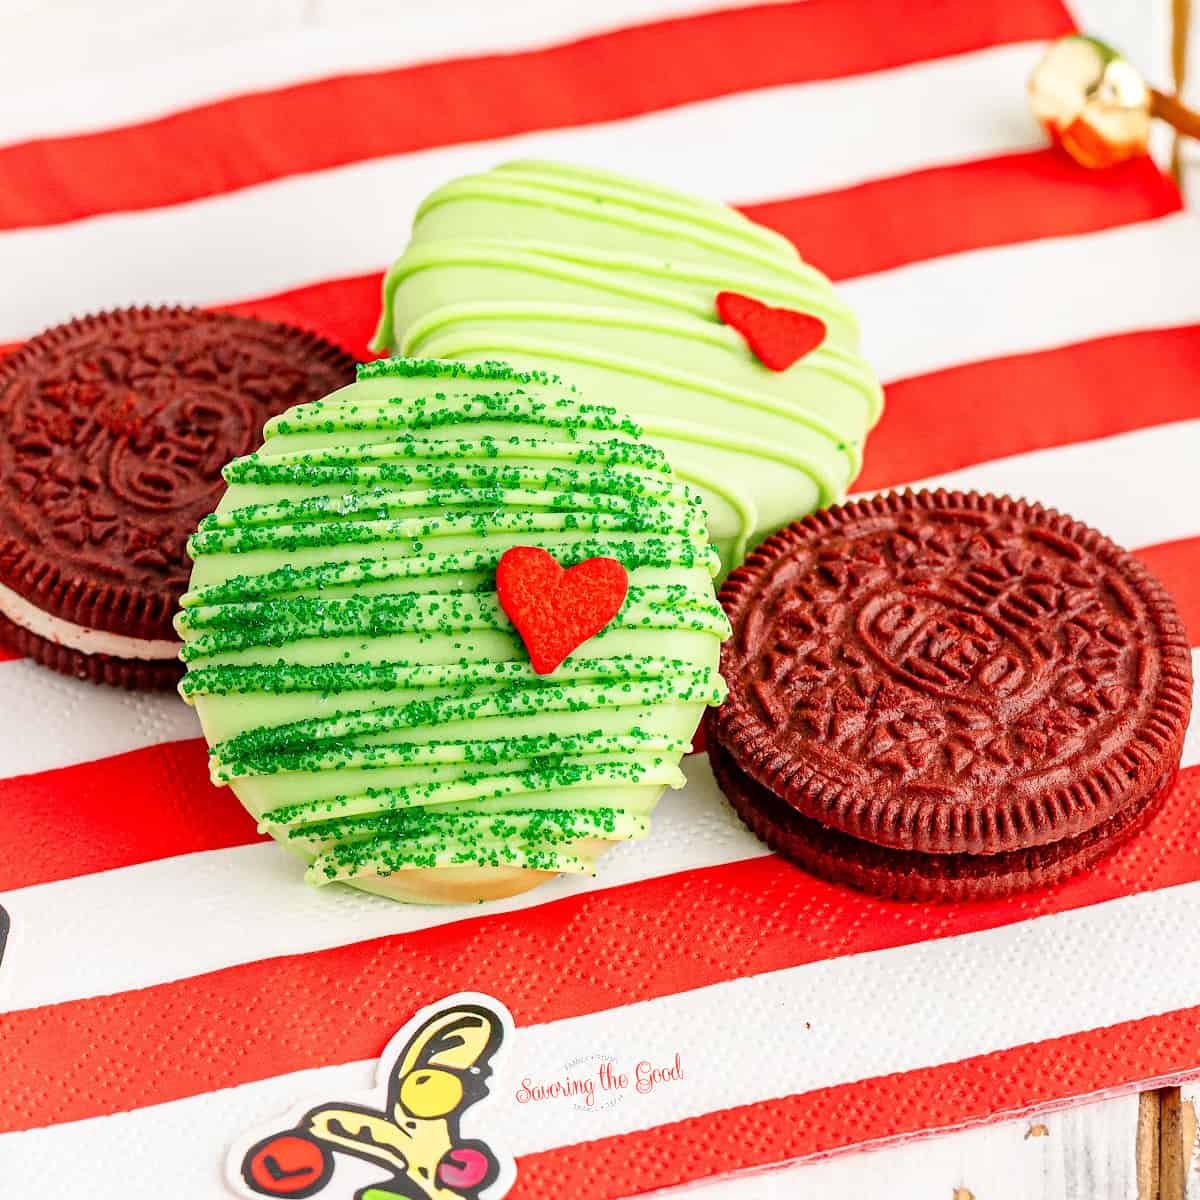
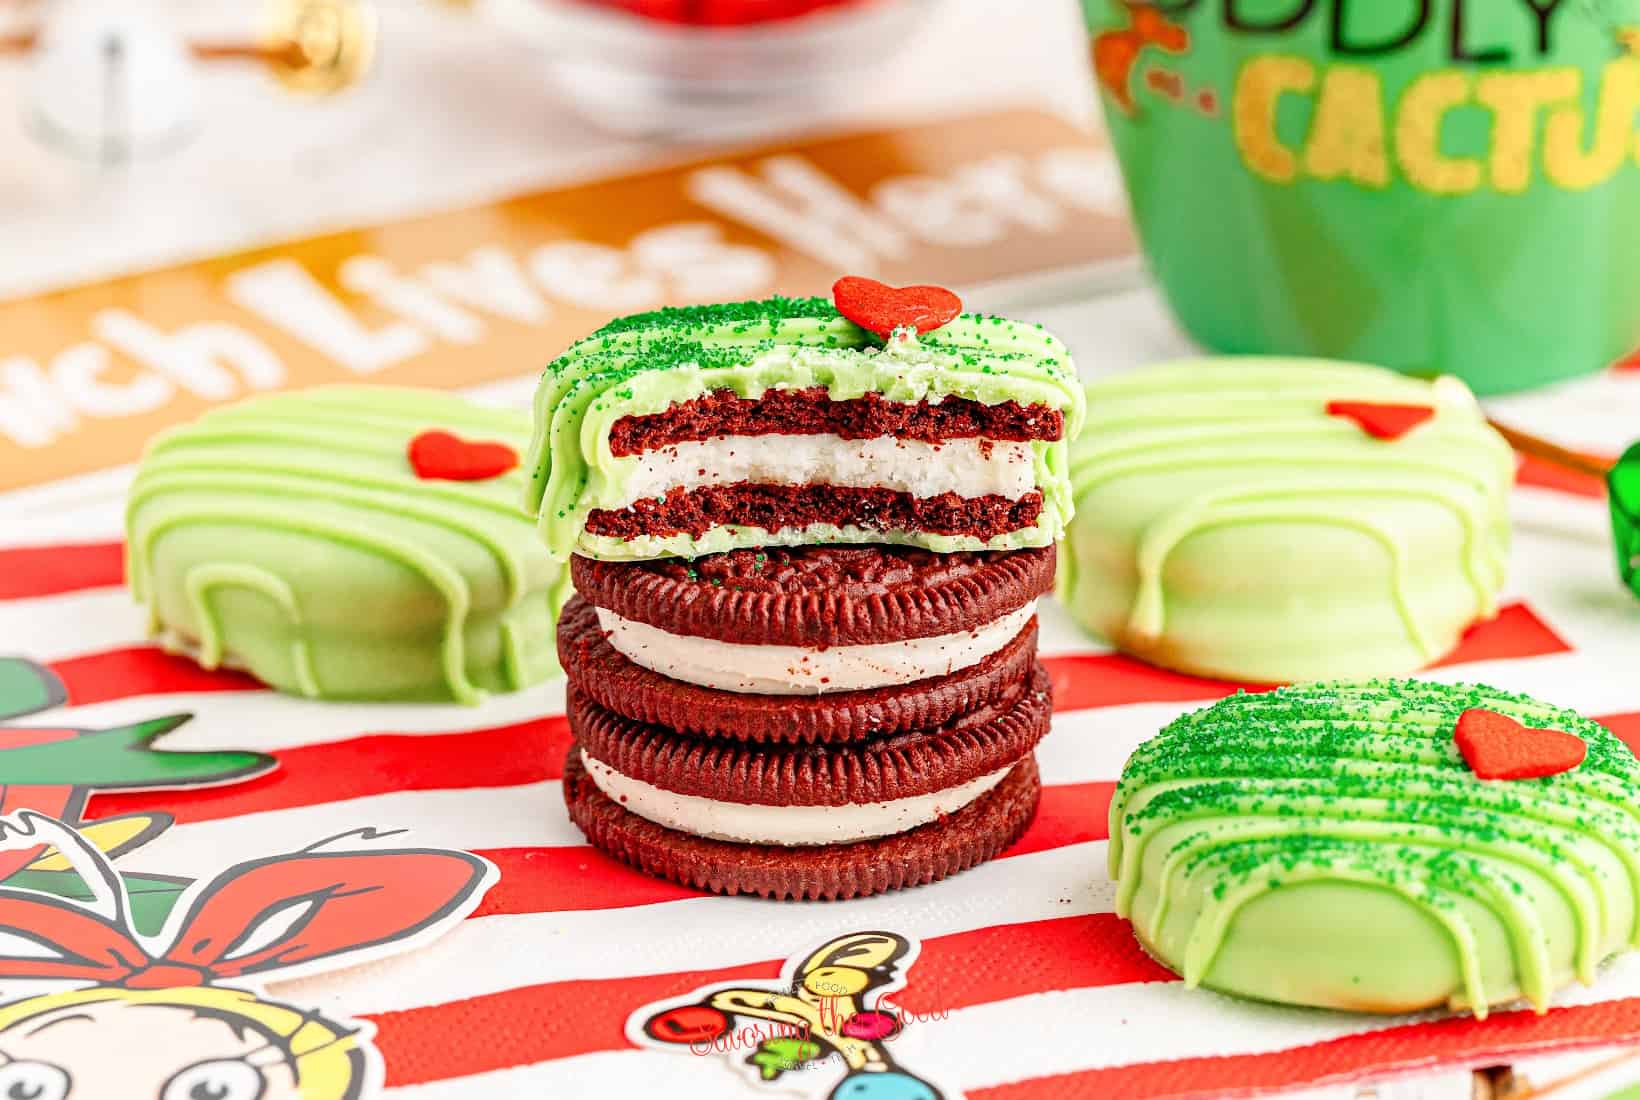
Grinch Chocolate Dipped Oreos
I am going to teach you to make the perfect chocolate-dipped Oreos, explore some fun recipe twists, share savvy storage tricks and answer any questions you may have. Be sure to check out my oreo chocolate truffles, oreo truffles, oreo red velvet cookies and my other oreo dessert recipes.
🥄 How to Make Chocolate Covered Oreos
To make delicious chocolate covered Oreos, you will need just a few simple ingredients and some easy-to-follow steps. Don't forget to check out Grinch Punch to go along with your Grinch-themed party!
🍫 Ingredients needed to make Grinch Chocolate Dipped Oreos

To create these delightful chocolate covered Oreos, you'll need a handful of basic ingredients.
- 12.2 ounce package Red Velvet Oreos
- 10 ounces light green candy melts (I used Melt 'Ems brand)
- Heart sprinkles
- Dark green sanding sugar (optional)
- Shortening or Coconut oil to thin the chocolate.(optional)
- Sprinkles or other toppings for decoration (optional).
- Parchment paper for easy cleanup.
❤️ Step-by-step instructions to dip the oreos

Let's get started making these delicious chocolate covered Oreos.
- Prepare two baking trays, lined with parchment paper and set aside.
- Divide out ½ cup of light green candy melt pieces for the decorative drizzle.

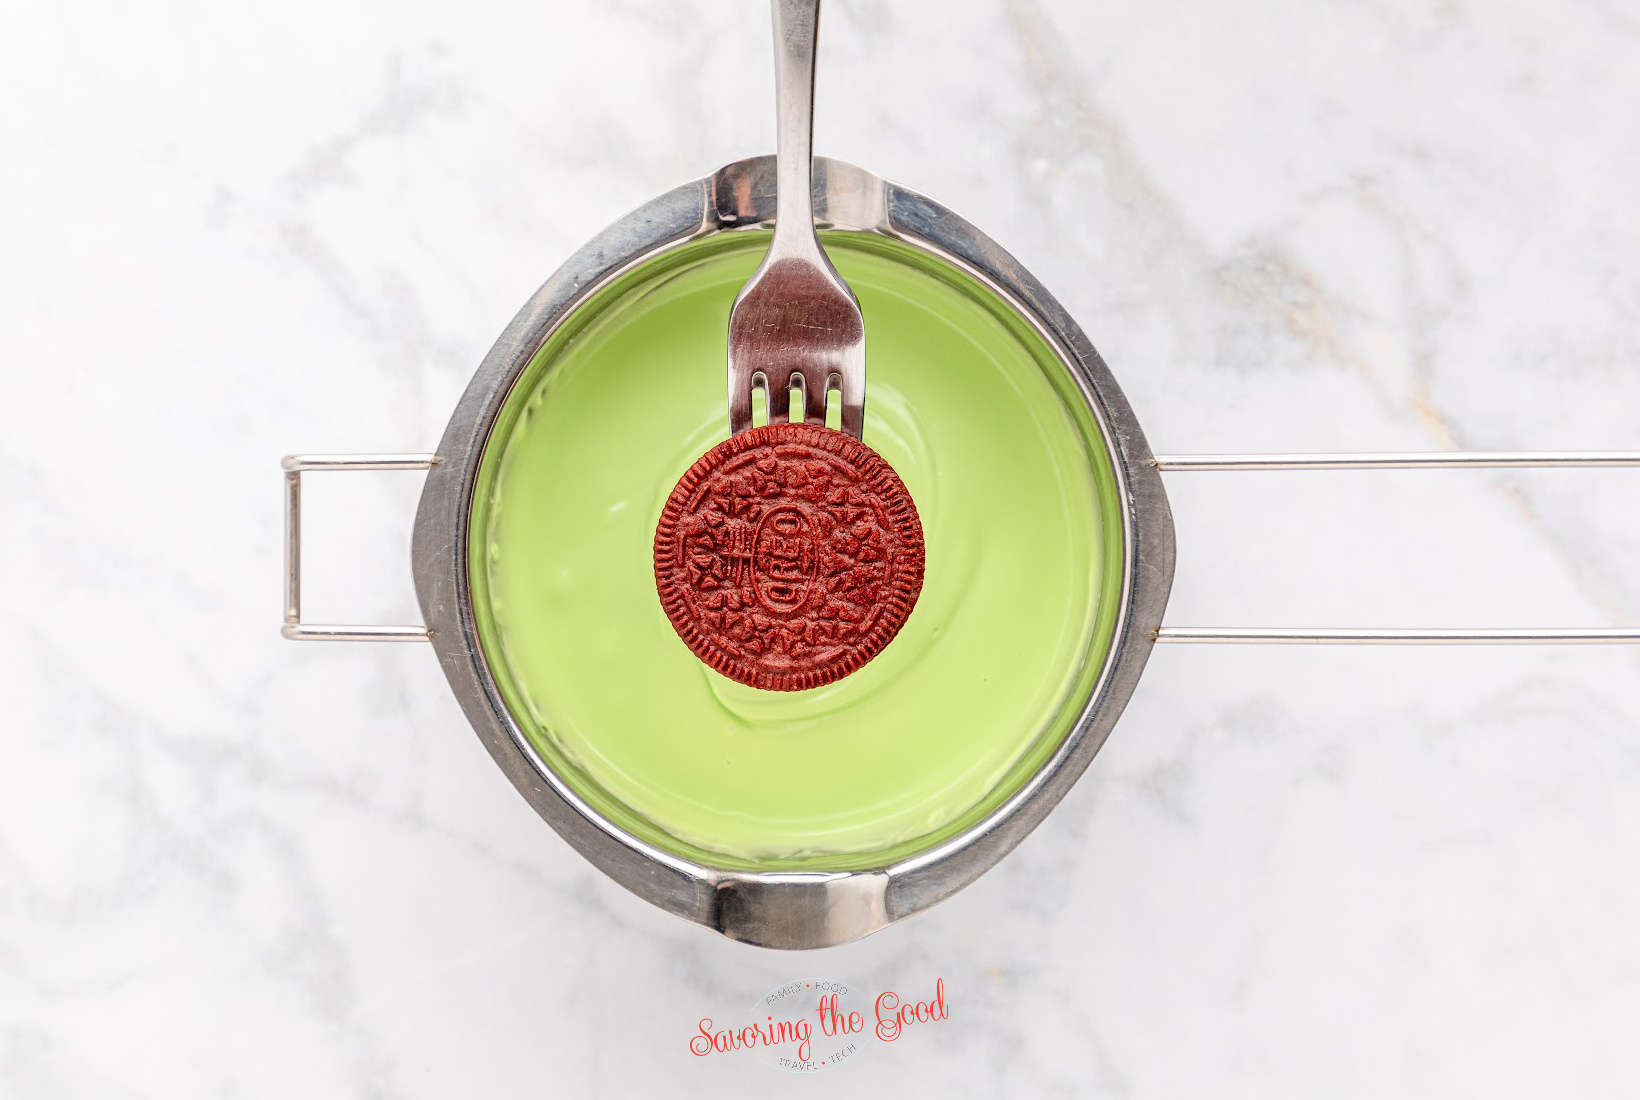
- Melt the remaining chocolate melting wafers in a double boiler over low heat, stirring every 30 seconds until fully melted and smooth.
- Alternatively, melt the chocolate wafers in the microwave safe bowl in the microwave using a low or defrost setting in 30 second intervals, stirring after each interval, until fully melted and smooth.
- Use a fork, dip one Oreo cookie at a time into the melted chocolate, flipping it to coat completely.
- Gently tap the handle of the fork against the edge of the double boiler or bowl to remove the extra chocolate from the covered oreo. (*Tip: to get a super smooth surface, tap the bottom of the fork on the surface of the melted chocolate. This will create tension in the chocolate, pulling it uniformly over the oreo. )
- Place onto the prepared tray and repeat with the remaining Oreos.
- While the chocolate is setting up, prepare your piping bag and decorative chocolate.
- Place ½ cup of light green candy melts into a microwave-safe piping bag, twist it shut, and then microwave it on a low or defrost setting until fully melted and smooth. Be sure to massage the bag every 1-2 minutes to ensure the candy melts are melting evenly.
- Once melted, snip a small piece of the tip off of the piping bag. Drizzle a design over the chocolate covered Oreo and then top it with a red heart sprinkle. You can also add some green sanding sugar if desired. Just be sure to move quickly before the drizzle sets completely.
- Allow the drizzle to set completely before serving. You may place the Oreos in the refrigerator to help the chocolate set faster


Recipe Tips: easy chocolate covered Oreos
Choosing the right chocolate for your chocolate covered Oreos recipe is crucial. Opt for a high-quality dipping or melting chocolate to get that glossy finish and delightful crunch when bitten into. Melting your chocolate correctly also plays a significant role in achieving the optimal consistency; utilize a double boiler method instead of using microwave as it provides better control over temperature.
Stir the melted chocolate thoroughly but gently to prevent air bubbles which can spoil the smooth texture on your cookies. Always dip Oreos one at a time and let excess chocolate drip off before placing them on parchment paper.
Finally, customize with jimmies or drizzles while the coating is still wet then let them harden completely at room temperature for best results!
🔄 Variations and Ideas for Chocolate Dipped Oreos
For those looking to take their chocolate covered Oreos to the next level, there are endless possibilities for flavor variations and decorative designs. From different flavored chocolates to fun toppings, let your creativity run wild with these delicious treats.
Different flavors and toppings
I love experimenting with different flavors and toppings for chocolate dipped Oreos. Here are some ideas to try:
- Mint: Add a drop of peppermint extract to the chocolate for a refreshing twist.
- Peanut Butter: Spread a thin layer of peanut butter on top of the Oreo before dipping it in chocolate.
- Sprinkles: Roll the chocolate coated Oreos in colorful sprinkles for a fun and festive look.
- Crushed Candy Canes: add crushed candy canes on top of the chocolate for a holiday-inspired treat.
- Coconut: Dip the Oreos in melted white chocolate, then roll them in shredded coconut for a tropical twist.
- Caramel Drizzle: Drizzle some caramel sauce over the chocolate for an extra gooey and delicious treat.
Decorative designs
To make your chocolate covered Oreos even more special, try these decorative designs:
- Drizzle Design: After dipping the Oreos in chocolate, use a spoon to drizzle a contrasting color of chocolate over the top. You can create swirls or zigzags for a visually appealing effect.
- Sprinkle Design: Before the chocolate sets, sprinkle colorful sprinkles, edible glitter, or crushed candies on top of the Oreos. This adds texture and makes them look festive.
- Swirl Design: Dip a toothpick into a different color of melted chocolate and create swirl patterns on top of the dipped Oreos. Be creative with your designs - you can make hearts, flowers, or any other shapes that suit the occasion.
- Cookie Cutter Design: Use cookie cutters to create unique shapes out of colored fondant or candy melts. Place these decorations on top of the dipped Oreos for an eye-catching design.
- Personalized Designs: Use food-safe markers to draw personalized messages or drawings on top of the dried chocolate shell. This is especially fun for kids' birthday parties or special occasions.
🎄 Holiday and seasonal themed chocolate covered Oreos
I love adding a festive touch to my chocolate covered Oreos, especially during holidays and special occasions. Here are some fun ideas to try:
- Halloween: Decorate your chocolate covered Oreos with spooky designs using black and orange sprinkles, or draw jack-o'-lantern faces on them with melted white chocolate.
- St. Patrick's Day: How fun is creating a pot of gold out of a cookie? Oreo cookies are delicious on their own, but when you cover them with chocolate and goodies they become irresistible!
- Christmas: Dip your Oreos in white chocolate and add red and green sprinkles for a festive look. You can also drizzle them with red and green colored chocolate for an extra touch of holiday cheer.
- Winter Snowmen: These adorable dipped Oreo snowman cookies start with Double Stuf Golden Oreo cookies, which are dipped in white chocolate.
- Valentine's Day: Use heart-shaped molds to make chocolate covered Oreos and decorate them with pink or red sprinkles. Write sweet messages on top using icing or edible markers.
- Easter: Dip your Oreos in pastel-colored chocolates like pink, yellow, and blue. Add decorative Easter-themed candies like mini eggs or bunny shapes on top.
- Fourth of July: Cover your Oreos in white chocolate and sprinkle them with red, white, and blue star-shaped sprinkles for a patriotic treat.
❄️ Storing and Serving Chocolate Covered Oreos
To keep your chocolate covered Oreos fresh and delicious, it's important to store them properly. Learn the best storage methods and how long they can be kept, as well as some great options for gifting or serving these sweet treats!
Proper storage methods
To keep your chocolate covered Oreos fresh and tasty, it's important to store them properly. After making them, place the chocolate covered Oreos in an airtight container or zip-top bag.
Store them in a cool and dry place away from direct sunlight. This will help prevent the chocolate from melting or getting too soft. If you prefer a firmer texture, you can also refrigerate the Oreos, but make sure they are still stored in an airtight container.
When stored properly, your delicious homemade treats can last up to one week without losing their flavor or texture. So go ahead and make a batch of these irresistible treats for yourself or to share with friends!
How long they can be kept
I always get asked how long chocolate covered Oreos can be kept, especially when I'm making them for a party or as gifts. The good news is that they can stay fresh and delicious for up to two weeks when stored properly.
Just make sure to keep them in an airtight container at room temperature, away from direct sunlight and heat sources. This will help maintain their crunchiness and prevent the chocolate from melting or becoming stale.
So feel free to make a big batch ahead of time and enjoy these tasty treats whenever you're in the mood!
When it comes to storing chocolate covered Oreos, refrigeration is not recommended as it can cause condensation on the chocolate surface, ruining their texture. Plus, refrigerated Oreos tend to develop a softer cookie center due to moisture absorption.
🎁 Options for gifting or serving
I love gifting and serving chocolate covered Oreos because they are delicious and visually appealing. One option for gifting is to package them in a clear cellophane bag, tie it with a colorful ribbon, and attach a cute gift tag.
These make great party favors or small gifts for friends and family. Another idea is to arrange the chocolate covered Oreos on a decorative platter or in a holiday-themed tin for serving at parties or gatherings.
You can also include them as part of a dessert buffet where guests can help themselves to this tasty treat. Whether you're giving them as gifts or serving them at an event, chocolate covered Oreos are always a hit!

What is the best type of chocolate to use for dipping Oreos? How far in advance can I make chocolate covered Oreos? Do I need to refrigerate them after they are made?
Best candy melts chocolate to use
For the best results when making chocolate covered Oreos, it's important to choose the right chocolate. I recommend using high-quality melting chocolate or candy melts specifically designed for coating and dipping.
These chocolates have a smooth texture and melt easily, ensuring that your Oreos will be evenly coated. You can find these chocolates in a variety of flavors and colors, so you can get creative with your chocolate covered Oreos.
Just make sure to follow the package instructions for melting and tempering the chocolate.
Top Tip
Remember to use a low heat or defrost setting when melting the candy melts. High heat will cause it to dry out and it will seize and clump up.
How far in advance they can be made
I typically make my chocolate covered Oreos a day or two in advance. This allows enough time for the chocolate to fully set and the flavors to meld together. If you want to be extra prepared, you can even make them up to a week ahead of time.
Just be sure to store them properly in an airtight container at room temperature. That way, they'll stay fresh and delicious until you're ready to serve them.
When it comes to making these treats for special occasions or events, it's always better to plan ahead. By preparing your chocolate covered Oreos in advance, you'll have one less thing to worry about on the big day.
Refrigeration requirements
To keep your chocolate-covered Oreos fresh and delicious, it's important to store them properly. After dipping the Oreos in chocolate and allowing them to set, place them in an airtight container or resealable bag.
Store them in the refrigerator for best results. This helps to prevent the chocolate from melting and keeps the cookies crispy. When you're ready to serve or enjoy them, simply remove from the fridge and let them come to room temperature before serving.
Refrigerating your chocolate covered Oreos will ensure that they stay tasty and enjoyable for as long as possible.
🍓 Other Chocolate Covered Dessert Ideas
Looking for more delicious chocolate-covered treats? Check out these additional recipes and tips for successful chocolate dipping techniques. Your sweet tooth will thank you!
Additional recipes for chocolate covered treats
I've got some more delicious ideas for chocolate covered treats that you can try at home. Check out these recipes:
- Strawberries: Dip fresh strawberries into melted chocolate for a sweet and tangy treat.
- Pretzels: Take crispy pretzels and dip them in melted chocolate for the perfect combination of salty and sweet.
- Bananas: Slice bananas into bite-sized pieces, then dip them in melted chocolate and freeze for a cool and creamy dessert.
- Peanut Butter Balls: Mix together peanut butter, powdered sugar, and butter, then roll into balls and dip in melted chocolate for a rich and indulgent snack.
- Marshmallows: Skewer marshmallows on sticks, then dip them in melted chocolate and let them set for a gooey and delightful treat.
- Nuts: Dip your favorite nuts, like almonds or cashews, into melted chocolate for a crunchy and satisfying snack.
- Raisins: Coat plump raisins with smooth melted chocolate for a chewy and decadent treat.
Tips for successful chocolate dipping techniques
Here are some tips to help you achieve perfectly dipped chocolate covered Oreos:
Remember to use a low heat or defrost setting when melting the candy melts. High heat will cause it to dry out and it will seize and clump up.
- Melt the chocolate in a microwave - safe bowl, stirring every 30 seconds until smooth and creamy.
- Use a fork or dipping tool to fully submerge each Oreo into the melted chocolate, ensuring that it is evenly coated on all sides.
- Tap the fork lightly on the side of the bowl to remove excess chocolate before transferring the dipped Oreo onto a lined baking sheet.
- For added flair, sprinkle your favorite toppings onto the freshly dipped Oreos while the chocolate is still wet.
- Allow the chocolate to set completely by placing the baking sheet in the refrigerator for about 15 - 20 minutes.
- To prevent any sticking, gently lift each cooled and hardened Oreo from the baking sheet using a spatula or your fingers.
Whether you're making them for yourself or as a special treat for others, chocolate covered Oreos are sure to be a hit. So go ahead and indulge in this irresistible combination of crunchy cookies and smooth chocolate!
FAQs
Chocolate covered Oreos are regular Oreo cookies that have been dipped in either milk or white chocolate for an extra indulgent treat.
Red velvet oreo cookies bring a unique flavor twist, combining the rich flavors of cocoa and cream cheese frosting with the classic crunch and creaminess of the traditional Oreo cookie.
Yes, original Oreo biscuits contain cocoa as one of their core ingredients, giving them their signature chocolaty taste.
Ingredients
- 1 package Red Velvet Oreos 12.2 oz.
- 1 package Candy Melts 10 oz. bag, Light Green
- 24 each Candy Hearts
- Dark green sanding sugar optional
Instructions
- Line two baking trays with parchment paper and set aside.
- Set aside ½ cup of light green candy melt pieces for the drizzle. Melt the remaining amount in a double boiler over low heat, stirring every 30 seconds until fully melted and smooth. You can alternatively melt them in the microwave using a low or defrost setting in 30 second intervals, stirring each time, until fully melted and smooth.
- Use a fork to dip one Oreo cookie into the melts and coat it completely. Lift it out with the fork and gently tap the fork against the edge of the double boiler or bowl to remove the excess coating. Place onto the prepared tray and repeat with the remaining Oreos.
- Place ½ cup of light green candy melts into a microwave safe piping bag, twist it shut, and then microwave it on a low or defrost setting until fully melted and smooth. Be sure to massage the bag every 1-2 minutes to ensure the candy melts are melting evenly.
- Once melted, snip a small piece of the tip off of the piping bag. Drizzle a design over the Oreo and then top it with a red heart sprinkle. You can also add some green sanding sugar if desired. Just be sure to move quickly before the drizzle sets completely.
- Allow the drizzle to set completely before serving. You may place the Oreos in the refrigerator to help the coating set faster. Enjoy!
Nutrition

I am Sarah Mock. Welcome!
Sarah Mock is a classically trained Chef and graduate of Johnson & Wales University. A culinary blogger for 15 years Sarah helps the home cook prepare her recipes with professional results.


Comments
No Comments