

Did you know you can make homemade yogurt with the help of your sous vide circulator? Sous vide yogurt is an easy way to make your own yogurt while maintaining all the probiotic benefits that come with incredible homemade yogurt.

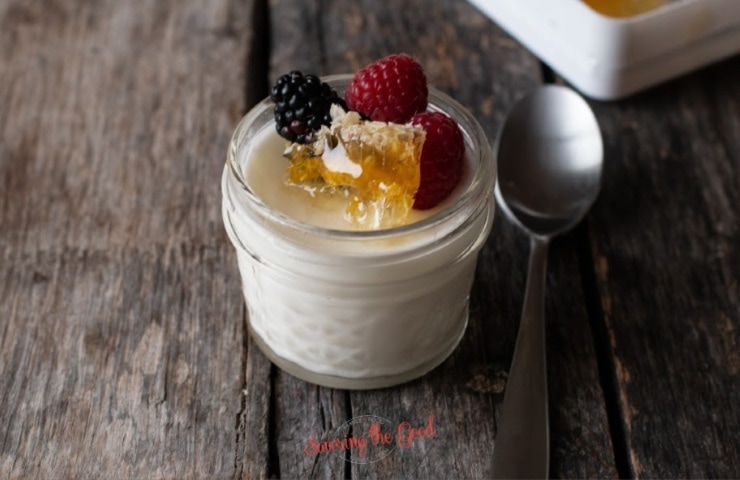
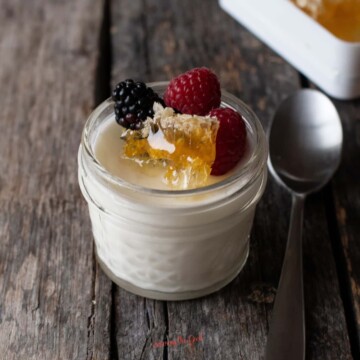
Here are my step-by-step instructions that will lead you to sous vide yogurt success. This is a basic plain yogurt recipe but feel free to top it with fresh fruit or a scoop of jam and a drizzle of home.
Ingredients needed to make yogurt at home:
Recipe Card?
To find the full printable recipe with specific measurements and directions CLICK HERE to go to the recipe card.
What type of milk should I use?

I use either 2% or skim cow milk to make yogurt for my family. But you are welcome to use whole milk. The higher the fat content the thicker the yogurt will be.
What is most important about the type of milk you use be either raw or pasteurized. Pasteurized is what I am able to find at my grocery store and raw milk can be found in various states, depending on the raw milk laws.
If you find milk that is labeled Ultra pasteurized milk (UP) or ultra-high temperature treatment (UHT) you are going to need to add a starter culture to the milk or the yogurt will not set. With UP or UHT milk, the milk has been heated to 275°F or higher for about one second and has killed any of the good cultures in the milk.
How to make Sous Vide Yogurt:
- Use a large gallon Ziploc bag or several quart-size glass jars, heat the milk to 180 F in the sous vide bath.
- Set a timer and hold the milk there for 30 minutes.
- Add ice to the water bath to cool it and drop the temperature of the milk to below 110 F.
- Stir in the starter culture yogurt.
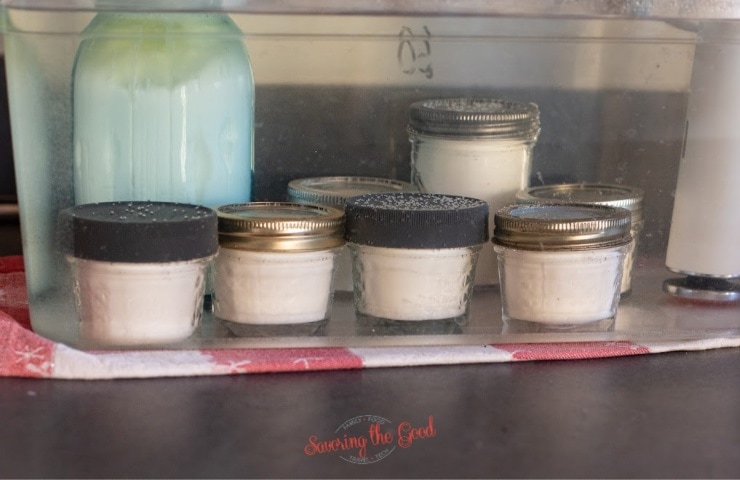
- Transfer to clean quart glass mason jars or multiple smaller glass jars.
- Reheat the sous vide water bath to 110-115 F
- Submerge the jars in the reheated sous vide making sure the water level is above the jars and place on a lid to keep evaporation to a minimum.
- Incubate the yogurt for a minimum of 5 hours or up to 24 hours.
- Chill in the refrigerator overnight.
- Enjoy the yogurt with your favorite fruit or granola toppings.
Frequently asked questions
The yogurt you find in the grocery store is not the same recipe. This sous vide yogurt recipe does not have added thickeners, stabilizers or flavorings.
yogurt to have a distinct yogurt tang, incubate it for 24 hours. The longer the incubation the more tangy flavor it will have. Additionally, if you are looking for a firmer set to your yogurt, go with a 115 incubation versus the 110 that will give you a softer, more pourable yogurt.
I have found that most commercially made yogurts at my grocery store will be labeled 'live and active cultures on the side of the container. It may be in small print but it should be there. This is what you are going to be looking for when you are looking to use a yogurt starter or yogurt with live active cultures.
Chef Tip To Make Thicker Yogurt
To make the yogurt thicker in consistency without adding thickeners, strain the yogurt in a strainer lined with cheesecloth or several layers of paper towels.
Ingredients
- ½ gal milk
- ½ Cup live active yogurt
Instructions
- Warm the milk to 180 F.
- Hold the milk there for 30 minutes. Sous vide is amazing for this because of the consistent temperature. This is a step that can be skipped but I find I have a better set to my yogurt.
- Cool milk to bellow 110 F.
- Stir in the yogurt with live active cultures.
- Transfer to clean quart jars or multiple smaller jars. Secure the with clean lids and bands or the no leak lids.
- Heat the water to 110-115 F. Submerge the jars in the reheated sous vide.
- Incubate the yogurt for a minimum of 5 hours or up to 24 hours. I prefer 24 hours for more of a tang to my yogurt.
- Once time is up, remove the yogurt from the water bath and chill in the refrigerator over night.
- Enjoy the yogurt with your favorite fruit or granola toppings.
Nutrition
Notes

I am Sarah Mock. Welcome!
Sarah Mock is a classically trained Chef and graduate of Johnson & Wales University. A culinary blogger for 16 years Sarah helps the home cook prepare her recipes with professional results.


Heather says
How long will the sealed jars of yogurt keep in the refrigerator?
AaronMsf says
Hello,
Adding powdered milk/cream gives a thicker consistency to the yogurt while increasing the protein (and fat depending on powdered dairy used). Different brands of powdered milk can lend different flavors to the yogurt, experimenting can add fun. I generally add the powder while its still hot then shake or stir to mix.
I find it to help make a thicker Greek and frozen yogurt.
Paul Welby says
Hi Pam,
I have found with making yogurt that if the product comes out runny or lumpy - I stir it up, briskly sometimes, to make it creamier which mixes in the whey and yogurt base, and if I want it thicker I strain it through cheesecloth (to remove some of the whey - the more whey you remove the thicker it will get). The stirring and addition/removal of the whey is going to be your variables to get the product that you want - just right. Hope this helps. :)
Paul W.
Pam Tanner says
I have made this several times now and love having this delicious ,healthy yogurt with homemade granola, fruit and nuts to top it off! Thank you!! One question however, I have yet to get my yogurt to come out as thick as I would like. It is always a little soupy and with small lumps. Neither of these issues affect the great taste of it but I prefer a thicker, smooth yogurt. Any suggestions??
(I use whole milk in our Sous Vide and let it sit for 30 min at 180* and then in jars, back in the Sous Vide for about 8 hrs. )