


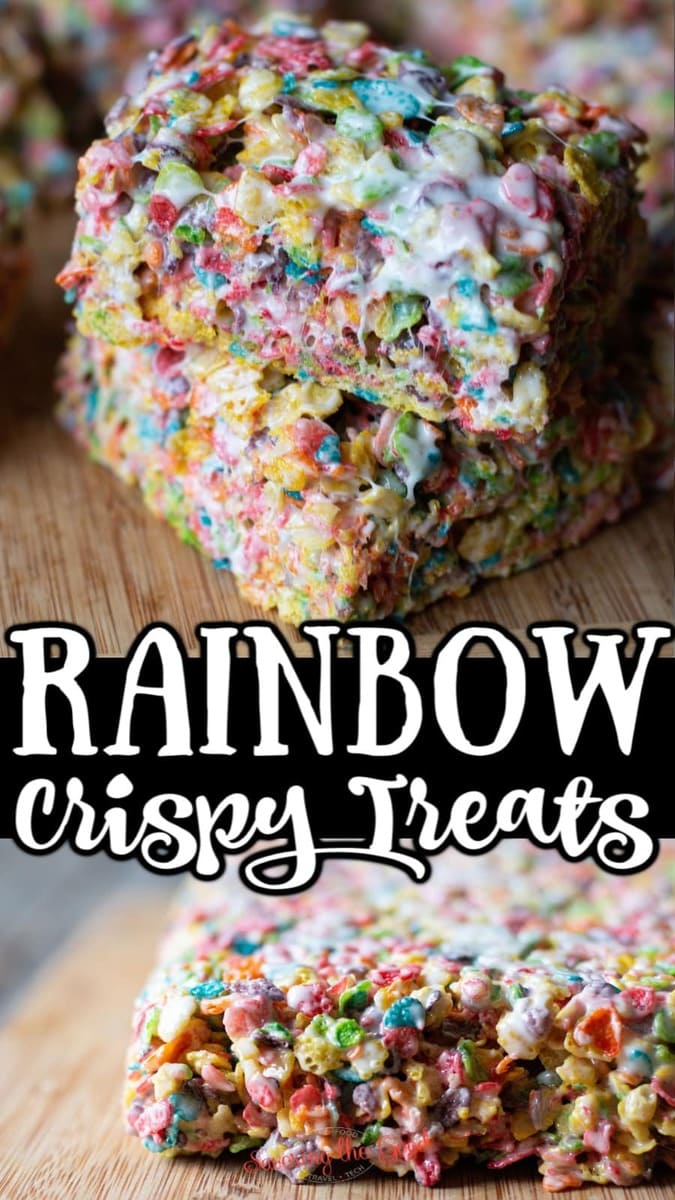
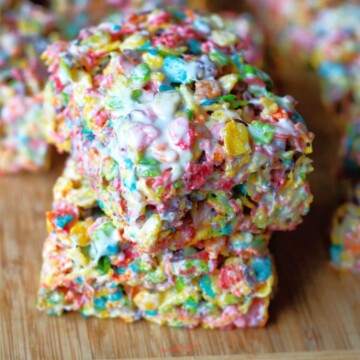
Fruity pebbles treats are the rainbow version of your favorite marshmallow cream and rice crispy treats.

Perfect for your rainbow party or your bake sale fundraiser, these no-bake treats have 4 simple ingredients and are ready in under 30 minutes.
WHAT INGREDIENTS DO YOU NEED TO MAKE FRUITY PEBBLES TREATS?
- Fruity Pebbles cereal - Post Fruity pebbles cereal is naturally gluten-free
- Marshmallows - most marshmallows are gluten and dairy-free but not naturally vegan.
- Butter - unsalted butter is what I prefer
- Vanilla extract
TOOLS NEEDED TO MAKE THE RICE CRISPY TREATS:
- large pot - you need a lot of room to stir the treats.
- silicone spatula - I spray my spatula with nonstick spray to help with easy cleanup.
- measuring cups - Pyrex cups are what I have on hand but other dry measuring cups will work.
- 9 x 13 pan - either glass or metal. Be sure to spray with non-stick spray.
- non-stick pan spray
- Chef knife or pizza wheel - once again, spray with non-stick pan spray.
Fruity Pebbles Rice Crispy Recipes with Marshmallow Fluff:

- First, spray a 9x13-inch pan with nonstick cooking spray.
- Then, melt butter in a large pot and drop the heat to medium-low and add the marshmallows and stir until melted.
- Remove from heat and stir in vanilla extract.
- Add cereal and stir to coat with the marshmallow mixture.
- Pour the marshmallow coated cereal into the coated pan, pressing the treats into the prepared pan.
- Let cool until firm, turn out of the pan and slice into bars.
- Store in an airtight container for up to 3 days. (if they last that long!)
FRUITY PEBBLES CEREAL TREATS WITH MARSHMALLOW FLUFF
Another absolutely delicious option is to add butter and some marshmallow butter and cream and add marshmallow fluff to your treat bars.
FRUITY PEBBLES TREATS INGREDIENTS:
- 4 tablespoons butter
- 8 cups mini marshmallows, divided
- 1 ½ cups Marshmallow Fluff
- 3 cups Rice Krispie cereal
- 3 cups Fruity Pebble cereal
HOW TO MAKE FRUITY PEBBLES TREATS WITH MARSHMALLOW FLUFF:
- Line a 9×13 pan with foil and spray lightly with nonstick spray, set aside.
- In a large saucepot over medium-low heat melt the butter.
- Once the butter is melted add in 6 cups of the mini marshmallows and salt, stirring constantly until they're melted. Remove the pot from the heat.
- Immediately stir in both cereals until coated with the melted marshmallows. Then stir in the Fluff until evenly mixed in. Finally stir in the remaining 2 cups of mini marshmallows.
- Spread the mixture into the prepared pan and press evenly.
- Allow the bars to cool and set for at least an hour before cutting into squares.
Microwave instructions
Perfect for the college dorm room, fruity cocoa pebbles are rice krispie treats that can be made in a microwave!
- 4 Tablespoons butter or margarine
- 1 pkg(10 oz) miniature marshmallows (6 cups)
- 6 cups fruity pebbles cereal
- Microwave butter in 4-qt microwaveable bowl on HIGH 45 seconds or until melted. Add marshmallows; toss to coat.
- Microwave 1-½ minutes or until marshmallows are completely melted and mixture is well blended, stirring after 45 seconds.
- Add cereal; mix well. Press firmly into greased foil-lined 13"x9" pan. Cool and cut into 24 squares.
Storage Tips
Store your rice crispy treats bars in an air tight closed container. Do not refrigerate.
CHEF TIP FOR MAKING RICE KRISPIE TREATS
- Don't let the marshmallows boil. High heat will crystallize the sugars, making the bars hard instead of chewy. Keep the heat just warm enough to melt the marshmallows.
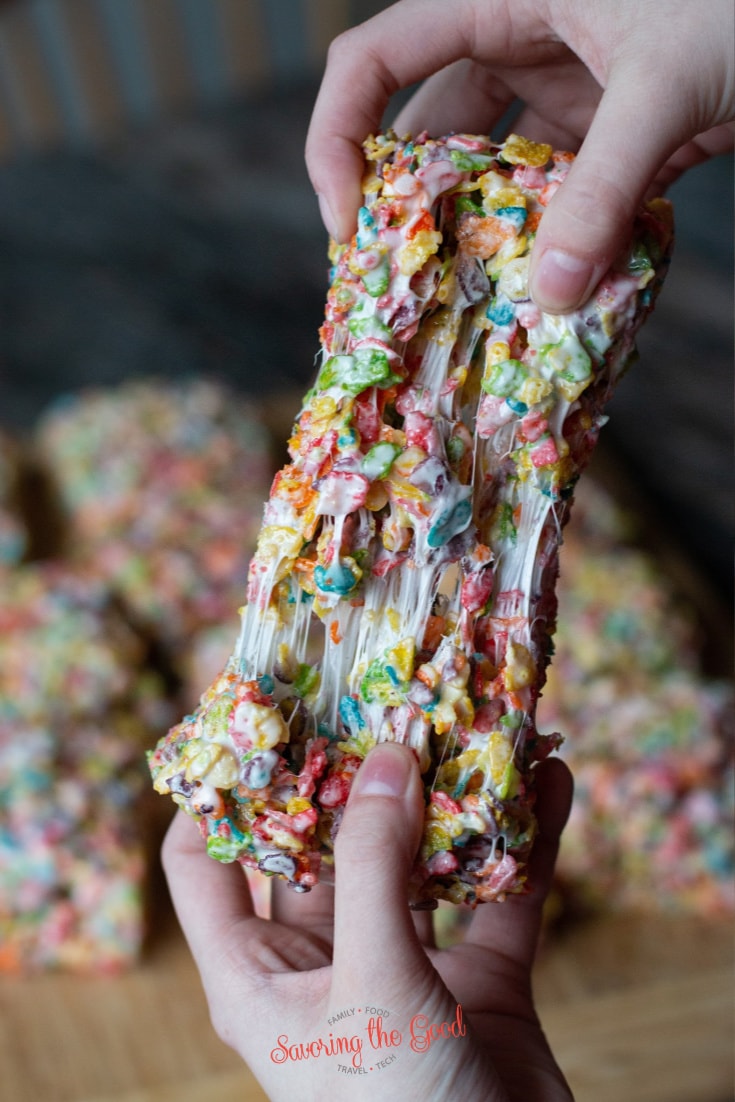
- When melting the marshmallows, allow the marshmallows to melt about 95%. The little bits of marshmallow will give the rice crispy treats pockets of marshmallow.
- Or add 1 cup of mini marshmallows right at the end before stirring in the fruity pebbles.
- Gently press the warm crispy treats into the pan, do not press hard, or compact them.
- Don't let the marshmallows over heat and take on color.
Tips for slicing:
- Generously spray the pan with nonstick spray before pressing the rice krispie treats into the pan.
- Use a large chef knife that has been dipped in hot water and dried before each cut.
- Or spray a chef knife or pizza wheel with non-stick spray before slicing.
FAQ's and Tips
Fruity pebbles cereal treats also are gluten-free and dairy-free when a dairy-free butter substitute is used. Post Fruity Pebble cereal is labeled gluten-free.
This is why fruity pebbles cereal treats are the perfect allergy-friendly treat to send to school and bake sales.
There are about 8-½ cups of fruity pebbles in each box. That means one box will make a 9x13 pan of sweet treats or grab 2 boxes to make one pan of extra-thick treats or 2 pans of single layer rice crispy treats.
Ingredients
- 6 Cups Fruity Pebbles cereal
- 10 ounces Marshmallows 32 large marshmallows
- 4 tablespoons Butter
- 1 Teaspoon Vanilla Extract
Instructions
- Spray a 9x13-inch pan with nonstick cooking spray.
- Melt butter in a large pot over medium heat.
- Drop the heat to medium-low and add the marshmallows and stir until melted.
- Remove from heat and stir in vanilla extract.
- Add cereal and stir to coat with the marshmallow mixture.
- Pour the marshmallow coated cereal into the coated pan.
- Gently press the treats with the back of a silicone spatula to compact and smooth the surface of the treats.
- Let set until firm, turn out of the pan and slice into bars.
- Store in an airtight container for up to 3 days. (if they last that long!)
Nutrition
Notes
- Don't let the marshmallows boil. High heat will crystallize the sugars, making the bars hard instead of chewy. Keep the heat just warm enough to melt the marshmallows.
- When melting the marshmallows, allow the marshmallows to melt about 95%. The little bits of marshmallow will give the treats pockets of marshmallow. Or add 1 cup of mini marshmallows right at the end before stirring in the cereal.
- Gently press the warm crispy treats into the pan, so not press hard, or compact them.
- Don't let the marshmallows to take on color.

I am Sarah Mock. Welcome!
Sarah Mock is a classically trained Chef and graduate of Johnson & Wales University. A culinary blogger for 15 years Sarah helps the home cook prepare her recipes with professional results.


Comments
No Comments