Savoring The Good®

  • All Recipes
  • Football Food
  • Crock-Pot
  • About Sarah
    • About Savoring The Good®
menu icon
go to homepage
  • All Recipes
  • Football Food
  • Crock-Pot
  • About Sarah
    • About Savoring The Good®
subscribe
search icon
Homepage link
  • All Recipes
  • Football Food
  • Crock-Pot
  • About Sarah
    • About Savoring The Good®
×
Savoring The Good > Uncategorized

Make These Morel Mushroom Recipes Before The Morels Disappear For Another Year

Three panels showing different pasta dishes: cream sauce with herbs on shell pasta, Morels in boiling broth, and sliced asparagus with cheese on baked pasta.

Choose from the best morel mushroom recipes for a delicious earthy treat. From crispy fried morels to creamy sauces, savor the nutty flavor of these prized mushrooms.

Morel Mushroom and Quinoa Salad

A plate of quinoa salad topped with morel mushrooms, spinach, crumbled cheese, and pine nuts, with a serving spoon resting in the dish.
Image Credit: thesophisticatedcaveman.com

This healthy and delicious Morel Mushroom and Quinoa Salad is bursting with earthy flavor. Plant-based, vegetarian, and can be made vegan.

To get all the recipes CLICK HERE

Asparagus and Morel Pizza with Garlic Confit

A white pizza topped with asparagus, morel mushrooms, roasted garlic cloves, and melted cheese on a wooden surface.
Image Credit: foxandbriar.com

This Asparagus and Morel Pizza with Garlic Confit is the perfect way to use your spring produce! Garlicky and cheesy, packed full of flavor and vegetarian!

To get all the recipes CLICK HERE

Morel pasta with cream, parmesan and thyme

A plate of shell pasta with creamy sauce, morel mushrooms, black pepper, and fresh herbs—perfect for fans of Morel Mushroom Recipes—served with a spoon on a white marble surface.
Image Credit: www.withspice.com

This morel pasta is filled with the rich flavor of morel mushrooms, nutty parmesan and fresh thyme. A decadent pasta dish worthy of morels!

To get all the recipes CLICK HERE

Pork Chops with Morel Mushroom Brandy Cream Sauce
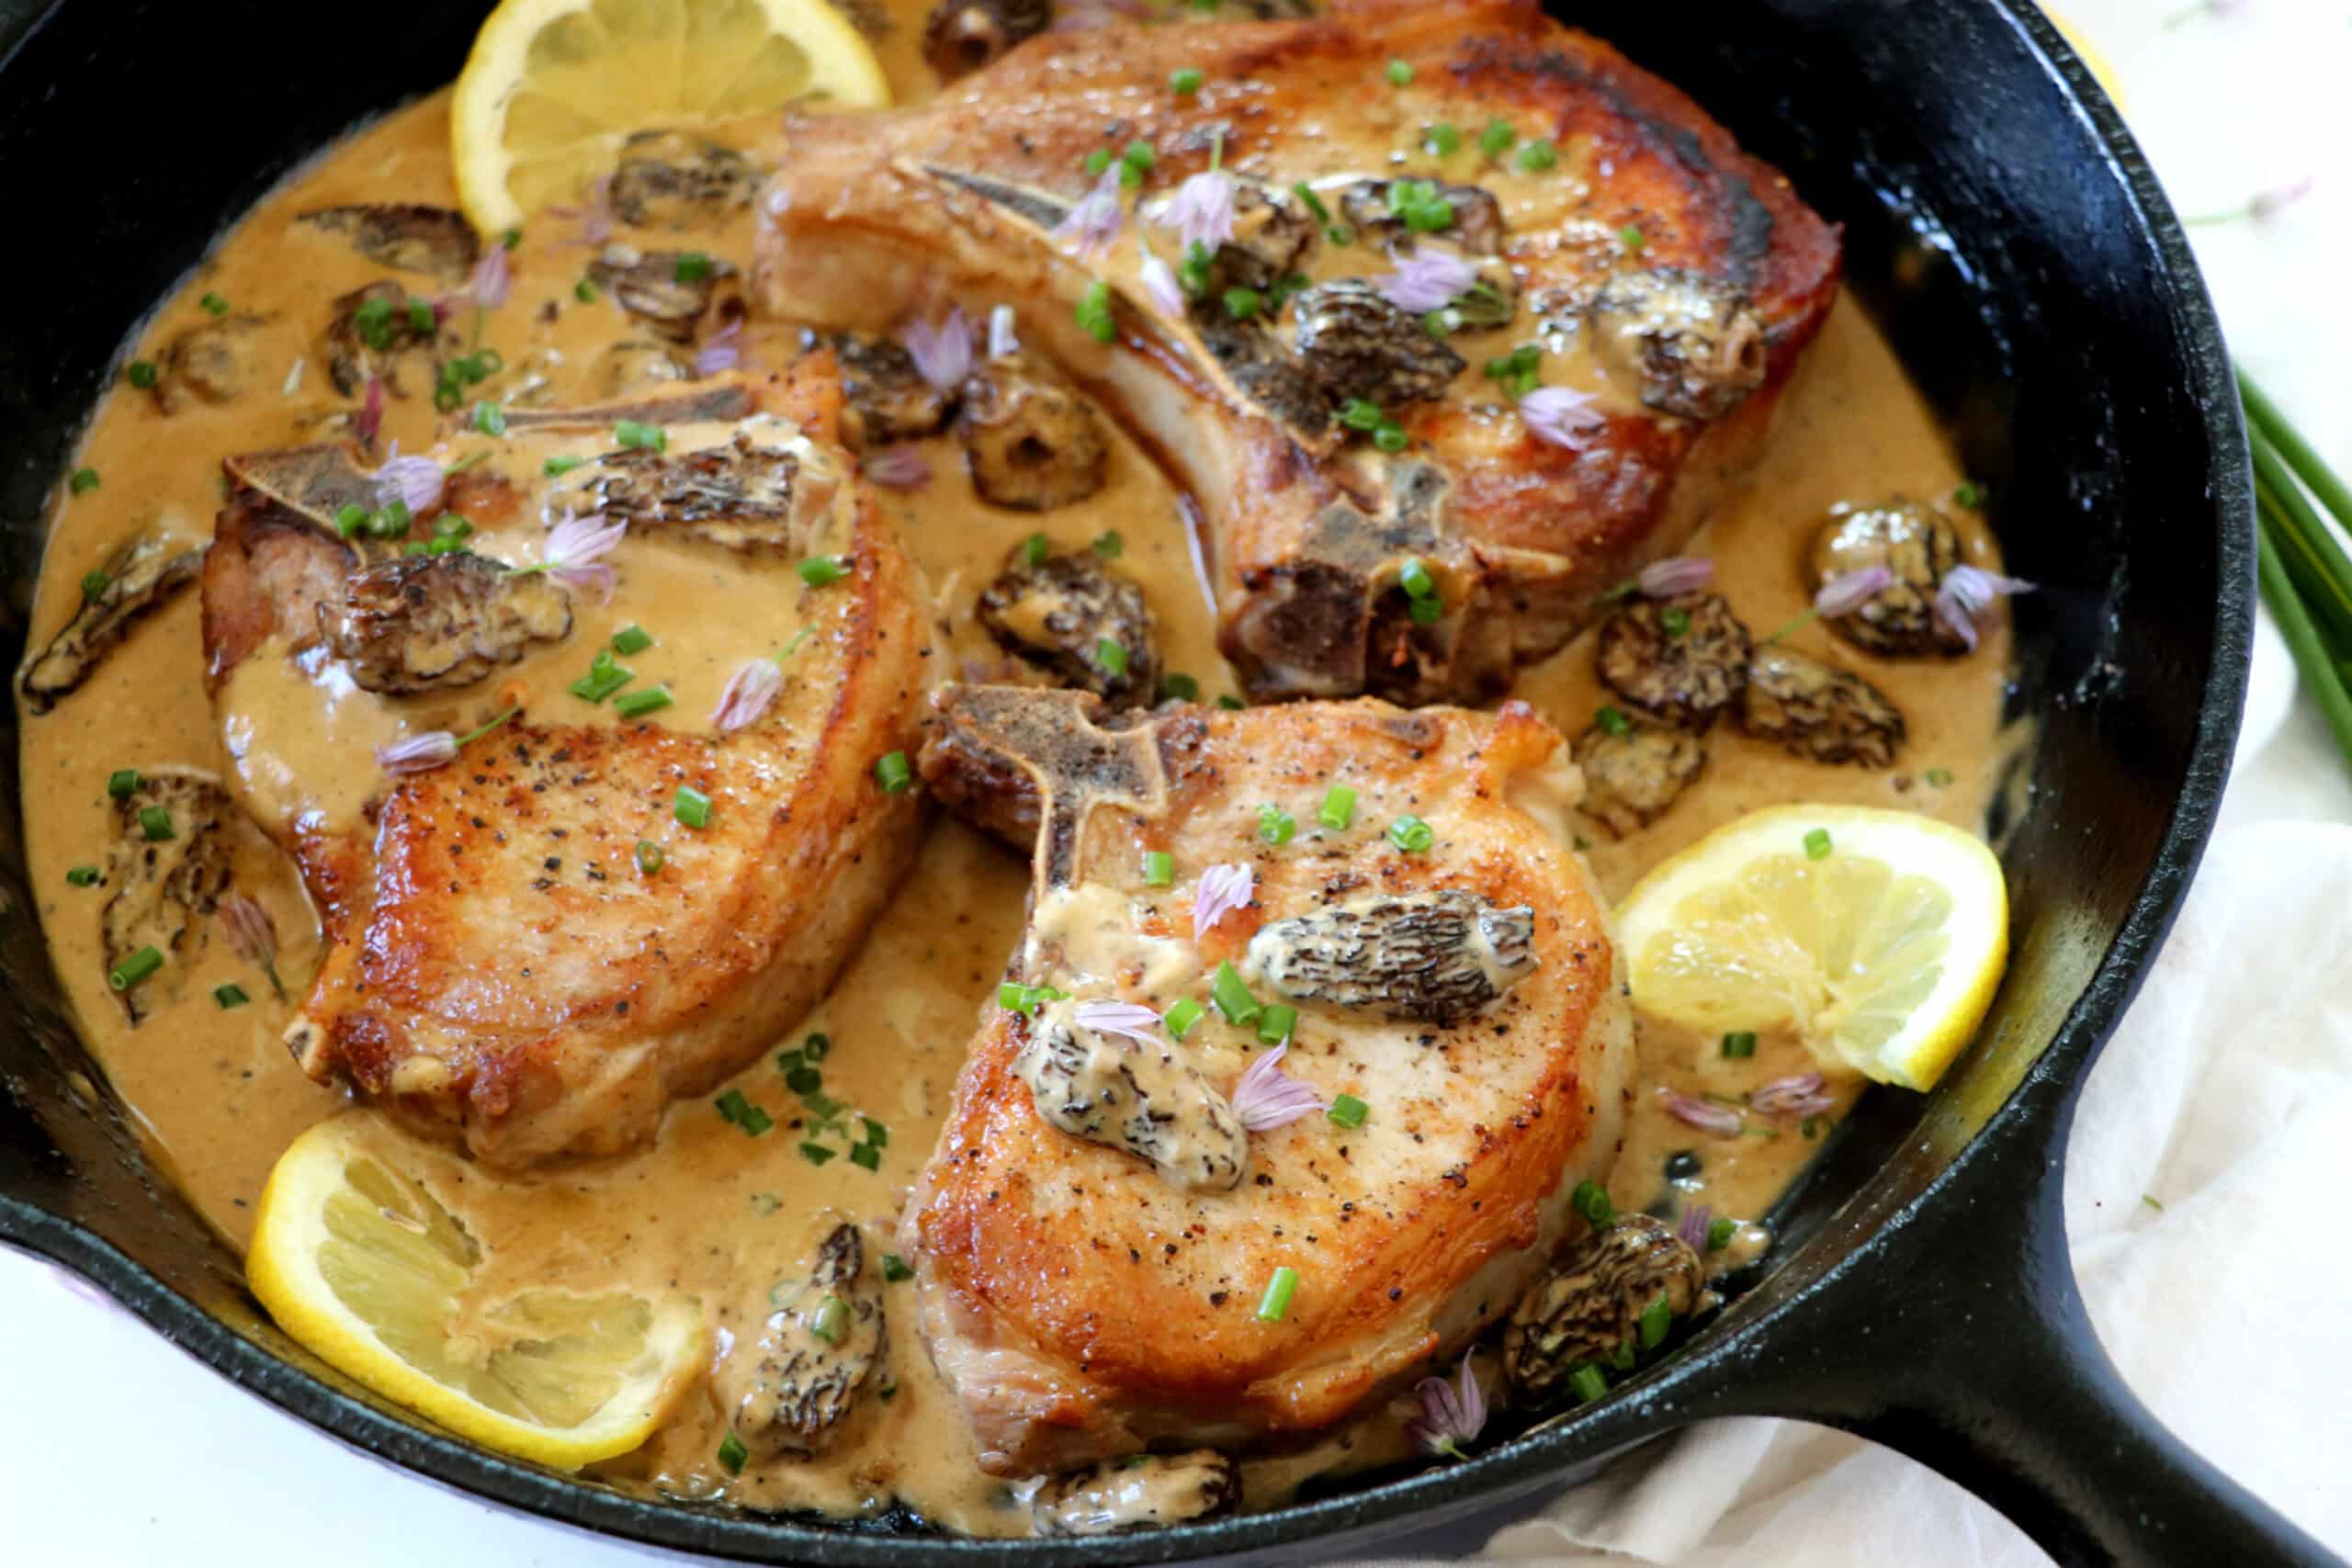
Three seared pork chops in a creamy sauce with morel mushrooms, lemon slices, and chopped herbs, served in a black cast iron skillet.
Image Credit: Dash of Savory

Pork Chops with Morel Mushroom Brandy Cream Sauce is a one pan job, which is super convenient. The perfect pan for the job is a Lodge cast iron.

To get all the recipes CLICK HERE

Chicken Breast in Creamy Mushroom Sauce

Golden chicken breast in a creamy mushroom sauce, inspired by Morel Mushroom Recipes and garnished with chopped parsley.
Image Credit: recipetineats.com

Quick chicken dinner that's elegant enough for company - a lightly crusted chicken breast with an incredible creamy mushroom sauce. Simple!

To get all the recipes CLICK HERE

Asparagus, Morel and Walleye Soup with Rye Croutons

A bowl of creamy soup garnished with green onions and dark rye croutons, served on a black plate with a spoon.
Image Credit: midwestliving.com

Here is where you will use 2-3 sentences to describe the image/post This recipe (with its totally addictive miso-butter croutons) is adapted from one served at Larder, a Jewish deli in Cleveland. (Chef Jeremy Umansky is also an expert in Asian fermentation.) The recipe is easily adapted to be vegetarian--just skip the fish for a light spring meal.

To get all the recipes CLICK HERE

Creamy Morel Mushroom Barley Soup

A bowl of creamy soup with morel mushrooms and herbs, two spoons on a napkin, and a glass jar with a light-colored liquid in the background.
Image Credit: Health Starts in the Kitchen

This Creamy Morel Mushroom Barley Soup is an easy and delicious way to get your mushroom fix in a healthy way. Can be made with either fresh or dried morel mushrooms.

To get all the recipes CLICK HERE

Morel Mushroom Sauce with Red Wine

A saucepan of creamy brown mushroom sauce sits on a cloth next to fresh thyme, an onion, and several morel mushrooms.
Image Credit: Skovkær

The morel mushroom red wine sauce is a very delicious and tasty morel mushroom sauce. It goes very well with especially meat and is perfect with pasta or on top of potatoes.

To get all the recipes CLICK HERE

Wild Garlic and Morel Risotto

A bowl of creamy risotto topped with morel mushrooms and herbs, served in a white and blue floral-patterned plate on a wooden table.
Image Credit: greatbritishchefs.com

Luke Holder's wild garlic and morel risotto recipe is a stunning example of seasonal springtime cooking. If you can't get hold of wild garlic, substitute with a mixture of herbs of your choice.

To get all the recipes CLICK HERE

buttery morel mushroom truffle pasta
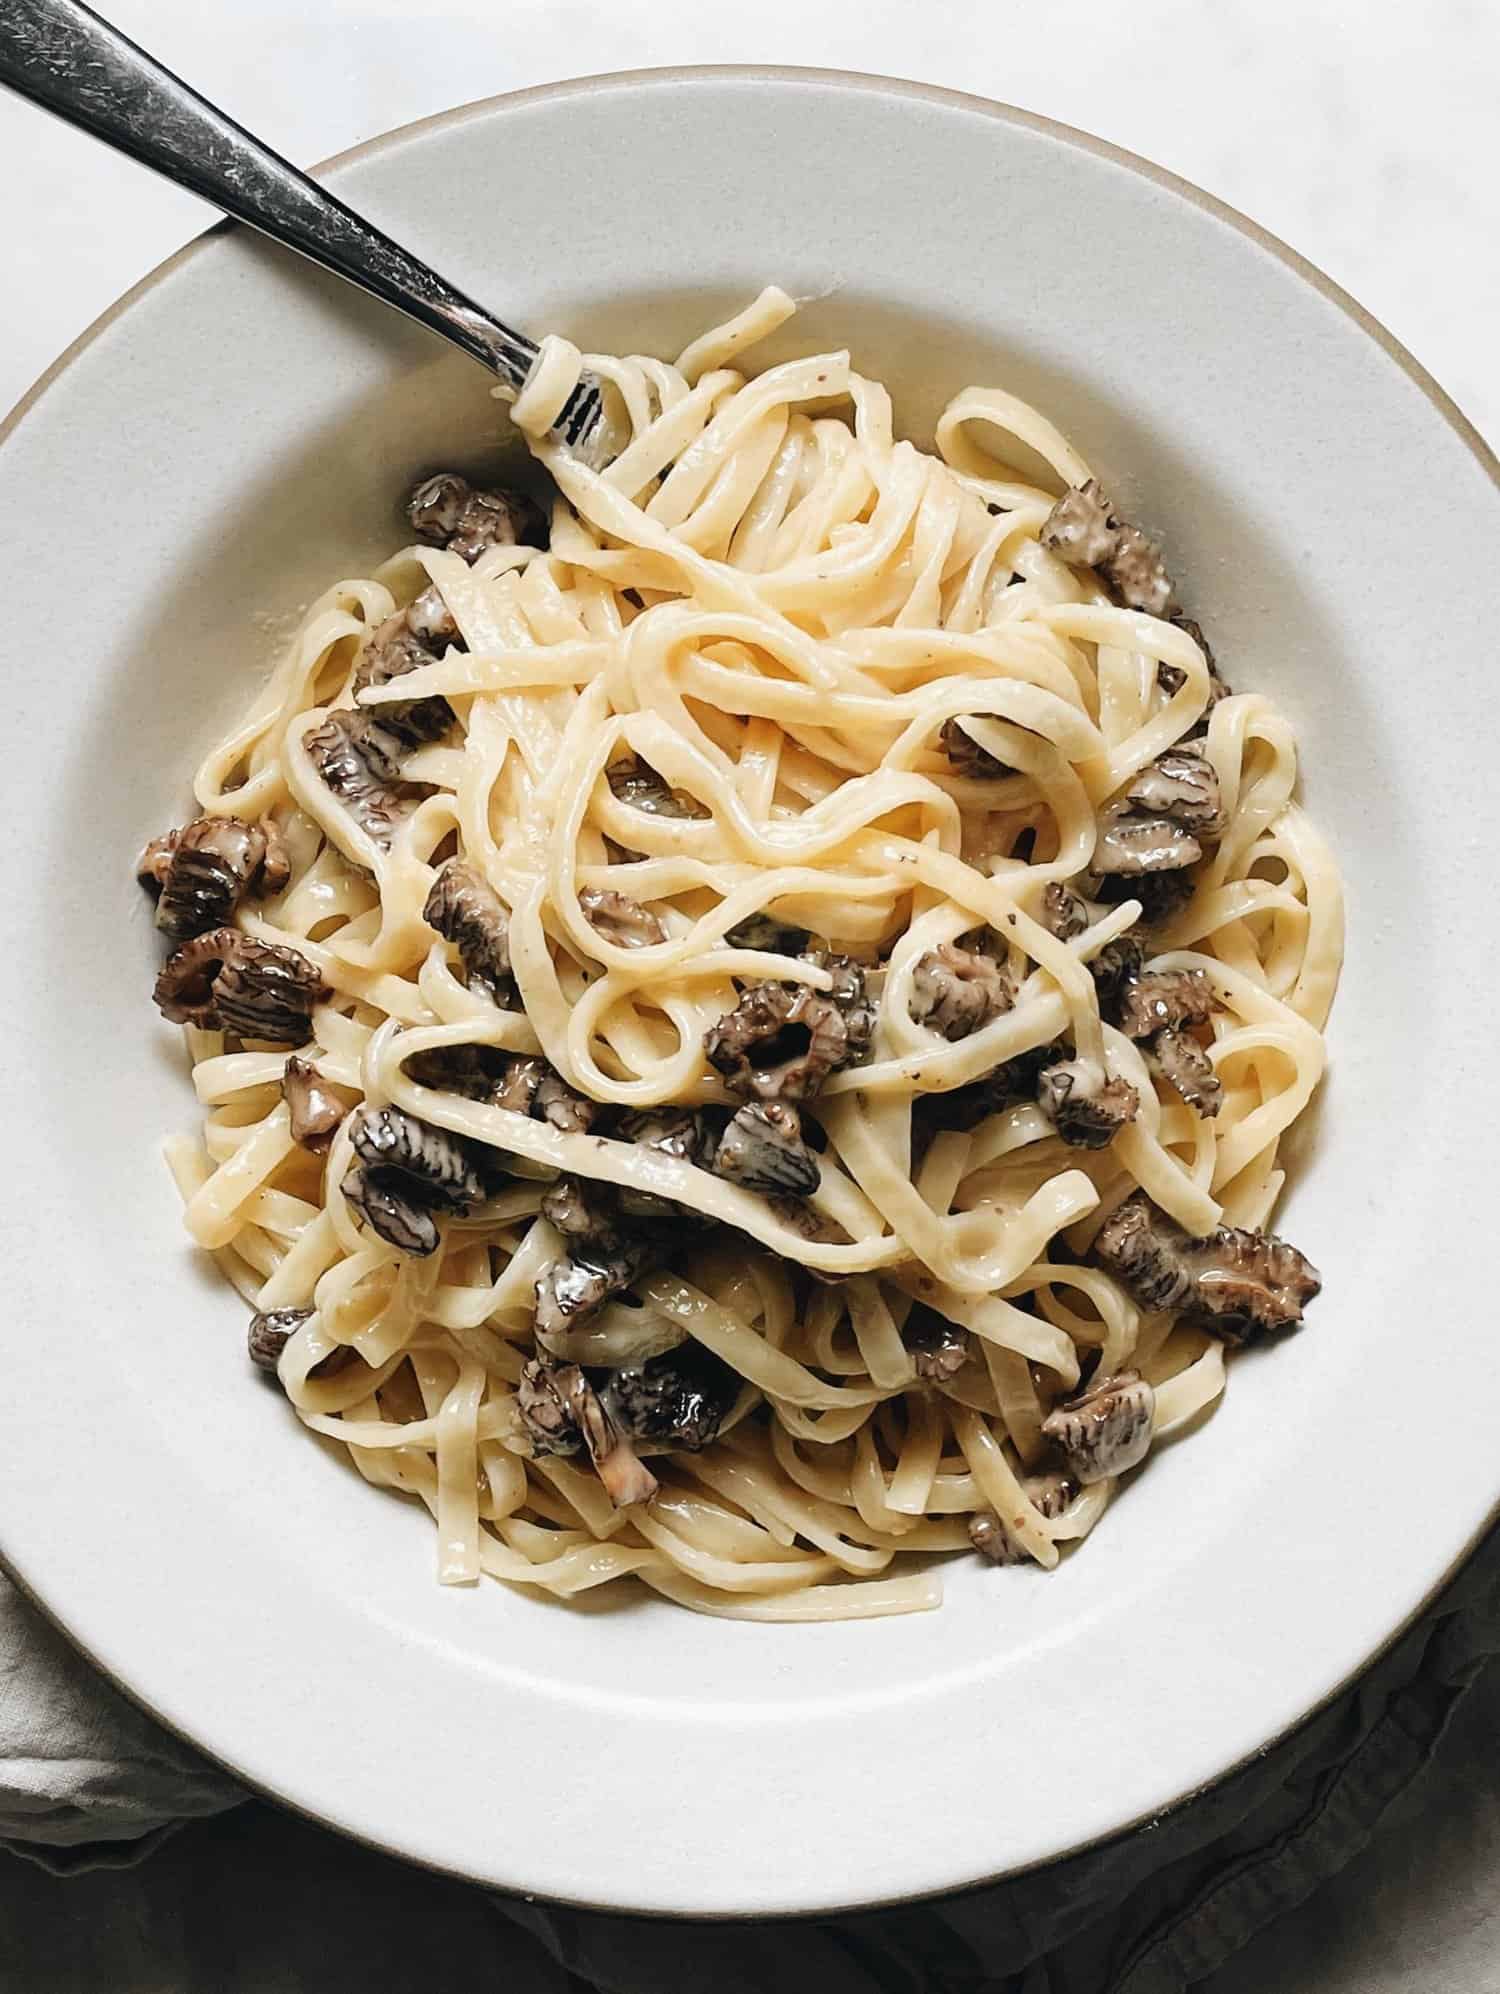
A white bowl of fettuccine pasta with a creamy sauce and mushrooms, with a fork resting in the bowl.
Image Credit:  italian enough

There's no truer definition of a Spring Awakening than bringing spring's iconic mushroom back from the dead. 

To get all the recipes CLICK HERE

Fancy Cakes For Any Occasion (yes YOU can make these! )

Three gourmet cakes on stands: a fruit-topped cake with a pear and berries, a bundt cake with cream, and a layered lemon cake with floral decorations.

Next time you want to stretch your cake baking skills, try one of these fancy cake recipes. Find inspiration for your next dessert masterpiece with these elegant layers and whimisical creations. 

Blackberry Poppy Seed Cake

A blackberry poppy seed cake packed with nutty flavor, vibrant blackberry basil jam, and a creamy mascarpone frosting. A late summer beauty!

Get all the cakes HERE

VEGAN LEMON BLUEBERRY CAKE

This Vegan Lemon Blueberry Cake is a moist, tender, and fluffy layer cake filled with blueberry jam and decorated with lemon buttercream frosting.

Get all the cakes HERE

Flourless Pistachio Cake with Chocolate Ganache

I'd like you to meet your new favorite cake: it's (naturally) bright green, loaded with nutty pistachio flavor, and topped with a silky smooth layer of chocolate ganache for good measure. And did I mention it's completely flourless?

Get all the cakes HERE

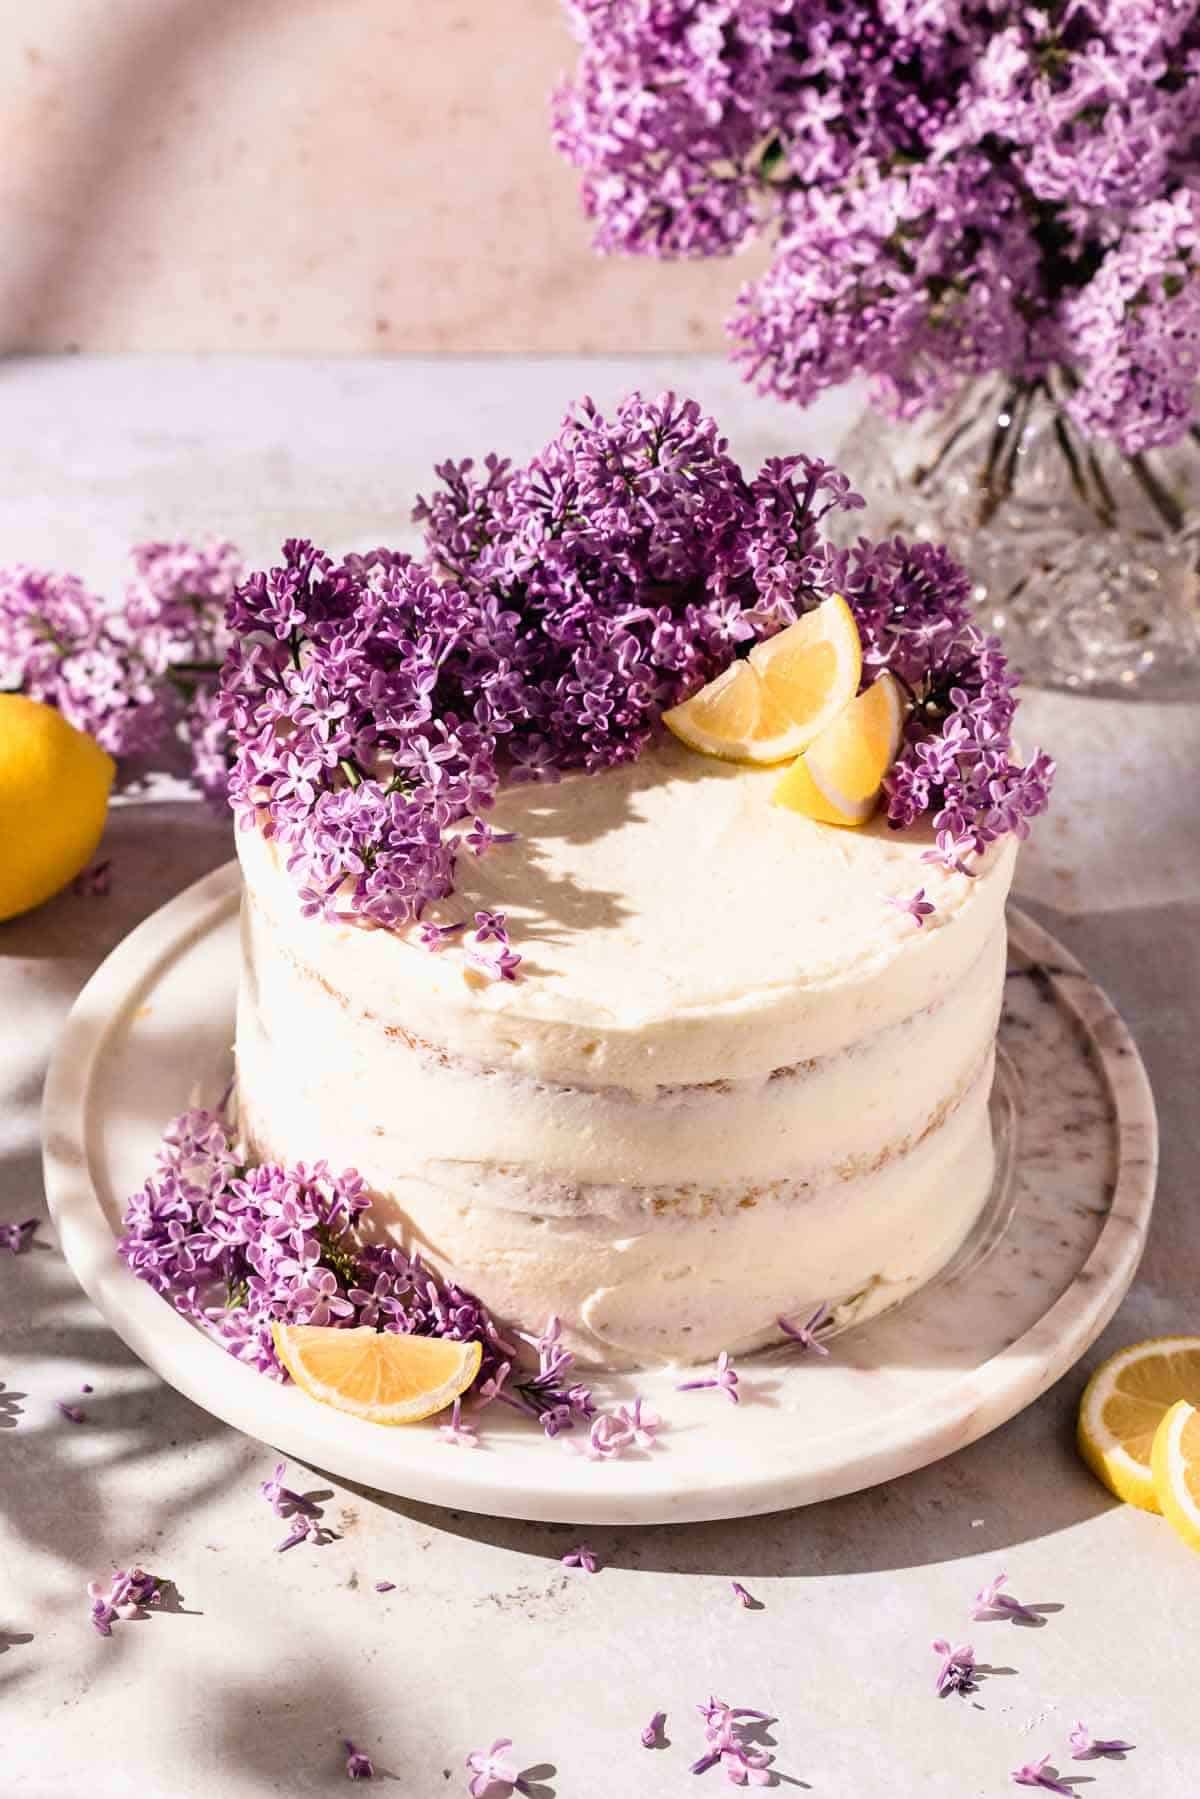
Lilac Cake with Lemon

Image credit goes to flouringkitchen.com

This lilac cake is fragrant, zesty, moist, and fluffy. The cake batter has lilac flowers inside and the layers are soaked with lilac syrup.

Get all the cakes HERE

Hazelnut Layer Cake

Wholesome gluten-free vegan layer cake with wonderful hazelnut flavor and luscious vegan hazelnut frosting fit for the celebration.

Get all the cakes HERE

Homemade Cherry Cake

Homemade Vintage Cherry Cake from scratch is bursting with sweet maraschino cherry flavor and tinted the perfect shade of pink!

Get all the cakes HERE

Lemon Chiffon & Rhubarb Fool Cake

It's rhubarb season and that means it's time for new rhubarb recipes! I've been intrigued lately with the idea of a rhubarb fool serving as a frosting for a light as air chiffon cake (I've been on a bit of a light and fluffy cake kick, as of late).

Get all the cakes HERE

HIGH ALTITUDE COFFEE LAYER CAKE

Soft and fluffy high altitude coffee layer cake, covered in espresso sugar, then layered with coffee buttercream.

Get all the cakes HERE

BLACK FOREST GÂTEAU

Black Forest cake is a childhood emotion for me. Chocolate cake with cold whipped cream and fresh cherries!

Get all the cakes HERE

Apricot Chamomile Cake

This apricot chamomile cake features three layers of white cake, thin layers of apricot preserves, and a light coating of sweet chamomile buttercream.

Get all the cakes HERE

CHOCOLATE CHESTNUT CAKE

This rich chocolate chestnut cake alternates layers of moist dark chocolate olive oil cake with a velvety smooth chestnut chocolate mousse.

Get all the cakes HERE

Strawberry Celebration Cake With Blood Orange Buttercream

The strawberry cake layer are light but they are plush. The strawberry flavour comes from both a concentrated strawberry purée and freeze-dried strawberry powder, with the latter being one of my favourite ingredients to use to achieve strawberry flavours without changing too much of the ratio of a trusted recipe. The cake layers sandwich a blood orange buttercream which is also in an appropriate shade of pink.

Get all the cakes HERE

Chocolate Orange Cake

Layers of cake and homemade icing combine to create this showstopping chocolate orange cake recipe. Made with simple ingredients, it's infused with flavors of sweet chocolate and zesty orange in a moist, decadent batter. Baked to tender perfection, it's the perfect dessert for holidays, birthdays, and everything in between!

Get all the cakes HERE

Salted Caramel Cake

Fluffy, light caramel sponge cake layered with caramel buttercream makes this Salted Caramel Cake perfect for your next gathering.

Get all the cakes HERE

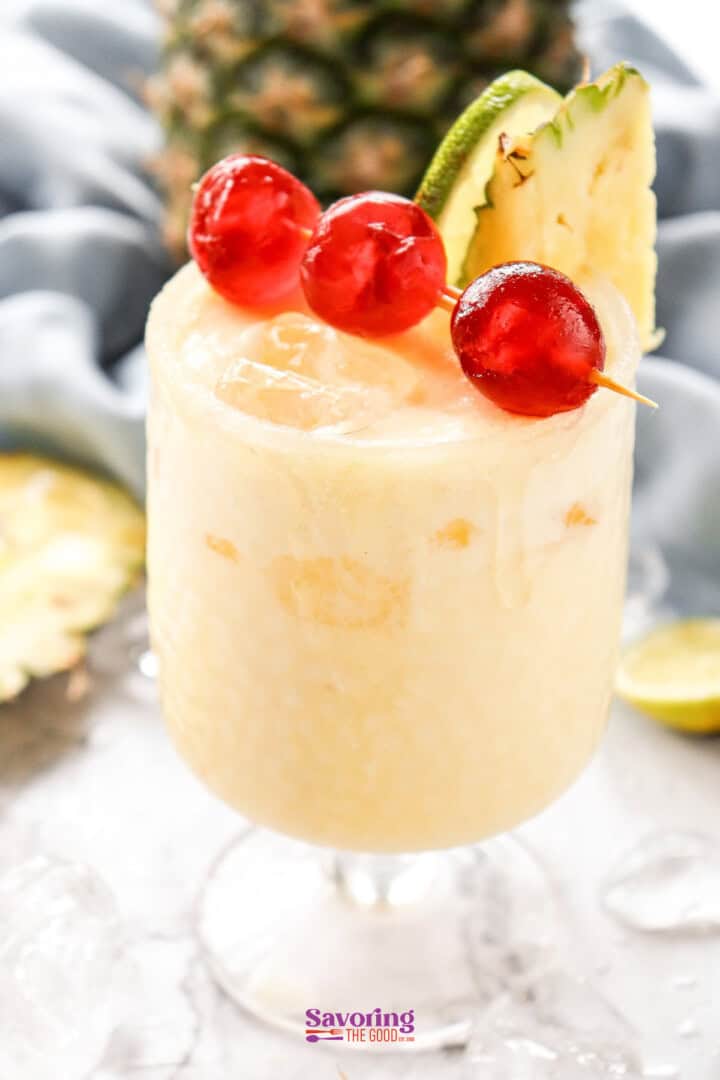
Pina Colada Mocktail (No Alcohol Needed)

A frosty pineapple mocktail garnished with cherries and a pineapple slice, served on a marble surface surrounded by ice cubes, pineapple chunks, and lime wedges.

This non-alcoholic piña colada is a creamy, tropical mocktail that tastes like the real thing-no alcohol needed. I created it after testing multiple versions for a party where half the guests didn't drink, but still wanted something fun and celebratory. The challenge was balance, not just removing rum-and this version nails it. Ready in 5 minutes.

A frosty pineapple mocktail garnished with cherries and a pineapple slice, served on a marble surface surrounded by ice cubes, pineapple chunks, and lime wedges.

Blend up this mocktail in less than 5 minutes for a cool and refreshing treat. If you are still unclear on the difference between a mocktail and a cocktail, I have got you covered in the highlighted post.

Why My Piña Colada Mocktail Works

I tested multiple versions of this drink to get the texture and flavor right without alcohol. Here's what actually makes the difference:

  • Coconut cream (not milk) gives the thick, restaurant-style texture.
  • Crushed ice blends smoother than cubes-this is the difference between slushy and chunky.
  • Lime juice balances the sweetness so it doesn't taste like juice.
  • Frozen pineapple option creates a thicker, colder drink (my family preferred it).

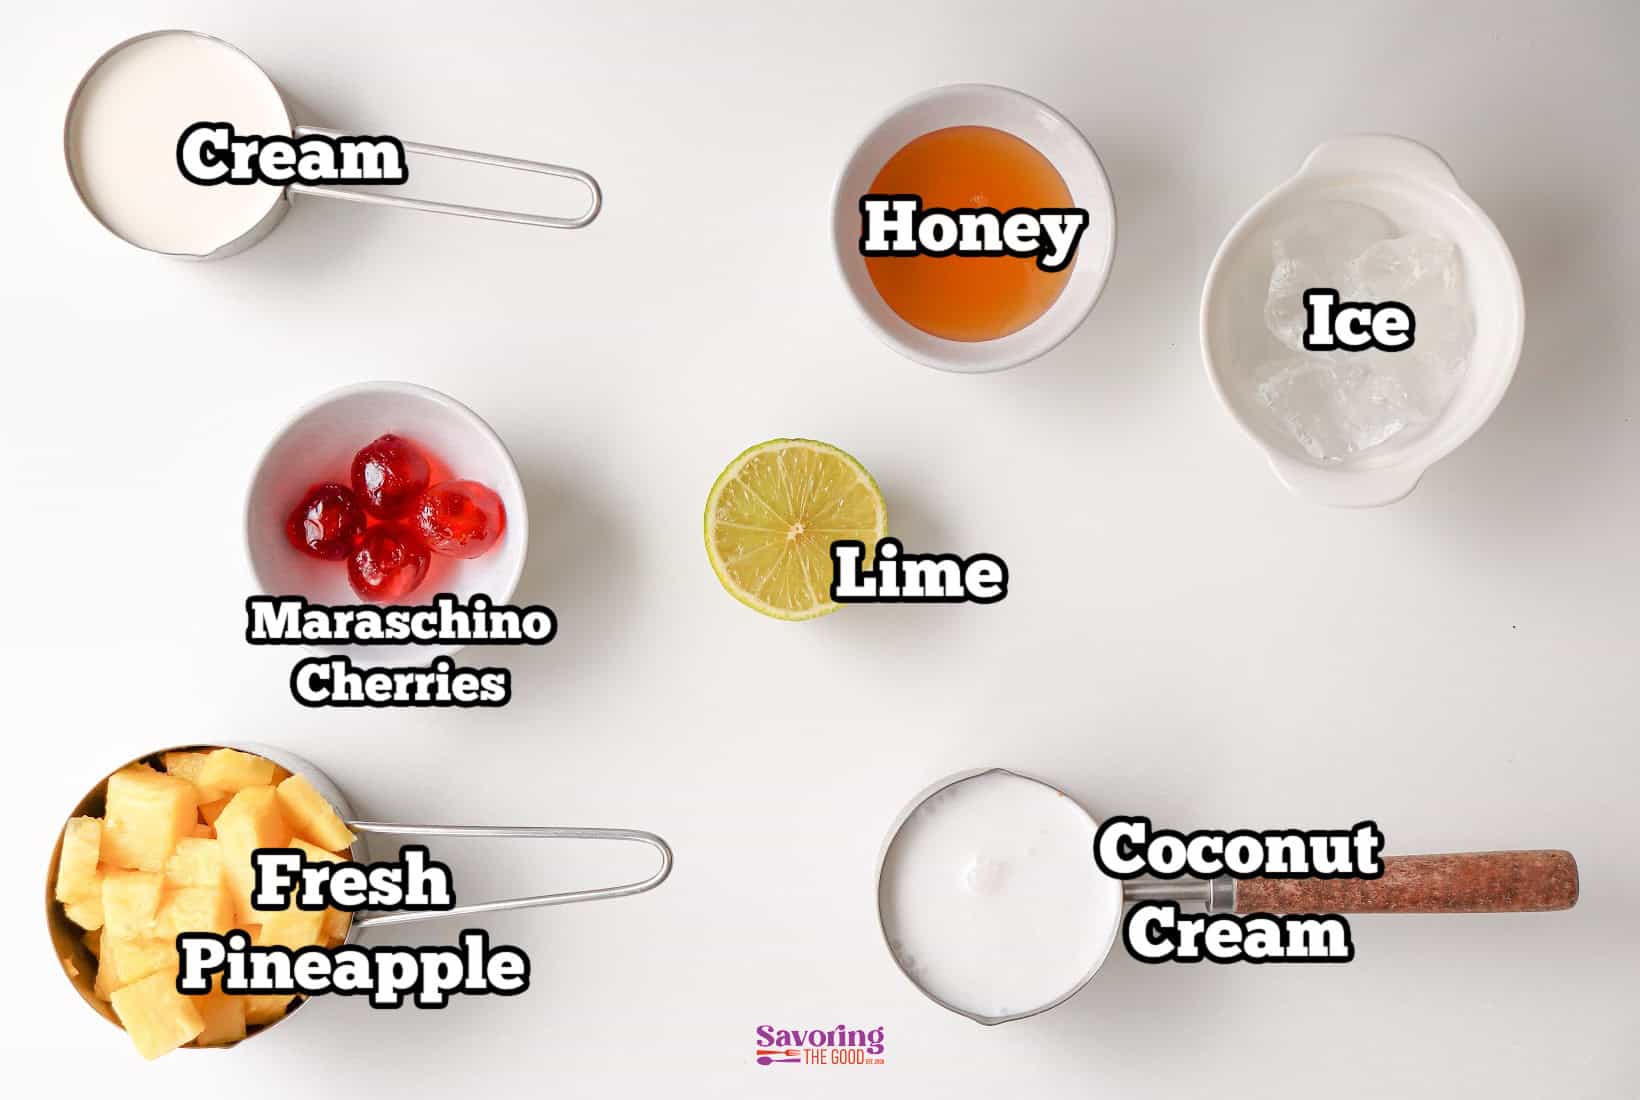
What is non-alcoholic piña colada made of?

Top-down view of various ingredients for a pina colada mocktail labeled: cream, honey, ice, maraschino cherries, lime, fresh pineapple, and coconut cream on a white

Recipe Card?

To find the full printable recipe with specific measurements and directions CLICK HERE to go to the recipe card.

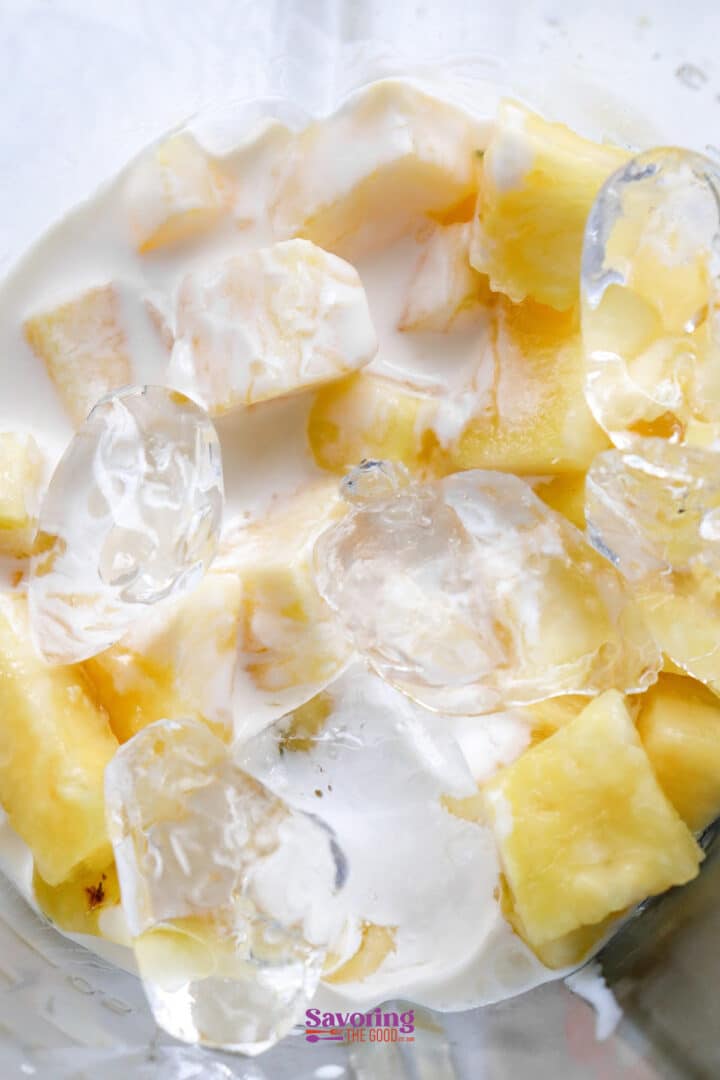
Chopped pineapple and ice cubes in a white liquid in a blender.

Blend the Ingredients

Add pineapple, coconut cream, lime juice, and crushed ice to a blender. Use crushed ice. Every time I tested this with regular cubes, the blender left small chunks and the texture felt off. Crushed ice blends fully into the drink and creates that smooth, slushy consistency you expect.

A frozen pineapple pina colada mocktail garnished with cranberries and a pineapple slice, served in a glass on a bed of ice.

Serve Immediately

Pour into chilled glasses (I keep mine in the freezer for 10 minutes before serving-it keeps the drink colder longer). Garnish with pineapple wedge and maraschino cherry if desired. This drink is best served fresh; the ice melts quickly and dilutes the flavor if it sits.

Ingredient Swaps & What Changes

Coconut Milk Instead of Coconut Cream
You lose the thick, creamy texture that makes this feel like a real pina colada. The drink tastes more like pineapple juice with a hint of coconut. I've made it this way when I'm out of coconut cream, and it's drinkable but not impressive. If you do use coconut milk, add a scoop of vanilla ice cream to thicken it up.

Frozen Pineapple Instead of Fresh
This works beautifully and actually makes the drink even colder and thicker. I tested this side-by-side with fresh pineapple and my family preferred the frozen version because it had a slushier texture. Use frozen pineapple chunks straight from the freezer-no need to thaw.

Canned Pineapple in Syrup
Skip this. I tested it once and it was too sweet-like drinking liquid candy. If canned is your only option, use pineapple packed in juice and drain it well. You'll still need to reduce the sugar or skip it entirely.

Make-Ahead Tips

I tested this both ways, blended fresh and prepped ahead. Here's what I learned: if you blend everything (including ice) more than 2 hours in advance, the ice melts and dilutes the flavor. The texture suffers.

My recommendation: blend the pineapple-coconut base (everything except ice) and refrigerate it for up to 6 hours. Add ice right before serving. The flavor stays bright and the texture stays perfect.

Here's the step-by-step:

  1. Blend pineapple, coconut cream, lime juice, and honey until smooth (no ice yet).
  2. Transfer to an airtight pitcher and refrigerate for up to 6 hours.
  3. Right before serving, add crushed ice and blend until slushy.
  4. Pour into chilled glasses and garnish.
Why is my mocktail watery?

You either blended it with ice too far in advance (ice melts and dilutes), or you used too much ice. Stick to the recipe ratio and blend right before serving.

Can I make a pitcher for a party?

Yes. Blend the base (pineapple, coconut cream, lime juice, honey) in batches and combine in a pitcher. Refrigerate. Right before guests arrive, add ice to individual glasses and pour the chilled base over the ice. Stir or shake to combine. This keeps the texture slushy and prevents dilution.

Can I use a blender bottle instead of a blender?

No-this drink relies on crushed ice being fully blended into the liquid. A shaker or bottle won't create the same texture.

A frosty pineapple mocktail garnished with cherries and a pineapple slice, served on a marble surface surrounded by ice cubes, pineapple chunks, and lime wedges.

Pina Colada Mocktail

This easy virgin piña colada mocktail recipe is perfect for anyone looking for a refreshing non-alcoholic frozen pineapple drink!
No ratings yet
Print Pin Rate
Course: Drinks - Non Alcoholic
Cuisine: Jamacian
Keyword: Pina Colada Mocktail
Prep Time: 5 minutes minutes
Cook Time: 2 minutes minutes
Total Time: 7 minutes minutes
Servings: 1 drink
Calories: 700
Author: Sarah Mock

Ingredients

  •  
    1 Cup pineapple chunks
  •  
    ½ Cup coconut cream
  • A whole, uncut green lime with a textured peel on a white background-the perfect citrus for crafting a classic Gimlet.½ Limes juiced
  • A 16 oz bottle of Dutch Gold Pure Honey from clover blossoms with a flip-top cap and certification label on the front.2 Tablespoons Honey
  •  
    crushed ice
  •  
    3 Maraschino cherries for garnish
Follow Savoring The Good On PinterestFollow @SavoringTheGood or tag #STGRecipes!

Instructions

  • Put the pineapple chunks, coconut cream, lime juice, and honey into a blender.
    1 Cup pineapple chunks, ½ Cup coconut cream, ½ Limes, 2 Tablespoons Honey
  • Add some ice cubes to the blender. Blend everything together until the ice is all crushed up into tiny pieces.
    crushed ice
  • Taste the pina colada drink. If it's not sweet enough, add a little more honey. If it's not tart/sour enough, add a bit more lime juice.
  • Carefully pour the blended pina colada into glasses. Decorate each glass with a pineapple slice and some glazed cherries on top.
    3 Maraschino cherries
  • Make sure to serve the pina colada mocktails cold. Drink and enjoy this delicious tropical treat!
Want to share when you made this recipe?Follow @SavoringTheGood & tag #STGRecipes!
Nutrition Facts
Pina Colada Mocktail
Serving Size
 
1
Amount per Serving
Calories
700
% Daily Value*
Fat
 
42
g
65
%
Saturated Fat
 
37
g
231
%
Polyunsaturated Fat
 
1
g
Monounsaturated Fat
 
2
g
Sodium
 
10
mg
0
%
Potassium
 
743
mg
21
%
Carbohydrates
 
89
g
30
%
Sugar
 
75
g
83
%
Protein
 
6
g
12
%
* Percent Daily Values are based on a 2000 calorie diet.
**Nutritional facts are just estimates. Please utilize your own brand nutritional values to double check against our estimates.
Like this recipe card? Want one for your site?Check out WP Recipe Maker!
Sarah Mock of savoringthegood.com headshot 2022

Sarah's Culinary Insight

  • Coconut cream vs. coconut milk: I tested both. Coconut cream gives you the thick, luxurious texture that makes this feel special. Coconut milk is too thin and the drink tastes watery.
  • Fresh pineapple vs. canned: Both work, but fresh pineapple has a brighter, less syrupy flavor. If you use canned, go for pineapple in juice (not syrup) or it gets too sweet.
  • Crushed ice is non-negotiable. I tried this with regular ice cubes and the texture was wrong-too chunky, not blended smooth. Crushed ice blends into the drink and creates that slushy, tropical vibe.
  • Lime juice balances the sweetness. I skipped it once and the drink tasted flat. The acid from the lime wakes up the pineapple and coconut flavors.

Sarah Mock of savoringthegood.com headshot 2022

I am Sarah Mock. Welcome!

Sarah Mock is a classically trained Chef and a graduate of Johnson & Wales University. A culinary blogger for 17 years, Sarah helps the home cook prepare her recipes with professional results.

Get to know me

as seen in:

Logos of Hersheyland, ABC News, and Good Day PA are showcased in a seamless row, providing a snapshot of popular brands.

Hersheyland Nightline Good Day Pa!

The vibrant design showcases the iconic logos of Pinterest, Rachael Ray, and Jell-O set against a bold red background. Sorry, the provided description doesn't offer enough detail to suggest important SEO keywords.

Pinterest Rachael JELL-O


Hungry for lunch? Grab one of these chicken wraps instead of going out to lunch!

Three different wraps perfect for lunch: a vegetable wrap with spinach, chicken wraps cut in half showing filling, and a kebab wrap with slaw and sauce.

Chicken wraps are a delicious way to use up leftover chicken, chicken tenders, and store-bought rotisserie chicken for a quick lunch, a light dinner or a weeknight dinner on the go!

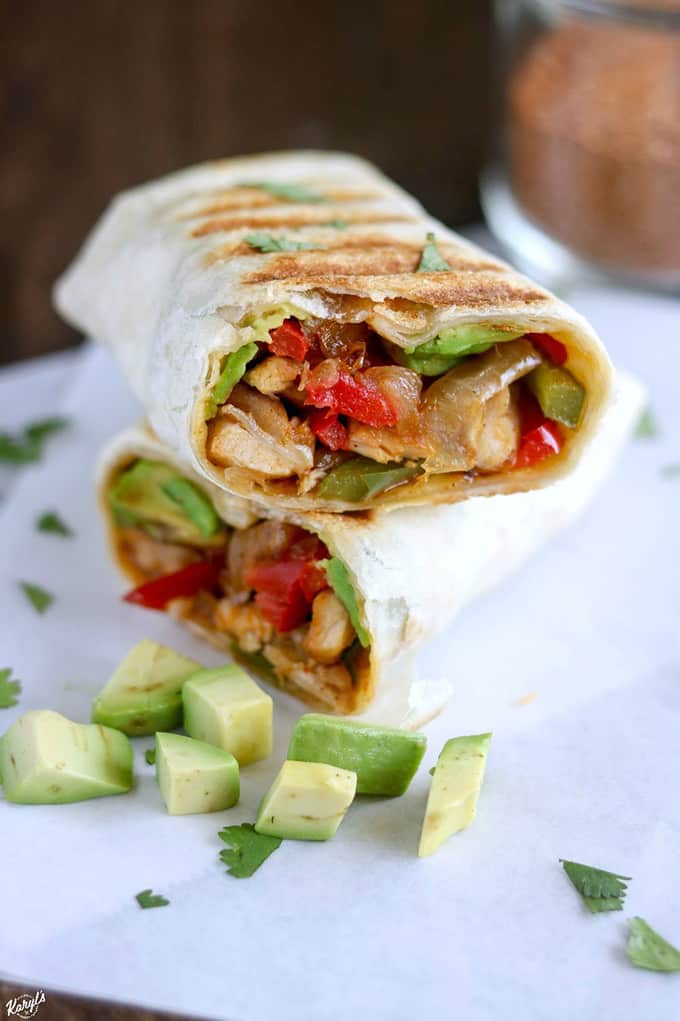
Crispy Chicken Fajita Wrap

A grilled wrap filled with chicken, bell peppers, and avocado, cut in half, with diced avocado pieces and cilantro garnish on the side.
image credit: karylskulinarykrusade.com

Crispy Chicken Fajita Wrap combines all of the delicious flavors of chicken fajitas in a tortilla. Traditional fajitas can be messy...these are easy to eat with just one hand! Get 41 recipes here: Recipes here

Buffalo Chicken Wraps

Stack of four halved wraps filled with chicken, sauce, and vegetables, secured with a toothpick.
image credit: gimmedelicious.com

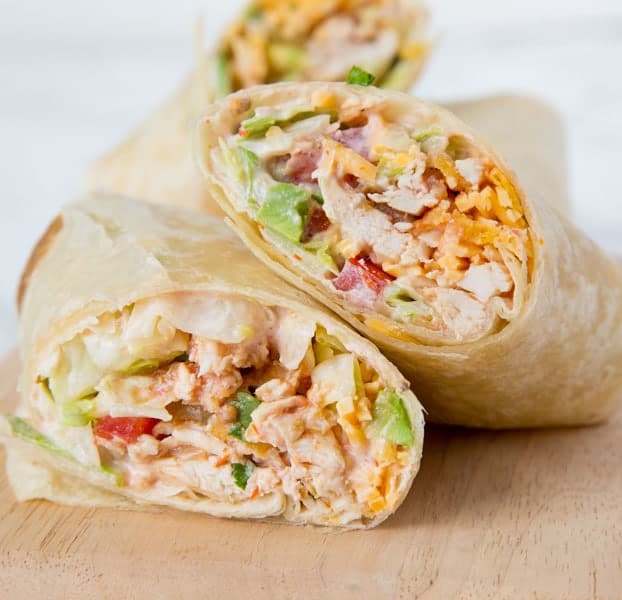
These buffalo chicken wraps have all the tasty flavors of buffalo wings without all the added fat and calories. They're made in under 5 minutes thanks to my best friend rotisserie chicken. If you don't have rotisserie chicken you can also use any pre-cooked chicken. Get 41 recipes here: Recipes here

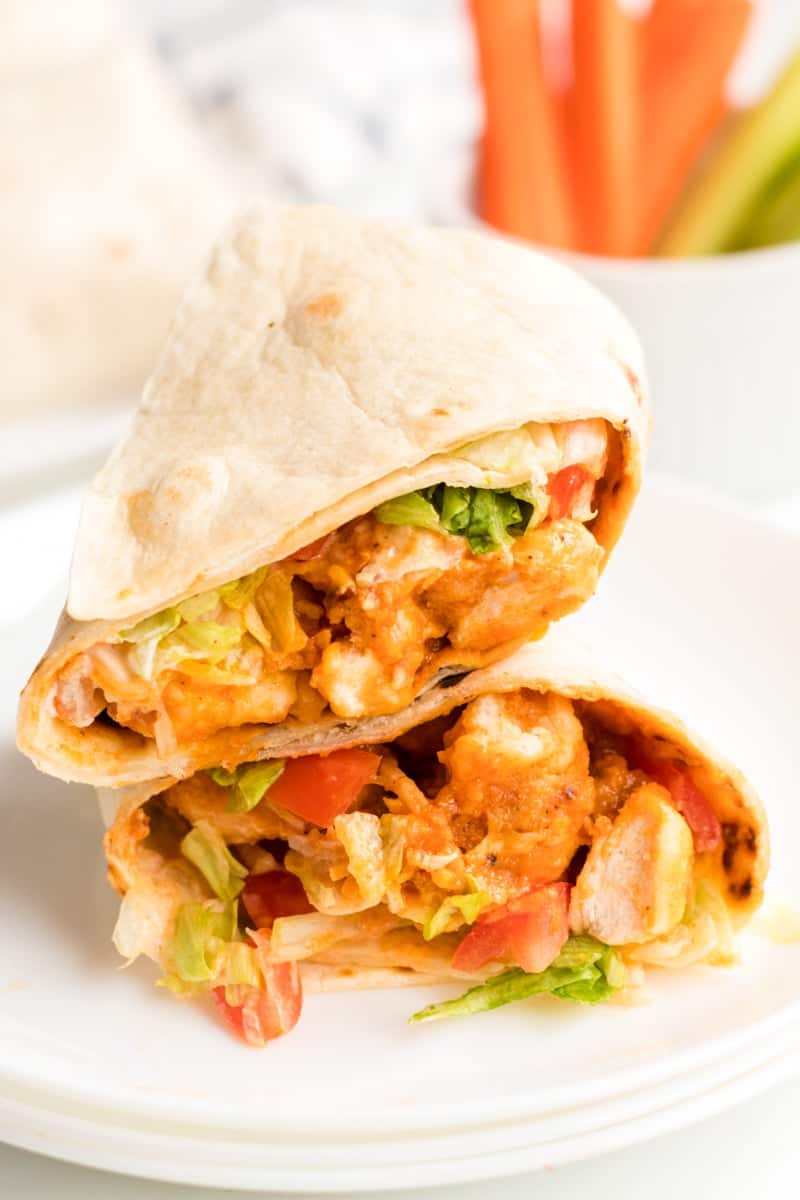
Buffalo Ranch Chicken Wrap

A wrap filled with crispy chicken, lettuce, tomatoes, and sauce on a white plate. Carrot sticks are slightly visible in the background.
image credit: persnicketyplates.com

Lightly breaded buffalo chicken pieces wrapped up in a soft tortilla with ranch dressing, shredded lettuce, cheese, and tomatoes make a great dinner or the perfect game day meal! Get 41 recipes here: Recipes here

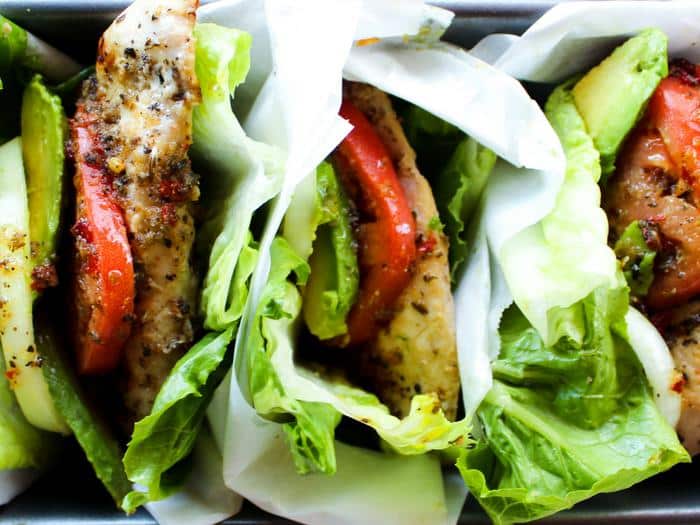
Italian Chicken Lettuce Wraps

Three lettuce-wrapped sandwiches featuring delicious grilled chicken, creamy avocado, and ripe tomato are arranged in a row on a tray—perfect for those exploring new chicken wrap recipes.
image credit: thewholecook.com

You'll love these lettuce wraps filled with chicken that's marinated in an easy and zesty homemade Italian dressing! These are a perfect low-carb meal you can load with veggies! Get 41 recipes here: Recipes here

Chicken Ranch Snack Wraps

Two chicken wraps with lettuce and sauce, cut in half and stacked on a red plate.
image credit: gracelikerainblog.com

Chicken Ranch Snack Wraps are an easy Mcdonald's copycat recipe that is perfect for a snack or a light lunch. These easy snacks use frozen chicken strips for convenience and are easily customizable. Get 41 recipes here: Recipes here

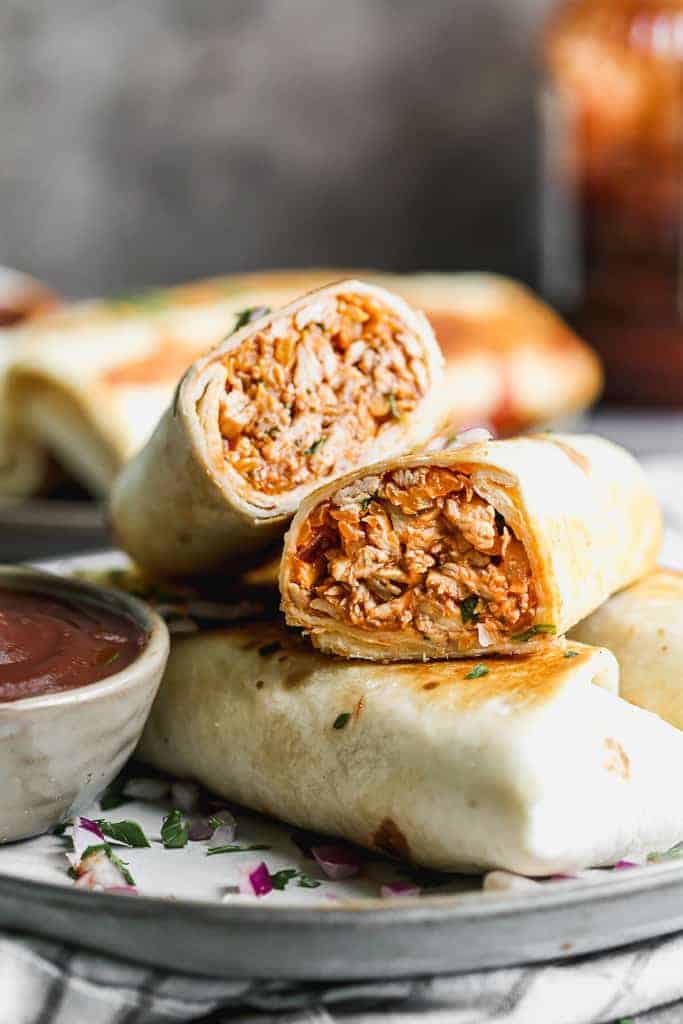
Simple BBQ Chicken Wrap

A plate of burritos filled with shredded chicken, with one burrito cut in half, showing the inside. A small bowl of sauce is beside the burritos.
image credit: dudethatcookz.com

BBQ Chicken Wrap made with tender chicken breast, bbq sauce, arugula, red onions, tomatoes, and cheese all wrapped up in a warm tortilla. Get 41 recipes here: Recipes here

Italian Chicken Wraps

A wrap filled with vegetables, grilled chicken, and cheese, cut in half on a slate board. Nearby are lemon wedges, croutons, and sliced tomatoes.
image credit: chelseasmessyapron.com

Italian Wraps are the tastiest and quickest meal to assemble! Tortillas get loaded with veggies, chicken, Italian dressing, and croutons! Get 41 recipes here: Recipes here

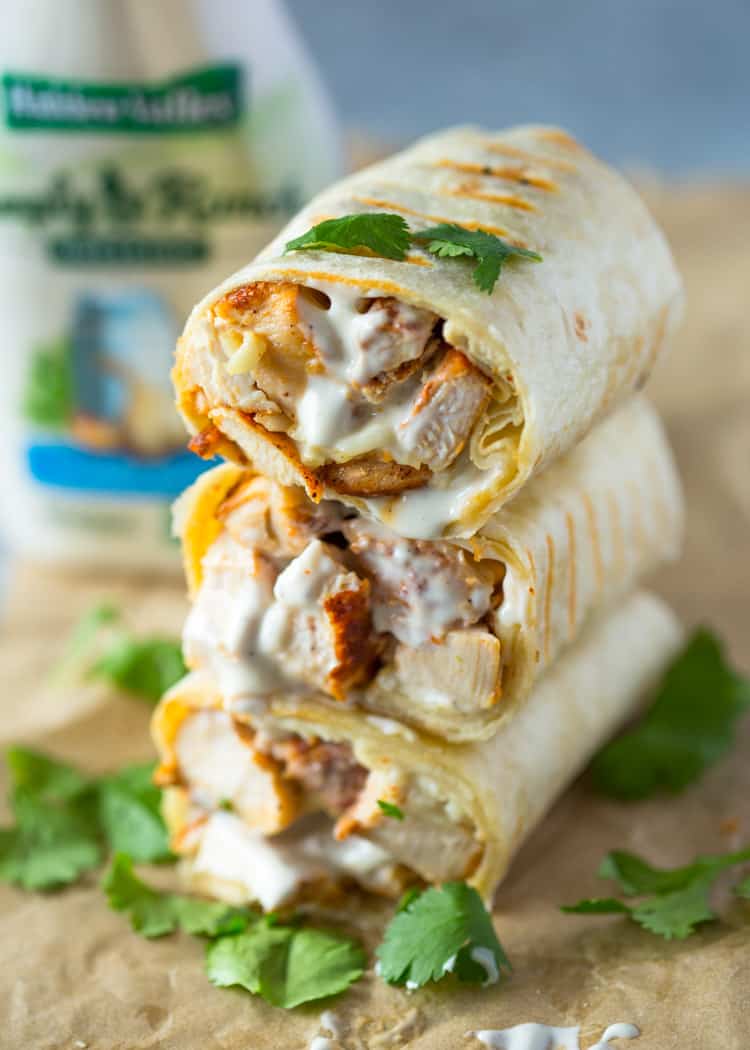
Chicken Ranch Wraps

Three chicken wraps stacked on parchment paper, filled with grilled chicken and drizzled with white sauce, garnished with cilantro. A bottle of dressing is partially visible in the background.
image credit: gimmedelicious.com

Healthy grilled chicken and ranch wraps are loaded with chicken, cheese and ranch. These tasty wraps come together in under 15 minutes and make a great lunch or snack!  Get 41 recipes here: Recipes here

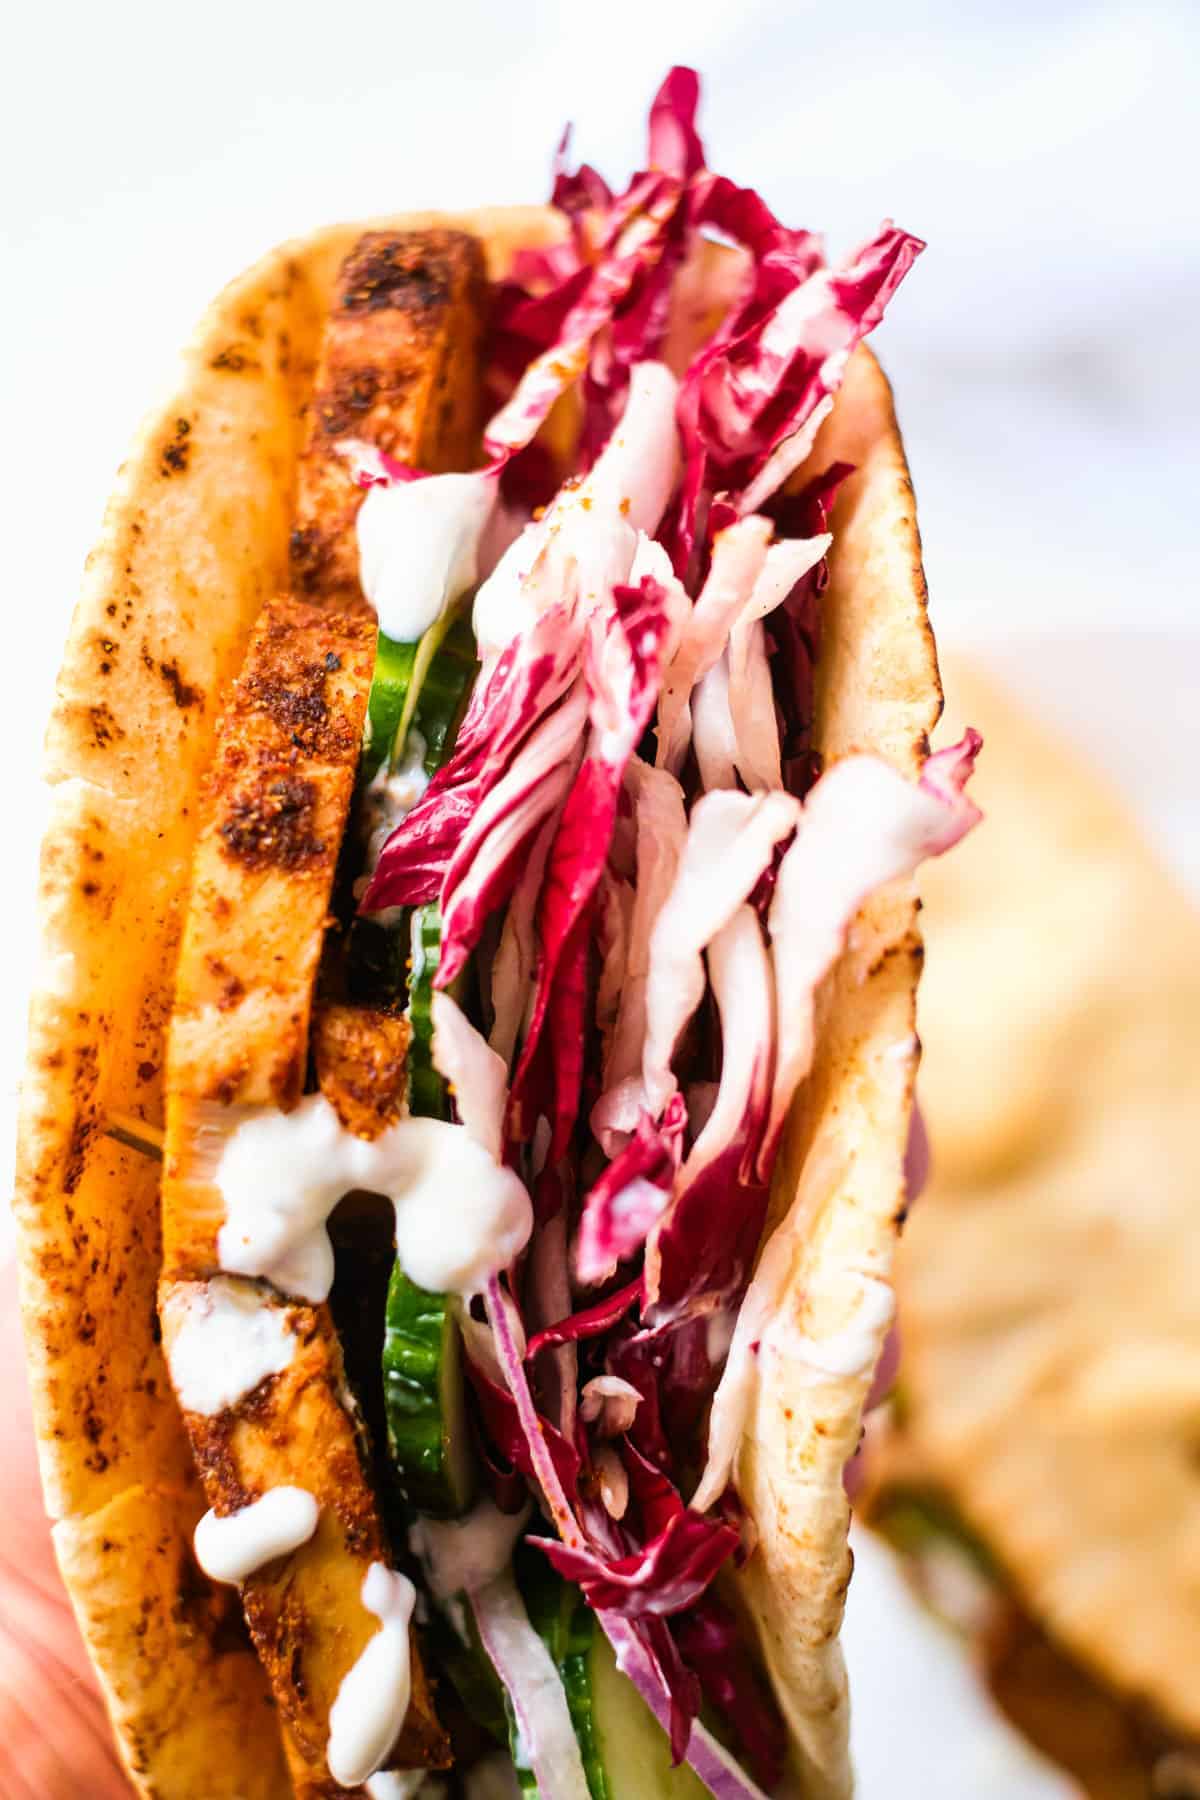
Chicken Shawarma Wrap

Close-up of a pita sandwich filled with grilled tofu, sliced cucumbers, shredded purple cabbage, and drizzled with white sauce.
image credit: budgetdelicious.com

This flavorful chicken shawarma wrap is easy to make on a budget and is loaded with exotic Middle Eastern flavors that you will love. Get 41 recipes here: Recipes here

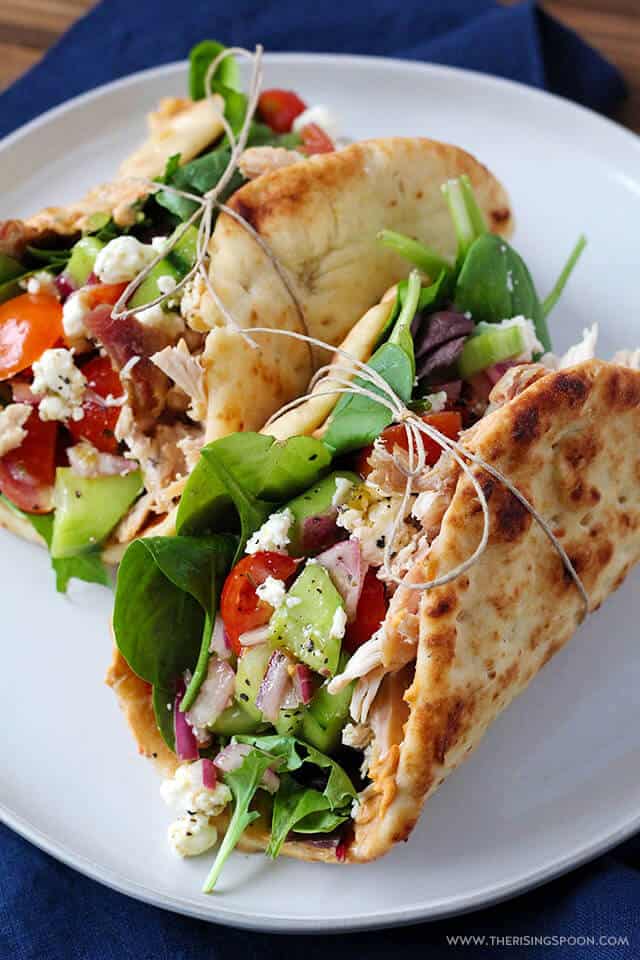
Chicken Hummus Naan Wraps

A plate with two chicken wraps on it.
image credit: budgetdelicious.com

An easy chicken wrap recipe you can throw together in just 15 minutes for a quick & healthy dinner or lunch. Featuring simple ingredients like shredded chicken, hummus, chopped fresh veggies, a homemade red wine vinaigrette, and crumbled cheese all piled onto a piece of soft & chewy naan bread. Get 41 recipes here: Recipes here

Sticky Chicken Finger Wraps

Close-up of two halves of a wrap filled with crispy chicken, lettuce, tomatoes, and sauce.
image credit: life-in-the-lofthouse.com

Sweet and spicy glazed chicken fingers stuffed inside a flour tortilla with lettuce, hot sauce, tomato, slivered red onion and cheese. These wraps make for a super yummy lunch or dinner! Get 41 recipes here: Recipes here

Crunchy Southwestern Chicken Wrap

image credit: dinnersdishesanddesserts.com

These boneless chicken breasts wraps come together in minutes, you can make them ahead, and the creamy spicy sauce made of salsa, sour cream and hot sauce makes them extra tasty! Get 41 recipes here: Recipes here

Shredded Chicken Recipes That Use Rotisserie Chicken

Three dishes displayed: a spinach casserole on the left, fried rotisserie chicken rolls in the center, and a cheese-topped casserole on the right, garnished with herbs.

Shredded chicken is a versatile ingredient that can be used in a variety of flavorful recipes, from hearty soups and stews to zesty tacos and flavorful sandwiches. In this article, we'll explore several tasty ways to repurpose your store-bought rotisserie chicken leftovers, providing you with easy-to-follow recipes that are sure to become new family favorites.

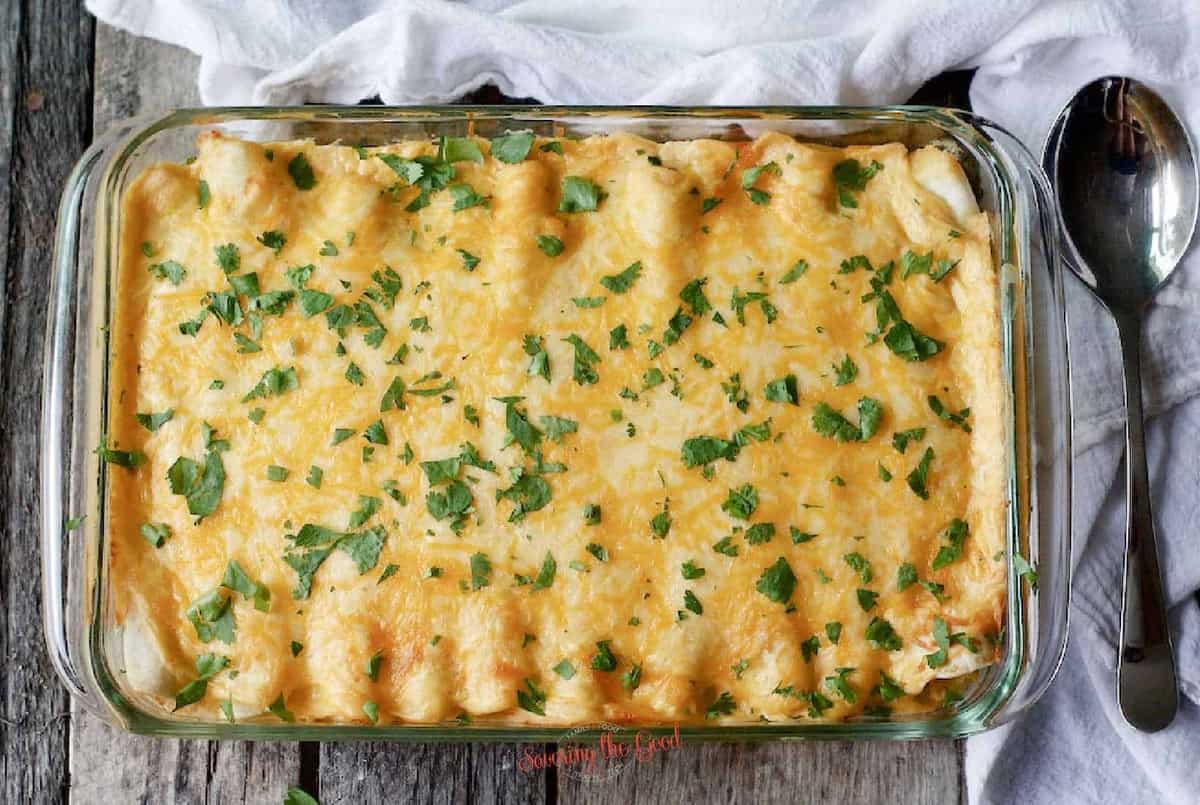
Sour Cream Chicken Enchiladas

horizontal image, full pan of casserole with chopped cilantro garnish
Image Credit: Savoring The Good.com

This is one of my favorite enchilada recipes because the simple ingredients are easy for new cooks to find at the grocery store and the chicken mixture with the sour cream enchilada sauce is not to spicy so that the whole family can enjoy it. To learn more: Get the full recipe

Buffalo Chicken Egg Rolls

one buffalo chicken dip egg roll sliced open, showing texture inside stacked on top of other egg rolls
Image Credit: SavoringTheGood.com

This buffalo chicken dip egg roll recipe is the combination of all the buffalo chicken dip ingredients, wrapped in an egg roll wrapper and fried to a crisp.  To learn more: Get The Full Recipe

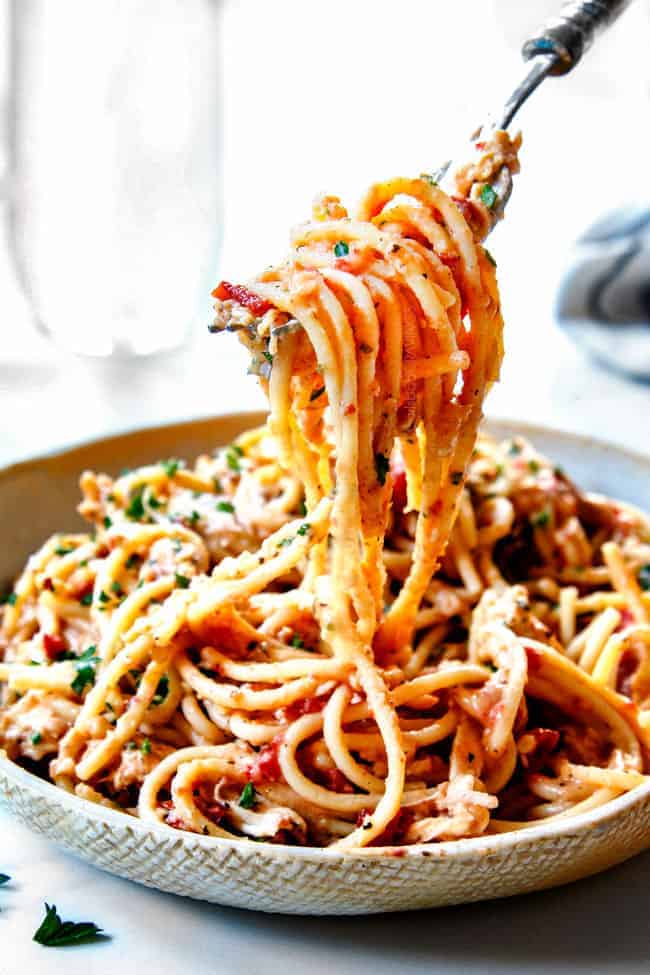
Chicken Spaghetti

A fork is being used to pick up spaghetti on a plate.
Image Credit: carlsbadcravings.com

This easy Chicken Spaghetti recipe is make-ahead friendly, freezer-friendly and easy to customize with your favorite veggies! To learn more: get all the recipes and more here

Chicken Broccoli Rice Casserole

Facebook image of chicken broccoli rice casserole
Image Credit: SavoringTheGood.com

This simple chicken broccoli rice casserole recipe is a comfort food ready in under 45 minutes and is the easiest weeknight meal. A classic recipe that the whole family will enjoy. To learn more: Get the full recipe

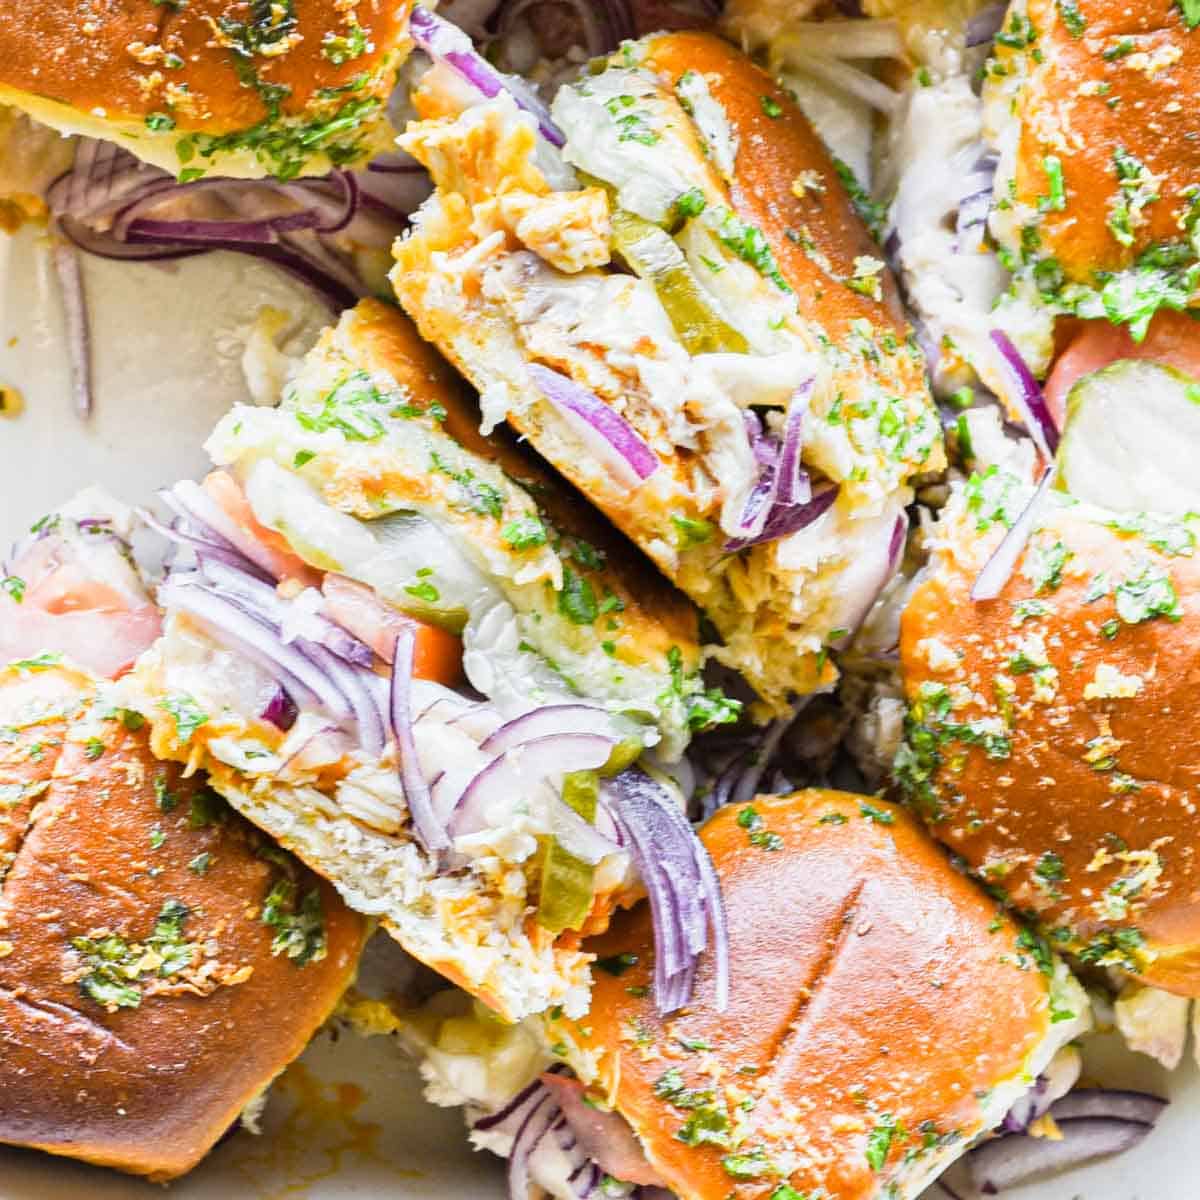
Shredded Rotisserie Chicken Sliders

A plate of sliders with onions, lettuce, and pickles.
Image Credit: cozycravings.com

They're then topped with an out-of-this-world herb garlic butter and baked to perfection. These toppings are a fun approach that's a bit different than the classic BBQ chicken sliders or buffalo chicken sliders. To learn more: get all the recipes and more here

Chicken Dumpling Soup

Chicken noodle soup in a white bowl with a spoon.
Image Credit: lenaskitchenblog.com

It showcases hearty vegetables and herbs, tender, juicy chicken shreds, and savory chicken broth. Homemade dumplings are dropped into the pot and simmered with the soup before everything is finished off with heavy cream for a creamy, velvety-smooth consistency. To learn more: get all the recipes and more here

Shredded Chicken Empanadas

A plate with four fried empanadas on it.
Image Credit: morethanyoucanchew.com.

Here is where you will use 2-3 sentences to describe the image/post you want to link them to. This is your excerpt or quick overview for the post. Make sure to include a link at the end (this is how you get traffic) similar to this. To learn more: get all the recipes and more here

Slow Cooker Chicken Teriyaki

Pulled pork in a white bowl with green onions.
Image Credit: Image credit goes to.

This easy Slow Cooker Chicken Teriyaki recipe is cooked with chicken breasts or thighs with honey, garlic, soy sauce that makes the perfect homemade sauce. Serve it in a bowl over rice with a vegetable like broccoli for a healthy balanced meal. To learn more: get all the recipes and more here

Olive Garden copycat Chicken Gnocchi Soup

Image Credit: persnicketyplates.com

This creamy Slow Cooker Chicken Gnocchi Soup is an Olive Garden copycat recipe. Filled with shredded chicken, potato gnocchi, and spinach, this soup is super simple to throw together in the crockpot! To learn more: get all the recipes and more here

Crockpot Mexican corn soup

A crockpot Mexican corn and chicken soup, topped with avocado and cilantro.
Image Credit: Image credit goes to.

Layers of flavor that include shredded chicken, black beans, creamed corn, Mexican spices as well as a creamy broth. Top this easy slow cooker soup with your choice of fresh squeezed lime, avocado, cilantro, sour cream and jalapeño. To learn more: Get the full recipe.

What Is Double Cream? Uses & US Equivalent

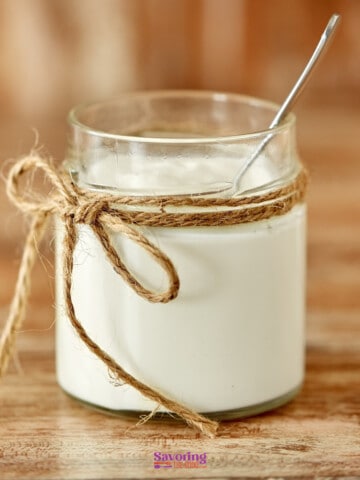
Clear glass jar filled with double cream, tied with a jute string, with a spoon inside, on a wooden table.

Double cream is a thick, high-fat dairy product used widely in UK cooking and baking, with a butterfat content of around 48%. If you've come across a British recipe calling for it and you're shopping at an American grocery store, you're not going to find it labeled that way. Here's exactly what it is, how it compares to what you do have access to, and what to use instead.

Clear glass jar filled with double cream, tied with a jute string, with a spoon inside, on a wooden table.

However, for those outside of the UK, understanding how double cream differs from its American counterpart, heavy cream, can be unclear. Let me help teach you the key distinctions between the two, discuss suitable substitutes, and share expert tips on effectively incorporating double cream into your cooking and baking.

What is Double Cream?

Double cream is the richest of the pourable creams, sitting at approximately 48% butterfat. That high fat content is what gives it a thick, spoonable consistency and makes it nearly impossible to curdle when heated.

It whips into stiff, stable peaks that hold their shape far longer than American heavy cream, which is why it shows up in everything from British trifles to pasta sauces to a bowl of fresh berries on a Sunday morning.

The only time I have worked with true English double cream was at Johnson & Wales, when our food purveyors sourced it specifically for our international pastry coursework. It is not something I can walk into my local grocery store and find, and chances are you cannot either.

How dairy farmers use milk to make double cream.

A man and woman interacting with cows in a sunlit barn, the man is kneeling and the woman is using a smartphone.

The key to making double cream lies in careful separation and pasteurization. Local dairy farmers will use milk with a naturally high butterfat content.

Using a centrifugal separator, they will separate the cream from the milk, ensuring that the fat content is between 48% to 60%, which is typical for double cream.

Pasteurization follows, where they gently heat the separated cream to a specific temperature, usually around 72°C for 15 seconds, to eliminate any harmful bacteria.

Profile of Double Cream

Double cream is calorie-dense; most of those calories come from fat. A little goes a long way in a recipe, which is honestly a good thing for your grocery budget. It also contains small amounts of protein and carbohydrates.

NutrientAmount per 100g
Energy467 kcal
Fat50.5 g
Saturated Fat31.7 g
Carbohydrates2.6 g
Proteins1.5 g

Double cream is calorie-dense, with a significant portion of its calories coming from fats, particularly saturated fats. You should be aware that while double cream can enrich the flavor and texture of dishes, I would suggest it to be used in moderation due to its fat content. Double cream also provides some level of protein and carbohydrates, making it a versatile ingredient in various recipes.

UK TermUS Equivalent
Double CreamHeavy Cream / Heavy Whipping Cream
Whipping CreamLight Whipping Cream

Double Cream vs. Heavy Cream

Double cream and heavy cream are not the same product, even though heavy cream is the closest American equivalent.

FeatureDouble CreamHeavy Cream
Butterfat ContentApproximately 48%Approximately 36-40%
ConsistencyThickSlightly less thick
WhippabilityWhips well, holds shapeWhips well
Use in CookingIdeal for thick sauces and dessertsSuitable for sauces, soups, and baking

Double cream sits at approximately 48% butterfat. American heavy cream runs between 36% and 40%. That difference matters most when you are whipping; double cream holds its peak longer and more firmly without needing a stabilizer. Heavy cream will whip well, but it softens faster at room temperature.

In cooked applications like sauces and soups, the difference is less noticeable. Heavy cream works as a 1:1 substitute in most recipes and gives you a result that is close, just slightly less rich.

Whipping Double Cream

A person in a red chef's jacket holds a whisk dripping with white cream above a stainless steel mixing bowl.

Start with cold cream and a cold bowl. I put my bowl and whisk in the freezer for at least 30 minutes before I start; the cold counteracts the friction heat from whipping and gives you a stiffer, more stable peak.

Begin at low speed until the cream turns frothy and you see small bubbles forming throughout. Then increase slowly to medium.

Watch for two stages: soft peaks, where the cream folds gently over itself when you lift the whisk, and firm peaks, where it stands upright with just a slight droop at the tip. Stop at firm peaks.

Over-whipping is the most common mistake. Once the cream turns grainy and starts to look chunky, you have gone too far and are on your way to butter. There is no coming back from that point.

If you are sweetening the cream, add your sugar as you increase from low to medium speed. For flavored whipped cream, add extracts or liqueurs at the same stage.

Whipped double cream holds its shape well in the refrigerator for a few hours. If you are making it ahead, store it covered and give it a quick re-whip before serving if needed.

What is a good substitute for double cream?

I am not fortunate enough to have double cream available to me in my part of the US. The food purveyors at my culinary school, Johnson & Wales University were able to source some English double cream when we were studying international pastry. That was the only time I have been able to find that type of cream for my recipes.

The good news is that heavy cream handles most of the same jobs. Here is what I reach for depending on the recipe.

  • Heavy Cream: The most practical substitute for American cooks. Use it 1:1 for double cream in any recipe. The result will be slightly less rich, but in most applications your guests will not know the difference.
  • Whole Milk and Butter: For a closer fat match, combine ⅞ cup of whole milk with ⅛ cup of melted unsalted butter per 1 cup of double cream needed. This brings the fat content closer to what double cream delivers and works well in sauces and baked goods.
  • Mascarpone: When I need a double cream substitute specifically for desserts, mascarpone is the closest thing I can find in the States. The texture is thick and rich; just keep in mind it will add a slightly tangy, cheesy note.
SubstituteUse CaseProportion
Heavy CreamGeneral Purpose1:1 for Double Cream
Milk and ButterGeneral Purpose⅞ cup Milk + ⅛ cup Butter for 1 cup Double Cream
MascarponeDessertsBy consistency and taste preference

Think about what the cream is doing in the recipe before you choose your substitute. If it is going into a sauce over heat, heavy cream is your answer. If it is being whipped for a topping or filling, the milk and butter combination will get you closer to the right consistency.

Dairy-Free alternatives to double cream

Full-fat coconut cream is the most reliable dairy-free substitute in cooked applications. It has a similar fat content, holds up under heat, and will not break in a sauce. It does carry a mild coconut flavor, so consider whether that works with your dish.

For desserts where you need a neutral flavor, cashew cream is a closer option. Keep in mind that cashew cream will not whip.

Storage and Preservation

Keep double cream refrigerated at below 5°C (41°F). Leave it in its original sealed packaging until you are ready to use it, and store it away from strong-smelling foods; cream absorbs odors easily.

ConditionShelf Life
Fridge5-7 days
Freezer1-2 months

If you need to freeze double cream, pour it into an ice cube tray first. That way you can thaw only what you need and avoid wasting the rest. Thaw it in the refrigerator for several hours or overnight before using.

A note on texture: once thawed, double cream will not whip as well. It is still perfectly usable in cooked applications, just do not plan to whip it after freezing.

If the cream smells sour or shows any discoloration, do not use it. Those are reliable signs of spoilage.

What to look for when buying double cream

If you are lucky enough to find double cream at a specialty grocery store or a British import shop, here is what to check before you buy.

Look for a fat content between 48% and 60% on the label. Check the sell-by date and look at the cream itself if possible; it should be smooth with no lumps or separation. Fewer additives on the ingredient list generally means better quality.

Buy it from a refrigerated case, not a shelf-stable display, and plan to use it within a week of opening.

Fat Content48% to 60%Essential for thickness and richness.
FreshnessSell-by dateLook for smooth consistency, no lumps.
PackagingSealed properlyChoose size based on needs.
HandlingRefrigerated storeKeep cold post-purchase, use within a week.
Nutritional InfoFat content, additivesFewer additives linked to higher quality.
UsageCulinary applicationsSuitable for whipping, cooking, and direct use on desserts.

Frequently Asked Questions

What is double cream?

Double cream is a high-fat dairy product, commonly used in the UK, with a fat content of approximately 48%. It is thicker than single cream and can be whipped to use in desserts or used in sauces and soups for a creamy consistency.

Is double cream the same as heavy cream?

No, double cream and heavy cream are not the same. While both are high in fat, heavy cream in the US typically contains about 36-38% fat, making it slightly lighter than double cream.

Can you make double cream at home?

Not really, and I want to be straight with you on that. True double cream requires a centrifugal separation process to achieve that 48% fat content; you can't replicate that in a home kitchen. What you can do is use heavy cream as a 1:1 substitute, or for a richer result, combine ⅞ cup of whole milk with ⅛ cup of melted unsalted butter per cup needed.

What is double cream in the US?

In the US, double cream is often referred to as 'heavy cream' or 'heavy whipping cream'. It's not exactly the same product, but the closest equivalent available.

Double whipped cream - what is it?

Double whipped cream is simply double cream that has been whipped until it is light and fluffy, often sweetened, and used as a topping for desserts.

Can I substitute double cream with other creams?

Yes, substitutes can be used depending on the recipe requirements, such as single cream or full-fat coconut milk for a non-dairy alternative. However, texture and flavor may vary.

A person in a red chef's jacket holds a whisk dripping with white cream above a stainless steel mixing bowl.

How to whip double cream

No ratings yet
Print Rate
Prep Time: 5 minutes minutes
Total Time: 5 minutes minutes
Servings: 8 servings
Calories: 101
Author: Sarah Mock

Ingredients

  • 1 Cup Double Cream
Follow Savoring The Good On PinterestFollow @SavoringTheGood or tag #STGRecipes!

Instructions

  • Chill all equipment.
  • Pour the double cream into the bowl.
    1 Cup Double Cream
  • Begin to whisk at a medium speed.
  • Increase to high speed as cream thickens.
  • Stop when you achieve the desired consistency.

Notes

It's important not to over-whip, as it can quickly become grainy and separate, turning into butter. If I'm sweetening the cream, I add sugar as I am turning it from low to medium speed. 
For flavored whipped cream, incorporate extracts or liqueurs at the same stage as sugar. Lastly, if I plan to use the whipped cream later, it’s best stored in the refrigerator where it holds its shape for a short period. 
Want to share when you made this recipe?Follow @SavoringTheGood & tag #STGRecipes!
Nutrition Facts
How to whip double cream
Serving Size
 
2 Tablespoons
Amount per Serving
Calories
101
% Daily Value*
Fat
 
11
g
17
%
Saturated Fat
 
7
g
44
%
Polyunsaturated Fat
 
0.5
g
Monounsaturated Fat
 
3
g
Cholesterol
 
34
mg
11
%
Sodium
 
8
mg
0
%
Potassium
 
28
mg
1
%
Carbohydrates
 
1
g
0
%
Sugar
 
1
g
1
%
Protein
 
1
g
2
%
* Percent Daily Values are based on a 2000 calorie diet.
**Nutritional facts are just estimates. Please utilize your own brand nutritional values to double check against our estimates.
Like this recipe card? Want one for your site?Check out WP Recipe Maker!

Sarah Mock of savoringthegood.com headshot 2022

I am Sarah Mock. Welcome!

Sarah Mock is a classically trained Chef and a graduate of Johnson & Wales University. A culinary blogger for 17 years, Sarah helps the home cook prepare her recipes with professional results.

Get to know me

as seen in:

Logos of Hersheyland, ABC News, and Good Day PA are showcased in a seamless row, providing a snapshot of popular brands.

Hersheyland Nightline Good Day Pa!

The vibrant design showcases the iconic logos of Pinterest, Rachael Ray, and Jell-O set against a bold red background. Sorry, the provided description doesn't offer enough detail to suggest important SEO keywords.

Pinterest Rachael JELL-O

Make This Vintage Cheeseball Recipe for National Cheeseball Day

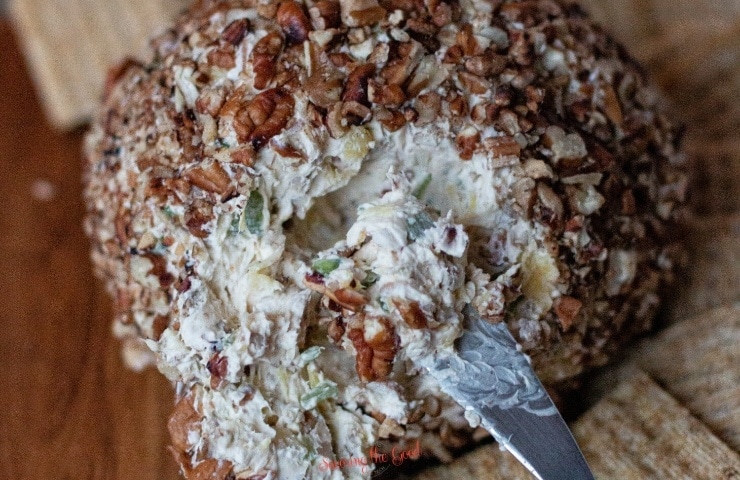
pineapple cheeseball with a serving spatula carving out a portion

Pineapple cheese ball is a vintage recipe from my childhood. Whenever we would have a party or needed an appetizer for a special occasion my mom would make this recipe.

Pineapple Cheese Ball Recipe with Pecans

pineapple cheeseball with a serving spatula carving out a portion
Image Credit: SavoringTheGood.com

The combination of the sweet pineapple and the tang of the green pepper is an unexpectedly delightful combination. Pecans always meant the holidays for my family. If you are not a fan of pecans you can always substitute chopped walnuts.

To learn more: get the full recipe.

Ingredients:

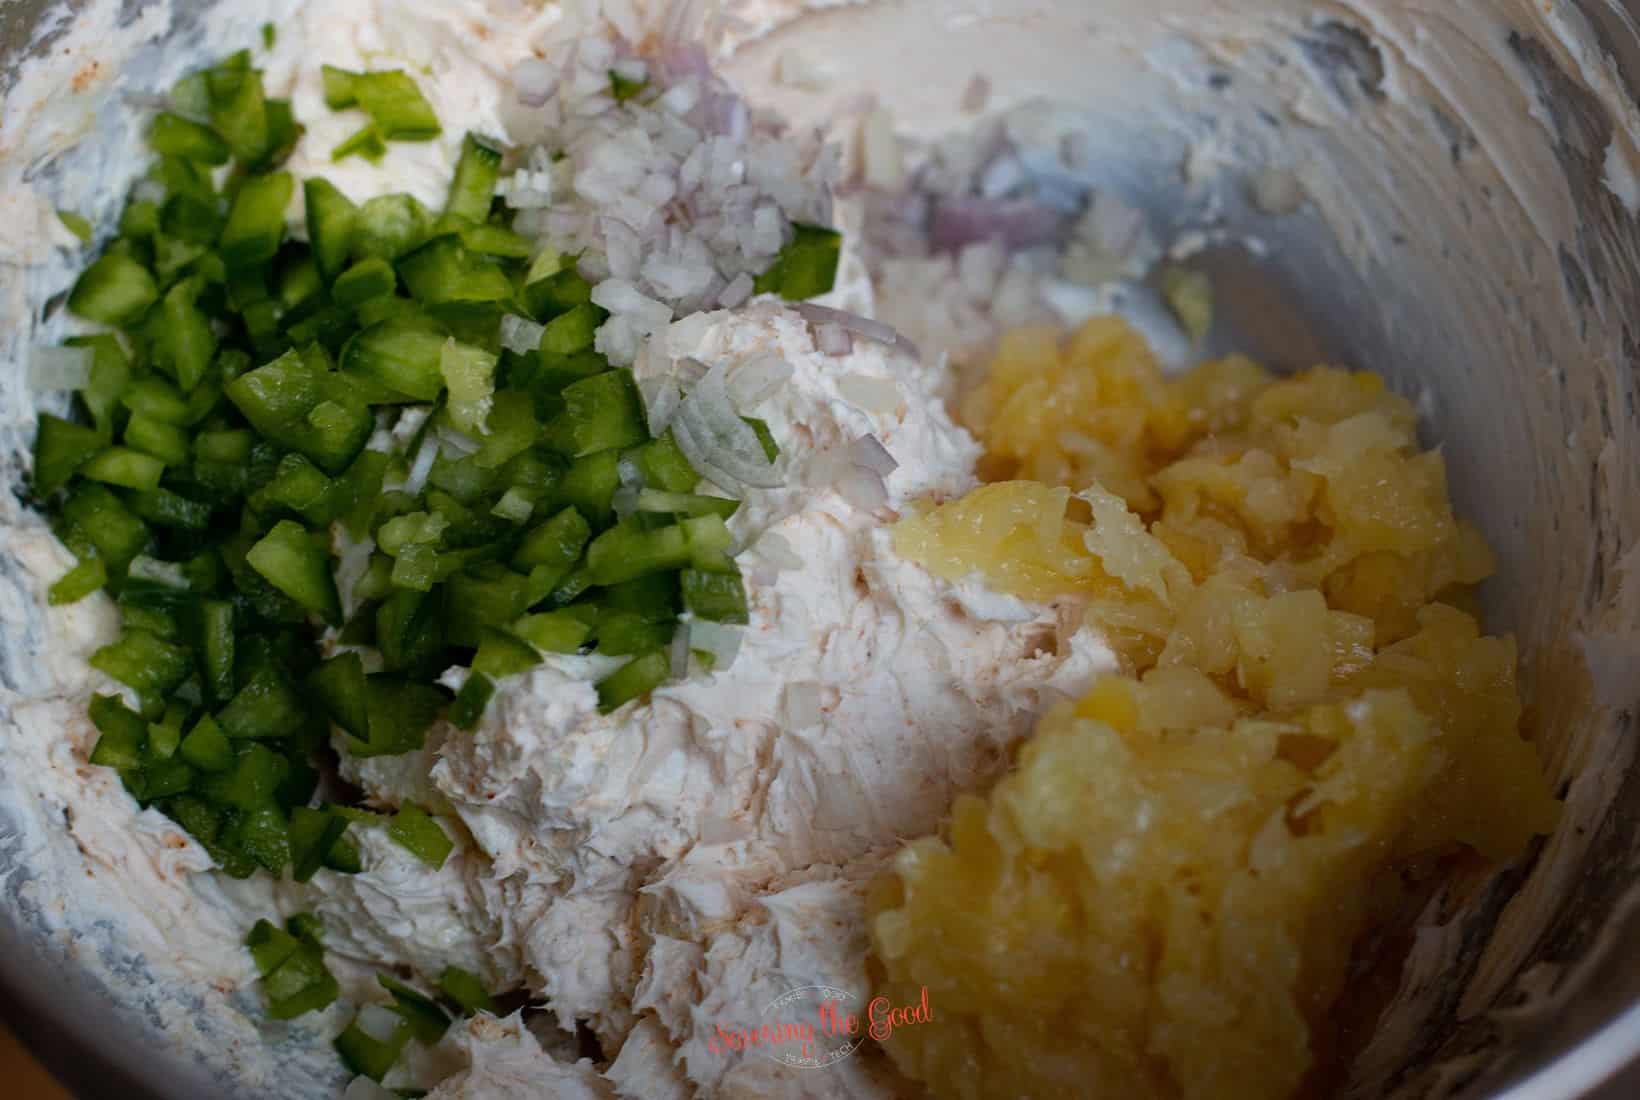
green pepper, cream cheese and pineapple in a bowl
Image Credit: SavoringTheGood.com
  • 2 packages cream cheese (8 ounce each)
  • 1 8 ounce can crushed pineapple (drained)
  • 2 teaspoons onions (chopped)
  • ½ cup green pepper (chopped)
  • 1-2 teaspoon seasoned salt
  • 1 ½ cup pecans (finely chopped)

To learn more: get the full recipe.

How to make a pineapple Hawaiian cheese ball with pecans

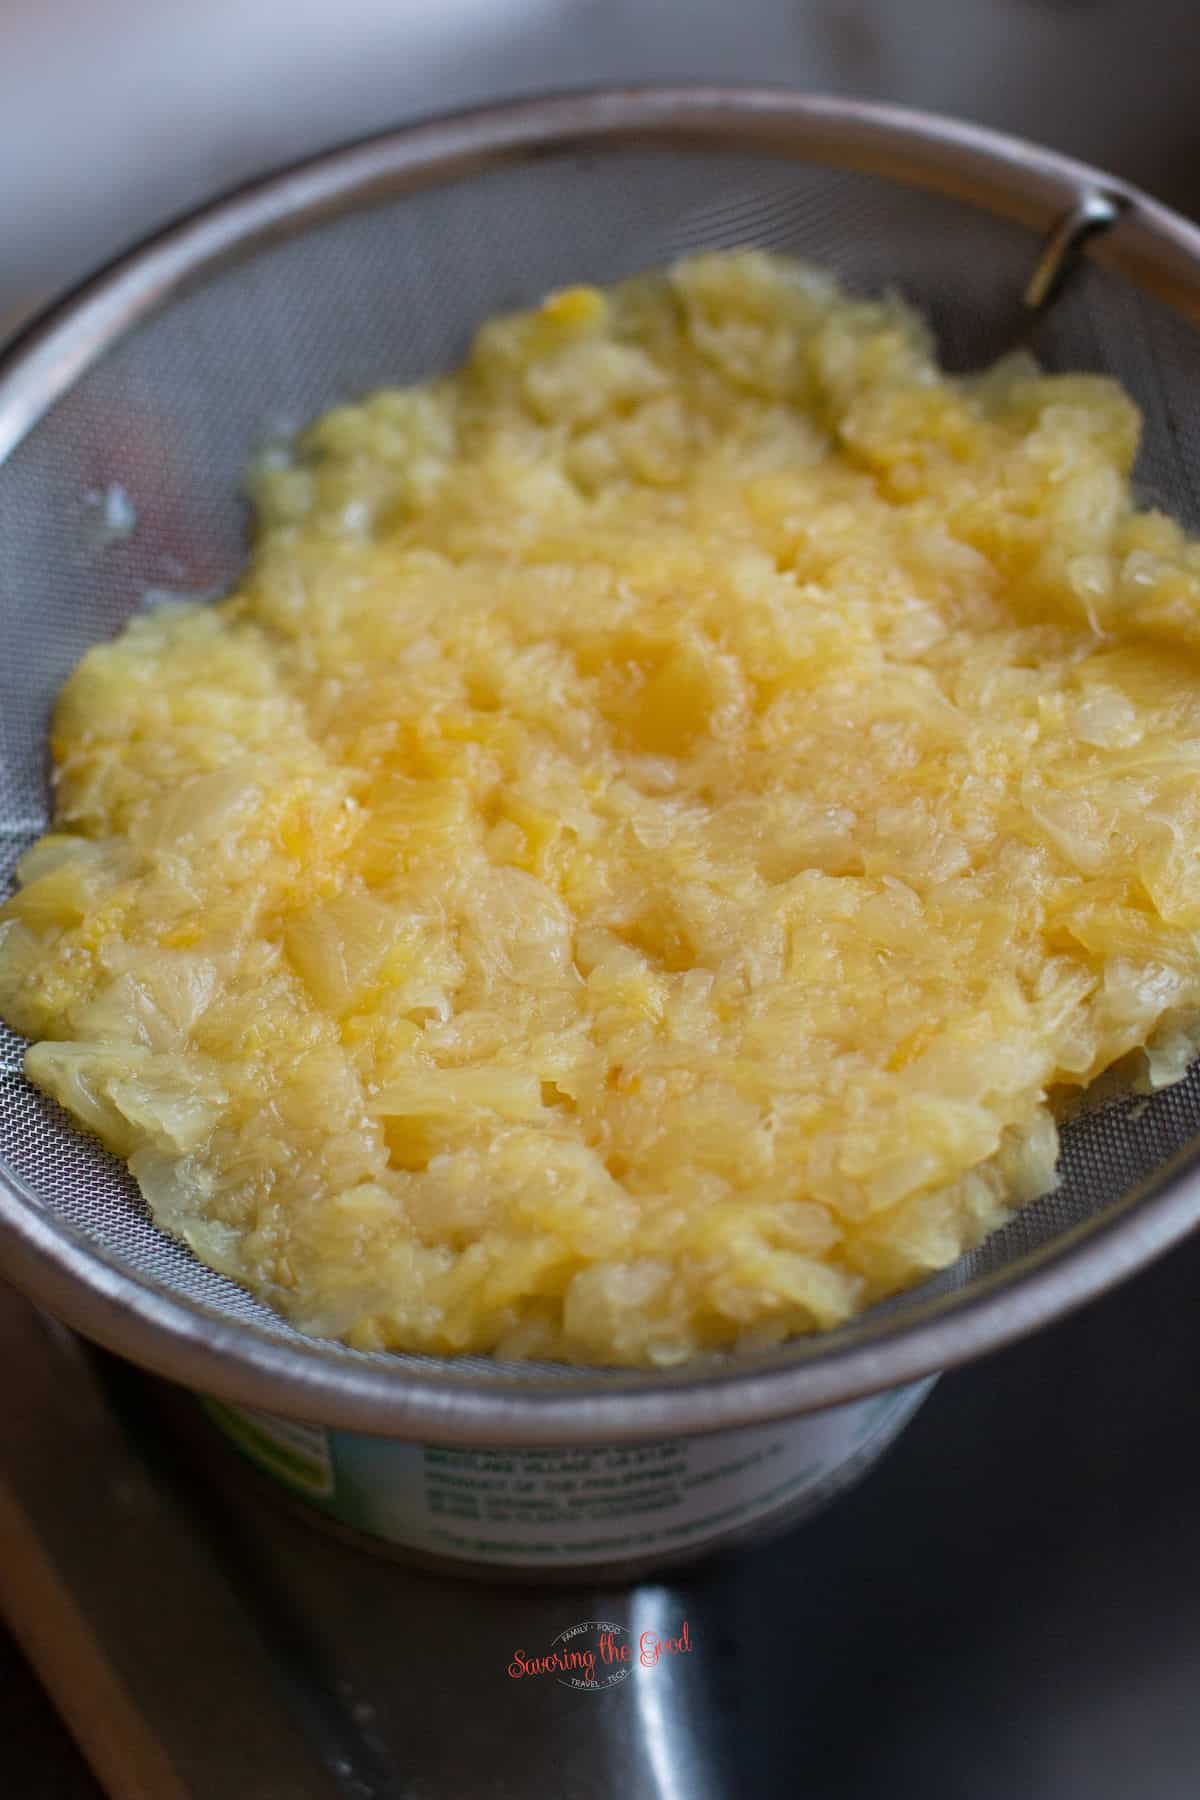
crushed pineapple draining
Image Credit: SavoringTheGood.com

Drain the pineapple.

To learn more: get the full recipe.

Chop Pecans

toasted pecans being chopped
Image Credit: SavoringTheGood.com

Warm pecans in a dry pan until they become fragrant. Chop and measure out 1 ½ cups.

To learn more: get the full recipe.

Mix it up!

green pepper, cream cheese and pineapple in a bowl
Image Credit: SavoringTheGood.com
  • While the pecans cool, finely dice the onion and the green pepper.
  • In a mixing bowl with the paddle attachment, cream together the cream cheese and the seasoned salt.
  • Scrape down the sides of the bowl and add the drained pineapple, onions, peppers, and 1 cup of the toasted, cooled pecans.

To learn more: get the full recipe.

Make a cheeseball

pineapple cheeseball wrapped in plastic wrap before nuts added
Image Credit: SavoringTheGood.com
  • Wrap the cheese ball in plastic wrap, forming a ball.
  • Refrigerate for 2 hours to firm up.

To learn more: get the full recipe.

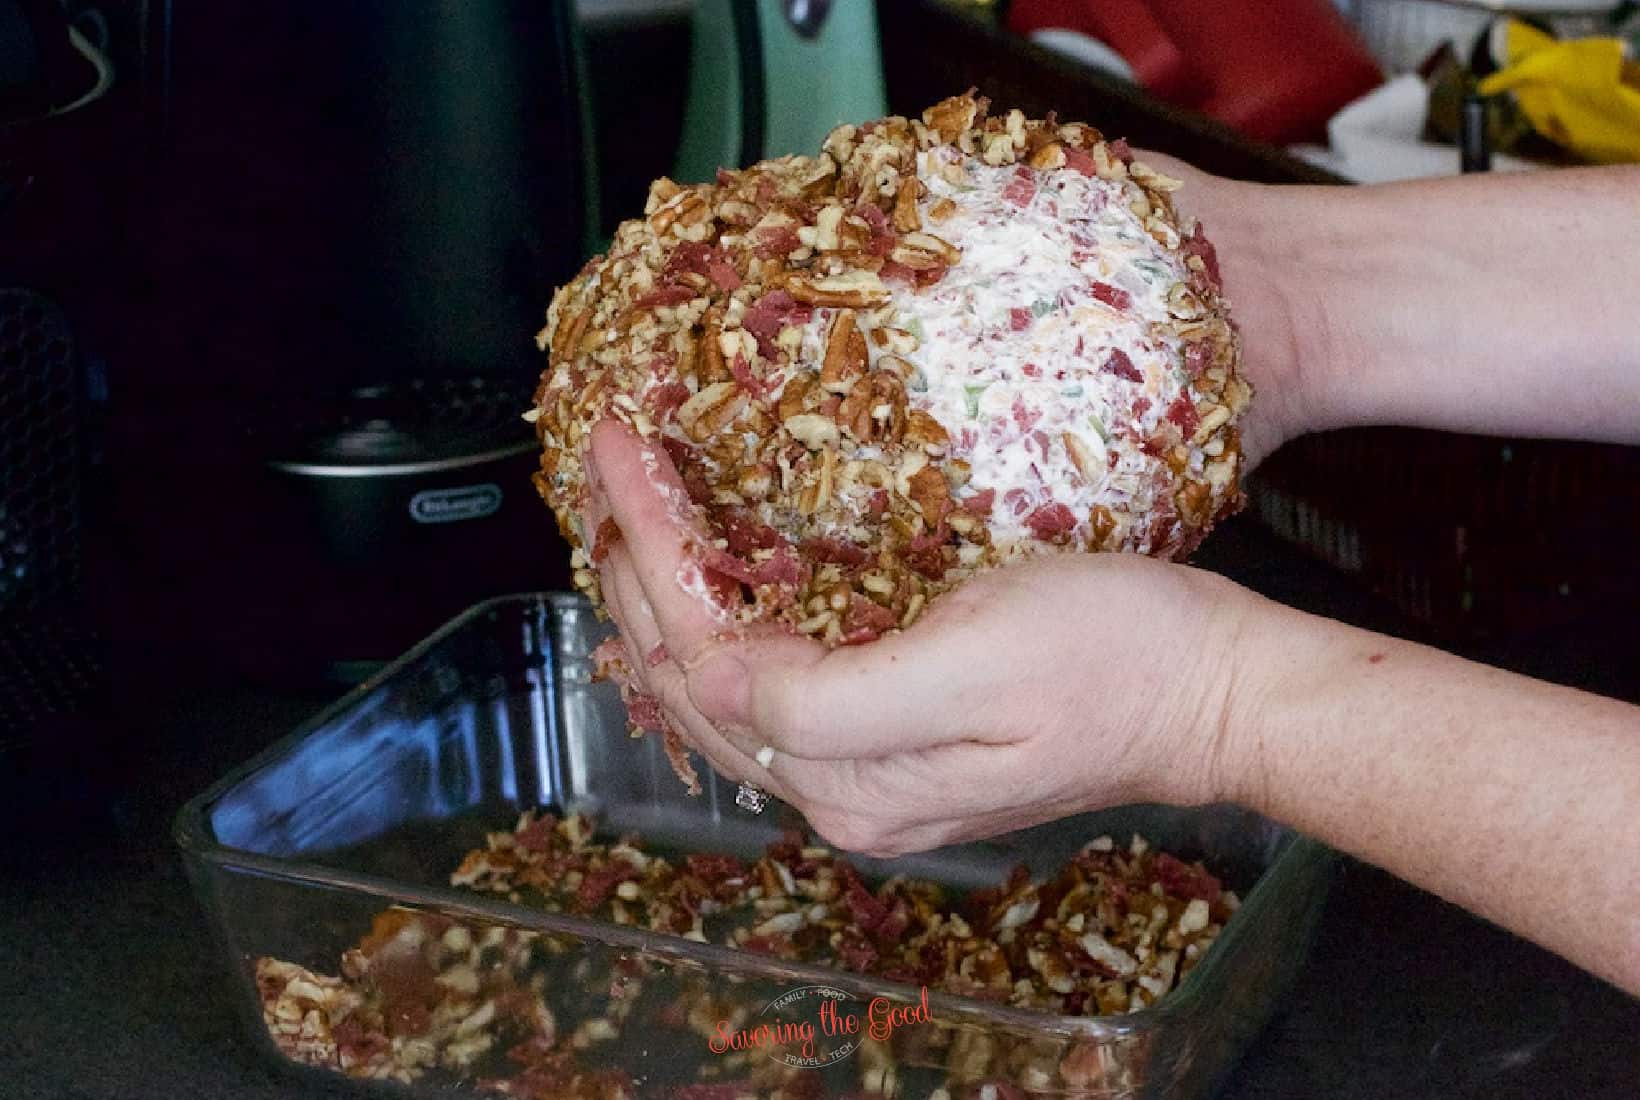
Add Pecans

showing how to add pecans to the outside of a Cheese Ball
Image Credit: SavoringTheGood

Unwrap the cheeseball and press the pecans onto the outside of the cheeseball.

To learn more: get the full recipe.

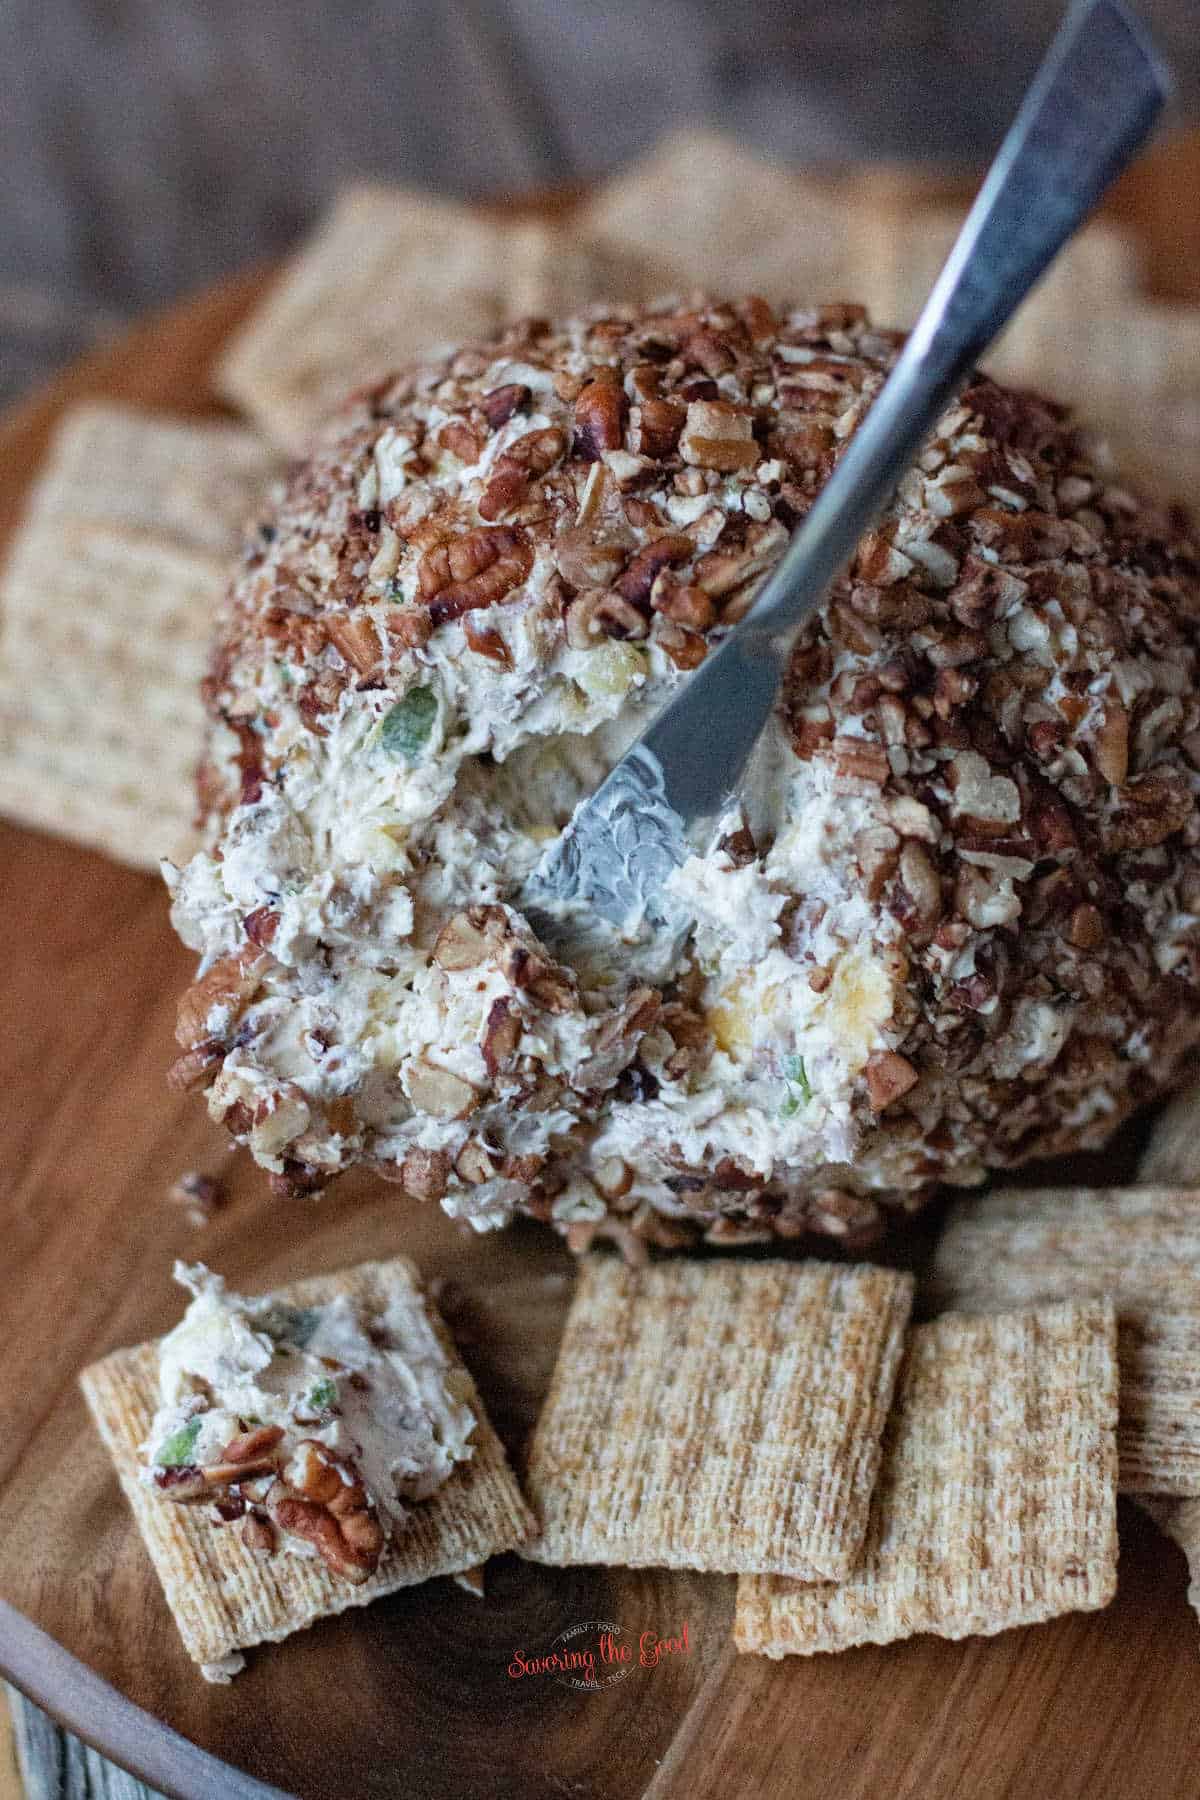
Serve with crackers.

pineapple cheeseball with pecans on the outside, triscuits on the side
Image Credit: SavoringTheGood.com

Serve with crackers. To learn more: get the full recipe.

Enjoy your cheeseball!

pineapple cheeseball with a serving spatula carving out a portion
Image Credit: SavoringTheGood.com

To learn more: get the full recipe.

The ONLY recipe you will need for Baked Ham with Pineapple Day (Glazed Ham day too!)

facebook image of Glazed Ham With Pineapples in a pan.

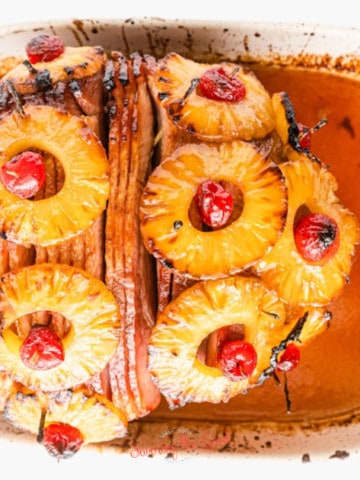
Brown sugar-glazed baked ham with fresh pineapple and maraschino cherries is the perfect, delicious combination of sweet and salty for National Baked Ham with Pineapple Day! Keep reading to get my recipe.

Brown Sugar Glazed Baked Ham With Pineapples

baked honey brown sugar ham with pineapples and cherries.
Image Credit: SavoringTheGood.com

This easy recipe has 5 simple ingredients and one of them is the precut spiral ham. Brown Sugar glazed baked ham with fresh pineapple and maraschino cherries is a delicious combination of sweet and salty for a Christmas dinner that feeds a crowd.

To learn more: Get the recipe here

Ingredients for Pineapple Brown Sugar Glaze For Ham

ingredients for baked ham with pineapples and cherries, ha,. brown sugar, maraschino cherries, pineapple rings, pineapple juice, honey.
Image Credit: SavoringTheGood
  • 4-6 pound ham
  • 1 can pineapple rings
  • 1 jar maraschino cherries
  • ½ cup honey
  • ½ cup brown sugar
  • 1 cup pineapple juice (reserved)

To learn more: Get the recipe here

How to make pineapple glazed ham

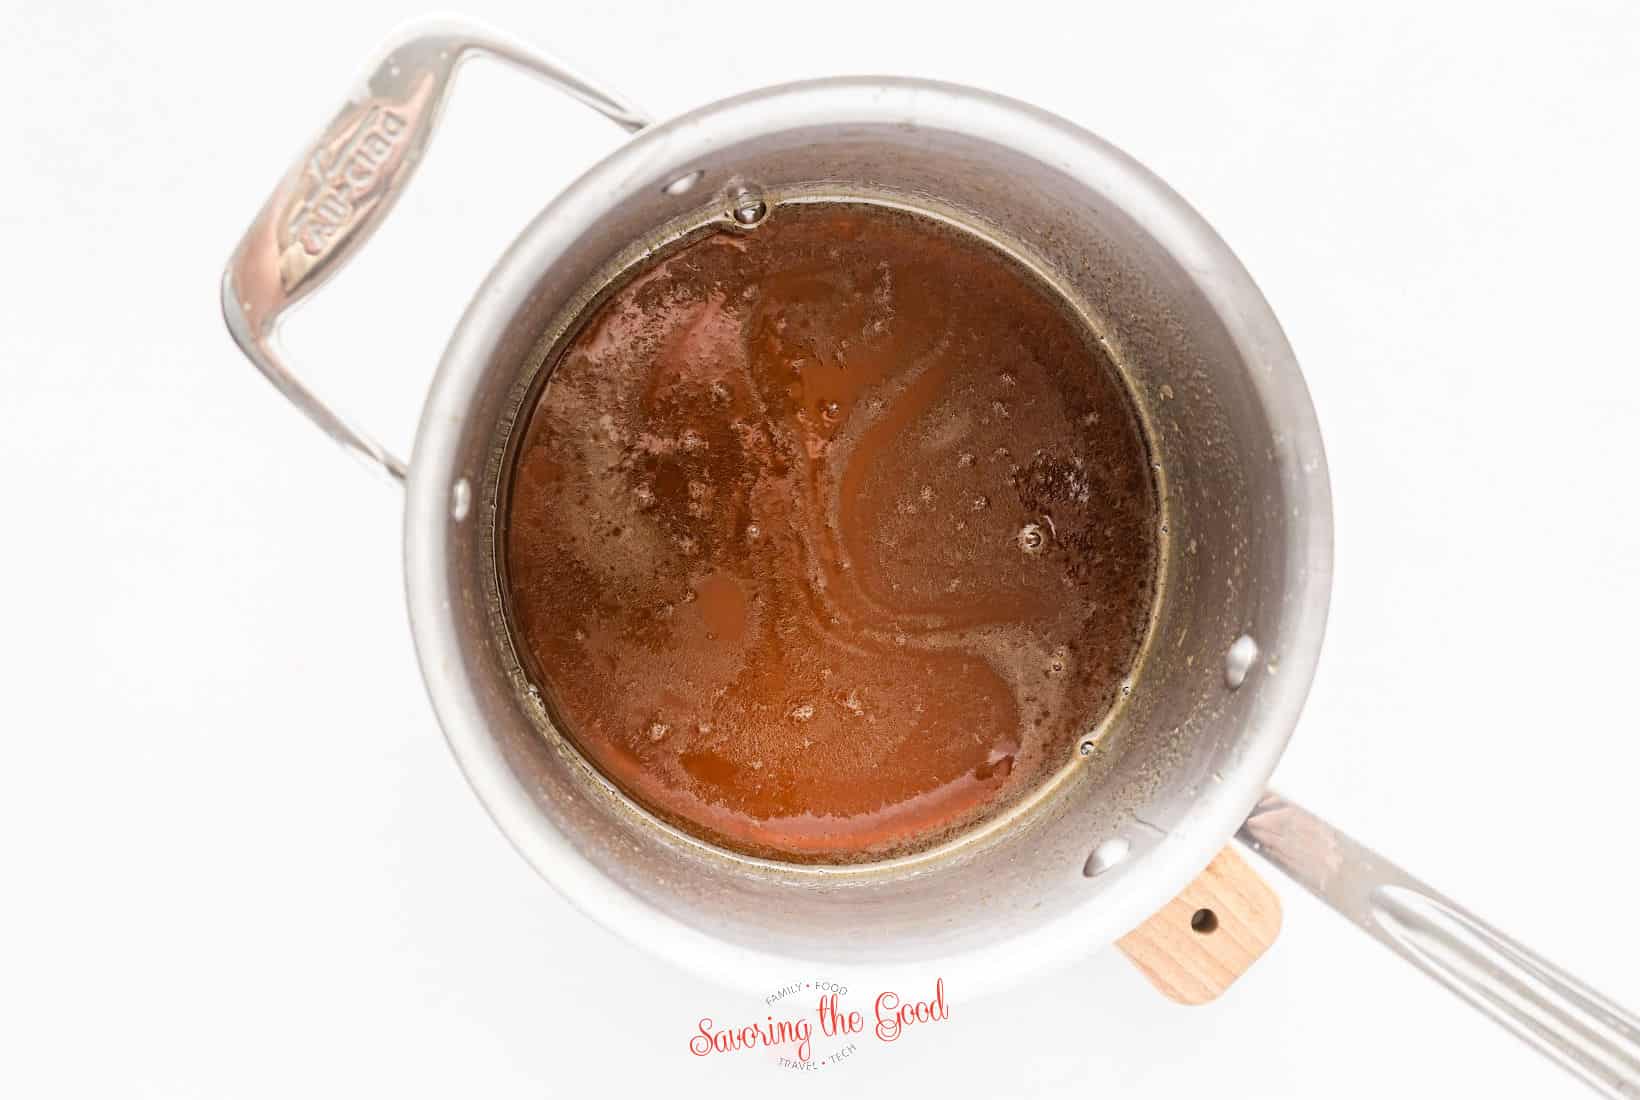
brown sugar glaze in an all-clad pan.
Image Credit: SavoringTheGood.com

Add the brown sugar glaze ingredients to a pan. Allow to simmer and reduce while you prepare the spiral ham.

To learn more: Get the recipe here

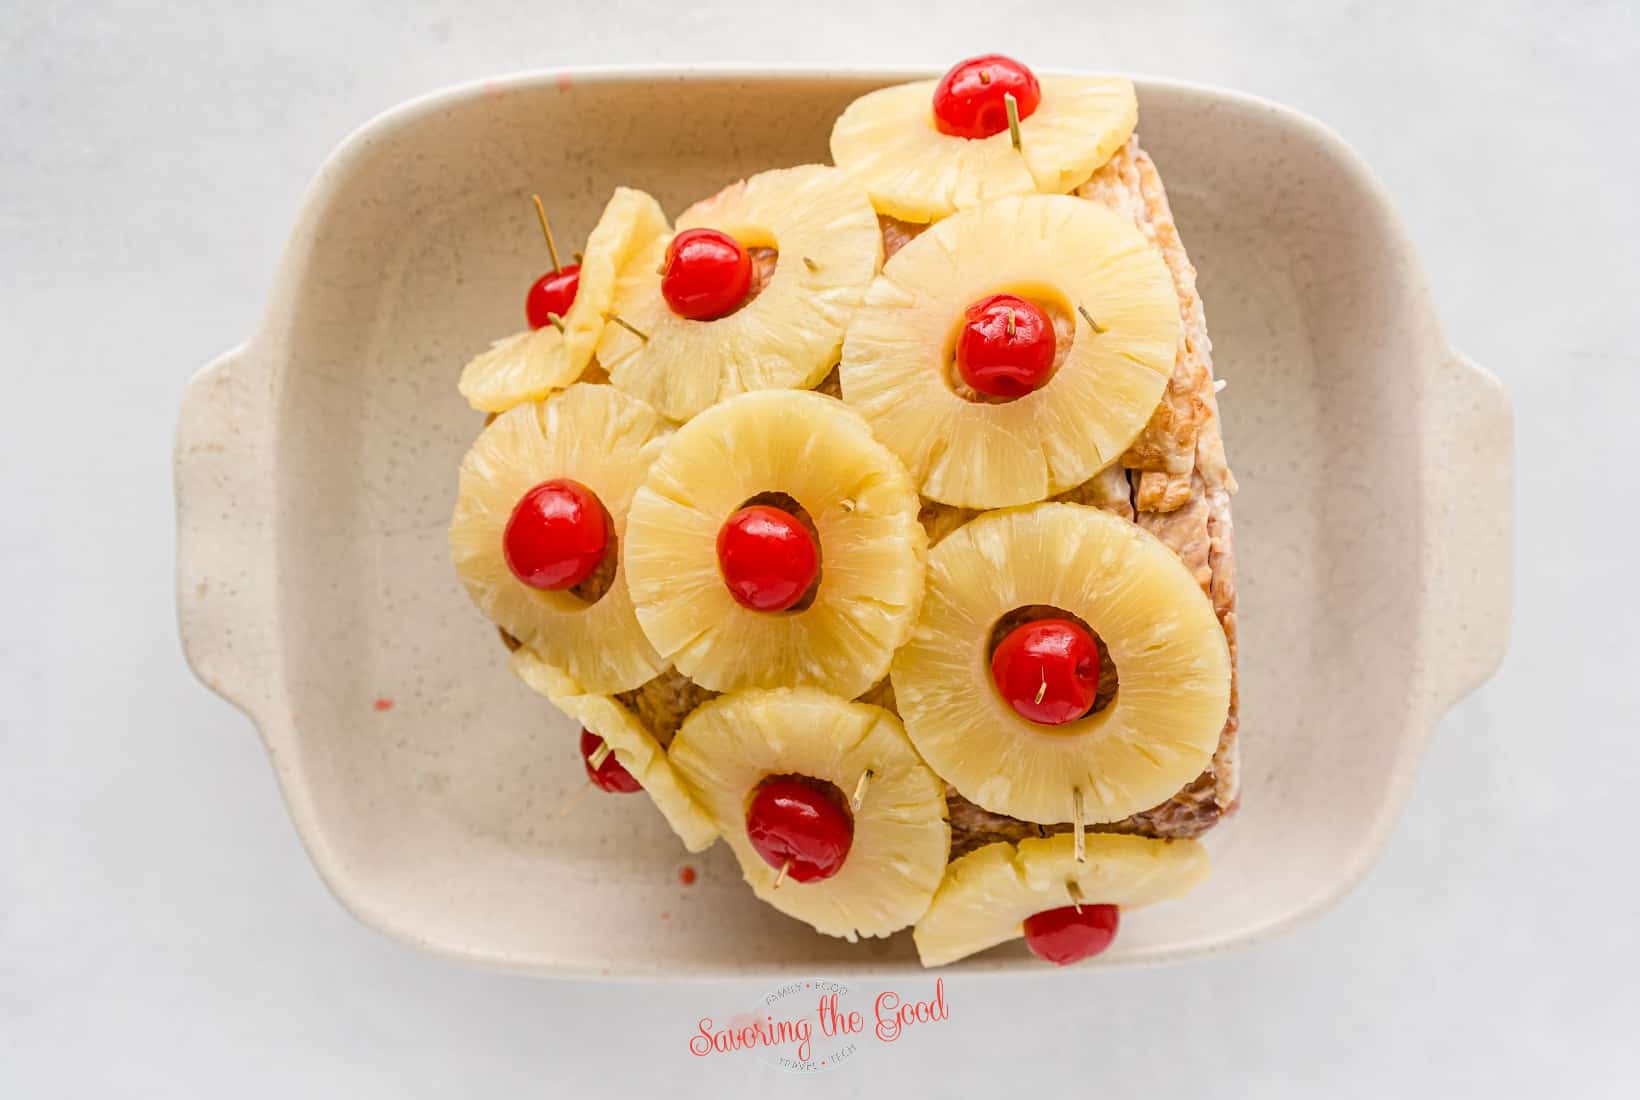
pineapple rings and cherries held in place with wood picks on a sliced ham.
Image Credit: SavoringTheGood.com

Using wooden toothpicks, secure the pineapple slices to the ham with a maraschino cherry in the center of each ring of pineapple.

To learn more: Get the recipe here

baked ham with pineapple rings and cherries, in a shite pan starting to take on colors.
Image Credit: SavoringTheGood.com

Place the prepared ham in a roasting pan, add water to the bottom of the pan, cover the ham with foil and bake for 45 minutes at 350.

To learn more: Get the recipe here

Glaze The Ham

basting brush brushing on brons sugar glaze onto the pineapple rings.
Image Credit: SavoringTheGood.com

Remove the foil, and baste with the brown sugar glaze. Bake for an additional 10 minutes. 

To learn more: Get the recipe here

Glaze The Ham...More

facebook image of Glazed Ham With Pineapples in a pan.
Image Credit: SavoringTheGood.com

Repeat 3 times for a total of an additional 40 minutes bake time.

To learn more: Get the recipe here

The Most Delicious Baked Ham with Pineapples

horizontal image of slices of baked ham with pineapples, cherries, potatoes and salad on the plate.
Image Credit: SavoringTheGood.com

I will plan on about ¾ lb. per person for a bone-in ham, so an 8 lb. ham will feed about 10-11 people. It also depends on how many side dishes you will be serving.

To learn more: Get the recipe here

Side Dishes to Serve with Ham

A roasted ham is sitting on a wooden cutting board.
Image Credit: SavoringTheGood.com

What to serve with ham? When it comes to this classic and savory centerpiece, finding the perfect dishes for its rich flavors is essential to creating a memorable meal.

To learn more: Side dishes to serve with ham.

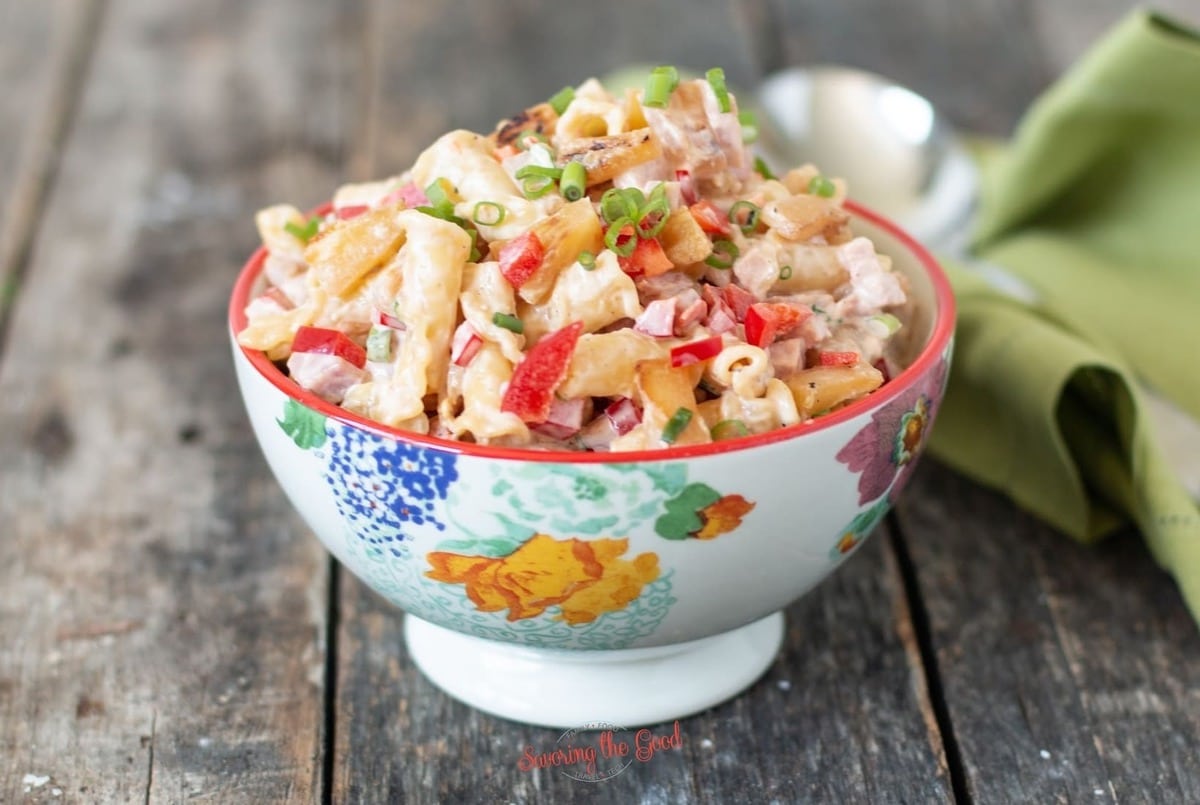
Hawaiian Pasta Salad Recipe - Perfect for Leftover Ham

Hawaiian pasta salad horizontal image
Image Credit: SavoringTheGood.com

Hawaiian pasta salad is the perfect ham and pineapple pasta salad recipe for using up leftover ham. Served it cold on a hot day for an easy side dish that everyone will love..

To learn more: Hawaiian Pasta Salad Recipe

Enter Your Spice Era With These Homemade Spice Blends

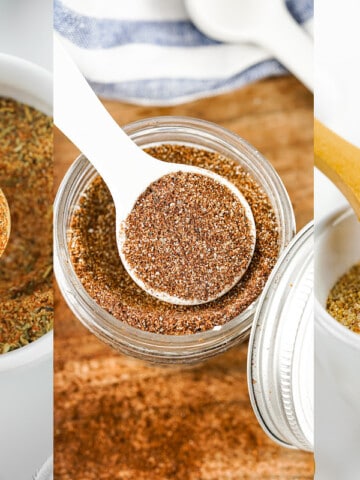
Three close-up images of different spices in jars with wooden spoons, showcasing textures and colors.

Homemade spices are the secret ingredient that can take your cooking from 'Delicate' to 'Gorgeous.' Whether you're looking to "Shake It Off" in the kitchen or want to add a "Sparks Fly" of flavor, homemade spices are the key to unlocking a whole new world of culinary possibilities.

All-Purpose Seasoning Blend Recipe

All Purpose Seasoning Blend.
Image Credit: SavoringTheGood.com

This seasoning blend is perfect for adding to meats, vegetables, soups, stews, and more, making it a great staple to have in your cupboard. Get the full recipe: All-Purpose Seasoning

Spaghetti Seasoning

spaghetti seasoning in a white bowl with wooden spoons off to the side.
Image Credit: SavoringTheGood.com

Pasta lovers, grab your fork, because today we're talking about something that will elevate your homemade spaghetti sauce game - DIY spaghetti seasoning! If you're tired of relying on store-bought packets or jars, which often contain additives and preservatives, this recipe is for you. Get the full recipe: Spaghetti Seasoning

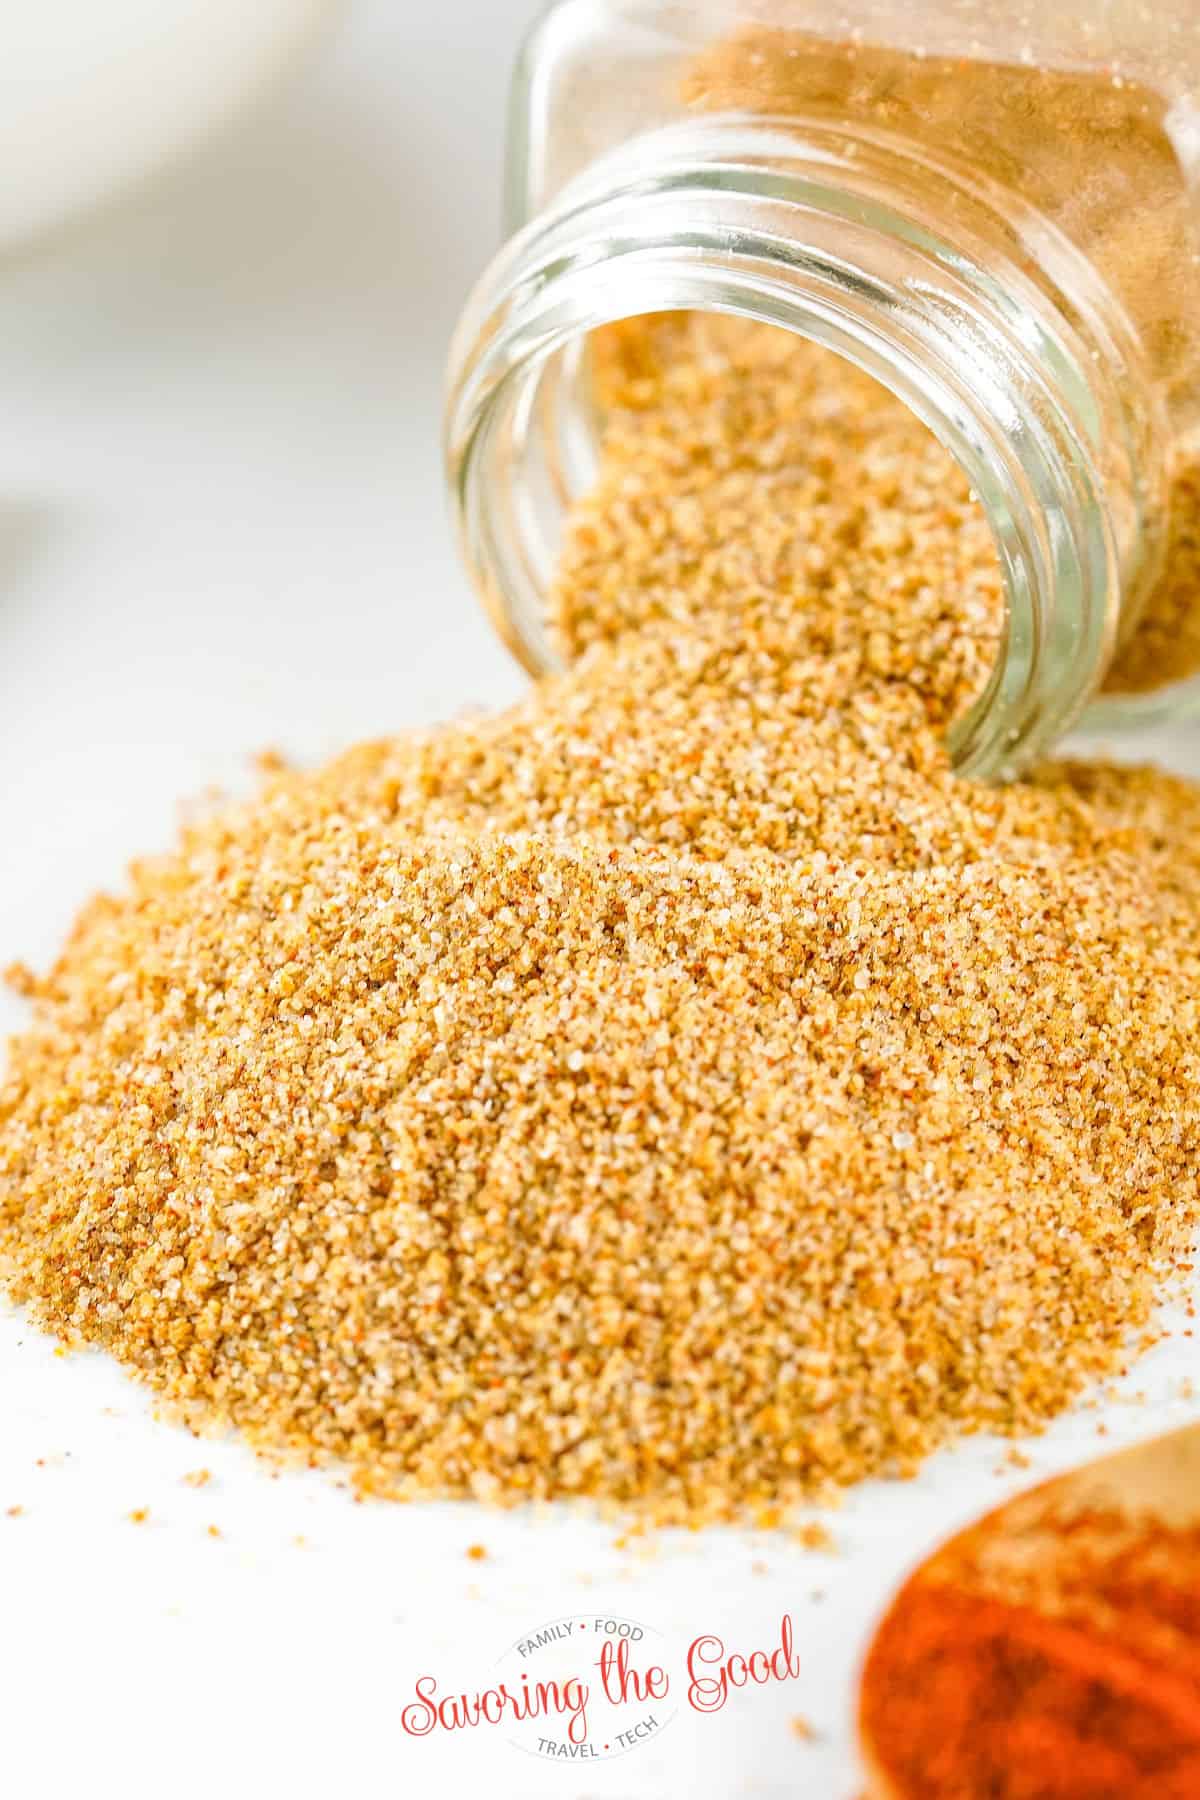
Homemade Seasoned Salt

seasoned salt spilled out of a clear glass jar.
Image Credit: SavoringTheGood.com

This homemade seasoning salt recipe combines common pantry seasonings to make a seasoned salt that is just like Lawry's seasoned salt! Get the full recipe: Homemade Seasoned Salt

Blackening Seasoning

tipped over glass container Blackening Seasoning
Image Credit: SavoringTheGood.com

Whether you are grilling, sautéing, or baking, blackening seasoning is a versatile ingredient that can bring out the best in your food. Enjoy this easy-to-follow recipe for making your own blackening seasoning at home. Get the full recipe: Blackening Seasoning

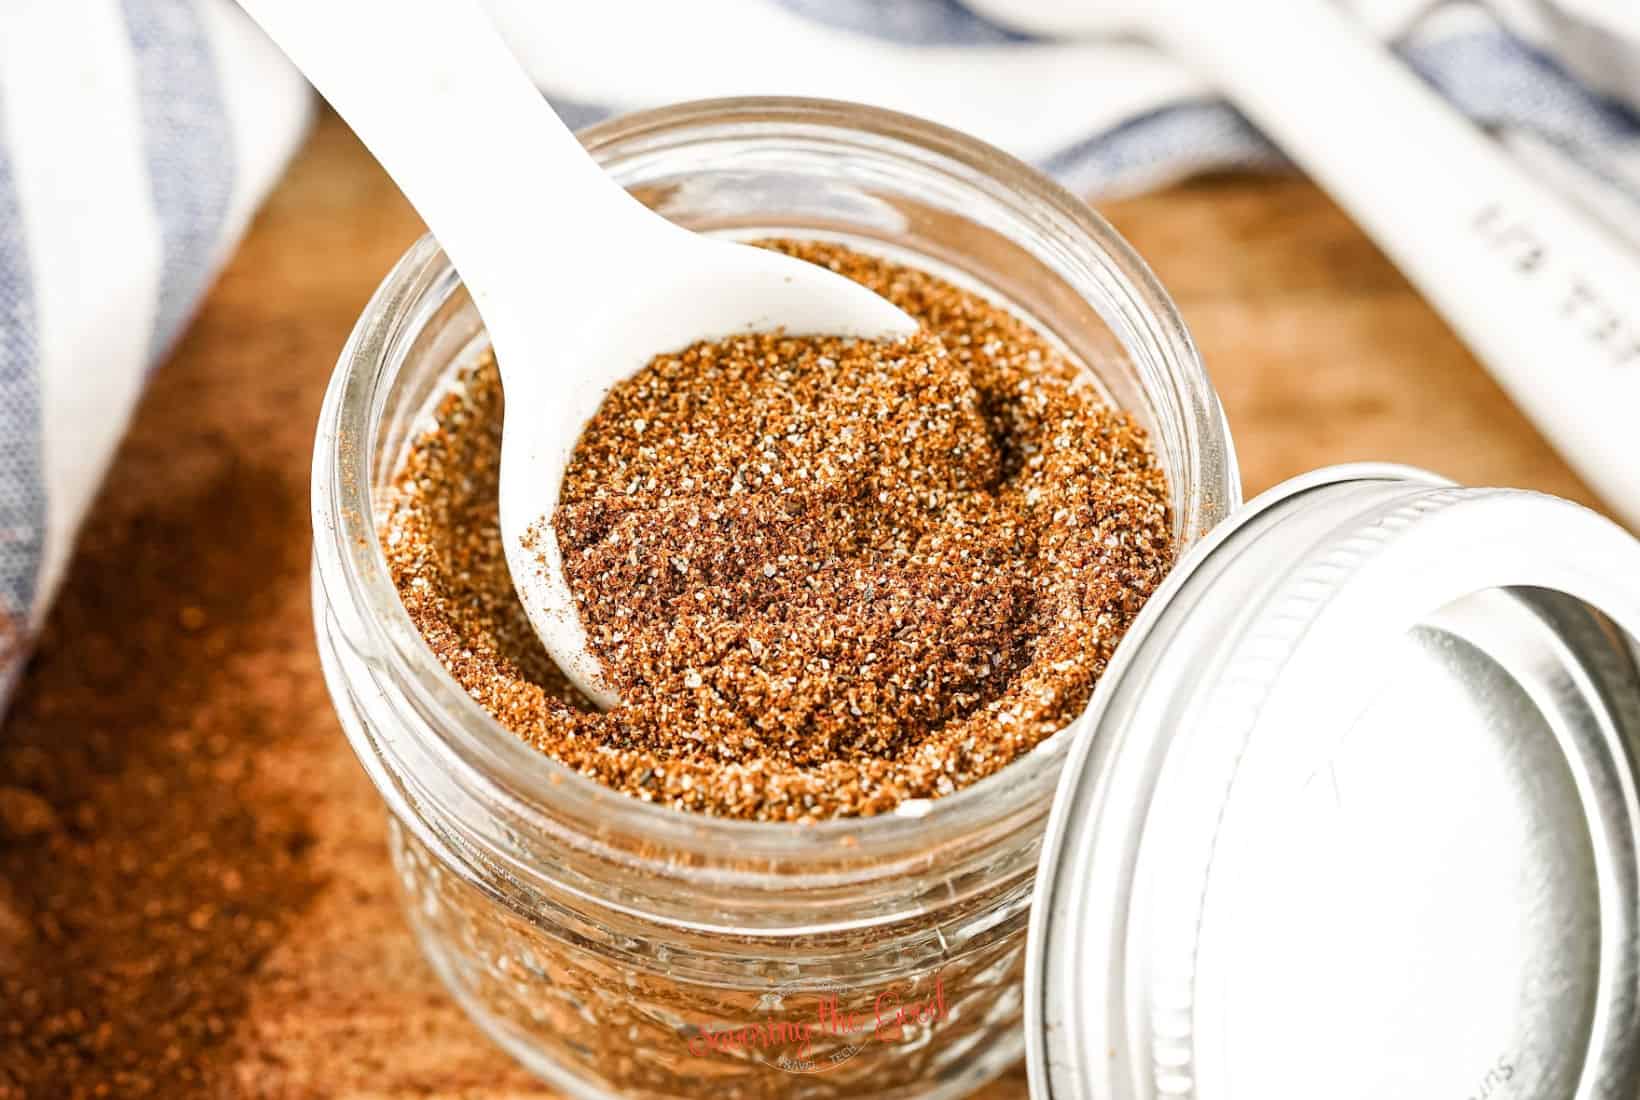
Chili Seasoning

Homemade Chili Seasoning Recipe in a glass jar with a white spoon.
Image Credit: SavoringTheGood.com

Whether you're a seasoned chili aficionado or making your first batch of chili, our easy to make spice mix recipe will empower you to create the best chili seasoning mix that will impress friends and family alike. Get the full recipe: Chili Seasoning

Poultry Seasoning

homemade poultry seasoning in a glass jar.
Image Credit: SavoringTheGood

Poultry seasoning adds flavor and depth to dishes, giving them a unique and delicious taste. Without poultry seasoning, holiday dishes like stuffing, gravy, and roasted chicken or turkey would be bland and lackluster. Get the full recipe: Poultry Seasoning

Chinese 5 Spice Substitute

Cinnamon, star anise, cloves and cinnamon sticks.
Image Credit: SavoringTheGood.com

Chinese 5 spice is a unique blend of five different spices that is commonly used in Chinese cuisine and is believed to have been created during the Ming dynasty. It is a versatile spice blend that can be used in a variety of dishes, both savory and sweet. The spice blend is known for its complex flavor profile. Get the full recipe: Chinese 5 Spice Substitute

Thanksgiving Turkey Seasoning

A glass jar filled with herbs and spices.
Image Credit: SavoringTheGood.com

Introducing the ultimate Turkey Rub Recipe, tailor-made for first-time cooks like you! Our foolproof blend of savory spices, including paprika, rosemary, and sage, will elevate your turkey to culinary perfection. Get the full recipe: Thanksgiving Turkey Seasoning

Turkey Brine (Dry Mix)

A bowl of saffron and sage powder, perfect for enhancing your turkey brine, displayed on a sleek black plate.
Image Credit: SavoringTheGood.com

If you are looking for the most flavorful, succulent, delicious Thanksgiving turkey you need this easy Thanksgiving turkey brine recipe. Follow my simple instructions for how to brine a turkey for Thanksgiving. Get the full recipe: Turkey Brine (Dry Mix)

Steak Bites Air Fryer with Garlic Butter

Cubed beef pieces seared in a black air fryer basket.

Make tender and juicy air fryer steak bites with garlic butter in minutes. This easy recipe is perfect for a quick and delicious dinner option.

Cubed beef pieces seared in a black air fryer basket.

By harnessing the power of your air fryer, you'll achieve a divine sear on the outside while keeping the interior deliciously juicy and tender.

The secret lies in the irresistible garlic butter sauce that coats each bite, creating an indulgent flavor profile that will have you coming back for more.

Steak Bites Ingredients:

Ingredients for marinating sirloin steak: salt, pepper, onion powder, garlic powder, brown sugar, and olive oil displayed on a marble surface.

Recipe Card?

To find the full printable recipe with specific measurements and directions CLICK HERE to go to the recipe card.
How to make air fryer steak bites

Step-by-step preparation of seasoned and air fryer cooked beef cubes: 1) raw beef cubes in a bowl, 2) seasoned beef cubes with spices, 3) beef cubes arranged on a cooking tray, 4) cooked beef cubes after roasting.
  1. Cut the sirloin steak into bite-sized pieces and toss with the olive oil, salt, pepper, onion powder, garlic powder, and brown sugar to marinate for 15-20 minutes.
  2. Preheat the air fryer to 400°F.
  3. Arrange the marinated steak pieces in a single layer in the air fryer basket and cook for 4-6 minutes, depending on desired doneness.
  4. While the steak continues to cook, melt the butter in the microwave and stir in the minced garlic and chopped parsley to make the garlic butter sauce.
  5. Transfer the cooked steak bites to a serving plate, pour the garlic butter sauce over the top, allow to rest for a couple minutes, and serve hot.

Did you make this recipe?

Do you have feedback that would be helpful to others? If so can help this small business owner by leaving a rating and a review in the comments section? Thank you for being part of the Savoring The Good Community. ~ Sarah

A plate of seasoned roasted baby potatoes rests on a marble surface, with herbs and salt shakers in the background.

Featured Side

Oven Roasted Baby Potatoes

Roasted Baby Potatoes

How do I know when the steak bites in the air fryer are done?

Two slices of grilled steak on a fork, with more pieces in the background.

The best way to get the perfect doneness is to keep a close eye on the steak bites, test them, and adjust the cooking time as needed based on your preferences.

Don't be afraid to experiment a bit to find the sweet spot for your air fryer and steak thickness.

Determining the doneness of the steak bites in the air fryer is important to get them just right.

Here are some tips to help you know when the air fryer steak bites are ready:

  • Time: The recipe suggests 4-6 minutes at 400°F, but the exact time may vary based on steak thickness and desired doneness.
  • Color and Texture: Look for golden-brown color, and use tongs to check firmness - slightly firm for medium, soft for rare, and very firm for well-done.
  • Internal Temperature: Use a meat thermometer, aiming for 130-135°F for medium doneness, adjusting time as needed.
  • Test Piece: You can cut into a larger bite to check the interior color - slightly pink for medium, cooked through for well-done.
A blue Thermapen digital thermometer from ThermoWorks, displaying 70.0, lies on a wooden table near a plate of grilled meat. The ThermoWorks logo and a "Shop Now" button are also visible, inviting you to explore the precision of this essential kitchen tool.

On sale for you today!

Sarah's Favorite Thermometer

Never question the temperature of your food again!

Get 15% off today

Best Cut of Steak to Air Fry for Bites?

Air frier beef cubes garnished with parsley on a white plate.

For the best cut of steak to use for air fryer steak bites, I would recommend using a sirloin steak. The key is to choose a steak that is relatively tender and will cook quickly in the air fryer without drying out.

Sirloin is an excellent all-around choice that fits the bill. Just be sure to cut it into evenly sized pieces for the most consistent cooking.

In addition to sirloin steak, there are a few other delicious options that would work well for air fryer steak bites. Flank steak is another cut that becomes nicely tender when cut into bite-sized pieces, and it has a great beefy flavor.

Hanger steak is another flavorful option that becomes very tender when cut into small pieces. Flat iron steak is another good choice, as it is a tender, well-marbled cut that is perfect for quick-cooking methods like air frying.

These alternative cuts can all work well in this recipe, providing tasty and tender steak bites when cooked in the air fryer.

Air Fyer Steak Bites Using Frozen Steak

The key things to remember are to preheat the air fryer, cook the frozen bites in a single layer, use a meat thermometer to check doneness, make the garlic butter sauce, and let the steak bites rest before serving.

This streamlined approach will have you enjoying delicious air fryer steak bites from frozen in no time.

  1. Preheat air fryer to 400°F.
  2. Arrange frozen steak bites in a single layer in the air fryer basket, being careful not to overcrowd.
  3. Air fry the steak bites for 8-12 minutes, flipping halfway through, until they reach your desired doneness (130-135°F internal temperature for medium).
  4. While the steak bites cook, prepare the garlic butter sauce as directed in the original recipe.
  5. Transfer cooked steak bites to a serving plate, drizzle with the garlic butter sauce, and let rest for 2-3 minutes before serving.

Can I make these garlic butter steak bites without an air fryer?

Absolutely, you can definitely make these garlic butter steak bites without an air fryer.

The key things to remember are to cook the steak bites in a single layer, whether on a baking sheet, in a skillet, or on skewers, to ensure even cooking.

Adjust the cooking time as needed based on the thickness of your steak bites and your preferred level of doneness.

Oven Method:

  1. Preheat your oven to 400°F (200°C).
  2. Prepare the steak bites and marinade as directed in the original recipe.
  3. Spread the marinated steak bites out in a single layer on a baking sheet or oven-safe skillet.
  4. Bake for 10-12 minutes, flipping the steak bites halfway through, until they reach your desired level of doneness.
  5. While the steak bites are baking, prepare the garlic butter as directed.
  6. Once the steak bites are cooked, transfer them to a serving plate and drizzle the garlic butter over the top.
  7. Allow to rest for a couple of minutes before serving.

Grill Method:

  1. Preheat your grill to medium-high heat.
  2. Prepare the steak bites and marinade as directed in the original recipe.
  3. Thread the marinated steak bites onto metal or wooden skewers.
  4. Grill the steak skewers for 4-6 minutes, turning occasionally, until they reach your desired level of doneness.
  5. While the steak bites are grilling, prepare the garlic butter as directed.
  6. Once the steak bites are cooked, transfer them to a serving plate and drizzle the garlic butter over the top.
  7. Allow to rest for a couple of minutes before serving.

How to store and reheat leftover steak bites?

Storing Leftover Steak Bites:

  1. Allow the steak bites to cool completely once they are cooked.
  2. Transfer the steak bites to an airtight container or resealable plastic bag.
  3. Refrigerate the leftover steak bites for up to 3-4 days.

Reheating Leftover Steak Bites:

  1. Preheat your air fryer to 350°F (175°C).
  2. Spread the leftover steak bites in a single layer in the air fryer basket.
  3. Reheat the steak bites for 2-3 minutes, shaking the basket halfway through, until they are heated through and slightly crispy on the outside.

Alternatively, you can also reheat the leftover steak bites in the oven:

  1. Preheat your oven to 350°F (175°C).
  2. Spread the leftover steak bites on a baking sheet in a single layer.
  3. Reheat the steak bites in the oven for 4-6 minutes, flipping halfway, until they are heated through.

Tips:

  • Avoid overcrowding the air fryer or baking sheet when reheating to ensure even heating.
  • You can optionally brush or drizzle the reheated steak bites with a small amount of the leftover garlic butter sauce to add extra flavor.
  • Keep a close eye on the steak bites while reheating to prevent them from drying out or overcooking.
Cubed beef pieces seared in a black air fryer basket.

Steak Bites Air Fryer with Garlic Butter

These steak bites air fryer style cook in minutes and are finished with rich garlic butter. With simple spices and sirloin steak, this is an easy, beginner-friendly way to make juicy steak at home.
No ratings yet
Print Pin Rate
Course: Air Fryer
Cuisine: American
Keyword: Air Fryer Steak Bites
Prep Time: 25 minutes minutes
Total Time: 25 minutes minutes
Servings: 4 servings
Calories: 252
Author: Sarah Mock

Ingredients

  •  
    16 Ounces sirloin steak
  • A 500ml bottle of California Olive Ranch Global Blend Extra Virgin Olive Oil with green and blue labeling, indicating a blend from Argentina, Portugal, Chile, and California-perfect for drizzling over your favorite shrimp avocado salad.2 Teaspoons olive oil
  • A Morton Salt container with a blue label featuring a girl in a yellow dress holding an umbrella, with salt pouring out of a container-an essential ingredient for perfectly seasoning dishes like Chicken Cordon Bleu.¼ Teaspoon salt
  • A 6 oz container of McCormick Pure Ground Black Pepper with a red lid and a ¼ Teaspoon Black Pepper
  • A plastic container of McCormick Onion Powder with a red lid and a green label stating ¼ Teaspoon Onion Powder
  • A bottle of McCormick Garlic Powder with a red lid and green label, featuring the brand logo and ¼ Teaspoon Garlic Powder
  • Domino Light Brown Sugar box, 16 oz, featuring a slice of Blackberry Dump Cake topped with whipped cream and berries, and a Non-GMO Project Verified label in the bottom right corner.½ Teaspoon Brown Sugar

For the Garlic Butter:

  • Whole garlic bulb with white papery skin, lying on its side against a plain white background-a perfect aromatic addition to your next slowcooker sausage casserole.2 cloves Garlic minced
  • A rectangular 8 oz package of Kerrygold Pure Irish Butter, unsalted, with a green and gold label and Irish grass-fed cow branding-perfect for creating delicious Saint Patrick's Day cupcakes.3 tablespoon Butter
  •  
    1 Teaspoon parsley chopped
Follow Savoring The Good On PinterestFollow @SavoringTheGood or tag #STGRecipes!

Instructions

  • Cut the sirloin steak into bite-sized pieces and toss with the olive oil, salt, pepper, onion powder, garlic powder, and brown sugar to marinate for 15-20 minutes.
    16 Ounces sirloin steak, 2 Teaspoons olive oil, ¼ Teaspoon salt, ¼ Teaspoon Black Pepper, ¼ Teaspoon Onion Powder, ¼ Teaspoon Garlic Powder, ½ Teaspoon Brown Sugar
  • Preheat the air fryer to 400°F.
  • Arrange the marinated steak pieces in a single layer in the air fryer basket and cook for 4-6 minutes, depending on desired doneness.
  • While the steak continues to cook, melt the butter in the microwave and stir in the minced garlic and chopped parsley to make the garlic butter sauce.
    2 cloves Garlic, 3 tablespoon Butter, 1 Teaspoon parsley
  • Transfer the cooked steak bites to a serving plate, pour the garlic butter sauce over the top, allow to rest for a couple minutes, and serve hot.

Notes

 
Want to share when you made this recipe?Follow @SavoringTheGood & tag #STGRecipes!
Nutrition Facts
Steak Bites Air Fryer with Garlic Butter
Serving Size
 
1 serving
Amount per Serving
Calories
252
% Daily Value*
Fat
 
16
g
25
%
Saturated Fat
 
8
g
50
%
Trans Fat
 
0.3
g
Polyunsaturated Fat
 
1
g
Monounsaturated Fat
 
6
g
Cholesterol
 
92
mg
31
%
Sodium
 
278
mg
12
%
Potassium
 
402
mg
11
%
Carbohydrates
 
1
g
0
%
Sugar
 
1
g
1
%
Protein
 
25
g
50
%
* Percent Daily Values are based on a 2000 calorie diet.
**Nutritional facts are just estimates. Please utilize your own brand nutritional values to double check against our estimates.
Like this recipe card? Want one for your site?Check out WP Recipe Maker!

Sarah Mock of savoringthegood.com headshot 2022

I am Sarah Mock. Welcome!

Sarah Mock is a classically trained Chef and a graduate of Johnson & Wales University. A culinary blogger for 17 years, Sarah helps the home cook prepare her recipes with professional results.

Get to know me

as seen in:

Logos of Hersheyland, ABC News, and Good Day PA are showcased in a seamless row, providing a snapshot of popular brands.

Hersheyland Nightline Good Day Pa!

The vibrant design showcases the iconic logos of Pinterest, Rachael Ray, and Jell-O set against a bold red background. Sorry, the provided description doesn't offer enough detail to suggest important SEO keywords.

Pinterest Rachael JELL-O


31 Chicken Leg Quarter Recipes You Have Never Made Before

Three different styles of cooking chicken leg quarter recipes are presented side by side.

These chicken quarter recipes for dinner have so much flavor and will make for a delicious, easy weeknight dinner.

Add a few simple seasonings such as lemon pepper seasoning, chili powder, or another seasoning mix to give the dark meat in the thigh quarters an amazing flavor profile.

Grilled Mojo Chicken Leg Quarters

Two grilled chicken halves on a platter, garnished with lime and lemon slices and cilantro. A bowl of black beans and rice is on the side, with a blue napkin nearby on the wooden table.
Image Credit: bigdeliciouslife.com

This Cuban-inspired dish is made with a delicious blend of orange juice, lime juice, garlic, and spices. Marinate the chicken for at least two hours, then grill to perfection. The result is juicy, tender chicken with a tangy and slightly sweet taste. Serve with rice and beans for a complete meal that will transport your taste buds to the tropics.

See all 31 recipes in this link.

Apple Roasted Herb Chicken

Roasted chicken pieces with mushrooms, red onions, and herbs in a skillet.
Image Credit: beautifuleatsandthings.com

It's the perfect balance of juicy chicken, sweet apples, and savory herbs that'll leave you wanting more. Simply season your chicken with a mixture of garlic powder, thyme, rosemary, salt, and pepper, then put the chicken in a baking dish surrounded by sliced apples.

See all 31 recipes in this link.

One-Pan Creamy Tuscan Chicken

A skillet with roasted chicken thighs in a creamy sauce with spinach and cherry tomatoes.
Image Credit: dudethatcookz.com

This recipe is a delicious one-pan dish that's perfect for a cozy night in. It features chicken cooked in a creamy sauce with sun-dried tomatoes, spinach, and garlic. The dish is packed with flavor and is easy to make - simply cook the chicken, add the sauce ingredients, and let everything simmer together.

See all 31 recipes in this link.

Grilled Fireman Chicken

Grilled chicken pieces on a metal tray garnished with herbs, with a bowl of sauce in the background and corn on the cob partially visible.
Image Credit: savoryexperiments.com

Fireman Chicken, aka Cornell Chicken BBQ, is a classic BBQ chicken marinade from upstate New York, but is making its way through the states!

A mouthwatering dish that's perfect for those who love bold and spicy flavors. This recipe features chicken marinated in a delicious mixture of hot sauce, honey, garlic, and soy sauce, then grilled to perfection.

See all 31 recipes in this link.

Herbs de Provence Roasted Chicken Quarter

Roasted chicken legs in a white dish, garnished with lemon wedges and parsley.
Image Credit: carnaldish.com

It's simple to make and packed with flavor. Just mix up a quick marinade with olive oil, lemon juice, garlic, and plenty of Herbs de Provence, then let your chicken soak up all that goodness for a few hours.

See all 31 recipes in this link.

Portuguese Grilled Piri Piri Chicken

Roasted chicken legs glazed with herbs and spices on a baking tray, garnished with lemon wedges.
Image Credit: diethood.com

This flavorful dish is made with marinated chicken pieces that are grilled to perfection, then topped with a spicy and tangy Piri Piri sauce. The sauce is made with a blend of spices, herbs, and peppers, giving it a unique and bold flavor that will tantalize your taste buds.

See all 31 recipes in this link.

Instant Pot Chicken Leg Quarters

A white plate with three roasted chicken legs and steamed broccoli, set on a stone surface alongside a folded striped cloth.
Image Credit: lowcarbafrica.com

This easy-to-follow chicken recipe requires minimal prep and ingredients, making it perfect for a quick and tasty meal. Simply season the chicken with paprika, garlic powder, and onion powder, then place the chicken in the instant pot with chicken broth and butter for only 15 minutes. The result is tender, fall-off-the-bone chicken!

See all 31 recipes in this link.

Smoked Chicken Quarters

A hand holding a cooked, seasoned chicken drumstick over a plate of additional chicken pieces, garnished with herbs and onions.
Image Credit: girlcarnivore.com

Perfect for a summer barbecue! The chicken leg quarters are seasoned with a blend of spices and smoked for several hours to create a delicious and smoky flavor. The result is juicy, tender flavorful chicken with a crispy skin. Serve with your favorite BBQ sauce and enjoy!

See all 31 recipes in this link.

BBQ Grilled Chicken Leg Quarters

Grilled chicken legs and asparagus on a tray, garnished with lemon halves and sprigs of fresh herbs.
Image Credit: thecrumbykitchen.com

Rub the chicken with a spice rub and basted on the grill, these BBQ Grilled Chicken Leg Quarters are a juicy & delicious addition to any cookout! Brush on some of your favorite barbecue sauce for a perfectly sticky and smoky summer dinner.

See all 31 recipes in this link.

Pollo Asado (Mexican Roast Chicken)

Three seasoned and cooked chicken leg quarters in a cast iron skillet, garnished with lime slices and herbs.
Image Credit: chilipeppermadness.com

A juicy and flavorful Mexican grilled chicken dish marinated in a blend of spices and citrus juices. The seasoned chicken is then grilled to perfection and served with fresh cilantro and lime wedges for a burst of bright flavors. It's easy to make and perfect for a backyard BBQ or a weeknight dinner.

See all 31 recipes in this link.

Don't Want To Toss Sourdough Discard? Choose From 100 Sourdough Discard Recipes 

A glass jar containing active sourdough starter with visible bubbles on a kitchen countertop.

Whether it's blueberry muffins, savory pancakes, or indulgent chocolate cake, these ideas will transform your excess starter into delicious delights. Bid farewell to discarding unfed sourdough - it's time to savor every bit of your baking journey!

Sourdough Discard Waffles

A waffle with blueberries and syrup.
Image Credit: dirtanddough.com

These waffles are perfect for a hearty breakfast! You will love the flavor sourdough adds to a classic breakfast food.

Get the full list here: CLICK HERE

Sourdough Crepes

A plate of pancakes with fruit on it.
Image Credit: barleyandsage.com

Make your brunch extra delicious by making crepes with sourdough! These are so tasty, but so easy.

Get the full list here: CLICK HERE
Chocolate Sourdough Cake

A chocolate sourdough discard cake with a hole in the middle.
image credit: Milk and Pop

This cake is the definition of decadence. Top it with rich chocolate frosting for an indulgent way to enjoy your sourdough starter!

Get the full list here: CLICK HERE

Sourdough Brownies

Four squares of chocolate brownies on a white surface.
image credit: Sugar Spun Run

Chocolate lovers are going to want to dig into this treat! Brownies are the perfect place to put your sourdough starter to work. This is such a good recipe for a sweet treat to share.

Get the full list here: CLICK HERE
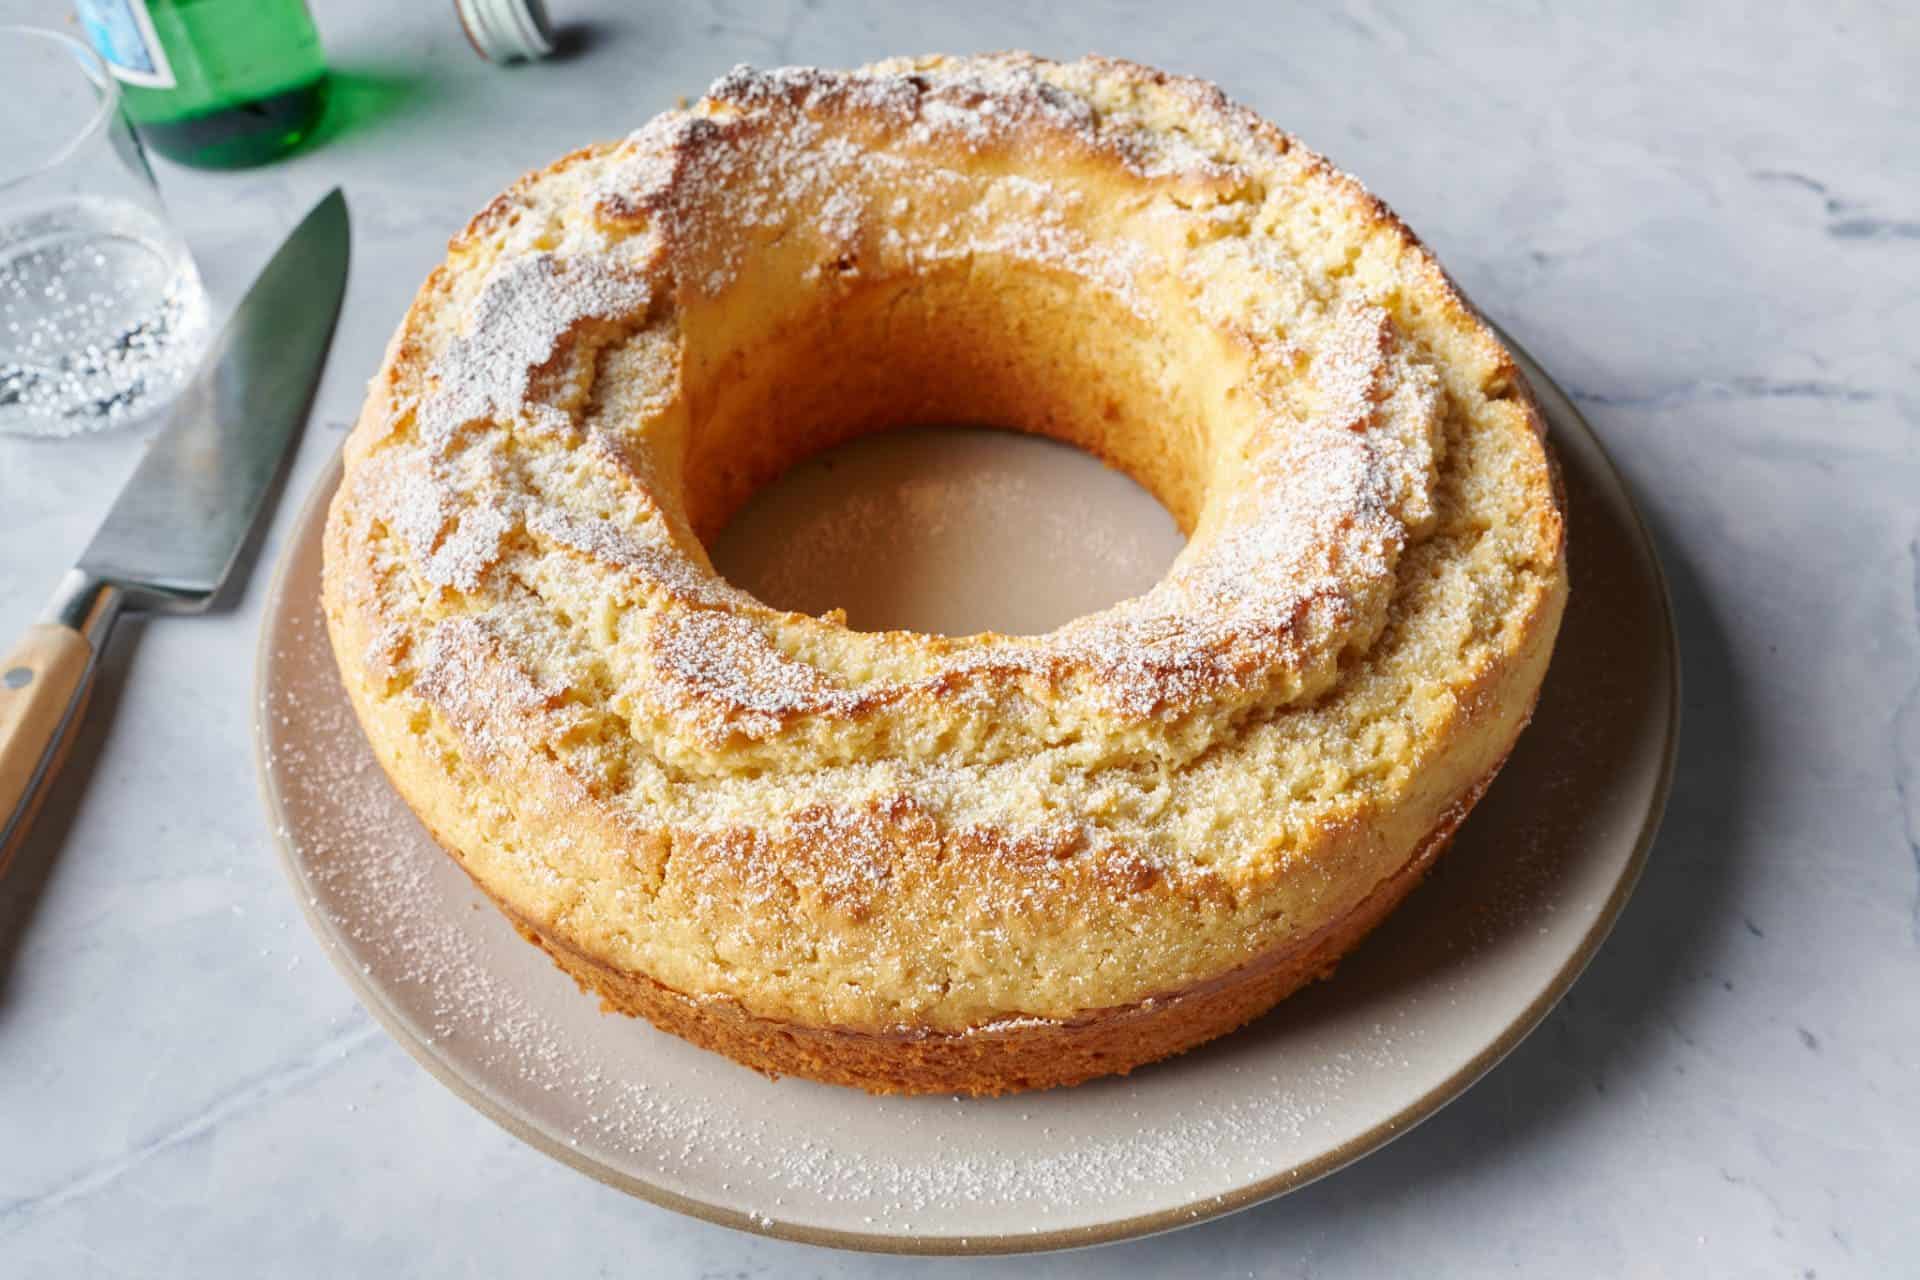
Ciambella

A pound cake with powdered sugar on a plate.
Image Credit: theperfectloaf.com

This sourdough starter discard cake is an Italian caked called ciambella: intensely lemony, ultra tender, and effortless to put together.

Get the full list here: CLICK HERE

Sourdough Galette with Fresh Peaches & Strawberries

A peach and apricot tart with a knife on top.
Image Credit: theclevercarrot.com

Learn how to make a buttery, flaky, sweet sourdough galette (step-by-step) with sourdough discard and fresh fruit.

Get the full list here: CLICK HERE

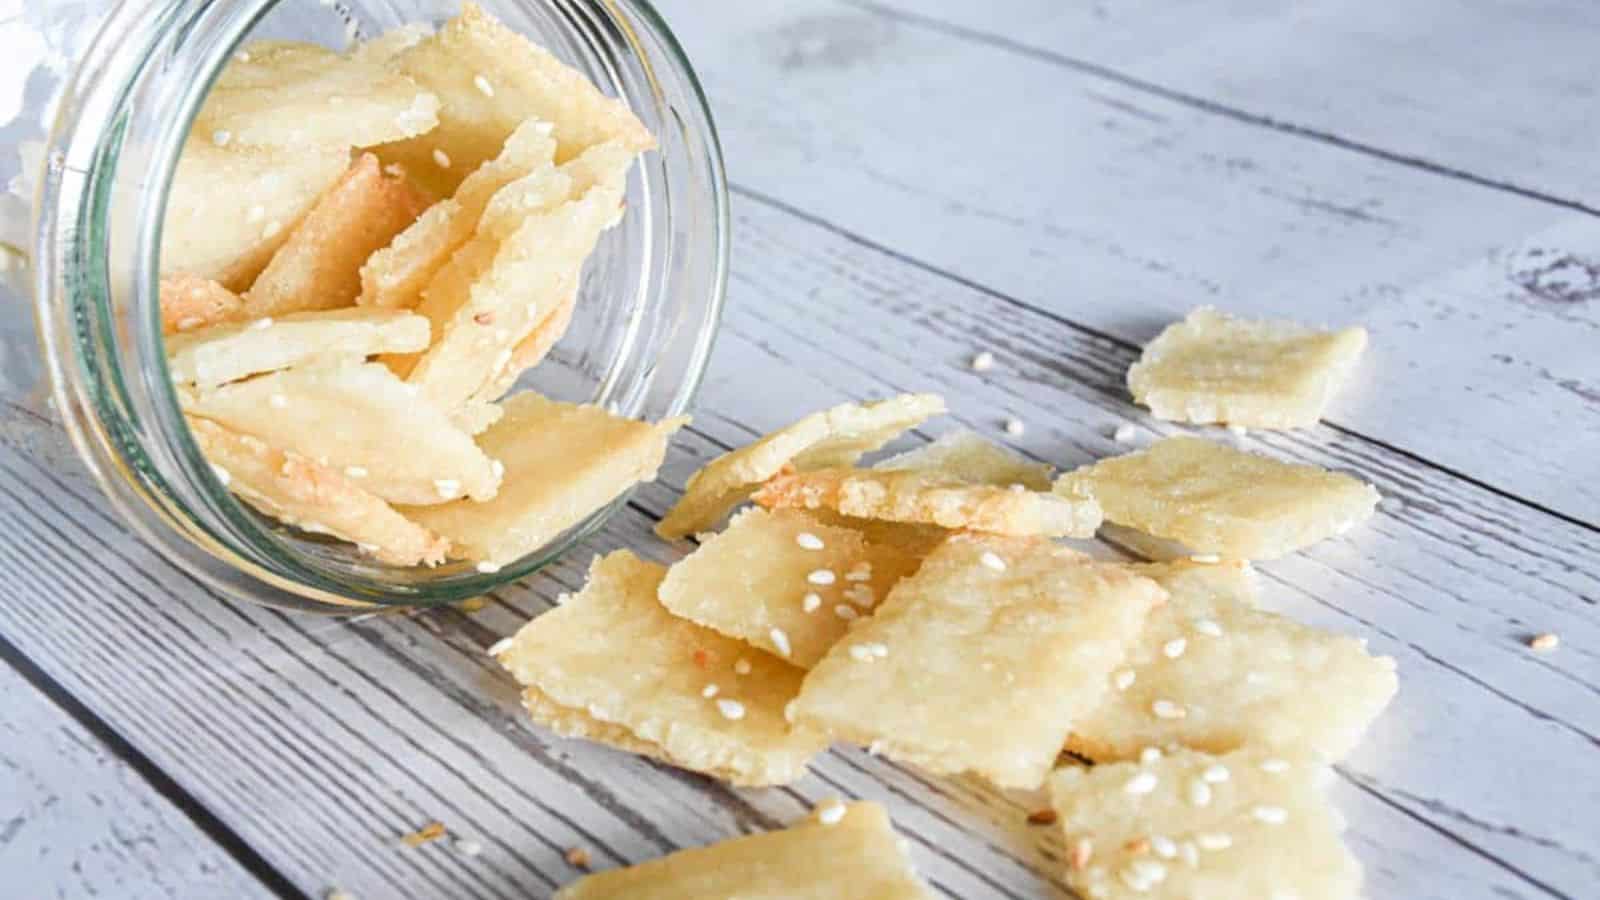
Sourdough Cheese Crackers

Crackers in a jar with sesame seeds.
Image Credit: stretchandfolds.com

These cheese crackers use your discard to make the crispiest snack! Boxed options have nothing on this homemade cracker!

Get the full list here: CLICK HERE

Sourdough Fruit and Nut Gourmet Crackers

A slice of bread with butter on it.
Image Credit: milkandpop.com

Sourdough Discard Gourmet Crackers are a great addition for a cheese plate, have that delicious crack and make the perfect gift during holidays.

Get the full list here: CLICK HERE

Sourdough Thumbprint Cookies

Jam cookies with powdered sugar on a plate.
Image Credit: littlespoonfarm.com

Sourdough thumbprint cookies are easy to make with your sourdough discard. Soft and tender cookies, topped with jam and powdered sugar.

Get the full list here: CLICK HERE

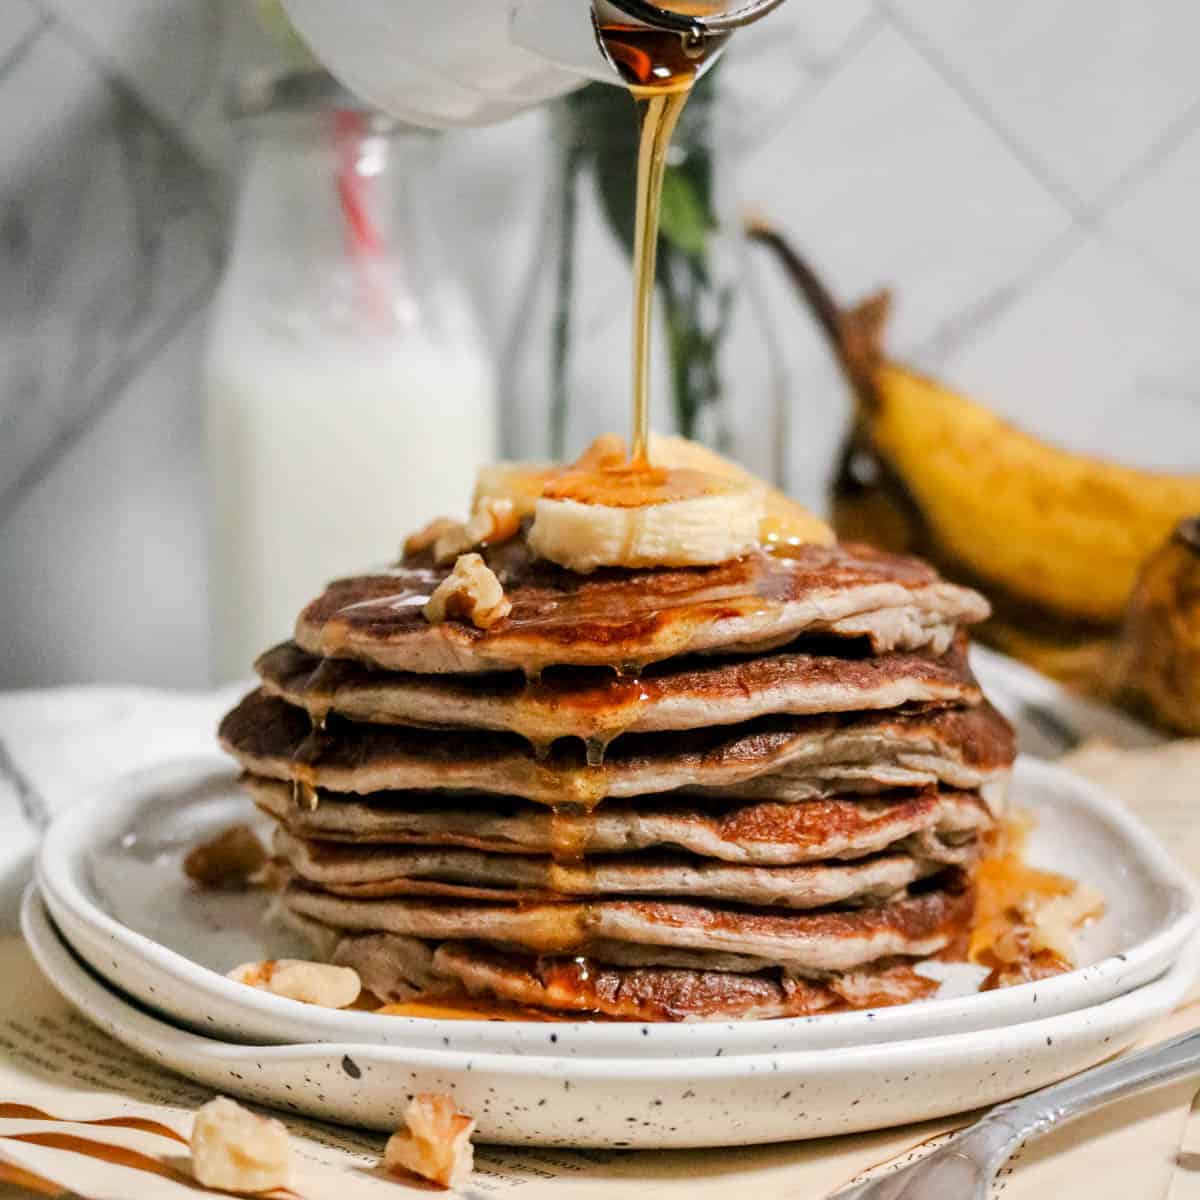
Sourdough Banana Nut Pancakes

A stack of pancakes with syrup being poured over them.
Image Credit: andeesapron.com

Start your day off on the right foot with a blend of tanginess, sweetness, and nutty goodness with these sourdough banana nut pancakes!

Get the full list here: CLICK HERE
Drink Like It Is 1920

Pouring a brown liquid into two glasses with ice on a bar counter during the 1920 Prohibition era, with a third glass containing a red drink.

Cheers my dears! Let's raise a glass to the 1920's and toast to the end of prohibition and give thanks to everyone who was creative in creating cocktails to get through the dark days of outlawed alcohol.

These creative cocktails were invented or popularized in speakeasies, birthing some of the most iconic drinks in cocktail history. (for everyone aged 21 and up!)

Bees Knees

A martini with a slice of orange and a cocktail shaker.
Image Credit: Image credit goes to missinthekitchen.com

Try a refreshing Bees Knees cocktail this weekend! It's so simple to make this easy gin cocktail from the prohibition days. A light and tasty cocktail.

To get all the cocktails in this series: CLICK HERE

Lilac Bees Knees

lilac bee's knees cocktail in glass
Image Credit: Image credit goes to savoringthegood.com

Enjoy this recipes for Lilac bee's knees cocktail at Mother's Day brunch, bridal showers or on cool spring evenings. The addition of fresh lilacs is a lovely addition to this Bee's knees cocktail recipe.

To get all the cocktails in this series: CLICK HERE

Pisco Punch

A glass with a drink and a slice of pineapple on top.
Image Credit: Image credit goes to diffordsguide.com

To get all the cocktails in this series: CLICK HERE

Abbey Cocktail

Two glasses of orange juice on a table.
Image Credit: Image credit goes to cupofzest.com

The Abbey Cocktail fits in at any party. Each sip is delightfully bitter, complex, aromatic, and bursting with refreshing orange juice. One sip and the party begins!

To get all the cocktails in this series: CLICK HERE

Boulevardier Cocktail

Two glasses of red wine on a silver tray.
Image Credit: Image credit goes to pinchandswirl.com

You'll see how easy it is with this recipe - a delicious and potent concoction with bourbon, Campari and vermouth (a twist on the classic Negroni using whiskey instead of gin)

To get all the cocktails in this series: CLICK HERE

Brown Derby

Two glasses of orange juice.
Image Credit: Image credit goes to gourmandeinthekitchen.com

A classic bourbon cocktail made with grapefruit and honey called a Brown Derby.

To get all the cocktails in this series: CLICK HERE

Death In The Afternoon

A cocktail with a lime garnish on top of a wooden cutting board.
Image Credit: Image credit goes to acouplecooks.com

Death in the Afternoon is a must-try absinthe cocktail invented by Ernest Hemingway! This easy drink is bubbly with a black licorice finish.

To get all the cocktails in this series: CLICK HERE

Champs Élysées

A glass of orange liquid.
Image Credit: Image credit goes to vintageamericancocktails.com

Champs Élysées is French for Elysian Fields and is named after the famous French avenue that terminates at the Arc de Triomphe. The earliest record of this cocktail comes from the 1925 book "Drinks Long and Short" by Nina Toye & A. H. Adair.

To get all the cocktails in this series: CLICK HERE

Mary Pickford

A pink cocktail with leaves and flowers on a table.
Image Credit: Image credit goes to littlefiggy.com

Easy to make, gorgeous, and completely delicious, a prohibition-era rum drink, The Mary Pickford Cocktail recipe. Impress your guests!

To get all the cocktails in this series: CLICK HERE

Pegu Club

A cocktail with a lime garnish on a wooden cutting board.
Image Credit: Image credit goes to acouplecooks.com

A classic 1920's gin cocktail that's like none other! It's boozy and sophisticated, with a citrusy herbal finish.

To get all the cocktails in this series: CLICK HERE

Homemade Teriyaki Sauce Recipe 

A spoon drizzling Teriyaki Sauce into a small bowl, with ginger and a jar of soy sauce in the background.

Skip the store bought sauce when you make your own teriyaki sauce at home is easy and allows you to customize the sweetness, thickness, and flavor to your own preferences.

A spoon drizzling Teriyaki Sauce into a small bowl, with ginger and a jar of soy sauce in the background.

Learn how to make homemade teriyaki sauce with this quick and easy homemade teriyaki sauce recipe. A great store-bought alternative!

Teriyaki sauce is a staple of Japanese cooking, known for its tangy, sweet and savory flavor. It's a versatile sauce that can be used as a marinade, basting agent, or dip for chicken, fish, or meat dishes.

Ingredients To Make Teriyaki Sauce

When it comes to making the best Teriyaki sauce at home, the right ingredients and a great recipe make all the difference. Here are the essential ingredients that you need to make a delicious Teriyaki sauce.

Various asian cooking ingredients labeled neatly in small bowls on a white surface.
  • Soy Sauce: the foundation of teriyaki sauce, providing a salty and savory base. It adds depth of flavor and is a staple in Asian cuisine. You can use regular or low-sodium soy sauce, depending on your preference. If you are looking for a gluten-free option, you can use tamari, which is a Japanese soy sauce made without wheat.
  • Water: helps to balance the intensity of soy sauce and prevents the sauce from becoming too overpowering. It also aids in achieving the desired consistency.
  • Light Brown Sugar: adds sweetness to the teriyaki sauce. This sweetness helps to mellow the saltiness of the soy sauce and creates a well-rounded flavor profile.
  • Rice Wine: contributes a mild sweetness and complexity to the sauce. It also enhances the overall aroma and complements the other flavors.
  • Honey: serves as an additional sweetener, offering a natural and distinct sweetness. It also adds a hint of floral notes to the teriyaki sauce.
  • Cornstarch: acts as a thickening agent. It helps to give the teriyaki sauce a glossy and smooth texture, ensuring it coats ingredients evenly when used as a glaze or marinade.
  • Minced Fresh Ginger: adds a bright and zesty flavor to the teriyaki sauce. It provides a subtle warmth and a refreshing element to balance the sweetness and saltiness. Learn how to peel ginger.
  • Sesame Oil: imparts a rich, nutty flavor that enhances the overall taste of the teriyaki sauce. It adds depth and a distinctive aroma to the final dish.
  • Minced Fresh Garlic: contributes a robust and savory character to the teriyaki sauce. It complements the other flavors and adds a savory complexity.

Teriyaki sauce is known for its sweet and savory flavor. Brown sugar, honey, and maple syrup are popular sweetening agents used in Teriyaki sauce. You can adjust the sweetness level to your liking by adding more or less sugar.

Make it! (it was) real good frozen breaded chicken breasts! Carmelizes. Easy 'n good!

- suzanne3224 on Pinterest

How To Make Homemade Teriyaki Sauce

  1. In a microwave-safe medium mixing bowl, combine all ingredients except for the water and cornstarch.
    Step-by-step preparation of Teriyaki Sauce with various ingredients being poured and whisked together in a bowl.
  2. Whisk the mixture and microwave for 1 minute.
    Pouring cornstarch slurry into a bowl of sauce with sesame seeds.
  3. Dissolve the cornstarch in water and incorporate it into the mixing bowl. Whisk thoroughly and return the bowl to the microwave for an additional 3 minutes, pausing to stir halfway through.
    A spoon lifting Teriyaki Sauce from a small white bowl, with brown sugar and a jar visible in the background.

You can either use the teriyaki sauce immediately or allow it to cool before storing it in an airtight container in the refrigerator, where it will keep well for up to one week.

Seasonal Favorite

Baked lattice top crust on an apple pie made with the Crisco pie crust recipe, showing flaky layers in the fluted edge.

This is my award-winning Crisco pie crust recipe; flaky, tender, and made with simple ingredients you already have.

Crisco Pie Crust

How To Use Homemade Teriyaki Sauce

Teriyaki Glaze

To make the glaze, simply combine all the ingredients in a saucepan and bring to a boil. Reduce the heat and let the mixture simmer until it thickens and becomes syrupy. This should take about 10-15 minutes. Be sure to stir the mixture frequently to prevent burning.

Teriyaki Marinade

This easy homemade teriyaki sauce makes an excellent marinade for meats and vegetables. To use it as a marinade, simply pour the sauce over your choice of protein or vegetables and let it marinate in the refrigerator for at least 30 minutes to an hour. You can also use the sauce to baste your meat or vegetables while grilling or roasting.

When using the sauce as a marinade, it's important to remember that the longer you marinate your food, the more flavorful it will be. However, if you marinate for too long, the acid in the sauce can break down the proteins and make the meat mushy.

Teriyaki Sauce Variations and Pairings

Traditional vs. Modern Twists

Teriyaki sauce is a classic Japanese sauce that has been enjoyed for centuries. However, there are many variations of this sauce, and some of them have been given a modern twist. Traditional teriyaki sauce is made with soy sauce, sake, and mirin, while modern variations may include ingredients like honey, brown sugar, or ginger.

When making homemade teriyaki sauce, you can experiment with different ingredients to create your own unique twist on this classic sauce. For example, you can add a touch of honey for sweetness, or use rice vinegar instead of mirin for a tangy flavor.

You Will Love This Sauce In The Recipes:

Teriyaki sauce is a versatile sauce that pairs well with a variety of proteins and vegetables. Here are some of my favorite ways to use this sauce:

  • Chicken: Make teriyaki chicken is a classic dish that is easy to make and always delicious. Marinate chicken breast, or chicken thighs in teriyaki sauce for at least an hour, then grill or bake until cooked through.
  • Salmon: Teriyaki salmon is another popular dish that is easy to make and always a crowd-pleaser. Brush salmon fillets with teriyaki sauce and bake until cooked through.
  • Stir Fry: Teriyaki sauce is the perfect addition to any stir fry. Simply add your favorite vegetables and protein to a wok or skillet, then drizzle with teriyaki sauce and stir until everything is coated.
  • Tofu: Teriyaki tofu is a great vegan option that is packed with flavor. Simply marinate tofu in teriyaki sauce for at least an hour, then bake or stir fry until crispy.
  • Pork: Teriyaki pork is a delicious and easy-to-make dish that is perfect for weeknight dinners. Marinate pork in teriyaki sauce for at least an hour, then grill or bake until cooked through.
  • Burgers: This sauce is great for a fun twist on a classic dish. Simply mix teriyaki sauce into your ground beef before forming into patties, then grill until cooked through.
  • Noodles: Teriyaki noodles are a great option for a quick and easy meal. Simply cook your favorite noodles, then toss with teriyaki sauce and your favorite vegetables and protein.

Teriyaki sauce is also a great option for those following a gluten-free diet, as long as you use gluten-free soy sauce. And for those looking for an authentic Japanese flavor, be sure to use traditional ingredients like sake and mirin in your homemade teriyaki sauce.

How To Store Homemade Teriyaki Sauce Recipe

A jar of Teriyaki Sauce with a metal lid off to the side, accompanied by brown sugar and a cloth napkin on a light surface.

As with any homemade sauce, proper storage is key to ensure longevity and freshness. To store this recipe for teriyaki sauce, it is best to keep it in an airtight container in the refrigerator. This will help to prevent any bacteria growth and keep the sauce fresh for a longer period of time.

It is important to note that homemade teriyaki sauce does not contain any preservatives, so it will not last as long as store-bought sauces. It is recommended to use the sauce within a few weeks of making it to ensure the best quality and taste.

Frequently Asked Questions

What are the essential ingredients for a traditional teriyaki sauce?

The traditional teriyaki sauce recipe includes soy sauce, mirin, sake, and sugar. Soy sauce is the base ingredient, while mirin and sake add sweetness and depth of flavor. Sugar is added to balance the flavors and to help the sauce caramelize when it's cooked.

How can I make a simple teriyaki sauce with just 3 or 4 ingredients?

To make teriyaki sauce, you only need a few ingredients: soy sauce, honey, and garlic. Some recipes may also include ginger or rice vinegar. Mix the ingredients together in a small bowl, and your teriyaki sauce is ready to use.

How is teriyaki traditionally made?

In Japan, teriyaki sauce is made by cooking soy sauce, mirin, and sugar together until the mixture thickens and becomes glossy. This sauce is then used to glaze grilled or broiled meat, fish, or vegetables.

What type of teriyaki sauce is commonly used in Japanese restaurants?

In Japanese restaurants, you will typically find a thicker, sweeter version of teriyaki sauce. This sauce is made with soy sauce, mirin, sake, and sugar, but also includes cornstarch or another thickener to give it a syrupy consistency.

How do you thicken teriyaki sauce during the cooking process?

To thicken teriyaki sauce during the cooking process, you can add a slurry of cornstarch and water to the sauce. Mix equal parts cornstarch and water in a small bowl until smooth, then add it to the sauce and stir until the sauce thickens.

Can I substitute mirin in a teriyaki sauce recipe, and if so, with what?

If you don't have mirin, you can substitute it with a combination of sake and sugar. For every ¼ cup of mirin, use ¼ cup of sake and 1 tablespoon of sugar. This will give you a similar flavor profile to mirin.

A spoon drizzling Teriyaki Sauce into a small bowl, with ginger and a jar of soy sauce in the background.

Homemade Teriyaki Sauce Recipe 

Skip the store bought sauce when you make your own teriyaki sauce at home is easy and allows you to customize the sweetness, thickness, and flavor to your own preferences.
No ratings yet
Print Pin Rate
Course: Ingredients
Cuisine: Asian
Keyword: Homemade Teriyaki Sauce
Prep Time: 5 minutes minutes
Cook Time: 4 minutes minutes
Total Time: 9 minutes minutes
Servings: 5 servings (¼ cup each)
Calories: 87
Author: Sarah Mock

Ingredients

  •  
    ½ Cup Soy Sauce
  • Domino Light Brown Sugar box, 16 oz, featuring a slice of Blackberry Dump Cake topped with whipped cream and berries, and a Non-GMO Project Verified label in the bottom right corner.¼ Cup Brown Sugar unpacked
  •  
    3 Tablespoon Rice Wine
  • A 16 oz bottle of Dutch Gold Pure Honey from clover blossoms with a flip-top cap and certification label on the front.1 Tablespoon Honey
  •  
    2 Teaspoons Minced Fresh Ginger
  •  
    1 ½ Teaspoons Sesame Oil
  •  
    1 Teaspoon Minced Fresh Garlic
  •  
    ¼ Cup Water
  • A yellow canister of Rumford Corn Starch with a red lid, labeled non-GMO, gluten free, 6.5 oz (184g), and featuring the Non-GMO Project Verified logo.1 Tablespoon Cornstarch
Follow Savoring The Good On PinterestFollow @SavoringTheGood or tag #STGRecipes!

Instructions

  • Combine all the ingredients except the water and cornstarch, in a medium mixing bowl, that's microwave safe.
    ½ Cup Soy Sauce, ¼ Cup Brown Sugar, 3 Tablespoon Rice Wine, 1 Tablespoon Honey, 2 Teaspoons Minced Fresh Ginger, 1 ½ Teaspoons Sesame Oil, 1 Teaspoon Minced Fresh Garlic
    Step-by-step preparation of Teriyaki Sauce with various ingredients being poured and whisked together in a bowl.
  • Whisk the ingredients and place in the microwave for 1 minute, before removing the bowl and stirring again.
    A spoon lifting Teriyaki Sauce from a small white bowl, with brown sugar and a jar visible in the background.
  • Dissolve the cornstarch in the water and add it to the mixing bowl. Whisk and place back in the microwave for another 3 minutes, pausing to stir halfway through.
    ¼ Cup Water, 1 Tablespoon Cornstarch
    Pouring cornstarch slurry into a bowl of sauce with sesame seeds.
  • Use right away or let cool and store in an airtight container in the fridge, for up to 1 week.
    A jar of Teriyaki Sauce with a metal lid off to the side, accompanied by brown sugar and a cloth napkin on a light surface.

Notes

 
Want to share when you made this recipe?Follow @SavoringTheGood & tag #STGRecipes!
Nutrition Facts
Homemade Teriyaki Sauce Recipe 
Serving Size
 
0.25 cup
Amount per Serving
Calories
87
% Daily Value*
Fat
 
1
g
2
%
Saturated Fat
 
0.2
g
1
%
Polyunsaturated Fat
 
1
g
Monounsaturated Fat
 
0.5
g
Sodium
 
1300
mg
57
%
Potassium
 
66
mg
2
%
Carbohydrates
 
17
g
6
%
Sugar
 
15
g
17
%
Protein
 
2
g
4
%
* Percent Daily Values are based on a 2000 calorie diet.
**Nutritional facts are just estimates. Please utilize your own brand nutritional values to double check against our estimates.
Like this recipe card? Want one for your site?Check out WP Recipe Maker!

Sarah Mock of savoringthegood.com headshot 2022

I am Sarah Mock. Welcome!

Sarah Mock is a classically trained Chef and graduate of Johnson & Wales University. A culinary blogger for 15 years Sarah helps the home cook prepare her recipes with professional results.

Get to know me

as seen in:

Logos of Hersheyland, ABC News, and Good Day PA are showcased in a seamless row, providing a snapshot of popular brands.

Hersheyland Nightline Good Day Pa!

The vibrant design showcases the iconic logos of Pinterest, Rachael Ray, and Jell-O set against a bold red background. Sorry, the provided description doesn't offer enough detail to suggest important SEO keywords.

Pinterest Rachael JELL-O


Air Fryer Teriyaki Salmon Recipe

Air fryer Glazed salmon fillet over a bed of rice with asparagus on the side, garnished with sesame seeds and green onions.

Craving a flavorful and easy salmon dish? Look no further than this air fryer teriyaki salmon recipe!

Air fryer Glazed salmon fillet over a bed of rice with asparagus on the side, garnished with sesame seeds and green onions.

This riff on the classic teriyaki salmon lets you enjoy savory, sweet, and umami flavors without relying on excess oil or mess.

The air fryer works to make easy work to cook the salmon fillets to tender, flaky perfection while the homemade teriyaki sauce (or store-bought) creates an irresistible sticky coating.

Whether using fresh or frozen salmon, making salmon in the air fryer is guaranteed to become one of your go-to air fryer recipes. Pair it with steamed veggies and rice for a complete, delicious meal.

Easy Air Fryer Terikai Salmon Ingredients

Ingredients for asian-style salmon marinade displayed on a kitchen countertop.

Recipe Card?

To find the full printable recipe with specific measurements and directions CLICK HERE to go to the recipe card.

How to make air fryer teriyaki salmon.

Making the Teriyaki Sauce:

  1. In a saucepan, mix the soy sauce, ¾ of the water, garlic, ginger, honey, and brown sugar.
    Overhead view of a frying pan surrounded by ingredients including soy sauce, honey, brown sugar, ginger, garlic, and oil.
  2. Heat the saucepan on medium heat and stir constantly until the sugar dissolves and the mixture thickens slightly.
  3. In a separate bowl, mix the cornstarch with the remaining ¼ water to make a slurry (thick mixture).
    An empty white bowl on the left and a white bowl with flour on the right, on a gray surface.
  4. Pour the cornstarch slurry into the saucepan and continue stirring until the sauce becomes thick and glossy, about 2-3 minutes.
  5. Remove the teriyaki sauce from heat and let it cool down.

Marinating the Salmon:

  1. Place the salmon fillets in a shallow dish or resealable plastic bag.
  2. Pour the cooled teriyaki sauce over the salmon, making sure it's evenly coated.
  3. Cover the dish or seal the bag and refrigerate for at least 15 minutes (up to 1 hour) to marinate.

Air Frying the Salmon:

  1. Take the marinated salmon out of the fridge and place it in an air fryer-safe dish.
  2. Preheat the air fryer to 400. Air fry the salmon for about 10 minutes, or until it's cooked through and flaky.
    Two salmon fillets marinating in a black dish.
  3. During the last 2-3 minutes of cooking, brush the reserved teriyaki sauce over the salmon if you want a caramelized glaze.
    Two glazed salmon fillets in an air fryer basket.

Serving:

  1. Carefully remove the cooked salmon from the air fryer.
  2. Sprinkle sesame seeds and thinly sliced scallions over the salmon.
    Air Fried teriyaki salmon served over rice with asparagus on a white plate.
  3. Serve the teriyaki salmon hot, over steamed rice or with your favorite side dishes.

Can I freeze Air Fryer Teriyaki Salmon?

Yes, you can freeze air fryer teriyaki salmon, but there are a few things to keep in mind:

  • Cool completely: Make sure to let the cooked teriyaki salmon cool down completely before freezing. Putting warm fish in the freezer can lead to freezer burn and negatively affect the texture.
  • Freeze portioned: It's best to portion the salmon into individual servings or meal-sized portions before freezing. This way, you can thaw only what you need without having to defrost the entire batch.
  • Use airtight containers or bags: To prevent freezer burn and drying out, pack the portioned salmon in airtight freezer-safe containers or bags. Squeeze out as much air as possible before sealing.
  • Add sauce separately: If you have any leftover teriyaki sauce, it's better to freeze it separately from the cooked salmon. The sauce can make the fish soggy when thawed if frozen together.
  • Freeze for up to 3 months: For best quality, frozen cooked salmon should be consumed within 2-3 months. Beyond that, it may start to develop off-flavors or drying out.

Can I make this with frozen salmon?

Yes, you can make this teriyaki salmon recipe with frozen salmon fillets. Here are tips when using frozen salmon to make teriyaki salmon in air fryer.

  • Thaw the salmon properly: Take the frozen salmon out of the freezer and let it thaw overnight in the refrigerator. This slow thawing process helps the salmon retain its moisture and texture. Avoid thawing the salmon at room temperature or in the microwave, as this can cause it to dry out or cook unevenly.
  • Pat the salmon dry: Once the salmon has thawed completely, use paper towels to pat it dry and remove any excess moisture from the surface. This step is important because excess moisture can dilute the teriyaki marinade and prevent proper browning or caramelization during air frying.
  • Marinate the salmon longer: Since frozen salmon can sometimes be a bit drier than fresh, consider marinating it for a longer time, up to 1 hour or even overnight. The longer marinating time will allow the salmon to absorb more flavor from the teriyaki sauce, resulting in a more moist and flavorful final product.

Can I use bottled teriyaki sauce?

Yes, you can use bottled teriyaki sauce instead of making your own teriyaki sauce from scratch.

Check the ingredient list and adjust the sweetness level of the bottled teriyaki sauce to your taste preference, adding extra flavors like ginger, garlic, or citrus juice if desired.

Marinate the salmon fillets in the bottled sauce for at least 15-30 minutes before air frying, and additionally reduce the sauce on the stovetop to create a thicker, glossier glaze to brush over the salmon during the final few minutes of cooking.

Do you put skin side up or down when air frying salmon?

Two pieces of glazed salmon in a air fryer dish.

When air frying salmon, it is generally recommended to place the fillets salmon skin side down in the air fryer basket or tray. For best results when air frying salmon, place the fillets skin-side down to get crispy skin, even cooking, easy removal, and a more appetizing appearance. Just be sure to lightly oil or spray the air fryer tray first to prevent sticking.

How to make this if you don't have an air fryer.

While an air fryer gives a nice crispy texture, baking allows you to still achieve a delicious teriyaki salmon when you don't have an air fryer. Just adjust the cooking time as needed for the thickness of the fillets.

  1. In a small saucepan, whisk together the soy sauce, ¼ cup water, honey, brown sugar, garlic and ginger. Bring to a simmer over medium heat.
  2. In a small bowl, mix the cornstarch and 2 tablespoons water to make a slurry. Slowly whisk the slurry into the teriyaki sauce. Simmer for 2-3 minutes until thickened. Remove from heat and let cool slightly.
  3. Place the salmon fillets in a shallow dish and pour ½ of the teriyaki sauce over them, reserving the other half for glazing. Turn to coat the salmon evenly. Cover and marinate for 15-30 minutes.
  4. Preheat oven to 400°F. Line a baking sheet with foil or parchment paper.
  5. Remove salmon from the marinade and place skin-side down on a prepared baking sheet.
  6. Bake for 12-15 minutes until salmon is cooked through and flakes easily with a fork.
  7. During the last 2-3 minutes, brush or spoon the reserved teriyaki sauce over the salmon to create a glaze.
  8. Garnish with sesame seeds and serve the teriyaki glazed salmon over rice if desired.

How to tell if the salmon is done?

The most accurate way is to use an instant-read food thermometer. Insert it into the thickest part of the salmon. It should read 145°F for fully cooked salmon.

How to tell if the salmon is done?

For best results, check the salmon a few minutes before the estimated cook time is up, as thicknesses can vary. It's better to undercook slightly than overcook salmon to prevent it from drying out. Let it rest for 5 minutes after cooking too. 

The most accurate way is to use an instant-read food thermometer. Insert it into the thickest part of the salmon. It should read 145°F for fully cooked salmon.

Gently press the top of the thickest part with your finger or tongs. Cooked salmon will feel firm and springy, while undercooked will still be very soft and squishy.

Use a fork to gently prod the thickest part of the salmon fillet. When it's done, the flesh should flake apart easily. Undercooked salmon will not flake and will still look translucent inside.

Air fryer Glazed salmon fillet over a bed of rice with asparagus on the side, garnished with sesame seeds and green onions.

Air Fryer Teriyaki Salmon Recipe

Try this easy air fryer teriyaki salmon recipe with a sweet savory teriyaki glaze on tender fillets.
5 from 1 vote
Print Pin Rate
Course: Air Fryer
Cuisine: Asian
Keyword: Air Fryer Teriyaki Salmon
Prep Time: 15 minutes minutes
Cook Time: 10 minutes minutes
Total Time: 25 minutes minutes
Servings: 4 servings
Calories: 250
Author: Sarah Mock

Ingredients

  •  
    1 lb salmon fillets 4 pieces
  •  
    ½ Cup soy sauce
  •  
    ½ Cup Water
  • Whole garlic bulb with white papery skin, lying on its side against a plain white background-a perfect aromatic addition to your next slowcooker sausage casserole.4 cloves Garlic minced
  •  
    1 inch ginger fresh
  • A 16 oz bottle of Dutch Gold Pure Honey from clover blossoms with a flip-top cap and certification label on the front.2 tablespoon Honey
  • Domino Light Brown Sugar box, 16 oz, featuring a slice of Blackberry Dump Cake topped with whipped cream and berries, and a Non-GMO Project Verified label in the bottom right corner.2 tablespoon Brown Sugar
  • A yellow canister of Rumford Corn Starch with a red lid, labeled non-GMO, gluten free, 6.5 oz (184g), and featuring the Non-GMO Project Verified logo.1 tablespoon Cornstarch
  •  
    1 Teaspoon sesame seeds for garnish
  •  
    1 scallion thinly sliced (for garnish)
Follow Savoring The Good On PinterestFollow @SavoringTheGood or tag #STGRecipes!

Instructions

Making the Teriyaki Sauce:

  • In a saucepan, mix the soy sauce, ¾ of the water, garlic, ginger, honey, and brown sugar.
  • Heat the saucepan on medium heat and stir constantly until the sugar dissolves and the mixture thickens slightly.
  • In a separate bowl, mix the cornstarch with the remaining ¼ water to make a slurry (thick mixture).
  • Pour the cornstarch slurry into the saucepan and continue stirring until the sauce becomes thick and glossy, about 2-3 minutes.
  • Remove the teriyaki sauce from heat and let it cool down.

Marinating the Salmon:

  • Place the salmon fillets in a shallow dish or resealable plastic bag.
  • Pour the cooled teriyaki sauce over the salmon, making sure it's evenly coated.
  • Cover the dish or seal the bag and refrigerate for at least 15 minutes (up to 1 hour) to marinate.

Air Frying the Salmon:

  • Preheat the air fryer to 400.
  • Take the marinated salmon out of the fridge and place it in an air fryer-safe dish.
  • Air fry the salmon for about 12 minutes, or until it's cooked through and flaky.
  • During the last 2-3 minutes of cooking, brush the reserved teriyaki sauce over the salmon if you want a caramelized glaze.

Serving:

  • Carefully remove the cooked salmon from the air fryer.
  • Sprinkle sesame seeds and thinly sliced scallions over the salmon.
  • Serve the teriyaki salmon hot, over steamed rice or with your favorite side dishes.

Notes

 
Want to share when you made this recipe?Follow @SavoringTheGood & tag #STGRecipes!
Nutrition Facts
Air Fryer Teriyaki Salmon Recipe
Serving Size
 
1 serving
Amount per Serving
Calories
250
% Daily Value*
Fat
 
8
g
12
%
Saturated Fat
 
1
g
6
%
Polyunsaturated Fat
 
3
g
Monounsaturated Fat
 
2
g
Cholesterol
 
62
mg
21
%
Sodium
 
1675
mg
73
%
Potassium
 
661
mg
19
%
Carbohydrates
 
20
g
7
%
Sugar
 
15
g
17
%
Protein
 
26
g
52
%
* Percent Daily Values are based on a 2000 calorie diet.
**Nutritional facts are just estimates. Please utilize your own brand nutritional values to double check against our estimates.
Like this recipe card? Want one for your site?Check out WP Recipe Maker!

Sarah Mock of savoringthegood.com headshot 2022

I am Sarah Mock. Welcome!

Sarah Mock is a classically trained Chef and graduate of Johnson & Wales University. A culinary blogger for 15 years Sarah helps the home cook prepare her recipes with professional results.

Get to know me

as seen in:

Logos of Hersheyland, ABC News, and Good Day PA are showcased in a seamless row, providing a snapshot of popular brands.

Hersheyland Nightline Good Day Pa!

The vibrant design showcases the iconic logos of Pinterest, Rachael Ray, and Jell-O set against a bold red background. Sorry, the provided description doesn't offer enough detail to suggest important SEO keywords.

Pinterest Rachael JELL-O

Truffle Fries (Air Fryer or Oven)

truffle fries.

Craving those irresistibly crispy, decadent truffle fries you've tried at restaurants? With this easy recipe, you can make delicious homemade truffle fries at home using truffle oil and freshly grated Parmesan cheese.

truffle fries.

Whether you opt for white truffle oil or black truffle oil and use frozen or homemade french fries, this easy recipe ensures your homemade fries achieve that coveted crispy exterior and rich, earthy truffle flavor. 

The key is a delicate drizzle of truffle oil tossed with the piping hot fries straight from the oven. Remember a little goes a long way! Add a sprinkling of Parmesan and a touch of truffle salt for an extra flavor boost. And you could also dip them in In-N-Out Sauce for those who like to dunk.

Skip the deep fryer and make these crispy truffle fries in the air fryer or your oven for an indulgent yet simple side dish everyone will love.

Recipe Card?

To find the full printable recipe with specific measurements and directions CLICK HERE to go to the recipe card.
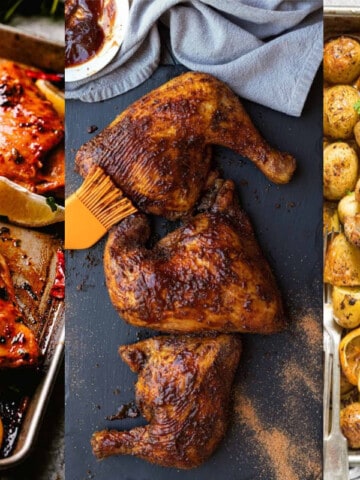
How to make homemade truffle fries in the air fryer.

  1. Cut potatoes into fry shapes and soak in ice water for 5 minutes, then pat dry.
  2. Toss the cut fries with olive oil.
  3. Air fry the oiled fries at 375°F for 35-40 minutes until crispy.
    steps 1-4 of making truffle fries in photos.
  4. While fries cook, prepare toppings: grate Parmesan and chop parsley.
    parmesean and chopped parsley in separate bowls.
  5. Once the fries are done, place in a bowl and drizzle with truffle oil. Gently toss to coat.
  6. Season the truffle-tossed fries with salt.
    truffle fries in a white bowl and a smaller bowl of salt.
  7. Transfer to a platter and top with grated Parmesan and chopped parsley. Serve hot.
    truffle fries with garnishes.

Truffle Fries in the Air Fryer with Frozen French Fries

  1. Preheat air fryer to 400°F. Add frozen fries to the basket in an even layer and air fry for 15-18 minutes, shaking halfway, until crispy.
  2. In a bowl, toss the hot air-fried fries with 2-3 tablespoons truffle oil until evenly coated. Season with salt.
  3. Return the truffle-tossed fries to the air fryer basket and air fry for 1-2 minutes more.
    french fries in an air frer basket for truffle fries.
  4. While fries cook, grate Parmesan and chop parsley.
  5. Transfer truffle fries to a platter and top with grated Parmesan and chopped parsley. Serve immediately.

Parmesan Truffle Fries Made With Frozen French Fries

Serve the Parmesan truffle fries fresh out of the oven while hot and fragrant. The high oven temperature helps re-crisp the frozen fries before tossing in the flavorful truffle oil and Parmesan.

  1. Preheat your oven to 425°F (218°C). Arrange the frozen french fries in a single layer on a large baking sheet lined with parchment paper. 
  2. Bake the frozen fries for 20-25 minutes, shaking the pan halfway, until golden brown and crispy.
  3. While the fries bake, grate the Parmesan cheese and chop the fresh parsley.
  4. Remove the fries from the oven and transfer them to a large bowl. Drizzle with 2-3 tablespoons of truffle oil.
  5. Using tongs or two spoons, gently toss the hot fries with the truffle oil until evenly coated. Season with salt to taste.
  6. Transfer the truffle-tossed fries back to the baking sheet and spread into an even layer.
  7. Sprinkle the freshly grated Parmesan and chopped parsley over the top. Return to the oven for 2-3 minutes until the cheese is melted.

How would you describe the flavor of a truffle?

Truffles have a very distinct, earthy and umami flavor that is hard to compare to other foods. The flavor is often described as luxurious, decadent and almost intoxicatingly aromatic when fresh, high-quality truffles are used.

Truffles have a unique and luxurious flavor profile that is musky, earthy, and redolent of damp forests and fallen leaves. The savory umami richness is similar to aged cheeses, with nutty undertones reminiscent of walnuts.

While some detect mild garlicky notes, truffles have a distinct aroma that can also veer into funky, almost sweaty territory for some.

Do truffle fries actually have truffle?

No, most truffle fries do not actually contain any pieces or shavings of real truffles. They get their truffle flavor from truffle oil, which is an olive oil that has been infused with molecules that mimic the aroma and flavor of truffles.

Real truffles are extremely expensive and rare, so using actual truffles on something like french fries would make them prohibitively costly for most restaurants and food vendors. The truffle oil provides that distinctive truffle aroma and taste without having to use the real fungus.

Some higher-end restaurants may offer truffle fries made with shavings of real black or white truffles on top as a premium item. But for the vast majority of truffle fry offerings, it's just regular french fries tossed with truffle-flavored olive oil rather than containing any part of the actual truffle itself.

What can I substitute for the truffle oil?

The truffle oil provides the most authentic flavor, but these substitutes can give you those beloved earthy, rich truffle notes. If you don't have truffle oil, there are a few substitutions you can use to still get that truffle flavor in your fries:

  1. Truffle salt or truffle powder - Look for truffle salt or truffle powder/seasoning in the spice aisle. A little goes a long way in providing that distinctive truffle aroma and taste.
  2. Dried porcini mushroom powder - Grind up some dried porcini mushrooms into a powder. Porcinis have an earthy, umami flavor somewhat reminiscent of truffles.
  3. Mushroom seasoning blend - Use a mushroom seasoning blend that contains dried porcini or other umami mushroom varieties.
  4. Finely grated Parmesan cheese -Parmesan has a nutty, savory flavor that pairs well with mushrooms/truffle flavors.
  5. Garlic powder and onion powder - These can help enhance the savory, earthy notes when combined with the mushroom powder/seasoning.

To make truffle-style fries without oil, try tossing the hot fries with 1-2 teaspoon truffle salt/powder or mushroom powder, along with grated Parmesan, garlic powder, salt and pepper to taste. Or make a herby mushroom seasoning with dried porcini, thyme, Parmesan and olive oil to toss the fries in.

How to reheat truffle fries

Here are simple instructions for reheating leftover truffle fries to get them crispy again. Be sure to only reheat the amount of fries you plan to eat right away. The more surface area exposed, the better for re-crisping. Check and shake/toss frequently to prevent over-browning. Adding a light drizzle of fresh truffle oil after reheating helps revive that rich truffle aroma and flavor.

Reheating in the Oven:

  1. Preheat your oven to 400°F (200°C).
  2. Spread the leftover truffle fries out in a single layer on a baking sheet lined with parchment paper or foil.
  3. Bake for 5-7 minutes, shaking the pan halfway, until fries are hot and crispy again.
  4. Optional: Drizzle with a little extra truffle oil and toss to re-coat the fries before serving.

Reheating in the Air Fryer:

  1. Preheat your air fryer to 375°F (190°C).
  2. Place the leftover fries in the air fryer basket, spreading them out evenly without overcrowding.
  3. Air fry for 3-5 minutes, shaking the basket halfway, until fries are hot and crispy.
  4. Optional: Transfer reheated fries to a bowl, drizzle with truffle oil, and gently toss to re-coat before serving.
truffle fries.

Truffle Fries

Enjoy the delicious combination of parmesan and truffle oil in this crispy truffle fries recipe. Enjoy my homemade parmesan truffle fries recipe!
No ratings yet
Print Rate
Course: Appetizer
Cuisine: American
Keyword: Parmesan Truffle Fries
Prep Time: 5 minutes minutes
Cook Time: 25 minutes minutes
Total Time: 30 minutes minutes
Servings: 4 servings
Calories: 148
Author: Sarah Mock

Ingredients

  •  
    4 potatoes Russet
  • A 500ml bottle of California Olive Ranch Global Blend Extra Virgin Olive Oil with green and blue labeling, indicating a blend from Argentina, Portugal, Chile, and California-perfect for drizzling over your favorite shrimp avocado salad.2 tablespoon olive oil
  •  
    2 tablespoon truffle oil
  •  
    ¼ Cup Parmesan Cheese shredded
  • A Morton Salt container with a blue label featuring a girl in a yellow dress holding an umbrella, with salt pouring out of a container-an essential ingredient for perfectly seasoning dishes like Chicken Cordon Bleu.¼ Teaspoons salt to taste
  •  
    Parsley finely chopped
Follow Savoring The Good On PinterestFollow @SavoringTheGood or tag #STGRecipes!

Instructions

Air fryer Instructions - Homemade Fries

  • Cut potatoes into fry shapes and soak in ice water for 5 minutes, then pat dry.
  • Toss the cut fries with olive oil.
  • Air fry the oiled fries at 375°F for 35-40 minutes until crispy.
  • While fries cook, prepare toppings: grate Parmesan and chop parsley.
  • Once fries are done, place in a bowl and drizzle with truffle oil. Gently toss to coat.
  • Season the truffle-tossed fries with salt.
  • Transfer to a platter and top with grated Parmesan and chopped parsley. Serve hot.

Frozen French Fries - Oven Instructions

  • Preheat your oven to 425°F (218°C). Arrange the frozen french fries in a single layer on a large baking sheet lined with parchment paper.
  • Bake the frozen fries for 20-25 minutes, shaking the pan halfway, until golden brown and crispy.
  • While the fries bake, grate the Parmesan cheese and chop the fresh parsley.
  • Remove the fries from the oven and transfer them to a large bowl. Drizzle with 2-3 tablespoons of truffle oil.
  • Using tongs or two spoons, gently toss the hot fries with the truffle oil until evenly coated. Season with salt to taste.
  • Transfer the truffle-tossed fries back to the baking sheet and spread into an even layer.
  • Sprinkle the freshly grated Parmesan and chopped parsley over the top. Return to the oven for 2-3 minutes until the cheese is melted.

Air Fryer with Frozen French Fries

  • Preheat air fryer to 400°F. Add frozen fries to the basket in an even layer and air fry for 15-18 minutes, shaking halfway, until crispy.
  • In a bowl, toss the hot air-fried fries with 2-3 tablespoons truffle oil until evenly coated. Season with salt.
  • Return the truffle-tossed fries to the air fryer basket and air fry for 1-2 minutes more.
  • While fries cook, grate Parmesan and chop parsley.
  • Transfer truffle fries to a platter and top with grated Parmesan and chopped parsley. Serve immediately.

Notes

Want to share when you made this recipe?Follow @SavoringTheGood & tag #STGRecipes!
Nutrition Facts
Truffle Fries
Serving Size
 
1
Amount per Serving
Calories
148
% Daily Value*
Fat
 
16
g
25
%
Saturated Fat
 
3
g
19
%
Polyunsaturated Fat
 
2
g
Monounsaturated Fat
 
11
g
Cholesterol
 
4
mg
1
%
Sodium
 
246
mg
11
%
Potassium
 
6
mg
0
%
Carbohydrates
 
0.2
g
0
%
Sugar
 
0.1
g
0
%
Protein
 
2
g
4
%
* Percent Daily Values are based on a 2000 calorie diet.
**Nutritional facts are just estimates. Please utilize your own brand nutritional values to double check against our estimates.
Like this recipe card? Want one for your site?Check out WP Recipe Maker!

Sarah Mock of savoringthegood.com headshot 2022

I am Sarah Mock. Welcome!

Sarah Mock is a classically trained Chef and graduate of Johnson & Wales University. A culinary blogger for 15 years Sarah helps the home cook prepare her recipes with professional results.

Get to know me

as seen in:

Logos of Hersheyland, ABC News, and Good Day PA are showcased in a seamless row, providing a snapshot of popular brands.

Hersheyland Nightline Good Day Pa!

The vibrant design showcases the iconic logos of Pinterest, Rachael Ray, and Jell-O set against a bold red background. Sorry, the provided description doesn't offer enough detail to suggest important SEO keywords.

Pinterest Rachael JELL-O


Scapes: What Are Garlic Scapes and How To Cook With Them

pile of curly garlic scapes.

Garlic scapes, the green shoots that appear in late spring and early summer from hard neck varieties of garlic, offer a delightful way to enjoy fresh garlic flavors. You'll find these curly green stalks sold by the bunch at farmer's markets for a few short weeks before the actual garlic bulbs develop.

pile of curly garlic scapes.

What are scapes?

In the context of garlic and leeks, 'scapes' refers to the green, curved stems that grow from the tops of these plants before the bulbs or flower heads develop. Scapes are edible and have a mild flavor similar to the vegetable bulbs themselves. They are often harvested and used in cooking before they become woody and inedible as the plant matures.

Garlic scapes or green garlic, the scape is the long, curled stem that emerges from the center of the plant and would eventually produce a flower and bulbil (small bulb) cluster if left on the plant. 

In leeks, the scape is the solid, round, seed stalk that grows vertically and would produce a cluster of white flowers on top if allowed to mature fully.

Scapes have become increasingly popular in recent years, as chefs and home cooks alike have discovered their unique flavor and versatility. They are a great way to add a subtle garlic flavor to dishes without overpowering other ingredients. Whether you're a fan of garlic or just looking to try something new, scapes are worth exploring in the kitchen.

What do garlic scapes taste like? 

They have a subtle garlic flavor that is less pungent than garlic cloves and are a versatile ingredient that can be used in a variety of dishes, from stir-fries to pestos to soups.

  • Distinctly garlicky, but not as pungent or spicy as mature garlic bulbs. The flavor is more mellow and grassy.
  • They have a wonderful green, herbaceous quality reminiscent of green garlic or garlic chives.
  • When raw, they can have a slightly nutty, sweet flavor underlying the garlicky flavor.
  • As they are immature flower stalks, the flavor is bright and "green" tasting.
  • When cooked, their flavor becomes richer and more mellow, losing some of the raw pungency.
  • They provide an aromatic garlic essence without being as intense or lingering as garlic cloves.

What do leek scapes taste like? 

Leek scapes have a fresh, mild onion-like flavor that is similar to the leek bulb itself, but slightly more delicate and grassy. The scapes tend to be more tender and less fibrous than the white and green parts of the leek stem. Their flavor is most pronounced when eaten raw, such as thinly sliced into salads or used as a garnish. When cooked, their flavor mellows out even more.

Leek scapes provide a fresh onion essence without being as intense as other alliums like garlic scapes. Their taste allows them to be used in a variety of dishes, both cooked and raw.

How do you clean and prepare garlic scapes?

Before cooking with scapes, it's important to properly prepare them. First, cut off the tips and the bulb, as these can get quite mealy once cooked. You'll also want to make sure to give them a good rinse to wash away any dirt or debris.

Now choose how you are going to use the clean scapes.

  • They can be chopped finely and used as a garnish or added to salads for a mild garlic flavor.
  • For a stronger garlic flavor, scapes can be sautéed or roasted.
    • To sauté, heat a tablespoon or so of butter or oil in a large skillet over medium-high heat. Add the chopped scapes and cook for 3 to 5 minutes, stirring occasionally, until they're browned and tender. For extra tender scapes, add a splash of water, cover the pan and cook for an additional 2 to 3 minutes.

Garlic Scapes Recipes:

Scapes have a mild garlic flavor that's a bit milder than raw garlic cloves, making them perfect for using raw in pesto recipes, salad dressings, and compound butter.

But you can also chop the tender tips of the scapes and cook them like green onions or scallions - sautéed with a little oil, grilled, or thrown into stir-fries.

I'd love to hear if you season with salt and pepper, or how else you like to use these fleeting late spring treats before garlic scapes disappear until next year.

Garlic Scape Hummus.

A square white bowl with guacamole and two toasted bread slices, garnished with herbs and fresh scapes, placed on a pastel, swirled surface.
credit: Oat&Sesame
Garlic Scape Hummus. Did you know that the flower stems from garlic are edible? Snip them off in June/July to add fresh garlic flavor to everything!
Get Full Recipe

White Bean and Garlic Scape Dip

A bowl of green hummus garnished with chopped green onions and fresh scapes, next to a plate of sliced pita bread.
credit: Just A Little Bit Of Bacon
Wondering what to do with garlic scapes? Puree them into a quick and creamy, garlicky bean and garlic scape dip! Great as a snack or for a party!
Get Full Recipe

Garlic Scape Aioli

A glass jar filled with creamy, pale green scape spread sits on a white surface, with curled green plant stems in the background.
credit: SimpleSeasonal.com
Are you the type that likes to put mayo on everything? If so, this tasty, well-balanced aioli will add a creamy and delicious flavor delight to your next meal!
Get Full Recipe

Garlic Scape Compound Butter

A cooked steak topped with a dollop of herbed butter, garnished with fresh garlic scapes, served on a white plate.
credit: TheBeardandtheBaker
You can't go wrong with a perfectly cooked steak, but this garlic scape compound butter will take your dinner over the edge! It's a three ingredient addition to your meal that will really create the best steak ever.
Get Full Recipe

Garlic Scapes Cheddar Biscuits Recipe

A basket filled with several golden-brown, triangular cheese scones stacked on top of each other, flecked with tender green scapes for a fresh twist.
credit: SheLovesBiscotti
Cheddar Biscuits -a garlic scapes recipe you are going to love! Even without a box mix, you can make flaky, soft & delicious biscuits every single time.
Get Full Recipe

Garlic Scape Dressing - Vinaigrette

A mason jar filled with a light green creamy scapes sauce or dressing, with a metal lid, sits on a white surface next to fresh green stalks.
credit: BinkysCulinaryCarnival
This garlic scape dressing or vinaigrette is the perfect addition to your salads and a great quick marinade for beef, chicken or pork.
Get Full Recipe

Farmers Market Garlic Scape Soup

Two bowls of green soup garnished with scapes, sliced green vegetables, and a drizzle of cream, served with slices of rustic bread on a striped cloth.
credit: The Lemon Apron
A silky, vivid soup showcasing summer's fleeting scapes, and garnished with grilled scape flower tops and feta cheese.
Get Full Recipe

Savory Frittata with Potato, Shiitake, and Garlic Scapes

A baked frittata with mushrooms, cheese, green peas, and tender scapes in a black cast iron skillet on a light-colored surface.
credit: UmamiGirl
This savory frittata with potato, shiitakes, garlic scapes, capers, and parmesan pushes ALL the right buttons. Don't miss it.
Get Full Recipe

creamy pasta with chicken and garlic scapes

A bowl and a large glass bowl of penne pasta with chicken, green beans, scapes, and sun-dried tomatoes sit on a wooden table, next to a grater, cheese, and a white towel.
credit: TastySeasons
creamy pasta with chicken and garlic scapes (or asparagus) is easy and flavorful with the addition of sun dried tomatoes and onions. great for busy weeknights!
Get Full Recipe

Baked Garlic Scape "Fries"

Baked Garlic Scape
credit: Veggiekins Blog
These garlic scape fries are a vegan snack that are baked and breaded in gluten-free breadcrumbs for extra crispy texture.
Get Full Recipe

Garlic Scape Chimichurri

A plate with a sunny-side-up egg and sliced steak, topped with green chimichurri sauce featuring fresh scapes, served on a white plate with a blue patterned rim.
credit: Diversivore
Garlic scapes give you garlic and green all in one package, so where better to use them than in a tangy, garlicky Argentine-style chimichurri sauce?
Get Full Recipe

Grilled Garlic Scapes

Charred garlic scapes with grill marks, arranged in overlapping loops on a white surface.
credit: Upstateerramblings
This simple recipe for grilled garlic scapes is a quick way to enjoy this unusual vegetable.
Get Full Recipe

Roasted Garlic Scapes

Roasted green beans and garlic scapes sprinkled with grated Parmesan cheese, served on a white rectangular plate.
credit: LadyLeesHome
It takes less than ten minutes to make a delicious side dish of roasted garlic scapes! Roasted garlic scapes are a great vegetable side dish to add to any main dish, and we even eat them as a snack.
Get Full Recipe

Pickled Garlic Scapes

Four glass jars filled with pickled green scapes are sealed with metal lids, lined up on a counter with a checkered cloth and white subway tile background.
credit: CreativeCanning
Pickled garlic scapes are a creative way to use garlic scapes, and they preserve the unique flavor of this spring vegetable for year round enjoyment. We grow a lot of garlic on our homestead, and
Get Full Recipe

How do you store garlic scapes?

Here are some tips for properly storing garlic scapes to keep them fresh:

In the Refrigerator:

  • Remove any wilted or yellowed outer layers/skins from the scapes.
  • Wrap the scapes loosely in a damp paper towel or store them in a perforated plastic bag in the crisper drawer of the refrigerator.
  • They should keep for 5-7 days stored this way in the fridge.

Freezing:

  • Garlic scapes freeze very well for longer term storage.
  • Chop or slice the scapes into desired lengths.
  • Spread them out on a baking sheet and freeze until solid.
  • Transfer the frozen pieces to airtight freezer bags, squeezing out any excess air.
  • Frozen garlic scapes will keep for 8-10 months.

Fresh Storage:

  • For short-term storage of a few days, you can store fresh scapes at room temperature.
  • Stand them upright in a glass or jar with about 1 inch of water in the bottom, like cut flowers.
  • Cover loosely with a plastic bag and store in a cool, dark place.

No matter which method, try to use garlic scapes soon after cutting for peak flavor and texture. Avoid moisture accumulation which can lead to decay.

Gardening with Scapes

4 cloves of garlic cloves in a gloved hand ready to be planted

Garlic scapes are a delicious and versatile addition to any garden. They are easy to grow and require minimal maintenance. When planting garlic, make sure to plant it in a sunny location with well-draining soil. Garlic prefers soil that is rich in organic matter, so adding compost or aged manure to the soil before planting is recommended. Learn more on how to grow garlic in the post I wrote for you.

When are scapes in season?

man wearing a hat holding up 2 handfuls of garlic scapes while standing in a garden.

Garlic scapes can be planted in the fall or in the early spring, depending on your agricultural zone. 

Scapes are harvested in the spring and early summer, typically in May and June. They are available at farmers' markets and specialty food stores, as well as some grocery stores. When buying scapes, look for firm, unblemished stalks with a bright green color. They should be stored in the refrigerator and used within a week of purchase.

How to grow garlic for scapes

how to grow garlic
  1. Plant the garlic cloves about 2-3 inches deep and 6-8 inches apart. Cover the cloves with soil and water them well. Garlic scapes require regular watering, especially during dry spells. 
  2. Harvesting garlic scapes is easy and can be done when they are young and tender. To harvest the scapes, wait until they are about 10-12 inches long and have curled into a loop.
  3. Cut the scapes off at the base of the plant using a sharp pair of scissors or pruning shears.

Leek scapes can also be harvested in a similar way. Wait until the scapes are about 12-18 inches long and have a bulge at the bottom. Cut the scapes off at the base of the plant using a sharp pair of scissors or pruning shears.


Sarah Mock of savoringthegood.com headshot 2022

I am Sarah Mock. Welcome!

Sarah Mock is a classically trained Chef and graduate of Johnson & Wales University. A culinary blogger for 16 years Sarah helps the home cook prepare her recipes with professional results.

Get to know me

as seen in:

Logos of Hersheyland, ABC News, and Good Day PA are showcased in a seamless row, providing a snapshot of popular brands.

Hersheyland Nightline Good Day Pa!

The vibrant design showcases the iconic logos of Pinterest, Rachael Ray, and Jell-O set against a bold red background. Sorry, the provided description doesn't offer enough detail to suggest important SEO keywords.

Pinterest Rachael JELL-O

Painkiller Drink Recipe

glass of painkiller cocktail with garnishes.

Made with Pusser's Rum, pineapple juice, orange juice, and cream of coconut, the painkiller cocktail is a creamy, fruity cocktail that offers a perfect balance of flavors-less sweet than a piña colada but just as tropical.

glass of painkiller cocktail with garnishes.

The Painkiller is a classic tropical cocktail made with Pusser's Rum, the trademark navy-strength blend that was originally created for the British Royal Navy. This iconic Caribbean cocktail was born in the 1970s at the Soggy Dollar Bar on Jost Van Dyke Island, famed for its laid-back beach vibes and great cocktails.

I live outside of Baltimore, Maryland, and Pusser's Caribbean Grille is a local favorite for their Painkiller. You can order it as a #2, #3, or #4-that's how many ounces of rum you'd like in the drink.

Painkiller Drink Ingredients

Watch for my tips for balancing flavors, choosing the best rum, and making a pitcher for a group.

painkiller cocktail

Recipe Card?

To find the full printable recipe with specific measurements and directions CLICK HERE to go to the recipe card.

How to Make a Painkiller Drink

This painkiller drink recipe comes together in minutes, and no bartending experience is required. It's the perfect tropical rum drink for summer parties, tiki nights, or any time you need a little Caribbean vacation in a glass.

A can of pineapple juice is being poured into a metal shaker on a countertop with blurred fruit in the background.

Shake the Ingredients

  • Fill a cocktail shaker with ice. Add 2 ounces of Pusser's Rum, 4 ounces of pineapple juice, 1 ounce of orange juice, and ½ ounce of cream of coconut.
  • Shake vigorously for 15-20 seconds to chill and blend the ingredients.

Prepare the Glass

Fill a tall glass (such as a highball or Collins glass) with fresh ice cubes.

painkiller cocktail

Strain and Serve

Strain the shaken cocktail mixture over the ice in the glass.

A glass of yellow-orange juice with ice, garnished with a pineapple slice and cherry. An orange and a jar of juice in the background.

Garnish

Top with freshly grated nutmeg, and add garnishes like pineapple wedges, orange slices, and maraschino cherries for a festive touch.

Presentation Tip

Grate fresh nutmeg just before serving for the best aroma and flavor.

Did you make this recipe?

Do you have feedback that would be helpful to others? If so can help this small business owner by leaving a rating and a review in the comments section? Thank you for being part of the Savoring The Good Community. ~ Sarah

Other rum suggestions instead of Pusser's:

If Pusser's Rum isn't available, these alternatives can work well in a Painkiller cocktail:

  • Gosling's Black Seal Rum
    A rich, dark Bermuda rum with bold molasses and spice notes. Bottled at 80 proof, it's a great substitute for Pusser's.
  • Kraken Black Spiced Rum
    Known for its high proof (94 proof) and flavors of vanilla, cinnamon, and clove, Kraken adds a robust, spiced character to the cocktail.
  • Myers's Original Dark Rum
    A Jamaican rum with molasses, banana, and spice notes. Bottled at 80 proof, it offers a comparable richness to Pusser's.
  • Coruba Dark Rum
    This Jamaican dark rum has an intense molasses flavor, making it a strong match for Pusser's.
  • Sailor Jerry Spiced Navy Rum
    With a higher proof (92 proof) and spiced profile, this rum is another excellent alternative.

How to Make a Pitcher of Painkiller Drinks

Making a pitcher of Painkiller cocktails is perfect for entertaining! Here's my method, which lets each guest customize the strength of their drink:

Ingredients (Serves 4):

  • 2 cups pineapple juice
  • ¼ cup orange juice
  • ¼ cup cream of coconut
  • Pusser's Rum (or substitute)
  • Garnishes: fresh pineapple wedges, orange slices, maraschino cherries, and freshly grated nutmeg
  • Ice

Large Pitcher Tip

For larger batches, simply double or triple the ingredients. Stir the base well before serving to ensure the cream of coconut is evenly distributed.

Instructions:

  1. Prepare the Base:
    In a large pitcher, combine 2 cups of ice, pineapple juice, orange juice, and cream of coconut. Stir vigorously until the cream of coconut is fully incorporated.
  2. Serve:
    Fill pilsner glasses halfway with fresh ice. Pour the cocktail base into each glass, filling them about ¾ of the way.
  3. Customize:
    Let each guest add their desired amount of rum. I recommend starting with 2 ounces, but they can adjust to their preference (1 ounce for a lighter drink or 3 ounces for a stronger one).
  4. Garnish:
    Top each glass with freshly grated nutmeg and garnishes like pineapple wedges, orange slices, and maraschino cherries.
A clear glass pitcher, is filled with iced red liquid and slices of blood oranges on a light surface.

Crystal Glass Pitcher

Features a sturdy handle and sleek spout, ensuring effortless, precise pours.

Buy on Amazon

Tips for the Perfect Painkiller

  • Use fresh pineapple juice for a brighter flavor.
  • Shake the cocktail vigorously to fully incorporate the cream of coconut.
  • Grate fresh nutmeg for a warm, aromatic finish.

Common Questions About Painkiller Cocktails

Can I use coconut cream instead of cream of coconut?

No, coconut cream and cream of coconut are not interchangeable. Coconut cream is unsweetened and pure, while cream of coconut is sweetened and syrupy, making it essential for the Painkiller's flavor.

What is the best rum for Painkiller cocktails?

If Pusser's Rum isn't available, try Gosling's Black Seal Rum, Kraken Black Spiced Rum, or Myers's Original Dark Rum for a similar flavor profile.

How do I make a non-alcoholic version?

Replace the rum with pineapple or orange juice for a refreshing mocktail version.

What is a painkiller drink made of?

A painkiller drink is made with Pusser's Rum, pineapple juice, orange juice, and cream of coconut, topped with freshly grated nutmeg. It's a classic Caribbean cocktail that originated at the Soggy Dollar Bar on Jost Van Dyke Island in the British Virgin Islands.

What's the difference between a painkiller drink and a piña colada?

Both are tropical rum drinks made with coconut and pineapple, but the painkiller drink also includes orange juice and uses dark navy rum like Pusser's instead of white rum. The result is a bolder, less sweet cocktail with more depth of flavor.

glass of painkiller cocktail with garnishes.

Painkiller Drink

Learn how to make the classic Painkiller cocktail recipe at home with rum, cream of coconut, pineapple juice, and orange juice. Enjoy a taste of the tropics with this tropical cocktail.
5 from 1 vote
Print Pin Rate
Course: Cocktails
Cuisine: Mediterranean
Keyword: painkiller cocktail
Prep Time: 3 minutes minutes
Total Time: 3 minutes minutes
Servings: 1 cocktail
Calories: 134
Author: Sarah Mock

Ingredients

  • 2 Ounces Pusser's Rum
  • 4 Ounces pineapple juice
  • 1 Ounce orange juice fresh squeezed is best
  • ½ Ounce cream of coconut
  • Ice

Garnishes

  • Fresh orange slices,pineapple wedges, and maraschino cherries for garnish pineapple wedges, and maraschino cherries for garnish
  • nutmeg freshly grated
Follow Savoring The Good On PinterestFollow @SavoringTheGood or tag #STGRecipes!

Instructions

  • Fill a cocktail shaker with ice and add rum, pineapple juice, orange juice, and. cream of coconut. Shake vigorously to chill and blend ingredients.
    2 Ounces Pusser's Rum, 4 Ounces pineapple juice, 1 Ounce orange juice, Ice, ½ Ounce cream of coconut
    Pouring liquids into a metal cup: on the left, lime juice from a can, and on the right, cream of coconut from a bottle.
  • Fill a tall glass with fresh ice cubes. Strain the shaken cocktail mixture over the fresh ice in the glass.
    painkiller cocktail
  • Garnish with freshly grated nutmeg on top along with fresh pineapple wedges, orange slices, and maraschino cherries.
    Fresh orange slices,pineapple wedges, and maraschino cherries for garnish, nutmeg
    painkiller cocktail

Notes

 
Want to share when you made this recipe?Follow @SavoringTheGood & tag #STGRecipes!
Nutrition Facts
Painkiller Drink
Serving Size
 
1 cocktail
Amount per Serving
Calories
134
% Daily Value*
Fat
 
3
g
5
%
Saturated Fat
 
2
g
13
%
Polyunsaturated Fat
 
0.1
g
Monounsaturated Fat
 
0.03
g
Sodium
 
10
mg
0
%
Potassium
 
204
mg
6
%
Carbohydrates
 
27
g
9
%
Sugar
 
23
g
26
%
Protein
 
1
g
2
%
* Percent Daily Values are based on a 2000 calorie diet.
**Nutritional facts are just estimates. Please utilize your own brand nutritional values to double check against our estimates.
Like this recipe card? Want one for your site?Check out WP Recipe Maker!

Sarah Mock of savoringthegood.com headshot 2022

I am Sarah Mock. Welcome!

Sarah Mock is a classically trained Chef and a graduate of Johnson & Wales University. A culinary blogger for 17 years, Sarah helps the home cook prepare her recipes with professional results.

Get to know me

as seen in:

Logos of Hersheyland, ABC News, and Good Day PA are showcased in a seamless row, providing a snapshot of popular brands.

Hersheyland Nightline Good Day Pa!

The vibrant design showcases the iconic logos of Pinterest, Rachael Ray, and Jell-O set against a bold red background. Sorry, the provided description doesn't offer enough detail to suggest important SEO keywords.

Pinterest Rachael JELL-O


Cotija Cheese Substitutes: Feta, Parmesan & More

A fresh round of white cotija cheese on a wooden board with parsley leaves and a knife in the background.

When a recipe calls for the bold, salty punch of cotija cheese but you don't have it on hand, don't worry; I have several excellent substitutes that deliver similar flavor, texture, and savory richness.

A fresh round of white cotija cheese on a wooden board with parsley leaves and a knife in the background.

If I'm making elote and don't have cotija, I usually grab feta-it crumbles the same way and holds up under heat. Whether you're making tacos, Mexican street corn, or enchiladas, the best cotija cheese substitutes range from familiar options like Parmesan and feta to plant-based picks like nutritional yeast or vegan parmesan. Here's how to choose the right replacement based on your dish.

What is a replacement for cotija cheese?

A fresh salad with leafy greens, tomatoes, crumbled cheese, red onion, and lemon on a plate.

When choosing a cotija substitute, consider both flavor and texture. Some alternatives may be too mild or too soft, which can affect your final dish.

Dairy-Based Cotija Cheese Alternatives

When it comes to finding something similar to cotija cheese, there are a few dairy-based options that can provide a similar texture and flavor. Here are some alternatives to cotija cheese that you can use in your recipes:

Feta Cheese

A block of feta cheese garnished with basil leaves and black olives on a small white dish.

Feta offers a similarly crumbly texture and salty tang, though its flavor is slightly milder and brighter. It works well in tacos, salads, and Mexican-inspired dishes.

Parmesan Cheese

Aged Parmesan provides a nutty, umami-rich flavor with a hard, granular texture. It's best for grating over soups, pastas, or elote, though it melts more than cotija when heated.

Queso Fresco

This fresh Mexican cheese is softer and milder than cotija but makes a great stand-in when you want a gentle salty topping. It won't crumble as finely, but the flavor still fits.

Aged Goat Cheese Crumbles

4 ounce log of goat cheese on a black slate surface

Goat cheese crumbles can mimic cotija's tangy profile, especially when using a firmer, aged version. Use lightly as a topping on vegetables, beans, or tacos.

Anejo Cheese

Aged and salty like cotija, añejo cheese is firm, crumbly, and often coated in paprika. It's a bit harder to find but an excellent flavor match.

Ricotta Salata

This firm, salted version of ricotta has a crumbly texture and mild flavor that works well in place of cotija, especially in salads and roasted dishes.

Vegan and Dairy-Free Cotija Alternatives

If you're looking for a vegan or non-dairy substitute for cotija, there are several options available that can provide similar flavors and textures to your dishes.

Nutritional Yeast

With its cheesy, nutty flavor, nutritional yeast works well as a dairy-free topping. Sprinkle it on roasted corn, tacos, or beans for a boost of umami.

Vegan Parmesan

Usually made from nuts and nutritional yeast, vegan parmesan offers a salty, crumbly topping for pasta, salads, or elote. The texture isn't identical, but the savory bite is close.

How to Choose the Best Cotija Cheese Substitute

A row of shrimp tacos with avocado and toppings on a wooden surface.

Whether you're avoiding cotija for cost or availability, plenty of substitutes come close in flavor and texture; no need to skip your favorite recipes.

When choosing a substitute, it is important to consider the dish you are making and the flavor profile you are trying to achieve.

To pick the best cotija substitute, think about:

  • Flavor: Cotija is salty and tangy. Feta and Parmesan come closest in intensity.
  • Texture: Look for firm, crumbly cheeses like ricotta salata, añejo, or aged goat cheese.
  • Dish Type: Mexican recipes work well with queso fresco or feta. For pasta or salads, try Parmesan or vegan Parmesan.
  • Availability: Use what you can find-Parmesan is easy to source and reliable in a pinch.

Storing and Handling Cheese Substitutes

  • Storage: Keep substitutes in an airtight container in the fridge to preserve flavor and texture.
  • Serving Tip: Taste before using-some replacements are saltier than others. Adjust your dish's seasoning accordingly.
  • Handling: Use clean utensils and hands to prevent spoilage, especially when using soft cheeses in cold dishes.

Sarah Mock of savoringthegood.com headshot 2022

I am Sarah Mock. Welcome!

Sarah Mock is a classically trained Chef and a graduate of Johnson & Wales University. A culinary blogger for 17 years, Sarah helps the home cook prepare her recipes with professional results.

Get to know me

as seen in:

Logos of Hersheyland, ABC News, and Good Day PA are showcased in a seamless row, providing a snapshot of popular brands.

Hersheyland Nightline Good Day Pa!

The vibrant design showcases the iconic logos of Pinterest, Rachael Ray, and Jell-O set against a bold red background. Sorry, the provided description doesn't offer enough detail to suggest important SEO keywords.

Pinterest Rachael JELL-O

Difference Between Vanilla Extract vs. Vanilla Essence

A bottle of vanilla extract on a wooden table.

Have you ever wondered what makes vanilla essence different from vanilla extract? Are they the same when cooking, or do they bring different flavors to your dishes? Let's find out!

A bottle of vanilla extract on a wooden table.

We'll explore the key differences between these two ingredients: vanilla essence and vanilla extract. Even though they both add that delicious vanilla taste to your food, they come from different places and have unique flavors. 

Difference Between Vanilla Extract vs. Vanilla Essence

What is the differences between vanilla essence and vanilla extract? Learn if they can be used interchangeably and how to distinguish between the two.

What is Vanilla Essence?

Vanilla essence, also referred to as imitation vanilla extract, is a type of flavoring that is made using synthetic vanillin, a chemical compound that is similar to the natural vanillin found in vanilla beans.

It is typically less expensive than natural vanilla extract, but it also has a less complex flavor profile.

What is Vanilla Extract?

Vanilla extract, on the other hand, is made by soaking vanilla beans in a mixture of alcohol and water. The resulting liquid is then strained and bottled. Because it is made from natural ingredients, pure vanilla extract has a more complex flavor profile than vanilla essence.

So, is vanilla essence, or imitation, the same as vanilla extract?

The answer is no. While both ingredients add a vanilla flavor to baked goods, they are made using different processes and ingredients.

Vanilla Extract and Vanilla Essence: Can you substitute one for the other?

When it comes to baking, it is important to choose the right ingredients for the recipe. If a recipe calls for vanilla extract, using vanilla essence instead may result in a less flavorful end product.

On the other hand, if a recipe calls for essence, using pure vanilla extract may result in a stronger vanilla flavor than intended.

Here is a loose analogy. If you are sewing a shirt and the pattern says to use cotton thread in your needle to stitch it together but you only have cotton yarn.

The shirt might be sewn together but it won't look or feel right. Same with extract vs essence. The recipe might come together, but the flavor, texture and balance will be off. 

Differences Between Vanilla Essence and Extract

A pile of dark brown vanilla beans on a table.
  • Ingredients: Vanilla essence, or imitation vanilla extract, is a synthetic substance that mimics the flavor of real vanilla. It is made by combining artificial flavors and colors with a water or alcohol base.
    • On the other hand, vanilla extract is made by soaking vanilla beans in alcohol and water. The alcohol extracts the flavor compounds from the beans, resulting in a concentrated liquid that is used to flavor food.
  • Production Process: The production process of vanilla essence and extract is quite different. Vanilla essence is made by mixing artificial flavors and colors with a water or alcohol base. The resulting mixture is then bottled and sold as essence. 
  • Flavor Profile: Vanilla extract has a richer, more complex flavor than vanilla essence. This is because the flavor compounds in vanilla extract are extracted directly from the vanilla beans, whereas the flavor in essence is artificially created.
    • Vanilla extract has a strong, sweet, and floral aroma, with a deep, rich, and creamy flavor. Essence, on the other hand, has a more one-dimensional flavor profile, with a strong, artificial vanilla taste.

Usage in Recipes

Various baking ingredients are arranged on a white table.

Vanilla extract is a popular ingredient in baking and cooking and is used to flavor a wide variety of dishes, including cakes, cookies, ice cream, and custards. It is also used in savory dishes, such as sauces and marinades.

Vanilla essence, on the other hand, is not as widely used in cooking and baking and is generally considered to be of lower quality than extract. It is often used as a cheap substitute for vanilla extract in recipes where the flavor of vanilla is not as important.

Conversion Measurements

When it comes to baking, it's important to use the right amount of vanilla extract or essence to ensure the perfect flavor. If a recipe calls for vanilla essence and you only have vanilla extract, you may be wondering how much to use.

The good news is that vanilla extract and essence can be used interchangeably in most recipes. However, there are some differences in flavor and strength, so it's important to keep this in mind when making substitutions.

In general, you can use the same amount of vanilla extract as you would vanilla essence. However, if you're using a particularly strong extract, you may want to use a little less to avoid overpowering the other flavors in your recipe.

But if you're using a weaker extract, you may want to use a little more to get the same level of flavor as you would with essence.

Keep in mind that these are just general guidelines, and you may need to adjust the amount of vanilla extract based on the specific recipe you're using. If you're unsure, it's always a good idea to start with a smaller amount and add more as needed.

Choosing Between Essence and Extract

When it comes to choosing between vanilla essence and vanilla extract, there are a few things to consider. Both are used to add vanilla flavor to dishes, but they differ in terms of their processing, flavor, and price.

Baking With Vanilla Extract vs. Vanilla Essence

For baking, vanilla extract is usually the preferred choice. This is because it has a more robust, pure flavor that can stand up to the heat of the oven. In addition, because baking recipes often call for small amounts of vanilla extract, the higher cost is not as much of a concern. 

Cooking with Vanilla Essence, or Imitation Vanilla Extract

For cooking, vanilla essence is a good choice. This is because it is less expensive than vanilla extract and has a milder, sweeter flavor that complements savory dishes. Vanilla essence is often used in sauces, marinades, and glazes, and can also be added to coffee, tea, and smoothies for a touch of sweetness.

Why is Pure Vanilla Extract So Expensive?

When it comes to price and availability, vanilla extract is generally more expensive and harder to find than vanilla essence. This is because vanilla extract is made from real vanilla beans, which are expensive and can be difficult to source.

Keep in mind, however, that some brands of essence may contain additives or artificial flavors, so be sure to read the label carefully before purchasing.

When choosing between the two, consider the dish you are making, the amount of vanilla required, and your budget. With a little experimentation, you can find the perfect vanilla flavor for all your culinary creations.

Is imitation vanilla the same as vanilla extract?

Imitation vanilla and vanilla extract are similar in that they both provide a vanilla flavor to recipes, but they are not the same thing.

Vanilla extract is made from vanilla beans that have been steeped in alcohol, which pulls the flavor compounds from the beans. This process results in a rich, complex flavor that is highly prized in baking and cooking.

On the other hand, the imitation version is made from synthetic vanillin, which attempts to replicate the flavor of real vanilla. While it is less expensive than vanilla extract, it often lacks the depth and complexity of flavor found in the real thing.

In recipes, you can usually substitute imitation for extract, but keep in mind that the flavor may not be as robust. If possible, it's always best to use real vanilla for the best flavor.

Is vanilla pod the same as vanilla essence?

Vanilla pods, also known as vanilla beans, are the dark, seed-filled pods harvested from vanilla orchids, providing intense aroma and flavor. Vanilla essence, or vanilla extract, is a concentrated liquid made by soaking vanilla pods in alcohol. While both provide vanilla flavor, pods are used for intense flavor and appearance, while essence is used for convenience.

Dessert Recipes

  • Peanut butter pie no bake recipe
    No-Bake Peanut Butter Pie Recipe
  • black raspberry ice cream, 3 scoops in a white bowl square image
    Black Raspberry Ice Cream Recipe
  • A glass dish filled with a mixture of chocolate-covered cereal pieces and melted marshmallows, reminiscent of golden graham s'mores.
    Golden Grahams S'mores Bars Recipe
  • square image of saucy strawberry topping in a jar with a spoon taking out a portion.
    Strawberry Topping
See more Dessert Recipes →

Sarah Mock of savoringthegood.com headshot 2022

I am Sarah Mock. Welcome!

Sarah Mock is a classically trained Chef and graduate of Johnson & Wales University. A culinary blogger for 15 years Sarah helps the home cook prepare her recipes with professional results.

Get to know me

Best Chinese 5 Spice Substitute: Alternatives for Authentic Flavor

A bowl of Chinese 5 spice substitute sprinkled on top of a bowl.

Looking for the best Chinese 5 spice substitute? Explore flavorful options for the best authentic flavor with these substitutes for Chinese five spice.

A bowl of Chinese 5 spice substitute sprinkled on top of a bowl.

What Is Chinese Five Spice

Chinese 5 spice is a unique blend of five different spices that is commonly used in Chinese cuisine and is believed to have been created during the Ming Dynasty. It is a versatile spice blend that can be used in a variety of dishes, both savory and sweet. The spice blend is known for its complex flavor profile.

What are the five spice ingredients?

This distinct spice blend typically consists of five key spices.

  • Star anise - provides a licorice-like flavor.
  • Sichuan peppercorns -add a numbing, tingling sensation to the tongue.
  • Fennel seeds - provide a sweet, anise-like flavor.
  • Cloves - add a warm, sweet flavor.
  • Cinnamon - provides a sweet and spicy flavor that ties all the other flavors together.

How to Make Homemade Chinese Five Spice Powder

Making Chinese 5 spice at home is relatively easy and can be done with just a few ingredients. To make your own Chinese 5 spice, combine the following:

  • 1 tablespoon ground cinnamon
  • 1 tablespoon ground cloves
  • 1 tablespoon ground fennel seeds
  • 1 tablespoon Sichuan peppercorns, toasted and ground
  • 1 tablespoon ground star anise

Mix all the ingredients together and store in an airtight container. This homemade version can be used in any recipe that calls for the store-bought version.

Best Chinese 5 spice substitute

If you don't have Chinese five spice powder blend on hand or you're looking for a different twist, several spice powder substitutes can provide a similar flavor profile.

Single-Ingredient Substitutes For Chinese Five-Spice

  • Star Anise: you can use it as a 1:1 substitute for Chinese 5 spice.
  • Fennel Seeds:  You can use ground fennel seeds or whole fennel seeds.
  • Szechuan Peppercorns:  often used in Chinese cuisine and can be used as a substitute.

Chinese Five-Spice Substitutes - Blends

  • Garam Masala: a spice blend that is commonly used in Indian cuisine. It is made up of cinnamon, cardamom, cloves, cumin, and coriander. It has a warm, spicy flavor that is similar to Chinese 5 spice.
  • Allspice: Allspice is a spice that is made from the dried berries of the Pimenta dioica plant. You can use it as a 1:1 substitute.
  • Pumpkin Pie Spice: Pumpkin pie spice is a blend of cinnamon, nutmeg, ginger, and allspice. It has a warm, spicy flavor that is similar to Chinese 5 spice. You can use it as a substitute for Chinese five-spice powder in sweet dishes.

Whether you choose a single-ingredient substitute or a blend substitute, you can achieve a similar flavor profile to Chinese 5 spice.

Comparing Chinese 5 Spice to Other Spice Mixes

Chinese 5 Spice vs. Mixed Spice

Mixed spice is a British spice blend that typically includes cinnamon, nutmeg, allspice, and cloves. While these spices share some similarities, they are not the same. Chinese 5 Spice includes Sichuan peppercorns and star anise, which give it a unique flavor profile that cannot be replicated by mixed spice. Mixed spice is not commonly used in Chinese cuisine, so it may not be the best substitute.

Chinese 5 Spice vs. Garam Masala

Garam masala is an Indian spice blend that typically includes cinnamon, cloves, cardamom, cumin, and coriander. While garam masala shares some ingredients, it does not contain Sichuan peppercorns or star anise, which are key components of Chinese 5 Spice. Garam masala may be a good substitute in recipes that call for warm, earthy flavors, but it will not provide the same numbing effect that Sichuan peppercorns do.

Chinese 5 Spice vs. Pumpkin Spice

Pumpkin spice is an American spice blend that typically includes cinnamon, nutmeg, ginger, and allspice. While pumpkin spice shares some ingredients, it does not contain Sichuan peppercorns or star anise, which are key components of 5 Spice powder. Additionally, pumpkin spice is typically used in sweet recipes, while Chinese 5 Spice is used in both sweet and savory dishes. Therefore, pumpkin spice may not be the best substitute. When choosing a substitute for Chinese 5 Spice, consider the flavor profile of the recipe and choose a spice blend that complements it well.

Is Chinese 5 spice the same as allspice?

While they share some similar flavor notes, the composition of these spices is different, making them distinct ingredients in the kitchen. Chinese five-spice is a blend of five spices and is commonly used in Chinese cuisine to add a unique flavor profile to dishes. On the other hand, allspice is a single spice derived from the dried unripe berries of the Pimenta dioica plant. It has a warm, sweet flavor reminiscent of a combination of cinnamon, cloves, and nutmeg. Allspice is often used in both sweet and savory dishes in various culinary traditions.

Adjusting Recipes and Flavor Profiles

When to Replace Chinese Five Spice

I understand the importance of using the right ingredients to achieve the desired flavor profile. However, sometimes certain ingredients may not be available or may not be suitable for certain dietary restrictions. In such cases, it is necessary to use substitutes to achieve the desired flavor profile.

When it comes to Chinese 5 spice, there are several substitutes available that can be used in dishes. Some of the most commonly used substitutes are garam masala, cinnamon, allspice, and star anise. These substitutes can be used in the same quantity as Chinese 5 spice to achieve a similar flavor profile.

It is important to note that while substitutes can be used, they may not always provide the exact same flavor profile as the original ingredient. Therefore, it is important to adjust the recipe accordingly to achieve the desired flavor profile.

Impacts on Authentic Chinese Dishes

Using substitutes for Chinese 5 spice can have an impact on the traditional dishes that use this spice blend. While the substitutes may provide a similar flavor profile, they may not provide the same depth and complexity of flavors that Chinese 5 spice provides.

For example, if a traditional Chinese dish requires the use of Chinese 5 spice, using a substitute may alter the flavor of the dish and make it taste different from the original. Therefore, it is important to consider the impact of using substitutes on traditional dishes and adjust the recipe accordingly.

Using substitutes for Chinese 5 spice can be a great way to achieve the desired flavor profile when the original ingredient is not available or suitable. However, it is important to adjust the recipe accordingly and consider the impact on traditional dishes when using substitutes.


Sarah Mock of savoringthegood.com headshot 2022

I am Sarah Mock. Welcome!

Sarah Mock is a classically trained Chef and graduate of Johnson & Wales University. A culinary blogger for 15 years Sarah helps the home cook prepare her recipes with professional results.

Get to know me

as seen in:

Logos of Hersheyland, ABC News, and Good Day PA are showcased in a seamless row, providing a snapshot of popular brands.

Hersheyland Nightline Good Day Pa!

The vibrant design showcases the iconic logos of Pinterest, Rachael Ray, and Jell-O set against a bold red background. Sorry, the provided description doesn't offer enough detail to suggest important SEO keywords.

Pinterest Rachael JELL-O

Boiled Peanut Recipe 🥜

boiled Peanuts in bowls on a table.

This guide will walk you through the simple process of boiling peanuts, allowing you to recreate the fantastic roadside boiled peanuts that hold a special place in your heart.

boiled Peanuts in bowls on a table.

A beloved Southern treat, boiled peanuts stand as a distinctive and delightful comfort food, symbolizing the warm embrace of Southern hospitality.

🥜 Ingredients needed:

Boiled Peanut Recipe ingredients raw peanuts, water, salt.
  • Raw Peanuts In Shell: Choose fresh peanuts, without any signs of mold, discoloration, or off-putting odors. Freshness ensures better flavor and texture.
  • Salt: The amount of salt is truly a preference that will change from person to person. Starting with ¼ cup is ideal. Halfway through cooking, taste a peanut, and if you would like more salt, you can add more.

Here is a visual overview of the ingredients in the recipe. Scroll down to the recipe at the bottom for quantities.

📝 Why are raw peanuts used when making boiled peanuts?

While raw peanuts are the preferred choice, some recipes may use dried raw peanuts that have been rehydrated through soaking. This can be a convenient option if fresh raw peanuts are not readily accessible.

Raw peanuts are a popular choice when making boiled peanuts due to their unique qualities. These peanuts have a higher moisture content compared to fully matured, dried peanuts, making them excellent for absorbing the rich flavors of the boiling liquid.

A bowl of peanuts.

Their tender texture allows them to reach the desired consistency during the cooking process without becoming tough or overly dry. The use of raw peanuts is deeply rooted in culinary traditions, especially in regions where boiled peanuts are a cherished dish. It adds authenticity to the preparation, and the availability of raw peanuts during the growing season makes them a natural choice for this flavorful snack.

The cultural significance of boiled peanuts made with raw peanuts is particularly notable in the Southern United States, where the practice is deeply ingrained in local culinary heritage.

Beyond tradition, the choice of raw peanuts enhances the overall flavor profile of the boiled peanuts. They are not only flavorful but also tender, creating a satisfying and enjoyable snack.

Additionally, the availability of raw peanuts during the harvest season ensures that the ingredients used are fresh and in season, contributing to the authenticity and quality of the dish.

🔥 How to make Southern boiled peanuts

How to make peanuts in a pot. 4 steps.
  1. Prepare the peanuts by removing empty shells, pieces, or bad peanuts.
  2. Let the peanuts soak for 8 hours or overnight, in cold water, changing out the water halfway through the soaking time.
  3. Drain and place in a 5-quart or larger boiling pot.
  4. Sprinkle salt over the peanuts, and cover the peanuts with water until it's an inch above them.
  5. Bring to a boil and let the peanuts cook over medium heat for 3 ½ hours or until desired softness, adding water as needed to prevent burning.
  6. Let the peanuts cool until they can be easily handled and enjoy your homemade Southern snack.

Boiling Peanuts Tip

It's important you do not turn up the stove to as high as it will go or you will risk burning your peanuts before they're done.

Cajun boiled peanut recipe

Ingredients:

  • 2 pounds fresh green peanuts
  • Cajun Spice Mix:
    • 2 tablespoons cayenne pepper
    • 2 tablespoons paprika
    • 1 tablespoon garlic powder
    • 1 tablespoon onion powder
    • 1 teaspoon dried thyme
    • 1 teaspoon dried oregano
  • Cajun Trinity:
    • 1 cup finely chopped onions
    • 1 cup finely chopped bell peppers
    • 1 cup finely chopped celery
  • 4-5 cloves garlic, whole or minced
  • Cajun Sausage or Smoked Meats (optional)
  • Cajun Hot Sauce (to taste)
  • Salt (to taste)

Instructions:

  1. Prepare Peanuts: Sort through 2 pounds of fresh green peanuts, removing any empty shells, pieces, or bad peanuts. Rinse them thoroughly.
  2. Soak: Soak the peanuts in cold water for up to 8 hours.
  3. Prepare Cajun Spice Mix: In a bowl, combine the Cajun spice mix ingredients.
  4. Chop Cajun Trinity: Finely chop 1 cup each of onions, bell peppers, and celery to create the Cajun trinity.
  5. Boiling Pot: In a large pot (5 quarts or larger), place the peanuts. Add the Cajun trinity, whole or minced garlic, and Cajun sausage or smoked meats if using.
  6. Add Cajun Spice Mix: Sprinkle the Cajun spice mix over the peanuts and vegetables. Adjust the salt to taste. If you like it spicier, add Cajun hot sauce according to your preference.
  7. Fill with Water: Pour water into the pot until it's about an inch over the top of the peanuts.
  8. Boiling: Set the pot to medium-high heat and bring the pot to a boil. Once boiling, reduce the heat to maintain a gentle simmer.
  9. Boil for 3 ½ Hours: Let the peanuts boil for 3 ½ hours or until they reach the desired tenderness. Stir occasionally to ensure even flavor distribution.
  10. Check for Doneness: Sample the peanuts periodically to check for doneness. Adjust seasoning if needed.
  11. Serve: Once the Cajun boiled peanuts are ready, drain any excess cooking liquid and serve them hot. Optionally, prepare a Cajun dipping sauce with mayo, Cajun seasoning, and lemon for added flavor.

Why do people boil peanuts in the shell?

A spoonful of boiled peanuts.

Boiling peanuts in the shell is a time-honored southern delicacy that enhances both the flavor and texture of this popular snack.

  • Flavor Absorption: Peanuts in the shell absorb the flavors of the boiling liquid, resulting in a more flavorful and savory snack. The shells act as a protective barrier, allowing the peanuts to soak up the seasonings and spices used in the boiling process without falling apart and turning to mush.
  • Texture: Boiling peanuts in the shell helps maintain a unique texture. The shells add a bit of firmness to the peanuts, giving them a satisfying bite. The process also allows the peanuts to absorb moisture without becoming overly soft.
  • Tradition and Authenticity: Boiling peanuts in the shell is a traditional and authentic method, especially in regions where boiled peanuts are a popular snack or treat. It adds to the cultural and regional identity of the dish.
  • Convenience: The shells provide a natural packaging, making it easy to grab a handful of peanuts without the need for additional utensils.
  • Visual Appeal: The shells contribute to the visual appeal of the boiled peanuts. They often take on a darker color during boiling, and the cracked shells reveal the darker, flavorful peanuts inside.

Can you overcook boiled peanuts?

Boiled peanuts in bowls on a table.

Yes, it is possible to overcook boiled peanuts, and doing so can affect their texture and taste. Overcooking may result in peanuts that are excessively soft or mushy, which is not the desired outcome for boiled peanuts.

To prevent overcooking, it's essential to monitor the boiling process and check the peanuts for doneness regularly.

Tips to avoid overcooking:

  • Frequent Sampling: Periodically sample a peanut by letting it cool for a moment and tasting it. This helps you gauge the texture and flavor.
  • Adjust Cooking Time: Boiling times can vary based on factors like peanut size, freshness, and personal preference. Adjust the cooking time accordingly to achieve the desired level of tenderness.
  • Start with Soaked Peanuts: If you soak the raw peanuts before boiling, it can reduce the overall cooking time. Soaking helps hydrate the peanuts, making them cook more evenly.
  • Simmer Instead of Boil: Maintain a gentle simmer rather than a rapid boil. Simmering allows for thorough cooking without causing the peanuts to become overly soft.
  • Test for Doneness: Pay attention to the texture, color, and flavor of the boiled peanuts. When they reach the right balance of tenderness and flavor absorption, it's time to stop the cooking process.

Storage Tips

Store these boiled peanuts in an airtight container and refrigerate them for up to a week. Ensure all excess water is drained before storing. Avoid freezing.

📝 Frequently asked questions, answers and tips:

Do you have to soak raw peanuts before boiling?

Yes, soaking raw peanuts before boiling is a crucial step. It helps rehydrate the peanuts and allows them to absorb flavors during the boiling process. Soaking also reduces the overall boiling time. Typically, you'll want to soak raw peanuts in water for at least 8 hours or overnight. This helps soften the peanuts and ensures they cook evenly when boiled. Once soaked, you can proceed with the boiling process for delicious homemade boiled peanuts.

How do you know when boiled peanuts are done?

To check for doneness, it's a good idea to periodically sample a peanut as they boil. Once they reach the desired texture and flavor, you can remove them from the heat. Remember, it's a matter of personal preference, so adjust the cooking time to achieve the level of tenderness you prefer.

Texture: The peanuts should be tender but not mushy. Test a few by biting into them. They should have a slightly firm texture.
Color: Boiled peanuts often take on a darker color due to absorbing the flavors of the brine. The shells may also crack, revealing the darker peanuts inside.
Taste: Grab one, let it cool for a moment, and taste it. The peanuts should have a savory and well-seasoned flavor.
Smell: The aroma of the boiled peanuts should be rich and nutty, indicating that they've absorbed the flavors of the boiling liquid.

How do you keep boiled peanuts from getting slimy?

To prevent boiled peanuts from getting slimy, follow these tips

  • Rinse and Clean Peanuts: Before soaking or boiling, thoroughly rinse the raw peanuts to remove any dirt or debris. This helps eliminate the potential for sliminess.
  • Change Soaking Water: If you're soaking the peanuts before boiling, change the soaking water at least once during the process. This helps remove impurities and reduces the risk of sliminess.
  • Use Fresh Water for Boiling: When you move on to the boiling stage, use fresh water rather than the soaking water. This helps ensure a clean cooking environment and minimizes the chance of sliminess.
  • Add Salt: Including salt in the boiling water not only enhances the flavor but also helps control the sliminess. Salt can act as a natural anti-sliminess agent.
  • Don't Overcrowd the Pot: Avoid overcrowding the pot with too many peanuts. This can lead to uneven cooking and create a more favorable environment for sliminess. Give the peanuts enough space to cook properly.
  • Boil at a Simmer: Maintain a gentle simmer rather than a rapid boil. High heat can contribute to sliminess. Slow and steady cooking allows the peanuts to cook thoroughly without becoming overly slimy.

📄 Related Recipes

  • fried tex mex egg roll with beeg, cheese, corn, tomatoes, cream cheese black beans, cut open on the bias to show texture. Sitting on a pile of the rest of the the golden egg rolls
    Taco Egg Rolls (Air Fryer or Fried)
  • A white bowl filled with watermelon cubes, topped with crumbled feta cheese, fresh mint leaves, and a drizzle of balsamic glaze.
    Feta Cheese and Watermelon Salad
  • A glass baking dish filled with baked pizza dip featuring pepperoni and cheese, with a bowl of sliced bread in the background.
    Pizza Dip Recipe
See more Appetizer Recipes →
boiled Peanuts in bowls on a table.

Boiled Peanuts

A beloved Southern treat, boiled peanuts stand as a distinctive and delightful comfort food
No ratings yet
Print Pin Rate
Course: Ingredients
Cuisine: French
Keyword: Boiled Peanuts
Prep Time: 8 hours hours
Cook Time: 3 hours hours 30 minutes minutes
Total Time: 11 hours hours 30 minutes minutes
Servings: 16 servings
Calories: 323
Author: Sarah Mock

Ingredients

  •  
    2 Pounds Raw Peanuts In Shell
  • A Morton Salt container with a blue label featuring a girl in a yellow dress holding an umbrella, with salt pouring out of a container-an essential ingredient for perfectly seasoning dishes like Chicken Cordon Bleu.¼ Cup Salt
  •  
    Water
Follow Savoring The Good On PinterestFollow @SavoringTheGood or tag #STGRecipes!

Instructions

  • Prepare the peanuts by removing empty shells, pieces, or bad peanuts.
    2 Pounds Raw Peanuts
  • Let the peanuts soak for 8 hours or overnight, in cold water, changing out the water halfway through the soaking time.
  • Drain and place in a 5-quart or larger boiling pot.
  • Sprinkle salt over the peanuts, and cover the peanuts with water until it's an inch above them.
    ¼ Cup Salt, Water
  • Bring to a boil and let the peanuts cook over medium heat for 3 ½ hours or until desired softness, adding water as needed to prevent burning.
  • Let the peanuts cool until they can be easily handled and enjoy your homemade Southern snack.
Want to share when you made this recipe?Follow @SavoringTheGood & tag #STGRecipes!
Nutrition Facts
Boiled Peanuts
Serving Size
 
1 serving
Amount per Serving
Calories
323
% Daily Value*
Fat
 
28
g
43
%
Saturated Fat
 
4
g
25
%
Polyunsaturated Fat
 
10
g
Monounsaturated Fat
 
13
g
Sodium
 
1781
mg
77
%
Potassium
 
422
mg
12
%
Carbohydrates
 
9
g
3
%
Protein
 
15
g
30
%
* Percent Daily Values are based on a 2000 calorie diet.
**Nutritional facts are just estimates. Please utilize your own brand nutritional values to double check against our estimates.
Like this recipe card? Want one for your site?Check out WP Recipe Maker!
Sarah Mock of savoringthegood.com headshot 2018

👩🏻‍🍳 Sarah Mock

CEO/Owner/Founder/Culinary Blogger

Sarah Mock is a classically trained Chef and graduate of Johnson & Wales University. A culinary blogger for 14 years Sarah helps the home cook prepare her recipes with professional results.

  • Visit Website (opens in a new tab)
  • Visit Facebook account (opens in a new tab)
  • Visit Instagram account (opens in a new tab)
  • Visit Pinterest account (opens in a new tab)

How to Make Rice Flour at Home

Homemade White flour in a jar with a wooden spoon.

Learn how to make rice flour at home with this easy step-by-step recipe. Enjoy fresh, pure flour without additives! Save money in the long run.

Homemade White flour in a jar with a wooden spoon.

Storing homemade rice flour properly is crucial to maintain its freshness and quality. Scroll down to see important storage tips, you can keep your homemade rice flour fresh and ready for use in various recipes.

You should use this method to make rice into flour at home.

By making rice flour at home, individuals can tailor it to their preferences, ensuring a fresh and high-quality ingredient for their culinary creations.

  • Control Over Ingredients:
    • Making rice flour at home allows individuals to have full control over the type and quality of rice used. They can choose organic, non-GMO, or specialty rice varieties, ensuring a higher level of ingredient transparency.
  • Freshness and Flavor:
    • Homemade rice flour is fresher compared to store-bought versions, which might have been sitting on shelves for an extended period. The freshness contributes to a better flavor in recipes, especially in delicate dishes where the taste of the flour plays a significant role.
  • Customization and Specialty Flours:
    • DIY rice flour provides the flexibility to customize the texture and flavor. Some recipes may require a specific grind or type of rice flour, and making it at home allows for this level of customization. Additionally, individuals can experiment with creating specialty flours by using unique rice varieties.

What kind of rice to use:

When making rice flour at home, the variety of rice you choose can impact the texture and flavor of the flour. Choose the type of rice based on your recipe and flavor preferences. Experimenting with different rice varieties and blends can also add unique flavor profiles to your homemade rice flour.

  • White Rice: This is a versatile option and widely used for making rice flour. It results in a neutral-flavored flour suitable for various recipes.
  • Brown Rice: Brown rice flour has a slightly nutty flavor and retains more nutrients compared to white rice flour. It adds a wholesome quality to baked goods.
  • Sweet Rice (Glutinous Rice): Despite the name, sweet rice flour is gluten-free. It has a sticky texture, making it suitable for recipes that require a chewy or stretchy consistency.
  • Basmati or Jasmine Rice: These aromatic rice varieties can be used to make fragrant rice flour, adding a subtle fragrance to your dishes.

What kind of grinder or blender should I use when making rice flour?

White rice in a spice grinder to make rice flour.

When making rice flour at home, the choice of grinder can significantly impact the texture of the flour. Here are two common types of grinders you can use:

  • Spice Grinder:
    • This is a dedicated grinder designed for spices and small quantities of dry ingredients. Additionally, a dedicated coffee grinder works well for making rice flour in small batches. Ensure the grinder is clean and dry before use.
  • Blender or Food Processor:
    • If you don't have a spice grinder, a high-quality blender or food processor can also be used. Break down the rice into smaller batches and pulse until you achieve a fine rice powder. This method is suitable for larger quantities.

Tips for Choosing:

  • Capacity: Consider the quantity of rice you plan to grind. Spice grinders are ideal for small amounts, while blenders or food processors can handle larger batches.
  • Texture Control: Spice grinders often provide better control over the texture, resulting in a finer flour. Blenders may require additional effort to achieve a similar consistency.
  • Cleanliness: Ensure the grinder or blender is thoroughly clean and dry before use to prevent any unwanted flavors or moisture from affecting the rice flour.

How do you make rice flour at home?

How to make rice flour in 4 steps.
  1. Place your chosen raw rice in the grinder, pulsing for around 15 seconds until you achieve a fine, flour-like consistency. Since most grinders can't handle a full 2 cups at once, work in smaller batches.
  2. For an extra smooth texture, consider sifting the flour to eliminate any lingering rice bits.
  3. Once done, store your freshly ground rice flour in an airtight container. Keep it in a cool, dry spot, and it should stay fresh for up to 5 months or even longer.

Should I soak rice before making flour?

I usually don't wash my rice before making rice flour for baking because the baking process ensures it is food-safe. However, if you prefer, you can rinse the rice well before making flour, ensuring it's fully dry. Some people soak rice before grinding to soften it, but when using a spice grinder, there's no need as the grinder handles the job efficiently.

Making homemade rice flour after soaking.

  1. Rinse the Rice:
    • If you prefer, rinse the rice under cold water to remove excess starch. This step is optional, especially if you're using white rice.
  2. Drain and Dry:
    • If you rinsed the rice, let it drain thoroughly. Spread the rice on a clean kitchen towel or paper towel to air-dry completely. It's crucial for the rice to be dry before grinding.
  3. Grind the Rice:
    • Use a high-quality spice grinder or a dedicated rice flour mill. Grind the dried rice in small batches to achieve a fine powder. The goal is to have a smooth and consistent texture.
  4. Sieve (Optional):
    • If you want an even finer flour, you can pass the ground rice through a fine mesh sieve to remove any larger particles.
  5. Store in an Airtight Container:
    • Transfer the freshly ground rice flour into a clean, dry, and airtight container. Label it with the date and type of rice used.

How to make rice flour without a grinder?

  1. Rinse and Dry (Optional):
    • Rinse the rice if desired, then let it dry completely.
  2. Blend in Batches:
    • Break down the rice into smaller batches. Place a portion in your blender or food processor.
    • Pulse in short bursts until you achieve a fine powder.
    • Be patient and scrape down the sides if needed.
  3. Sieve (Optional):
    • For a smoother texture, sift the ground rice through a fine mesh sieve.
  4. Combine and Store:
    • Combine all batches and store the rice flour in an airtight container, labeled with the date and rice type.

Can rice flour be made in a food processor?

Using a food processor is a convenient alternative to a spice grinder and works well, especially for larger quantities.

  1. Rinse and Dry (Optional): Rinse the rice if desired, then let it dry completely.
  2. Grind in Batches: Break down the rice into smaller batches and place them in the food processor.
  3. Pulse Until Fine: Pulse the rice in the food processor until it reaches a fine powder-like consistency. Be patient and scrape down the sides if needed.
  4. Sieve (Optional): For an even finer texture, you can sift the ground rice through a fine mesh sieve.
  5. Combine and Store: Combine all batches and store the rice flour in an airtight container, labeled with the date and type of rice used.

Storage Tips

A jar of rice flour next to a spoon and a wooden spoon.

Storing homemade rice flour properly is crucial to maintain its freshness and quality. By following these storage tips, you can keep your homemade rice flour fresh and ready for use in various recipes.

  • Airtight Container: Transfer the homemade rice flour to a clean, dry, and airtight container. Ensure that there is no moisture inside the container, as moisture can lead to spoilage and the development of mold.
  • Cool, Dark Place: Store the container in a cool, dark place, away from direct sunlight. Exposure to light and heat can affect the flavor and shelf life of the rice flour.
  • Labeling and Date: Always label the container with the type of rice flour and the date it was made. This makes it easier to keep track of freshness and ensures you use the oldest batch first.

Bonus Tip

Refrigeration Option: For longer shelf life, especially if you live in a humid environment, consider storing the rice flour in the refrigerator. The cool temperature helps prevent the flour from going rancid.

Rice Flour Recipes

  • Pound Cake
  • Buttery Mochi
  • Rice Flour Pancakes
  • Vegan Rice Balls
  • Vietnamese Fried Rice Cakes

Find the rest of the rice flour recipes in this article.

Frequently asked questions, answers and tips:

How much rice flour from 1 cup of rice?

The conversion from rice to rice flour depends on the type of rice you're using. As a general guideline:

White Rice: 1 cup of uncooked white rice yields approximately 1 ½ cups of rice flour.

Brown Rice: 1 cup of uncooked brown rice yields about 1 ¼ to 1 ⅓ cups of rice flour.

Keep in mind that these measurements are approximate, and the actual yield may vary based on factors like the variety of rice and how finely the rice flour is ground. It's always a good idea to measure and adjust based on your specific recipe needs.

Is rice flour just ground rice?

Yes, exactly! Rice flour is made by grinding rice into a fine powder. The process involves milling or grinding rice grains until they reach the desired consistency. Depending on the recipe and the type of rice used, the resulting rice flour can vary in texture and flavor.

There are different types of rice flour, including white rice flour, brown rice flour, and sweet rice flour (glutinous rice flour), each offering unique characteristics. White rice flour is commonly used in gluten-free baking, while brown rice flour retains more of the rice grain's natural nutrients and fiber. Sweet rice flour, despite its name, is gluten-free and is often used for its sticky texture in certain recipes.

Homemade White flour in a jar with a wooden spoon.

Homemade Rice Flour

Learn how to make rice flour at home with this easy step-by-step recipe.
No ratings yet
Print Pin Rate
Course: Ingredients
Cuisine: Asian
Keyword: Homemade Rice Flour
Prep Time: 2 minutes minutes
Grinding: 5 minutes minutes
Total Time: 7 minutes minutes
Servings: 3 cups
Calories: 450
Author: Sarah Mock

Ingredients

  • 2 Cups uncooked white rice
Follow Savoring The Good On PinterestFollow @SavoringTheGood or tag #STGRecipes!

Instructions

  • Place your chosen raw rice in the grinder, pulsing for around 15 seconds until you achieve a fine, flour-like consistency. Since most grinders can't handle a full 2 cups at once, work in smaller batches.
    2 Cups uncooked white rice
    White rice in a spice grinder to make rice flour.
  • For an extra smooth texture, consider sifting the flour to eliminate any lingering rice bits.
    How to make rice flour in 4 steps.
  • Once done, store your freshly ground rice flour in an airtight container. Keep it in a cool, dry spot, and it should stay fresh for up to 5 months or even longer.
    White rice flour in a glass jar next to a spoon and spoons.

Notes

The conversion from rice to rice flour depends on the type of rice you're using. As a general guideline:
White Rice: 1 cup of uncooked white rice yields approximately 1 ½ cups of rice flour.
Brown Rice: 1 cup of uncooked brown rice yields about 1 ¼ to 1 ⅓ cups of rice flour.
Keep in mind that these measurements are approximate, and the actual yield may vary based on factors like the variety of rice and how finely the rice flour is ground. It's always a good idea to measure and adjust based on your specific recipe needs.
Want to share when you made this recipe?Follow @SavoringTheGood & tag #STGRecipes!
Nutrition Facts
Homemade Rice Flour
Serving Size
 
1 cup
Amount per Serving
Calories
450
% Daily Value*
Fat
 
1
g
2
%
Saturated Fat
 
0.2
g
1
%
Polyunsaturated Fat
 
0.2
g
Monounsaturated Fat
 
0.3
g
Sodium
 
6
mg
0
%
Potassium
 
142
mg
4
%
Carbohydrates
 
99
g
33
%
Sugar
 
0.1
g
0
%
Protein
 
9
g
18
%
* Percent Daily Values are based on a 2000 calorie diet.
**Nutritional facts are just estimates. Please utilize your own brand nutritional values to double check against our estimates.
Like this recipe card? Want one for your site?Check out WP Recipe Maker!

Sarah Mock of savoringthegood.com headshot 2022

I am Sarah Mock. Welcome!

Sarah Mock is a classically trained Chef and graduate of Johnson & Wales University. A culinary blogger for 16 years Sarah helps the home cook prepare her recipes with professional results.

Get to know me

as seen in:

Logos of Hersheyland, ABC News, and Good Day PA are showcased in a seamless row, providing a snapshot of popular brands.

Hersheyland Nightline Good Day Pa!

The vibrant design showcases the iconic logos of Pinterest, Rachael Ray, and Jell-O set against a bold red background. Sorry, the provided description doesn't offer enough detail to suggest important SEO keywords.

Pinterest Rachael JELL-O

Recipes That Use Rice Flour

A stack of lemon muffins made with a rice flour recipe on a plate next to a cup of tea.

Rice flour, a versatile and gluten-free alternative to traditional wheat flour, is a light and powdery substance derived from finely milled rice grains. It opens up possibilities for those with dietary restrictions or those simply seeking diverse and flavorful options in their cooking.

A stack of lemon muffins made with a rice flour recipe on a plate next to a cup of tea.

Rice flour's neutral taste and smooth texture make it an ideal ingredient for an array of delectable recipes, from crispy snacks and tender desserts to savory main courses.

Pound Cake

This cake brings together the richness of butter, the lightness of rice flour, and the sweetness of sugar for a delicious treat.

Get The Recipe

Buttery Mochi

If you like mochi, you'll appreciate the fusion of rice flour, coconut milk, and butter, which results in a unique and indulgent dessert.

Get The Recipe

Light and Fluffy Rice Flour Pancakes

You'll get to enjoy a stack of fluffy pancakes that can be generously drizzled with maple syrup for a sweet touch with this recipe.

Get The Recipe

Vietnamese Fried Rice Cakes

By using rice flour, this Vietnamese street food delicacy achieves a crispy and chewy texture that gives it authentic textures and flavors.

Get The Recipe

Vegan Rice Balls

Prepare these flavorful vegan balls and relish their soft and chewy texture in every bite.

Get The Recipe

Steamed Rice Noodle Rolls

This Vietnamese recipe shows you how to prepare rice noodle rolls, highlighting the importance of using rice flour to achieve the authentic texture.

Get The Recipe

Gluten Free Crispy Rice Chips

Made from a simple blend of rice flour, cornstarch, and potato starch, they're gluten-free, light, crunchy, and seasoned to perfection.

Get The Recipe

Filipino Coconut Mochi Fritters

The preparation involves combining glutinous rice flour with coconut milk to create a batter that is then shaped into balls and deep-fried to a golden brown perfection. Finally, these treats are coated with a sweet coconut caramel sauce.

Get The Recipe

Gluten Free Blueberry Muffins

This muffin recipe is a deliciously different experience that has the goodness of blueberries with the wholesome texture of rice.

Get The Recipe

Chocolate Chip Cookies

By incorporating rice flour into the mix, these cookies not only cater to dietary restrictions but also boast a unique texture and flavor that sets them apart from traditional recipes.

Get The Recipe

Almond Shortbread Cookies

This recipe promises to deliver a batch of shortbread cookies that not only satiates your sweet cravings but also showcases the perfect fusion of nutty and citrus notes within its delectable batter.

Bibingka

Get The Recipe

Bánh Xèo

Impress your taste buds and guests alike with the vibrant and authentic flavors of banh xeo, featuring the essential element of bean sprouts for that perfect crunch and freshness.

Get The Recipe

Brown Rice Flour Brownies

This gluten-free brownie recipe, featuring a perfect balance of ingredients, ensures a moist and fudgy texture that satisfies your sweet cravings.

Get The Recipe

Moist Carrot Cake

What makes this cake recipe appealing is its moist and fluffy texture. The grated carrots and crushed pineapple make each bite incredibly soft and tender.

Get The Recipe

Coconut and Banana Bread

Enjoy a tropical twist with this coconut and banana bread. The bananas boosts the moisture content, and the coconut flakes give a pleasant feel to the bread.

Coconut Rice Cakes

The jasmine rice, known for its fragrant and slightly sticky nature, contributes to a gummy yet tender consistency in these rice cakes, while the shredded coconut adds a layer of crunchiness.

Get The Recipe

Cinnamon Sugar Cookies

These sugar cookies strike a lovely balance between soft and crumbly and make them a perfect treat for those who appreciate a more intricate texture in their baked goods.

Get The Recipe

Chocolate Cake

The cocoa used in this gluten free chocolate cake recipe contributes a robust and velvety essence, creating a decadent dessert that mirrors the best traditional chocolate cakes.

Get The Recipe

Waffles

The texture of these waffles is notably crisp on the outside, giving way to a light and airy interior.

Get The Recipe

Sesame Scallion Bread

Imagine the sesame seeds and scallions infusing every layer of your favorite sandwich, adding depth and character to each bite.

Get The Recipe

Zucchini Bread

Get The Recipe

Tortillas

The rice flour introduces a distinct yet mild flavor that goes well with various fillings, making them a versatile choice if you're craving for something sweet and savory.

Get The Recipe

Snickerdoodles Cookies

The rice flour and other gluten-free ingredients give these cookies delicate and melt-in-your-mouth goodness.

Get The Recipe

Chiffon Cake

Rice flour provides a subtle nuttiness and a slightly gummy texture to the cake, setting it apart from more common wheat flour-based cakes.

Get The Recipe

Flatbread

In terms of taste, the flatbread boasts a mild, slightly nutty flavor from the gluten-free rice flour to create an ideal canvas for various toppings and accompaniments.

Get The Recipe

Pizza Dough

The gluten-free rice flour pizza dough offers a tasty and inclusive alternative for pizza lovers who seek a crust free from gluten.

Get The Recipe

Lemon Cake

The key ingredients in this recipe for gluten free lemon cake include almond flour, sweet rice flour, and potato starch, providing an alternative that doesn't compromise on taste or texture.

Fruit and Nut Cake

This cake will let you savor a rich, moist texture with a hint of nuttiness from the red rice flour and crunchiness from the nuts.

Get The Recipe

Mug Cake

Made with rice flour, baking flour, butter, milk, sugar, and vanilla extract, this mug cake is a convenient and tasty gluten-free dessert option that uses a simple method for a quick and satisfying sweet indulgence.

Get The Recipe

Porridge

You can tailor the flavor of this porridge to your liking by adding a variety of toppings such as fresh fruits, nuts, seeds, or a drizzle of honey.

Get The Recipe

Jam Cookies

The white rice flour contributes a light and delicate quality to the cookies, making them crumbly and melt-in-your-mouth tender.

Get The Recipe

Lentil and Chickpea Meatloaf

One of the rice flour recipes that stand out in this list is this lentil and chicken meatloaf. The spiciness and earthiness of the ingredients impart richness to the meatloaf.

Get The Recipe

Matcha Steamed Buns

When these matcha steamed buns are steamed to perfection, they yield a soft and pillowy texture with a subtle hint of matcha flavor in every bite.

Get The Recipe

Peach Mochi

Whether you're a connoisseur of Japanese-inspired sweets or simply someone with a sweet tooth, this peach mochi is a must-try, thanks to the perfect fusion of simple rice flour elegance and the lusciousness of ripe peaches.

Get The Recipe

Cookie Dough Truffles

With gluten-free flour made from rice flour, potato starch, and tapioca flour, the recipe carries a sweet and buttery flavor, reminiscent of homemade chocolate chip cookie batter.

Get The Recipe

Chinese Dessert Soup with Glutinous Rice Balls

The sugar and rock sugar in the soup provides a sweet undertone. The soup may also include various ingredients such as red beans, which levels up the flavor.

Get The Recipe

Mochiko Chicken

The taste of mochiko chicken can be described as a blend of savory and slightly sweet flavors. The sweet rice flour adds a pleasant sweetness and contributes to the irresistibly crispy coating that envelops each piece of chicken.

Get The Recipe

Yeast Bread

This dairy free and FODMAP friendly bread allows you to control the ingredients, ensuring no hidden additives, and often results in a fresher, tastier loaf.

Baked Apple Fritters

Baking instead of frying is a positive aspect of these fritters. They are also simple to make and uses fresh apples for natural sweetness and moisture.

Get The Recipe

Donuts

Incorporating ingredients like coconut flour, these donuts can be paired with many toppings.

Get The Recipe

Momos

The taste of these momos is distinct because of the use of rice flour for the dough, adding more flavor and textue to the fillings.

FAQ's and Tips

What are the pros and cons of rice flour?

Rice flour is a versatile ingredient with its own set of pros and cons. It's important to consider these aspects based on your specific dietary needs and the type of recipe you're working on.

Pros:

  • Gluten-Free: Rice flour is naturally gluten-free, making it an excellent choice for those with gluten sensitivity or celiac disease.
  • Easy Digestibility: It's easy on the digestive system and is often recommended for individuals with digestive issues.
  • Nutrient Content: While not as rich as whole-grain flours, rice flour contains some essential nutrients, including minerals like manganese and magnesium.
  • Light Texture: It imparts a light and tender texture to baked goods, making it suitable for various recipes.
  • Versatility: Rice flour can be used in both sweet and savory dishes, from baking to thickening sauces and coatings.

Cons:

  • Lack of Gluten: The absence of gluten can be a drawback in certain recipes that require the stretchiness and structure provided by gluten-containing flour.
  • Nutrient Comparison: Compared to whole-grain flours, rice flour might have a lower nutritional profile, as it lacks the bran and germ found in whole grains.
  • Potential for Grittiness: In some recipes, especially if not finely ground, rice flour can result in a slightly gritty texture.
  • Shorter Shelf Life: Due to the absence of oils found in whole grains, rice flour may have a shorter shelf life and can turn rancid if not stored properly.
  • Pecan halves spread out on a metal baking sheet, some pieces slightly broken, ready for roasting or baking.
    How To Roast Pecans (Oven or Skillet)
  • A knife slices into a roasted turkey breast garnished with herbs, displayed on a white platter with sprigs of rosemary on a wooden table.
    What to Serve with Turkey (Best Side Dishes)
  • Sliced roasted turkey breast arranged on a white cutting board, with a larger unsliced portion visible in the background.
    How to Carve a Turkey Breast
  • Ricotta and Cottage Cheese Stuffed Shells


Sarah Mock of savoringthegood.com headshot 2022

I am Sarah Mock. Welcome!

Sarah Mock is a classically trained Chef and graduate of Johnson & Wales University. A culinary blogger for 15 years Sarah helps the home cook prepare her recipes with professional results.

Get to know me

as seen in:

Logos of Hersheyland, ABC News, and Good Day PA are showcased in a seamless row, providing a snapshot of popular brands.

Hersheyland Nightline Good Day Pa!

The vibrant design showcases the iconic logos of Pinterest, Rachael Ray, and Jell-O set against a bold red background. Sorry, the provided description doesn't offer enough detail to suggest important SEO keywords.

Pinterest Rachael JELL-O

Alternative to Aluminum Foil

A person holding a roll of aluminum foil on a green background.

Aluminum foil is what I use to line baking sheets, cover dishes in the oven, and wrap food for cooking or storage. I use aluminum foil because it is convenient and inexpensive, but there are plenty of times when I want to use less of it or need a quick substitute.

A person holding a roll of aluminum foil on a green background.

The good news is that many kitchen tools can replace aluminum foil depending on how you plan to cook. Reusable options like silicone baking mats, glass containers, and ceramic dishes can often do the same job while reducing waste.

Below are some of the best alternatives I have found to aluminum foil, and when to use them.

Quick Answer: Best Alternatives to Aluminum Foil

If you need a quick replacement for aluminum foil, the best options are silicone baking mats for lining baking sheets, parchment paper for baking or roasting, and glass or ceramic dishes with lids for covering food in the oven. For food storage, beeswax wraps and reusable containers work well.

Best Aluminum Foil Alternatives

AlternativeBest ForReusableHeat Safe
Silicone baking matsLining baking sheets, roasting vegetablesYesYes
Parchment paperBaking, roasting, air fryer cookingNoYes
Beeswax wrapsCovering bowls, wrapping sandwichesYesNo
Glass containersStoring and reheating foodYesYes
Ceramic dishesBaking casseroles and roasting foodYesYes
Stainless steel containersStorage and reheatingYesYes
Grill baskets or cast ironGrilling vegetables or seafoodYesYes
Fabric bowl coversCovering containers for storageYesNo

Common Ways Aluminum Foil Is Used (and What to Use Instead)

Many people use foil in the kitchen for very specific tasks. Fortunately, most of these jobs can be done using other kitchen tools.

Lining Baking Sheets

Aluminum foil is often used to line baking sheets for easier cleanup. Instead of foil, you can use:

  • Silicone baking mats
  • Parchment paper

Both options create a non-stick surface and help prevent food from sticking to the pan.

Covering Dishes in the Oven

Foil is commonly used to cover casseroles or baking dishes while they cook.

Alternatives include:

  • A lid from a pot or Dutch oven
  • A baking sheet placed over the dish
  • Oven-safe glass lids
  • A parchment paper tent

These methods help trap heat and moisture while the food cooks.

Grilling Food

Foil packets are often used to cook vegetables or seafood on the grill. Instead of foil, you can use:

  • Cast iron skillets
  • Grill baskets
  • Roasting pans
  • Direct grilling on the grates for larger foods

These tools keep small foods from falling through the grill grates while allowing them to cook over high heat.

Steaming Food

Foil packets are sometimes used to steam food. Instead, you can use:

  • Bamboo steamers
  • Stainless steel steamer baskets
  • Covered oven-safe dishes
  • Parchment paper packets

These methods allow steam to circulate around the food while keeping it moist.

Reusable Alternatives to Aluminum Foil

Reusable kitchen tools can replace foil in many situations and often work just as well.

Silicone Baking Mats Instead of Aluminum Foil

A tray of red, white and blue swirl cookies on a silicone baking sheet.

Silicone baking mats are one of the most useful reusable alternatives to aluminum foil when baking. These mats are made of food-grade silicone and sit directly on a baking sheet to create a non-stick surface.

Silicone baking mats work well for:

  • Baking cookies and pastries
  • Roasting vegetables
  • Cooking sticky foods
  • Lining sheet pans for easy cleanup

Some common types include full-size baking sheet mats, toaster oven mats, and non-stick baking mats. With proper care, silicone mats can last for years and can be reused many times. I still have the Silpat mat I bought in college!

Beeswax Food Wraps: A Natural Alternative

Beeswax wraps are a reusable alternative to foil or plastic wrap for covering food and containers. These wraps are made from cotton coated with beeswax and tree resin.

The warmth of your hands softens the wax so the wrap molds around bowls, containers, or food.

Beeswax wraps can be used to:

  • Cover bowls or containers
  • Wrap sandwiches or cheese
  • Store fruits and vegetables

Because they can be washed and reused, beeswax wraps are a practical option for reducing single-use kitchen materials.

Reusable Plastic Containers

A set of clear plastic food storage containers filled with vegetables.

Plastic containers are another common option for storing food instead of wrapping it in foil. They are available in many shapes and sizes and are often used for leftovers or meal prep.

If you use reusable plastic containers, choose food-safe containers labeled for storage or reheating. Avoid heating plastics that are not marked microwave-safe.

Glass Containers

Glass containers are a versatile alternative to aluminum foil for storing or reheating food.

They come in a variety of shapes and sizes and can often move directly from the refrigerator to the oven or microwave.

Glass containers are useful for:

  • Storing leftovers
  • Reheating meals
  • Covering casseroles or baked dishes
  • Meal prep storage

Many containers are made from tempered or borosilicate glass, which can withstand heat and sudden temperature changes.

When using glass containers in the oven, placing them on a baking sheet can help prevent cracking.

Ceramic Dishes Instead of Aluminum Foil

Ceramic baking dishes can replace foil when roasting or baking food in the oven. Many ceramic dishes come with lids, eliminating the need to cover food with foil during cooking.

Ceramic dishes are often made from materials like stoneware or porcelain. These materials are fired at high temperatures, making them durable and resistant to cracking.

They are commonly used for:

  • Casseroles
  • Roasted vegetables
  • Baked pasta dishes
  • Covered oven cooking

Many ceramic dishes are also dishwasher safe and easy to clean.

Stainless Steel Containers

Three stainless steel pots on a stove top.

Stainless steel containers are durable and long-lasting alternatives to aluminum foil for cooking and storing food.

One advantage of stainless steel is its resistance to corrosion. Unlike aluminum, which can react with acidic foods, stainless steel handles ingredients like tomatoes, citrus, and vinegar without affecting the flavor.

Stainless steel containers can be used for:

  • Food storage
  • Reheating meals
  • Cooking acidic foods

They are also highly recyclable and can last for many years in the kitchen.

Fabric Covers

Fabric bowl covers are another reusable alternative for covering food containers. They are washable, reusable, and come in a variety of sizes to fit bowls and dishes.

Fabric covers are useful for:

  • Covering bowls during food storage
  • Protecting leftovers in the refrigerator
  • Replacing plastic wrap or foil

Many are made from cotton or linen and can withstand repeated washing.

Disposable Alternatives to Aluminum Foil

Some alternatives to foil are single-use but still useful in certain situations.

Parchment Paper Instead of Aluminum Foil

Parchment paper is one of the most common substitutes for aluminum foil when baking. It creates a non-stick barrier between the pan and the food and can also be used to wrap foods for roasting or steaming.

Parchment paper is commonly used for:

  • Lining baking sheets
  • Baking cookies and pastries
  • Wrapping food for roasting or steaming
  • Air fryer cooking

Many types of parchment paper are compostable, especially unbleached parchment.

Can You Use Parchment Paper in an Air Fryer?

Yes, parchment paper can be used in an air fryer as long as it is properly sized.
Make sure the parchment paper:

Fits inside the basket.
Does not cover the air fryer's ventilation holes.
Is weighed down with food so it does not move during cooking.

This helps maintain airflow, which is essential for air fryer cooking.

When Aluminum Foil Is Still Useful

While many tools can replace aluminum foil, there are still a few situations where foil is convenient.

Aluminum foil is commonly used for:

  • Campfire cooking
  • Wrapping tightly sealed cooking packets
  • Protecting pie crust edges during baking
  • Covering oddly shaped dishes without lids

In these cases, foil may still be the most practical option.


Sarah Mock of savoringthegood.com headshot 2022

I am Sarah Mock. Welcome!

Sarah Mock is a classically trained Chef and a graduate of Johnson & Wales University. A culinary blogger for 17 years, Sarah helps the home cook prepare her recipes with professional results.

Get to know me

as seen in:

Logos of Hersheyland, ABC News, and Good Day PA are showcased in a seamless row, providing a snapshot of popular brands.

Hersheyland Nightline Good Day Pa!

The vibrant design showcases the iconic logos of Pinterest, Rachael Ray, and Jell-O set against a bold red background. Sorry, the provided description doesn't offer enough detail to suggest important SEO keywords.

Pinterest Rachael JELL-O

Prosciutto and Cantaloupe (Melon with Prosciutto Skewers)

A person is holding melon wrapped in prosciutto.

Cantaloupe and prosciutto, a timeless culinary pairing originating from Italian traditions, offer a marriage of sweet and salty, savory flavors.

A person is holding melon wrapped in prosciutto.

These melon with prosciutto skewers are a fun alternative to prosciutto wrapped melon. No need for a knife and fork! Be sure to add them to your list of easy appetizers along with cream cheese sausage balls, turkey sliders, and my mom's pineapple cheeseball.

Why You Will Love This Recipe For Cantaloupe Melon and Prosciutto

  • Perfect Flavor Harmony: The marriage of sweet, juicy cantaloupe with the savory, salty richness of prosciutto creates an exquisite flavor harmony. The contrasting tastes blend together beautifully, offering a delightful balance of sweet and savory in each bite.
  • Simple yet Elegant Appetizer: This easy summer appetizer requires minimal ingredients and effort. Yet, when presented, the visual appeal is stunning. The elegant pairing of prosciutto-wrapped cantaloupe is not only delicious but also makes for an impressive and sophisticated appetizer for any occasion.
  • Textural Pleasure: The contrasting textures of the tender, juicy cantaloupe and the delicate, thinly sliced prosciutto provide a delightful sensation in your mouth. The softness of the melon combined with the slightly chewy yet tender prosciutto offers a pleasing textural experience.
  • Versatility and Adaptability: While the classic combination involves wrapping prosciutto around cantaloupe balls, this recipe is highly adaptable. You can experiment by varying the presentation-slicing the cantaloupe and layering it with prosciutto, creating skewers, or even incorporating other complementary ingredients to customize the dish to your taste preferences.

Ingredients For Prosciutto e Melone

Prosciutto vs melon - the difference between prosciutto and melon.

Recipe Card?

To find the full printable recipe with specific measurements and directions CLICK HERE to go to the recipe card.

How to make Prosciutto and Melon Appetizer

The classic Italian pairing of prosciutto and melon is the perfect summer appetizer is a delicious balance of sweet and salty. Wouldn't marinated mozzarella balls pair so beautifully with this recipe?

How to cut a cantaloupe for Prosciutto vs melon - the difference between prosciutto and melon.
  1. Prepare the Cantaloupe: Begin by slicing the melon in half and removing the seeds. Use a melon baller to create uniformly sized round balls. 
    Sliced ham and melon on a wooden table.
  2. Slice the Prosciutto: Cut the Prosciutto slices in half. Then, take each piece of prosciutto and fold it accordion-style, forming a decorative bow-like pattern. 
    A bowl of melon balls with procuitto on a wooden table.
  3. Assemble the Bites: Start by skewering a cantaloupe ball onto a skewer. Carefully thread the folded prosciutto onto the skewer, positioning it beside the cantaloupe. Add a second cantaloupe ball.
    A person holding a piece of melon and procuitto on a skewer.

Can I use other types of melon?

While cantaloupe and honeydew are the most commonly used melons when pairing with prosciutto, you can certainly explore other types of melons to create unique flavors.

Two halves of a cantaloupe on a wooden surface.

When experimenting with different melon varieties, consider their sweetness, juiciness, and overall flavor profile. The goal is to find a melon that complements the saltiness of the prosciutto and creates a pleasing balance of flavors.

Here are a few other melon varieties you might consider:

  • Watermelon: Its sweet, juicy nature contrasts nicely with the saltiness of the ham.
  • Crenshaw Melon: This melon has a sweet and slightly spicy flavor. Its smooth, pale flesh can make for an interesting pairing with prosciutto due to its unique taste.
  • Galia Melon: Galia melon can offer a slightly different twist to the traditional prosciutto-melon pairing.
  • Charentais Melon: Known for its sweet and floral taste, Charentais melon can be an excellent choice to accompany prosciutto. Its vibrant orange flesh and fragrant aroma make it an appealing option.

How thin should the slices of prosciutto be?

When preparing prosciutto for pairing with melon or for other recipes, aim for slices that are almost translucent, about 1 to 2 millimeters thick. When purchasing prosciutto, you can request thin slices from the deli counter if you're not slicing it yourself.

Using a VERY sharp knife or a meat slicer can help achieve the desired thinness. Aim for slices that are thin enough to be easily manipulated but not so thin that they tear or become too fragile to handle.

What can I use in place of prosciutto?

When substituting for Italian prosciutto, consider the flavor profile and texture of the alternative to ensure it complements the other ingredients in your dish.

Prosciutto and Cantaloupe on a serving board.

Each substitute may bring its own unique taste, so it's worth experimenting to find the best fit for your specific recipe or dietary preferences.

If you're looking for alternatives to prosciutto for a dish, there are several options that can provide similar flavors or textures. Here are some alternatives to consider:

  • Serrano Ham: a dry-cured Spanish ham with a slightly different flavor profile. It's typically less expensive than prosciutto and has a savory, salty taste. Serrano ham can be sliced thinly and used as a substitute in recipes where prosciutto is called for.
  • Coppa (Capicola): also known as capicola, is another cured pork product with a rich flavor. It's made from the neck or shoulder of the pig and offers a slightly different taste compared to prosciutto.
  • Bresaola: This air-dried, salted beef offers a leaner option compared to prosciutto. It has a rich, slightly sweet flavor and works well in recipes where a cured meat is required.
  • Smoked Salmon: While not similar in taste to prosciutto, smoked salmon offers a flavorful alternative, especially in dishes where a delicate, smoky taste is desired. 
  • Vegetarian Options: For those seeking vegetarian or vegan alternatives, thinly sliced roasted vegetables (like zucchini or eggplant), marinated tofu, or even strips of nori (seaweed) can be used creatively to mimic the texture and appearance of prosciutto in certain dishes.

Additional Flavors To Add To Prosciutto e Melon

cantaloupe balls wrapped with ham and rosemary on a wooden cutting board.

While the classic combination of salty prosciutto and melon is delightful on its own, adding additional flavors can further elevate this appetizer. Here are a few complementary ingredients to consider incorporating with Prosciutto e Melon:

  • Balsamic Glaze or Reduction: A drizzle with balsamic glaze or a balsamic reduction over the prosciutto-wrapped melon can introduce a sweet and tangy contrast to the prosciutto and melon recipe.
  • Fresh Herbs: Adding a touch of fresh herbs like fresh basil, mint, or thyme can bring a burst of freshness and aromatic notes to the dish. Garnishing with finely chopped herbs or whole leaves can add visual appeal and a hint of herbaceousness.
  • Cheese: Pairing prosciutto and melon with a mild, creamy cheese such as mozzarella, burrata, or goat cheese can introduce creaminess and additional depth of flavor to the ensemble.
  • Citrus Zest or Segments: Adding a sprinkle of citrus zest (lemon, lime, or orange) or small segments of citrus fruits can provide a zesty and refreshing contrast to the dish.
  • Arugula or Greens: Placing a small bed of fresh arugula or other peppery greens underneath the prosciutto-wrapped melon can add a layer of texture and a slightly bitter contrast that complements the dish.

These additional flavors can be used individually or combined creatively to customize the Prosciutto e Melone recipe according to your preferences, adding depth, complexity, and an exciting twist to this classic Italian appetizer.

How To Make a Balsamic Glaze:

This homemade balsamic glaze is versatile and can be drizzled over various dishes, including salads, roasted vegetables, meats, or used as a finishing touch on appetizers like Prosciutto e Melon.

Ingredients:

  • 1 cup balsamic vinegar
  • 2 tablespoons honey or brown sugar (optional for added sweetness)
  1. Pour balsamic vinegar into a saucepan over medium heat.
  2. Stir in honey or brown sugar (if using) until dissolved.
  3. Bring to a gentle boil, then simmer for 10-15 minutes until reduced by half, stirring occasionally to prevent sticking.
  4. Remove from heat when it thickens to a syrupy consistency that coats the back of a spoon. Cool slightly before storing or using.

FAQ's and Tips

What fruit goes well with prosciutto?

Prosciutto pairs exceptionally well with various fruits due to its savory, salty flavor profile. When combined, they create a harmonious blend of flavors that elevate the taste of the prosciutto, making it an ideal appetizer or part of a charcuterie board.

Some fruits that complement prosciutto beautifully include:

  • Melon: Cantaloupe and honeydew melon are classic choices. Their subtle sweetness contrasts superbly with the saltiness of prosciutto, creating a delightful balance of flavors.
  • Fig: Fresh figs or figs drizzled with a bit of honey can bring a sweet and slightly earthy note that complements the richness of prosciutto.
  • Pear: Slices of ripe pear offer a juicy and slightly sweet taste that contrasts well with the saltiness of prosciutto. The combination of textures is also appealing.
  • Peach: Ripe, juicy peaches provide a lovely sweetness that pairs nicely with prosciutto. The soft texture of the peach contrasts with the cured meat.
  • Pineapple: The tangy sweetness of pineapple can balance the saltiness of prosciutto, creating a refreshing and flavorful combination.
  • Apple: Crisp apple slices, especially varieties like Granny Smith or Honeycrisp, offer a sweet-tart flavor that complements the savory prosciutto.

Why do people eat prosciutto with melon?

The combination of prosciutto and melon is a traditional Italian pairing that has been enjoyed for generations The classic pairing of prosciutto with melon lies in the delightful interplay between the sweet, juicy fruit and the savory, salty cured ham, creating a delicious and refreshing flavor experience that has stood the test of time. 

In Italy, this combination is particularly popular during the summer months when melons are at their peak ripeness. The refreshing nature of the fruit complements the lighter appetite during warmer weather. 

It's often served as an antipasto (appetizer) or as part of a larger antipasti spread. The simplicity of this combination allows the quality of the ingredients to shine.

What is prosciutto?

Prosciutto is a type of Italian dry-cured ham that is renowned for its delicate flavor and smooth texture. It's made from the hind leg or thigh of a pig, specifically the pork leg.

The traditional process of making prosciutto involves curing the meat with salt and then air-drying it for an extended period, which can range from several months to a few years depending on the specific variety and producer.

Prosciutto is typically sliced thinly and served uncooked, making it a popular ingredient in antipasti, charcuterie boards, sandwiches, salads, and various appetizers.

A person is holding melon wrapped in prosciutto.

Prosciutto and Cantaloupe

The classic Italian pairing of prosciutto and melon is the perfect summer appetizer is a delicious balance of sweet and salty.
No ratings yet
Print Pin Rate
Course: Appetizer
Cuisine: Italian
Keyword: Prosciutto and Cantaloupe
Prep Time: 10 minutes minutes
Cook Time: 0 minutes minutes
Total Time: 10 minutes minutes
Servings: 24 skewers
Calories: 25
Author: Sarah Mock

Ingredients

  • 1 Cantaloupe
  • 12 slices Prosciutto paper thin.
Follow Savoring The Good On PinterestFollow @SavoringTheGood or tag #STGRecipes!

Instructions

Prepare the Cantaloupe:

  • Cut the cantaloupe in half and remove the seeds. Using a melon baller, scoop out round balls of cantaloupe. Ensure the balls are uniform in size for a pleasing presentation.
    1 Cantaloupe
    How to cut a cantaloupe for Prosciutto vs melon - the difference between prosciutto and melon.

Slice the Prosciutto:

  • Cut the prosciutto slices in half. Then take a strip of prosciutto and fold it accordion-style, creating a bow-like pattern. This folding technique adds texture and visual appeal to the appetizer.
    12 slices Prosciutto
    Sliced ham and melon on a wooden table.

Assemble the Bites:

  • Skewer a cantaloupe ball with a skewer, then carefully thread the folded prosciutto onto the skewer, placing it next to the cantaloupe. The prosciutto should sit nicely against the cantaloupe ball, showcasing the bow pattern.
    A bowl of melon balls with procuitto on a wooden table.
  • Arrange the skewers on a platter. You can stand them up by sticking the skewers into a half cantaloupe base or lay them down elegantly on a serving tray.
    cantaloupe balls wrapped with ham and rosemary on a wooden cutting board.

Notes

These bites are best served chilled. You can refrigerate them for about 30 minutes before serving to enhance their flavor and freshness.
Want to share when you made this recipe?Follow @SavoringTheGood & tag #STGRecipes!
Nutrition Facts
Prosciutto and Cantaloupe
Serving Size
 
2
Amount per Serving
Calories
25
% Daily Value*
Fat
 
2
g
3
%
Saturated Fat
 
1
g
6
%
Trans Fat
 
0.01
g
Polyunsaturated Fat
 
0.3
g
Monounsaturated Fat
 
1
g
Cholesterol
 
3
mg
1
%
Sodium
 
33
mg
1
%
Potassium
 
44
mg
1
%
Carbohydrates
 
2
g
1
%
Sugar
 
2
g
2
%
Protein
 
1
g
2
%
* Percent Daily Values are based on a 2000 calorie diet.
**Nutritional facts are just estimates. Please utilize your own brand nutritional values to double check against our estimates.
Like this recipe card? Want one for your site?Check out WP Recipe Maker!

Sarah Mock of savoringthegood.com headshot 2022

I am Sarah Mock. Welcome!

Sarah Mock is a classically trained Chef and graduate of Johnson & Wales University. A culinary blogger for 15 years Sarah helps the home cook prepare her recipes with professional results.

Get to know me

Different Types Of Spatulas and Their Uses

Three wooden kitchen utensils on a wooden table.

As someone who has spent a lot of time in the kitchen, I can confidently say that spatulas are one of the most versatile kitchen tools you can have. They come in a variety of materials and designs, each with its own unique benefits. 

Three wooden kitchen utensils on a wooden table.

Spatulas can be made from a variety of materials, each with its own set of advantages and disadvantages.

Here are some of the most common material-based classifications:

  • Silicone spatulas: made from a heat-resistant, non-stick material that is perfect for use with delicate foods. They are also easy to clean every last bit from the mixing bowl and come in a variety of shapes and sizes, making them a popular choice for home cooks and professional chefs alike.
  • Metal spatulas: durable, heat-resistant, and come in a variety of shapes and sizes. They are perfect for use with heavy foods like meat and vegetables, but can also be used for delicate tasks like pancakes or crepes.
  • Kitchen spatulas: are typically made from plastic or nylon and are designed for general use in the kitchen. They are often used for mixing, stirring, as a scraper, and are typically heat-resistant and dishwasher-safe.

Design Variations

Spatulas are an essential tool in any kitchen, and choosing the right type can make all the difference. By understanding the different material-based classifications and design variations, you can select the perfect spatula for your needs.

  • Turner spatulas: the most traditional type and are perfect for flipping and turning food items in a pan. They have a long, narrow, and tapered blade that easily slides under fragile and hefty foods without causing them to fall apart.
  • Fish spatulas: a type of metal spatula that can be used to turn not only fish but also meat. They have a strong, rigid, flexible, and thin blade, making them perfect for flipping in tricky situations.
  • Flat spatulas: designed for spreading icing or other toppings on cakes and other baked goods. They typically have a long, flat blade that is perfect for smoothing and spreading.

Cake Spatula

Cake spatulas are long and flat, with a slightly curved edge. They are made of metal or plastic and are used for spreading batter evenly in cake pans or for transferring cakes from the pan to a cooling rack.

Frosting Spatula

An offset spatula with a black handle on a white surface.

Icing spatulas, also known as frosting spatulas, are used for spreading frosting or icing on cakes and cupcakes. They come in different shapes and sizes, with the most common being the offset. The offset spatula has a bent handle that keeps the user's hand away from the finished product allowing for a smooth and even spread. 

BBQ Spatula

A metal spatula on a stove top.

BBQ spatulas, also known as grill spatulas, are designed for flipping and turning food on the grill. They are usually made of metal with a long wooden handle, allowing the user to keep their hands away from the heat. They come in different shapes and sizes, with some having a serrated edge for cutting through meat.

Specialized Spatulas

When it comes to cooking, having the right tools is essential. Spatulas are no exception. While most can be used for a variety of tasks, some are designed for specific purposes. 

Fish and Egg Spatulas

A stainless steel spatula on a white background.

Fish turners and egg spatulas are designed with a thin, flexible stainless steel blade that can easily slide under delicate foods without breaking them. The blade is typically wider, making it easier to flip larger items like fish fillets or omelets. They are also great for removing cookies from a baking sheet without damaging them.

Slotted and Pancake Spatulas

Slotted spatulas are designed with slots or holes in the blade. This allows excess liquid to drain away, making them ideal for flipping burgers or steaks. The openings also make it easier to remove food from a pan without taking excess oil or sauce with it.

Pancake spatulas are similar, but they are designed with a wider blade that is perfect for flipping flat foods. The wider blade also makes it easier to slide under larger items like quesadillas or grilled cheese sandwiches.

Selecting the Best Spatula

When it comes to selecting the right spatula, there are a few factors to consider. 

Purpose

Are you flipping flapjacks? Scrambling eggs? Sautéing vegetables? Each of these tasks requires a different type. As my Chef instructor would tell me: 'Use the right tool for the right job'.

Material

The material is another important factor to consider. There are several materials to choose from, including silicone, rubber, metal, and wood. Silicone and rubber are great for non-stick cookware, while metal is better for high-heat cooking. Wood spatulas are ideal for getting into the corners of pots.

Comfort

The comfort of the spatula is also an important consideration. Look for one with a comfortable grip that is easy to hold. 

Spatula Care and Maintenance

  • Clean after each use. Use warm, soapy water to clean the spatula, and dry it thoroughly.
  • Avoid using abrasive cleaners or scrubbers, as they can damage your tool.
  • Store your in a dry place, away from heat and moisture.
  • If dishwasher safe, you can clean it in the dishwasher. However, hand washing is always the best option.

By considering the purpose, material, and comfort of the spatula, and taking care of it properly, you can ensure that your spatula will serve you well for years to come.

Spatula vs Turner

A person is making a crepe on a frying pan.

The terms "spatula" and "turner" are often used interchangeably, but they refer to two different types of kitchen utensils. A spatula is a broad, flat utensil with a long handle, while a turner is a narrower, more tapered utensil that is used for turning food in a pan or on a griddle. When selecting a spatula or turner, consider the type of cooking you will be doing to determine which utensil is best for your needs.

Professional and Home Use

As a professional chef, I have used many different types of spatulas in my career. However, there are a few types that I would recommend for both professional and home use.

  • Baking Spatula: A baking spatula, also known as an offset spatula, is a must-have for any pastry chef or baker. This spatula has a long, narrow blade that is offset from the handle, which allows you to easily spread frosting, batter, or dough in a smooth and even layer. It is also great for lifting delicate pastries or cookies off of a baking sheet without damaging them.
  • Spatula Turner: A spatula turner, also known as a flipper or turner, is a versatile tool that every chef should have in their kit. It has a broad, flat blade that is perfect for turning food in a hot pan, such as eggs, or burgers. It is also great for transferring food from the pan to a plate or serving dish.

Best Practices for Home Cooks

  • Choose the Right Spatula: When selecting a spatula for home use, consider the type of cooking you will be doing. If you plan on doing a lot of baking, invest in a good quality baking spatula. If you plan on cooking a lot of meats or vegetables, a spatula turner is a great all-purpose tool to have.
  • Use the Right Technique: When using a spatula, it is important to use the right technique to avoid damaging your food or your cookware. When turning food in a pan, slide the spatula under the food and lift it up gently, rather than trying to scoop it up. This will help prevent the food from breaking apart or sticking to the pan.
  • Maintain Your Spatula: To keep your spatula in good condition, clean it after each use with warm, soapy water and a soft sponge. Avoid using abrasive cleaners or scrubbers, as these can damage the surface of your spatula. Store your spatula in a dry place to prevent rust or corrosion.

Frequently Asked Questions

What are the advantages of using a silicone spatula over other materials?

One of the most significant benefits of using silicone is that it is gentle on non-stick cookware. Silicone does not scratch or damage the surface of non-stick pans or bowls. Silicone is also heat-resistant, making it safe to use in high-temperature cooking and baking. 

How does a slotted spatula differ from a solid one in its use?

A slotted spatula has spaces or holes in the head, allowing liquids and oils to drain away from the food. This makes it ideal foods that release a lot of liquid, such as fish and vegetables. A solid spatula, on the other hand, is better suited for flipping and turning foods that are dry or have a minimal amount of liquid.

What characteristics should I look for in a spatula when cooking with non-stick pans?

When cooking with non-stick, it is essential to choose one that will not scratch or damage the surface. You're looking for a spatula with a soft, non-abrasive head, such as silicone or nylon. The spatula should also have a smooth edge to not scrape or scratching of the non-stick coating. Additionally, make sure the spatula is heat-resistant and can withstand high temperatures without melting or warping. A wooden spatula or rubber spatula is naturally non-slip.

What is the best type of spatula to use for flipping eggs without breaking them?

When it comes to turning eggs, a flexible spatula is the best choice. Look for a spatula with a thin, flexible head, such as a fish spatula.

How does an offset spatula enhance the decorating process in baking?

An offset spatula is a baking tool with a long, narrow blade that is angled at the handle. The offset design allows the spatula to reach into tight spaces and angles, making it easy to spread frosting and other toppings evenly. The blade is also thin and flexible, allowing for precise control when decorating cakes and other baked goods.


Sarah Mock of savoringthegood.com headshot 2022

I am Sarah Mock. Welcome!

Sarah Mock is a classically trained Chef and graduate of Johnson & Wales University. A culinary blogger for 16 years Sarah helps the home cook prepare her recipes with professional results.

Get to know me

as seen in:

Logos of Hersheyland, ABC News, and Good Day PA are showcased in a seamless row, providing a snapshot of popular brands.

Hersheyland Nightline Good Day Pa!

The vibrant design showcases the iconic logos of Pinterest, Rachael Ray, and Jell-O set against a bold red background. Sorry, the provided description doesn't offer enough detail to suggest important SEO keywords.

Pinterest Rachael JELL-O

Air Fry Broccolini

Broccoli in an air fryer on a marble countertop.

While roasted broccolini is great, air frying baby broccoli has won me over with its perfect crispy-to-tender texture and intensified flavors. My new favorite green veggie discovery has earned a permanent place on my regular side dish rotation!

Broccoli in an air fryer on a marble countertop.

I never knew much about broccolini, also known as "baby broccoli", until a side dish changed my perspective. While broccolini resembles its close relative broccoli, it has slim asparagus-like stalks and petite florets.

I had only ever seen broccolini roasted before. But my friend served broccolini roasted in an air fryer one night along with dinner, and it was oh so delicious - the high heat airflow delivered the vegetables extra crispy and caramelized on the outside while keeping them nice and tender inside.

Why you are going to love this easy air fryer recipe

  • It's Simple - With a short prep and cook time and only a handful of ingredients, it's ready in less than 20 minutes. Great for busy weeknights.
  • Veggies Crisp Up Perfectly - The hot air circulates all around to make the broccolini uniformly crispy on the outside while keeping the inside tender.
  • Nutrient Retention - Air frying uses less oil while the high heat also locks in nutrients better than other cooking methods.
  • Flavor Variations Galore - The basic recipe lets the broccolini flavor shine. But customizations like garlic, chili flakes, Parmesan or sesame seeds take it to the next level.

Ingredients Needed to Make Air Fryer Broccolini:

Air fryer broccolini ingredients olive oil, salt, and pepper in a bowl.

Recipe Card?

To find the full printable recipe with specific measurements and directions CLICK HERE to go to the recipe card.

Air Fryer Tip

Cut the broccolini into uniform pieces so that they cook evenly with the air flow in the air fryer basket.

How to make this air fryer broccolini recipe:

Ever since that revelation of broccolini in the air fryer, I now often whip up a batch myself as an easy, tasty side for weeknight meals. It fills the house with amazing aromas of roasted veggies too! The prep work is minimal - just wash the broccolini, trim the ends, toss with a touch of oil and seasonings, then set the air fryer timer.

  1. Preheat Air fryer to 375°F.
  2. Wash broccolini thoroughly and drain well.
  3. Trim leaves from stems and cut off the bottom of stems.
    Fresh broccolini on a cutting board with a knife.
  4. In a medium bowl, toss broccolini with olive oil, salt, and pepper until evenly combined and coated.
  5. Transfer seasoned broccolini to an air fryer basket in single layer, avoiding overcrowding.
  6. Cook broccolini at 375°F for 6 minutes.
  7. Remove the basket and flip the broccolini using tongs.
    Learn how to cook broccolini in the air fryer.
  8. Return the basket to the air fryer and cook for another 6 minutes.
  9. When the air fryer cycle is complete, transfer crispy broccolini to the serving dish.
    Roasted broccoli on a white plate.
  10. If desired, drizzle with lemon juice before serving

Did you make this recipe?

Do you have feedback that would be helpful to others? If so can help this small business owner by leaving a rating and a review in the comments section? Thank you for being part of the Savoring The Good Community. ~ Sarah

Seasonal Favorite

Baked lattice top crust on an apple pie made with the Crisco pie crust recipe, showing flaky layers in the fluted edge.

This is my award-winning Crisco pie crust recipe; flaky, tender, and made with simple ingredients you already have.

Crisco Pie Crust

Different Ways to Season Broccolini

The air fryer lends itself well to developing flavors on vegetables. Mix and match herbs, spices, citrus, garlic, dressings, etc. for your signature broccolini side!

  • Lemon Pepper - Toss broccolini with freshly grated lemon zest, lemon juice, olive oil, salt, and coarse cracked black pepper.
  • Southwest Style - Coat broccolini in olive oil, chili powder, cumin, garlic powder, and lime juice for a tex-mex kick.
  • Italian Herb - Toss broccolini florets with olive oil, italian herb seasoning blend, minced garlic, salt and pepper.
  • Everything Bagel - Mix broccolini with olive oil, everything bagel seasoning, sesame seeds, dried minced onion and garlic.
  • Chili Lime - Dress broccolini with olive oil, lime zest and juice, diced chili peppers, cilantro, and salt.
  • Parmesan Ranch - Combine air-fried broccolini with a drizzle of ranch dressing and sprinkle with shaved parmesan cheese.

Reheating Instructions

A tray of broccolini roasted in a air fryer basket.

To Reheat in Air Fryer

  1. Place the leftover broccolini in a single layer in the air fryer basket, making sure not to overcrowd it.
  2. Air fry at 330°F for 4-5 minutes, until warmed through.
  3. Stir or flip over halfway for even heating if needed.

To Reheat in Microwave:

  1. Transfer broccolini to a microwave-safe dish in an even layer.
  2. Add a tablespoon of water to prevent drying out.
  3. Cover dish fully with plastic wrap and vent one corner.
  4. Microwave on High for 2 minutes, stopping to stir once after 1 minute if necessary.
  5. Let stand 1 minute before serving.

Tips:

  • Monitor microwaved broccolini to avoid overheating.
  • Reheating in air fryer will re-crisp the outsides better if desired.

Air Fryer Tips:

  • Cut even-sized pieces: Cut the broccolini into uniform pieces so that they cook evenly with the air flow in the air fryer basket. Large and small pieces will lead to uneven cooking.
  • Toss in oil before cooking: The small amount of oil in the recipe helps the broccolini get evenly browned and crisp during air frying. Make sure all pieces are lightly coated.
  • Flip halfway through: Air fryers cook very quickly, so flipping the broccolini halfway through the cooking time ensures the other side gets evenly cooked as well. Don't forget this step!

Storage Tips

Follow proper storage guidelines to safely enjoy leftover broccolini again later!

Short Term Storage:

  • Let broccolini cool to room temperature before storing.
  • Place broccolini in an airtight container or resealable plastic bag.
  • Store in the refrigerator for 3-5 days maximum.

Long Term Storage:

  • Portion broccolini into freezer bags or airtight containers, removing as much air as possible.
  • Freeze for up to 3 months.
  • When ready to reuse, don't thaw before reheating either in the air fryer or microwave per reheating instructions.

Extra Tips:

  • Check leftovers for signs of mold before storing or re-eating.
  • Add a paper towel inside the storage container to help absorb excess moisture.
  • For best results, reheat fried broccolini in the air fryer to restore the crispy texture.
A sheet pan salmon fillet cooked to perfection, topped with a lemon wedge and served alongside roasted asparagus on a dark tray.

Featured Recipe

Sheet Pan Salmon and Asparagus

Sheet Pan Salmon and Asparagus

FAQ's and Tips

Do you cut the stems of broccolini?

An important prep step is to remove any leaves, and to trim the very end of the broccolini stems. This helps ensure even cooking when air frying.

Can you still eat broccolini when it turns yellow?

When broccolini begins to yellow and open into flowers past its prime for consumption, the temptation may be to discard it entirely. However, with proper handling, much of the vegetable can still be salvaged and eaten.

Start by slicing off the extremely yellow, bitter florets until only pale green hues remain on the heads and stems. Then utilize quick cooking techniques like stir-frying or steaming to counteract the increasing toughness and unfavorable flavor profile of a less-than-fresh broccolini bunch.

Check carefully for signs of rot or mold first, as well. While the signature sweetness and tender crunch of broccolini at its peak cannot be recaptured once flowering, the salvageable parts lend themselves reasonably well to incorporation into fried rice, pasta, or casseroles when fresh options are lacking.

Do you need to wash broccolini?

Washing vegetables like broccolini removes any dirt or debris so that what you eat is clean. Letting the broccolini drain after washing helps remove excess moisture so the broccolini crisps up properly in the air fryer.

What's the difference between Broccolini and broccoli?

Broccolini is a premium hybrid vegetable that combines broccoli and asparagus traits into a sweet, versatile green with a high cost. Regular broccoli is more commonly available, robust in flavor, and cheaper by the bunch.

Broccolini and broccoli may look like close cousins, but broccolini is a hybrid green carefully bred to combine the best attributes of broccoli and asparagus.

While standard broccoli has broad, dense florets and large stalks, tender broccolini has slender elongated stalks ending in delicate bite-sized florets more akin to asparagus spears.

The flavor profile differs as well - broccolini trades out robust earthiness for sweet, mild, almost fruity notes with a subtler crunch, making it ideal for quick cooking techniques.

Of course, for the novelty of this specially cultivated and versatile vegetable, there is a premium price tag - broccolini generally rings in at three to four times the cost of common broccoli bunches.

So whether the delicate flavor and texture is worth the cost comes down to personal preference!

Broccoli in an air fryer on a marble countertop.

Air Fryer Broccolini

Try this quick and easy air fryer broccolini recipe for a crispy and delicious side dish. Perfect for roasting in your air fryer!
No ratings yet
Print Pin Rate
Course: Air Fryer
Cuisine: American
Keyword: Air Fryer Broccolini
Prep Time: 3 minutes minutes
Cook Time: 12 minutes minutes
Total Time: 15 minutes minutes
Servings: 4 servings
Calories: 109
Author: Sarah Mock

Ingredients

  •  
    1 pound broccolini
  • A 500ml bottle of California Olive Ranch Global Blend Extra Virgin Olive Oil with green and blue labeling, indicating a blend from Argentina, Portugal, Chile, and California-perfect for drizzling over your favorite shrimp avocado salad.2 Tablespoons Olive Oil
  • A Morton Salt container with a blue label featuring a girl in a yellow dress holding an umbrella, with salt pouring out of a container-an essential ingredient for perfectly seasoning dishes like Chicken Cordon Bleu.dash Salt
  • A 6 oz container of McCormick Pure Ground Black Pepper with a red lid and a dash Black Pepper
  • A plastic bottle of ReaLemon 100% Lemon Juice with a yellow cap, a lemon-shaped top, and images of lemons on a green label-perfect for adding a burst of citrus flavor to your favorite recipes like Lemon Cheesecake Bars.dash Lemon Juice optional
Follow Savoring The Good On PinterestFollow @SavoringTheGood or tag #STGRecipes!

Instructions

  • Wash your broccolini and let the water drain.
    1 pound broccolini
    Fresh broccolini on a cutting board with a knife.
  • Remove the leaves off the stems.
  • In a medium bowl, add the broccolini, olive oil, salt and pepper. Mix until well combined.
    2 Tablespoons Olive Oil, dash Salt, dash Black Pepper
    Air fryer broccolini ingredients olive oil, salt, and pepper in a bowl.
  • Add to the broccolini to the air fryer basket and air fry for 12 minutes on 375 degrees Fahrenheit. Make sure to flip the broccolini over halfway.
    A tray of broccolini roasted in a air fryer basket.
  • Remove from the air fryer and sprinkle some lemon juice, if preferred.
    dash Lemon Juice
    A person air frying broccolini on a plate.
Want to share when you made this recipe?Follow @SavoringTheGood & tag #STGRecipes!
Nutrition Facts
Air Fryer Broccolini
Serving Size
 
1
Amount per Serving
Calories
109
% Daily Value*
Fat
 
7
g
11
%
Saturated Fat
 
1
g
6
%
Polyunsaturated Fat
 
1
g
Monounsaturated Fat
 
5
g
Sodium
 
33
mg
1
%
Potassium
 
0.1
mg
0
%
Carbohydrates
 
8
g
3
%
Sugar
 
3
g
3
%
Protein
 
4
g
8
%
* Percent Daily Values are based on a 2000 calorie diet.
**Nutritional facts are just estimates. Please utilize your own brand nutritional values to double check against our estimates.
Like this recipe card? Want one for your site?Check out WP Recipe Maker!

Sarah Mock of savoringthegood.com headshot 2022

I am Sarah Mock. Welcome!

Sarah Mock is a classically trained Chef and graduate of Johnson & Wales University. A culinary blogger for 16 years Sarah helps the home cook prepare her recipes with professional results.

Get to know me

as seen in:

Logos of Hersheyland, ABC News, and Good Day PA are showcased in a seamless row, providing a snapshot of popular brands.

Hersheyland Nightline Good Day Pa!

The vibrant design showcases the iconic logos of Pinterest, Rachael Ray, and Jell-O set against a bold red background. Sorry, the provided description doesn't offer enough detail to suggest important SEO keywords.

Pinterest Rachael JELL-O


Brazilian Lemonade Recipe (Brazilian Limeade)

Brazilian Limeade

This easy Brazilian limonada is a frothy blend of tart Key limes, sweetened condensed milk and ice.

Brazilian Limeade

If you have leftover limes you can make my popular no-bake key lime pie, keto margarita, strawberry daiquiri, and big batch to go margarita.

Why is Brazilian lemonade not called limeade?

In Brazilian Portuguese, "limão" means both lime and lemon. When the drink's name was translated to English, "lemonade" stuck despite being made with limes. This is similar to how some other foods and drinks retain their traditional names in translation even when they might be slightly misleading. The short answer is yes, it's made with limes.

What is Brazilian Lemonade Made Of?

Brazilian Limeade ingredients with text overlay labeling them.

Recipe Card?

To find the full printable recipe with specific measurements and directions CLICK HERE to go to the recipe card.

Can you use any lime or are the thin-skinned key limes preferable?

While regular limes can still make a tasty limeade, key limes are best to replicate the authentic Brazilian flavor. Their floral, sweet-tart juice with zippy lime zest oils is hard to beat! So if you come across them at the market, key limes are highly recommended for preparing this Brazilian drink.

How to Make Brazilian Lemonade

2 Brazilian Limeades
Top view of a blender filled with chopped green limes on a marble surface.

Prepare the Limes

  1. Rinse several fresh limes under running water to clean them. Pat them dry.
  2. Chop the whole limes, skin and all, into smaller pieces so they can be easily blended.
Top view of a blender containing chopped green apples, lime slices, and liquid, on a marble countertop.

Make the Limeade Base

  1. In a blender or food processor, blend the limes along with water and sweetened condensed milk.
  2. Puree on high speed for 2-3 minutes until very smooth.
Blender filled with green liquid on the left, metal strainer with the same liquid on the right, both on a marble surface.

Strain Out Pulp and Skins

  1. Pour the lime puree through a fine mesh strainer to separate all the pith and skins, only keeping the flavorful lime juice.
2 Brazilian Limeades

Assemble the Limeade

  1. Fill tall glasses with ice cubes.
  2. Gently pour the freshly strained limeade over top the ice. Garnish with lime slices or mint leaves if desired.

Make Ahead Tips

With smart mixing and chilling ahead of time, you can enjoy well-balanced, properly diluted Brazilian limeades without last minute work or watery flavors. Just be sure to tweak the sweetener and add fresh garnishes at the very end!

Option 1: Puree and strain your fresh lime juice up to 2 days in advance. Store it covered in the refrigerator until ready to use. This allows you to prepare the time-consuming juice extraction part early.

Option 2: Make the recipe as directed but do not add the ice. Refrigerate it for up to 48 hours before serving. The flavors may improve with this extra time for the sugar and citrus to mingle.

Did you make this recipe?

Do you have feedback that would be helpful to others? If so can help this small business owner by leaving a rating and a review in the comments section? Thank you for being part of the Savoring The Good Community. ~ Sarah

Seasonal Favorite

Baked lattice top crust on an apple pie made with the Crisco pie crust recipe, showing flaky layers in the fluted edge.

This is my award-winning Crisco pie crust recipe; flaky, tender, and made with simple ingredients you already have.

Crisco Pie Crust

Serving Suggestions

2 Brazilian Limeades

Recipe FAQs

Do you need to peel the limes first?

No, you do not need to peel key limes or regular limes before juicing them to make Brazilian limeade. It is perfectly edible, so you can juice the whole lime directly.

For regular (Persian) limes, you also typically juice them whole when making limeade. The outside contains flavorful oils that will get captured when squeezing the lime.

Can I use regular limes for Brazilian limeade?

Standard limes can simply be sliced in half and squeezed as-is with their skin intact right into the juice mixture. This retains all the aromatic oils in the peel for the fullest lime flavor in the simple, refreshing Brazilian limeade. If adding lime zest for extra flavor. The zest is easier to grate off first before juicing.

If you want to remove any pesticide residue or wax on the skin from non-organic limes, giving them a good scrub beforehand helps remove most of it.

Chef Tip

Pour the chilled pre-made limeade over ice to serve. Top individual portions with ice rather than icing down the whole pitcher, so it doesn't get diluted as it sits.

Reader Favorites

  • Pear butter in a glass canning jar with spices to the side and a whole pear to the right of the jar
    Pear Sauce Recipe
  • lasagna roll up on a serving fork coming out of the full pan, cheese pulling
    Lasagna Roll Ups Recipe
  • Four tacos filled with shredded meat from a delicious Mojo Pork Recipe, garnished with cilantro, and accompanied by lime wedges on a white plate.
    Mojo Pork Recipe
  • Sous vide eggs on toast, broken to show the runny yolk
    Sous Vide Poached Eggs: 60°C or 63°C

More Drink Recipes

  • Two tall glasses of refreshing passion fruit juice with ice and striped straws sit on a marble surface. Nearby, halved passion fruit and a yellow cloth add vibrant color to the scene.
    Fresh Passion Fruit Juice Recipe
  • A glass of refreshing strawberry lemonade with ice, garnished with a lemon slice and whole strawberry, placed on a coaster. Other glasses, fresh strawberries, and lemons are in the background.
    Homemade Strawberry Lemonade
  • fresh beet juice in a clear glass
    Beet Juice Recipe
See more Beverages →
Brazilian Limeade

Brazilian Limeade Recipe

This Brazilian Limeade recipe is the perfect mix of tart and sweet using real limes and sweetened condensed milk for a refreshing drink.
5 from 1 vote
Print Pin Rate
Course: Drinks
Cuisine: Brazilian
Keyword: Brazilian Limeade
Prep Time: 1 minute minute
4 minutes minutes
Total Time: 5 minutes minutes
Servings: 4 servings
Calories: 246
Author: Sarah Mock

Ingredients

  • A whole, uncut green lime with a textured peel on a white background-the perfect citrus for crafting a classic Gimlet.6 each Limes Key limes, prefered
  •  
    3 Cups Water
  • 1 Cup Sweetened Condensed Milk
  •  
    2 Cups Ice
Follow Savoring The Good On PinterestFollow @SavoringTheGood or tag #STGRecipes!

Instructions

  • Wash the limes and chop them.
    4 steps to make Brazilian Limeade
  • In a blender, add the chopped limes, water, and sweetened condensed milk. Blend for a few minutes, or until as smooth as possible.
  • Strain everything.
  • Pour over ice.
Want to share when you made this recipe?Follow @SavoringTheGood & tag #STGRecipes!
Nutrition Facts
Brazilian Limeade Recipe
Serving Size
 
1 serving
Amount per Serving
Calories
246
% Daily Value*
Fat
 
7
g
11
%
Saturated Fat
 
4
g
25
%
Polyunsaturated Fat
 
0.3
g
Monounsaturated Fat
 
2
g
Cholesterol
 
26
mg
9
%
Sodium
 
112
mg
5
%
Potassium
 
285
mg
8
%
Carbohydrates
 
42
g
14
%
Sugar
 
42
g
47
%
Protein
 
6
g
12
%
* Percent Daily Values are based on a 2000 calorie diet.
**Nutritional facts are just estimates. Please utilize your own brand nutritional values to double check against our estimates.
Like this recipe card? Want one for your site?Check out WP Recipe Maker!

Sarah Mock of savoringthegood.com headshot 2022

I am Sarah Mock. Welcome!

Sarah Mock is a classically trained Chef and graduate of Johnson & Wales University. A culinary blogger for 16 years Sarah helps the home cook prepare her recipes with professional results.

Get to know me

as seen in:

Logos of Hersheyland, ABC News, and Good Day PA are showcased in a seamless row, providing a snapshot of popular brands.

Hersheyland Nightline Good Day Pa!

The vibrant design showcases the iconic logos of Pinterest, Rachael Ray, and Jell-O set against a bold red background. Sorry, the provided description doesn't offer enough detail to suggest important SEO keywords.

Pinterest Rachael JELL-O


How to Make Buttermilk at Home

how to make buttermilk featured image of a large glass jar of buttermilk.

To make homemade buttermilk it is a simple process that requires only two ingredients: regular milk and an acid. The acid can be in the form of vinegar, lemon juice, or cream of tartar. The acid reacts with the milk, causing it to curdle and thicken, resulting in homemade buttermilk.

how to make buttermilk featured image of a large glass jar of buttermilk.

What Is Buttermilk?

As someone who loves to cook, I find that buttermilk is one of the most versatile ingredients in my kitchen. Buttermilk is a tangy, acidic dairy product that is commonly used in baking, marinades, and dressings.

Traditionally, buttermilk was the liquid left over after churning butter from cream. The leftover liquid was then fermented by naturally occurring lactic acid bacteria, which gave it its characteristic tangy flavor. Nowadays, most buttermilk is made by adding lactic acid bacteria to pasteurized milk. This process creates a similar environment to the traditional method but is safer and more consistent.

Recipe Card?

To find the full printable recipe with specific measurements and directions CLICK HERE to go to the recipe card.

How to Make Buttermilk from Milk

This is a simple process that requires only two ingredients: regular milk and an acid. The acid can be in the form of vinegar, lemon juice, or cream of tartar. The acid reacts with the milk, causing it to curdle and thicken, resulting in homemade buttermilk.

  1. Pour 1 cup of whole or 2% milk into a liquid measuring cup.
  2. Add 1 tablespoon of vinegar or lemon juice to the milk. Alternatively, you can use 1 ½ teaspoons of cream of tartar.
  3. Stir the mixture and let it sit for 5-10 minutes. You should see small curdled bits in the mixture, which means it's ready to use.
  4. Use the buttermilk immediately, or store it in an airtight container in the refrigerator for up to 1 week.

It's important to note that the type of milk you use will affect the flavor and consistency of the buttermilk. Whole milk will result in a richer and creamier buttermilk, while 2% milk will produce a lighter and tangier buttermilk.

Additionally, you can adjust the amount of acid you use to suit your taste preferences. Using more acid will result in a tangier buttermilk while using less acid will produce milder buttermilk.

How to Make Buttermilk with Vinegar

To make your own buttermilk from cows' milk you will need white vinegar and milk. This is the method that was passed down from my grandmother, to my mother, to me and now I share it with you.

  1. Measure out one tablespoon of white vinegar and add it to a measuring cup.
  2. Pour enough milk into the measuring cup to measure one cup.
  3. Stir the mixture and let it stand for about five minutes.

The acid in the vinegar will cause the milk to curdle and thicken. You can use this homemade buttermilk recipe in any recipe that calls for buttermilk.

  • If you need more or less than one cup of buttermilk, simply use the same ratio of vinegar to milk. For example, if you need two cups of buttermilk, use two tablespoons of vinegar and enough milk to measure two cups.
  • It's important to note that this method works best with whole milk. If you use skim or low-fat milk, the resulting buttermilk may be thinner and less flavorful.

How to Make Buttermilk from Cream

  1. Start by pouring 1 cup of heavy cream into a clean jar or container with a tight-fitting lid.
  2. Add 1 tablespoon of plain yogurt or store-bought buttermilk as a starter culture to the cream.
  3. Give the mixture a good stir, then cover the jar with a lid.
  4. Allow the cream mixture sit at room temperature for about 12 to 24 hours, depending on the desired thickness and tanginess of the buttermilk. The longer it sits, the thicker and tangier it will become.
  5. Check the mixture every few hours and give it a gentle stir to ensure that the culture is evenly distributed.

Once the buttermilk has reached the desired consistency and flavor, I give it a final stir and transfer it to the refrigerator to chill. The buttermilk can be stored in an airtight container in the refrigerator for up to 2 weeks.

How to Make Buttermilk with Lemon Juice

large glass jar of homemade buttermilk with a kitchen towel.

If you are looking for a quick and easy way to make buttermilk, using lemon juice is a great option. Here's how to do it:

  1. Start with one cup of milk. You can use any type of milk, including whole, skim, or almond milk.
  2. Add one tablespoon of freshly squeezed lemon juice to the milk.
  3. Stir the mixture thoroughly and let it sit for a few minutes. The acid in the juice will cause the milk to curdle and thicken, giving it the tangy flavor of buttermilk.
  4. After a few minutes, your homemade buttermilk is ready to use in your recipe.

It's important to note that the acidity of the lemon juice can vary, so you may need to adjust the amount of lemon juice you use depending on the type of milk you are using. If you find that your buttermilk is not sharp enough, you can add a bit more juice until you reach the desired flavor.

Using lemon juice to make buttermilk is a great option if you don't have any buttermilk on hand or if you want to avoid buying it at the store. It's also a good choice if you want to make a smaller amount of buttermilk, as you can easily adjust the recipe to make just the amount you need.

Seasonal Favorite

Baked lattice top crust on an apple pie made with the Crisco pie crust recipe, showing flaky layers in the fluted edge.

This is my award-winning Crisco pie crust recipe; flaky, tender, and made with simple ingredients you already have.

Crisco Pie Crust

How to Make Buttermilk from Yogurt

Making buttermilk at home from yogurt is a quick and easy process way to get buttermilk without having to go to the store. Here's how to do it:

  1. Start with plain yogurt. You can use either Greek or regular yogurt, but make sure it's plain and unsweetened. Flavored yogurts won't work for this.
  2. Measure out the amount of yogurt you need. For every cup of buttermilk called for in your recipe, you'll need 1 cup of yogurt.
  3. Thin out the yogurt with milk. Add enough milk to the yogurt to thin it out to the consistency of buttermilk. For 1 cup of yogurt, you'll need about ¼ to ½ cup of milk. Whole milk will give you the closest consistency to real buttermilk, but you can use any type of milk you like.
  4. Stir the yogurt and milk together until they're well combined. Your homemade buttermilk is now ready to use in your recipe.

Using yogurt is a great option if you don't have any buttermilk on hand or if you're looking for a lower-fat alternative. It's also a good way to use up any leftover yogurt you have in the fridge. Just remember to adjust the amount of milk you add based on how thick or thin your yogurt is.

How to Make Buttermilk for Fried Chicken

Using Buttermilk for Fried Chicken

One of the secrets to making delicious fried chicken is to use buttermilk. Buttermilk helps to tenderize the chicken and infuse it with flavor. 

  1. Pour one cup of milk into a measuring cup. Add one tablespoon of white vinegar or lemon juice to the milk.
  2. Stir the mixture together and let it sit for five to ten minutes. You will notice that the milk will begin to curdle and thicken slightly.
  3. After the mixture has thickened, give it a good stir and then use it in your fried chicken recipe.

Using for fried chicken

  1. Simply marinate your chicken in the buttermilk mixture for at least an hour before frying.
  2. When you're ready to fry the chicken, remove it from the buttermilk and shake off any excess liquid.
  3. Then, coat the chicken in seasoned flour and fry it in hot oil until it's crispy and golden brown.

How To Make Homemade Buttermilk with Coconut Milk

Looking for a dairy-free buttermilk substitute? Use coconut milk to make a vegan buttermilk alternative. Here is how you do it:

Ingredients:

  • 1 cup coconut milk (canned, full-fat works best)
  • 2 tablespoons freshly squeezed lemon juice or white vinegar
  • 1 teaspoon sugar (optional)

Instructions:

  1. Pour the coconut milk into a 1 cup glass measuring cup or bowl. Ensure you are using full-fat coconut milk, not "light".
  2. Add the lemon juice or vinegar and sugar (if using). The acidity helps create the tangy taste and thickens the milk.
  3. Whisk together until fully blended. It should start to thicken slightly.
  4. Allow the mixture to sit at room temperature for about 10-15 minutes as it continues to thicken.
  5. Transfer to an airtight container and store in the refrigerator.
  6. Let chill for at least 2 hours (or up to 2 days) for best results and for flavors to meld before using in recipes.
  7. Shake or stir the chilled buttermilk before using, as it may separate a bit.

Easy Homemade Buttermilk Substitute

When you're in the middle of baking and realize you don't have buttermilk, don't worry! There are several substitutes you can use that will work just as well. Here are a few options:

Milk and Vinegar/Lemon Juice

One of the most popular buttermilk substitutes is made by combining milk with an acid like vinegar or fresh lemon juice. To make this substitute, simply add 1 tablespoon lemon juice or of vinegar to 1 cup of milk. Stir the mixture and let it sit for a few minutes until it thickens and curdles. This substitute works best in recipes that call for a small amount of buttermilk.

Yogurt

Another great substitute for buttermilk is plain yogurt. To use yogurt as a substitute, simply mix one cup of plain yogurt with one tablespoon of milk to thin it out. This substitute works well in recipes that require a thicker consistency, like pancakes or waffles.

Sour Cream

If you have sour cream on hand, you can use it as a substitute for buttermilk. Mix one cup of sour cream with one tablespoon of milk to thin it out. This substitute works best in recipes that require a tangy flavor, like biscuits or scones.

Cream of Tartar and Milk

One less common but effective substitute for buttermilk is made by combining cream of tartar with milk. To make this substitute, mix 1 ¾ teaspoons of cream of tartar with one cup of milk. This substitute works best in recipes that require a thick and creamy consistency, like cakes or muffins.

Overall, there are many substitutes for buttermilk that can be used in a pinch. Experiment with these options to find the one that works best for your recipe and taste preferences.

How to Freeze Buttermilk:

Properly frozen buttermilk should retain much of its flavor and performance for baking etc when thawed. Freezing gives it long term storage.

  1. Start with fresh buttermilk that hasn't been previously frozen. Freezing, thawing, and re-freezing buttermilk can cause some texture and flavor changes. Fresh is best.
  2. Pour the buttermilk into freezer-safe containers or bags, leaving about ½ inch of headspace at the top. You want to leave room for expansion as it freezes. Sturdy plastic containers or zipper freezer bags work well.
  3. Seal the containers tightly or squeeze out excess air and properly seal bags. This prevents freezer burn. Make sure any containers you use have leak-proof, airtight lids.
  4. Label the containers clearly with the quantity and date. This makes it easier when you go to use it.
  5. Freeze for up to 2-3 months. Place containers flat in the coldest part of your freezer, usually the back. Fats in buttermilk can go rancid after too long.
  6. Thaw frozen buttermilk in the fridge overnight before using, gently remixing once thawed. The texture may be slightly more thick or clumpy than fresh.

Frequently Asked Questions

What can I use if I don't have buttermilk?

If you don't have buttermilk, you can make a substitute using milk and an acid like lemon juice or vinegar. For every cup of milk, add 1 tablespoon of acid and let it sit for 5-10 minutes until it thickens. You can also use yogurt or sour cream as a substitute.

Is half and half a substitute for buttermilk?

No, half and half is not a good substitute for buttermilk. Half and half is a mixture of milk and cream, whereas buttermilk is a cultured dairy product with a tangy flavor and thick texture. If you don't have buttermilk, it's best to use a substitute made with milk and an acid.

how to make buttermilk featured image of a large glass jar of buttermilk.

Homemade Buttermilk

To make homemade buttermilk it is a simple process that requires only two ingredients: regular milk and an acid.
No ratings yet
Print Pin Rate
Course: Ingredients
Cuisine: American
Keyword: How To Make Buttermilk
Prep Time: 1 minute minute
3 minutes minutes
Total Time: 4 minutes minutes
Servings: 1 cup
Calories: 149
Author: Sarah Mock

Ingredients

  • A white milk carton with a blue label reading 1 Cup Milk
  • A clear plastic bottle of Heinz distilled white vinegar with a white cap and colorful vegetables on the label.1 Tablespoon vinegar
Follow Savoring The Good On PinterestFollow @SavoringTheGood or tag #STGRecipes!

Instructions

  • Pour 1 cup of whole or 2% milk into a liquid measuring cup.
    1 Cup Milk
  • Add 1 tablespoon of vinegar or lemon juice to the milk. Alternatively, you can use 1 ½ teaspoons of cream of tartar.
    1 Tablespoon vinegar
  • Stir the mixture and let it sit for 5-10 minutes. You should see small curdled bits in the mixture, which means it's ready to use.
  • Use the buttermilk immediately, or store it in an airtight container in the refrigerator for up to 1 week.
Want to share when you made this recipe?Follow @SavoringTheGood & tag #STGRecipes!
Nutrition Facts
Homemade Buttermilk
Serving Size
 
1 cup
Amount per Serving
Calories
149
% Daily Value*
Fat
 
8
g
12
%
Saturated Fat
 
5
g
31
%
Polyunsaturated Fat
 
0.3
g
Monounsaturated Fat
 
2
g
Cholesterol
 
29
mg
10
%
Sodium
 
93
mg
4
%
Potassium
 
366
mg
10
%
Carbohydrates
 
11
g
4
%
Sugar
 
12
g
13
%
Protein
 
8
g
16
%
* Percent Daily Values are based on a 2000 calorie diet.
**Nutritional facts are just estimates. Please utilize your own brand nutritional values to double check against our estimates.
Like this recipe card? Want one for your site?Check out WP Recipe Maker!

Sarah Mock of savoringthegood.com headshot 2022

I am Sarah Mock. Welcome!

Sarah Mock is a classically trained Chef and graduate of Johnson & Wales University. A culinary blogger for 16 years Sarah helps the home cook prepare her recipes with professional results.

Get to know me

as seen in:

Logos of Hersheyland, ABC News, and Good Day PA are showcased in a seamless row, providing a snapshot of popular brands.

Hersheyland Nightline Good Day Pa!

The vibrant design showcases the iconic logos of Pinterest, Rachael Ray, and Jell-O set against a bold red background. Sorry, the provided description doesn't offer enough detail to suggest important SEO keywords.

Pinterest Rachael JELL-O


Why Cakes Sink or Crack 🍰 Expert Insights and Solutions

a sunken yellow cake in a pan in an oven.

How many times have you googled 'why does my cake sink in the middle?

a sunken yellow cake in a pan in an oven.

This might be the last time you search for why cakes sink and crack. I am here with my Baking And Pastry degree knowledge and some simple tips, so you can prevent these mishaps and achieve a perfectly baked cake every time.

Understanding Cake Batter Sinking and Cracking

Firstly, let's talk about cake sinking. There are a few reasons why your cake could sink in the middle. One possibility is that the cake wasn't fully baked in the center. To avoid this, make sure to use a toothpick or skewer to test the cake's doneness. The toothpick should come out clean or with a few crumbs attached, but never with wet batter. Additionally, if you live in a high altitude area, you may need to adjust your recipe or baking time to account for the lower air pressure, which can affect the cake's rise.

Another reason why your cake may sink is due to over-mixing the batter. Over-mixing can cause too much air to be incorporated into the batter, which can cause it to collapse during baking. To prevent this, mix the batter just until the ingredients are combined and avoid over-beating.

Now let's talk about cake cracking. Cakes can crack for a few reasons, including baking at too high of a temperature or using too much leavening agent, such as baking powder or baking soda. To prevent this, make sure to measure your ingredients accurately and follow the recipe closely. Additionally, avoid opening the oven door too frequently during baking, as this can cause fluctuations in temperature that can lead to cracking.

Finally, it's important to note that cakes can sink or crack after being taken out of the oven if they are not allowed to cool properly. To prevent this, make sure to let your cake cool in the pan for at least 10-15 minutes before removing it from the pan and transferring it to a wire rack to cool completely.

Reasons for Cake Sinking in the Oven

a sunken yellow cake in a pan in an oven.

As a baker, I know that sinking or cracking cakes can be frustrating. There are several reasons why a cake may sink or crack, and it's essential to understand them to prevent it from happening in the future.

High Altitude Baking

High altitude baking can be a significant factor in cake sinking. At high altitudes, the air pressure is lower, and the air is drier, which can affect the baking process. When baking at high altitudes, the cake may rise too quickly, and then collapse in the middle, resulting in a sunken cake.

To prevent this, it's essential to adjust the recipe for high altitude baking. You may need to increase the baking time, reduce the amount of baking powder, or increase the oven temperature slightly. It's also helpful to add extra liquid to the recipe to prevent the cake from drying out.

Overall, understanding the reasons for cake sinking, such as high altitude baking, can help you prevent it from happening in the future. With a few adjustments to your recipe and baking process, you can ensure that your cakes come out perfectly every time.

What causes cakes to sink in the middle?

After taking your cake out of the oven, you may notice that it has sunk in the middle. This can be frustrating, especially if you were hoping to serve the cake to guests or bring it to a special occasion.

Underbaking

If your cake is not fully baked, it may sink in the middle. Be sure to test your cake for doneness using a toothpick or cake tester. The tester should come out clean when inserted into the center of the cake. When in pastry school we would check to see that a crust has formed all across the top of the cake. Then we would GENTLY tap the surface of the cake to see if there was any giggle or wiggle. If there was any movement, especially one resembling jello, the door was quickly and softly closed because this was an underbaked cake. 

Opening the oven door

female peering in the oven to see how her baked item is doing.

Opening the oven door too often during baking can cause the temperature to fluctuate, which can cause your cake to sink. Try to resist the urge to check on your cake too frequently. Instead, turn on the oven light to check to see if the cake is ready to be tested with a toothpick. By opening the door an oven can lose oven temperature as much as 25 degrees, depending on the time the door was open. The oven then has to recalibrate by recalibrating and bringing the oven back up to temperature. 

Overmixing the batter

Overmixing your cake batter can cause too much air to be incorporated, which can the batter to rise too much and then sink in the middle. Mix your batter just until all the ingredients are incorporated.

Using the wrong cake pan size

Using a pan that is too small for the amount of batter can cause overflow and then sink in the middle. Be sure to use the correct pan size specified in the recipe.

Not enough baking powder or baking soda ie. leavening agent

If your cake does not have enough baking powder or baking soda, it may not rise properly and then sink in the middle. Be sure to measure your ingredients accurately and follow the recipe closely.

 Oven temperature is too high or too low

Oven temperature issues can definitely contribute to uneven rising and sinking in cakes.

Here are some key things to know:

If the oven is too hot:

  • The exterior of the cake sets too quickly before the inside finishes expanding
  • This causes the center to keep rising to form a dome shape
  • Overbrowning around the edges is another indicator of too high a temperature

If the oven is too low:

  • The cake batter doesn't get hot enough fast enough to properly activate rising agents
  • This leads to minimal rise throughout and a dense, gummy texture
  • Check your oven with a thermometer to confirm the accuracy

To prevent oven temp issues:

  • Invest in an inexpensive oven thermometer to routinely check accuracy
  • Preheat sufficiently - at least 15 mins for most standard ovens
  • Avoid opening the oven door unnecessarily during baking
  • Know your hot and cool spots and rotate accordingly halfway through bake time

Checking your oven temperature control and making adjustments is crucial for cakes to expand slowly and evenly while baking. Keeping the door closed also maintains that ambient heat.

How do I keep my cake from rising in the middle?

  • Avoid opening the oven door while baking. Sudden drops in oven temp from an opened door can cause the exterior of cakes to set before the inside finishes expanding. The center then keeps rising, creating a dome shape.
  • Check for oven hot spots. If the oven heats unevenly, rotate the pan halfway during baking. You can test your oven temp accuracy using an oven thermometer too.
  • Use cake strips. These insulate the sides of cake pans and regulate the outside from setting before the inside. Strips also keep edges from overbrowning.

Can I Eat A Cake That Sank In The Middle?

As a baker, I understand the frustration of having a cake sink or crack in the middle. But what about the safety of consuming a sunken cake? Can you still eat it?

The good news is that a sunken cake is still safe to eat as long as it has been properly baked and stored. However, it may not have the best texture or appearance.

Here are some tips on how to safely consume a sunken cake:

A sunken cake is still safe to eat as long as it has been properly re-baked and stored. However, it may not have the best texture or appearance.

By following these tips, you can safely consume a sunken cake or use it for other purposes.

  • Check the baking time and temperature: A sunken cake may be a result of underbaking or baking at a low temperature. Make sure to follow the recipe instructions and check the cake for doneness using a toothpick or cake tester.
  • Store the cake properly: A sunken cake should be stored in an airtight container at room temperature or in the refrigerator. Make sure to wrap the cake tightly with plastic wrap or aluminum foil to prevent it from drying out.
  • Cut out the sunken part: If the sunken part is too moist or underbaked, it is best to cut it out before consuming the cake. You can use a cookie cutter or a knife to cut out the sunken part and then cover the cake with frosting or whipped cream.
  • Use the cake for other purposes: If the sunken cake is too dry or unappealing, you can still use it for other purposes. You can crumble it up and use it as a topping for ice cream or yogurt, or use it to make cake pops or truffles.

Preventing Cake From Sinking and Cracking

As a baker, I know how frustrating it can be when your cake sinks or cracks. However, with a few precautions, you can prevent these issues and ensure that your cake turns out perfectly every time. In this section, I will discuss some pre-baking and post-baking tips that can help prevent cake sinking and cracking.

Precautions to Take to Prevent an Underbaked Cake

Before you start baking your cake, there are a few things you can do to prevent it from sinking or cracking. Here are some pre-baking precautions you can take:

  • Use the right pan size: Using the right pan size is crucial to prevent your cake from sinking. If the pan is too small, the batter will overflow, and if it's too big, the cake will be too thin and may sink in the middle. Check the recipe for the recommended pan size and use that.
  • Preheat the oven: Preheating the oven is essential to ensure that the cake bakes evenly. If the oven is not preheated, the cake may sink or crack. Preheat the oven for at least 15 minutes before baking the cake.
  • Measure ingredients accurately: Measuring ingredients accurately is crucial to ensure that the cake rises properly and doesn't sink or crack. Use a kitchen scale to weigh the ingredients or use measuring cups and spoons.
  • Don't overmix the batter: Overmixing the batter can result in sinking or cracks. Mix the batter just until all the ingredients are combined.

Post-Baking Care

Once the cake is out of the oven, there are a few things you can do to prevent it from sinking or cracking. Here are some post-baking care tips:

  • Don't open the oven door too often: Opening the oven door too often can trigger a sink or crack. Only open the oven door when necessary, such as to check if the cake is done.
  • Let the cake cool in the pan: Letting it cool in the pan for a few minutes before removing it can help prevent it from sinking or cracking. This allows the cake to set and prevents it from collapsing.
  • Remove the cake from the pan carefully: Removing from the pan too soon or too roughly can cause it to sink or crack. Run a knife around the edges of the pan to loosen, then invert the pan onto a wire rack to remove the cake.

By following these pre-baking and post-baking precautions, you can prevent your cake from sinking or cracking and ensure that it turns out perfectly every time.

Frequently Asked Questions

How do you make a cake rise evenly?

Here are some tips to help a cake rise evenly:

  • Properly cream butter & sugar. Beat together the butter and sugar thoroughly until light and fluffy. This aerates the mixture which will help the cake rise. Go for at least 5 minutes.
  • Don't overmix once flour is added. Gently fold in the dry ingredients just until no streaks of flour remain. Overmixing develops gluten which can make a cake tough and unevenly rise.
  • Use proper leavening agents. Make sure to use the right leavening like baking powder/soda for your recipe. Check expiration dates too. Old leaveners lose potency.
  • Allow eggs & butter to reach room temp before using. Incorporating colder ingredients into batter can cause uneven rising.
  • Grease pans thoroughly & evenly. A key for an even rise is the batter spreading evenly in the pan. Grease all over the inside surfaces well.
  • Bake on a center rack at the proper temp. Place cakes towards the center of the oven for even surrounding heat rather than too close to top/bottom heating elements.
  • Cool cakes layers completely before frosting or filling. This allows the structure to firm up before adding extra weight from frosting that can cause uneven sinking.

Why do cakes fall when cooling?

Cakes can fall when cooling due to several reasons. One of the most common reasons is that the cake was not fully baked in the center. When a cake is not fully baked, the center of the cake will sink as it cools. Another reason for a cake to fall is that it was over-mixed. Over-mixing can cause the cake to rise too much in the oven and then fall as it cools.

Why does my cake break when I take it out of the pan?

Cakes can break when taken out of the pan due to several reasons. One of the most common reasons is that the cake was not fully cooled before removing it from the pan. When a cake is still warm, it is more delicate and can easily break. Another reason is that the pan was not greased or floured properly before baking. 

Is cracked cake bad?

A cracked cake is not necessarily bad. Cracks can happen for several reasons, including over-mixing, over-baking, or sudden changes in temperature. However, a cracked cake can be a sign that the batter was over-baked or over-mixed, which can affect the texture and taste of the cake. If the finished produce is still moist and flavorful, then a few cracks are not a big deal.

Why did my cake sink on the sides?

One of the most common reasons is that the oven temperature was too high, causing the cake to rise too quickly and then sink on the sides. Another reason is that the cake was over-mixed or over-leavened, causing the cake to rise too much and then sink on the sides. It could also be due to uneven baking, where the sides of the cake were baked faster than the center, causing the cake to sink on the sides.


Sarah Mock of savoringthegood.com headshot 2022

I am Sarah Mock. Welcome!

Sarah Mock is a classically trained Chef and graduate of Johnson & Wales University. A culinary blogger for 16 years Sarah helps the home cook prepare her recipes with professional results.

Get to know me

as seen in:

Logos of Hersheyland, ABC News, and Good Day PA are showcased in a seamless row, providing a snapshot of popular brands.

Hersheyland Nightline Good Day Pa!

The vibrant design showcases the iconic logos of Pinterest, Rachael Ray, and Jell-O set against a bold red background. Sorry, the provided description doesn't offer enough detail to suggest important SEO keywords.

Pinterest Rachael JELL-O


Hawaiian Roll Turkey Sliders

turkey hawaiian roll slider on a spatula

Turkey Hawaiian roll sliders are a delicious and easy snack that everyone will love. They are perfect for parties, game nights, or just a quick snack. With a few simple ingredients, you can create a tasty and satisfying snack that will leave everyone wanting more.

turkey hawaiian roll slider on a spatula

When making turkey Hawaiian roll sliders, it is important to choose the right type of turkey. You can use leftover turkey from Thanksgiving or buy pre-cooked turkey from the store.

Make sure to choose a turkey that is not too dry and has a good flavor. You can also add some seasoning to the turkey to enhance its flavor.

To make the sliders, you will need Hawaiian rolls, turkey, cheese, and some sauce. You can use any type of cheese you like, but I prefer cheddar or Swiss cheese. For the sauce, you can use cranberry sauce, mayonnaise, mustard, or any other sauce you like.

Ingredients for Hawaiian Roll Turkey Sliders

I love making turkey Hawaiian roll sliders because they are the perfect snack for any occasion. They are easy to make, and everyone loves them. Hawaiian rolls are soft, fluffy, and sweet, and they pair perfectly with the savory taste of turkey.

ingredients for turkey hawaiian roll sliders with text labeling each one. rolls, cheese, turkey, cranberry sauce, dijon etc.

Recipe Card?

To find the full printable recipe with specific measurements and directions CLICK HERE to go to the recipe card.

If you're looking for an easy and delicious party food, turkey Hawaiian roll sliders are perfect! They're quick to make and always a crowd-pleaser.

How to Make Turkey Cranberry Sliders With Leftover Turkey

turkey hawaiian roll sliders stacked on a white plate.

I love making turkey Hawaiian roll sliders because they are so easy to prepare and they taste amazing. Here are the steps I follow to make these delicious sliders:

  1. Preheat oven to 350°F.
  2. Slice Hawaiian rolls in half horizontally. Place bottom halves in baking pan, layering provolone, ham, turkey, bacon and more provolone on each.
    steps 1-4 of making turkey hawaiian roll sliders
  3. In a small bowl, mix cranberry sauce and Dijon mustard. Spread mixture on cut sides of Hawaiian roll tops.
  4. Top sandwiches with coated roll tops.
  5. Melt butter in a bowl. Brush melted butter over tops of sandwiches. Sprinkle with poppy seeds and minced onion.
    adding cranberry sauce and the top of the rolls to the turkey hawaiian roll sliders before baking.
  6. Bake 10-15 minutes until golden brown.
    turkey hawaiian roll sliders
  7. Remove from oven, slice sandwiches, and serve.

These sliders are perfect for a quick and easy lunch or dinner, or for serving at a party or gathering. They are also a great way to use up leftover turkey from Thanksgiving or any other holiday. The combination of the sweet Hawaiian rolls, savory turkey, tangy cranberry sauce, and melted cheese is simply irresistible.

What to Serve with Turkey Sliders

turkey hawaiian roll sliders

When it comes to serving turkey Hawaiian roll sliders, the possibilities are endless. These sliders are perfect for any occasion, whether it's a game day party or a family gathering.

Here are a few serving suggestions to get you started:

Pair with a side dish

Turkey sliders go great with a variety of side dishes. Some popular options include sweet potato fries, coleslaw, and potato salad. You can also serve them with a side of chips or veggies for a lighter option.

Add toppings

One of the great things about sliders is that they're easy to customize. You can add toppings like avocado, bacon, or even pineapple to give your sliders an extra burst of flavor. Don't be afraid to get creative with your toppings!

Make a slider bar

If you're hosting a party, consider setting up a slider bar. This allows your guests to customize their sliders to their liking. Offer a variety of toppings and sauces, and let your guests build their own sliders.

Serve as an appetizer or main dish

Turkey sliders can be served as an appetizer or a main dish. If you're serving them as an appetizer, plan on 2-3 sliders per person. If you're serving them as a main dish, plan on 3-4 sliders per person.

How to Keep Sliders on Hawaiian Rolls Warm

To keep your sliders warm during a party or gathering, consider using a slow cooker. Simply place the sliders in the slow cooker on low heat, and they'll stay warm and ready to eat. You can also cover them with foil and place them in the oven on low heat.

4 Mistakes to Avoid When Making Turkey Sliders on Hawaiian Rolls

single turkey hawaiian roll slider.

When making turkey Hawaiian roll sliders, there are a few common mistakes that you should avoid making to ensure that your sliders turn out delicious.

Here are some of the mistakes that I have made in the past, and how you can avoid them:

Using Dry Turkey

One of the biggest mistakes that you can make when making turkey sliders is using dry turkey. To avoid this, make sure that you use fresh turkey or leftover turkey that has been properly stored. You can also add a little bit of gravy or mayonnaise to the turkey to keep it moist.

Not Using Enough Sauce

Another common mistake that people make when making turkey sliders is not using enough sauce. The sauce is what gives the sliders their flavor, so it's important to use enough. You can use cranberry sauce, gravy, or any other sauce that you like.

Overcooking the Sliders

Overcooking the sliders is another common mistake that people make. To avoid this, make sure that you don't leave the sliders in the oven for too long. Check them regularly to make sure that they are not burning.

Using Stale Bread

Using stale bread is another mistake that you should avoid. Make sure that you use fresh Hawaiian rolls for your sliders. If you can't find fresh rolls, you can always toast them in the oven for a few minutes to freshen them up.

By avoiding these common mistakes, you can ensure that your turkey Hawaiian roll sliders turn out delicious every time.

Frequently Asked Questions

What are some different type of slider recipes?

Sliders are small sandwiches typically made with a meat patty or deli meat, cheese, and a small bun. However, there are many different variations of sliders that can be made with different meats, cheeses, and buns. Some popular types of sliders include beef sliders, chicken sliders, pulled pork sliders, and even vegetarian sliders made with portobello mushrooms.

How do you make sheet pan turkey sliders?

Sheet pan turkey sliders are a simple and easy way to make sliders for a crowd.

  1. To make sheet pan turkey sliders, start by preheating your oven to 375°F.
  2. Place a layer of Hawaiian rolls on a baking sheet.
  3. Top the rolls with sliced turkey, cheese, and any other desired toppings such as cranberry sauce or stuffing.
  4. Add another layer of Hawaiian rolls on top.
  5. Brush the tops of the rolls with melted butter and sprinkle with garlic powder.
  6. Bake for 15-20 minutes until the cheese is melted and the tops of the rolls are golden brown.

What is a recipe for turkey and Swiss sliders?

To make turkey and Swiss sliders, start by preheating your oven to 350°F. Then, slice a package of Hawaiian rolls in half horizontally. Place the bottom half of the rolls in a baking dish. Layer sliced turkey and Swiss cheese on top of the rolls. Add any desired toppings such as mustard, mayo, or cranberry sauce. Place the top half of the rolls on top of the turkey and cheese. Brush the tops of the rolls with melted butter and sprinkle with garlic powder. Bake for 10-15 minutes until the cheese is melted and the tops of the rolls are golden brown.

turkey hawaiian roll slider on a spatula

Hawaiian Roll Turkey Slider Recipe with Cranberry Sauce

Turkey Hawaiian roll sliders are a delicious and versatile dish that can be served in a variety of ways. Whether you're hosting a party or just looking for a quick and easy meal, these sliders are sure to be a hit.
5 from 1 vote
Print Rate
Course: Thanksgiving
Cuisine: American
Keyword: Hawaiian Roll Turkey Sliders
Prep Time: 5 minutes minutes
Cook Time: 10 minutes minutes
Total Time: 15 minutes minutes
Servings: 12 rolls
Calories: 186
Author: Sarah Mock

Ingredients

  •  
    12 count Hawaiian rolls
  •  
    12 slices Provolone Cheese
  •  
    ½ pound Deli ham or Leftover holiday ham
  •  
    ½ pound Deli turkey or leftover Thanksgiving Turkey
  •  
    8-10 slices Bacon cooked crisp
  •  
    ¾ Cup cranberry sauce
  •  
    1 Tablespoon dijon mustard
  • A rectangular 8 oz package of Kerrygold Pure Irish Butter, unsalted, with a green and gold label and Irish grass-fed cow branding-perfect for creating delicious Saint Patrick's Day cupcakes.2 Tablespoon Butter
  •  
    1 Teaspoon poppy seeds
  •  
    1 Teaspoon minced dried onion
US Customary - Metric
Follow Savoring The Good On PinterestFollow @SavoringTheGood or tag #STGRecipes!

Instructions

  • Preheat your oven to 350 degrees.
    Close-up of a black oven control panel showing a temperature dial set around 200 degrees Celsius, digital display, and various function buttons.
  • Slice your hawaiian rolls in half.
    12 count Hawaiian rolls
  • Place the bottom half in the pan and layer with provolone, ham, turkey, bacon and another layer of provolone cheese.
    12 slices Provolone Cheese, ½ pound Deli ham, ½ pound Deli turkey, 8-10 slices Bacon
  • In a small bowl mix together the cranberry sauce and dijon mustard.
    ¾ Cup cranberry sauce, 1 Tablespoon dijon mustard
  • Spread the cranberry mixture on the inside of the top half of the rolls.
  • Place the rolls on top.
  • In a small bowl melt your butter.
    2 Tablespoon Butter
  • Brush the butter all over the tops of the rolls.
    1 Teaspoon poppy seeds, 1 Teaspoon minced dried onion
  • Sprinkle with the poppy seeds and minced onion.
  • Bake in the oven for 10-15 minutes until golden brown.
  • Slice and serve!
Want to share when you made this recipe?Follow @SavoringTheGood & tag #STGRecipes!
Nutrition Facts
Hawaiian Roll Turkey Slider Recipe with Cranberry Sauce
Serving Size
 
1 sandwich
Amount per Serving
Calories
186
% Daily Value*
Fat
 
11
g
17
%
Saturated Fat
 
6
g
38
%
Trans Fat
 
0.1
g
Polyunsaturated Fat
 
1
g
Monounsaturated Fat
 
4
g
Cholesterol
 
37
mg
12
%
Sodium
 
622
mg
27
%
Potassium
 
135
mg
4
%
Carbohydrates
 
9
g
3
%
Sugar
 
6
g
7
%
Protein
 
12
g
24
%
* Percent Daily Values are based on a 2000 calorie diet.
**Nutritional facts are just estimates. Please utilize your own brand nutritional values to double check against our estimates.
Like this recipe card? Want one for your site?Check out WP Recipe Maker!

Sarah Mock of savoringthegood.com headshot 2022

I am Sarah Mock. Welcome!

Sarah Mock is a classically trained Chef and graduate of Johnson & Wales University. A culinary blogger for 16 years Sarah helps the home cook prepare her recipes with professional results.

Get to know me

as seen in:

Logos of Hersheyland, ABC News, and Good Day PA are showcased in a seamless row, providing a snapshot of popular brands.

Hersheyland Nightline Good Day Pa!

The vibrant design showcases the iconic logos of Pinterest, Rachael Ray, and Jell-O set against a bold red background. Sorry, the provided description doesn't offer enough detail to suggest important SEO keywords.

Pinterest Rachael JELL-O

Pineapple Casserole Recipe

pineapple casserole with a spoon taking out a portion.

Pineapple casserole is a beloved Southern classic that's as versatile as it is delicious. Combining sweet pineapple, creamy cheese, and a golden, buttery cracker topping, this dish is a hit at potlucks, holiday gatherings, or weeknight dinners.

pineapple casserole with a spoon taking out a portion.

Whether you're wanting a nostalgic comfort food or looking for a unique dish to serve, this pineapple casserole is sure to become a favorite.

  • It's simple to make, with a short ingredient list and an easy assembly process.
  • Pineapple casserole has a nostalgic appeal as a classic potluck and family gathering comfort food.
  • Leftover pineapple casserole can be refrigerated or frozen and reheated while retaining good flavor.
  • The contrast of the sweet, soft pineapple filling and the crunchy, buttery topping is so delicious.

Pineapple Casserole Ingredients:

sugar, flour, cheese, butter, crushed pineapple, ritz crackers ingredients for pineapple casserole.

Recipe Card?

To find the full printable recipe with specific measurements and directions CLICK HERE to go to the recipe card.

Substitutions and Additions

Customize your pineapple casserole to suit your taste or pantry staples! Here are some easy substitutions and tips for choosing the best pineapple texture for your dish:

  • Flavor Boosters: Add brown sugar, cinnamon, vanilla, almond extract, rum, or shredded coconut for extra flavor.
  • Pineapple Options:
    • Chunks: Distinct pieces with a soft bite; great for texture but can vary in size.
    • Tidbits: Smaller, more uniform pieces that blend seamlessly into the filling.
    • Crushed: Smooth texture with no fruit pieces; ideal for a consistent filling but can become mushy.

Can I use fresh pineapple instead of canned pineapple?

Chef knife, female hand cutting off the outside of a pineapple.

Yes, with a few adjustments like well-draining the fresh fruit and absorbing extra moisture, you can swap fresh pineapple into almost any pineapple casserole dish.

Here are some tips for using fresh:

  • Choose ripe, fresh pineapples. They should have a sweet, tropical fragrance when ripe. Avoid pineapples that smell fermented or have soft spots.
  • Drain on paper towels or a fine mesh strainer for at least 15 minutes to remove excess juice.
  • Pat the pineapple chunks dry before mixing into the casserole recipe. The fresh pineapple will likely render more liquid than canned.
  • Consider adding a touch more cornstarch, flour or quick-cooking tapioca starch to the filling to account for extra moisture.
  • Let the casserole stand for 10-15 minutes after baking to allow the filling to set up before serving. If needed, you can broil the casserole for 1-2 mins at the end to eliminate any surface moisture.

How to make pineapple casserole

pineapple casserole. with a spoon.

It's easy to make with just a handful of ingredients, and its sweet-and-savory flavor makes it perfect as both a side dish and a dessert. Plus, it's a make-ahead recipe, so you can prep it in advance and bake it when you're ready.

Preheat and Prep

  • Preheat the oven to 350°F.
  • Grease an 8x8-inch baking dish and set aside.
A sifter with crushed pineapple over a measuring cup filled with juice, placed on a rustic wooden surface. Two opened cans are visible in the background.

Prepare the Pineapple

Drain the crushed pineapple, reserving ⅓ cup of the juice.

A ceramic dish filled with pineapple casserole mingled with grated cheese sits on a rustic wooden surface, echoing the comforting warmth of a classic pineapple casserole.

Make the Filling

  • In a medium bowl, stir together the flour and sugar.
  • Add the reserved pineapple juice and stir until smooth.
  • Fold in the drained pineapple and half of the shredded cheddar cheese until well combined.
  • Pour the mixture into the prepared baking dish.
A bowl of shredded cheese and crumb mixture next to a dish of creamy casserole on a wooden surface.

Prepare the Topping

  • In a small bowl, mix the remaining cheese, crushed Ritz crackers, and melted butter.
  • Sprinkle the topping evenly over the pineapple mixture.
pineapple casserole in a le creuset dish.

Bake

Bake for 35-45 minutes, or until the edges are bubbly and the top is lightly golden.

Prevent Over Browning

If the topping browns starts too quickly, loosely cover with aluminum foil.

spoon of pineapple casserole in a le creuset dish.

Serve and Store

  • Let the casserole cool for 5-10 minutes before serving warm.
  • Store leftovers in the refrigerator.

Did you make this recipe?

Do you have feedback that would be helpful to others? If so can help this small business owner by leaving a rating and a review in the comments section? Thank you for being part of the Savoring The Good Community. ~ Sarah

A sheet pan salmon fillet cooked to perfection, topped with a lemon wedge and served alongside roasted asparagus on a dark tray.

Featured Recipe

Sheet Pan Salmon and Asparagus

Sheet Pan Salmon and Asparagus

Is Pineapple Casserole a Dessert or a Side Dish?

pineapple casserole in a le creuset dish.

Pineapple casserole can easily be served as either a side dish or a dessert, depending on the ingredients and seasonings you choose. The sweet pineapple filling and crunchy topping make it a great fit for both sweet and savory occasions!

It pairs perfectly with baked ham, pork chops, or other savory entrees. For a fresh twist, add herbs like parsley or cilantro, or sprinkle nuts like almonds, pecans, or walnuts for extra crunch.

Seasonal Favorite

Baked lattice top crust on an apple pie made with the Crisco pie crust recipe, showing flaky layers in the fluted edge.

This is my award-winning Crisco pie crust recipe; flaky, tender, and made with simple ingredients you already have.

Crisco Pie Crust

Make-Ahead Instructions

You can prepare this pineapple casserole ahead of time! Follow these tips to ensure it turns out perfectly:

  1. Prepare the Filling:
    • Mix the pineapple, sugar, flour, and other filling ingredients up to 2 days in advance.
    • Store the filling in a covered bowl in the refrigerator.
  2. Assemble the Casserole:
    • If baking the next day, pre-bake the filling (without the topping) for 10 minutes to help it set. Let it cool, then cover and refrigerate.
  3. Add the Topping Before Baking:
    • When ready to bake, add the buttery cracker topping.
    • If baking straight from the fridge, let the casserole sit at room temperature for 15-20 minutes, then add 10-15 minutes to the baking time.
  4. Prevent Over-Browning:
    • Cover the casserole with foil if the topping browns too quickly. Remove the foil during the last 5 minutes of baking for a golden finish.

Freezing tips

For making way ahead, cook, cool, and freeze for up to 1 month. Thaw in the refrigerator overnight before baking as usual.

Reheating Instructions

To enjoy your pineapple casserole leftovers, follow these simple methods. For the best results, use the oven to maintain a crispy topping.

Oven Method (Best for Crispy Topping):

  1. Preheat the oven to 350°F.
  2. Cover the casserole loosely with aluminum foil.
  3. Bake for 15-20 minutes, or until heated through.
  4. Remove the foil during the last 5 minutes to crisp up the topping.

Microwave Method (Quick Option):

  1. Transfer individual servings to microwave-safe plates.
  2. Cover with a paper towel or loose plastic wrap.
  3. Microwave on High for 60-90 seconds, or until hot.
  4. Stir to evenly distribute heat before serving.

Stovetop Method:

  1. Transfer the casserole to a saucepan over medium-low heat.
  2. Cover and cook, stirring occasionally, for about 10 minutes, or until heated through.

Tips for All Methods:

  • If the casserole seems dry, add a splash of milk or pineapple juice to restore moisture.
  • Refrigerate leftovers within 2 hours and consume within 3-4 days.
  • Avoid reheating more than once to maintain the best texture and flavor.
pineapple casserole with a spoon taking out a portion.

Classic Pineapple Casserole with Ritz Crackers

Pineapple casserole is a classic American casserole dish that combines canned pineapple, and cheese and has a crunchy, buttery cracker topping.
5 from 1 vote
Print Pin Rate
Course: Side Dish
Cuisine: American
Keyword: pineapple casserole
Prep Time: 10 minutes minutes
Cook Time: 40 minutes minutes
Total Time: 50 minutes minutes
Servings: 8 servings
Calories: 250
Author: Sarah Mock

Ingredients

  •  
    2 cans crushed pineapple 20 ounce each, drained, juice reserved
  •  
    ⅓ Cup pineapple juice saved from the canned pineapple
  • A 4-pound bag of Domino granulated pure cane sugar with a yellow and white design, showing nutrition information and branding-perfect for sweetening recipes like rhubarb sour or your favorite desserts.⅓ Cup Sugar
  • A 5-pound bag of King Arthur Baking Company unbleached bread flour with 12.7% protein content, labeled for ideal use in bread, pizza crust, and rolls-perfect for creating hearty sides like homemade loaves to serve alongside a comforting slowcooker sausage casserole.⅓ Cup Flour, All Purpose
  •  
    1 Cup Cheddar cheese shredded and divided in ½
  • A rectangular 8 oz package of Kerrygold Pure Irish Butter, unsalted, with a green and gold label and Irish grass-fed cow branding-perfect for creating delicious Saint Patrick's Day cupcakes.¼ Cup Butter
  •  
    1 sleeve Ritz Crackers about 40 crackers, crushed
US Customary - Metric
Follow Savoring The Good On PinterestFollow @SavoringTheGood or tag #STGRecipes!

Instructions

  • Preheat the oven to 350°F. Grease an 8x8-inch baking dish and set aside.
    Close-up of a black oven control panel showing a temperature dial set around 200 degrees Celsius, digital display, and various function buttons.
  • Drain the 2 cans crushed pineapple and reserve the pineapple juice to be used in the next step.
    2 cans crushed pineapple
  • In a medium bowl, stir together the Flour and sugar Add the reserved pineapple juice and stir until combined.
    ⅓ Cup pineapple juice, ⅓ Cup Sugar, ⅓ Cup Flour, All Purpose
  • Add the drained pineapple and half the shredded cheddar cheese and stir until fully incorporated.
    1 Cup Cheddar cheese
  • Pour the pineapple mixture to the prepared baking dish.
  • In a small bowl, mix together the other half of the shredded cheese, crushed Ritz cracker crumbs and melted butter.
    ¼ Cup Butter, 1 sleeve Ritz Crackers, 1 Cup Cheddar cheese
  • Spread the buttery crumbs evenly over the top of the casserole.
  • Bake for 35-45 minutes or until bubbling around the edges and lightly browned on top.
  • Let cool for 5-10 minutes before serving warm. Store leftovers in the refrigerator.

Notes

If you notice the cracker topping getting too dark too fast, cover loosely with aluminum foil to prevent over browning.
Want to share when you made this recipe?Follow @SavoringTheGood & tag #STGRecipes!
Nutrition Facts
Classic Pineapple Casserole with Ritz Crackers
Serving Size
 
1 serving
Amount per Serving
Calories
250
% Daily Value*
Fat
 
11
g
17
%
Saturated Fat
 
6
g
38
%
Trans Fat
 
0.2
g
Polyunsaturated Fat
 
0.5
g
Monounsaturated Fat
 
3
g
Cholesterol
 
29
mg
10
%
Sodium
 
141
mg
6
%
Potassium
 
207
mg
6
%
Carbohydrates
 
36
g
12
%
Sugar
 
30
g
33
%
Protein
 
5
g
10
%
* Percent Daily Values are based on a 2000 calorie diet.
**Nutritional facts are just estimates. Please utilize your own brand nutritional values to double check against our estimates.
Like this recipe card? Want one for your site?Check out WP Recipe Maker!

Sarah Mock of savoringthegood.com headshot 2022

I am Sarah Mock. Welcome!

Sarah Mock is a classically trained Chef and graduate of Johnson & Wales University. A culinary blogger for 16 years Sarah helps the home cook prepare her recipes with professional results.

Get to know me

as seen in:

Logos of Hersheyland, ABC News, and Good Day PA are showcased in a seamless row, providing a snapshot of popular brands.

Hersheyland Nightline Good Day Pa!

The vibrant design showcases the iconic logos of Pinterest, Rachael Ray, and Jell-O set against a bold red background. Sorry, the provided description doesn't offer enough detail to suggest important SEO keywords.

Pinterest Rachael JELL-O


Substitute for Brown Sugar

brown sugar in a brown dish.

Brown sugar is a common ingredient in many recipes, adding a rich, caramel-like flavor to baked goods, sauces, and marinades. However, there are times when brown sugar is not available or when another option is desired. In such cases, it is useful to know about brown sugar substitutes that can be used in its place.

brown sugar in a brown dish.

Brown sugar is a type of sugar that is made by adding molasses to granulated white sugar. It has a moist texture and a rich, sweet flavor that makes it a popular ingredient in many recipes. Brown sugar is often used in recipes for cookies, cakes, and pies, as well as in savory dishes like barbecue sauce and baked beans. It is also used as a topping for oatmeal and other breakfast cereals.

  • Common brown sugar substitutes include honey, maple syrup, coconut sugar, and white sugar with molasses.
  • When choosing a brown sugar substitute, it is important to consider the flavor, texture, and moisture content of the recipe.

Understanding Brown Sugar

Brown sugar is a type of sugar that is commonly used in baking and cooking. It is made by mixing white granulated sugar with molasses, which gives it its distinctive brown color and flavor. Brown sugar is often used in recipes that call for a rich, caramelized flavor, such as chocolate chip cookies, brownies, and barbecue sauce.

One of the key roles of brown sugar in baking is to provide flavor. The molasses in brown sugar gives it a rich, caramel flavor that is not found in white sugar. This flavor can add depth and complexity to baked goods and other dishes.

Brown sugar also plays a role in texture. Because it contains more moisture than white sugar, brown sugar can help keep baked goods moist and tender. It can also help create a chewy texture in cookies and other baked goods.

In addition to flavor and texture, brown sugar can also affect the color of baked goods. The caramelized flavor and color of brown sugar can give baked goods a darker, richer color than white sugar.

Top Tip

If a recipe calls for brown sugar for its flavor, a substitute such as white sugar or sugar in the raw may not provide the same caramelized flavor. Similarly, if a recipe calls for brown sugar for its moisture content, a substitute such as packed brown sugar may be necessary to achieve the desired texture.

What Can I Use If I Don't Have Brown Sugar?

Brown sugar is a common ingredient in many recipes, but if you find yourself without it in your cupboard, there are several substitutes you can use. Here are some common brown sugar substitutes:

Molasses and White Sugar

One of the most common substitutes is a combination of molasses and granulated sugar. To make this substitute, mix one tablespoon of molasses with one cup of granulated sugar. This substitute will not have the same texture as brown sugar, but it will have a similar flavor.

How to make 1 cup of light brown sugar?

To make 1 cup of light brown sugar, mix 1 cup of white sugar with 1 tablespoon of molasses. Mix the sugar and molasses together until the molasses is evenly distributed throughout the sugar.

Can I use maple syrup instead of brown sugar?

Another alternative for brown sugar is maple syrup. To use maple syrup as a substitute, use ¾ cup of maple syrup for every one cup of brown sugar called for in the recipe. Keep in mind that using maple syrup will change the flavor of the recipe.

Muscovado Sugar

Muscovado sugar is a type of unrefined brown sugar that has a strong molasses flavor. It can be used as a substitute for dark brown sugar. Use the same amount of muscovado sugar as you would brown sugar in the recipe.

Light Brown Sugar

If you don't have dark brown sugar on hand, you can use light brown sugar instead. Keep in mind that light brown sugar has less molasses than dark brown sugar, so the flavor will be slightly different.

Agave or Coconut Sugar

Agave nectar or coconut sugar can be used in recipes that call for light brown sugar. Use the same amount of agave or coconut sugar as you would brown sugar in the recipe.

Turbinado Sugar

Turbinado sugar is a type of raw sugar that has a light brown color and a mild molasses flavor. Use the same amount of turbinado sugar as you would brown sugar in the recipe.

Honey

Honey can be used as a brown sugar alternative in recipes that call for light brown sugar. Use ¾ cup of honey for every one cup of brown sugar called for in the recipe. Keep in mind that using honey will change the flavor of the recipe.

Date Sugar

Date sugar is made from dried dates that have been ground into a fine powder. Use the same amount of date sugar as you would brown sugar in the recipe.

Choosing the Best Brown Sugar Substitute

When looking to replace brown sugar, it is important to consider the recipe, texture, baking, taste, and more. There are various options available that can be used as a replacement for brown sugar, each with its own unique characteristics.

  • White Sugar and Molasses: One option is to use white granulated sugar mixed with molasses. This substitute is a great choice for recipes that require brown sugar, as it provides a similar taste and texture. However, it may not work well in recipes that require a specific texture or consistency.
  • Honey or Maple Syrup: These sweeteners are great for sauces, glazes, and oatmeal. They provide a unique flavor and texture that can enhance the overall taste of the dish. However, they may not work well in recipes that require leavening.
  • Coconut Sugar: It has a similar taste and texture to brown sugar, and can be used in recipes that require a specific texture or consistency. However, it may not work well in recipes that require a light color.

Incorporating Brown Sugar and Dark Brown Sugar Substitutes into Recipes

When substituting brown sugar with a different ingredient, it is important to consider the impact it will have on the final recipe. Here are some tips for incorporating substitutes into your favorite recipes:

Adjust the Quantity

When using a substitute, it is important to adjust the quantity to achieve the desired sweetness level. For example, if you use honey as a substitute, you will need to use less of it than you would brown sugar. This is because honey is sweeter than brown sugar.

Consider the Texture

Brown sugar adds moisture to baked goods, which can affect the texture of the final product. When using a substitute, it is important to consider how it will affect the texture of the recipe. For example, using maple syrup instead of brown sugar may result in a slightly different texture due to the additional liquid.

Use the Right Substitute

When choosing a substitute for brown sugar, it is important to choose the right one for the recipe. For example, using molasses as a substitute for brown sugar in chocolate chip cookies may result in a stronger molasses flavor that may not be desirable.

Experiment with Different Substitutes

There are many different substitutes for brown sugar, and each one will have a slightly different flavor and texture. Experimenting with different substitutes can help you find the one that works best for your recipe. For example, using coconut sugar instead of brown sugar in a glazed ham recipe may result in a slightly caramelized flavor.

By following these tips, you can successfully incorporate substitutes into your favorite recipes and achieve the desired flavor and texture.

What's Another Substitute for Brown Sugar

Brown sugar is a popular sweetener used in many recipes. Fortunately, there are alternatives to brown sugar that can be used in recipes.

White Sugar

White sugar is a common substitute for brown sugar. It is refined and has a higher glycemic index, meaning it can cause a rapid spike in blood sugar levels. However, it can be used in moderation as a substitute for brown sugar in recipes.

Agave

Agave nectar is a natural sweetener that is low in calories and has a lower glycemic index than white sugar. It can be used as a substitute for brown sugar in recipes, but it is important to use it in moderation as it is still high in fructose.

Coconut Sugar

Coconut sugar is a natural sweetener made from the sap of coconut palms. It can be used as a substitute for brown sugar in recipes.

Honey

Honey is a natural sweetener that is high in antioxidants and has antibacterial properties. It can be used as a substitute for brown sugar in recipes, but it is important to use it in moderation as it is still high in calories and added sugars.

Date Sugar

Date sugar is a natural sweetener made from dried dates. It can be used as a substitute for brown sugar in recipes, but it can be difficult to dissolve and may not work well in some recipes.

Turbinado Sugar

Turbinado sugar is a partially refined sugar that has a light brown color and a mild molasses flavor. It has a slightly lower glycemic index than white sugar and can be used as a substitute for brown sugar in recipes.

Palm Sugar

Palm sugar is a natural sweetener made from the sap of palm trees. It has a lower glycemic index than white sugar and contains small amounts of nutrients. It can be used as a substitute for brown sugar in recipes.

Maple Sugar

Maple sugar is a natural sweetener made from maple syrup. It has a lower glycemic index than white sugar and contains small amounts of antioxidants and minerals. It can be used as a substitute for brown sugar in recipes.

Frequently Asked Questions

What are some substitutes for brown sugar without molasses?

If you don't have molasses, you can use honey, maple syrup, or corn syrup as a substitute for brown sugar. Keep in mind that these substitutes will change the flavor of your recipe.

Can I use white sugar instead of brown sugar in baking?

Yes, you can use white sugar instead of brown sugar in baking, but keep in mind that the flavor and texture of your baked goods will be slightly different. To get a similar flavor to brown sugar, add a tablespoon of molasses to one cup of white sugar.

What can I use in place of brown sugar in cookies?

You can use white sugar or a combination of white sugar and honey or maple syrup as a substitute for brown sugar in cookies. Keep in mind that the texture and flavor of your cookies will be slightly different.

Is it possible to use maple syrup instead of brown sugar?

Yes, you can use maple syrup instead of brown sugar, but keep in mind that maple syrup is thinner and sweeter than brown sugar. To get a similar texture to brown sugar, reduce the amount of liquid in your recipe.


Sarah Mock of savoringthegood.com headshot 2022

I am Sarah Mock. Welcome!

Sarah Mock is a classically trained Chef and graduate of Johnson & Wales University. A culinary blogger for 16 years Sarah helps the home cook prepare her recipes with professional results.

Get to know me

as seen in:

Logos of Hersheyland, ABC News, and Good Day PA are showcased in a seamless row, providing a snapshot of popular brands.

Hersheyland Nightline Good Day Pa!

The vibrant design showcases the iconic logos of Pinterest, Rachael Ray, and Jell-O set against a bold red background. Sorry, the provided description doesn't offer enough detail to suggest important SEO keywords.

Pinterest Rachael JELL-O


Best Substitutes for Anchovy Paste

anchovies in a tin, tin open as the featured image of anchovy paste substitute.

What to do when there is no anchovy paste in the pantry? Need an anchovy substitute?  These are the best anchovy alternatives packed with umami goodness.

anchovies in a tin, tin open as the featured image of anchovy paste substitute.

Let's learn about flavorful substitutes for anchovy paste - from seaweed delights and tantalizing soy sauce to vibrant capers, and yes even some DIY options are available to you.

Anchovy Substitute Highlights:

  • One of the best substitutes for anchovy paste is mashed anchovy fillets.
  • Fish sauce can also be used as a substitute for anchovy paste in most recipes.
  • Worcestershire sauce, Asian fish sauce, shrimp paste, capers, and umeboshi paste are other substitutes suggested in the article.
  • The substitutes mentioned in the article can recreate the same umami flavor as anchovy paste.
  • Some other substitutes for anchovy paste include capers, olives, and green beans.
  • Trout and sardines can also be used as more authentic alternatives to anchovy paste.
  • The article mentions using anchovy paste substitute in Caesar dressing recipes.
  • The ratio of anchovy paste to mashed anchovy fillet is suggested as one teaspoon to one fillet.
  • The article highlights that the substitutes mentioned can be used as alternatives to actual anchovies in recipes.

Anchovy Paste vs. Anchovy Fillets: What's the Difference?

Anchovy paste and anchovy fillets differ in form, concentration, and usage in culinary preparations. Anchovy paste is a blended mixture of ground anchovies, vinegar, water and salt. This makes it a fantastic addition to sauces or dressings where robust flavors are desired.

On the other hand, anchovy fillets are whole fish that have been cured and then packed typically in oil or salt. They possess a less pronounced taste compared to their pasted counterparts but deliver a solid umami kick nonetheless when used right.

The fillets can be finely chopped or mashed for recipes requiring more texture while still invoking rich savoriness. Plus, you can substitute one teaspoon of paste with two fillets or one teaspoon of finely chopped/mashed anchovies for your favorite dishes.

Popular Substitutes for Anchovy Paste

There are several popular substitutes for anchovy paste, including soy sauce, kalamata olives/tapenade, seaweed, miso paste, capers, and umeboshi paste.

1. Soy sauce substitute

soy sauce in a black leaf shaped bowl on a dark background.

Since it's readily available worldwide, utilizing soy sauce as a swap is convenient for most home cooks. Soy sauce packs a punch of umami flavor, making it an excellent substitute for anchovy paste. It's brewed from fermented soybeans and shares the same savory taste that you find in anchovies.

In recipes where originality matters, such as Caesar dressing or pasta dishes, using soy sauce can add depth without overly affecting texture or color. But be careful with the amount you use; soy sauce can be powerful! Start with small quantities and adjust according to your taste preferences to avoid overwhelming your dish.

2. Kalamata olives/tapenade 

seaweed with chopsticks.

Kalamata olives, known for their distinct flavor and purple color, make a fantastic anchovy paste substitute. These Greek olives are often pitted and mashed into a spread called tapenade, which shares similar salty and briny characteristics with anchovies.

No food processor? Don't fret! Simply chop them finely or crush them using a mortar and pestle, then you're all set to create deliciously savory recipes without any hint of fishiness. And if you're adhering to vegetarian or vegan diets - this is perfect for you!

3. Seaweed: an unexpected anchovy alternative

seaweed with chopsticks.

Seaweed is another excellent substitute for anchovy paste that can add a savory, umami flavor to your dishes. It can be used in various forms, such as dried seaweed flakes or powder.

Simply sprinkle it into your recipes to enhance the taste and provide a hint of oceanic richness.

4. Miso paste

Made from fermented soybeans, miso paste offers a rich and savory flavor that can closely resemble the umami taste of anchovies.

It adds depth and complexity to dishes, making it a popular choice in Asian cuisine. Just like with anchovy paste, you'll want to start with a small amount of miso paste and adjust it according to your taste preferences. It may not be an exact replica of the fishy taste of anchovies but can still provide a delicious alternative in various recipes.

5. Capers

green capers in a clear glass flip top jar.

These little briny buds add a burst of tangy flavor to dishes, making them an excellent option for recreating the umami taste of anchovies.

You can use capers in a variety of recipes, such as pasta sauces, dressings, and even pizza toppings. Just remember that capers are quite strong in flavor, so you may need to adjust the amount depending on your personal preference.

6. Umeboshi paste

A flavorful Japanese condiment that can work as a substitute. Made from salty pickled plums, umeboshi paste adds a unique tanginess and umami taste to dishes.

Its intense flavor profile makes it an excellent choice for vegetarian or vegan recipes needing that extra punch of flavor. 

7. Shrimp paste

Shrimp paste tends to be slightly sweeter and less fishy in flavor compared to anchovy paste. But it can still provide that savory, seafood flavor punch that anchovies offer.

Tips for Using Anchovy Paste Substitutes in Recipes

To substitute anchovy paste in recipes, you can use fish sauce or shrimp paste for a similar umami flavor. Experiment with different amounts to find the perfect balance for your dish.

Anchovy to anchovy paste equlvilent

I love using anchovy paste in my recipes, but sometimes I run out and need a substitute. One handy tip I've learned is that 1 teaspoon of anchovy paste can be replaced with either 2 fillets or 1 teaspoon of finely chopped/mashed anchovies.

This ratio works well to maintain the umami flavor that anchovy paste brings to dishes like pasta sauces or dressings. So, if you ever find yourself without anchovy paste, remember this easy substitution!

Fish sauce or shrimp paste as a substitute

Fish sauce is made from fermented fish, while shrimp paste is made from ground up shrimp that has been fermented. Adding them to your dishes will give a similar depth of flavor as anchovy paste would.

For substituting with shrimp paste, the general recommendation is to use about half the amount of shrimp paste as you would anchovy paste. So if a recipe calls for 1 teaspoon of anchovy paste, use around ½ teaspoon of shrimp paste. 

Other Good Substitutes

If you're feeling adventurous in the kitchen, there are a few other creative options to substitute for anchovy paste.

8. Worcestershire sauce

Just like anchovy paste, Worcestershire sauce contains fermented fish that brings the umami taste to your meals. Its tangy and robust profile complements various cuisines, from pasta sauces and dressings to marinades and stews.

So if you're in need of a vegetarian-friendly substitute or simply want to try something different, Worcestershire sauce is worth considering as an alternative to anchovy paste in your cooking adventures.

9. Asian fish sauce

It is made from fermented fish and has a strong umami flavor that can mimic the taste of anchovies. Fish sauce can be used as a suitable substitute in various recipes such as dressings, marinades, soups, and stir-fries.

Asian fish sauce provides an excellent alternative for those who are looking for vegetarian or vegan substitutes for anchovy paste. Its rich flavor profile makes it an ideal choice when you don't have anchovy paste on hand but still want to achieve that umami taste in your dishes.

Anchovy paste recipe

To make your own anchovy paste at home, you'll need a few simple ingredients, anchovy filets and an optional squeeze of lemon juice.

  1. Start by finely chopping or mashing 4 to 6 anchovy fillets - this will give you about 1 teaspoon of paste.
  2. Then, mix in some olive oil until the mixture becomes smooth and creamy. You can also add a touch of lemon juice for extra freshness if desired.

This homemade anchovy paste can be used as a substitute in recipes that call for store-bought anchovy paste, adding the same savory umami flavor to your dishes.

FAQs about Anchovy Paste Substitutes

Can anchovy paste be substituted for fillets in Caesar dressing?

Yes, anchovy paste can be substituted for fillets in Caesar salad dressing. In fact, it is a common practice to use anchovy paste as a convenient alternative to whole anchovy fillets. The ratio is usually 1 teaspoon of anchovy paste to replace 2 fillets or 1 teaspoon of finely chopped/mashed anchovies.

Can fish sauce be used as a substitute for anchovy paste?

Fish sauce can indeed be used as a substitute for in many recipes. It provides a similar umami flavor and adds depth to dishes just like anchovy paste. In fact, fish sauce is commonly used in Asian cuisines as a flavor enhancer and can bring that same savory taste to your cooking.

How much anchovy paste equals one anchovy fillet?

To achieve the same taste in your recipes, you can substitute one teaspoon of anchovy paste with either two fillets or one teaspoon of finely chopped/mashed anchovies. This ratio will help maintain the umami flavor that anchovy paste provides.

Experimenting with different amounts is also a good idea to find the perfect balance for your dishes.

How much fish sauce equals one fillet?

In my experience, when substituting fish sauce for anchovy paste in recipes, it is suggested to use about one teaspoon of fish sauce as an equal replacement for one anchovy fillet.

FAQs

Can I substitute anchovy paste for anchovy fillets in pasta?

Yes, if you're out of fillets, you can use an equivalent amount of anchovy paste as a substitute in your pasta recipe.

What can I use as an anchovy paste substitute for Caesar dressing?

For those who don't have anchovies or are vegetarian, using capers or Worcestershire sauce can bring similar tangy taste to your Caesar dressing like the original recipe.

Is fish sauce a good substitute for anchovy paste?

Yes! Fish sauce is known to impart similar flavors and tastes just like that of the anchovies, making it a good alternative when there's no access to them.

How many fillets does one tin of the anchovy paste equal?

Usually, two teaspoons of this condensed savory product equals about five whole medium-sized fish, but the equation might be slightly altered based on brands.


Sarah Mock of savoringthegood.com headshot 2022

I am Sarah Mock. Welcome!

Sarah Mock is a classically trained Chef and graduate of Johnson & Wales University. A culinary blogger for 16 years Sarah helps the home cook prepare her recipes with professional results.

Get to know me

as seen in:

Logos of Hersheyland, ABC News, and Good Day PA are showcased in a seamless row, providing a snapshot of popular brands.

Hersheyland Nightline Good Day Pa!

The vibrant design showcases the iconic logos of Pinterest, Rachael Ray, and Jell-O set against a bold red background. Sorry, the provided description doesn't offer enough detail to suggest important SEO keywords.

Pinterest Rachael JELL-O


Onion Powder vs. Onion Salt

onion powder on a spoon.

Are you torn between using onion powder and onion salt in your culinary creations? These two versatile seasonings, despite having similar names, offer unique flavor profiles when added to soups, sauces and other savory dishes.

onion powder on a spoon.

Differences Between Onion Powder and Onion Salt

red shallots and white shallots.

Onion powder is made from dehydrated onions, while onion salt is a combination of onion powder and table salt.

They use different ingredients, each providing its distinct taste. Onion powder is created by grinding dehydrated onions into a fine powder. It offers a sweet yet pungent flavor that enhances the profile of an array of dishes.

On the other hand, onion salt consists of a combination of onion powder and table salt, presenting a spice blend for convenience in cooking. This mixture often features three parts salt to one part onion powder but may vary depending on brand preferences or dietary concerns.

Some manufacturers also add anti-caking agents to prevent clumping during storage.

Does onion salt and onion powder smell and taste the same? 

These seasonings have distinct differences in flavor and aroma. Onion powder provides a more intense onion taste compared to onion salt, making it a popular choice for those who want a bolder flavor profile in their dishes.

The dehydrated nature of the powder concentrates the natural flavors of onions, enhancing its overall taste. On the other hand, onion salt offers a milder flavor with added hints of saltiness.

This combination can be convenient when you want to add both seasoning and sodium to your cooking without using separate ingredients.

Texture: Onion Powder vs. Onion Salt

They also differ in terms of their texture and granulation. Onion powder is finely ground, resulting in a smooth and powdery consistency. It easily dissolves when added to dishes, making it ideal for creating an even distribution of flavor throughout the food.

Onion salt, on the other hand, has a coarser texture due to the addition of salt crystals. These larger granules provide a bit of crunchiness when sprinkled on top of dishes or used as a seasoning during cooking.

Should You Use Onion Powder or Onion Salt

tipped over salt shaker.

Consider the flavor intensity you desire, the salt content and dietary concerns, as well as storage and shelf life when deciding between onion salt vs. onion powder.

When to use onion salt

The flavor intensity is an important factor to consider when choosing between the two seasonings. Onion powder tends to have a milder taste compared to onion salt, making it ideal for those who prefer a more subtle onion flavor in their dishes.

However, if you want a stronger and more pronounced onion taste, then using onion salt would be the better option. It's important to remember that both options can enhance the flavors of your recipes, so choose based on your personal preference and the specific dish you're preparing.

Is granulated onion the same as powdered onion

Granulated onion and powdered onion are made from the same dehydrated onions, but granulated is coarser and provides more texture, while powdered is fine and dissolves fully into the dish for concentrated flavor. They aren't exactly interchangeable, but both can be good options to use based on the specific recipe and results you want.

Powdered onion is made by finely grinding dehydrated onions into a very fine powder. It has a consistency similar to flour. Powdered onion fully dissolves when used in cooking.

Granulated onion is made by coarsely grinding dehydrated onions into small granules. It has a gritty, sandy texture. Granulated onion does not fully dissolve when cooked, and adds texture.

Powdered onion has a more concentrated flavor than granulated onion. A smaller amount of powdered onion is needed to achieve the same intensity of flavor.

Granulated onion provides more texture and bulk. It's useful as a seasoning on its own, while powdered onion is usually used in combination with other ingredients.

Dried onion flakes would be another form - these are light and flaky, sort of halfway between a granulated and powdered texture.

What about sodium?

These seasonings differ in terms of salt content and dietary concerns. While both seasonings contain sodium, onion salt has a higher concentration because it combines the flavor of onions with table salt.

This makes it more potent in taste but also increases its sodium content, which may be a concern for individuals on low-sodium diets or those looking to reduce their overall sodium intake.

However, if you prefer a milder flavor or are watching your sodium intake, using onion powder instead can be a suitable alternative. It allows you to enjoy the taste and aroma of onions without adding extra salt to your dishes.

Storage and shelf life

Onion powder and onion salt both have a long shelf life if stored properly. It is recommended to keep them in airtight containers in a cool, dry place away from sunlight. This will help preserve their flavor and aroma for longer periods of time.

Since they are dehydrated products, they have a relatively stable shelf life of up to one to two years. However, it's always best to check the expiration date on the packaging before using them in your recipes.

Remember, proper storage is key to maintaining the quality of these seasonings and ensuring that they last as long as possible.

When it comes to choosing between onion powder and onion salt, there are a few things to consider. The main differences lie in the ingredients used, flavor and aroma, and texture. If you're looking for a milder taste with more convenience, onion powder may be the way to go.

However, if you want a stronger flavor profile or need to watch your sodium intake, then onion salt could be a better choice. Ultimately, it all depends on your personal preferences and dietary needs when deciding which one is best for your cooking ventures.

FAQs

Can I replace onion salt with garlic powder?

Yes, you can substitute garlic powder for onion salt in recipes if necessary b ut taste for saltiness before serving. But, consider using spices like seasoned salt or even an entirely different flavor burst such as garlic salt to experiment with your dish flavors!

Are there other substitutes for Onion Powder?

Absolutely! Some possible alternatives include fresh onions, dried onions known as onion flakes or granules, or related products like an interesting concoction called the 'onion soup mix.

What's a good substitution when neither Onion Powder nor Onion Salt are available?

In circumstances where both options seem scarce, making use of multi-purpose staples such as Garlic Salt would work effectively to enhance the taste but also transform into unique 'onion seasoning'.


Sarah Mock of savoringthegood.com headshot 2022

I am Sarah Mock. Welcome!

Sarah Mock is a classically trained Chef and graduate of Johnson & Wales University. A culinary blogger for 16 years Sarah helps the home cook prepare her recipes with professional results.

Get to know me

as seen in:

Logos of Hersheyland, ABC News, and Good Day PA are showcased in a seamless row, providing a snapshot of popular brands.

Hersheyland Nightline Good Day Pa!

The vibrant design showcases the iconic logos of Pinterest, Rachael Ray, and Jell-O set against a bold red background. Sorry, the provided description doesn't offer enough detail to suggest important SEO keywords.

Pinterest Rachael JELL-O


Mocktail With Cranberry Juice

clear glass with a mocktail with cranberry juice in it.

Picture this: a crimson elixir that tantalizes your taste buds, introducing you to a world of tart and sweet harmony. That's right, we're talking about the sensational mocktails with cranberry juice.

clear glass with a mocktail with cranberry juice in it.

If you want non-alcoholic cocktails that are both visually stunning and a burst of flavor, this is your ticket to mocktail paradise. Explore the enchanting world of cranberry-infused mocktails and discover why they're the perfect choice for your next occasion or a well-deserved self-indulgence.

Best Cranberry Mocktail Recipes

Try out these cranberry mocktail recipes made with cranberry juice to add sparkle to any occasion. These non-alcoholic mocktail recipes are perfect for everyone to enjoy!

1. Cranberry-Lime Mocktail

Two refreshing cranberry mocktails in glasses, adorned with lime slices, mint sprigs, and cranberries on skewers, elegantly set on a marble surface.

For those looking to enjoy a guilt-free drink, the cranberry juice, fresh lime juice, and lime slices in this drink are recommended. Add ice cubes to appreciate the flavors more.

Get The Recipe

1. Cranberry Pomegranate Holiday Mocktail

Packed with the zing of tart cranberry juice, pomegranate juice, and the refreshing chill of crushed ice, the drink is a sip of pure winter magic. This mocktail is a deliciously dazzling addition to your holiday lineup.

Get The Recipe

2. Cranberry Ginger Beer Mocktail

Sip on this cranberry juice cocktail and let the cranberries and effervescent ginger beer transport you to a world of refreshment and celebration, with tangy cranberry juice and spicy ginger beer.

3. Sparkling Cranberry Mocktail

Unveil the perfect blend of unsweetened cranberry juice and effervescent bubbles, making this sparkling mocktail an absolute must-try for any occasion.

Get The Recipe

4. Cranberry Ginger Ale Punch

When it's time to quench your thirst and impress your friends, make sure to serve up this cranberry ginger ale punch for a delicious and refreshing beverage. This festive punch is not only a taste sensation but also a visual delight when adorned with a colorful garnish.

Get The Recipe

5. Cranberry Lime Mocktail

Unleash a wave of fruity refreshment with this Christmas. Combine cranberry juice and a splash of lime and make every sip a journey to flavor paradise.

Get The Recipe

6. Cranberry Rosemary Digestive Mocktail

The cranberry-rosemary digestive mocktail recipe is a concoction that embraces the earthy aroma of fresh rosemary. This fun and alcohol-free mocktail ensures that everyone can enjoy its sweet-tart flavors and the comforting hint of fresh rosemary.

Get The Recipe

8. Cranberry Apple Mocktail

This non-alcoholic cranberry drink recipe is made with apple juice, cranberry juice, and sparkling water or soda water, and has less sugar than most store-bought drinks. All you need to do is fill the glass with ice, pour the juices, and top it off with some bubbles.

Get The Recipe

9. Cranberry Moscow Mule

The key to its spirited flavor lies in the homemade cranberry simple syrup, which adds sweetness and tartness to this non-alcoholic drink.

Get The Recipe

10. Cranberry Kombucha Mocktail

You need to make this cranberry drink recipe using cranberry juice, ginger kombucha, lemon juice, and fresh cranberries. It's easy to make, delicious, and good for your gut.

Get The Recipe

11. Cranberry and Orange Juice Mocktail

You'll find the refreshing flavors of cranberry juice and orange in this drink delightful. This flavorsome orange and cranberry mocktail offers a sharp taste with a hint of sweetness.

Get The Recipe

12. Cranberry Mint Mocktail

This concoction has the allure of cranberry juice with the invigorating essence of fresh mint leaves. Garnish with a sprig of mint for that perfect finishing touch.

Get The Recipe

13. Virgin Cosmopolitan

The recipe offers a twist on the classic cocktail, making it accessible to non-drinkers and those looking for a simple mocktail alternative. It's among the cranberry mocktails with the best citrus flavors.

Get The Recipe

14. Sparkling Ginger Mocktail

This sparkling ginger cranberry mocktail is a bubbly drink that can be enjoyed by all, celebrating a special occasion or simply looking for a fun tart cranberry-flavored drink without alcohol.

Get The Recipe

Seasonal Favorite

Baked lattice top crust on an apple pie made with the Crisco pie crust recipe, showing flaky layers in the fluted edge.

This is my award-winning Crisco pie crust recipe; flaky, tender, and made with simple ingredients you already have.

Crisco Pie Crust

15. Cranberry Margarita Mocktail

To serve, make sure the entire rim of the glass has flaky sea salt, garnish with fresh cranberries and lime slices, and savor the bright and tangy flavors of this yummy mocktail.

Get The Recipe

16. Cranberry and Pineapple Elixir

As you prepare this earrthy and sweet elixir, feel free to use more sparkling water or club soda, which adds a refreshing effervescence to the mix. Additionally, don't hesitate to incorporate some citrus to accentuate the flavors.

Get The Recipe

17. Very Berry Mocktail

Make cranberry the star of this very berry mocktail. With its vibrant red hue and a medley of berries, this mocktail is a treat to your taste buds and eyes.

Get The Recipe

19. Cranberry Elderflower Mocktail

You can easily enjoy and make this cranberry mocktail. This alcohol-free cranberry drink has snappy and delicate floral notes from the cranberries and elderflower.

Get The Recipe

20. Sparkling Apple Cranberry Mimosa Mocktail

Don't miss out on this cranberry sparkler mocktail on the holidays. The cranberries and the apple juice or cider sweetness to balance each other perfectly, making this mocktail a holiday cocktail for everyone.

Get The Recipe

22. Cranberry Basil Sangria Mocktail

As the countdown to New Year's Eve begins, level up your celebration with a cranberry basil sangria mocktail. This enticing recipe brings together the vibrant flavors of cranberry juice mocktail with a hint of sweetener.

Get The Recipe

23. Fresh Pear and Cranberry Mocktail

Savor fresh fruit puree that has a rich cranberry flavor and a hint of lemon zest with this drink. You can use fresh or frozen cranberries and add some sparkling water or champagne if you prefer alcoholic beverages.

Get The Recipe

24. Red Bull Mocktail

With this mocktail, there's no need to worry about the ginger beer being too spicy because the tart cranberry juice balances the flavors perfectly.

Get The Recipe

What are the ingredients in cranberry juice?

Cranberry juice typically contains cranberries as the main ingredient, which provides the characteristic tart flavor. Water is added to the crushed cranberries to produce the juice. The specific ingredients and amounts vary by brand, but the key components are cranberries, water, and often some type of sweetener.


Sarah Mock of savoringthegood.com headshot 2022

I am Sarah Mock. Welcome!

Sarah Mock is a classically trained Chef and graduate of Johnson & Wales University. A culinary blogger for 15 years Sarah helps the home cook prepare her recipes with professional results.

Get to know me

Christmas Puppy Chow Recipe 🍬 AKA Muddy Buddies

christmas puppy chow with peppermint candies

Christmas puppy chow is quick and easy to make in under 30 minutes. No peanut butter in this easy and delicious twist on a classic puppy chow.

christmas puppy chow with peppermint candies

🍬 Puppy chow ingredients:

ingredients for christmas puppy chow., peppermints, peppermint extract, chex cereal, candy coating. Text overlay.

Here is a visual overview of the ingredients in the recipe. Scroll down to the recipe at the bottom for quantities.

📝 Ingredient notes:

  • Chex Cereal - Any crisp rice or corn cereal like Rice Chex, Corn Chex, or even Rice Krispies would work. Look for a plain cereal without added sugars or flavors.
  • White Almond Bark - white chocolate coating provides sweetness and binds everything together. Regular chocolate would overwhelm the peppermint. White chocolate or almond bark allows the mint to shine. Pick a good quality bark without paraffin wax.
  • Crushed Peppermints - These add a crunchy texture and refreshing peppermint flavor. Use hard round peppermints, not soft or creamy ones. Crush into small pieces for even distribution and a nice peppermint burst.
  • Peppermint Extract - This boosts the minty flavor. Use pure extract without added sugar or corn syrup for best flavor. Start with ¼ teaspoon and add more to taste if you want stronger mint.

🔄 Can I use a different kind of cereal?

Just use the same amount of whatever cereal you choose - 12 oz by weight or around 3 cups of cereal measured out. The rest of the ingredients can stay the same. It may just change the texture slightly depending on the cereal you use, but it will still be tasty!

You'll want to stick with plain cereal without a lot of flavoring since peppermint and white chocolate will be the main flavors. Cereals with a round or puffed shape tend to work best for mixing into this type of treat.

Here are some great substitutions

  • Corn chex instead of rice chex
  • Wheat chex instead of rice chex
  • Frosted mini wheats
  • Frosted flakes cereal
  • Cheerios

Can I use white chocolate chips for the white almond bark?

You can substitute 24 oz white chocolate chips for the almond bark, but add 1-2 tablespoon vegetable or melted coconut oil to help the chips coat smoothly when melted. Break chips into smaller pieces first and microwave in short bursts, stirring frequently to prevent burning. The coating may be thinner so cool slightly before pouring over the cereal.

You may need to refrigerate or freeze the puppy chow chex mix for 10-15 minutes to help set the coating since white chocolate chips don't harden as much as almond bark. With these adjustments to the texture, melting, and cooling, white chocolate chips can work well in place of almond bark to make homemade puppy chow.

🥣 How to make Christmas Puppy Chow

white chocolate in chunks and then white chocolate melted in black bowls.
  1. Break the almond bark into pieces and put it in a microwave-safe bowl. Microwave it, stopping to stir every 15 seconds, until it's completely melted. Once melted, stir in the peppermint extract.
    steps 1-4 of how to make christmas puppy chow
  2. Use your biggest bowl and pour the cereal into it. Pour the melted almond bark over the cereal and mix it up really well, so all the cereal gets coated.
  3. Add the crushed peppermints too and give it another good stir. If you want, you can also throw in some red sprinkles now.
    horizontal image of christmas peppermint puppy chow.
  4. Finally, lay some parchment paper on the counter or a tray and dump the cereal mixture onto it. Let it sit for about 10 minutes to harden. Then dig in and enjoy your Christmas muddy buddies!

🔨 Best way to crush peppermint candies.

The key is using hard peppermints and crushing them in a way that allows you to control the texture for the right ¼ to ½ inch sized pieces.

Here are some tips for the best way to crush peppermint candies:

  • Use a food processor or blender. Add the unwrapped peppermints and pulse until you get small crushed pieces. Don't over-process into a powder.
  • Place in a ziplock bag and use a rolling pin or mallet to gently crush them. Crush in small batches for even crushing.
  • Put them between two sheets of wax paper or in a folded towel and hit with a hammer. This lets you control the force.
  • Use a mortar and pestle to grind them into crushed bits. The molcajete style works best.

Round peppermint discs work better than soft chewy candies. The hard style crunches up nicely. Crush them when you're ready to use them for maximum flavor potency. Crushed mints lose aroma over time.

Work in batches and be careful crushing. Separate any uncrushed pieces to re-crush for uniformity.

❄️ How long does puppy chow last?

Properly stored, puppy chow can last 1-2 weeks at room temperature in an airtight container. The cereal will eventually start to soften as it absorbs moisture.

For maximum freshness and crunch, it's best to store puppy chow in an airtight container in the fridge. This can extend its shelf life to 2-3 weeks.

Look for signs it may be going stale: cereal softening, chocolate coating melting, loss of peppermint aroma. Discard if it develops an off smell or flavor.

❄️ Freezer instructions for holiday puppy chow

You can also freeze puppy chow for long-term storage. In an airtight freezer container or bag, it can keep for 2-3 months in the freezer. Thaw in the refrigerator before serving.

Things that will decrease its shelf life: humidity, heat, exposing it to air which causes the cereal to lose crunch. Storing in the fridge or freezer prevents this.

📝 Frequently asked questions, answers and tips:

Why is muddy buddies called puppy chow?

The most common theory for why the snack mix is called "puppy chow" is due to its resemblance to dry dog or puppy kibble. The coated cereal pieces have a chow-like crunchy shape similar to the hard food given to puppies. Letting dogs lick the powdery seasoning off the snack also resembles when puppies lick peanut butter off their noses. So the name "puppy chow" likely originated from the crispy, coated cereal bits bearing a close semblance to actual puppy chow or kibble.

Other possible origins include the term being used in the Midwest where high school groups would make big batches for cheap fundraising snacks to feed hungry teenage boys. The addictive quality of the treat also earned it the "puppy chow" label since it's "good enough to eat" - even for puppies! So while the exact origin is uncertain, the snack's similarity to puppy food in look and texture seems the most plausible reason for the name.

christmas puppy chow with peppermint candies

Christmas Puppy Chow Recipe

Candy Cane Chex Mix, it's so delicious and ready in just minutes! Only a few ingredients to make this incredibly tasty snack.
No ratings yet
Print Pin Rate
Course: Dessert Recipes
Cuisine: American
Keyword: Christmas Puppy Chow
Prep Time: 10 minutes minutes
Chill Time: 10 minutes minutes
Total Time: 20 minutes minutes
Servings: 20 servings
Calories: 275
Author: Sarah Mock

Ingredients

  • 12 Ounces rice Chex
  • 24 Ounces Almond Bark
  • ½ Cup Peppermint Candy crushed
  • ¼ teaspoon peppermint extract
Follow Savoring The Good On PinterestFollow @SavoringTheGood or tag #STGRecipes!

Instructions

  • Break the bark into pieces and place in a microwave safe bowl, microwave until melted, stirring every 15 seconds. When the almond bark is completely melted add in the peppermint extract and stir.
    24 Ounces Almond Bark
  • Pour cereal into the largest bowl you have, pour the melted chocolate over the cereal and stir to make sure everything is coated. Add the crushed peppermints and stir once again. If you want to use red sprinkles add them here. (Optional)
    12 Ounces rice Chex, ¼ teaspoon peppermint extract, ½ Cup Peppermint Candy
  • Place parchment paper down on the counter or tray and pour all the cereal on the paper and let harden for about 10 minutes. Enjoy!
Want to share when you made this recipe?Follow @SavoringTheGood & tag #STGRecipes!
Nutrition Facts
Christmas Puppy Chow Recipe
Serving Size
 
1
Amount per Serving
Calories
275
% Daily Value*
Fat
 
10
g
15
%
Saturated Fat
 
10
g
63
%
Polyunsaturated Fat
 
0.1
g
Monounsaturated Fat
 
0.1
g
Sodium
 
147
mg
6
%
Potassium
 
32
mg
1
%
Carbohydrates
 
43
g
14
%
Sugar
 
29
g
32
%
Protein
 
1
g
2
%
* Percent Daily Values are based on a 2000 calorie diet.
**Nutritional facts are just estimates. Please utilize your own brand nutritional values to double check against our estimates.
Like this recipe card? Want one for your site?Check out WP Recipe Maker!

Sarah Mock of savoringthegood.com headshot 2022

I am Sarah Mock. Welcome!

Sarah Mock is a classically trained Chef and graduate of Johnson & Wales University. A culinary blogger for 16 years Sarah helps the home cook prepare her recipes with professional results.

Get to know me

as seen in:

Logos of Hersheyland, ABC News, and Good Day PA are showcased in a seamless row, providing a snapshot of popular brands.

Hersheyland Nightline Good Day Pa!

The vibrant design showcases the iconic logos of Pinterest, Rachael Ray, and Jell-O set against a bold red background. Sorry, the provided description doesn't offer enough detail to suggest important SEO keywords.

Pinterest Rachael JELL-O


Turkey Gravy from Drippings

A spoon is pouring turkey gravy with drippings over a plate of mashed potatoes and stuffing.

Crafting homemade turkey gravy using the flavorful drippings from the roasting pan is not only straightforward but also far superior to store-bought alternatives. You can prepare a delicious batch in just 15 minutes with this simple recipe.

A spoon is pouring turkey gravy with drippings over a plate of mashed potatoes and stuffing.

Looking for more Thanksgiving recipes to make your meal easy and delicious? I always encourage my readers to know how to thaw a frozen turkey, then you will want to make a choice between my turkey brine or turkey rub to bring the flavors.

Then you will need to decide how to prepare your Thanksgiving turkey. I can show you how to oven roast a turkey, make a smoked turkey, a spatchcocked turkey, or a sous vide turkey breast or turkey roulade for those who just want white meat.

I can teach you to make giblet gravy and 5 minute fresh cranberry sauce. And everyone needs to know how to carve a whole turkey or to carve a turkey breast.

🏆 Why this is the best turkey gravy recipe

This turkey gravy recipe excels in flavor, texture, and adaptability, making it a top choice for enhancing your Thanksgiving feast.

A bowl of mashed potatoes topped with rich turkey gravy made from drippings, placed on a table.
  • This recipe utilizes turkey drippings, which are the golden essence of a roasted turkey. These drippings infuse the gravy with an authentic and rich turkey flavor that's hard to replicate with artificial additives. It's the genuine taste of Thanksgiving.
  • By incorporating a roux made with all-purpose flour, this recipe achieves a smooth and creamy texture for the best gravy. The roux method ensures that the gravy is velvety and lump-free, providing a delightful consistency that complements your turkey beautifully.
  • Making gravy from turkey drippings encourages you to taste and adjust the seasoning with salt and pepper. This level of customization allows you to fine-tune the gravy to your specific taste preferences. Whether you like it a bit saltier or with a touch more pepper, you have the flexibility to make it perfect for your table.

🍗 Ingredients needed:

Turkey gravy made from drippings, flour, stock, and seasonings in bowls.

Here is a visual overview of the ingredients in the recipe. Scroll down to the recipe at the bottom for quantities.

📝 Ingredient notes:

The turkey stock or broth forms the liquid base, the turkey drippings bring the turkey's unique flavor, the flour thickens the gravy, and the salt and pepper season it to perfection. Combining these ingredients results in a tasty and well-balanced turkey gravy.

  • Turkey Stock: serves as the base for your gravy. It provides a flavorful liquid that, when combined with the other ingredients, forms the sauce. The stock is made from simmering turkey bones, vegetables, and seasonings, extracting their flavors to create a rich and savory foundation for your gravy.
  • Turkey Drippings: essential for bringing that delicious, roasted turkey flavor to your gravy. They are the juices that accumulate during the turkey's roasting process. These drippings contribute a depth of flavor that's uniquely associated with the Thanksgiving bird.
  • All-Purpose Flour: used to thicken the gravy and give it a smooth, velvety texture. In this recipe, it's used to make a roux, which is a mixture of flour and fat (in this case, the turkey drippings). The roux thickens the liquid and helps to create a consistent, gravy-like consistency.
  • Salt & Pepper, to taste: These seasonings are crucial for enhancing the overall flavor of the gravy. Salt adds savory depth, while pepper provides a subtle kick of heat. Seasoning to taste ensures that the gravy is perfectly seasoned according to your preferences.

See the suggestions below on how to add additional flavor to your Thanksgiving turkey gravy.

What are turkey drippings?

As the turkey cooks, it releases flavorful juices from the meat. These juices mix with the natural fats from the turkey and any seasonings you've used. All of this delicious liquid that accumulates in the bottom of the roasting pan is what we call "turkey drippings" or "pan drippings".

You can usually find them in the bottom of the roasting pan after you've cooked your turkey, and they are the secret ingredient that makes the best gravy taste like Thanksgiving! These drippings are a key ingredient to make the gravy and bring a deep, roasted turkey flavor to your dishes.

How can I make my gravy taste better?

A white jug with gravy made from turkey drippings and mashed potatoes on a table.

Remember that tasting and adjusting as you go is crucial to achieving the perfect flavor. Tailor your gravy to your personal taste preferences, and you'll have an easy and delicious sauce to accompany your turkey.

To make your turkey gravy from drippings taste even better, you can follow these tips:

  • Quality Drippings: Start with high-quality turkey drippings. The better and more flavorful of your drippings, the better your gravy will taste. Make sure to skim off any excess fat for a richer flavor.
  • Seasoning: Season your gravy well with salt and pepper. Taste as you go and adjust the seasoning to your liking. You can also add a pinch of herbs like thyme, rosemary, or sage for extra flavor.
  • Use Stock: If you find your drippings a bit lacking in flavor, you can add some turkey or chicken stock to enhance the taste. Homemade stock is ideal, but store-bought will work too.
  • Aromatics: Saute finely chopped onions, garlic, or shallots in the pan before adding the drippings. This adds depth and aroma to your gravy.
  • Deglaze: When making your roux, you can deglaze the pan with a little white wine or brandy for an extra layer of flavor.
  • Reduction: Simmer your gravy for a longer time to reduce it and intensify the flavor. Be patient; this can take some time, but it's worth it.
  • Umami Boosters: Add umami-rich ingredients like a dash of soy sauce or a small amount of tomato paste. These can elevate the overall taste of your gravy.
  • Strain: Strain your gravy to remove any lumps or unwanted bits, resulting in a smoother and more flavorful sauce.
  • Balance Sweetness and Acidity: If your gravy is too salty, you can balance it with a touch of sweetness, like a little maple syrup or a squeeze of lemon juice if it's too bland.
  • Butter Finish: For a luxurious touch, whisk in a small piece of cold butter at the end. It adds a silky texture and a lovely sheen to your gravy.

🔪 How to make turkey gravy from drippings

A series of photos showing the process of making turkey gravy using drippings.

Discover the ultimate way to create the most delicious and velvety turkey gravy for your Thanksgiving feast. It's rich, smooth, and incredibly easy, utilizing those flavorful pan drippings and seasonings from your turkey, ensuring nothing goes to waste.

  1. Start by gently warming the turkey drippings in a medium-sized saucepan on the stove over medium-low heat. Be patient, as the goal is to warm them, not bring them to a boil.
  2. Once the drippings are warmed, introduce the flour and blend until you achieve a thick, paste-like consistency.
  3. Gradually pour in the turkey stock while maintaining a constant stir with a whisk. Allow the mixture to simmer for a few more minutes until it thickens. Keep that stirring going without interruption!
  4. When you're satisfied with the texture, remove the saucepan from the heat. Take a moment to taste your creation and, if necessary, adjust the seasoning with salt or pepper to your liking. Now, it's time to savor your delicious gravy!

Can homemade turkey gravy be made ahead?

You can make the best turkey gravy ahead of time and ensure it's warm and ready to delight your guests when it's time to serve your turkey.
Prepare the gravy a day or two before your event. After cooking, allow it to cool to room temperature. Once the homemade gravy has cooled, store it in an airtight container in the refrigerator. Make sure it's tightly sealed to prevent any off-flavors from being absorbed.

♨️ Reheating Instructions

A white bowl of soup with a spoon on top, filled with delicious turkey gravy from drippings.

Reheat the gravy gently on the stove over low to medium-low heat. Stir it frequently to ensure it heats evenly and doesn't scorch. If it's too thick, you can add a little extra splash of stock or water to reach your desired consistency.

To keep the gravy warm for service, consider using a double boiler. This setup prevents the direct contact of the gravy with high heat, which can cause it to burn. Keep the water in the lower pot simmering, and place your gravy pot in the upper pot. Stir occasionally to maintain a consistent temperature.

If you have a thermal container or a thermos, it can be an excellent way to keep the gravy hot without the need for a stove. Preheat the container with hot water, empty it, and then pour the hot gravy inside. Seal it tightly until you're ready to serve.

📝 Frequently asked questions, answers and tips:

Is turkey gravy better with flour or cornstarch?

Both flour and cornstarch can be used to thicken turkey gravy from drippings, and the choice largely depends on your preference and dietary restrictions.

Flour: Using all-purpose flour is a traditional way to thicken gravy. It provides a hearty and slightly nutty flavor. To use flour, make a roux by mixing equal parts of flour and fat (usually butter or the turkey drippings) and then gradually adding it to the simmering drippings while stirring continuously. This method gives a more classic taste to your gravy.

Cornstarch: Cornstarch is a gluten-free alternative and results in a smoother, glossy texture in your gravy. To use cornstarch, mix it with a small amount of cold water to create a slurry, then whisk it into the simmering drippings. Once the gravy returns to boil it thickens quickly and can make your gravy appear clear and glossy.

Why is my gravy lumpy?

If you find it challenging to remove any lumps of flour, you can gently press the back of a spoon against them and incorporate them into the mixture. To achieve the finest gravy, it's crucial to ensure that the flour is fully dissolved into the drippings before introducing the stock.

As a last resort, pass the lumpy gravy through a fine mesh strainer to remove the lumps.

A spoon is pouring turkey gravy with drippings over a plate of mashed potatoes and stuffing.

Turkey Gravy From The Drippings

Make the Best Turkey Gravy using pan drippings! This easy homemade turkey gravy recipe is rich and delicious. Make turkey gravy from drippings this year!
No ratings yet
Print Pin Rate
Course: Side Dish
Cuisine: American
Keyword: Turkey Gravy From The Drippings
Prep Time: 2 minutes minutes
Cook Time: 10 minutes minutes
Total Time: 12 minutes minutes
Servings: 8 servings
Calories: 57
Author: Sarah Mock

Ingredients

  •  
    4 Cups Turkey Stock
  •  
    ¼ Cup Turkey Drippings
  • A 5-pound bag of King Arthur Baking Company unbleached bread flour with 12.7% protein content, labeled for ideal use in bread, pizza crust, and rolls-perfect for creating hearty sides like homemade loaves to serve alongside a comforting slowcooker sausage casserole.¼ Cup Flour, All Purpose
  • Two clear acrylic mills-one filled with coarse salt, the other with whole black peppercorns, both topped with metal knobs-stand side by side on a white background, ready to season your favorite dishes like Shrimp Avocado Salad.Salt and pepper to taste
US Customary - Metric
Follow Savoring The Good On PinterestFollow @SavoringTheGood or tag #STGRecipes!

Instructions

  • Over medium low heat on a stove, heat the turkey drippings in a medium saucepan. This shouldn't take long as they just need to be heated, not boiling.
    ¼ Cup Turkey Drippings
  • Once the drippings have warmed up, add the flour and mix until there's no more flour. This will make a thick paste-like mixture.
    ¼ Cup Flour, All Purpose
  • Pour the stock into the mixture, stirring constantly. Let the mixture heat for a couple more minutes or until it starts to thicken. Never stop stirring!
    4 Cups Turkey Stock
  • Remove from the heat. Carefully taste and adjust with salt or pepper, if need be. Enjoy!
    Salt and pepper
Want to share when you made this recipe?Follow @SavoringTheGood & tag #STGRecipes!
Nutrition Facts
Turkey Gravy From The Drippings
Serving Size
 
4 ounces
Amount per Serving
Calories
57
% Daily Value*
Fat
 
1
g
2
%
Saturated Fat
 
0.4
g
3
%
Polyunsaturated Fat
 
0.3
g
Monounsaturated Fat
 
1
g
Cholesterol
 
4
mg
1
%
Sodium
 
169
mg
7
%
Potassium
 
128
mg
4
%
Carbohydrates
 
7
g
2
%
Sugar
 
2
g
2
%
Protein
 
3
g
6
%
* Percent Daily Values are based on a 2000 calorie diet.
**Nutritional facts are just estimates. Please utilize your own brand nutritional values to double check against our estimates.
Like this recipe card? Want one for your site?Check out WP Recipe Maker!

Sarah Mock of savoringthegood.com headshot 2022

I am Sarah Mock. Welcome!

Sarah Mock is a classically trained Chef and graduate of Johnson & Wales University. A culinary blogger for 16 years Sarah helps the home cook prepare her recipes with professional results.

Get to know me

as seen in:

Logos of Hersheyland, ABC News, and Good Day PA are showcased in a seamless row, providing a snapshot of popular brands.

Hersheyland Nightline Good Day Pa!

The vibrant design showcases the iconic logos of Pinterest, Rachael Ray, and Jell-O set against a bold red background. Sorry, the provided description doesn't offer enough detail to suggest important SEO keywords.

Pinterest Rachael JELL-O

Snowman Oreo Truffles

Snowman chocolate truffles on a wooden board.

Indulge in the delightful world of Snowman Oreo Balls / Truffles, a sweet and whimsical treat that perfectly captures the essence of the holiday season.

Snowman chocolate truffles on a wooden board.

These delectable truffles feature the iconic Oreo cookie's rich chocolate flavor, creamy cream cheese, and a smooth white chocolate coating, all artfully crafted into adorable snowmen.

Ingredients:

Oreo cookie ingredients arranged on a white plate.

These three ingredients work in harmony to create the classic Oreo truffle, combining the rich, chocolatey Oreo flavor with the creaminess of cream cheese and the sweetness of the chocolate coating.

Recipe Card?

To find the full printable recipe with specific measurements and directions CLICK HERE to go to the recipe card.

Substitutions

This recipe is versatile, and you can use any flavored Oreos you like, such as Peppermint, Gingerbread, Chocolate, or Golden Oreos. Just ensure you use approximately 45 regular cookies to maintain the desired consistency.

In case you can't locate Wilton's Snowman Decorating Sprinkles, black sugar pearls or black icing gel can be used to create the eyes and smile. For the nose, an orange sprinkle or an orange tic tac will do the trick!

How to make these easy Oreo truffles

Four stages of making oreo balls in a food processor.
  1. Grind full-size Oreos in a food processor until you have cookie crumbs. Or add them to a gallon size zip top bag and crush them with a rolling pin or large spoon.
  2. Beat softened cream cheese until smooth in a mixing bowl.
  3. Add the cream cheese with Oreo crumbs.
  4. Mix on medium speed until well combined.
    Chocolate truffles in a red tray on a white background.
  5. Form even-sized 1-inch balls using a cookie scoop.
  6. Chill the oreo balls on a prepared baking sheet in the refrigerator for 2 hours.
    This instructional guide provides step-by-step instructions on making adorable snowman cookies using Oreo balls.
  7. Make the snowman hat decorations while they set up. (see below for more step by step instructions)
  8. Melt the chocolate in a double boiler and then dip truffles in melted white chocolate and decorate with sprinkles.(see below)
  9. Add the snowman hats on top.
  10. Allow to set for about 15 minutes before serving.

How to dip Oreo balls in chocolate melting wafers

Following these detailed steps will help you create perfectly coated and decorated Oreo truffles. Ensure that your Oreo balls have been chilled in the refrigerator for the recommended 2 hours, as this helps them hold their shape.

Learn how to make delicious chocolate ice cream by coating oreo balls in white melting chocolate for a delightful twist.
  1. In a double boiler over low heat or using a microwave-safe bowl on low setting, melt the white chocolate wafers. If using a microwave, stir every 30 seconds until the chocolate is fully melted and smooth.
  2. Take one chilled Oreo ball at a time. Using a fork or dipping tool, gently lower the ball into the melted chocolate, ensuring it's fully coated. You can also use a spoon to pour chocolate over the ball.
  3. Lift the coated ball using the fork, allowing excess chocolate to drip off.
  4. Lightly tap the fork on the side of the double boiler or bowl to even out the chocolate coating on the ball.
    Learn the step-by-step process of adding faces to snowmen Oreo balls while making delicious snowman cookies.
  5. Place the coated ball back onto the parchment-lined baking sheet.
  6. Immediately add your desired sprinkles to decorate the truffle. Place two black sugar pearl sprinkles for the eyes, an orange sprinkle or orange tic tac for the nose, and additional black sugar pearl sprinkles for the smile. Work quickly as the chocolate coating may set fast.
  7. Repeat this process for all the balls.
  8. Once all the truffles are coated and decorated, add the snowman hats on top of each one. If the chocolate has already set, dab a little of the melted chocolate on top of the truffle before placing the hat. Hold it steady for a few seconds to ensure it sets and doesn't slide off.
    Oreo snowman truffles arranged on a wooden board.
  9. Allow the truffles to set completely for about 15 minutes before serving. You can keep them in the refrigerator until you're ready to enjoy!

How to make the snowman Oreo truffle hat garnish

A series of pictures showing how to make a chocolate christmas hat.
  1. Apply a small amount of the melted chocolate to the top of an Oreo half using a skewer.
  2. Quickly place an upside-down Rolo candy on top of the chocolate-covered Oreo half.
  3. Decorate with sprinkles as desired.
  4. Repeat this process to make the remaining snowman hats, and then set them aside to allow the chocolate to harden.

Storage Tips

Any leftovers should be stored in the refrigerator in an airtight container in the refrigerator for up to 5 days.

Frequently asked questions, answers and tips:

Why are my Oreo balls falling apart?

By following these tips and experimenting with the mixture's components, they should be able to create Oreo truffles that hold together well.

  • Ensure Proper Chilling: First, make sure that the cookie balls have been properly chilled in the refrigerator for the recommended time, which is typically 2 hours in this recipe. Chilling helps the mixture firm up and hold its shape.
  • Cream Cheese Consistency: Check that the cream cheese is at room temperature and softened properly. Mixing it when it's too cold or too warm can affect the binding of the mixture.
  • Proper Mixing: When combining the cream cheese with the cookie crumbs, ensure thorough mixing. This will help evenly distribute the cream cheese and create a cohesive mixture.
  • Handling Gently: Be gentle when forming the balls. Overly compacting them or rolling them too vigorously can cause them to fall apart. Use a light touch when shaping the balls.
  • Chocolate Coating: When dipping the balls in melted chocolate, make sure the coating is smooth and even. If it's too thick or uneven, it can affect the truffle's structural integrity.
  • Use Quality Ingredients: Ensure that you're using high-quality ingredients, especially the chocolate wafers and full fat cream cheese. Subpar ingredients can impact the texture and consistency.
  • Allow Set Time: After decorating the truffles, allow them to set for the recommended time. Rushing this step can lead to instability.
Do Oreo truffles need to be refrigerated?

Oreo truffles should be refrigerated to preserve their texture, prevent spoilage due to cream cheese content, and enhance their flavor. The cold temperature maintains their firmness and ensures they remain safe to eat. Chilling also makes them easier to handle, particularly for serving and transportation.

Can I use double stuf Oreos for this recipe?

Using Double Stuf or Mega Stuf Oreos can lead to excess moisture, causing the balls to lose their shape. I suggest opting for standard creme Oreo varieties. In case you only have Double Stuf or Mega Stuf, remember to reduce the amount of cream cheese for better consistency.

Snowman chocolate truffles on a wooden board.

Snowman Oreo Truffles (3 Ingredient Oreo Balls)

Easy Snowman Oreo Truffles are made with 3 ingredients: Oreo cookies, cream cheese, and chocolate. Easy to make and perfect for the holiday season!
5 from 1 vote
Print Pin Rate
Course: Dessert Recipes
Cuisine: American
Keyword: Snowman Oreo Truffles
Prep Time: 1 hour hour
Chill Time: 2 hours hours
Total Time: 3 hours hours
Servings: 24 balls
Calories: 149
Author: Sarah Mock

Ingredients

  •  
    1 package Oreo Cookies about 45 cookies
  • Box of Kraft Philadelphia Original Cream Cheese, 8 oz (226g), silver packaging with blue and white logo, and renewable energy label on the left-perfect for making delicious Lemon Cheesecake Bars.8 Ounces Cream Cheese softened to room temperature
  •  
    10 Ounces Ghirardelli melting wafers white, divided
  •  
    12 each Mini Oreos pulled apart
  •  
    24 each Rolo candy dark chocolate
  •  
    Holly sprinkle mix garnish
  •  
    Snowman sprinkle mix garnish
Follow Savoring The Good On PinterestFollow @SavoringTheGood or tag #STGRecipes!

Instructions

  • Grind Oreo cookies into crumbs using a food processor.
    1 package Oreo Cookies
  • Beat softened cream cheese until smooth in a mixing bowl.
    8 Ounces Cream Cheese
  • Combine cream cheese with Oreo crumbs, then form even-sized balls.
  • Chill the balls in the refrigerator for 2 hours.
  • Create snowman hats by melting white chocolate wafers.
    10 Ounces Ghirardelli melting wafers
  • Dip each ball in melted chocolate and decorate with sprinkles.
  • Add the snowman hats on top.
    12 each Mini Oreos, 24 each Rolo candy, Holly sprinkle mix, Snowman sprinkle mix
  • Allow to set for about 15 minutes before serving.
Want to share when you made this recipe?Follow @SavoringTheGood & tag #STGRecipes!
Nutrition Facts
Snowman Oreo Truffles (3 Ingredient Oreo Balls)
Serving Size
 
1 truffle
Amount per Serving
Calories
149
% Daily Value*
Fat
 
8
g
12
%
Saturated Fat
 
4
g
25
%
Trans Fat
 
0.01
g
Polyunsaturated Fat
 
1
g
Monounsaturated Fat
 
3
g
Cholesterol
 
10
mg
3
%
Sodium
 
110
mg
5
%
Potassium
 
58
mg
2
%
Carbohydrates
 
17
g
6
%
Sugar
 
11
g
12
%
Protein
 
2
g
4
%
* Percent Daily Values are based on a 2000 calorie diet.
**Nutritional facts are just estimates. Please utilize your own brand nutritional values to double check against our estimates.
Like this recipe card? Want one for your site?Check out WP Recipe Maker!

Sarah Mock of savoringthegood.com headshot 2022

I am Sarah Mock. Welcome!

Sarah Mock is a classically trained Chef and graduate of Johnson & Wales University. A culinary blogger for 15 years Sarah helps the home cook prepare her recipes with professional results.

Get to know me

What to Serve with Beef Wellington

A plate with vegetables and potatoes, perfect as sides for beef wellington.

If you're anything like me, making Beef Wellington feels like a little triumph. I mean, who doesn't love that delicate pastry, succulent beef, and scrumptious duxelles? 

A plate with vegetables and potatoes, perfect as sides for beef wellington.

However, choosing the right side dish to go with it can be just as important (and sometimes as tricky) as perfecting the Wellington itself. So, if you've found yourself scratching your head over what to serve alongside this beauty, this list has got you covered!

Best Side Dishes to Serve with Beef Wellington

I've put together some of my favorite side dishes that not only complement Beef Wellington but also make any beef dish truly memorable.

These are dishes that have passed the "family test" and have earned a solid spot on our dinner table time and time again. So, without further ado, let's dive right in!

Potato Side Dishes to Serve with Beef Wellington

With the countless ways to prepare potatoes, it's almost like they're the Swiss Army knife of the culinary world.

Muffin Tin Potato Stacks

Two delicious potato stacks of thinly sliced, baked potatoes are garnished with chopped herbs and grated cheese on a ceramic plate.
A simple potato stacks recipe that delivers gorgeous, golden, and irresistibly crispy results every time.
Get Full Recipe

Sous Vide Potatoes with Rosemary

Sous vide cooking is more than just steaks. Sous vide potatoes are the perfect side dish to your favorite entree. These potatoes are infused with flavor, creamy on the inside and crisp on the outside. You may never roast a potato again!
Get Full Recipe

Twice Baked Potato Casserole With Bacon

twice baked potato casserole recipe square image
Twice baked potato casserole is the easy cold weather comfort food recipe with all the flavors of a stuffed potato. Crisp bacon, cheddar cheese, sour cream and green onions fill every fork full of this kid friendly recipe.
Get Full Recipe

Crockpot Ham And Potato Soup

big bowl of Crockpot Ham And Potato Soup
There is nothing more comforting that a warm bowl of ham and potato soup on a cold winter day. This cheesy crockpot ham and potato soup uses up leftover ham, potatoes, corn and peas. Set your crockpot in the morning and come home to delicious soup your whole family will love.
Get Full Recipe

Baby Potatoes Recipes

baby potatoes recipes.
These baby potatoes recipes are the simple side dish needed to make weeknight dinners complete. Grab a bag of baby potatoes, and a few simple ingredients like fresh herbs, minced garlic, and oil, and you are set to make a classic side dish to go along with your Sunday pot roasts and roast chicken.

Dauphinoise Potatoes (Potatoes au Gratin)

Dauphinoise Potatoes might be the elegant touch you've been looking for. Layers of thinly sliced potatoes baked to golden perfection.

Get The Recipe

Miso Garlic Mashed Potatoes

Give the traditional mashed potatoes an umami twist. The miso paste enriches the flavor of the potatoes, making every bite a super delightful experience.

Get The Recipe

Honey Bacon Roasted Potatoes

Sweet, salty, and oh-so-crispy, these roasted potatoes are a flavor bomb. The honey and bacon combo? Absolutely irresistible.

Get The Recipe

Potato Knishes

A bite-sized treat filled with creamy potato goodness. If you've never tried a knish, now's the perfect time!

Get The Recipe

Sweet and Spicy Mexican Roasted Sweet Potatoes

If you're looking to introduce a hint of sweet and spicy to the table, these roasted sweet potatoes are the way to go.

Get The Recipe

Roasted Garlic Mashed Potatoes

Elevate your mashed potatoes by adding roasted garlic. It brings out a beautiful sweetness and nuttiness that complements so well with the creaminess of the spuds.

Get The Recipe

Crispy Potato Rosti

Imagine hash browns, but elevated. This Swiss potato dish is crisp on the outside, tender on the inside, and a delight throughout. 

Get The Recipe

Vegetable Side Dishes for Beef Wellington

These aren't just any veggies-they're spectacular, flavorful, and sure to wow your guests.

Smashed Brussel Sprouts

Remember the days when we'd push our sprouts around the plate? Well, not anymore. These smashed goodies are crisp on the edges, flavorful, and will have everyone asking for seconds.

Get The Recipe

Crunchy Onion Rings

Now, I know what you're thinking. "Onion rings?" But here's the twist: they're air-fried! Less oil, all the crunch, and just downright delicious. A perfect indulgence that won't weigh you down.

Get The Recipe

Zucchini Fritters

If you haven't tried these golden little patties, you're in for a treat. They're light, savory, and a great way to sneak in those greens. Top with a dollop of yogurt or sour cream, and you've got a winner.

Get The Recipe

Roasted Brussels Sprouts and Broccoli

Why have one veggie when you can have two? The roasting brings out the nutty goodness, impressing even the most adamant veggie haters. 

Get The Recipe

Restaurant Fried Green Beans

Another delicious, crispy veggie treat. Just like those fancy restaurants, but in the comfort of your home.

Get The Recipe

Roasted Asparagus

Simple, elegant, and always a classic. A drizzle of olive oil, a sprinkle of sea salt, and you've got a side dish that speaks volumes in flavor.

Get The Recipe

Butternut Squash Fritters

Sweet butternut squash in a fritter? Yes, please! Perfectly crispy on the outside, soft on the inside.

Get The Recipe

Lemon Parmesan Cheese Smashed Broccoli

Broccoli doesn't have to be boring. With a zesty lemon touch and a sprinkle of Parmesan, this will totally be the star on your table. 

Get The Recipe

Honey Balsamic Roasted Carrots

Carrots roasted to perfection, glazed with a sweet and tangy honey balsamic dressing. It's simple but makes quite the statement.

Get The Recipe

Savory Spanish Garlic Brussels Sprouts

Take a trip to Spain without leaving your kitchen. The garlic infusion adds a depth that's hard to resist.

Get The Recipe

Sauteed Asparagus and Mushrooms

Two of my favorites in one dish. The earthy mushrooms complement the fresh asparagus perfectly. It's a match made in veggie heaven!

Get The Recipe

Maple Glazed Carrots

Just a touch of maple syrup elevates the humble carrot into a side dish worthy of any feast.

Get The Recipe

Baked Thyme and Prosecco Parsnips

Parsnips, often the unsung heroes of the root vegetable world, get a touch of glamor in this recipe. The Prosecco and thyme add a twist that's both wonderfully festive and delish.

Get The Recipe

Salt and Pepper Mushrooms

I've been loving this simple recipe-just mushrooms seasoned perfectly with salt and pepper and maybe a touch of garlic if you're feeling fancy. They're a dream, a crunchy, umami-filled dream.

Get The Recipe

Side Salads

Meaty mains and refreshing salads; it's the age-old duo!

Cucumber Onion Salad

There's nothing like a refreshing cucumber salad to cleanse the palate. The tanginess of the onions combined with the cool cucumbers is the perfect summer treat.

Get The Recipe

Cold Pea Salad

Sometimes the classics just hit the spot. This cold pea salad is creamy, cool, comforting, and just delightful.

Get The Recipe

Classic Caesar

Sometimes the oldies are the goodies. This salad never fails-crunchy croutons, crisp lettuce, and that iconic dressing? Superb! 

Get The Recipe

Roasted Root Vegetable Side Salad

Autumn in a bowl, that's what this is. Those root veggies are caramelized to perfection and just pop with flavor. It's the kind of warmth and heartiness you need on a chilly afternoon.

Get The Recipe

Walnut Fig Squash Kale Salad

Walnut Fig Squash Kale Salad balances sweetness, nuttiness, and earthiness in every bite. It's a hearty, flavorful, and absolutely beautiful side.

Get The Recipe

Shaved Rainbow Carrot Sesame Salad

This salad is vibrant, refreshing, and offers a delightful crunch. Plus, sesame gives it that little extra something.

Get The Recipe

Brussels Sprout Slaw

Thinly sliced and mixed with a tangy dressing, this slaw is crunchy, zesty, and full of surprises.

Get The Recipe

Grilled Apricot Couscous Salad

Sweet and smoky grilled apricots, fluffy couscous, a splash of herbs-this salad is what Mediterranean dreams are made of.

Get The Recipe

Lemon Arugula Salad with Pine Nuts

The peppery arugula, zesty lemon, and crunchy pine nuts create a light and invigorating side dish perfect for a refreshing bite. 

Get The Recipe

Creamy Waldorf Salad

Crunchy apples, plump grapes, and creamy dressing-it's a dance of textures and flavors that your kids will absolutely adore!

Get The Recipe

Avocado and Beet Salad

Creamy avocado meets earthy beets in this yummy salad. It's a visual treat that's well-balanced and energizing.

Get The Recipe

French-Style Potato and Green Salad

A twist on the traditional potato salad with some crisp greens added for good measure. It's hearty but fresh, the perfect combination to complement that Beef Wellington. 

Get The Recipe

Baby Kale Salad with Pomegranate and Pecans

The deep reds of the pomegranate seeds, the crunch of the pecans, and the tender baby kale leaves create a harmony in your mouth. It's the kind of side dish that'll make your guests go, "Oh, what is this?!"

Get The Recipe

These grains and starchy sides are appetizing, comforting, and every bit as spectacular as your main dish.

Yorkshire Pudding

frameborder="0">

There's no better pair for a Beef Wellington than a classic Yorkshire pudding. Fluffy, golden, and with that unmistakable airy center, it's like a warm hug for your taste buds.

Get The Recipe

Simple Instant Pot Brown Rice

Now, I know brown rice might sound a tad bit plain, but trust, it's all about the texture and the subtle nuttiness.

Gigi Hadid Pasta

This pasta is creamy, spicy, and every bit as glamorous as its namesake. It's a modern classic, if you will. And next to Beef Wellington? Positively runway-worthy.

Get The Recipe

Dill Pickle Pasta Salad

An unexpected twist on the classic pasta salad, this dish has got zing. It's refreshing, with a hint of nostalgia. Perfect for those warm evenings when you want something hearty but not too heavy.

Get The Recipe

Hawaiian Pasta Salad Recipe

Sweet pineapples, creamy dressing, and that delightful pasta-it's a tropical escape minus the hassle of booking a flight.

Get The Recipe

Sweet Corn Risotto

Corn and risotto, two of my favorites coming together in a creamy, dreamy dish. Each spoonful is a symphony of flavors and textures, with the corn adding that lovely sweet pop.

Get The Recipe

Peach Prosciutto Hot Honey Orzo Salad

Sweet peaches, salty prosciutto, and spicy honey over delicate orzo? Absolutely yes!

Get The Recipe

Quinoa Cucumber Salad with Dill, Feta, and Mint

While quinoa is all the rage these days for its benefits, this salad makes it a star for its taste. Fresh dill, tangy feta, and revitalizing mint? So refreshing.

Get The Recipe

Wild Rice Pilaf

This isn't your everyday rice. Paired with some herbs and maybe some dried fruits or nuts, it's a side dish that'll leave an impression.

Get The Recipe

Creamy Pumpkin Polenta

Imagine the smoothness of polenta with the sweet, earthy taste of pumpkin. It's comfort in a bowl, and a heartwarming side for your exquisite beef dish.

Get The Recipe

What better way to soak up the juicy flavors of beef wellington than with a piece of bread?

Cheesy Eggplant Puff Pastry

The light and flaky layers of the puff pastry combined with the deliciousness of eggplant and cheese? Heavenly!

Get The Recipe

Cheesy Olive Tapenade Crostini

These crostinis are a fiesta of flavors. Crunchy, cheesy, and topped with that flavorful olive tapenade, they're a delightful little tease before the dinner party.

Get The Recipe

Garlic Parmesan Dinner Rolls

Nothing says comfort like freshly baked bread. Add in garlic and Parmesan? You're in for a treat.

Get The Recipe

Pull Apart Hatch Green Chile Cheese Bread

Spicy, cheesy, and oh-so-indulgent, this bread is for those who love a little kick with their meal.

Get The Recipe

Italian Tomato Bruschetta

The refreshing taste of ripe tomatoes, a hint of garlic, a sprinkle of basil, and a generous drizzle of olive oil on a toasty slice of Italian bread. Each bite is like a mini trip to a warm summer's day in Italy.

Get The Recipe

Sauces to Serve with Beef Wellington

Wondering what to serve to elevate a beef tenderloin dish? At your next dinner party, choose an easy to prepare sauce to spoon alongside your beef Wellington.

Red Wine Reduction

A favorite in many households, and for a good reason! This sauce, with its deep flavors and velvety texture, can make your beef tenderloin even more luxurious. 

Get The Recipe

Béarnaise Sauce

This is the crème de la crème of steak sauces. With its creamy texture and a delicate blend of tarragon and shallots, it's the perfect accompaniment to a well-cooked tenderloin. 

Get The Recipe

Mushroom Sauce

Mushrooms have this natural umami, which pairs beautifully with the notes of a the beef. I can practically hear the sizzle of the beef and the simmer of the sauce just thinking about it!

Get The Recipe

Mustard Cream Sauce

The piquancy of mustard balanced with the silkiness of cream is just divine. It adds a sharpness to the beef that makes every bite a taste sensation.

Get The Recipe

Vegan Hollandaise Sauce

Creamy, tangy, and utterly delightful, Vegan Hollandaise Sauce will pleasantly surprise your guests. Perfect for those looking for a dairy-free option without compromising on taste.

Get The Recipe

Sarah Mock of savoringthegood.com headshot 2022

I am Sarah Mock. Welcome!

Sarah Mock is a classically trained Chef and a graduate of Johnson & Wales University. A culinary blogger for 17 years, Sarah helps the home cook prepare her recipes with professional results.

Get to know me

as seen in:

Logos of Hersheyland, ABC News, and Good Day PA are showcased in a seamless row, providing a snapshot of popular brands.

Hersheyland Nightline Good Day Pa!

The vibrant design showcases the iconic logos of Pinterest, Rachael Ray, and Jell-O set against a bold red background. Sorry, the provided description doesn't offer enough detail to suggest important SEO keywords.

Pinterest Rachael JELL-O


100 Ways To Cook An Egg

White and brown eggs in a wicker basket, showcasing 100 ways to prepare an egg.

This comprehensive guide is about to blow your mind with 100 diverse and delectable ways to cook an egg - from comforting classics right through to innovative international delights.

White and brown eggs in a wicker basket, showcasing 100 ways to prepare an egg.

Ever feel stuck in a breakfast rut, always reaching for the same old fried or scrambled eggs? Trust me, I totally get it. But here's the good news: eggs are one of the most incredibly versatile ingredients out there with a world of preparations waiting to be explored.

Classic Egg Preparations

Hard-boiled eggs are a versatile and easy way to enjoy eggs, whether eaten on their own or used in salads and sandwiches.

Hard boiled eggs

Let's dive into the simplicity and versatility of hard-boiled eggs.

  • You can enjoy them as a quick, protein - packed snack.
  • Slice them up for a savory addition to your salads.
  • Dice them for egg salad sandwiches.
  • Garnish your soup with quartered hard-boiled eggs.
  • Mix chopped hard - boiled eggs into your tuna or pasta salad for an extra oomph.
  • Decorate your deviled eggs with red paprika or fresh dill.
  • Enjoy them inside a breakfast burrito with bacon and cheese.
  • Grate them over roasted asparagus or brussels sprouts for a delightful dinner side dish.
  • Use them in traditional Easter egg painting and hunts.

Soft boiled eggs

Soft boiled eggs open up a world of tasty possibilities. They're a simple, fast-cooking classic that can enliven your breakfast table and beyond. Here are just a few ways you can make and use them:

  • Basic Soft Boiled Egg: Bring water to a boil, gently add the eggs, lower the heat to medium and cook for about 5-6 minutes.
  • Dippy Eggs: Make soft boiled eggs and serve with "soldiers" or thin strips of toast perfect for dipping in the runny yolk.
  • Soft Boiled Eggs in Breakfast Burritos: Wrap soft boiled eggs with salsa, cheese, and beans inside a warm tortilla.
  • Ramen Noodles with Soft Boiled Eggs: Create an authentic Japanese-style egg dish by adding soft boiled eggs to your ramen noodles.
  • Soft Boiled Egg Salad Sandwiches: Mash soft boiled eggs with some mayo, mustard, salt, pepper then spread on bread for a quick meal.
  • Egg Salad: Use yogurt instead of mayo for a lighter version of egg salad sandwiches.
  • Spinach and Lentil Salad with Soft Boiled Eggs: Top spinach leaves and cooked lentils with soft-boiled eggs for an easy lunch.

Scrambled eggs

Scrambled eggs provide a quick, versatile and delicious meal that you can enjoy at any time of the day. Let's get cracking with these flavorful variations:

  • Classic scrambled eggs: Beat your eggs in a bowl, pour into a hot non-stick skillet, and gently stir until cooked to your desired consistency.
  • Mexican-style: Add salsa, jalapeno peppers, and cilantro for some southwestern flair.
  • Italian-style: Stir in chopped tomatoes, fresh basil and mozzarella cheese for an Italian twist.
  • Scrambled egg breakfast burrito: Wrap your cooked scrambled eggs with avocado slices, black beans, and shredded cheese in a warm tortilla.
  • Scrambled egg toast: Top off whole grain toast with creamy scrambled eggs and sprinkle on chives or dill for added freshness.
  • Japanese-style scrambled eggs (Japanese Egg Dishes): Mix beaten eggs with soy sauce, mirin, sugar before cooking to create light and fluffy Tamagoyaki style scramble.

Fried eggs

Fried eggs are quick and easy to make. Here are a few tips to help you achieve the perfect fried eggs:

  1. Heat a non - stick skillet over medium heat.
  2. Add a small amount of oil or butter to the pan and let it melt.
  3. Crack the egg directly into the pan, being careful not to break the yolk.
  4. Cook the egg for about 2 - 3 minutes, until the white is set but the yolk is still runny.
  5. If you prefer your yolk cooked through, carefully flip the egg and cook for an additional 1 - 2 minutes.
  6. Remove the fried egg from the pan and season with salt and pepper.

Poached eggs

Poached eggs are a delicious and versatile way to cook eggs. Here are some ideas for using poached eggs in different dishes:

  • Eggs Benedict: Top a toasted English muffin with a poached egg, Canadian bacon, and hollandaise sauce for a classic breakfast dish.
  • Salads: Add to salads for a creamy and protein-packed addition. They pair well with leafy greens, roasted vegetables, and vinaigrette dressings.
  • Grain bowls: Elevate your grain bowl by topping it with a perfectly poached egg. The runny yolk adds richness and flavor to the dish.
  • Ramen: Break open a poached egg and let the yolk mingle with the broth in your bowl of ramen noodles. It creates a luscious texture and adds extra richness.
  • Avocado toast: Place a poached egg on top of avocado toast for an Instagram-worthy breakfast or brunch option. Sprinkle some herbs or crushed red pepper flakes for extra flavor.

Omelets

Omelets were one of the first interactive food stations I learned when I was a cook at the local country club. Here are some variations you can try:

  • Cheesy: Add your favorite cheese, like cheddar or mozzarella, to the beaten eggs before cooking.
  • Vegetable: Sautee a mix of colorful vegetables, such as bell peppers, onions, and spinach, and then add them to the beaten eggs.
  • Western: Cook diced ham, bell peppers, and onions before folding them into the beaten eggs.
  • Mediterranean: Mix chopped tomatoes, feta cheese, olives, and fresh herbs like basil or parsley into the beaten eggs.
  • Mexican: Add some spice by mixing in diced jalapenos, salsa, and shredded cheese.

Baked Egg Dishes

Baked egg dishes are a delicious and versatile way to enjoy eggs. From quiche to frittatas, these dishes can be customized with your favorite ingredients for a tasty meal any time of day.

Quiche

Quiche is a versatile and delicious baked egg dish that can be enjoyed for breakfast, brunch, or even dinner. Here are some creative quiche variations to try:

  • Spinach and feta: A classic combination of flavors, this quiche is packed with spinach and tangy feta cheese.
  • Bacon and cheddar: Indulge in the savory goodness of crispy bacon and melted cheddar cheese in this hearty quiche.
  • Mushroom and Swiss: Earthy mushrooms and nutty Swiss cheese make for a rich and satisfying quiche option.
  • Tomato and basil: Bright, fresh tomatoes paired with fragrant basil create a light and summery flavor profile in this quiche.
  • Broccoli and cheddar: Sneak some veggies into your meal with this cheesy broccoli-packed quiche.

Frittatas

Frittatas are a versatile and delicious way to use up ingredients in your fridge. They are easy to make and can be enjoyed for breakfast, lunch, or dinner. Here are some variations you can try:

  • Spinach and feta: Sauté spinach until wilted, then mix it with crumbled feta cheese before adding it to the beaten eggs.
  • Mushroom and goat cheese: Sauté sliced mushrooms until golden brown, then sprinkle them over the beaten eggs along with crumbled goat cheese.
  • Tomato and basil: Slice tomatoes and tear fresh basil leaves, then layer them on top of the beaten eggs before cooking.
  • Potato and onion: Thinly slice potatoes and onions, then sauté them until tender before adding them to the beaten eggs.
  • Mediterranean: Combine chopped roasted red peppers, Kalamata olives, crumbled feta cheese, and dried oregano with the beaten eggs for a taste of the Mediterranean.
  • Smoked salmon and dill: Flake smoked salmon into small pieces, then mix it with chopped fresh dill before adding it to the beaten eggs.
  • Bacon and cheddar: Cook bacon until crispy, then crumble it and mix it with shredded cheddar cheese before combining with the beaten eggs.
  • Veggie: Sautee a combination of your favorite vegetables like bell peppers, zucchini, broccoli, or asparagus before adding them to the beaten eggs.
  • Ham and Swiss: Dice cooked ham into small pieces, then mix it with shredded Swiss cheese before adding it to the beaten eggs.
  • Mexican-style: Add diced jalapenos, black beans, corn kernels, chopped cilantro, and shredded pepper jack cheese to give your frittata a little spice.

Egg casseroles

I love making egg casseroles because they are versatile and can be customized to suit any taste. Here are some delicious variations to try:

  • Cheesy Bacon and Potato Egg Casserole
  • Bacon, Spinach and Feta Egg Casserole
  • Ham and Swiss Egg Casserole
  • Veggie Loaded Egg Casserole

Breakfast bread bowls

I love starting my day with a delicious breakfast bread bowl. Here are some tasty variations you can try:

  • Sausage and Egg Bread Bowl: Hollow out a bread roll and fill it with cooked sausage, scrambled eggs, and cheese. Bake until the cheese is melted and bubbly.
  • Bacon and Avocado Bread Bowl: Slice a bread roll in half and toast it. Spread mashed avocado on one half, then top with crispy bacon and a fried egg.
  • Caprese Bread Bowl: Cut off the top of a bread roll and scoop out the inside. Fill it with sliced tomatoes, fresh mozzarella, basil leaves, and a drizzle of balsamic glaze.
  • Spinach and Feta Bread Bowl: Saute spinach until wilted, then mix it with crumbled feta cheese. Stuff the mixture into a hollowed-out bread roll and bake until heated through.
  • Ham and Swiss Bread Bowl: Layer sliced ham, Swiss cheese, and Dijon mustard inside a hollowed-out bread roll. Toast until the cheese is melted.

Egg tart

I love making egg tarts because they are delicious and easy to make. Here are some variations you can try:

  • Classic Portuguese - crisp, flaky crust holding a creamy custard center, blistered on top from the high heat of an oven.
  • Hong Kong - style  - a mild filling and a pastry crust that is flaky and crumbly. 
  • Macau - style - A custard tart baked in a flaky puff pastry shell is often served straight from the oven.
  • Matcha green tea - it's more of a matcha custard tart than a matcha egg tart.  

Egg-Based Sandwiches and Wraps

  • Breakfast sandwiches are a convenient and delicious way to start your day, with options like bacon, egg, and cheese or sausage and egg on a toasted English muffin.
  • Egg salad sandwiches make for a light and refreshing lunch option, combining hard boiled eggs with mayo, mustard, and seasonings on your choice of bread.
  • For those looking for a heartier breakfast option, breakfast burritos packed with scrambled eggs, cheese, veggies, and protein such as bacon or sausage are the perfect pick-me-up.
  • Wraps filled with scrambled eggs can be customized to your liking by adding in veggies like bell peppers or spinach for added nutrition.
  • Want to take Eggs Benedict to the next level? Try an Eggs Benedict burger featuring a fried egg atop a juicy burger patty with hollandaise sauce - it's brunch meets burger perfection.

Breakfast Egg Sandwiches

Start your day with a delicious breakfast sandwich. Here are some tasty variations to try:

  • Classic bacon, egg, and cheese on a toasted English muffin.
  • Sausage, egg, and pepper jack cheese wrapped in a warm tortilla.
  • Ham, egg, and Swiss cheese on a buttery croissant.
  • Smoked salmon, scrambled egg, and cream cheese on a toasted bagel.
  • Avocado, fried egg, and cheddar cheese on whole wheat toast.

Egg salad sandwiches

These egg salad sandwiches are quick, easy, and always satisfying. Here are a few variations to try:

  • Classic: Mix hard boiled eggs with mayonnaise, mustard, salt, and pepper. Spread on bread and enjoy.
  • Avocado: Mash avocado with chopped boiled eggs, lime juice, cilantro, salt, and pepper. Spread on bread for a creamy twist on the traditional sandwich.
  • Greek-inspired: Combine boiled eggs with chopped cucumbers, tomatoes, red onion, feta cheese, lemon juice, olive oil, dill, salt, and pepper. Serve on whole grain bread for a flavorful lunch.
  • Curry: Add curry powder to your classic egg salad mix for a spicy kick. Top with lettuce leaves and serve on pita bread for an exotic twist.

Deviled Eggs

Deviled eggs with bacon and chives.

A classic appetizer made by halving hard-boiled eggs and scooping out the yolks. These yolks are then mixed with mayonnaise, mustard, and various seasonings, resulting in a creamy, flavorful filling. This mixture is spooned back into the egg whites, creating a delightful and savory bite-sized treat often garnished with paprika or fresh herbs.

  • Avocado and Bacon
  • Spicy Deviled Eggs
  • Sriracha Deviled Eggs
  • Classic Southern

Breakfast burritos

Start your morning off right with a delicious breakfast burrito. Here are some tasty variations you can try:

  • Bacon, egg, and cheese
  • Veggie and cheese
  • Sausage and pepper 
  • Spinach and mushroom
  • Southwest - style breakfast

Egg wraps

I love making egg wraps because they are versatile and make for a satisfying meal. Here are some delicious variations to try:

  • Spinach and feta egg wrap: Saute spinach with garlic, then scramble some eggs and mix in crumbled feta cheese. Spread the mixture onto a tortilla, roll it up, and enjoy!
  • Buffalo chicken egg wrap: Cook diced chicken in buffalo sauce until fully cooked. Scramble some eggs and pour them over the chicken, cooking until set. Place the mixture on a tortilla along with some lettuce and ranch dressing.
  • Mediterranean veggie egg wrap: Sauté bell peppers, zucchini, and onions in olive oil until tender. Add scrambled eggs to the pan and cook until done. Spread hummus on a tortilla, add the egg mixture, and top with crumbled feta cheese.
  • BLT egg wrap: Fry bacon until crispy, then remove from pan and drain on paper towels. In the same pan, scramble some eggs until cooked through. Place lettuce, tomato slices, and the scrambled eggs on a tortilla before topping with the crispy bacon.
  • Southwest black bean egg wrap: In a skillet, cook black beans with cumin, chili powder, and garlic powder. Scramble some eggs separately. Spread refried beans on a tortilla, add the scrambled eggs and black bean mixture, then sprinkle with shredded cheese.

Eggs Benedict burger

I love combining classic dishes to create something new and exciting. One of my favorite creations is the Eggs Benedict burger. Here are some delicious variations to try:

  • Classic Eggs Benedict burger: Start with a juicy beef patty topped with a poached egg, crispy bacon, and hollandaise sauce. Place it all between two toasted English muffins for a mouthwatering burger experience.
  • Salmon Eggs Benedict burger: Swap out the beef patty for a grilled salmon fillet. Top it with a poached egg, sautéed spinach, and creamy hollandaise sauce. Serve it on a toasted brioche bun for an elegant twist.
  • Vegetarian Eggs Benedict burger: For a meatless option, use a veggie burger patty instead of beef. Add a poached egg, avocado slices, tomato, and hollandaise sauce for a satisfying vegetarian meal.
  • Turkey Bacon Eggs Benedict burger: Opt for turkey bacon instead of regular bacon. Pair it with a beef patty and top it off with a perfectly poached egg and hollandaise sauce.
  • Mushroom Eggs Benedict burger: For mushroom lovers, create a scrumptious combination by using grilled Portobello mushrooms in place of the meat patty. Layer on the poached egg, sautéed spinach, and rich hollandaise sauce.

International Egg Dishes

Some international egg dishes to try include Huevos Rancheros, Chinese egg tart, Stracciatella (Italian egg drop soup), Lox and cream cheese scramble, and Shakshuka.

Huevos Rancheros

Huevos Rancheros is a delicious and satisfying Mexican egg dish that makes for a hearty breakfast or brunch. Here are some ways you can prepare it:

  1. Fry corn tortillas until crispy.
  2. Top the tortillas with refried beans.
  3. Cook eggs sunny - side up and place them on top of the beans.
  4. Pour a spicy tomato sauce over the eggs.
  5. Sprinkle with crumbled queso fresco or shredded Monterey Jack cheese.
  6. Garnish with chopped cilantro, sliced avocado, and a squeeze of lime juice.

Chinese egg tart

I love making Chinese egg tarts because they are a delicious and popular treat. Here are some variations you can try:

  1. Classic Chinese egg tart with flaky pastry crust
  2. Mini egg tarts with a buttery shortbread crust
  3. Coconut custard egg tarts for a tropical twist
  4. Matcha green tea egg tarts for a unique flavor combination
  5. Pandan - flavored egg tarts for an aromatic treat

Stracciatella - Italian egg drop soup

I love making Stracciatella, an Italian egg drop soup. Here's how you can make it at home:

  1. In a pot, bring chicken broth to a simmer.
  2. Beat eggs in a separate bowl and slowly pour them into the simmering broth while stirring gently.
  3. Add grated Parmesan cheese and stir until melted and incorporated into the soup.
  4. Season with salt and pepper to taste.
  5. Optional: You can add some chopped spinach or escarole for added flavor and nutrition.
  6. Cook for another 5 minutes or until the eggs are fully cooked but still soft and tender.
  7. Serve hot and garnish with fresh parsley.

Lox and cream cheese scramble

I love experimenting with different ways to cook eggs, and one of my favorite creations is the lox and cream cheese scramble. It's a delicious twist on traditional scrambled eggs that adds a savory and creamy flavor. Here's how I make it:

  • Beat a few eggs in a bowl.
  • Heat some butter in a non - stick skillet over medium heat.
  • Add the beaten eggs to the skillet and scramble them gently.
  • Once the eggs start to set, add chunks of smoked salmon and dollops of cream cheese to the pan.
  • Continue stirring until the eggs are fully cooked and fluffy.
  • Season with salt, pepper, and any other herbs or spices you like.

Shakshuka

I love Shakshuka because it's a flavorful and versatile dish that can be enjoyed for breakfast, lunch, or dinner. Here are some variations of Shakshuka that you can try:

  • Traditional Shakshuka with poached eggs simmered in a rich tomato sauce with bell peppers, onions, and spices.
  • Spicy Shakshuka with the addition of chili flakes or hot sauce to give it an extra kick.
  • Cheesy Shakshuka topped with melted feta or mozzarella cheese for a gooey and indulgent twist.
  • Veggie - packed Shakshuka with added vegetables like spinach, zucchini, or mushrooms for a nutritious meal.
  • Mediterranean - inspired Shakshuka with olives, artichoke hearts, and crumbled feta cheese for a taste of the Mediterranean.

Creative Egg Recipe Variations

- Avocado toast with poached egg: Top a slice of toasted bread with mashed avocado, a perfectly poached egg, and a sprinkle of salt and pepper for a simple and satisfying breakfast or brunch option.

Avocado toast with poached egg

Avocado toast with poached egg is a delicious breakfast option. Here are some variations to try:

  • Top your avocado toast with a perfectly poached egg for a creamy and protein - packed meal.
  • Add sliced tomatoes and a sprinkle of salt and pepper for extra flavor.
  • Drizzle some hot sauce or sriracha on top for a spicy kick.
  • Sprinkle some crumbled feta cheese or goat cheese over the avocado and egg for added creaminess.
  • Garnish with fresh herbs like cilantro or parsley for a burst of freshness.

Egg-stuffed biscuit

I love making egg-stuffed biscuits because they're delicious and portable. Here's how to make them:

  1. Preheat the oven to 375°F.
  2. Flatten a refrigerated biscuit dough with your hands.
  3. Place a cooked, scrambled egg in the center of the flattened biscuit.
  4. Sprinkle shredded cheese on top of the egg.
  5. Fold the sides of the biscuit over the egg and cheese, sealing it shut.
  6. Place the filled biscuits on a baking sheet lined with parchment paper.
  7. Bake for 12 - 15 minutes or until golden brown.
  8. Let cool for a few minutes before serving.

Deviled eggs with pickled beets and root chips

I love making deviled eggs with pickled beets and root chips because they add a unique twist to this classic appetizer. Here's how to make them:

  1. Hard boil a dozen eggs and let them cool.
  2. Peel the eggs and carefully cut them in half lengthwise.
  3. Gently remove the yolks and place them in a bowl.
  4. Mash the yolks with mayonnaise, Dijon mustard, salt, and pepper until smooth and creamy.
  5. Spoon or pipe the yolk mixture back into the egg white halves.
  6. Top each deviled egg with a slice of pickled beet for a pop of color and tangy flavor.
  7. Serve the deviled eggs on a platter with crispy root chips alongs

Pesto asparagus egg skillet

If you're looking to add a burst of flavor to your breakfast, try making a pesto asparagus egg skillet. This delicious dish combines the freshness of asparagus with the richness of eggs for a satisfying meal. Here's how to make it:

  1. Heat a skillet over medium heat and add a tablespoon of olive oil.
  2. Add chopped asparagus to the skillet and sauté until tender, about 5 minutes.
  3. In a separate bowl, whisk together eggs, salt, pepper, and a spoonful of pesto.
  4. Pour the egg mixture over the cooked asparagus in the skillet.
  5. Cook the eggs, gently stirring occasionally, until they are set but still slightly runny, about 3 - 4 minutes.
  6. Remove the skillet from heat and let it sit for a minute to finish cooking.
  7. Serve your pesto asparagus egg skillet hot with a sprinkle of grated Parmesan cheese on top.

Cloud eggs

Cloud eggs are a unique and trendy way to cook eggs. They are fluffy and delicious, with a light and airy texture. Here are some creative variations you can try:

  • Parmesan Cloud Eggs: Whip egg whites until stiff peaks form, then fold in grated parmesan cheese. Spoon the mixture onto a baking sheet and create a well in the center of each mound. Bake until lightly golden, then carefully place an egg yolk into each well. Bake for another few minutes until the yolks are set.
  • Bacon and Cheese Cloud Eggs: Cook bacon until crispy, then crumble it into small pieces. Whip the egg whites until stiff, then gently fold in shredded cheese and the bacon bits. Spoon the mixture onto a baking sheet, creating wells for the yolks. Bake until the cloud eggs are puffed up and golden brown.
  • Herb-infused Cloud Eggs: Mix chopped fresh herbs like parsley, basil, or chives into the whipped egg whites before baking them in mounds on a baking sheet. Create wells for the yolks and bake until they reach your desired doneness.
  • Southwest-style Cloud Eggs: Add spices like chili powder or cumin to the whipped egg whites before baking them into clouds. Top each cloud with diced tomatoes, black beans, shredded cheese, and sliced avocado after adding the yolks.
  • Smoked Salmon Cloud Eggs: Place slices of smoked salmon onto a baking sheet before spooning on the whipped egg white mixture. Create wells for the yolks and bake as usual. Once done, top each cloud with more smoked salmon slices for added flavor.

Sweet Egg Dishes

  • Lemon meringue angel food cake with a light and fluffy texture that melts in your mouth, topped with tangy lemon curd and sweetened egg whites.
  • Strawberry Tres Leches, a moist and creamy sponge cake soaked in a combination of three milks - condensed milk, evaporated milk, and heavy cream - then topped with fresh strawberries for a burst of fruity goodness.
  • Classic flan made with smooth caramel sauce on top of silky custard made from eggs, milk, sugar and vanilla extract. A comforting dessert that is sure to please any sweet tooth.
  • Key lime angel pie featuring a zesty key lime filling made from fresh lime juice, condensed milk and egg yolks all nestled into a light graham cracker crust. The perfect balance of tartness and sweetness.
  • Impossible cake where magic happens as the batter separates into distinct layers during baking - fudgy chocolate at the bottom, creamy custard in the middle and airy sponge cake on top.

Classic flan

I love making classic flan because it's a delicious dessert that everyone enjoys. Here are some variations of this creamy and caramel dessert that you can try:

  • Vanilla Flan - The classic version made with a rich custard infused with vanilla bean.
  • Coconut Flan - Add a tropical twist to your flan by using coconut milk in the custard mixture.
  • Chocolate Flan - For all the chocolate lovers out there, this decadent variation combines chocolate and caramel flavors.
  • Coffee Flan - Infuse your flan with a hint of coffee for a delightful pick-me-up after dinner.
  • Pumpkin Flan - Perfect for fall, this seasonal twist incorporates pumpkin puree and warm spices into the custard.
  • Citrus Flan - Brighten up your flan with the zest and juice of oranges or lemons for a refreshing citrusy flavor.
  • Almond Flan - Add some nutty goodness by incorporating almond extract or ground almonds into the custard mixture.

Egg Recipes

  • Veggie and cheese frittata: Whip up a delicious frittata loaded with colorful veggies and cheesy goodness for a delicious start to your day.
  • Garden herb veggie and breakfast tacos: Fill soft tortillas with garden-fresh herbs, vegetables, and eggs for a nutritious twist on traditional breakfast tacos.
  • Spinach and lentil poached eggs: Combine protein-rich lentils with nutrient-dense spinach and perfectly poached eggs for a satisfying meal that will keep you energized all day long.
  • Light egg salad: Create a lighter version of the classic egg salad by using Greek yogurt instead of mayo, adding in fresh herbs and crunchy vegetables for added flavor.

Veggie and cheese frittata

I love making veggie and cheese frittatas. Here are some tasty variations you can try:

  • Spinach and mushroom frittata: Saute spinach and mushrooms in olive oil until tender, then add them to beaten eggs with shredded cheddar cheese. Cook on the stovetop until set, then finish under the broiler for a golden top.
  • Roasted vegetable frittata: Roast your favorite veggies, like bell peppers, zucchini, and onions, until caramelized. Add them to the egg mixture along with crumbled goat cheese for a flavorful frittata.
  • Mediterranean frittata: Use sun-dried tomatoes, Kalamata olives, and feta cheese to give your frittata a Mediterranean twist. It's perfect for brunch or dinner.
  • Southwest-style frittata: Add some heat to your frittata with diced jalapenos, black beans, corn kernels, and Mexican blend cheese. Serve it with salsa and guacamole for a fiesta on your plate.
  • Asparagus and gruyere frittata: Blanch asparagus spears until crisp-tender before adding them to the egg mixture with grated gruyere cheese. The nutty flavor of gruyere pairs beautifully with asparagus.

FAQs

1. What are some basic preparations for cooking an egg?

Basic preparations include sunny-side up variations, scrambled eggs, or poached eggs which fall under traditional and modern egg dishes.

2. Can you suggest some special egg-based dishes with sauces?

Sure! Eggs can be cooked in tomato sauce or brown butter to add flavor, or they can feature in Indian-style dishes like curries adorned with sumptuous sauces.

3. How can I use eggs in my breakfast sandwiches and burritos?

You could try creating egg breakfast sandwiches using Egg McMuffin variations or even make hearty egg burritos featuring elements of rice and potato.

4. Are there any ways to cook an egg with bread?

Absolutely! Try baking eggs in a hollowed-out slice of bread for a fun twist on the classic egg toast - it makes a delightful breakfast!

5.Do any cultures have unique styles for preparing eggs?

Many global cuisine styles use eggs creatively; Japanese-style and Indian style cooking bring out amazing flavors from the humble ingredient through stir fries, soups, and rice dishes.

6. Could I incorporate mushrooms into my favorite recipes that include eggs?

Yes indeed! Pairing mushroom's earthy flavors with various types of egg preparations such as omelets or Egg Biscuits with Gravy enhances the dish remarkably.


Sarah Mock of savoringthegood.com headshot 2022

I am Sarah Mock. Welcome!

Sarah Mock is a classically trained Chef and graduate of Johnson & Wales University. A culinary blogger for 16 years Sarah helps the home cook prepare her recipes with professional results.

Get to know me

as seen in:

Logos of Hersheyland, ABC News, and Good Day PA are showcased in a seamless row, providing a snapshot of popular brands.

Hersheyland Nightline Good Day Pa!

The vibrant design showcases the iconic logos of Pinterest, Rachael Ray, and Jell-O set against a bold red background. Sorry, the provided description doesn't offer enough detail to suggest important SEO keywords.

Pinterest Rachael JELL-O


What To Serve with Sea Bass (30 Best Side Dishes)

A plate of sea bass with asparagus and risotto.

Looking for the perfect accompaniment for sea bass? Opt for a side dish that complements its flavors - think easy-to-enjoy veggies, a potato side dish, and more!

A plate of sea bass with asparagus and risotto.

Perfect Sides to Serve with Sea Bass

Sea bass is like a blank canvas waiting for you to add to the flavor profile. goodness.

Apple Fennel Salad

Oval white plate with thinly sliced cucumber and fennel salad, topped with walnuts, on a light marble surface. A wooden spoon rests on the edge of the plate-perfect for what to serve with sea bass.
It involves thinly slicing apples, celery, and fennel, and then tossing them with a simple dressing made from olive oil and lemon. The salad is then topped with walnuts and parmesan, which makes it one of the best side dishes for a variety of main courses.
Get Full Recipe

Garlic Butter Mushrooms

Close-up of sautéed mushrooms in a pan, being stirred with a wooden spoon. The mushrooms are garnished with chopped parsley. These savory mushrooms are an excellent side when deciding what to serve with sea bass.
credit: easyweeknightrecipes.com
You can make this recipe easily. Sautee the sliced mushrooms in a rich and aromatic garlic butter sauce until they become tender and golden brown to create this ideal side dish for seafood.
Get Full Recipe

Spicy Cucumbers

A white bowl holds a stack of cucumber slices arranged in a pyramid shape, topped with a small red pepper slice-an ideal side when considering what to serve with sea bass. A larger white bowl and other kitchen items are blurred in the background.
credit: thedeliciouslife.com
Are you looking for a way to enjoy your vegetables with a kick? Then, make this spicy dish. The cucumbers are sliced, deseeded, and marinated in a tasty mixture and chilled for a period of 2 to 3 hours in the refrigerator.
Get Full Recipe

Garlic Mashed Potatoes

A bowl of mashed potatoes with melting butter and sprinkled with chopped chives, perfect for what to serve with sea bass. A spoon rests on the side.
credit: saltandlavender.com
Made with boiled potatoes, butter, milk, garlic, salt, and pepper. make this mashed potato dish extra savory by adding some cheese, sour cream, or fresh herbs.
Get Full Recipe

Pesto Quinoa Bowl

A bowl of quinoa salad mixed with spinach, sun-dried tomatoes, chickpeas, and pine nuts sits next to a wooden fork on a red and white cloth-perfect when deciding what to serve with sea bass.
credit: potluck.ohmyveggies.com
If you're wondering what to serve, you can enjoy this pesto quinoa bowl as a main course or a side dish with sea bass, some bread, or salad. This nutritious dish has cooked quinoa, fresh vegetables, and homemade pesto sauce. 
Get Full Recipe

Roasted Brussels Sprouts

Crispy Brussels Sprouts on a sheetpan square image
You just need a few ingredients to create this Brussels sprouts side. This delicious side dish can be served with a drizzle of balsamic vinegar or honey for a sweet and zesty taste.
Get Full Recipe

Basmati Rice Pilaf

A bowl of cooked rice garnished with chopped herbs sits on a light surface next to a striped cloth, making it an excellent side dish if you're wondering what to serve with sea bass.
credit: A Beautiful Plate
You'll enjoy a tasty mixture of sautéed onions, garlic, and chicken broth in this Basmati rice recipe. It uses a special trick of heating the broth before adding it to the rice, which helps the rice cook evenly and prevents it from becoming mushy.
Get Full Recipe

Cauliflower Baked Parmesan

A close-up of baked chicken Parmesan cutlets topped with melted cheese, marinara sauce, and garnished with parsley on a parchment-lined baking tray. One cutlet is partially sliced with a fork.
credit: Women of Today
If you're a fan of sea bass, you won't want to miss having it with this delectable cauliflower-baked parmesan recipe. This flavorsome dish has tender cauliflower florets coated in a rich Parmesan cheese crust.
Get Full Recipe

Lemon Arugula Pasta

A bowl of twisted pasta with wilted greens and grated cheese, accompanied by a fork-perfect for deciding what to serve with sea bass.
credit: Sip and Feast
Lemon zest and juice are combined with garlic, oil, and pasta, Parmigiano Reggiano cheese, and wilted, peppery arugula in this easy dish that can be made in under 30 minutes!
Get Full Recipe

Cranberry Kale Quinoa Salad with Candied Pecans and Feta

A bowl of kale salad mixed with quinoa, dried cranberries, and chopped nuts, with a spoon in it - the perfect side dish for what to serve with sea bass.
credit: peasandcrayons.com
This quick and easy recipe is made with fresh kale, dried quinoa, dried cranberries, candied pecans, and feta cheese. The salad is tossed in a super simple lemon dressing for a vegetarian salad.
Get Full Recipe

Couscous Salad (Easy Recipe)

A bowl of vegetable couscous with diced bell peppers, zucchini, and chickpeas, garnished with green onions. Perfect for what to serve with sea bass, it's accompanied by a spoon, and a halved red pepper and scattered green onions resting on a cutting board.
credit: Elavegan
The mix of fresh ingredients perfectly complements each other, thanks to the hearty base, vegetables, aromatic herbs, and zesty dressing.
Get Full Recipe

Amish Broccoli Salad with Cauliflower, Bacon & Raisins

Amish Broccoli salad hero image. square.
Traditional Amish broccoli and cauliflower salad recipe is a great way to enjoy chopped fresh broccoli florets and cauliflower florets at the peak of their freshness and flavors.
Get Full Recipe

Cheesy Green Bean Casserole

Casserole dish filled with green beans, melted cheese, and bacon, with a wooden serving spoon. Brown cloth napkin placed beside the dish. This savory casserole makes an ideal side when considering what to serve with sea bass.
You'll want to add this canned green bean recipe to your meal planning. With its rich and tangy profile, this cheesy casserole is a perfect addition to any holiday feast or comfort food spread.
Get Full Recipe

Red Potato Salad with Herbs

A bowl filled with potato salad garnished with fresh herbs and featuring chunks of red potatoes and diced celery in a creamy dressing-an ideal side dish when considering what to serve with sea bass.
credit: inspiredtaste.net
Get Full Recipe

Creamy Avocado Soup

A bowl of green soup garnished with avocado chunks, pumpkin seeds, herbs, and a red seasoning. A spoon lies in the bowl-perfect for those wondering what to serve with sea bass.
credit: theendlessmeal.com
Blending ripe avocados with lime juice and cilantro results in a wonderful flavor profile that matches well with a dollop of Greek yogurt for added smoothness. This soup is a perfect choice for a satisfying meal on a warm day.
Get Full Recipe

Buttery Peas and Mushrooms

A white bowl filled with cooked green peas, sliced mushrooms, and onions. The food is garnished with pepper and displayed on a wooden table with a blue bowl in the background-an ideal side when wondering what to serve with sea bass.
credit: spicysouthernkitchen.com
The earthiness of the mushrooms matches well with the sweetness of the peas, making it an ideal side for sea bass, steak, roast pork, or chicken and gravy.
Get Full Recipe

Steamed Cabbage

A white plate filled with cooked shredded cabbage, garnished with chopped herbs and red pepper flakes, set on a light wooden surface, with a fork and napkin visible in the background - perfect for those pondering what to serve with sea bass.
credit: H Recipes Blog
By steaming the cabbage until tender and then flavoring it with a delicious mix of garlic and olive oil, this dish offers a yummy accompaniment to your main dish.
Get Full Recipe

Crispy Black Bean Tacos

A plate of folded tacos with a crispy exterior, garnished with cilantro, served with lime wedges, pickled red onions, and guacamole on the side-a delightful idea for what to serve with sea bass. A striped napkin is partially visible.
credit: playswellwithbutter.com
The tacos are made by filling warm corn tortillas with a smoky black bean mixture. The tacos are then baked to create crispy and golden-brown tacos that are oozing with gooey melted cheese. So it's perfect for taco night and is sure to satisfy every bite.
Get Full Recipe

Rosemary Garlic Dinner Rolls

A baking dish filled with freshly baked dinner rolls topped with herbs, placed on a marble surface with a white kitchen towel and sprigs of fresh rosemary in the background, makes a perfect accompaniment to what to serve with sea bass.
credit: aberdeenskitchen.com
Freshly baked, warm, soft, fluffy rosemary garlic dinner rolls perfect as a side for soups, stews and saucy meals.
Get Full Recipe

Crustless Spinach Pie With Feta Cheese

Close-up of a few slices of savory flatbread with visible layers of cheese and greens, laid out on a parchment-lined surface - an ideal side for what to serve with sea bass.
credit: realgreekrecipes.com
If you're searching for a delicious spinach dish, you've come to the right place. Packed with spinach, feta, and herbs, it's a tasty Greek-inspired dish that's perfect for a light lunch or dinner.
Get Full Recipe

🥣 More of the Best Side Dish Parings

Instant Pot Risotto

Instant Pot Risotto
credit: instantpoteats.com
This risotto recipe simplifies the traditional method of making risotto by utilizing the Instant Pot, ensuring a creamy and flavorful dish in a fraction of the time. The mushrooms, kale, and Arborio rice work well in the dish.
Get Full Recipe

Sweet Potato Chowder

A close-up of a creamy soup containing chunks of butternut squash, kale, pepitas (pumpkin seeds), and small crispy bits, possibly bacon, in a grey bowl-an excellent starter if you're wondering what to serve with sea bass.
credit: howsweeteats.com
This sweet potato chowder recipe is perfect for the colder seasons. That's because of the natural sweetness of sweet potatoes with a well-balanced blend of the flavorings.
Get Full Recipe

Zucchini Fritters

A stack of three zucchini fritters topped with a dollop of sour cream and a dill sprig, placed on a black plate with a wooden slab base, surrounded by more fritters, dill, and a glass vase with dill. These make an elegant side dish if you're wondering what to serve with sea bass.
credit: feastingathome.com
A delicious way to use up summer zucchini is by making this dish. The freshness and tanginess come from the dill, feta, and tzatziki sauce.
Get Full Recipe

Green Beans Almondine

A white plate of green beans topped with toasted almond slivers and caramelized shallots, making it the perfect side dish to serve with sea bass.
credit: gypsyplate.com
The crisp-tender green beans with a flavorful almond and garlic sauce are ideal for your main meal, including sea bass. This recipe takes the beans to a whole new level of deliciousness, with the added crunch of toasted almonds and a touch of lemon zest.
Get Full Recipe

Roasted Vegetables

A bowl of roasted vegetables, including Brussels sprouts, cauliflower, butternut squash, red onions, and sweet potatoes, sits on a light-colored surface with a white napkin and a pepper shaker nearby-an excellent side dish if you're wondering what to serve with sea bass.
credit: Kristine's Kitchen
To create this low-carb side, you just need a variety of veggies such as bell peppers, Brussels sprouts, red onions, cauliflower, and sweet potatoes tossed in olive oil, salt, and pepper. It's not only versatile, but also irresistibly delicious with its crispy, caramelized edges.
Get Full Recipe

Black Pepper Stir Fried Udon

Close-up of a dish of stir-fried udon noodles with broccoli and red chili slices being mixed with tongs, perfect as what to serve with sea bass.
credit: pinchofyum.com
The chewy udon noodles with a black pepper sauce taste heavenly in this Asian-inspired dish. The smoky charred veggies add depth to the dish and go well with the bold, peppery flavors.
Get Full Recipe

Sarah Mock of savoringthegood.com headshot 2022

I am Sarah Mock. Welcome!

Sarah Mock is a classically trained Chef and a graduate of Johnson & Wales University. A culinary blogger for 17 years, Sarah helps the home cook prepare her recipes with professional results.

Get to know me

as seen in:

Logos of Hersheyland, ABC News, and Good Day PA are showcased in a seamless row, providing a snapshot of popular brands.

Hersheyland Nightline Good Day Pa!

The vibrant design showcases the iconic logos of Pinterest, Rachael Ray, and Jell-O set against a bold red background. Sorry, the provided description doesn't offer enough detail to suggest important SEO keywords.

Pinterest Rachael JELL-O

Homemade Sugar Cubes DIY Sugar Cubes Recipe

Sugar cubes in a bowl on a wooden table.

Are you tired of the same old store-bought sugar cubes? Believe it or not, people find homemade food and products more satisfying. Let me teach you to make your own custom-flavored, personalized sugar cubes at home.

Sugar cubes in a bowl on a wooden table.

Ready to add some sparkle to your cuppa with these cute little gems?

Why Make Homemade Sugar Cubes?

Making homemade sugar cubes offers the opportunity to customize flavors and colors, save on costs, and embark on a fun DIY project.

Customization of flavors and colors

Homemade sugar cubes offer an exciting opportunity for customization. You're not limited to plain white cubes with a standard sweet taste. Use food coloring and flavored extracts to create cubes that are as visually appealing as they are tasty.

For instance, you can make pink strawberry-flavored sugar cubes or even swirl different colors and flavors together for a tie-dye effect! Whether it's lemon yellow, mint green, or lavender purple, the choice is yours.

Even more fun - match them to the theme of your next party or event. This simple step adds personality and creativity into something typically mundane like a cube of sugar.

Cost-saving

Buying premade sugar cubes can really add up over time, especially if you are a frequent user. Learning how to make homemade sugar cubes is a cost-effective solution that could save you quite some money in the long run.

Instead of regularly spending on store-bought products, use basic household ingredients like granulated sugar and water.

Besides being an economical choice, making your own cubes of sugar at home eliminates unnecessary packaging waste. Every small effort counts when it comes to environmental conservation! You will be trimming both your budget and ecological footprint by opting for DIY sugar cube production.

Fun DIY project

Making homemade sugar cubes turns a simple kitchen task into an engaging DIY project. As you mix colors and flavors, creativity sparks ignite while you learn a valuable skill. Not only will the process entertain kids, but it also offers adults a chance to unwind and make something practical and beautiful from scratch.

Plus, there's nothing quite like serving guests tea or coffee with your own custom-made sugar cubes. Creating these little sweet treats becomes more than just cooking - it's about expressing yourself through food and creating memorable experiences in the comfort of your own home.

Ingredients and Equipment Needed To Make Sugar Cubes

To make homemade sugar cubes, you will need just a few simple ingredients and equipment. These include granulated sugar, water, optional flavorings and food coloring, as well as silicone molds or mini ice cube trays.

Granulated sugar and water

To make homemade sugar cubes, you'll need white granulated sugar as the main ingredient. Granulated sugar is the most common type of sugar and it easily dissolves in water, making it perfect for creating the sweet, crystalline structure of sugar cubes.

It's readily available at grocery stores and inexpensive, which makes it a cost-effective choice for making your own sugar cubes at home. To get the purest sugar cubes, purchase a box or bag of sugar instead of a large bag. The smaller box has fewer chances of impurities in the product. 

To make homemade sugar cubes, water is a crucial ingredient. It is used to dissolve a small portion of the granulated sugar and create a mixture is like wet sand and is able to be pressed into molds or ice cube trays.

When choosing the right amount of water, it's important to follow the recipe closely to ensure the sugar cubes have the perfect consistency. Too little water may result in dry and crumbly cubes, while too much water can make them overly moist and difficult to remove from the molds.

By adding just the right amount of water, you'll be able to create beautifully formed sugar cubes that are ready to sweeten your favorite beverages or decorate your desserts.

Add any desired flavorings or food coloring to the water so that it can be easily distributed throughout the sugar, you can pour this mixture into your chosen molds or ice cube trays. Allow them to dry and harden completely before removing them carefully from their containers.

Optional flavorings and food coloring

Give your homemade sugar cubes a personalized touch by experimenting with optional flavorings and food coloring. By adding a few drops of vanilla extract, almond essence, or any other flavored extracts to the sugar mixture, you can create unique and delicious cubes that suit your taste preferences.

If you want to make your sugar cubes visually appealing, consider using food coloring to add vibrant hues to them. Whether you prefer pastel shades or bold colors, the choice is yours! Let your creativity run wild as you customize your homemade sugar cubes with these optional ingredients.

Silicone molds or ice cube trays

Silicone candy molds or ice cube trays are essential tools for making homemade sugar cubes. These versatile options allow you to create various shapes and sizes, adding a fun touch to your sugary creations.

With silicone molds, you can choose from an array of designs like hearts, stars, or even animals to make your sugar cubes more visually appealing. Ice cube trays work just as well if you prefer the classic cube shape.

The best part is that both silicone molds and ice cube trays are easily accessible and affordable, making them excellent choices for beginners and avid DIY enthusiasts alike. So go ahead and get creative with your sugar shapes using these convenient tools!

Step-by-Step Instructions for DIY Sugar Cubes

To make homemade sugar cubes, dissolve granulated sugar in water, then add optional flavorings and food coloring if desired. Pour the mixture into silicone molds or ice cube trays and allow it to dry and harden.

Once hardened, remove the sugar cubes from the molds or trays and store them in an airtight container for future use.

  1. Add sugar to a mixing bowl - add white granular sugar to a mixing bowl fitted with a paddle attachment or add sugar to the bowl of a food processor fitted with a blade attachment. 
  2. With the bowl mixing on low or the food processor pulsing, add any flavors and/or food colorings to the sugar, and allow it to fully incorporate.
  3. With the mixer or food processor still running add water, drop by drop to the mixture until the sugar is moistened and takes on the texture of damp sand. You want the sugar to hold its shape when firmly squeezed in your hand. If it crumbles, add another drop of two of water. 
  4. Press mixture into molds or ice cube trays.
    Alternatively, this can be done with a bowl and a spoon or silicone scraper.
  5. Place the filled molds or trays in a cool, dry place where they can dry and harden undisturbed for at least 24 hours. Once they are completely hardened, carefully remove the sugar cubes from the molds or trays and store them in an airtight container until ready to use.

Allow to dry and harden

  1. After filling the molds or ice cube trays, it's important to let them dry and harden completely. This process usually takes about 24 to 48 hours, depending on the humidity in your environment.

    Be patient and resist the temptation to touch or remove them too soon - allowing adequate drying time ensures that your homemade sugar cubes will hold their shape and consistency when you use them later.
  2. Once they are dried to the touch, carefully flip them from the molds or trays onto a baking sheet and allow them to further dry an additional 24-48 hours, depending on the moisture content in the cubes and the humidity in the room. 
  3. Remove and store in an airtight container.
    After allowing the homemade sugar cubes to dry and harden, it's time to remove them from their molds or ice cube trays. Carefully pop them out by gently pressing on the bottom of each mold or flexing the sides of the tray.

To ensure that your sugar cubes stay fresh and maintain their shape, store them in an airtight container. This will protect them from moisture in the air, preventing any clumping or melting.

An airtight container such as a glass jar or plastic storage box works well for this purpose. Now you can enjoy your custom-made sugar cubes whenever you want to add a touch of sweetness to your favorite beverages!

Tips and Tricks

Get creative with your homemade sugar cubes by experimenting with different flavors and colors. Add edible flowers or herbs for an extra touch, and even personalize them with custom shapes or designs.

Don't forget to store and package your homemade sugar cubes properly to keep them fresh and ready to use anytime.

Experiment with different flavors and colors

Get creative with your homemade sugar cubes by experimenting with different flavors and colors. Mix things up by adding extracts like vanilla, almond, or mint to give your sugar cubes a unique taste.

You can also play with food coloring to create vibrant cubes that add a pop of color to your tea or coffee. Don't be afraid to mix and match flavors and colors to find your perfect combination.

The possibilities are endless when it comes to customizing your homemade sugar cubes!

Add edible flowers or herbs for an extra touch

Enhance the visual appeal and flavor of your homemade sugar cubes by adding edible flowers or herbs. Not only will this extra touch make your sugar cubes look more vibrant, but it will also infuse them with a subtle floral or herbal taste.

Imagine the delightful combination of a lavender-infused cup of tea or a mint-flavored beverage! Simply place a small sprig of your chosen flower or herb into each mold before pouring in the sugar mixture.

The result? Beautifully adorned sugar cubes that add an elegant and fragrant twist to any drink.

Personalize with custom shapes or designs

Get creative with your homemade sugar cubes by personalizing them with custom shapes or designs. Use silicone molds in various shapes such as hearts, stars, or even letters and other fun shapes to add a unique touch to your sugar cubes.

Alternatively, you can use small cookie cutters to mold the sugar mixture into fun and playful shapes. The possibilities are endless when it comes to designing your own sugar cubes.

Let your imagination run wild and make each cube a mini work of art!

Store and package the homemade sugar cubes properly

Store and package your homemade sugar cubes properly to ensure their freshness and longevity. After allowing the cubes to dry and harden, remove them from the molds or ice cube trays.

Place the sugar cubes in an airtight container at room temperature to protect them from moisture. This will prevent clumping or deterioration of texture over time. Keep the container in a cool, dry place away from direct sunlight.

By storing your homemade sugar cubes correctly, you can enjoy their sweetness and decorative appeal whenever you want!

Now that you have the ultimate guide to making homemade sugar cubes, get ready to unleash your creativity in the kitchen! With customizable flavors, cost-saving benefits, and a fun DIY project, making your own sugar cubes has never been easier.

So grab your ingredients and molds, follow our step-by-step instructions, and enjoy the sweet satisfaction of creating these delightful treats at home. Get started today!

FAQs

What is the process of making homemade sugar cubes?

Making homemade sugar cubes involves compressing granulated sugar into small, square shapes, then allowing them to dry and solidify.

Why should I make my own sugar cubes?

Creating your own sugar cubes allows you to control the size and sweetness of each cube according to your preference.

Are there special tools needed in making homemade sugar cubes?

No special tools are required; common kitchen items like a spoon, bowl for mixing, and a mold or ice cube tray can be used for shaping.

Can I flavor my homemade sugar cubes?

Yes! You can add various flavors or spices such as vanilla extract or cinnamon during the preparation process to create flavored sugar cubes.

Sugar cubes in a bowl on a wooden table.

Homemade Sugar Cubes

Learn how to make homemade sugar cubes with just 2 simple ingredients: white granulated sugar and water.
No ratings yet
Print Rate
Course: Ingredients
Cuisine: French
Calories:
Author: Sarah Mock
Follow Savoring The Good On PinterestFollow @SavoringTheGood or tag #STGRecipes!
Want to share when you made this recipe?Follow @SavoringTheGood & tag #STGRecipes!
**Nutritional facts are just estimates. Please utilize your own brand nutritional values to double check against our estimates.
Like this recipe card? Want one for your site?Check out WP Recipe Maker!


Sarah Mock of savoringthegood.com headshot 2022

I am Sarah Mock. Welcome!

Sarah Mock is a classically trained Chef and graduate of Johnson & Wales University. A culinary blogger for 16 years Sarah helps the home cook prepare her recipes with professional results.

Get to know me

as seen in:

Logos of Hersheyland, ABC News, and Good Day PA are showcased in a seamless row, providing a snapshot of popular brands.

Hersheyland Nightline Good Day Pa!

The vibrant design showcases the iconic logos of Pinterest, Rachael Ray, and Jell-O set against a bold red background. Sorry, the provided description doesn't offer enough detail to suggest important SEO keywords.

Pinterest Rachael JELL-O

Grinch Chocolate Dipped Oreos ❤️ Chocolate Covered Oreos Recipe

Three chocolate covered Oreo cookies on a red and white striped napkin.

Ever found yourself scratching your head over dessert ideas for a gathering? After countless soirees and potlucks, I've discovered that chocolate covered Oreos hit the sweet spot every time - they're straightforward, easy to make yet irresistibly decadent.

Three chocolate covered Oreo cookies on a red and white striped napkin.

Grinch Chocolate Dipped Oreos

I am going to teach you to make the perfect chocolate-dipped Oreos, explore some fun recipe twists, share savvy storage tricks and answer any questions you may have. Be sure to check out my oreo chocolate truffles, oreo truffles, oreo red velvet cookies and my other oreo dessert recipes.

🥄 How to Make Chocolate Covered Oreos

To make delicious chocolate covered Oreos, you will need just a few simple ingredients and some easy-to-follow steps. Don't forget to check out Grinch Punch to go along with your Grinch-themed party!

🍫 Ingredients needed to make Grinch Chocolate Dipped Oreos

Red velvet oreos, green sanding, red velvet oreos, green sanding, red velvet ore.

To create these delightful chocolate covered Oreos, you'll need a handful of basic ingredients.

  • 12.2 ounce package Red Velvet Oreos
  • 10 ounces light green candy melts (I used Melt 'Ems brand)
  • Heart sprinkles
  • Dark green sanding sugar (optional)
  • Shortening or Coconut oil to thin the chocolate.(optional)
  • Sprinkles or other toppings for decoration (optional).
  • Parchment paper for easy cleanup.

❤️ Step-by-step instructions to dip the oreos

A plate of green Grinch chocolate covered Oreos with hearts on it.

Let's get started making these delicious chocolate covered Oreos.

  1. Prepare two baking trays, lined with parchment paper and set aside.
  2. Divide out ½ cup of light green candy melt pieces for the decorative drizzle.
    A bowl of green icing sitting on top of a marble countertop, perfect for grinch-themed desserts.
  3. Melt the remaining chocolate melting wafers in a double boiler over low heat, stirring every 30 seconds until fully melted and smooth.
  4. Alternatively, melt the chocolate wafers in the microwave safe bowl in the microwave using a low or defrost setting in 30 second intervals, stirring after each interval, until fully melted and smooth.
    A Grinch-themed oreo cookie with a fork in it.
  5. Use a fork, dip one Oreo cookie at a time into the melted chocolate, flipping it to coat completely.
    A bowl of green ice cream with chocolate covered oreos.
  6. Gently tap the handle of the fork against the edge of the double boiler or bowl to remove the extra chocolate from the covered oreo. (*Tip: to get a super smooth surface, tap the bottom of the fork on the surface of the melted chocolate. This will create tension in the chocolate, pulling it uniformly over the oreo. )
    Green macaroons on a red tray, inspired by the Grinch.
  7. Place onto the prepared tray and repeat with the remaining Oreos.
  8. While the chocolate is setting up, prepare your piping bag and decorative chocolate.
    A green plastic cone on a marble table.
  9. Place ½ cup of light green candy melts into a microwave-safe piping bag, twist it shut, and then microwave it on a low or defrost setting until fully melted and smooth. Be sure to massage the bag every 1-2 minutes to ensure the candy melts are melting evenly.
    Green heart-shaped cookies on a red tray, inspired by the Grinch character and made with chocolate covered Oreos.
  10. Once melted, snip a small piece of the tip off of the piping bag. Drizzle a design over the chocolate covered Oreo and then top it with a red heart sprinkle. You can also add some green sanding sugar if desired. Just be sure to move quickly before the drizzle sets completely.
    Grinch-themed chocolate covered oreos on a red tray.
  11. Allow the drizzle to set completely before serving. You may place the Oreos in the refrigerator to help the chocolate set faster

Recipe Tips: easy chocolate covered Oreos

Choosing the right chocolate for your chocolate covered Oreos recipe is crucial. Opt for a high-quality dipping or melting chocolate to get that glossy finish and delightful crunch when bitten into. Melting your chocolate correctly also plays a significant role in achieving the optimal consistency; utilize a double boiler method instead of using microwave as it provides better control over temperature.

Stir the melted chocolate thoroughly but gently to prevent air bubbles which can spoil the smooth texture on your cookies. Always dip Oreos one at a time and let excess chocolate drip off before placing them on parchment paper.

Finally, customize with jimmies or drizzles while the coating is still wet then let them harden completely at room temperature for best results!

🔄 Variations and Ideas for Chocolate Dipped Oreos

For those looking to take their chocolate covered Oreos to the next level, there are endless possibilities for flavor variations and decorative designs. From different flavored chocolates to fun toppings, let your creativity run wild with these delicious treats.

Different flavors and toppings

I love experimenting with different flavors and toppings for chocolate dipped Oreos. Here are some ideas to try:

  • Mint: Add a drop of peppermint extract to the chocolate for a refreshing twist.
  • Peanut Butter: Spread a thin layer of peanut butter on top of the Oreo before dipping it in chocolate.
  • Sprinkles: Roll the chocolate coated Oreos in colorful sprinkles for a fun and festive look.
  • Crushed Candy Canes: add crushed candy canes on top of the chocolate for a holiday-inspired treat.
  • Coconut: Dip the Oreos in melted white chocolate, then roll them in shredded coconut for a tropical twist.
  • Caramel Drizzle: Drizzle some caramel sauce over the chocolate for an extra gooey and delicious treat.

Decorative designs

To make your chocolate covered Oreos even more special, try these decorative designs:

  • Drizzle Design: After dipping the Oreos in chocolate, use a spoon to drizzle a contrasting color of chocolate over the top. You can create swirls or zigzags for a visually appealing effect.
  • Sprinkle Design: Before the chocolate sets, sprinkle colorful sprinkles, edible glitter, or crushed candies on top of the Oreos. This adds texture and makes them look festive.
  • Swirl Design: Dip a toothpick into a different color of melted chocolate and create swirl patterns on top of the dipped Oreos. Be creative with your designs - you can make hearts, flowers, or any other shapes that suit the occasion.
  • Cookie Cutter Design: Use cookie cutters to create unique shapes out of colored fondant or candy melts. Place these decorations on top of the dipped Oreos for an eye-catching design.
  • Personalized Designs: Use food-safe markers to draw personalized messages or drawings on top of the dried chocolate shell. This is especially fun for kids' birthday parties or special occasions.

🎄 Holiday and seasonal themed chocolate covered Oreos

Grinch-inspired Oreo cookies with a green frosting.

I love adding a festive touch to my chocolate covered Oreos, especially during holidays and special occasions. Here are some fun ideas to try:

  • Halloween: Decorate your chocolate covered Oreos with spooky designs using black and orange sprinkles, or draw jack-o'-lantern faces on them with melted white chocolate.
  • St. Patrick's Day: How fun is creating a pot of gold out of a cookie? Oreo cookies are delicious on their own, but when you cover them with chocolate and goodies they become irresistible!
  • Christmas: Dip your Oreos in white chocolate and add red and green sprinkles for a festive look. You can also drizzle them with red and green colored chocolate for an extra touch of holiday cheer.
  • Winter Snowmen: These adorable dipped Oreo snowman cookies start with Double Stuf Golden Oreo cookies, which are dipped in white chocolate.
  • Valentine's Day: Use heart-shaped molds to make chocolate covered Oreos and decorate them with pink or red sprinkles. Write sweet messages on top using icing or edible markers.
  • Easter: Dip your Oreos in pastel-colored chocolates like pink, yellow, and blue. Add decorative Easter-themed candies like mini eggs or bunny shapes on top.
  • Fourth of July: Cover your Oreos in white chocolate and sprinkle them with red, white, and blue star-shaped sprinkles for a patriotic treat.

❄️ Storing and Serving Chocolate Covered Oreos

To keep your chocolate covered Oreos fresh and delicious, it's important to store them properly. Learn the best storage methods and how long they can be kept, as well as some great options for gifting or serving these sweet treats!

Proper storage methods

To keep your chocolate covered Oreos fresh and tasty, it's important to store them properly. After making them, place the chocolate covered Oreos in an airtight container or zip-top bag.

Store them in a cool and dry place away from direct sunlight. This will help prevent the chocolate from melting or getting too soft. If you prefer a firmer texture, you can also refrigerate the Oreos, but make sure they are still stored in an airtight container.

When stored properly, your delicious homemade treats can last up to one week without losing their flavor or texture. So go ahead and make a batch of these irresistible treats for yourself or to share with friends!

How long they can be kept

I always get asked how long chocolate covered Oreos can be kept, especially when I'm making them for a party or as gifts. The good news is that they can stay fresh and delicious for up to two weeks when stored properly.

Just make sure to keep them in an airtight container at room temperature, away from direct sunlight and heat sources. This will help maintain their crunchiness and prevent the chocolate from melting or becoming stale.

So feel free to make a big batch ahead of time and enjoy these tasty treats whenever you're in the mood!

When it comes to storing chocolate covered Oreos, refrigeration is not recommended as it can cause condensation on the chocolate surface, ruining their texture. Plus, refrigerated Oreos tend to develop a softer cookie center due to moisture absorption.

🎁 Options for gifting or serving

I love gifting and serving chocolate covered Oreos because they are delicious and visually appealing. One option for gifting is to package them in a clear cellophane bag, tie it with a colorful ribbon, and attach a cute gift tag.

These make great party favors or small gifts for friends and family. Another idea is to arrange the chocolate covered Oreos on a decorative platter or in a holiday-themed tin for serving at parties or gatherings.

You can also include them as part of a dessert buffet where guests can help themselves to this tasty treat. Whether you're giving them as gifts or serving them at an event, chocolate covered Oreos are always a hit!

A plate of chocolate-covered Oreos with the words grinch lives here.

What is the best type of chocolate to use for dipping Oreos? How far in advance can I make chocolate covered Oreos? Do I need to refrigerate them after they are made?

Best candy melts chocolate to use

For the best results when making chocolate covered Oreos, it's important to choose the right chocolate. I recommend using high-quality melting chocolate or candy melts specifically designed for coating and dipping.

These chocolates have a smooth texture and melt easily, ensuring that your Oreos will be evenly coated. You can find these chocolates in a variety of flavors and colors, so you can get creative with your chocolate covered Oreos.

Just make sure to follow the package instructions for melting and tempering the chocolate.

Top Tip

Remember to use a low heat or defrost setting when melting the candy melts. High heat will cause it to dry out and it will seize and clump up.

How far in advance they can be made

I typically make my chocolate covered Oreos a day or two in advance. This allows enough time for the chocolate to fully set and the flavors to meld together. If you want to be extra prepared, you can even make them up to a week ahead of time.

Just be sure to store them properly in an airtight container at room temperature. That way, they'll stay fresh and delicious until you're ready to serve them.

When it comes to making these treats for special occasions or events, it's always better to plan ahead. By preparing your chocolate covered Oreos in advance, you'll have one less thing to worry about on the big day.

Refrigeration requirements

To keep your chocolate-covered Oreos fresh and delicious, it's important to store them properly. After dipping the Oreos in chocolate and allowing them to set, place them in an airtight container or resealable bag.

Store them in the refrigerator for best results. This helps to prevent the chocolate from melting and keeps the cookies crispy. When you're ready to serve or enjoy them, simply remove from the fridge and let them come to room temperature before serving.

Refrigerating your chocolate covered Oreos will ensure that they stay tasty and enjoyable for as long as possible.

🍓 Other Chocolate Covered Dessert Ideas

Looking for more delicious chocolate-covered treats? Check out these additional recipes and tips for successful chocolate dipping techniques. Your sweet tooth will thank you!

Additional recipes for chocolate covered treats

I've got some more delicious ideas for chocolate covered treats that you can try at home. Check out these recipes:

  • Strawberries: Dip fresh strawberries into melted chocolate for a sweet and tangy treat.
  • Pretzels: Take crispy pretzels and dip them in melted chocolate for the perfect combination of salty and sweet.
  • Bananas: Slice bananas into bite-sized pieces, then dip them in melted chocolate and freeze for a cool and creamy dessert.
  • Peanut Butter Balls: Mix together peanut butter, powdered sugar, and butter, then roll into balls and dip in melted chocolate for a rich and indulgent snack.
  • Marshmallows: Skewer marshmallows on sticks, then dip them in melted chocolate and let them set for a gooey and delightful treat.
  • Nuts: Dip your favorite nuts, like almonds or cashews, into melted chocolate for a crunchy and satisfying snack.
  • Raisins: Coat plump raisins with smooth melted chocolate for a chewy and decadent treat.

Tips for successful chocolate dipping techniques

Here are some tips to help you achieve perfectly dipped chocolate covered Oreos:

Remember to use a low heat or defrost setting when melting the candy melts. High heat will cause it to dry out and it will seize and clump up.

  1. Melt the chocolate in a microwave - safe bowl, stirring every 30 seconds until smooth and creamy.
  2. Use a fork or dipping tool to fully submerge each Oreo into the melted chocolate, ensuring that it is evenly coated on all sides.
  3. Tap the fork lightly on the side of the bowl to remove excess chocolate before transferring the dipped Oreo onto a lined baking sheet.
  4. For added flair, sprinkle your favorite toppings onto the freshly dipped Oreos while the chocolate is still wet.
  5. Allow the chocolate to set completely by placing the baking sheet in the refrigerator for about 15 - 20 minutes.
  6. To prevent any sticking, gently lift each cooled and hardened Oreo from the baking sheet using a spatula or your fingers.

Whether you're making them for yourself or as a special treat for others, chocolate covered Oreos are sure to be a hit. So go ahead and indulge in this irresistible combination of crunchy cookies and smooth chocolate!

FAQs

What are chocolate covered Oreos?

Chocolate covered Oreos are regular Oreo cookies that have been dipped in either milk or white chocolate for an extra indulgent treat.

How do red velvet Oreos differ from other chocolate covered Oreos?

Red velvet oreo cookies bring a unique flavor twist, combining the rich flavors of cocoa and cream cheese frosting with the classic crunch and creaminess of the traditional Oreo cookie.

Is there any actual chocolate in Oreo biscuits themselves?

Yes, original Oreo biscuits contain cocoa as one of their core ingredients, giving them their signature chocolaty taste.

Three chocolate covered Oreo cookies on a red and white striped napkin.

Grinch Chocolate Covered Oreos Recipe

Learn how to make Grinch Chocolate Dipped Oreos! This easy recipe shows you how to make chocolate covered Oreos with a festive twist.
5 from 1 vote
Print Rate
Course: Dessert
Cuisine: American
Keyword: Grinch Chocolate Covered Oreos
Prep Time: 30 minutes minutes
Setting Time: 15 minutes minutes
Total Time: 45 minutes minutes
Servings: 24 cookies
Calories: 88
Author: Sarah Mock

Ingredients

  •  
    1 package Red Velvet Oreos 12.2 oz.
  •  
    1 package Candy Melts 10 oz. bag, Light Green
  • 24 each Candy Hearts
  •  
    Dark green sanding sugar optional
Follow Savoring The Good On PinterestFollow @SavoringTheGood or tag #STGRecipes!

Instructions

  • Line two baking trays with parchment paper and set aside.
  • Set aside ½ cup of light green candy melt pieces for the drizzle. Melt the remaining amount in a double boiler over low heat, stirring every 30 seconds until fully melted and smooth. You can alternatively melt them in the microwave using a low or defrost setting in 30 second intervals, stirring each time, until fully melted and smooth.
  • Use a fork to dip one Oreo cookie into the melts and coat it completely. Lift it out with the fork and gently tap the fork against the edge of the double boiler or bowl to remove the excess coating. Place onto the prepared tray and repeat with the remaining Oreos.
  • Place ½ cup of light green candy melts into a microwave safe piping bag, twist it shut, and then microwave it on a low or defrost setting until fully melted and smooth. Be sure to massage the bag every 1-2 minutes to ensure the candy melts are melting evenly.
  • Once melted, snip a small piece of the tip off of the piping bag. Drizzle a design over the Oreo and then top it with a red heart sprinkle. You can also add some green sanding sugar if desired. Just be sure to move quickly before the drizzle sets completely.
  • Allow the drizzle to set completely before serving. You may place the Oreos in the refrigerator to help the coating set faster. Enjoy!
Want to share when you made this recipe?Follow @SavoringTheGood & tag #STGRecipes!
Nutrition Facts
Grinch Chocolate Covered Oreos Recipe
Serving Size
 
2 cookies
Amount per Serving
Calories
88
% Daily Value*
Fat
 
4
g
6
%
Saturated Fat
 
1
g
6
%
Trans Fat
 
0.01
g
Polyunsaturated Fat
 
1
g
Monounsaturated Fat
 
2
g
Sodium
 
73
mg
3
%
Potassium
 
44
mg
1
%
Carbohydrates
 
13
g
4
%
Sugar
 
8
g
9
%
Protein
 
1
g
2
%
* Percent Daily Values are based on a 2000 calorie diet.
**Nutritional facts are just estimates. Please utilize your own brand nutritional values to double check against our estimates.
Like this recipe card? Want one for your site?Check out WP Recipe Maker!

Sarah Mock of savoringthegood.com headshot 2022

I am Sarah Mock. Welcome!

Sarah Mock is a classically trained Chef and graduate of Johnson & Wales University. A culinary blogger for 15 years Sarah helps the home cook prepare her recipes with professional results.

Get to know me

Can It Go in the Oven? (A Guide to Oven-Safe Materials)

A woman is holding a blue pot in an oven.

Ever been caught in that kitchen conundrum, pondering, "Can this go in the oven?" You're not alone! After extensive research on topics like pyrex safety in ovens, the suitability of glass or even whether parchment paper can stand up to high heat, we're here to unravel the mystery.

A woman is holding a blue pot in an oven.

Let me help you decipher which materials are safe and those better left untouched. This guide is about to make your cooking adventure safer and more straightforward than ever before.

Oven-Safe Materials

Glass, ceramic, metal, and silicone are all materials that can safely go in the oven.

Glass

Glass dishes really shine in the oven! Thanks to their great heat distribution, your food cooks evenly. If it's Pyrex glass cookware, you can use it for everything from baking a cake to reheating leftovers.

But be aware - all glass isn't created equal when it comes to oven use. Check first because some types don't handle the heat well. For peace of mind, choose borosilicate glass; its reputation as the safest option for ovens is well deserved.

Ceramic

Ceramic holds a top spot in the list of oven-safe materials. Many ceramic plates and dishes can withstand high temperatures, making them ideal for your baking needs. Specific types include glazed stoneware which, with its robust nature, often proves suitable for oven use.

However, it's crucial to check the manufacturer's instructions that provide specific temperature limits.

You'll find ceramics come in various styles and materials fit for an array of culinary tasks. Handmade pottery brings a unique flair to your kitchenware collection but may pose some caveats when it comes to oven safety.

Before sliding these artisan creations into your appliance, make sure you've confirmed their heat resistance either by consulting with the maker or checking any labels indicating their oven-safe status.

It just takes a little due diligence to ensure you're using safe and durable cookware!

Metal

I often reach for my trusty metal cookware when preparing meals. Metals like stainless steel and cast iron are heroes in the oven, withstanding high temperatures without even breaking a sweat! My favorites are stainless steel pans as they are durable and can handle just about any temperature your oven sets.

Plus, their heat-transmitting properties mean my food cooks quickly and evenly. Even aluminum foil is up for the task; have you ever noticed how it seems to adjust to whatever temperature setting you choose? And don't forget copper pans - they're not only pretty but also super functional in the oven.

However, watch out for non-oven safe metals; those could spoil your culinary masterpiece!

Silicone

Silicone is a versatile material that is safe to put in the oven and can withstand high and low temperatures. It is commonly used for making baking trays, muffin tins, and other cookware items.

Whether you are heating or freezing your food, silicone can handle it all. Silicone ice-cube trays are also safe to use. The flexible synthetic rubber used in silicone bakeware and cookware allows it to tolerate higher temperatures without warping or melting.

So if you're looking for durable and heat-resistant kitchen tools, silicone is an excellent choice!

Materials to Avoid Putting in the Oven

Plastic, paper, Styrofoam, and non-oven safe metals should never be put in the oven. Find out why these materials can cause serious damage and potential risks. Read on to learn more about keeping your kitchen safe.

Plastic

Two plastic containers with lids sitting on top of each other.

Plastic is an oven-safe material that you should definitely avoid using when baking or cooking. Most plastics are not designed to withstand high temperatures, and they can melt or release harmful chemicals when exposed to the heat of the oven.

It's important to note that even if a plastic container is labeled as "microwave safe," it doesn't necessarily mean it's safe for use in the oven. Household plastic wrap, in particular, is very thin and unsafe for use in the oven.

So, be sure to choose alternative materials like glass or ceramic when it comes to baking or heating food in the oven.

Paper

A brown paper bag with coffee cups and a cup on a white background.

Paper products should generally be avoided when it comes to using them in the oven. While certain types of paper, like parchment paper, can withstand high heat temperatures and are safe for oven use, other types such as wax paper and plain paper should not be put in the oven.

Wax paper has a low melting point and can pose a fire hazard if exposed to high temperatures. Plain paper is also unsuitable for food products due to its poor barrier properties, low heat sealability, and weak strength.

It's best to stick with oven-safe materials like glass, ceramic, metal, or silicone when cooking in the oven to ensure safety and avoid any mishaps or accidents.

Styrofoam

A tray of fried chicken sitting on a table.

Styrofoam is not safe to put in the oven. It has low temperature limits and can warp or soften when exposed to high temperatures. That's why it's important to avoid using Styrofoam containers for heating or cooking food in the oven.

The same goes for plastic containers, including Styrofoam, as they can melt or release harmful chemicals when exposed to heat. It's also worth noting that Styrofoam should not be put in the microwave either because it may melt and leach chemicals into your food.

While Styrofoam is commonly used for packaging and insulation, it should never be exposed to high temperatures in the oven.

Non-Oven Safe Metals

Non-oven safe metals should be avoided when putting materials in the oven. Magnetic metals, in particular, should never be placed in the oven as they can cause serious damage and even start a fire.

It is important to note that non-oven safe metals should always be kept away from high temperatures to prevent any potential hazards. Oven manufacturers generally recommend not placing metal items in the oven to avoid accidents or damage to your cookware.

While some food packaging made of metal may tolerate being in the oven, it is best to check with the manufacturer's instructions before doing so.

Precautions when Using Oven-Safe Materials

Use heat-safe utensils when handling hot oven-safe materials to prevent burns or melting. Be cautious and handle all items with care, using oven mitts or tongs as needed. Allow the material to cool properly before attempting to remove it from the oven.

Heat-safe utensils

When using the oven, it's important to have the right utensils to work with. Heat-safe utensils like silicone or wooden tools are perfect for stirring ingredients in the oven or right after taking them out.

These materials won't melt or warp under high temperatures, ensuring that you can confidently use them without any worries. So whether you're mixing up a sauce on the stovetop or stirring a casserole in the oven, reach for these heat-safe utensils and cook with ease.

Being cautious

I always make sure to exercise caution when using oven-safe materials. It's important to remember that overheating these materials can release toxic contaminants into the air, which is not only harmful but also dangerous.

I take extra care to avoid leaving cooking food unattended in the oven and handle hot surfaces with caution when loading or unloading items. Safety should never be compromised, so it's crucial to follow the manufacturer's instructions for using and cleaning your oven properly.

By being cautious, we can ensure a safe and enjoyable cooking experience.

Allowing it to cool properly

It is crucial to give your oven enough time to cool properly after use. This step helps prevent accidents and ensures the safety of everyone in the kitchen. When you remove your dish from the oven, hot temperatures can still linger in the air and on the cookware.

By allowing it to cool naturally, you reduce the risk of burns or other injuries. So remember, be patient and give your oven some time to cool down before handling any hot materials inside.

Safety should always come first!

Oven-Safe Cookware Materials

Carbon steel, stainless steel, cast iron, and non-stick pans are all excellent choices for oven-safe cookware. These materials can handle high heat without warping or damaging the food being cooked.

Discover more about these versatile cooking materials and how they can enhance your baking and roasting experience.

Carbon Steel

Carbon steel is a great option for oven-safe cookware. It is made from iron and carbon, which are both safe materials for cooking. Unlike some other types of metals, carbon steel does not contain any toxic substances that could leach into your food.

Additionally, carbon steel cookware is durable and can last a long time if properly cared for. Just remember that it's not dishwasher-safe! One of the benefits of carbon steel is its ability to withstand high heat, making it perfect for use in the oven.

So go ahead and confidently use your carbon steel pans and baking sheets when you need them for oven cooking!

Stainless Steel

Most stainless steel cookware is oven safe because it has a high melting point and can withstand high temperatures. This means you can confidently use your stainless steel pots, pans, and baking sheets in the oven without worrying about them warping or melting.

In fact, the oven-safe temperature range for stainless steel cookware is typically quite high, making it suitable for a variety of cooking tasks. So whether you're roasting vegetables or baking a cake, you can count on your stainless steel cookware to handle the heat with ease.

Cast Iron

A cast iron skillet on a wooden cutting board.

Cast iron is one of the best materials for oven-safe cookware. It can withstand high temperatures and is great for browning, sautéing, baking, and frying in the oven. Cast iron pans are extremely durable and can handle heat up to 500°F or even 800°F.

This material is known for its ability to distribute heat evenly, making it a popular choice among home cooks when it comes to oven cooking. Whether you're making a roast or baking cornbread, cast iron will ensure that your food comes out perfectly cooked every time.

Non-stick

Non-stick cookware is a great option for those who want to avoid food sticking to their pans. However, it's important to know the limitations when using non-stick pans in the oven.

Non-stick pans with PTFE (Teflon) coatings should not be used in an oven above 500°F. The high heat can cause the coating to break down and release harmful fumes. It's always best to follow the manufacturer's instructions and recommended temperature limits for your non-stick cookware when using it in the oven.

So, while non-stick pans are convenient for stovetop cooking, make sure you use them safely if you decide to put them in the oven as well.

Non-stick cookware has its advantages but also some important considerations. Ceramic cookware, on the other hand, is naturally stick-resistant and can handle higher temperatures than conventional nonstick pans.

Common Cooking Items to Avoid Putting in the Oven

Avoid putting wax paper, paper products such as napkins or plates, certain types of glassware, and uncontained food in the oven.

Wax paper

Wax paper is not suitable for putting in the oven because it cannot withstand high temperatures. It is made of a food-safe tissue paper that has been coated with paraffin wax. If you were to place wax paper in the oven, it could potentially catch fire and ruin your food.

To ensure the best baking results, it is recommended to use parchment paper instead of wax paper. Parchment paper is designed to resist heat and will not melt or cause any safety issues when used in the oven.

Paper products

Paper products, such as plain paper and cardboard, are generally not suitable for use in the oven. This is because they have poor barrier properties and low heat sealability, which can lead to issues like burning or charring.

Additionally, paper has low strength and may not hold up well under high temperatures. It's important to avoid putting wax paper in the oven as it can melt and pose a fire hazard. However, if you're looking for a safe alternative for baking tasks like lining pans or wrapping food, parchment paper can withstand higher heat temperatures than wax paper and is suitable for oven use.

Certain glassware

Certain glassware should be avoided when it comes to using the oven. Putting the wrong type of glass in the oven can lead to cracking or damage if not handled correctly. It's important to check whether your glassware is oven-safe before using it for cooking or baking.

Pyrex glass cookware, for example, is specifically designed to withstand high temperatures and is safe to use in the oven. However, not all types of glass are suitable for this purpose.

Cold or damaged glassware, as well as non-tempered glass, should never be put in the oven. When it comes to choosing which glasses are safe for baking or roasting, look for tempered glass options that have been specially treated to handle heat without breaking.

Uncontained food

It is important to avoid putting uncontained food directly in the oven. When food is not properly covered or placed in a dish, it can cause spills and drips on the oven floor or racks.

This can lead to smoke, unpleasant odors, and even potential fire hazards. In addition, uncontained food may splatter and create a mess that is difficult to clean up. To prevent these issues, always use cookware or baking dishes when cooking food in the oven to contain any liquids or loose ingredients.

Knowing which materials are safe to use in the oven is crucial for home cooks. Glass and ceramic dishes are reliable choices, while metals like stainless steel and carbon steel are also suitable for oven use.

However, it's essential to avoid plastic, paper, styrofoam, and non-oven-safe metals to prevent any potential hazards. By following these guidelines and using heat-safe utensils, you can confidently cook delicious meals without worrying about damaging your cookware or compromising your safety.

FAQs

Is Pyrex safe for use in the oven?

Pyrex is made of tempered glass, making it completely safe for oven use.

What symbols indicate if a material is oven-safe?

Symbols for oven-safe materials are usually specific to each manufacturer, ensuring you can safely put their product in the oven.

Can you put wax paper or parchment paper in an oven?

While parchment paper is safe to use in the oven, wax paper is not because it could melt, creating smoke and potentially catching fire.

Are porcelain and CorningWare dishes suitable for my oven?

Both porcelain and CorningWare are typically safe for your conventional or microwave ovens as they can withstand high temperatures without cracking or breaking.


Sarah Mock of savoringthegood.com headshot 2022

I am Sarah Mock. Welcome!

Sarah Mock is a classically trained Chef and graduate of Johnson & Wales University. A culinary blogger for 16 years Sarah helps the home cook prepare her recipes with professional results.

Get to know me

as seen in:

Logos of Hersheyland, ABC News, and Good Day PA are showcased in a seamless row, providing a snapshot of popular brands.

Hersheyland Nightline Good Day Pa!

The vibrant design showcases the iconic logos of Pinterest, Rachael Ray, and Jell-O set against a bold red background. Sorry, the provided description doesn't offer enough detail to suggest important SEO keywords.

Pinterest Rachael JELL-O

Types of Salt (A Complete Kitchen Guide)

A woman in an apron mixing ingredients in a kitchen.

Salt - it's found in every kitchen corner, right? I've scratched my head in the grocery aisle more than a couple of times, gazing at the multitude of options. From cooking up a storm in my own kitchen and doing a good dose of homework, I've gathered some pretty interesting insights about different salts and their culinary uses.

A woman in an apron mixing ingredients in a kitchen.

Different Types of Salt

There are various types of salt that can be used in cooking and other applications. Some common types include table salt, kosher salt, sea salt, Himalayan salt, rock salt, pickling salt, black salt, and Epsom salt.

Table Salt

Table salt, a popular type of granulated white salt, plays a pivotal role in the world of cooking. It's composed of about 40% sodium and 60% chloride, acting not only as a flavoring agent but also as a binder and stabilizer in culinary preparations.

One can easily sprinkle it directly onto food during the cooking process for an added zest. Among table salts, iodized variety occupies its own niche - it's essentially regular table salt enriched with essential iodine, contributing to our daily nutrient intake.

Kosher Salt

A glass of salt sitting on a cutting board.

Kosher salt stands out brilliantly in commercial kitchens and is my top pick for barbecue and general cooking recipes. The larger grain size of kosher salt, compared to table salt, gives it a distinct crunch that enhances food texture.

It's basically sodium chloride with no specific religious significance, despite its name hinting at Jewish dietary laws.

Switching between different types like kosher salt and regular table salt is not worrisome as they can be used interchangeably in cooking. Of course, the difference comes down to their dissolving rate where kosher has an edge due to its compact structure.

Now imagine your favorite steak seasoned with these robust grains - what a palate delight! I use Kosher salt to make my favorite basil salt.

Sea Salt

Dead sea sands, egypt - dead sea sands, egypt -.

Known for its coarse texture, sea salt brightens the flavor of food with a hint of brininess. As it's made by evaporating seawater, each grain packs in various minerals such as magnesium and calcium that lend a complex flavor profile.

Unlike table salt, which is heavily refined and mixed with additives, sea salt undergoes less processing ensuring you get a more natural product. While it does contain iodine naturally present in seawater, the levels are lower compared to iodized salt.

When using sea salt in your cooking or baking process remember; because of its larger crystals, you might need to adjust quantities to achieve the same level of seasoning as other salts.

Whether used as finishing touches on caramel desserts or roasted vegetables; It's all about personal preference when choosing between different types of salt like kosher salt vs sea salt or himalayan salt vs kosher etc., but there's no denying that having options can make culinary experiments more exciting!

Himalayan Salt

A pile of pink and white salt.

Himalayan salt is a type of salt that comes from the Himalayan Mountains in South Asia. It has a natural pink color, which is due to trace minerals found in the salt. This salt contains up to 98 percent sodium chloride and is believed to come from ancient sea beds in the region.

Many chefs and home cooks appreciate the unique flavor and texture that Himalayan salt adds to their dishes.

Rock Salt

A bag of rock salt on top of a wooden table.

Rock salt is a type of salt that comes from underground mines and is formed from sedimentary rock. It is mainly composed of sodium chloride, the same chemical compound found in table salt.

To extract rock salt, dynamite is used to mine it and then it is crushed into smaller pieces for use in food. Rock salt can be found all over the world and is abundant in various rock formations.

Pickling Salt

Pickling salt is a type of pure granulated salt or sodium chloride that is specifically used for pickling and canning purposes. It doesn't contain any additives or additional ingredients, unlike other types of salt such as table salt or sea salt.

This makes pickling salt the ideal choice for pickling because it won't interfere with the flavors or textures of your preserved foods. Plus, pickling salt has a very fine crystal structure, which means it dissolves quickly and easily when added to your brine solution.

So if you're planning on making delicious homemade pickles, be sure to reach for some pickling salt!

Black Salt

A black and white photo of Black Salt.

Black salt, also known as Himalayan black salt or kala namak, is a type of salt commonly used in Indian cuisine. It is found in the salt mines of the Himalayan mountains and has a distinct flavor that adds depth to dishes.

Ayurveda recognizes the benefits of black salt, including its digestive properties and ability to alleviate bloating. In cooking, black salt is often used as a condiment or seasoning to enhance flavors in various dishes.

Its unique taste makes it a popular choice for adding an extra layer of complexity to both savory and sweet recipes.

Epsom Salt

A spoonful of epsom salt on top of a pile of snow.

Epsom salt is a unique type of salt that is composed of magnesium and sulfate. Unlike other salts, it does not contain sodium. The main benefit of Epsom salt comes from its high magnesium content, which can help with muscle aches, inflammation, and stress relief.

Many people use Epsom salt in baths to relax and rejuvenate their bodies. However, it's important to note that excessive use of Epsom salt in a bath can have adverse effects. So, if you're looking for an all-natural way to soothe your body and mind, give Epsom salt a try!

Comparisons between Types of Salt

I will compare the differences between kosher salt and sea salt, sea salt and table salt, kosher salt and regular salt, Himalayan salt and kosher salt, as well as Epsom salt and table salt.

Kosher Salt vs. Sea Salt

Kosher salt and sea salt are two popular types of salt that home cooks often use in their recipes. While both can add flavor to dishes, there are some key differences between the two.

Kosher salt is primarily composed of sodium chloride and has larger, irregularly shaped crystals compared to sea salt. It is called "kosher" because it is used in the koshering process of drawing blood from meat.

Chefs prefer kosher salt for its ability to evenly season food due to its larger crystals.

On the other hand, sea salt is obtained by evaporating seawater, resulting in delicate and flaky or pyramid-shaped crystals. Sea salt has a natural and slightly briny flavor, making it a popular choice for seafood dishes.

Sea Salt vs. Table Salt

Sea salt and table salt are two commonly used types of salt in cooking. Sea salt is obtained by evaporating seawater, while table salt is mined from salt deposits and processed into fine crystals.

One key difference between the two is that table salt is usually fortified with iodine and anti-caking agents, whereas sea salt contains a small amount of naturally occurring minerals.

Both sea salt and table salt contain around 40% sodium by weight, so they have comparable amounts of sodium. However, they do differ in taste and flavor due to the different minerals present in sea salt.

Kosher Salt vs. Regular Salt

Kosher salt and regular salt are two common types of salt that you will often find in your kitchen. One key difference between these salts is their grain size. Kosher salt has larger crystals compared to regular table salt, which has smaller granules.

This difference in grain size can impact how the salts dissolve and interact with food. Additionally, kosher salt does not contain iodine, unlike regular table salt which is often fortified with this important nutrient.

So if a recipe calls for kosher salt and you only have regular table salt on hand, it's best to use less of the regular table salt to avoid oversalting your dish.

Himalayan Salt vs. Kosher Salt

When it comes to choosing salt for your cooking, two popular options are Himalayan salt and kosher salt. While both can enhance the flavor of your dishes, there are some differences to consider.

Himalayan salt is often considered a preferred choice due to its higher mineral content and trace elements compared to kosher salt. It also has a distinctive pink color that adds visual appeal to your meals.

On the other hand, kosher salt is commonly used in meat curing and has a coarser texture than Himalayan salt. Ultimately, the choice between these salts depends on personal preference and dietary considerations.

Epsom Salt vs. Table Salt

Epsom salt and table salt are two types of salts that have different compositions and uses. Epsom salt, also known as magnesium sulfate, is made up of naturally occurring minerals with no additives.

On the other hand, table salt is made of sodium chloride and is commonly used in cooking and seasoning food. It is important to note that while table salt can enhance the flavor of our dishes, Epsom salt has a bitter taste and is not suitable for cooking purposes.

Instead, Epsom salt is often used for its therapeutic properties such as in bath salts for relaxation or to soothe muscle soreness.

Uses for Salt

Salt has a variety of uses, including cooking and seasoning, baking, pickling and preserving, beauty, as well as cleaning and household purposes.

Cooking and Seasoning

A person mixing greens and pomegranate in a bowl.

I love using different types of salt when I cook and season my food. Whether it's coarse sea salt or fine sea salt, each variety adds a unique flavor to my dishes. Salt is essential for bringing out the flavors in ingredients and enhancing the overall taste of a dish.

It can be used to season meats, vegetables, soups, stews, and even sauces. So next time you're in the kitchen, don't forget to reach for your favorite type of salt to elevate the flavors of your culinary creations!

Baking

A woman in an apron mixing ingredients in a kitchen.

Salt plays a crucial role in baking. It not only provides flavor to baked goods but also strengthens the dough, controls the rate of yeast fermentation, and helps improve texture. When added to recipes, salt enhances the overall taste by balancing out sweetness and enhancing other flavors.

Additionally, salt helps strengthen gluten in bread dough, resulting in a better structure and rise. Remember that using salt in baking can also help extend the shelf life of your creations.

Different types of salt can be used for different purposes in baking, so it's worth experimenting with options like kosher salt or sea salt to see which one works best for your recipes.

Pickling and Preserving

Cucumbers in a glass jar on a wooden table.

Pickling and preserving is a popular method of extending the shelf life of food, especially for those who enjoy homemade pickles and canned goods. One key ingredient in this process is pickling salt, which is specifically designed for these purposes.

Unlike regular table salt, pickling salt does not contain any anti-caking agents or additives, ensuring that the flavor and texture of your preserved foods remain intact. By using salt as a preservative, you can create delicious pickled vegetables like sauerkraut or cucumbers that can be enjoyed long after their peak season.

Remember to follow proper preservation techniques to ensure the safety and longevity of your homemade creations.

Beauty

A bowl of sea salt and other items on a white background.

Salt has numerous benefits for beauty. It can be used as a natural remedy for various skin conditions, such as acne and eczema. Salt scrubs help exfoliate the skin, removing dead cells and promoting a beautiful glow.

Additionally, salt can be used to treat stains on teeth and constipation. When it comes to hair care, rinsing with salt water can add volume and texture to your locks. So why not incorporate this versatile ingredient into your beauty routine?.

Cleaning and Household Use

A person cleaning a stove top with a sponge.

Salt is not only useful in the kitchen, but it can also be a powerful cleaning agent for various household tasks. It has antiseptic properties that enable it to cut through grease, remove odors, and lift stains.

When mixed with soda water, salt becomes an effective cleaner for the inside of refrigerators - deodorizing and getting rid of any lingering smells. You can even use table salt to clean around your home as it has scientifically proven benefits.

From scrubbing away the grime on your cutting boards to preventing apple slices from browning, salt is an inexpensive, non-toxic, eco-friendly cleaning solution that you probably already have in your pantry.

Benefits and Drawbacks of Different Salts

In our cooking journey, it's crucial to understand the benefits and drawbacks of using different types of salts. Here's what you need to know:

Benefits:

  • Salt acts as a flavor enhancer, improving the taste of our dishes.
  • Certain salts, like Himalayan and sea salt, contain beneficial minerals such as potassium, iron, and calcium.
  • Iodized table salt helps to replenish our iodine intake, a crucial nutrient for maintaining thyroid.
  • Salt serves as a binder and stabilizer in many recipes, ensuring a consistent texture.
  • Using salt in moderation can help maintain our body's electrolyte balance.

Drawbacks:

  • Overuse of salt can lead to issues like high blood pressure and heart disease.
  • Table salt is often stripped of vital nutrients during the manufacturing process.
  • Despite having lower sodium levels, Himalayan salt, along with other specialty salts, can still contribute to sodium overload if not used sparingly.
  • Some people may find the strong, distinct flavor of certain salts, such as black or rock salt, overpowering.
  • Although sea salt and table salt have similar nutritional values, sea salt is often marketed as 'better', which can be misleading.

Differences in Flavor and Texture

Different types of salt have distinct flavors and textures that can enhance the taste and experience of your dishes. Sea salt, for example, has a slightly different taste compared to table salt due to the presence of trace minerals.

It also has a coarser grain and a softer texture, which can add a delightful crunch to your meals. On the other hand, table salt is finer in texture and dissolves quickly on the palate.

The size of salt grains plays a significant role in determining its flavor profile - larger crystals tend to provide bursts of flavor while smaller grains distribute more evenly throughout your food.

So experiment with different salts in your recipes to discover new dimensions of flavor and texture that will elevate your cooking game!

Nutritional Content

Different types of salt may vary slightly in their nutritional content, but all types are primarily made up of sodium chloride. source. Sea salt and table salt, for example, have comparable amounts of sodium by weight and provide the same basic nutritional value.

Celtic salt and pink Himalayan salt also have similar nutritional content. However, Himalayan salt is known for its benefits due to its mineral content which includes trace amounts of potassium, magnesium, and calcium.

It's important to note that regardless of the type of salt you use, moderation is key because excessive sodium intake can be harmful to you.

Proper Usage and Storage of Salt

When it comes to using and storing salt, it's important to keep a few key things in mind. Here are some tips for proper usage and storage:

  • Store salt in an airtight container: This will help prevent moisture from getting in and causing clumping or caking.
  • Keep salt away from heat and sunlight: Exposure to these elements can affect the quality of the salt over time.
  • Use the right amount of salt when cooking: Adding too much salt can overpower the flavors of your dish, while adding too little may result in a bland taste. Start with a small amount and adjust as needed.
  • Use different salts for different purposes: Different types of salts have varying flavors and textures, so consider using specific salts for specific dishes. For example, sea salt is great for finishing touches on salads or grilled meats, while kosher salt works well for seasoning during cooking.
  • Follow recipe instructions: If a recipe calls for a specific type of salt, it's best to use that type to achieve the desired results.
  • Be cautious with iodized salt: If you're planning on using iodized table salt, be aware that it may have a slightly metallic taste compared to other salts.
  • Regularly check the expiration date: While most salts have an indefinite shelf life if stored properly, it's still important to periodically check for any expiration dates or signs of spoilage.

Myth Debunking: Common Misconceptions about Salt

There are several common misconceptions about salt that I want to address. One myth is that sea salt is less salty than table salt, but this is not true. Both sea salt and table salt contain about 40% sodium and taste equally salty. source

Another misconception is that adding salt to your home-cooked food is the main source of dietary sodium. In reality, processed foods contribute much more sodium to our diets than the small amount we add while cooking.

It's also important to note that excess sodium has been linked to issues beyond just blood pressure, so it's essential to consume it in moderation. Lastly, many people believe that all types of salt can be used interchangeably in cooking, but each type actually has its own distinct flavor and texture which can significantly impact the taste of your dishes.

So next time you reach for the salt shaker, remember these facts and don't let common myths influence your choices in the kitchen.

Understanding the different types of salt can greatly enhance your culinary skills. Whether you prefer the fine texture of table salt or the unique flavor of Himalayan salt, each type has its own distinct qualities.

Experimenting with these salts in your cooking and baking will open up a world of possibilities and help you find the perfect seasoning for every dish. So go ahead, explore the wide range of salts available and elevate your home cooking to new heights!

FAQs

What are the main differences between sea salt and table salt?

Sea salt vs table salt differs mainly in their taste, texture and processing; where table salt is finely ground with added iodine, sea salt is coarser and derived directly from evaporated seawater.

Are there specific uses for black salt and rock salt?

Yes, Black Salt offers unique flavors suited to certain dishes while rock salts have many uses ranging from ice melting to grilling on a slab.

How does kosher salt compare to regular or iodized salts?

Regular or Iodized salts are fine-grained compared to Kosher Salt which is flaky; the flavor of kosher can be less intense due to its lower density per volume making it more desirable in cooking.

Can you substitute pickling salt for kosher?

Pickling Salt vs. kosher Salt differ mostly by grain size; while you could substitute one for another in recipes, adjustments might be needed since pickling has smaller granules and thus packs more densely than kosher.

Is there a difference between Himalayan Pink Salt and Sea salt (including Kosher)?

Yes! Despite both being used as cooking salts, Himalayan Pink has additional mineral content that gives it its distinctive color whereas both Sea Salts & Kosher varieties derive their qualities largely based on ocean source & processing methods respectively.


Sarah Mock of savoringthegood.com headshot 2022

I am Sarah Mock. Welcome!

Sarah Mock is a classically trained Chef and graduate of Johnson & Wales University. A culinary blogger for 16 years Sarah helps the home cook prepare her recipes with professional results.

Get to know me

as seen in:

Logos of Hersheyland, ABC News, and Good Day PA are showcased in a seamless row, providing a snapshot of popular brands.

Hersheyland Nightline Good Day Pa!

The vibrant design showcases the iconic logos of Pinterest, Rachael Ray, and Jell-O set against a bold red background. Sorry, the provided description doesn't offer enough detail to suggest important SEO keywords.

Pinterest Rachael JELL-O

Keto Ground Turkey Recipes

A turkey burger with lettuce and tomatoes on a wooden board.

Turkey is incredibly versatile-smoke it, oven-roast it, or spatchcock it, no problem. And ground turkey? It's a game-changer.

A turkey burger with lettuce and tomatoes on a wooden board.

If you want to make the most of your turkey, don't miss out on my Turkey Rub, or my Sous Vide Turkey Roulade! 

Be sure to learn how to carve a turkey breast, tackle a whole turkey like a pro, or whip up a fantastic dry turkey brine mix, I've provided easy-to-follow tutorials just for you.

Low-Carb Ground Turkey Recipes

You can whip up some amazing keto-friendly recipes using ground turkey that are both flavorful and waistline-friendly. Think burgers, meatballs, meatloaf, and so much more.

These keto recipes using ground turkey are perfect for keto enthusiasts and anyone looking for tasty, guilt-free options. From comforting casseroles to light and refreshing salads, you'll never run out of ideas!

Keto Ground Turkey Crust Pizza

Who says you can't enjoy pizza on a keto diet? This one's got a turkey crust that'll make your taste buds do the happy dance. 

If you enjoyed this recipe, you might wanna check out my Gyro Pizza and Pizza Casserole. I've even got the lowdown on Pizza Dip and a guide to Canning Pizza Sauce!

Get The Recipe

Keto Turkey Meatballs with Sun-Dried Tomatoes

Tender, hearty, and packed Italian spices and herbs, Keto Turkey Meatball with Sun-Dried Tomatoes is all set to jazz up your plate and win your taste buds over.

Get The Recipe

Baked Turkey and Zucchini Meatballs

Another meatball recipe, this dish brings together the goodness of turkey and zucchini to create some golden, scrumptious addition to your spaghetti. It's a spin on a classic meatball dish, perfect for a satisfying, well-balanced afternoon meal.

For that extra saucy flavor, I recommend you drizzle some Keto Alfredo Sauce on top!

Get The Recipe

Jalapeño Turkey Burgers with Mushroom Buns

Spice things up with Jalapeño Turkey Burgers. Sandwiched between two very flavorful mushroom buns, this recipe offers a one-of-a-kind burger experience.

Get The Recipe

Juicy Ground Turkey Burger Patties

For all you burger lovers out there, these ground turkey burger patties are a must-try. They're seasoned just right and cooked to juicy, mouthwatering perfection.

Get The Recipe

Turkey Meat and Bacon Sandwiches

Slices of tender turkey meat meet crispy bacon, all wrapped in your choice of low-carb bread or lettuce wraps. It's a winning combo that's perfect for a quick bite.

Get The Recipe

Easy Keto Turkey Meatloaf

This turkey meatloaf is as easy as pie (well, easier, actually). Seasoned just right and baked to golden goodness, it's a simple, no-fuss option for keto lovers looking for something comforting.

Get The Recipe

Low-Carb Turkey Meatballs in Maple Mustard Sauce

Picture succulent turkey meatballs swimming in a mouthwatering maple syrup and mustard sauce. It's a sweet and savory low-carb dish for those who want something a little different and a lot more delicious.

Get The Recipe

Turkey Club Meatballs and Roasted Red Pepper Aioli

This recipe is basically a classic club sandwich but in meatball form, bursting with flavor and served alongside a creamy roasted red pepper aioli. It's a keto-friendly twist that's sure to please.

Ground Turkey Meatloaf Muffins

A turkey meatloaf muffin is basically a bite-sized meatloaf. It's got portion control down to a science, making it the go-to choice for those who want a meatloaf fix minus the carbs.

Get The Recipe

Turkey Taco Lettuce Wraps

Take your ground turkey on a Mexican flavor trip with classic taco seasonings and crispy lettuce. Pile on some diced tomatoes, a sprinkle of cheese, and a dollop of guacamole, and you've got yourself a zesty, satisfying meal that won't weigh you down.

Get The Recipe

Asian Turkey Lettuce Wraps

Elevate your ground turkey with a kick of ginger, soy, and sesame, all wrapped up in crisp fresh lettuce leaves.

Serve it with my Asian Broccoli recipe for a seriously tasty East Asian foodie trip.

Get The Recipe

Low-Carb Ground Turkey Bowls

Lean ground turkey teams up with cauliflower rice, seasoned to perfection. It's a low-carb twist on the traditional rice bowls that won't leave you feeling heavy.

Get The Recipe

Low Carb Turkey Casserole with Spinach and Cheese

This casserole is like a warm hug on a plate. It's got lean turkey, nutritious spinach, and lots of gooey cheese, all baked up in a low-carb way that's hearty and wholesome.

Get The Recipe

Cheese Stuffed Turkey Burgers with Spinach

Say hello to your new burger obsession! These turkey patties are packed with spinach and cheese for a flavor explosion-the kind of burger you can savor guilt-free!

Get The Recipe

Turkey Stuffed Peppers

Imagine bell peppers as edible bowls, crammed with a mix of ground turkey, rice (or cauliflower rice for low-carb lovers), veggies, and secret spices. We bake 'em till they're melt-in-your-mouth good!

Get The Recipe

Spicy Ground Turkey Stir-Fry with Green Beans

This one's a weeknight winner! Ground turkey cooks up with green beans, a bunch of veggies, and a zesty sauce for that extra kick. It's quick, easy, and oh-so-delicious.

Get The Recipe

Keto Turkey Chili

Think turkey mince, tomatoes, chili spices, chicken broth, and a dollop of keto-friendly toppings in one large pot. Yum!

Get The Recipe

Spicy Turkey Cauliflower Rice

Want fried rice minus the carbs? You can't go wrong with Spicy Turkey Cauliflower Rice. It's a sizzle-fest with veggies and just the right amount of spice.

Get The Recipe

Cabbage and Ground Turkey Skillet

Another skillet recipe, Cabbage and Ground Turkey Skillet is a simple yet savory and nutritious one-pan wonder that's perfect for busy weeknight dinners.

Get The Recipe

Southwest Egg and Turkey Breakfast Skillet

Rise and shine with this zesty morning delight! It's got eggs, turkey, cheese, onion, and more, all jazzed up with those bold Southwestern flavors.

Get The Recipe

Turkey Breakfast Sausage (Turkey Patties)

These turkey patties are lean, mean, and perfect for a tasty start to your day. For more keto breakfast recipes, check out Keto Morning Meals without Eggs.

Get The Recipe

Ground Turkey Hash with Squash and Pepper

When your morning needs a little something extra, this Ground Turkey Hash with Squash and Pepper recipe delivers. It's hearty and downright delicious.

Get The Recipe

Buffalo Turkey Meatballs

Kick things up a notch with these buffalo turkey meatballs! They're like a flavor party in your mouth-tangy, spicy, and perfect for sharing during game day and movie nights.

Get The Recipe

Baked Turkey Meatballs

Whip up a batch for a fuss-free meal that'll keep everyone coming back for more.

Get The Recipe

Ground Turkey Stroganoff

When you're after some fancy keto-friendly meal, give Ground Turkey Stroganoff a try. It's filling and oh-so-creamy. Pair it with a Margarita for an afternoon of pure luxury with your pals.

Get The Recipe

AIP Turkey Burgers

AIP Turkey Burgers are all about amazing taste and staying paleo-friendly. No grains or dairy here-just a delicious and wholesome choice for anyone rocking the paleo lifestyle.

Get The Recipe

Keto Frittata with Turkey Sausage and Bacon

Morning vibes just got keto-fied with this awesome frittata. It's loaded with turkey sausage and bacon for that extra protein punch!

Get The Recipe

Turkey and Zucchini Roll-Ups Keto Recipe

In this recipe, we're rolling up turkey in soft, delicate zucchini slices, making a tasty, low-carb treat that's filled with flavor and all-around goodness.

Get The Recipe

Garlic Butter Turkey with Cauliflower

Turkey and garlic butter-need I say more? Pair it up with some roasted cauliflower florets, and you've got a dinner that's both easy and indulgent.

Get The Recipe

Cauliflower Nachos with Ground Turkey Taco Meat

Say goodbye to traditional nachos and hello to Cauliflower Nachos with Ground Turkey Taco Meat. We're replacing carb-heavy chips with cauliflower florets, then topping them with seasoned ground turkey, melted cheese, and all your favorite keto-friendly fixings.

Get The Recipe

Keto Turkey Pot Pie

When I'm not making Turkey Shepherd's Pie or Ham Pot Pie for Thanksgiving, I use my ground turkey for Keto Turkey Pot Pie.

Imagine tender turkey, a velvety cauliflower sauce, and a golden almond flour crust. It's like a warm, carb-friendly hug for your taste buds!

Get The Recipe

Parmesan Crusted Turkey Cutlets

These turkey cutlets are all about getting seriously crispy and super cheesy with a big ol' Parmesan hug. Think of them as turkey schnitzel's wild, crunchy cousin-really heartwarming and completely delish.

Get The Recipe

Thai Turkey Meatballs in Coconut Curry

Thai Turkey Meatball in Coconut Curry is the bomb! They're super good for the body-gluten-free, dairy-free, and paleo-friendly.

You can serve them up with your go-to rice, noodles, zoodles, or whatever floats your boat! 

Get The Recipe

Thai Peanut Cabbage Turkey Bowls

Peanut Cabbage Turkey Bowl is a tasty mix of sweet peanut butter and maple flavors, paired with crunchy cabbage and ground turkey. Easy, one-pan Asian-inspired meal perfect for any occasion.

Get The Recipe

Thai Ground Turkey Lettuce Wraps

These Lettuce Wraps are very quick to make, like under 30 minutes quick! You can enjoy them as a meal or serve them as appetizers, and trust me, your guests will totally love them.

Get The Recipe

Quick Curried Turkey Rice Bowl

Another rice bowl recipe, Curried Turkey Rice Bowl takes your leftover ground turkey and curry mix to the next level. Try it yourself!

Get The Recipe

Enchilada Casserole with Ground Turkey

This recipe is all about stacking layers of chili spices, cheese, sour cream, onion, canned red chili enchilada sauce, and ground turkey for a yummy, stress-free weeknight meal.

Get The Recipe

Low Carb Stuffed Zucchini Boats

Try Low Carb Stuffed Zucchini Boats. They're loaded with zucchini deliciousness and topped with melty cheese, giving you the best of both worlds-fresh veggies and comfort food!

Get The Recipe

Spaghetti Squash Lasagna Boats

Much like my Lasagna Roll Ups, Crockpot Lasagna, and Lasagna Soup, these spaghetti squash boats are all about getting cozy with meat sauce and cheese, delivering exquisite flavors alongside a serving of veggies.

Get The Recipe

Ground Beef or Turkey Taco Zoodle Casserole

Zucchini Lasagna and Spicy Turkey Meat Sauce is a savory fusion of ground meat, zucchini noodles, and Tex-Mex spices, baked to perfection for a hearty taco-inspired dinner. 

If you are looking for more ground beef dishes, check out this long list of Keto Beef Recipes.

Get The Recipe

Zucchini Lasagna and Spicy Turkey Meat Sauce

Swap out the noodles for zucchini and amp up the flavor with a spicy turkey sauce in this guilt-free take on lasagna. 

If you enjoyed this recipe, you might also like my Zucchini Fritters.

Get The Recipe

Zucchini and Ground Turkey Skillet with Pesto

Zucchini and Ground Turkey Skillet is a delectable low-carb recipe that you can cook in under 30 minutes. 

Get The Recipe

Brussels, Ground Turkey, and Arugula Bowl

This bowl brings together Brussels sprouts, seasoned ground turkey, and peppery arugula for a flavorful meal that folks are sure to love.

Get The Recipe

Cauliflower Turkey Stuffing

A keto-friendly twist on traditional stuffing, this dish uses cauliflower instead of bread, mixed with turkey and fragrant herbs to create a holiday side dish that's simply wow.

Get The Recipe

Turkey Brussels Sprouts Skillet

Have some leftover turkey breast? You can't go wrong with Turkey Brussels Sprouts Skillet. It's so easy to make, you can just toss the meat with your brussels sprouts, red bell pepper, and spices, stir, and you're good to go!

Get The Recipe

Egg Roll in a Bowl

Egg Roll in a Bowl has all the flavors of an egg roll minus the wrapper. Whenever I've got pals and fam dropping by, this dish is my go-to. It's simple, yet seriously scrumptious!

Get The Recipe

Stuffed Poblanos with Ground Turkey

Add some spice to your dinner routine with Stuffed Poblanos with Ground Turkey. And if the recipe is not spicy enough, feel free to crank up the chili spices to your liking!

Get The Recipe

Simple Turkey Patties with Avocado

No need for eggs or breadcrumbs in this recipe! Avocado takes the spotlight, giving the mixture that irresistible softness and a rich, buttery, creamy flavor boost.

Get The Recipe

Bacon Mushroom Stuffed Turkey Meatloaf

A lighter version of the meatloaf we all love, this rich and juicy meatloaf dish gets that umami flavor boost from mushrooms and a hint of smokiness from bacon. Perfect for your next picnics and barbecue party!

Get The Recipe

Turkey Poblano Tostadas

This keto turkey dish is as hearty as they come, with tomato paste, pinto beans, garlic and onion, roasted poblano peppers, cheeses, and veggies, all sandwiched between corn tortillas straight from the oven.

Get The Recipe

Turkey Stuffed Portobello Mushrooms

In this recipe, big, juicy Portobello caps are filled with seasoned ground turkey, spinach, and gooey melted cheese to create a meal that's bursting with rich flavors.

Get The Recipe

Crock Pot White Turkey Chili (without Beans)

If you're looking for an epic white chili recipe, this recipe is IT. Whether it's a lazy Sunday or game day, trust me, Crock Pot White Turkey Chili (without Beans) won't disappoint! 

For more crock pot recipes, check out my Mississippi Pot Roast, Ham and Potato Soup, and Cilantro Lime Chicken. 

Get The Recipe

Turkey Pumpkin Chili

Another pumpkin chili recipe, Turkey Pumpkin Chili is one of my favorite ground turkey recipes for the fall season. 

And don't worry, adding pumpkin does not make it taste like a dessert at all. It just adds a subtle nutty flavor that pairs surprisingly well with the chili.

Get The Recipe

Baked Turkey Meatballs with Garlic Lemon Butter Sauce

Baked Turkey Meatballs are smothered in a tangy garlic lemon butter sauce for that zesty and refreshing taste-the kind of flavor you'd want for a chill lunch by the beach!

Get The Recipe

Greek Ground Turkey

When I made this dish for the first time, I was like..Seriously, every ingredient, from the olives and feta cheese to the tomatoes, just work perfectly together. It's got that savory punch and a burst of freshness that's just spot on.

Get The Recipe

Zucchini Noodle Bolognese

Zucchini Noodle Bolognese is kinda like the Italian beef ragu, but honestly, I think it's way better. You've got those fresh zoodles all snuggled up with a luscious bolognese sauce, topped off with some aromatic basil and a generous sprinkle of grated parmesan. Yum!

Get The Recipe

Turkey Taco Salad

I'm all about good dinner salads, especially in the summer. And let me tell you, Turkey Taco Salad is right up there with my favorites like Cucumber Onion Salad, Dill Pickle Salad, and Hawaiian Pasta Salad. 

It might require a bit more effort in the kitchen though, but believe me, it's totally worth it.

Get The Recipe

Pizza Turkey Burgers

Pizza burgers are basically pizza in the shape of a burger: think pepperoni, cheese, sauce, and a touch of fresh basil. If you're a fan of pizza (and let's be honest, who isn't?), you'll definitely love these! 

Get The Recipe

Turkey Lula Kebab

One bite of Turkey Lula Kebab and you'll be instantly transported to the bustling streets of Armenia. Succulent, tender, aromatic, it is everything you would want from a grilled dish and more!

Get The Recipe


Sarah Mock of savoringthegood.com headshot 2022

I am Sarah Mock. Welcome!

Sarah Mock is a classically trained Chef and graduate of Johnson & Wales University. A culinary blogger for 15 years Sarah helps the home cook prepare her recipes with professional results.

Get to know me

as seen in:

Logos of Hersheyland, ABC News, and Good Day PA are showcased in a seamless row, providing a snapshot of popular brands.

Hersheyland Nightline Good Day Pa!

The vibrant design showcases the iconic logos of Pinterest, Rachael Ray, and Jell-O set against a bold red background. Sorry, the provided description doesn't offer enough detail to suggest important SEO keywords.

Pinterest Rachael JELL-O

Dip Recipes: Sour Cream

A white bowl of dip with celery and chives.

Are you looking for a quick and easy way to spice up your snacks and appetizers? Do you want to impress your guests with a starter that goes well with almost anything? If you answered yes, then you need to try sour cream dips!

A white bowl of dip with celery and chives.

These dips are the ultimate party food. They are simple to make, versatile, and full of flavor. These delicious dips use sour cream as a base and add herbs, spices, cheese, or even your choice of smoky meat to create a chip-ready dip.

Whether you prefer a classic sour cream and onion dip, a zesty Mexican sour cream, or a herby pesto one, you will find an easy recipe below that suits your taste.

Boat Dip (Rotel Ranch Taco Dip)

Boat Dip recipe square image
Tiktok boat dip viral recipe is the perfect summer poolside taco dip appetizer, ready in 5 minutes. This Mexican flavor fiesta taco dip recipe has 4 ingredients plus chips for dipping.
Get Full Recipe

Easy Mexican Corn Dip Recipe

Easy Mexican Corn Dip in a red rimmed bowl with chips
Mexican corn dip is a family favorite and usually disappears faster than it should. My easy Mexican corn dip recipe features Mexicorn, roasted green chilies as well as shredded cheese.
Get Full Recipe

Caramelized Onion Dip with Crisp Bacon

A hand holds a slice of bread topped with a cheesy caramelized onion dip with bacon, with more of the savory dip visible in a dish in the background.
Crispy bacon, sweet caramelized onions, and melty cheese come together in this irresistible baked party dip.
Get Full Recipe

KNORR Veggie Spinach Dip Recipe (& Bread Bowl Instructions)

knorr spinach dip in a bread bowl.
A packet of Knorr vegetable recipe mix combined with sour cream, mayonnaise, minced fresh water chestnuts, chopped spinach and chopped scallions to make one of my favorite spinach dips ever!
Get Full Recipe

Chipped Beef Dip

A baked dish with a creamy, white topping, garnished with chopped green onions and red bits of meat, placed on a wooden surface with a silver spoon on the side.
Chipped beef dip is one of our favorite hot dips to serve for for game day, as an appetizer or to take to a potluck. Warm chipped beef dip is a classic appetizer that everyone loves.
Get Full Recipe

Easy Fried Pickle Dip with Crispy Panko Topping

A bowl of cream cheese and fried dill pickle dip topped with crispy breadcrumbs, accompanied by pretzel chips on the side.
Topped with crispy golden panko breadcrumbs, this easy dip perfectly balances creamy, crunchy, and zesty in every bite.
Get Full Recipe

Hot Artichoke Spinach Dip with Cream Cheese & Roasted Garlic

A white square dish filled with baked spinach and artichoke dip, topped with melted cheese and herbs, with a spoon inside.
Creamy hot artichoke spinach dip blends softened cream cheese, mayonnaise, Parmesan, mozzarella, garlic, chopped artichoke hearts, and drained spinach. Bake until bubbly and golden for a crowd-pleasing appetizer served with chips or bread.
Get Full Recipe

Spicy Crab Dip

A blue patterned bowl filled with creamy crab salad-reminiscent of classic sour cream dips-topped with chopped green onions, set on a red and white checkered cloth with crackers in the background.
credit: wondermomwannabe.com
A quick and easy appetizer to make for a party. The great party about this party recipe is that it is a no-cook crab dip so you don't have to heat up your kitchen.
Get Full Recipe

Mexican Sour Cream Dip

A bowl of creamy sour cream dip topped with chopped green onions and herbs, surrounded by tortilla chips and corn chips on a light surface.
credit: kimscravings.com
This easy-to-make dip recipe is one you'll surely have on repeat once you get your first taste! It has mouthwatering Mexican flavors and a subtle kick of heat!
Get Full Recipe

Loaded Sour Cream Dip

A bowl of creamy sour cream dip topped with bacon bits and herbs, surrounded by tortilla chips, with one chip scooping up the flavorful dip.
credit: aldentediva.com
Loaded sour cream dip is a guaranteed crowd pleasing recipe made with sour cream, bacon bits, ranch and just a few other simple ingredients.
Get Full Recipe

Seasoned Sour Cream Dip

A bowl of creamy sour cream dip topped with sliced green onions, surrounded by baked pierogi on a plate.
credit: momfoodie.com
This mildly spicy seasoned sour cream recipe gets a flavor boost from the the medley of spices added. The sour cream dip tastes so much better than plain sour cream. It's great on so many foods, it is likely to become one of you go-to dip recipes, that you will end out making it over and over again!
Get Full Recipe


Sarah Mock of savoringthegood.com headshot 2022

I am Sarah Mock. Welcome!

Sarah Mock is a classically trained Chef and graduate of Johnson & Wales University. A culinary blogger for 15 years Sarah helps the home cook prepare her recipes with professional results.

Get to know me

as seen in:

Logos of Hersheyland, ABC News, and Good Day PA are showcased in a seamless row, providing a snapshot of popular brands.

Hersheyland Nightline Good Day Pa!

The vibrant design showcases the iconic logos of Pinterest, Rachael Ray, and Jell-O set against a bold red background. Sorry, the provided description doesn't offer enough detail to suggest important SEO keywords.

Pinterest Rachael JELL-O

No Bake Key Lime Pie with Graham Cracker Crust

A no bake key lime pie with a slice taken out of it.

No-bake key lime pie is a creamy, tangy, no-oven-required dessert made with a buttery graham cracker crust and a cream cheese filling that sets up firm enough to slice cleanly. I have made this pie more times than I can count, and the trick is in the chill time; the overnight rest is what takes it from good to "we've dubbed it Key Lime cheesecake." Ready in 20 minutes; chilling time is at least 4 hours.

A no bake key lime pie with a slice taken out of it.

No-bake key lime pie is the dessert I reach for every summer when turning on the oven feels like a personal offense. Serve it alongside a pitcher of big-batch margaritas or a glass of Brazilian lemonade and you have a backyard spread that requires almost zero effort. If you are already in no-bake mode, my sugared prosecco grapes are worth adding to the table too.

Ingredients:

These are pantry and refrigerator staples; the only thing worth seeking out is full-fat cream cheese. Do not use the reduced-fat version; it will not set up the same way. Check your pantry, you might have the ingredients to make my famous hot bacon dressing too!

ingredients for no bake key lime pie with text overlay. Crust: Graham cracker crumbs Unsalted butter, melted Granulated sugar Salt (optional) Filling: Full fat cream cheese, softened to room temperature Sweetened condensed milk Lime juice Fresh lime zest Cool Whip, thawed Toppings: Whipped cream Lime zest

Recipe Card?

To find the full printable recipe with specific measurements and directions CLICK HERE to go to the recipe card.

We've dubbed it Key Lime cheesecake.

★★★★★~Kirstie ~ 4/2026

Did not like this.

The cream cheese would not blend smoothly.

- Lesley L ~ Pinterest

Sarah Mock of savoringthegood.com headshot 2022

Sarah's Culinary Insight

  • The cream cheese must be fully softened before you start. Cold cream cheese will not beat smooth; you will end up with lumps in your filling. Pull it out of the refrigerator at least 30 minutes ahead.
  • The overnight chill is not optional if you want clean slices. Four hours gets you a pie you can serve; overnight gets you a pie you can be proud of.
  • Regular Persian limes work fine here. Key limes give you a slightly more floral, aromatic flavor; Persian limes give you clean tartness. Both produce a great pie; do not skip the recipe over limes.
  • For the cleanest slices, put the finished pie in the freezer for 1-2 hours before serving, then let slices sit at room temperature for 10 minutes before eating. This is the move for a dinner party.
  • One reader noted the cream cheese would not blend smoothly; that is almost always a temperature problem. Room temperature cream cheese beats like a dream.

How To Make No-Bake Key Lime Pie

This pie comes together in three stages: crust, filling, chill. The crust sets in the freezer while you mix the filling, so nothing is waiting on anything. Work through the steps in order and you will have this assembled in under 25 minutes.

A no bake key lime pie with a slice taken out.

Prepare your pie plate

Spray a 10-inch pie plate with cooking spray and set it aside. A light coat of spray is all you need; this keeps the crust from sticking when you slice and serve.

A food processor filled with graham cracker crumbs

Make graham cracker crumbs

Add graham crackers to a food processor and pulse until you have fine, even crumbs. You want them uniform; coarse crumbs will give you a crumbly crust that falls apart when you cut it.

Two bowls with sugar, melted butter, graham cracker crumbs and flour in them.

Mix the Crust

Transfer the crumbs to a mixing bowl and stir in the sugar and salt. Add melted butter and mix until the crumbs look like wet sand and hold together when you press them between your fingers. If the mixture still crumbles loosely, add a small drizzle more of melted butter.

A graham cracker crust for no bake key lime pie in a white dish on a marble table.

Press and Freeze the Crust

Press the crumb mixture firmly and evenly into the bottom and up the sides of the prepared pie plate. Use the flat bottom of a measuring cup to press and compact it; a loosely pressed crust will not hold its shape when filled. Place the crust in the freezer for at least 10 minutes while you make the filling.

Whipped cream on a marble countertop.

Beat the Cream Cheese

In a large mixing bowl, beat the softened cream cheese with a hand mixer on medium-high speed until completely smooth and creamy; about 2 minutes. This step matters. Any lumps in the cream cheese at this stage will still be lumps in your finished pie.

Sarah's Chef Tip:

When zesting limes, use a fine grater and work only the outer green layer. Stop before you hit the white pith underneath; it is bitter and it will compete with the lime flavor you are building.

A glass bowl filled with whipped cream and lime zest.

Add the Filling Ingredients

Add the sweetened condensed milk, lime juice, and lime zest. Beat on medium speed until fully combined and smooth. The filling will be thick and pourable.

Whipped cream in a glass bowl.

Fold In the Cool Whip

Using a rubber spatula, gently fold in the thawed Cool Whip or homemade whipped topping. Fold, do not stir; stirring will deflate the whipped topping and give you a denser filling.

A key lime no bake pie in a white plate

Fill the Crust

Remove the crust from the freezer. Pour the filling into the crust and spread it evenly with an offset spatula or the back of a spoon. Work from the center out, pressing lightly to remove any air pockets.

Chill the pie

Cover the pie loosely and refrigerate for at least 4 hours, or overnight. The filling needs this time to set up firm enough to slice. Overnight is the better option; the lime flavor deepens considerably.

A lime pie with a slice taken out.

Garnish and Serve

When ready to serve, pipe or dollop whipped cream over the top and finish with fresh lime zest and lime slices. Slice with a clean, sharp knife, wiping the blade between cuts for clean edges.

Did you make this recipe?

Do you have feedback that would be helpful to others? If so can help this small business owner by leaving a rating and a review in the comments section? Thank you for being part of the Savoring The Good Community. ~ Sarah

Substitutions

A few swaps worth knowing before you start.

  • Regular Persian limes instead of key limes You lose a bit of the floral, aromatic quality that makes key lime pie distinct. What you gain is easy availability and a clean, straightforward tartness. I have made this pie with Persian limes dozens of times; it is a great pie. If you can find key limes, use them. If you cannot, do not let that stop you.
  • Bottled key lime juice instead of fresh This works and I have used it; the flavor is slightly flatter than fresh. Nellie and Joe's Famous Key West Lime Juice is the brand worth buying if you go this route.
  • Reduced-fat cream cheese I tested this. The filling does not set up as firmly, and the texture is noticeably softer. Full-fat is the right call here.
  • Homemade whipped cream instead of Cool Whip This works beautifully and I actually prefer it. Whip 1 cup of heavy cream to stiff peaks with 2 tablespoons of powdered sugar. The flavor is cleaner and the texture is slightly airier. The pie will be a bit less stable for slicing, so chill it overnight rather than just 4 hours.
  • Alternative crusts Golden Oreos, Nilla Wafers, gingersnaps, or shortbread cookies all work in place of graham crackers. Gingersnap crust is my personal favorite variation; the spice plays well with the lime. A store-bought graham cracker crust also works if you want to cut out a step entirely.

Can no-bake key lime pie be made ahead?

This pie is genuinely better made ahead; the lime flavor intensifies and the filling sets more firmly the longer it chills.

  1. Assemble the pie completely through Step 8
  2. Cover loosely with plastic wrap; avoid pressing the wrap directly onto the filling.
  3. Refrigerate for up to 48 hours before serving.
  4. Add whipped cream garnish and lime zest right before serving; not the night before.

Storage

Leftover no-bake key lime pie keeps well for 3-4 days in the refrigerator.

  1. Cover the pie plate tightly with plastic wrap or transfer individual slices to an airtight container.
  2. Refrigerate immediately; do not leave at room temperature for more than 2 hours.

    To freeze: Wrap the whole pie (or individual slices) in plastic wrap, then in a layer of foil. Freeze for up to 1 month. Thaw overnight in the refrigerator. The texture will be slightly softer after freezing but still delicious. Some readers prefer it slightly frozen; it slices like a dream straight from the freezer with a 10-minute rest.

FAQ's and Tips

While I try to share all the information you need to make this recipe in your home with restaurant-quality results, there still may be a question or two. Or these are questions I have received from the community about this recipe. I do my best to answer them as clearly as I can. I hope this helps.

My cream cheese has lumps in the filling. What went wrong?

Almost always a temperature issue. Cold cream cheese does not beat smooth, no matter how long you run the mixer. Pull it from the refrigerator at least 30 minutes before you start, or cut it into small pieces and let it sit for 20 minutes. Beat it alone first before adding any other ingredients.

How do I get clean slices?

Freeze the finished pie for 1-2 hours before you plan to serve it. Slice with a clean, sharp knife and wipe the blade between each cut. Let slices sit for about 10 minutes before serving so they soften slightly.

How can I ensure the pie crust holds its shape when I add the filling?

Freeze the pressed crust for at least 10 minutes before adding the filling. If you want extra insurance, bake the crust at 350F for 7-10 minutes, let it cool completely, then fill. Both methods work; the freeze is faster.

Can I make this vegan?

A reader in the comments reported success replacing all the dairy with plant-based alternatives. She noted it came out less firm but set up well after freezing. Savoring The Good has not tested this variation; try it at your own risk and report back.

A no bake key lime pie with a slice taken out of it.

No Bake Key Lime Pie

With a hearty graham cracker crust and a smooth, airy, lime-infused filling, every forkful offers a perfect balance of sweetness and tanginess, leaving you feeling refreshed.
5 from 3 votes
Print Pin Rate
Course: Dessert
Cuisine: American
Keyword: No Bake Key Lime Pie
Prep Time: 15 minutes minutes
Chill: 4 hours hours
Total Time: 4 hours hours 15 minutes minutes
Servings: 10 slices
Calories: 496
Author: Sarah Mock

Ingredients

Crust:

  •  
    2 sleeves graham cracker crumbs about 1 ¾ cup
  • A rectangular 8 oz package of Kerrygold Pure Irish Butter, unsalted, with a green and gold label and Irish grass-fed cow branding-perfect for creating delicious Saint Patrick's Day cupcakes.½ Cup Butter unsalted, melted
  • A 4-pound bag of Domino granulated pure cane sugar with a yellow and white design, showing nutrition information and branding-perfect for sweetening recipes like rhubarb sour or your favorite desserts.2 Teaspoons Sugar
  • A Morton Salt container with a blue label featuring a girl in a yellow dress holding an umbrella, with salt pouring out of a container-an essential ingredient for perfectly seasoning dishes like Chicken Cordon Bleu.¼ Teaspoon Salt (optional to balance out sweetness)

Filling

  • Box of Kraft Philadelphia Original Cream Cheese, 8 oz (226g), silver packaging with blue and white logo, and renewable energy label on the left-perfect for making delicious Lemon Cheesecake Bars.24 Ounces Cream Cheese softened to room temperature
  • 14 Ounces sweetened condensed milk
  • A whole, uncut green lime with a textured peel on a white background-the perfect citrus for crafting a classic Gimlet.¾ Cup fresh lime juice
  •  
    1 Teaspoon lime zest
  •  
    8 Ounces Cool Whip thawed

Toppings:

  •  
    Whipped cream
  •  
    Lime zest
Follow Savoring The Good On PinterestFollow @SavoringTheGood or tag #STGRecipes!

Instructions

  • Spray a 10-inch pie plate with cooking spray and set it aside. A light coat of spray is all you need; this keeps the crust from sticking when you slice and serve.
    ingredients for no bake key lime pie with text overlay. Crust: Graham cracker crumbs Unsalted butter, melted Granulated sugar Salt (optional) Filling: Full fat cream cheese, softened to room temperature Sweetened condensed milk Lime juice Fresh lime zest Cool Whip, thawed Toppings: Whipped cream Lime zest
  • Add graham crackers to a food processor and pulse until you have fine, even crumbs. You want them uniform; coarse crumbs will give you a crumbly crust that falls apart when you cut it.
    2 sleeves graham cracker crumbs
    A food processor filled with graham cracker crumbs
  • Transfer the crumbs to a mixing bowl and stir in the sugar and salt. Add melted butter and mix until the crumbs look like wet sand and hold together when you press them between your fingers. If the mixture still crumbles loosely, add a small drizzle more of melted butter.
    2 Teaspoons Sugar, ¼ Teaspoon Salt, ½ Cup Butter
    Two bowls with sugar, melted butter, graham cracker crumbs and flour in them.
  • Press the crumb mixture firmly and evenly into the bottom and up the sides of the prepared pie plate. Use the flat bottom of a measuring cup to press and compact it; a loosely pressed crust will not hold its shape when filled. Place the crust in the freezer for at least 10 minutes while you make the filling.
    A graham cracker crust for no bake key lime pie in a white dish on a marble table.
  • In a large mixing bowl, beat the softened cream cheese with a hand mixer on medium-high speed until completely smooth and creamy; about 2 minutes. This step matters. Any lumps in the cream cheese at this stage will still be lumps in your finished pie.
    24 Ounces Cream Cheese
    Whipped cream on a marble countertop.
  • Add the sweetened condensed milk, lime juice, and lime zest. Beat on medium speed until fully combined and smooth. The filling will be thick and pourable.
    14 Ounces sweetened condensed milk, ¾ Cup fresh lime juice, 1 Teaspoon lime zest
    A glass bowl filled with whipped cream and lime zest.
  • Using a rubber spatula, gently fold in the thawed Cool Whip or homemade whipped topping. Fold, do not stir; stirring will deflate the whipped topping and give you a denser filling.
    8 Ounces Cool Whip
    Whipped cream in a glass bowl.
  • Remove the crust from the freezer. Pour the filling into the crust and spread it evenly with an offset spatula or the back of a spoon. Work from the center out, pressing lightly to remove any air pockets.
    A key lime no bake pie in a white plate
  • Cover the pie loosely and refrigerate for at least 4 hours, or overnight. The filling needs this time to set up firm enough to slice. Overnight is the better option; the lime flavor deepens considerably.
    A key lime no bake pie in a white plate
  • When ready to serve, pipe or dollop whipped cream over the top and finish with fresh lime zest and lime slices. Slice with a clean, sharp knife, wiping the blade between cuts for clean edges.
    Whipped cream, Lime zest
    A lime pie with a slice taken out.

Notes

How do I get clean slices?
Freeze the finished pie for 1-2 hours before you plan to serve it. Slice with a clean, sharp knife and wipe the blade between each cut. Let slices sit for about 10 minutes before serving so they soften slightly.
Want to share when you made this recipe?Follow @SavoringTheGood & tag #STGRecipes!
Nutrition Facts
No Bake Key Lime Pie
Serving Size
 
1 slice
Amount per Serving
Calories
496
% Daily Value*
Fat
 
37
g
57
%
Saturated Fat
 
22
g
138
%
Trans Fat
 
0.4
g
Polyunsaturated Fat
 
2
g
Monounsaturated Fat
 
10
g
Cholesterol
 
110
mg
37
%
Sodium
 
341
mg
15
%
Potassium
 
287
mg
8
%
Carbohydrates
 
35
g
12
%
Sugar
 
31
g
34
%
Protein
 
8
g
16
%
* Percent Daily Values are based on a 2000 calorie diet.
**Nutritional facts are just estimates. Please utilize your own brand nutritional values to double check against our estimates.
Like this recipe card? Want one for your site?Check out WP Recipe Maker!

Sarah Mock of savoringthegood.com headshot 2022

I am Sarah Mock. Welcome!

Sarah Mock is a classically trained Chef and a graduate of Johnson & Wales University. A culinary blogger for 17 years, Sarah helps the home cook prepare her recipes with professional results.

Get to know me

as seen in:

Logos of Hersheyland, ABC News, and Good Day PA are showcased in a seamless row, providing a snapshot of popular brands.

Hersheyland Nightline Good Day Pa!

The vibrant design showcases the iconic logos of Pinterest, Rachael Ray, and Jell-O set against a bold red background. Sorry, the provided description doesn't offer enough detail to suggest important SEO keywords.

Pinterest Rachael JELL-O


  • « Previous Page
  • 1
  • 2
  • 3
  • 4
  • 5
  • …
  • 11
  • Next Page »
Sarah Mock of savoringthegood.com headshot 2022

I'm Sarah Mock, Welcome!

Sarah Mock is a classically trained Chef and graduate of Johnson & Wales University. A culinary blogger for 17 years Sarah helps the home cook prepare her recipes with professional results.

Get to know me

Trending Recipes:

  • A close-up of grilled chicken wings stacked on a plate, garnished with parsley, with a side of dipping sauce in the background.
    Grilled Chicken Wings
  • A bowl of taco salad with ground beef, lettuce, tomatoes, black olives, jalapeños, corn, shredded cheese, crushed tortilla chips, red onions, lime wedges, and a dollop of sour cream.
    Dorito Taco Salad
  • Buffalo cauliflower bites are roasted florets coated in a tangy red sauce, served on a white plate with a fork and garnished with fresh herbs.
    Buffalo Cauliflower Bites
  • A bowl of chili pie topped with shredded cheese, chopped onions, and green onions, surrounded by crunchy Fritos corn chips on a white plate.
    Frito Pie Recipe
See more Football Food →

Footer

Sharing this recipe on social media is both encouraged and appreciated. Please share the direct link back to the recipe. Copy/Paste and/or screenshots of the recipe to any social media is strictly prohibited. Content and photographs are copyright-protected. SavoringTheGood®

As an Amazon Associate, I earn from qualifying purchases.

©2026 Savoring The Good® All rights reserved.
Privacy Policy | Accessibility Policy | About Sarah Mock | About Savoring The Good | Terms Of Service

Rate This Recipe

Your vote:


Let me know what you thought of this recipe to leave your stars. Stuck for what to say? Click one of these inspiration prompts to get you started:

This worked exactly as written, thanks!
My family loved this! I just had to share.
This recipe is delicious but I have a suggestion...
Could you clarify for me...
Here is how I included this recipe in m celebration of...
This recipe was wonderful but can you point me to a recipe for...

As always, I appreciate you and what you bring to the Savoring The Good community!

A rating is required
A name is required
An email is required