Savoring The Good®

  • All Recipes
  • Football Food
  • Crock-Pot
  • About Sarah
    • About Savoring The Good®
menu icon
go to homepage
  • All Recipes
  • Football Food
  • Crock-Pot
  • About Sarah
    • About Savoring The Good®
subscribe
search icon
Homepage link
  • All Recipes
  • Football Food
  • Crock-Pot
  • About Sarah
    • About Savoring The Good®
×
Savoring The Good > Uncategorized

Crockpot Chicken Breast Recipes

Pan of crock pot chicken marsala with mushrooms and a rich brown sauce, garnished with herbs.

Get ready for meal prep made easy with these delicious crock pot chicken breast recipes. From creamy Alfredo to spicy Mexican, we've got an easy recipe for every taste. Try one tonight and simplify your dinner routine!
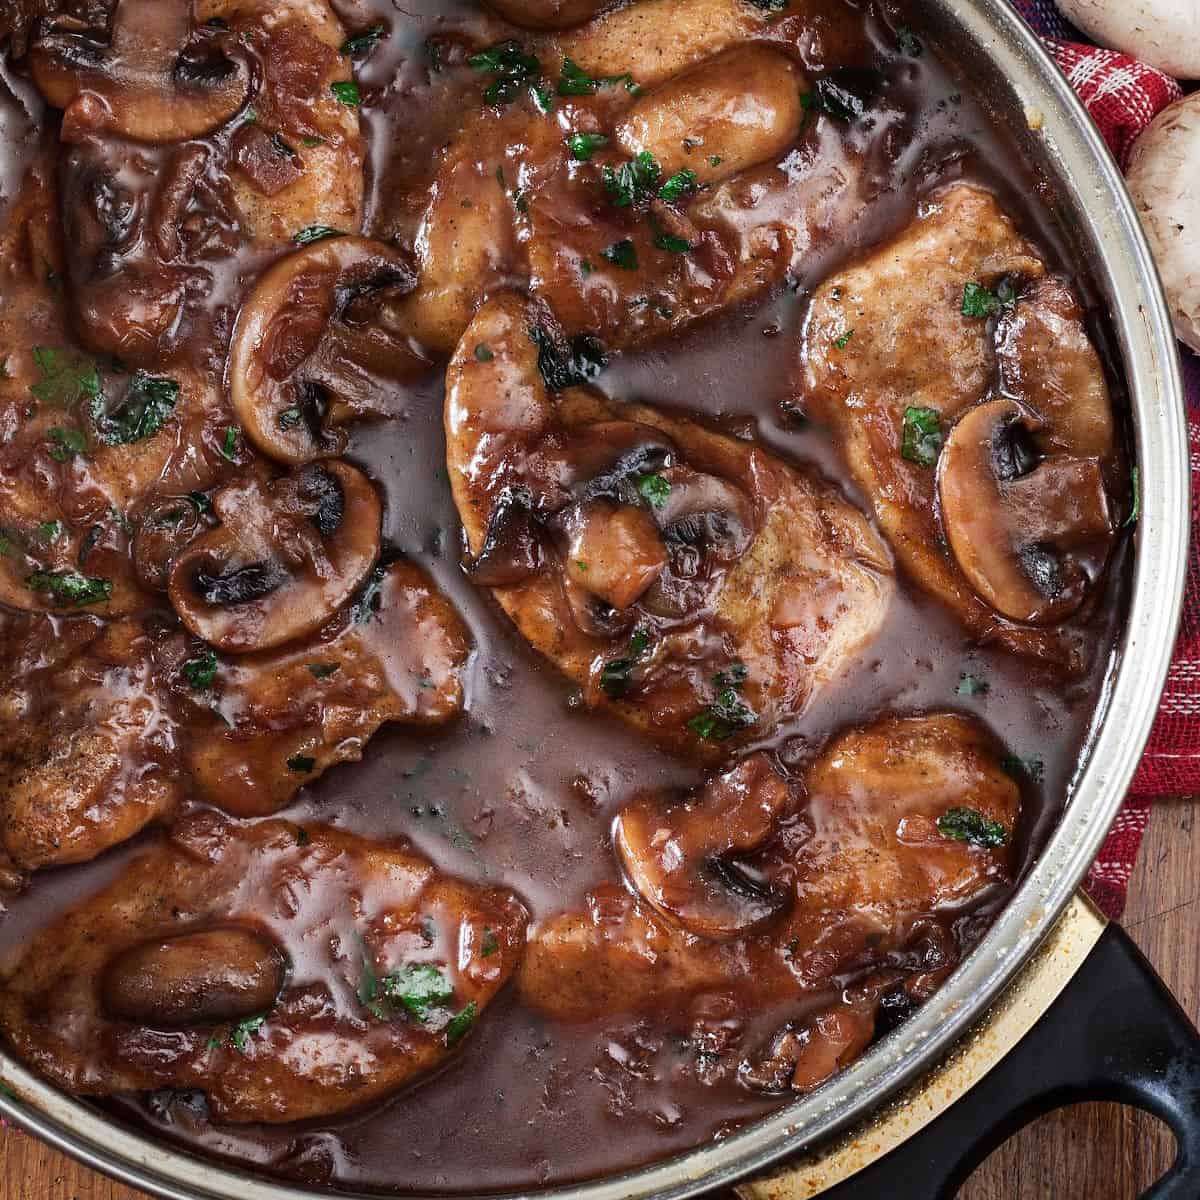
Pan of crock pot chicken marsala with mushrooms and a rich brown sauce, garnished with herbs.

These easy slow cooker chicken breast recipes combine simple ingredients and are an easy way to get the entire family around the dinner table during busy weeknights.

I keep some basic ingredients on hand to keep meal prep to a minimum when making one of these easy recipes for crockpot chicken meals. Stock up on skinless boneless chicken breasts when they are on sale and keep them in the freezer.

The pantry will have white rice, chicken stock, cream of chicken soup, cream cheese, sour cream and dried herbs and spices.

Many of these chicken slow cooker recipes will call for garlic, garlic powder, onion powder, cheddar cheese, and Italian seasoning so be sure to keep those ingredients in your refrigerator and pantry to make dinner time prep easier.

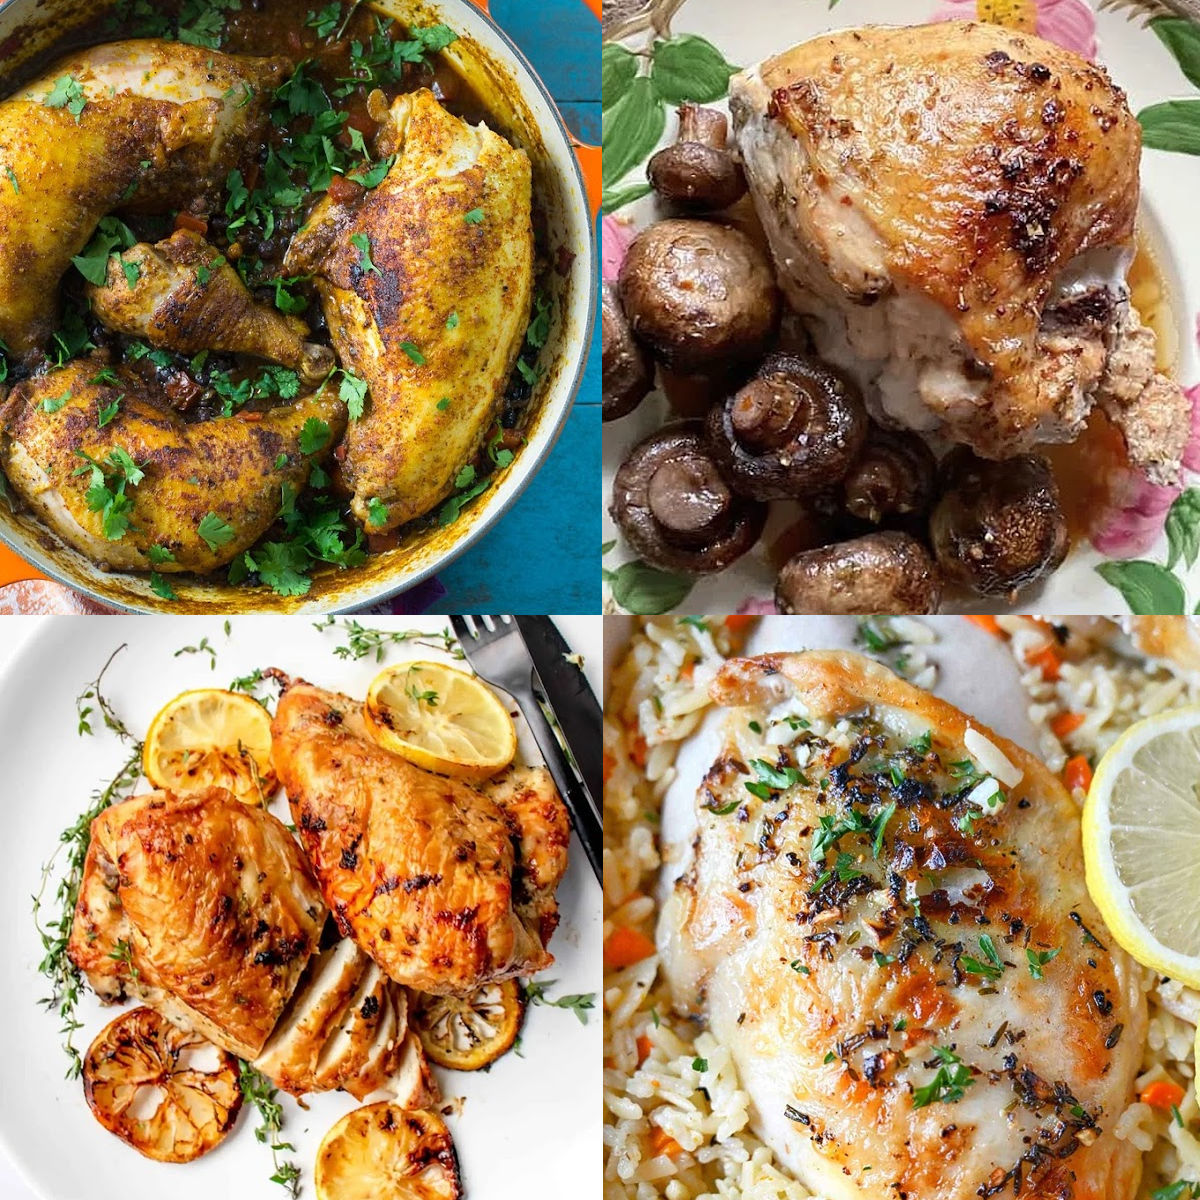
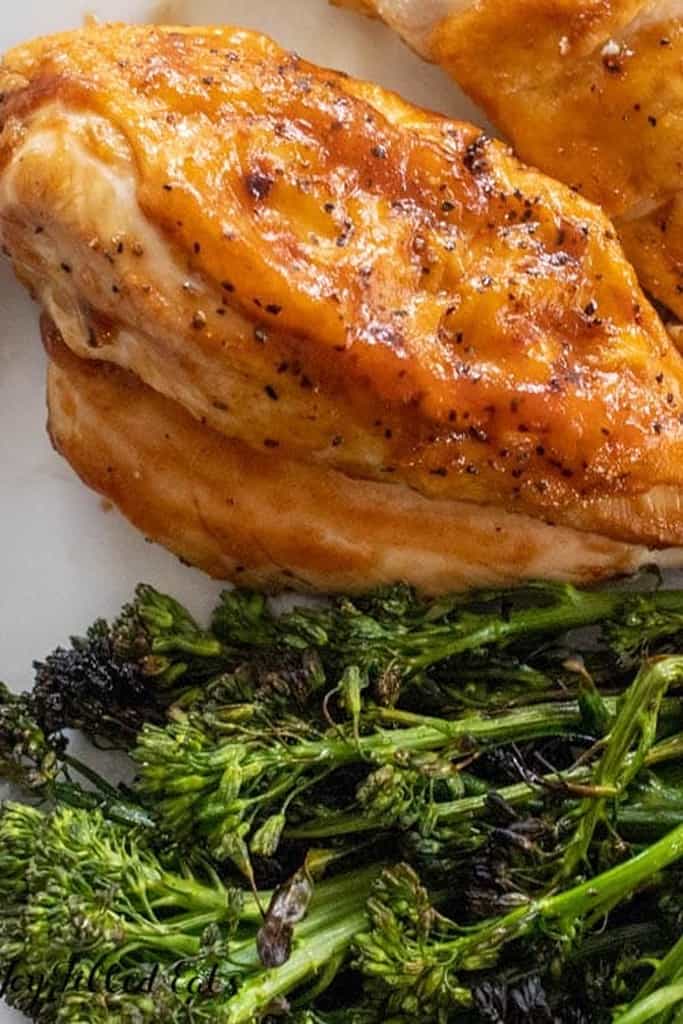
I also have the best bone in chicken breast recipes for you to check out along with my sous vide chicken breast and these chicken quarter recipes.

Crockpot Chicken Breast Recipes (Slow Cooker)

This collection of recipes is focused on using a slow cooker to prepare chicken breast dishes. The recipes are simple and include instructions on how to prepare the ingredients and use the slow cooker.

It's important to follow the recipe closely to ensure the crockpot chicken breast recipes turn out well.

Slow Cooker Chicken Tikka Masala

A plate of white rice topped with pieces of chicken in orange sauce, served with naan bread on a wooden board and a fork beside the plate.
Slow cooker chicken tikka masala is a creamy, warmly spiced chicken dish made with tomato puree, garam masala, and a touch of cream. My friend taught me her chicken tikka masala recipe years ago, and I adapted it for the slow cooker so you can have tender, flavorful chicken without standing over the stove. This serves 4 over basmati rice with naan on the side.
Get Full Recipe

Creamy Crock Pot Chicken Marsala

Savor the rich flavors of Crock Pot Chicken Breast Recipes with tender chicken breasts, mushrooms, and savory gravy, all garnished with fresh herbs.
This Crock Pot Chicken Marsala recipe is a creamy mushroom studded dinner! Put your slow cooker to work with this easy chicken marsala.
Get Full Recipe

Southwest Crockpot Chicken and Rice

Discover a delightful Crock Pot Chicken Breast Recipe with slow-cooked Mexican chicken and rice, richly adorned with cheese, black beans, corn, and diced tomatoes all simmering together in a black pot.
This cheesy and delicious Southwest crock pot chicken with rice recipe is so easy in the slow cooker. Come home to the best comfort food!
Get Full Recipe

Crockpot Chicken Pot Pie

A Crock Pot chicken pot pie filling sits invitingly next to a bowl of the same savory delight. A spoonful hovers above, poised to add its rich flavor, while a golden biscuit crowns the dish. Perfect for fans of chicken breast recipes seeking comfort in every bite.
This Crockpot Chicken Pot Pie is a fast and simple way to make a hearty meal the whole family loves. The chicken is perfectly baked in a creamy sauce with vegetables and topped with buttery biscuits. It literally makes itself in the crockpot.
Get Full Recipe

Crock Pot Chicken and Rice

A white plate with succulent shredded chicken over yellow rice, garnished with chopped herbs, is placed on a wooden table beside a blue napkin and a fork-a delightful dish inspired by Crock Pot chicken breast recipes.
One of the easiest meal you can make is Crock Pot Chicken with Rice with only has 3 ingredients. It's a family favorite. Is cheap and easy to feed a family.
Get Full Recipe

FOUR Ingredient Crockpot Chicken

Plate with succulent Crock Pot chicken breast pieces on a bed of seasoned rice.
This Crockpot Lemon Chicken is so easy and perfect for a busy weeknight. This 4 ingredient, quick slow cooker chicken dinner is amazingly flavorful.
Get Full Recipe

Crockpot Creamy Chicken with Ranch

A white bowl filled with creamy bowtie pasta topped with tender Crock Pot chicken breast pieces and garnished with parsley.
Five ingredient, very simple Slow Cooker Creamy Chicken can quickly be thrown together in the crock pot for a meal the whole family will love!
Get Full Recipe

Crockpot Orange Chicken Recipe

Crockpot Orange Chicken Recipe
This Crockpot Orange Chicken Recipe is an easy and delicious way to get dinner tonight on the table with very little effort. It's irresistible!
Get Full Recipe

Slow Cooker Chicken and Potatoes with Green Beans

Chicken and green beans in a slow cooker.
Nothing is easier than this recipe for Chicken and Potatoes with Green Beans! Chicken breasts, green beans, red skin potatoes
Get Full Recipe

Crockpot Mexican Corn and Chicken Soup

crockpot mexican corn soup
This crockpot Mexican corn soup has layers of flavor that include shredded chicken, black beans, creamed corn, Mexican spices as well as a creamy broth. Top this easy slow cooker soup with your choice of fresh squeezed lime, avocado, cilantro, sour cream and jalapeño.
Get Full Recipe

Easy Slow Cooker Chicken & Rice

A spoonful of Crock Pot chicken breast crack chicken and rice topped with melted cheese and bacon bits.
Slow Cooker Crack Chicken and Rice - chicken, ranch dressing mix, bacon, cheddar cheese, cream of chicken soup, milk and rice. The BEST!
Get Full Recipe

Olive Garden Crock Pot Chicken

Close-up of creamy pasta featuring tender shredded chicken from crock pot chicken breast recipes, garnished with vibrant parsley.
This recipe for Olive Garden Crock Pot Chicken is the perfect weeknight meal. This slow cooker Italian chicken recipe is easy to make and doesn't require a lot of ingredients.
Get Full Recipe

Tuscan Chicken in the Slow Cooker

Creamy Tuscan chicken from Crock Pot Chicken Breast Recipes is served over linguine on a white plate, beautifully garnished with spinach and sun-dried tomatoes.
Crock Pot Tuscan Chicken Crock Pot Tuscan Chicken is an amazing dinner that once you make it, you will want it again (and again!). I mean seriously…there is no way that you can go wrong when you decide to go deep into your shelves to pull out your slow cooker for Crock Pot recipes
Get Full Recipe

Chicken Slow Cooker Enchiladas

This plate of enchiladas features savory Crock Pot chicken breast, black beans, corn, melted cheese, and a dollop of sour cream.
These Chicken Slow Cooker Enchiladas are so easy to make and full of flavor! This recipe is perfect for busy weeknights!
Get Full Recipe

Crock Pot Creamy Lemon Chicken Breasts

A plate of lemon herb chicken breasts, a delight among Crock Pot chicken breast recipes, is garnished with lemon slices and herbs on a patterned cloth. A bowl of Brussels sprouts sits in the background with a serving spoon nearby.
Crock Pot Creamy Chicken is delicious over pasta, or mashed potatoes. Cook on low for juiciest results. 
Get Full Recipe

Crock Pot Chicken Spaghetti

Crock Pot chicken breast recipes come to life with this slow cooker dish, featuring creamy spaghetti mixed with diced tomatoes and shredded chicken.
Crock Pot Chicken Spaghetti is a hearty slow cooker pasta recipe made with shredded chicken breasts cooked in a cream soup and cream cheese mixture and loaded with shredded cheese.
Get Full Recipe

Chicken Breasts in the Slow Cooker with Asian Flavors

Grilled chicken breasts on a black plate with a side bowl of sauce and a spoon, reminiscent of the rich flavors found in Crock Pot Chicken Breast Recipes.
Up until recently, I had been a strong believer that white, boneless skinless chicken meat does not belong in a Crock Pot. Surprisingly, this crock pot chicken recipe completely changed my mind. The shredded breast meat comes out so tender, flavorful, and juicy that it can easily rival slow-cooked dark chicken thighs.
Get Full Recipe

Slow Cooker Garlic Parmesan Chicken & Potatoes

A crock pot filled with potatoes and cheese.
Slow cooker garlic Parmesan chicken & potatoes is an easy yet comforting dish that the entire family will enjoy.
Get Full Recipe

Crock Pot Creamy Tuscan Chicken

Crock Pot chicken breast recipes come alive in this dish, featuring creamy chicken breasts with spinach and diced tomatoes simmered to perfection in a rich sauce.
An easy, creamy Tuscan garlic chicken recipe in the Crock Pot, featuring juicy skinless chicken breasts, sun-dried tomatoes, spinach, and creamy sauce!
Get Full Recipe

Crock Pot Marry Me Chicken

A plate of creamy Crock Pot chicken with sun-dried tomatoes served over white rice. Salt and pepper shakers are in the background.
This Crock Pot Marry Me Chicken recipe is the perfect meal for a special occasion. This slow cooker dinner recipe features tender chicken cooked in a creamy sundried tomato sauce that's packed with flavor!
Get Full Recipe

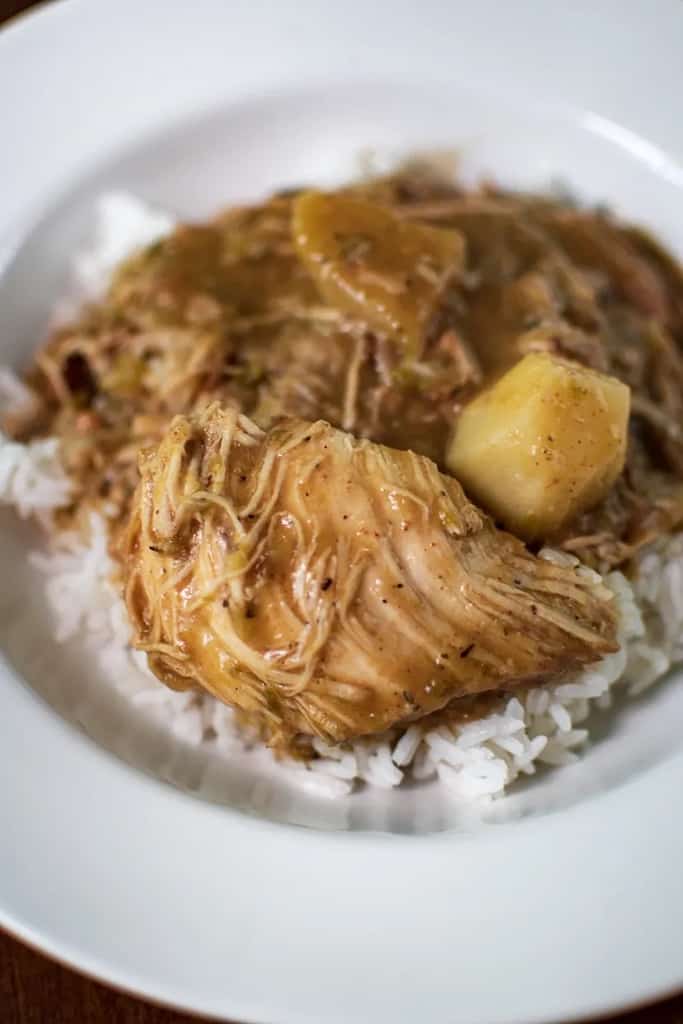
Slow Cooker Brown Sugar Balsamic Chicken

A savory plate of shredded chicken, slow-cooked to perfection using a crock pot chicken breast recipe, smothered in rich brown sauce.
This flavorful and tender Slow Cooker Brown Sugar Balsamic Chicken is so easy to make with basic ingredients. It has delicious flavors and just the right amount of sweetness.
Get Full Recipe

Seasonal Favorite
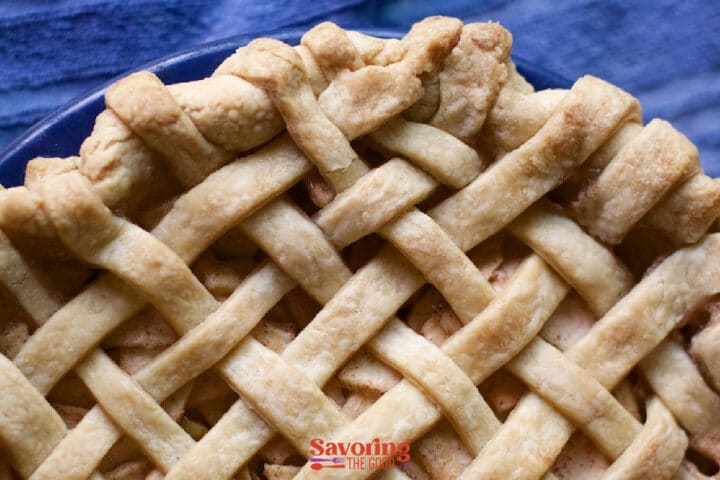
Baked lattice top crust on an apple pie made with the Crisco pie crust recipe, showing flaky layers in the fluted edge.

This is my award-winning Crisco pie crust recipe; flaky, tender, and made with simple ingredients you already have.

Crisco Pie Crust

Crock Pot Jerk Chicken

A bowl of rice topped with seasoned Crock Pot chicken breast, diced vegetables, pickled onions, fresh cilantro, and sliced avocado.
Crock Pot Jerk Chicken - an easy and delicious crock pot jerk chicken recipe. Serve over coconut rice or cauliflower rice! Meal-Prep friendly!
Get Full Recipe

Slow Cooker Brown Sugar Balsamic Chicken

A plate of shredded, sauce-covered chicken, made using one of the delightful Crock Pot Chicken Breast recipes, is garnished with fresh herbs.
This flavorful and tender Slow Cooker Brown Sugar Balsamic Chicken is so easy to make with basic ingredients. It has just the right amount of sweetness.
Get Full Recipe

Slow Cooker Creamy Tomato Basil Chicken Recipe

Discover the delight of crock pot chicken breast recipes with our slow cooker creamy tomato chicken, elegantly garnished with fresh herbs.
This Slow Cooker Creamy Tomato Basil Chicken is SO easy and flavorful, you wouldn't believe it only has just a few ingredients!
Get Full Recipe

Slow Cooker Teriyaki Chicken

A bowl of glazed chicken pieces, slow-cooked to perfection, is topped with sesame seeds and chopped green onions, bringing a Crock Pot chicken breast recipe to life.
Slow cooker teriyaki chicken is cooked with garlic, ginger, soy sauce olive oil and honey, then shredded and coated with sauce.
Get Full Recipe

Crockpot BBQ Chicken (Pulled Chicken)

Crock Pot Chicken Breast Recipes come alive with shredded chicken in a slow cooker, stirred gently with a wooden spoon and coated in a thick, reddish-brown sauce.
This Crockpot BBQ Pulled Chicken a quick, easy, and so flavorful. Perfect for any party, potluck, or picnic! Shred the chicken and return it to the pot to bathe in an addictive BBQ sauce!
Get Full Recipe

Slow Cooker Cranberry Chicken

A glossy red-glazed crock pot chicken breast is served on white rice, accompanied by green beans on the side.
Sweet cranberry and tangy BBQ sauce give plain chicken breasts a sweet & savory spin that's hard to resist! Slow Cooker Cranberry Chicken is a crockpot win!
Get Full Recipe

Crock Pot Bourbon Honey Garlic Chicken

A plate of chicken with rice and vegetables on it.
If you love bourbon chicken from the food court at the mall, you'll love this version of Crock Pot Honey Bourbon Chicken
Get Full Recipe

Crock Pot Chicken Fajitas

Two soft tacos filled with Crock Pot chicken breast, sautéed onions, and bell peppers rest invitingly on a white plate.
Crock Pot Chicken Fajitas will quickly become a new dinner favorite! The flavors are incredible with the chicken, bell peppers, onion and an assortment of Mexican spices.
Get Full Recipe
A large black and silver Crockpot filled with mixed vegetables and sauce is set to the "Low" heating option.

Sarah's recommendation

7 qt. Crock-Pot

Perfect for Chicken, Roasts and Meals for 8+ people.

Buy on Amazon

Slow Cooker Easy Chicken Fajitas

A platter of crock pot chicken fajitas with bell peppers and onions, garnished with lime wedges, avocado slices, and cilantro.
This crockpot fajitas recipe only has 5 ingredients! Quick and tasty, serve these fajitas with your favorite accompaniments.
Get Full Recipe

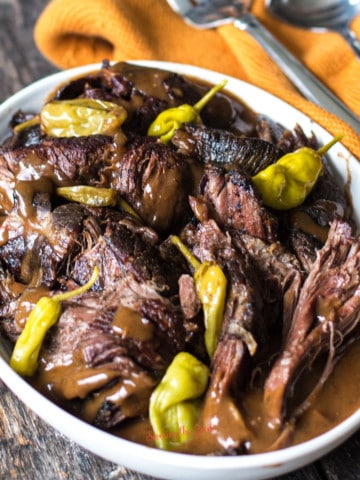
Crock Pot Mississippi Chicken

Shredded Crock Pot chicken breast recipes come to life with tender chicken and vibrant peppers, perfectly cooked in a slow cooker, with two forks on top.
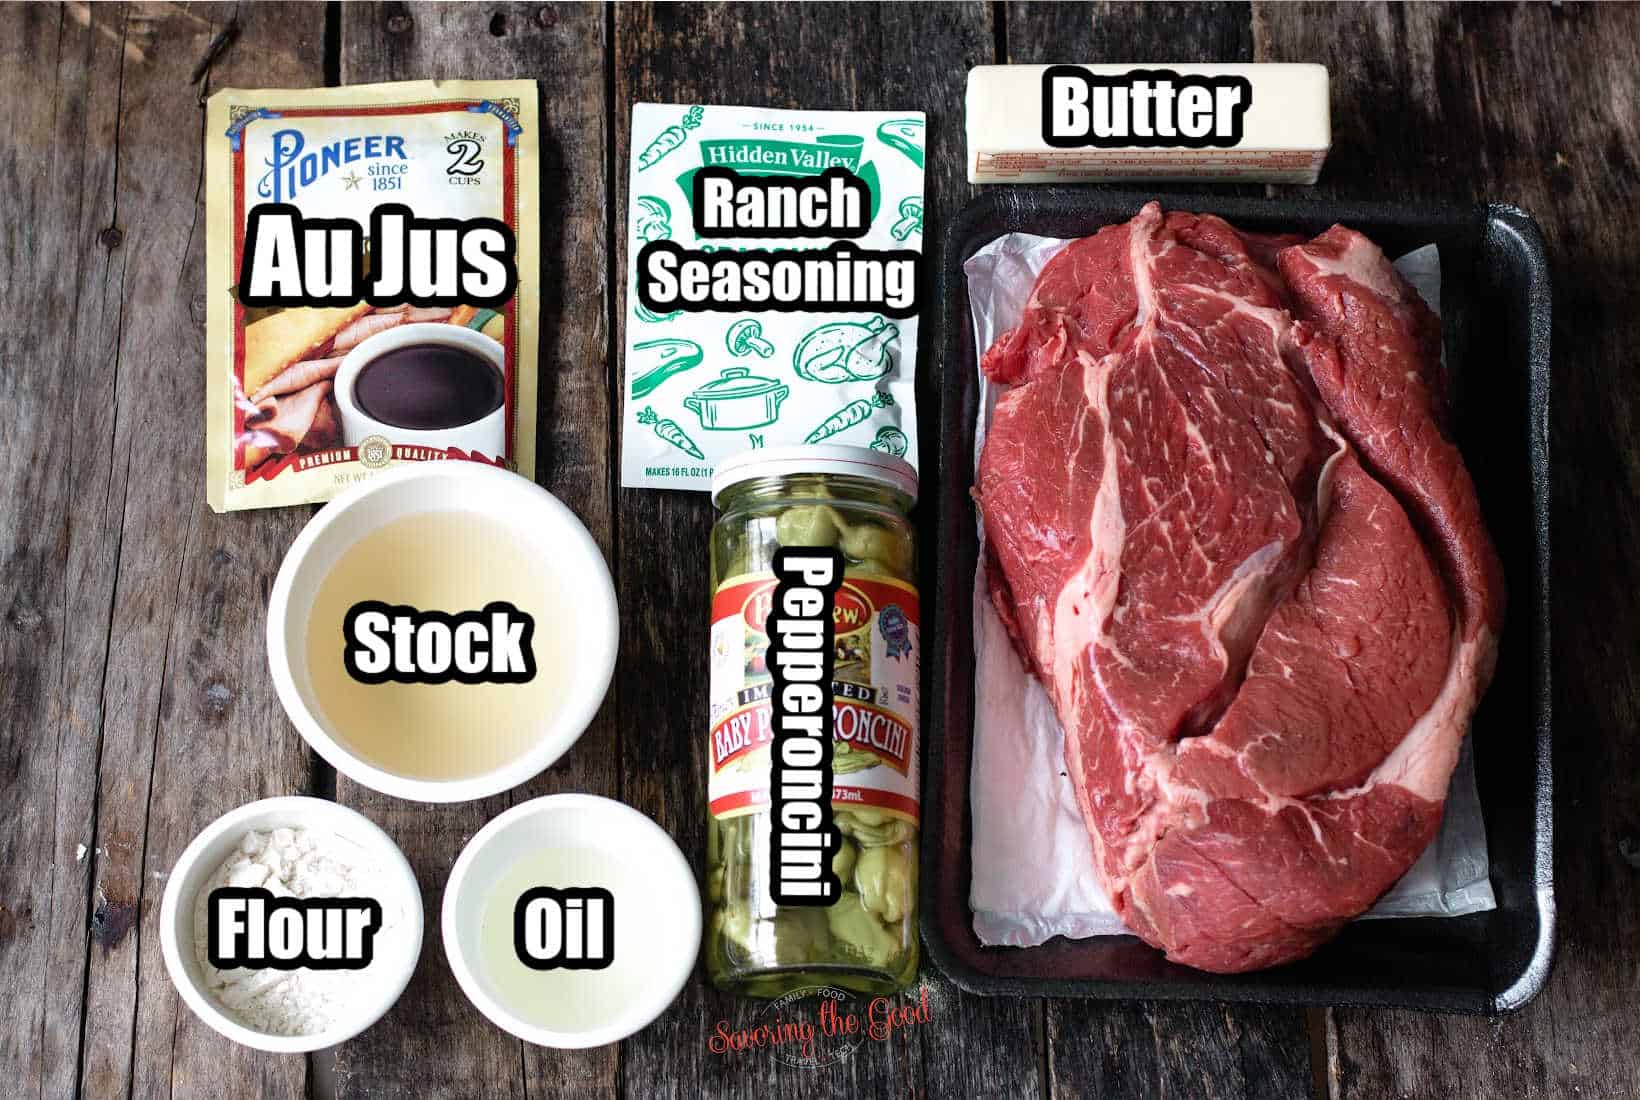
Crock Pot Mississippi Chicken is made with chicken, au jus gravy, ranch seasoning, real butter and pepperoncini peppers. Absolutely scrumptious!
Get Full Recipe

Easy Crockpot Chicken Parmesan

Close-up of a dish with meatballs in a rich tomato sauce, reminiscent of comforting Crock Pot chicken breast recipes, topped with melted cheese.
Crock-Pot Chicken Parmesan - no breading, so it's a lighter version of the standard favorite. Bring out that crock-pot and get it going this summer.
Get Full Recipe

Crock pot Creamy Ranch Chicken Recipe

Savor a delightful crock pot chicken stew with potatoes and carrots in a creamy sauce, garnished with herbs. This luscious recipe features tender, flavorful chicken breast and is served directly from the sleek black slow cooker for a comforting meal.
Crock Pot Creamy Chicken with ranch Recipe is a must try. It's packed with lots of ranch flavor and hearty chicken and vegetables.
Get Full Recipe

Slow Cooker Chicken and Egg Noodles

A bowl of creamy chicken noodle pasta garnished with herbs, inspired by savory Crock Pot chicken breast recipes.
Slow Cooker Chicken recipe and Noodles is one of the most simple, satisfying and comforting recipes. This delicious meal is sure to warm your whole family up and keep their bellies full.
Get Full Recipe

Slow Cooker Ranch Chicken Recipe

A Crock Pot creation featuring shredded chicken breast, perfectly garnished with chopped herbs.
Slow cooker ranch chicken is the base for so many delicious recipes. Ready in 3 hours with just 3 ingredients.
Get Full Recipe

Slow Cooker Tomato Tortellini Soup {with Chicken}

Two bowls of steaming tomato-based tortellini soup with spinach sit invitingly next to a crock pot, showcasing the delicious potential of Crock Pot chicken breast recipes.
This tomato tortellini soup with chicken broth and spinach is light and hearty at the same time and oh so delicious!
Get Full Recipe

Chicken Casserole with Doritos

Dorito Chicken Casserole in a black bowl next to a pan of Dorito Chicken Casserole
Dorito chicken casserole is an easy chicken casserole that my family loved.  This is a cheesy chicken dish that has the crunch of Doritos and the spice of rotel tomatoes.
Get Full Recipe

Salsa Chicken

Two tacos filled with flavorful Crock Pot chicken breast, black beans, and corn on a plate.
Salsa chicken is tender chicken cooked with a flavorful salsa. This recipe is so simple to make & perfect for a busy weeknight dinner.
Get Full Recipe

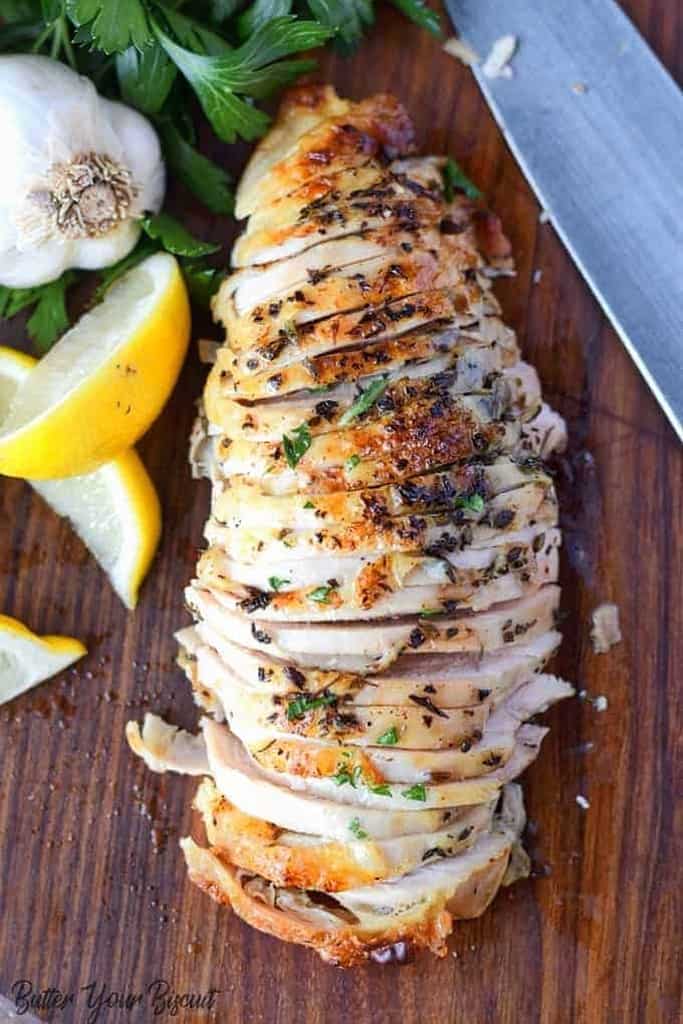
Slow Cooker Rosemary Garlic Chicken

Close-up of rosemary garlic chicken with a herb crust on a plate. Text reads: "Rosemary Garlic Chicken - Healthy Crock Pot Chicken Breast Recipe.
Get Full Recipe

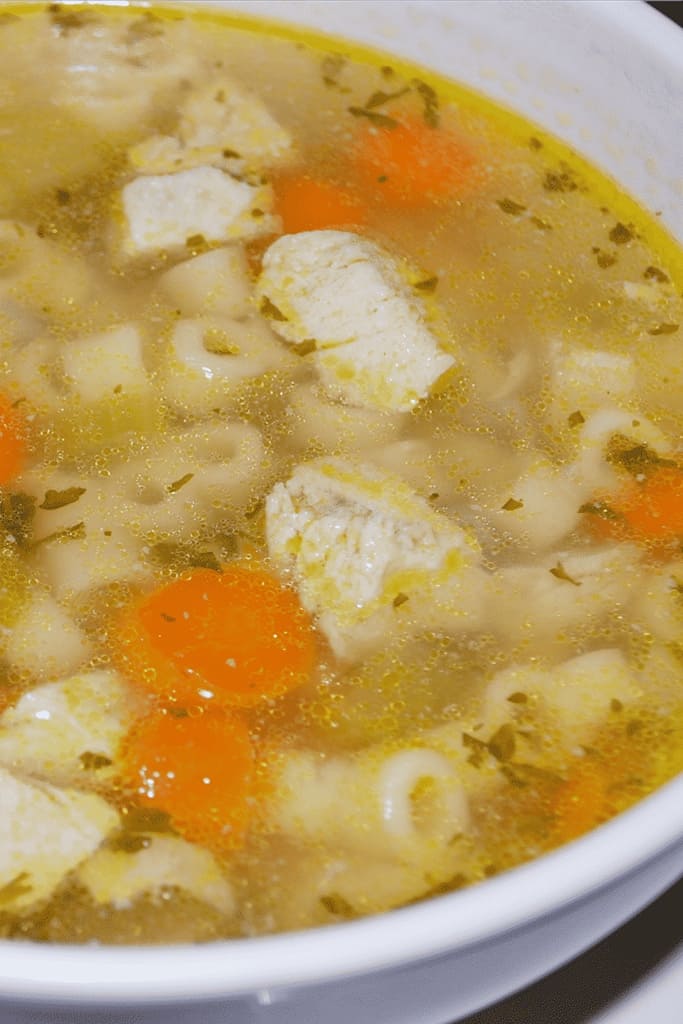
Crock-Pot Chicken Noodle Soup

Chicken noodle soup in a slow cooker.
When the cold season hits, make this easy slow cooker chicken noodle soup recipe with lean white meat, vegetables, and pasta.
Get Full Recipe

Slow Cooker Tex Mex Chicken and Rice

Mexican chicken enchiladas on a white plate.
credit: carriesexperimentalkitche.com
Craving a nutritious weekday dinner you can make fast? This Slow Cooker Tex-Mex Chicken and Rice is a great option. It's made with juicy boneless chicken breasts cooked to perfection with black beans, corn, salsa, and rice for a tasty, fuss-free meal the whole family will love.
Get Full Recipe

Guava BBQ Pulled Chicken Recipe

A pulled pork sandwich with coleslaw and chips on a plate.
credit: oliviascuisine.com
BBQ Pulled Chicken gets a makeover, featuring my famous Guava BBQ Sauce! Just dump everything in the slow cooker and let it work its magic until the chicken is juicy, tender and ready to be devoured. Seriously, what could be easier than that?
Get Full Recipe

Slow Cooker Mexican Shredded Chicken {3 ingredients}

A bowl of shredded chicken with cilantro and other food.
credit: familyfoodonthetable.com
This easy slow cooker Mexican shredded chicken packs a flavor punch with just 3 ingredients and a few minutes of prep time. The chicken cooks to tender perfection in the slow cooker before shredding for versatile use in tacos, nachos, grain bowls, sliders, salads and more all week long. With bold Mexican spices, zesty tomatoes, and succulent chicken, you'll love how a short ingredient list creates big, complex flavors with little effort on your part.
Get Full Recipe

Crockpot BBQ Chicken (2 Ways)

A plate of food with a side of rice.
credit: lowcarbmaven.com
This crockpot BBQ chicken recipe is a cinch to make and creates its own luscious smoky sauce right in the slow cooker. Though my version with simple pantry staples happens to be low carb and keto-approved, feel free to riff on the ingredients to suit your tastes.
Get Full Recipe

Maple BBQ Chicken

Bbq chicken on a white plate with sauce on it.
credit: confessionsofafitfoodie
This Instant Pot Maple BBQ Chicken is gluten-free, dairy-free, and so amazingly easy to make in your Instant Pot! Enjoy BBQ all year long!
Get Full Recipe

Crockpot BBQ Chicken

Bbq pulled pork on a plate with coleslaw and ketchup.
credit: joyfilledeats
All it takes is a little bit of planning, a few ingredients, a crockpot, and you are well on your way to an EASY Crockpot BBQ Chicken.
Get Full Recipe

Crockpot Crack Chicken

Chicken salad sandwich on a plate with a side of slaw.
credit: temeculablogs
Crockpot crack chicken is great made into sandwiches or little appetizer sliders! Tender cream cheese chicken shredded to perfection in your slow cooker.
Get Full Recipe

Crack Chicken Sandwiches

A bowl of dip and a bowl of french fries.
credit: persnicketyplates
These Slow Cooker Chicken Bacon Ranch Sandwiches, affectionately dubbed "Crack Chicken," are dangerously easy to devour! Succulent chicken and cream cheese simmer to melty perfection in the crockpot with a blend of zesty ranch seasonings. After shredding the chicken and mixing it with crispy bacon, sharp cheddar, and snipped scallions, the addictive cheesy chicken goodness gets piled high on soft buns for the ultimate crave-worthy sandwich.
Get Full Recipe

Slow Cooker Greek Lemon Chicken Soup (Avgolemono)

A bowl of chicken and lemon soup with a spoon.
Slow Cooker Greek Lemon Chicken Soup is creamy, satisfying and packed with fresh lemon flavor! It's the easiest way to make avgolemono soup and it includes a gluten-free option!
Get Full Recipe

Lazy Slow Cooker Chicken Fajitas

Mexican chicken burrito with peppers and sour cream.
credit: thelazyslowcooker.com
Slow cooker chicken fajitas are an easy, crowd pleasing dish made with tender chicken, peppers and onions. A one pot meal all will love!
Get Full Recipe

Slow Cooker Chicken Taco Bowls

Mexican chicken enchiladas in a red bowl with sour cream.
credit: wondermomwannabe
These chicken taco bowls are super easy to make in an Instant Pot or slow cooker. If you love Tex Mex, you probably have all the ingredients on hand!
Get Full Recipe

Slow Cooker Crockpot Chicken Fajitas

Mexican chicken in a white bowl with peppers and tomatoes.
credit: staysnatched.com
This Slow Cooker Crockpot Chicken Fajitas recipe is bursting with tender chicken infused with zesty spices and perfectly seasoned bell peppers and onions. This is a dump-and-go meal perfect for weeknight dinners. Serve these on warm tortillas with your favorite toppings.
Get Full Recipe

Slow Cooker Orange Chicken

A bowl of chicken and rice with a fork.
credit: bellyfull.net
Turn your favorite Chinese takeout into an easy crock pot meal. No breading and no frying make this recipe both simple without sacrificing the flavor.
Get Full Recipe

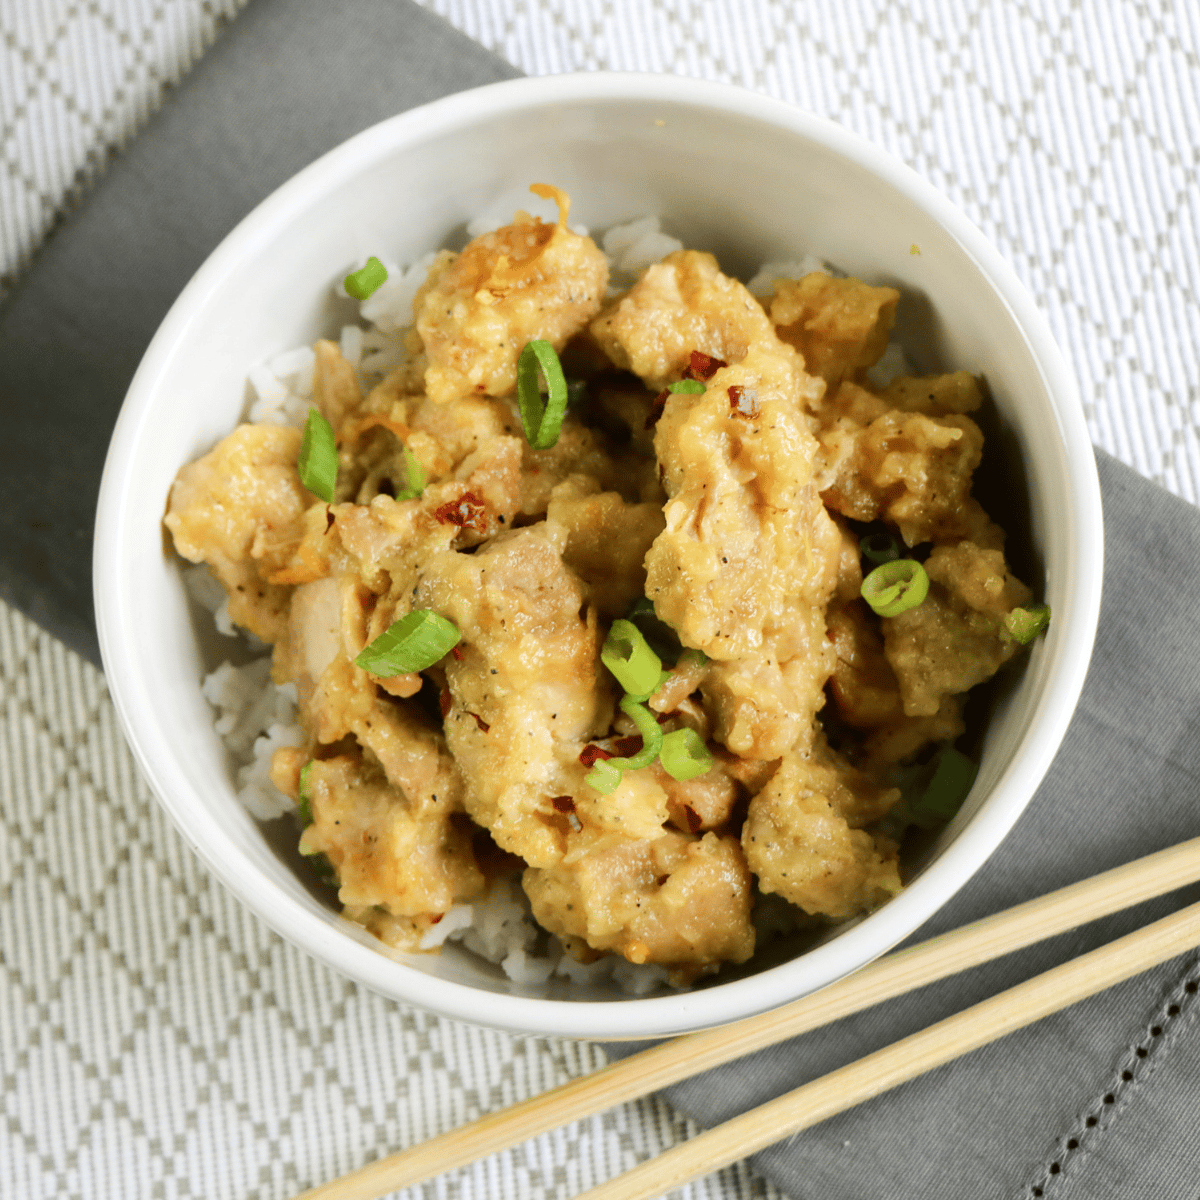
Crockpot Orange Chicken Recipe

A bowl of food with chopsticks.
credit: wondermomwannabe.com
This Crockpot Orange Chicken Recipe is an easy and delicious way to get dinner on the table with very little effort. It's irresistible!
Get Full Recipe

3 Ingredient Crockpot Orange Chicken

A bowl of food with a spoon.
credit: temeculablogs
Here is an easy crockpot orange chicken recipe to make that cooks on it's own in your crockpot. Heathy and easy to make, even my kids love this one!
Get Full Recipe

Frequently asked questions, answers and tips for slow cooker chicken

Is it OK to put raw chicken in slow cooker?

It is generally safe to cook raw chicken in a slow cooker as long as you follow proper food safety guidelines.

Here are some tips to ensure the safe cooking of raw chicken in a slow cooker:

2. Use a meat thermometer to ensure that the internal temperature of the chicken reaches 165°F (74°C).
3. Do not overcrowd the slow cooker.
4. Cook the chicken on the high setting for at least 3-4 hours or on low setting for at least 6-8 hours.
5. Do not remove the lid of the slow cooker while cooking, as this can reduce the temperature and increase the risk of foodborne illness.

Is it better to cook chicken breasts on high or low in crockpot?

When cooking chicken breasts in a slow cooker or crockpot, it's generally better to cook them on low rather than on high.

When you cook slow cooker chicken recipes on high heat, they can cook too quickly and become tough or dry. However, if you're short on time, you can cook chicken on high heat for the first hour or two to help it cook faster, and then switch it to low heat for the remainder of the cooking time.


Sarah Mock of savoringthegood.com headshot 2022

I am Sarah Mock. Welcome!

Sarah Mock is a classically trained Chef and graduate of Johnson & Wales University. A culinary blogger for 15 years Sarah helps the home cook prepare her recipes with professional results.

Get to know me

as seen in:

Logos of Hersheyland, ABC News, and Good Day PA are showcased in a seamless row, providing a snapshot of popular brands.

Hersheyland Nightline Good Day Pa!

The vibrant design showcases the iconic logos of Pinterest, Rachael Ray, and Jell-O set against a bold red background. Sorry, the provided description doesn't offer enough detail to suggest important SEO keywords.

Pinterest Rachael JELL-O

Ice Cream Maker Recipes for Cuisinart Ice Cream Maker

A wooden bowl holds three scoops of lavender ice cream, crafted using Cuisinart ice cream maker recipes, and elegantly garnished with lavender flowers and mint leaves.

These ice cream recipes are best when made in a Cuisinart ice cream maker.

A wooden bowl holds three scoops of lavender ice cream, crafted using Cuisinart ice cream maker recipes, and elegantly garnished with lavender flowers and mint leaves.

Next time you take out your homemade ice cream maker these Cuisinart ice cream maker recipes will give you lots of delicious ice cream recipe options.

Cuisinart Ice Cream Recipes

Black Raspberry Ice Cream

black raspberry ice cream, 3 scoops in a white bowl square image
Black raspberry ice cream can be made with fresh or frozen black raspberries. Heavy cream, milk, sugar, and a hint of the vanilla extract along with ripe black raspberries make for a creamy, fruit ice cream.
Get Full Recipe

Chocolate Chip Cookie Dough Ice Cream

Three scoops of vanilla ice cream with chocolate chips, inspired by cuisinart ice cream maker recipes, served in chocolate waffle cones on a metal tray, with mini chocolate chips scattered nearby.
credit: houseofnasheats.com
Chocolate Chip Cookie Dough Ice Cream is made with the best slow-churned vanilla ice cream and lots of edible chocolate chip cookie dough in every bite!
Get Full Recipe

Vanilla Ice Cream

A close-up of a vanilla ice cream scoop in a waffle cone, resting on a blue cloth-perfect inspiration for your next batch using Cuisinart ice cream maker recipes.
credit: Like Mother, Like Daughter
This Vanilla Ice Cream is the best of the best. With only four ingredients, it comes together in just a few minutes for the perfect sweet scoop to satisfy your cravings. I've been making this
Get Full Recipe

Chocolate Ice Cream

Scoops of chocolate ice cream in a white bowl with a metal spoon-perfect for trying out new Cuisinart ice cream maker recipes.
credit: Adventures of Mel
How to make the best old-fashioned homemade chocolate ice cream (no eggs) recipe. Easy, machine churned, delicious chocolaty flavor.
Get Full Recipe

Homemade Reese's Ice Cream Recipe

A scoop of rich chocolate ice cream in a rectangular container, with a metal scooper ready for action. Stacked bowls await in the background, perfect for enjoying treats made from Cuisinart ice cream maker recipes.
credit: Simply Stacie
This REESE Ice Cream is creamy, smooth and packed full of yummy REESE flavour that we all know and love. Enjoy it any time of year!
Get Full Recipe

Strawberry Ice Cream

A bowl of strawberry ice cream with visible strawberry pieces, crafted using Cuisinart ice cream maker recipes, is surrounded by fresh whole strawberries on a dark background.
credit: simplystacie.net
So creamy, sweet and luscious! This fresh Strawberry Ice Cream recipe is ready in a matter of hours and super simple to make at home.
Get Full Recipe

Pumpkin Ice Cream

A container of pumpkin ice cream next to a bowl with a scoop of the ice cream, cinnamon sticks, and an orange pumpkin in the background.
credit: justisafourletterword.com
Homemade pumpkin ice cream is the perfect fall treat and it's surprisingly easy to make - with or without an ice cream maker.
Get Full Recipe

Rhubarb Crumble Ice Cream

Ice cream scooper in a pan of strawberry and crumble-topped ice cream on a white surface.
credit: houseofnasheats.com
This Rhubarb Crumble Ice Cream has a deliciously tart ribbon of sweet roasted rhubarb filling and plenty of buttery chunks of crumble topping throughout!
Get Full Recipe

Chocolate Peanut Butter Ice Cream

A bowl of chocolate ice cream with chunks, placed on a dark surface. Two white spoons and peanut butter cups are in the background.
credit: barefeetinthekitchen.com
Creamy chocolate peanut butter ice cream generously filled with chunks of peanut butter cups. Kids and adults agree, it's a favorite!
Get Full Recipe

Apple Pie Ice Cream

Close-up of apple pie ice cream scoops in a container with slices of green apple on top and beside it, placed on a white surface with a gray cloth in the background.
credit: houseofnasheats.com
Apple Pie Ice Cream is loaded with cinnamon and apples for a delicious Fall flavored ice cream! Like eating apple pie in ice cream form!
Get Full Recipe

Piña Colada Ice Cream

A refreshing bowl of homemade ice cream infused with the tropical flavors of pineapple and coconut, prepared using a Cuisinart ice cream maker.
credit: bakedbyrachel.com
Creamy homemade dairy-free piña colada ice cream, bursting with coconut and pineapple flavors. A fun frozen treat to cool off with!
Get Full Recipe

Birthday Cake Ice Cream

A scoop of funfetti cake batter ice cream with colorful sprinkles in a rectangular container.
credit: My Name Is Snickerdoodle
Here is a super simple recipe for Homemade Birthday Cake Ice Cream! Bits of vanilla cake, frosting and plenty of sprinkles.
Get Full Recipe

Coffee Ice Cream Recipe

Two scoops of coffee ice cream in a waffle cone against a blurred background.
credit: joyfoodsunshine.com
Rich, ultra-creamy, with a bold coffee flavor - this is the best homemade coffee ice cream recipe! It's easy to make with only 7 ingredients and is better than store-bought varieties.
Get Full Recipe

Pistachio Ice Cream

A close-up of pistachio ice cream served in metal bowls, topped with crushed pistachios.
credit: bowl-me-over.com
Sweet, creamy old fashioned Pistachio Ice Cream Recipe. This treat is over-the-top rich and easy to make. Everyone loves old-fashioned ice cream!! #ad #SummerGrilling #ToraniFlavor
Get Full Recipe

Butter Pecan Ice Cream

Three scoops of pecan ice cream stacked on a cone, placed on a glass jar, against a dark background.
credit: cookinglsl.com
Simple Butter Pecan Ice Cream made in a Cuisinart ice cream maker. Light, soft flavorful and very delicious.
Get Full Recipe

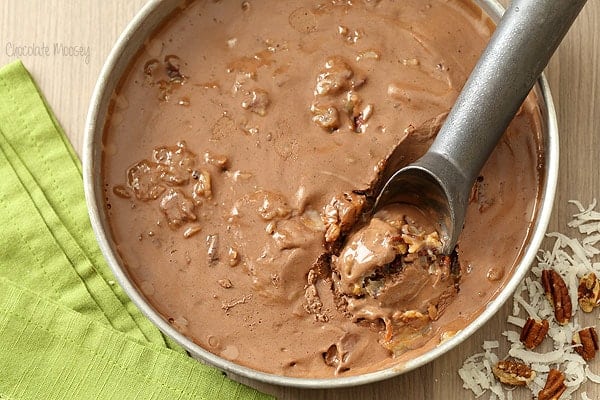
German Chocolate Cake Ice Cream

German-Chocolate-Cake-Ice-Cream
credit: chocolatemoosey.com
German Chocolate Cake Ice Cream with homemade German chocolate cake frosting folded in is everything you love about cake without baking one.
Get Full Recipe

Salted Caramel Ice Cream

Close-up of a metal ice cream scoop with a scoop of vanilla ice cream studded with chocolate chunks and caramel swirls.
credit: mycasualpantry.com
Salted Caramel Ice Cream with Chocolate Covered Peanuts - creamy vanilla ice cream blended with salted caramel and crunchy peanuts. A delicious
Get Full Recipe

Huckleberry Ice Cream

Four scoops of pink ice cream with chocolate chips, inspired by Cuisinart ice cream maker recipes, served on a white plate with a brown rim, set atop a white cloth featuring a striped pattern.
credit: houseofnasheats.com
Huckleberry Ice Cream is a fun fruity flavor made with sweet tart wild huckleberries. I have tips in case you can't find them where you live!
Get Full Recipe

Toasted Marshmallow Ice Cream Recipe

Three waffle cones-two with vanilla ice cream and one empty-rest on marble, surrounded by mini marshmallows and waffle pieces, inspiring new cuisinart ice cream maker recipes.
credit: simplystacie.net
Only THREE ingredients in this simple no-churn ice cream recipe! It's creamy, sweet and full of toasty deliciousness.
Get Full Recipe

Rum Raisin Ice Cream

Two amber glass cups filled with vanilla ice cream, inspired by Cuisinart ice cream maker recipes, are topped with golden raisins and set on a white surface beside a beige cloth.
credit: garlicandzest.com
Craving rum raisin? My rum raisin ice cream recipe is best. A delicious rum ice cream studded w/rum-soaked raisins. It's smooth & creamy.
Get Full Recipe

Maple Walnut Ice Cream

A metal ice cream scoop serves nut-filled scoops from a rectangular container, inspired by Cuisinart ice cream maker recipes, with walnuts and a glass pitcher nearby.
credit: houseofnasheats.com
This Maple Walnut Ice Cream recipe has a custard base made with real maple syrup and there are pieces of toasted walnut in every bite!
Get Full Recipe

Triple Coconut Ice Cream

A loaf pan filled with coconut ice cream, made using Cuisinart ice cream maker recipes, is topped with toasted coconut, with a scoop served in a glass bowl and an ice cream scoop nearby.
credit: cinnamonandcoriander.com
This Triple Coconut Ice Cream is the real deal and as coconutty as it gets. It has both coconut cream and coconut milk as a base and is speckled with toasted coconut flakes! A Coconut
Get Full Recipe

Blueberry Cheesecake Ice Cream

A white bowl filled with scoops of blueberry swirl ice cream-made from one of our favorite Cuisinart ice cream maker recipes-sits on a light wooden surface, with a few blueberries nearby.
credit: Creations by Kara
Decadent homemade blueberry cheesecake ice cream. Graham cracker crumbs & blueberry ripple in a luscious cream cheese base!
Get Full Recipe

Banana Ice Cream

A metal ice cream scoop lifts a ball of vanilla ice cream from a rectangular container, ready to inspire your next batch of Cuisinart ice cream maker recipes.
credit: lemonsforlulu.com
Nothing beats eating a couple of scoops of cool and creamy homemade banana ice cream on a hot summers day. This recipe is simple and pure and is a great way to use up those ripe bananas!
Get Full Recipe

Maraschino Cherry Ice Cream

Three ice cream cones filled with pink cherry ice cream, inspired by Cuisinart ice cream maker recipes, sit on a white surface with maraschino cherries and a checkered cloth nearby.
credit: noblepig.com
Maraschino Cherry Ice Cream is a deliciously creamy cherry ice cream and does not require making a custard. Just chill your ingredients before freezing in your ice cream maker and you will soon be enjoying your new favorite dessert.
Get Full Recipe

Butterfinger Ice Cream Recipe

A bowl of vanilla ice cream-made using Cuisinart ice cream maker recipes-topped with chocolate and orange candy pieces, served with a spoon.
credit: creationsbykara.com
Butterfinger Ice Cream - rich and creamy vanilla based ice cream filled with chunks of Butterfinger candy bars. A crowd pleasing ice cream recipe!
Get Full Recipe

Chocolate Cherry Stracciatella Gelato Recipe

Bowls of cherry ice cream with visible cherry pieces, fresh cherries, and metal spoons on a dark surface-perfect inspiration for cuisinart ice cream maker recipes.
credit: cookinglsl.com
Chocolate Cherry Stracciatella Gelato Recipe - a summer favorite! Refreshing combination of sweet cherries, vanilla ice cream and chocolate.
Get Full Recipe

Dulce de Leche Ice Cream Recipe

A glass bowl filled with several scoops of light brown ice cream sits on a white surface, inspired by Cuisinart ice cream maker recipes, with a metal container and a small bowl in the background.
credit: Chisel & Fork
This dulce de leche ice cream recipe uses South America's favorite sweet sauce to create a caramel-like and creamy ice cream.
Get Full Recipe

Fresh Mint Chip Ice Cream

A metal ice cream scoop lifts a scoop of cookies and cream ice cream from a container, perfect inspiration for your next batch of Cuisinart ice cream maker recipes.
credit: theviewfromgreatisland.com
This Fresh Mint Chip Ice Cream is made with real mint leaves and dark chocolate ~ summer eating doesn't get any better! The zippy flavor of the fresh mint paired with an extra quantity of dark chocolate makes this the best mint chip ice cream I've ever tasted.
Get Full Recipe

Roasted Banana Chocolate Chunk Ice Cream

A metal ice cream scoop with a scoop of cookie dough ice cream and another scoop on a gray surface, inspired by tasty Cuisinart ice cream maker recipes.
credit: Handle The Heat
Roasted Banana Chocolate Chunk Ice Cream is full of rich caramel and vanilla flavors with chunks of chocolate throughout. Egg-free recipe!
Get Full Recipe

Rocky Road Ice Cream Recipe

A metal ice cream scoop lifts a portion of chocolate ice cream with marshmallow pieces from a glass dish, perfect for trying with your favorite Cuisinart ice cream maker recipes.
credit: Creations by Kara
The creamiest rocky road ice cream ever! Loaded with toasted almonds & marshmallows, this is an unbeatable chocolate ice cream recipe!
Get Full Recipe

Mint Chocolate Chip Ice Cream

A white bowl filled with mint chocolate chip ice cream scoops, made from cuisinart ice cream maker recipes, garnished with fresh mint leaves, and a spoon resting in the bowl.
credit: dishesanddustbunnies.com
Treat yourself to homemade Mint Chocolate Chip Ice Cream, a delightful and refreshing dessert perfect for any occasion! 🍦🌿🍫 Follow this simple recipe to create a creamy, minty indulgence loaded with rich chocolate chips using an ice cream maker. Impress your loved ones with this scrumptious frozen treat that's easy to make at home. Enjoy! 😋
Get Full Recipe

Key Lime Pie Ice Cream

A glass dish with two scoops of ice cream, inspired by cuisinart ice cream maker recipes, is garnished with a lime slice and crumbled cookie on a marble surface, with lime wedges and a pan in the background.
credit: recipegirl.com
The graham cracker crumbs really turn it into a pie-like ice cream flavor. Get out that ice cream maker and make some pie ice cream!
Get Full Recipe

Fresh Mint Chip Ice Cream

A metal ice cream scoop lifts a ball of cookies and cream ice cream from a rectangular container, inspired by delicious Cuisinart ice cream maker recipes.
credit: theviewfromgreatisland.com
This Fresh Mint Chip Ice Cream is made with real mint leaves and dark chocolate ~ summer eating doesn't get any better! The zippy flavor of the fresh mint paired with an extra quantity of dark chocolate makes this the best mint chip ice cream I've ever tasted.
Get Full Recipe

Root Beer Ice Cream

Two scoops of chocolate ice cream, inspired by Cuisinart ice cream maker recipes, served in a waffle bowl on a beige textured cloth, with another serving in the background.
credit: kudoskitchenbyrenee.com
Grab your spoon and get ready. This root beer ice cream tastes just like a root beer float, minus the straw and foam!
Get Full Recipe

Homemade Peppermint Ice Cream

A container of pink ice cream with two scoops and a green ice cream scooper, surrounded by candy canes and festive decorations-perfect inspiration for your next Cuisinart ice cream maker recipes.
credit: amandascookin.com
This easy pink peppermint ice cream recipe is churned to creamy, dreamy perfection and studded with peppermint crunch in every spoonful.
Get Full Recipe

Blueberry Ice Cream Recipe

A scoop of purple blueberry ice cream in a waffle bowl, garnished with fresh blueberries, showcases the magic of Cuisinart ice cream maker recipes, with another delicious serving in the background.
credit: creationsbykara.com
Blueberry Ice Cream - cream cheese makes this ice cream extra rich and creamy, and it is bursting with fresh blueberry flavor!
Get Full Recipe

Bourbon Cinnamon Ice Cream

A metal ice cream scoop holding a serving of spiced ice cream sits on a dark surface with ground cinnamon and glasses of brown liquid in the background, perfect for trying new Cuisinart ice cream maker recipes.
credit: killingthyme.net
Impress your friends this holiday season with this light and creamy Cinnamon Bourbon Ice Cream! It pairs amazingly with deep fall flavors.
Get Full Recipe

Vegan Cookie Dough Ice Cream

An ice cream cone with a scoop of melting ice cream-made from Cuisinart ice cream maker recipes-is placed upside down inside a clear glass jar, with another cone blurred in the background.
credit: makeitdairyfree.com
This absolutely amazing vegan cookie dough ice cream needs just 12 ingredients and can be completely Top 8 Allergen Free. Prep time is just 20 minutes.
Get Full Recipe

Seasonal Favorite

Baked lattice top crust on an apple pie made with the Crisco pie crust recipe, showing flaky layers in the fluted edge.

This is my award-winning Crisco pie crust recipe; flaky, tender, and made with simple ingredients you already have.

Crisco Pie Crust

Sarah Mock of savoringthegood.com headshot 2022

I am Sarah Mock. Welcome!

Sarah Mock is a classically trained Chef and graduate of Johnson & Wales University. A culinary blogger for 16 years Sarah helps the home cook prepare her recipes with professional results.

Get to know me

as seen in:

Logos of Hersheyland, ABC News, and Good Day PA are showcased in a seamless row, providing a snapshot of popular brands.

Hersheyland Nightline Good Day Pa!

The vibrant design showcases the iconic logos of Pinterest, Rachael Ray, and Jell-O set against a bold red background. Sorry, the provided description doesn't offer enough detail to suggest important SEO keywords.

Pinterest Rachael JELL-O


What to Serve With Lamb Chops: 26 Perfect Sides

A plate of creamy risotto garnished with sprouts and asparagus spears, perfect as a delightful side for lamb chops, with a fork on the side.

The best side dishes for lamb chops are meant to complement the flavor of lamb. These are the most popular side dishes to serve whether your main course is a rack of lamb, lamb lollipops, tender lamb chops or any time you are serving dinner guests your favorite lamb dinner.

A plate of creamy risotto garnished with sprouts and asparagus spears, perfect as a delightful side for lamb chops, with a fork on the side.

Also, any of my baby potatoes recipes would also be a good option. Serve an ice cream recipes for cuisinart ice cream maker for dessert!

What Goes Good With Lamb Chops?

Here is my list of what goes with lamb chops. This recipe collection offers a variety of flavorful and easy-to-make side dishes that pair perfectly with lamb chops. From roasted vegetables and grains to salads and dips, each recipe includes simple ingredients and instructions to elevate your lamb chop dinner. Whether you prefer sweet or savory, spicy or mild, there is a side dish option for everyone in this collection.

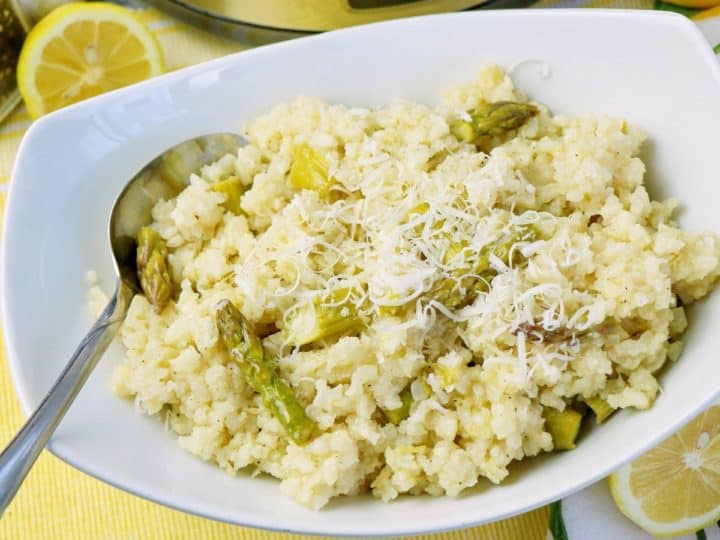
Slow Cooker Lemon Asparagus Risotto

Creamy risotto with fresh asparagus is makes a delicious side dish or meatless main dish and comes together perfectly in the slow cooker!
Get Full Recipe

Mushroom Risotto

Creamy dreamy, herby and delicious, this mushroom risotto is perfect as a side, or even as a main dish. Make this for your family!
Get Full Recipe

Butternut Squash Risotto

Butternut Squash Risotto, finished with basil and parmesan cheese, is a hearty side dish or a delicious vegetarian main course.
Get Full Recipe

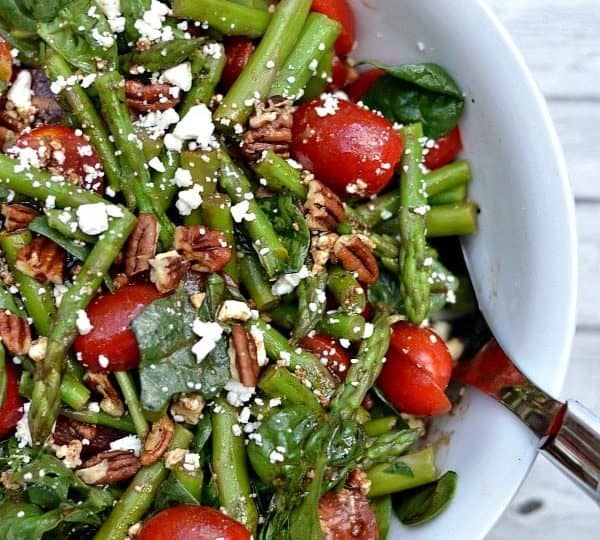
Asparagus Salad with Spinach, Tomatoes and Balsamic Vinaigrette

Spinach, Asparagus, Tomato Salad Recipe with tossed with toasted pecans, feta cheese and homemade Balsamic Vinaigrette. A perfect fresh salad for a meal or as a side.
Get Full Recipe

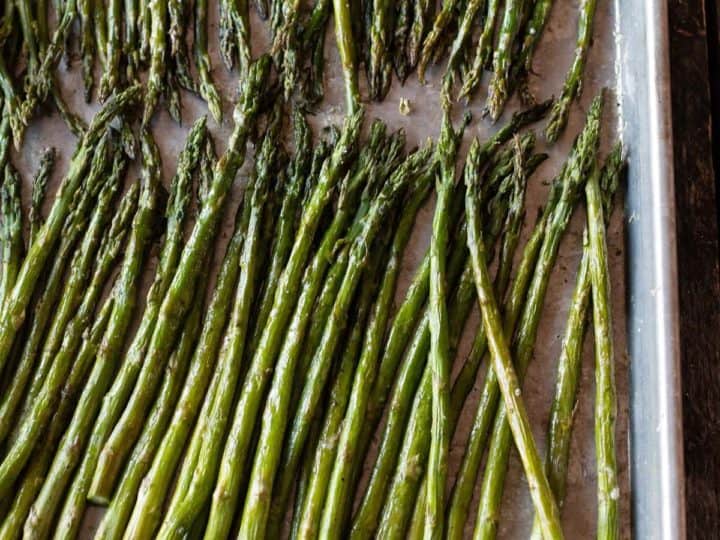
Roasted Asparagus

Roasting asparagus is a quick and easy way to enhance the delicate flavors of the asparagus and give the asparagus tips a bit of char.
Get Full Recipe

Greek Lemon Potatoes

Crispy on the outside. Creamy on the inside with just enough lemon juice not to be overpowering. These Greek Lemon Roasted Potatoes are a great choice to serve at a dinner party whether you are serving meat dishes such as chicken, pork, beef or fish.
Get Full Recipe

Crispy Oven-Roasted Brussels Sprouts with Parmesan

Crispy Brussels Sprouts on a sheetpan square image
Crispy Brussels Sprouts are the keto low-carb side dish that will turn everyone into a brussel sprout lover. This recipe for smashed brussel sprouts with parmesan cheese have crispy, cheezy edges and oven-roasted caramel goodness.
Get Full Recipe

Green Beans with Warm Pistachio Vinaigrette

Green Beans with Warm Pistachio Vinaigrette has a delicious red wine vinaigrette with crushed pistachios for the perfect side to serve with your favorite lamb chop recipe.
Get Full Recipe

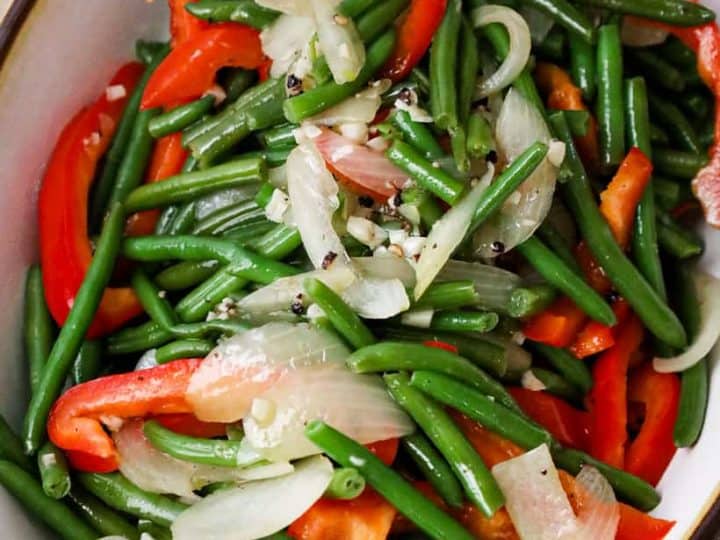
Sautéed Frozen Green Beans

Boasting the onion and garlic goodness, this simple sautéed frozen green beans is a keeper recipe for an easy weeknight side dish.
Get Full Recipe

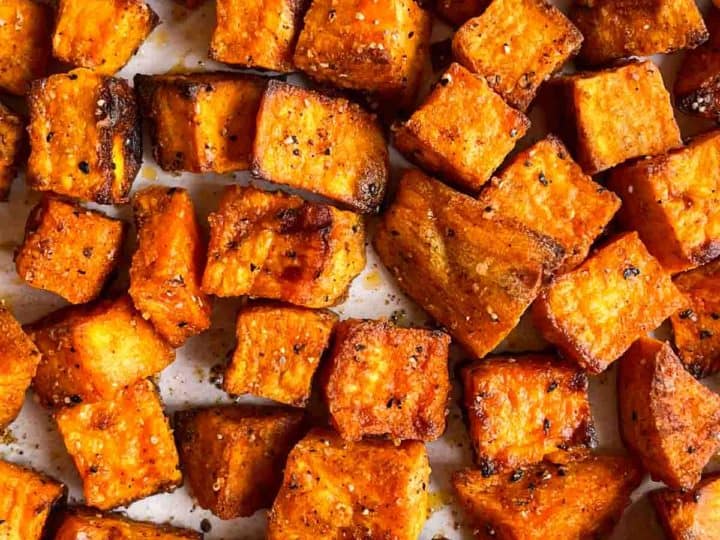
Crispy Roasted Sweet Potatoes

Crispy Roasted Sweet Potatoes are easy and full of flavor - a side dish that can be cooked in the oven or the air fryer!
Get Full Recipe

Classic Hot Bacon Dressing (Pennsylvania Dutch Style)

Hot Bacon Dressing square image
Hot Bacon Dressing is also known as Pennsylvania Dutch hot bacon dressing, is the unexpected sweet, tangy and bacon-filled dressing that will dress up a simple spinach salad.
Get Full Recipe

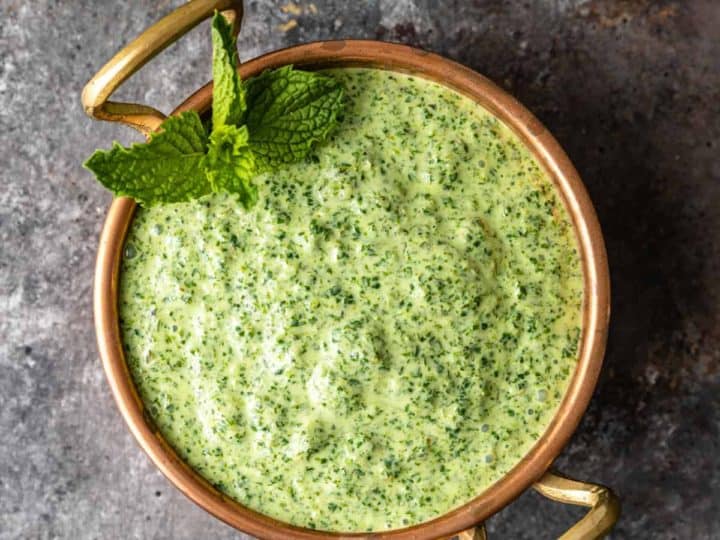
Mint Chutney

Pudina chutney is a flavorful yogurt-based Indian mint sauce. Make this mint chutney recipe to serve as a condiment with dosa and idli, or as a dip.
Get Full Recipe

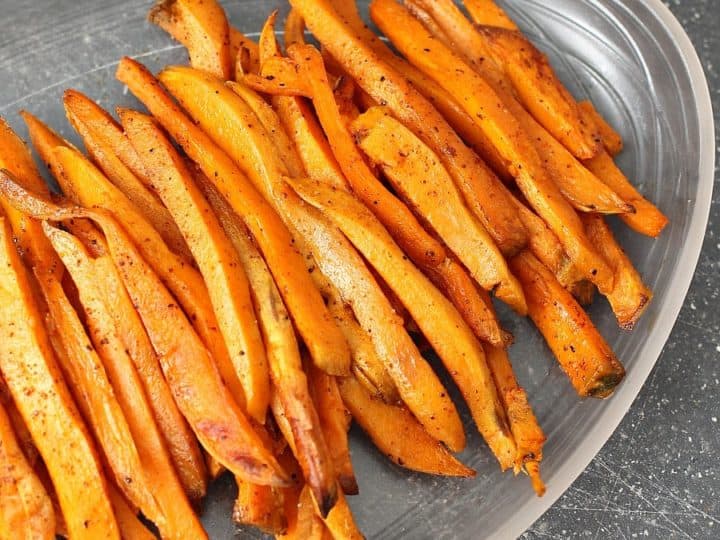
Baked Sweet Potato Fries

Baked sweet potato fries on a plate.
One of my favorite side dishes/snacks - oven baked sweet potato fries with a little kick of chili powder!
Get Full Recipe

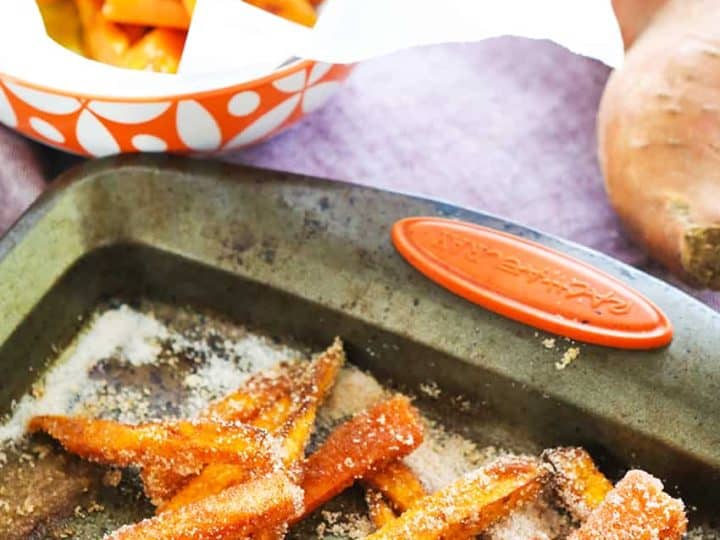
Air Fryer Sweet Potato Fries

Sweet potato fries on a baking sheet.
Air Fryer Sweet Potato Fries is a delicious way to enjoy sweet potatoes! The air fryer works its magic and transforms them into one of the best sides to serve with lamb loin chops. Such a delicious lamb chops sides!
Get Full Recipe

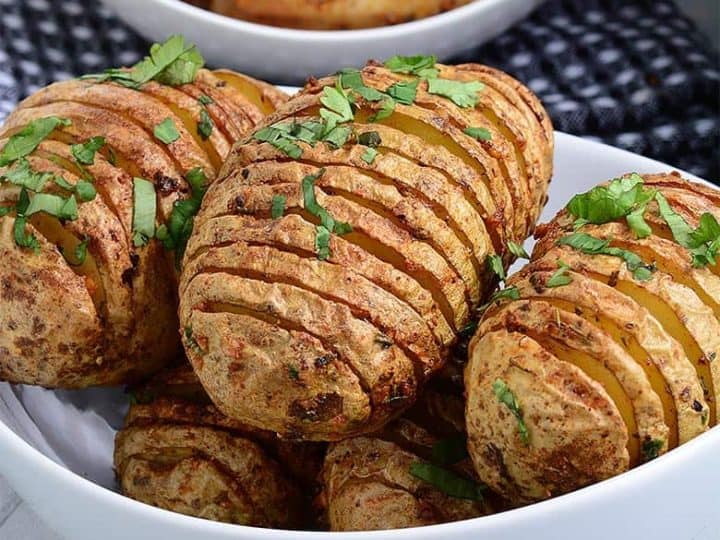
CRISPY AIR FRYER HASSELBACK POTATOES

A white bowl with fried potatoes and chicken wings.
There's nothing quite like some crispy, buttery Hasselback potatoes; they're delicious, impressive, and just so much fun to prepare. I will show you how to make the delightful Hasselback potatoes at home.
Get Full Recipe

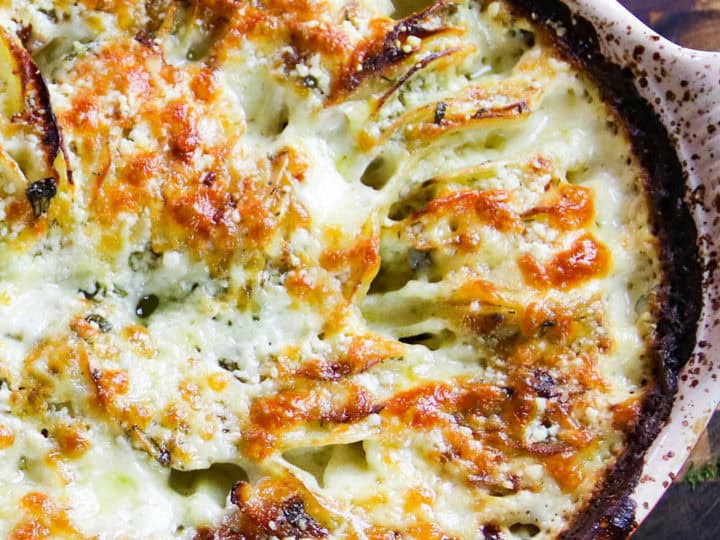
Cheesy Hasselback Potato Gratin

A dish of cheesy roasted cauliflower on a wooden table.
The most incredible marriage of hasselback potatoes and potatoes au gratin. Cheesy, creamy, well seasoned and sure to be a crowd favorite.
Get Full Recipe

Seasonal Favorite

Baked lattice top crust on an apple pie made with the Crisco pie crust recipe, showing flaky layers in the fluted edge.

This is my award-winning Crisco pie crust recipe; flaky, tender, and made with simple ingredients you already have.

Crisco Pie Crust

Rosemary Cheddar Hasselback Potatoes

Easy hasselback potatoes - a simple and creative way to enjoy potatoes. This simple side dish can be enjoyed as a side or appetizer.
Get Full Recipe

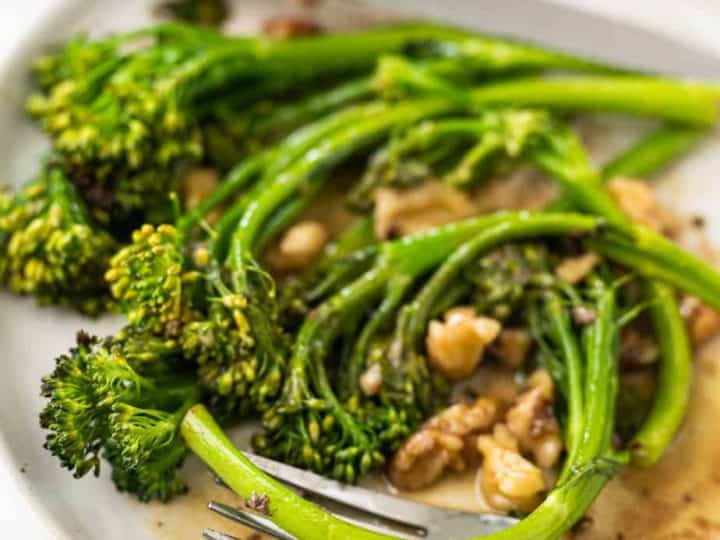
Broccolini with Honey Mustard Vinaigrette

This easy broccolini with honey mustard vinaigrette will add a delicious sweet and savory flavor. A delicious lamb chop side.
Get Full Recipe

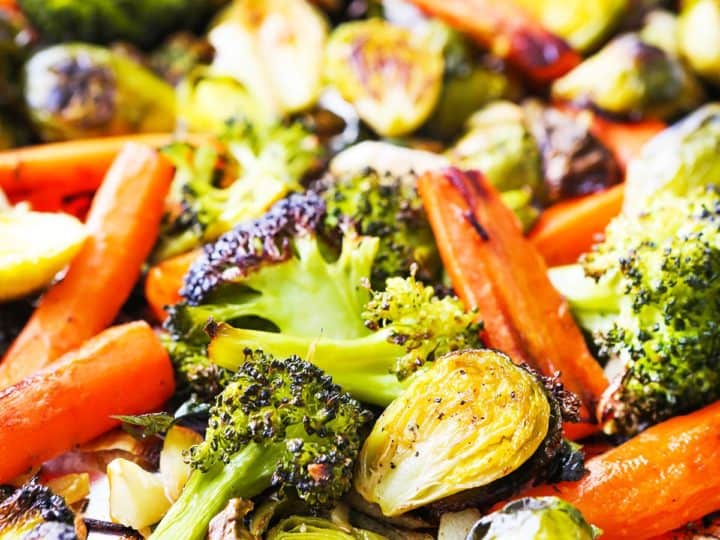
Oven Roasted Vegetables

These are the easiest and best roasted vegetables recipe you will make. This simple recipe will turn root vegetable haters into veggie lovers! This is probably one of my favorite lamb chop sides.
Get Full Recipe

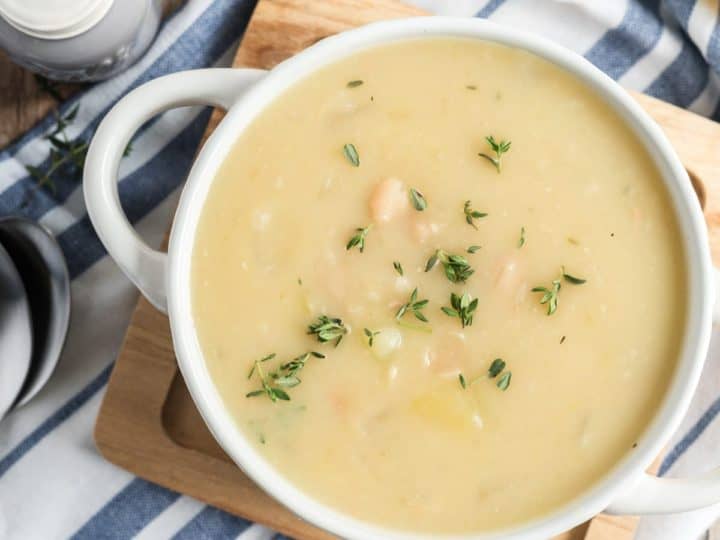
White Bean Soup (with Potato Lemon and Thyme)

A rich, filling soup is made with white beans, potato, lemon, fresh garlic and thyme perfect for cold days when you need a warm bowl of comfort!
Get Full Recipe

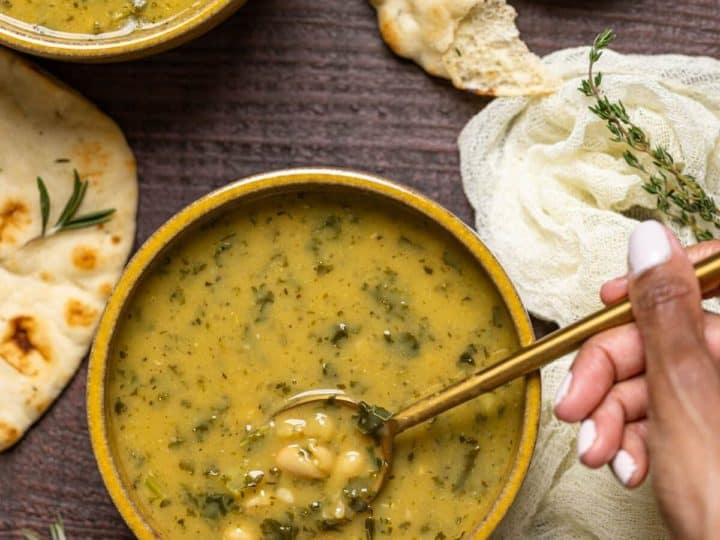
Creamy Vegan White Bean Soup

Filled with delicious herbs and spices, made from white beans, vegetable stock, full-fat coconut cream/milk, and chopped kale; this soup is quite the hearty meal and uses mostly pantry staple ingredients to get the job done. 
Get Full Recipe

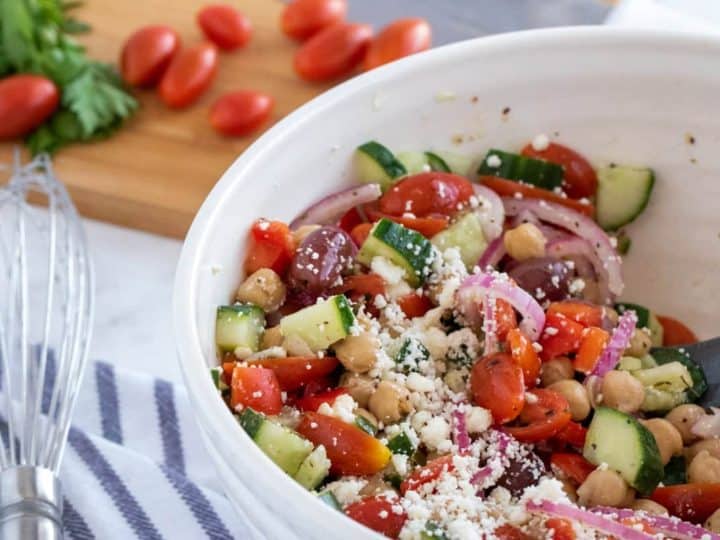
Greek Chickpea Salad

An excellent make-ahead Vegan Chickpea Salad, that will stay good for a few days in the fridge, making this perfect side dish for lunches.
Get Full Recipe

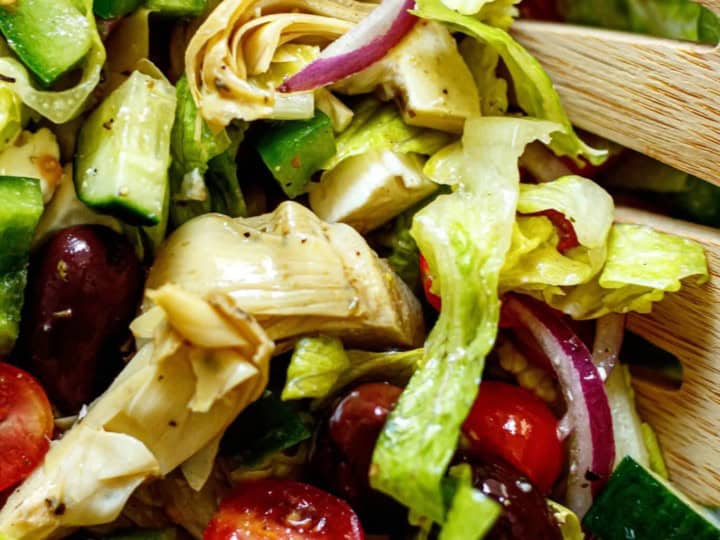
Greek Salad

A salad with olives, tomatoes, and cucumbers, perfect as a side for lamb chops.
The Best Greek Salad filled with fresh veggies, salty feta cheese, sliced cherry tomatoes and just the right amount of herbs. This salad is the best side dish to serve with rosemary lamb chops.
Get Full Recipe

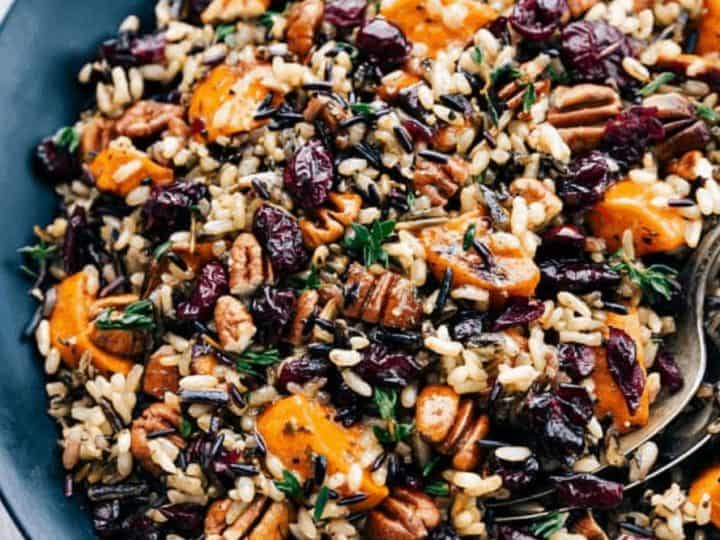
Cranberry Pecan Sweet Potato Wild Rice Pilaf

A plate of wild rice salad with sliced sweet potatoes, pecans, cranberries, and herbs makes a delightful side for lamb chops.
Cranberry Pecan Sweet Potato Wild Rice Pilaf is such an amazing sweet potato dish because it is infused with so many incredible flavors and textures. Crunchy pecans, cranberries, sweet potato, wild rice, and herbs come together in this unforgettable dish!
Get Full Recipe

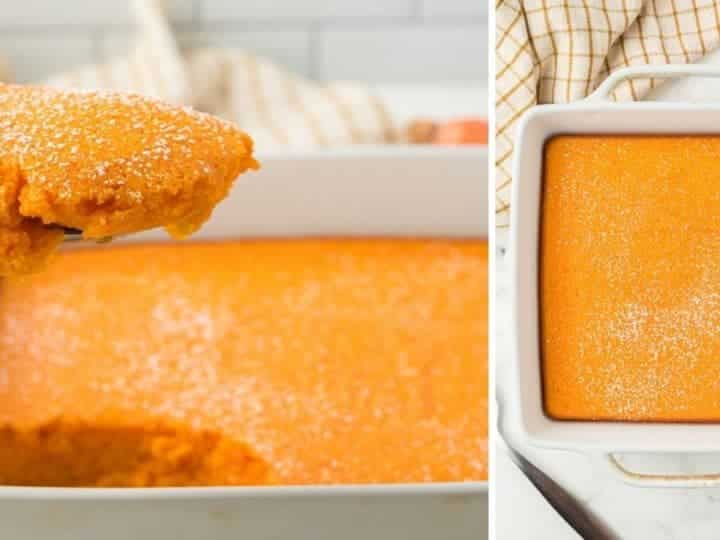
Carrot Souffle Recipe

A baking dish holds a square carrot souffle, perfect as an elegant side for lamb chops. One piece is being lifted with a spatula, revealing its soft texture. The top is lightly dusted with powdered sugar for a touch of sweetness.
This carrot soufflé recipe is one of the very best side dishes for your next meal. Fresh carrots are pureed and baked with butter and sugar until golden brown. It's an elegant side for an everyday meal or special occasion.
Get Full Recipe

Creamed Spinach

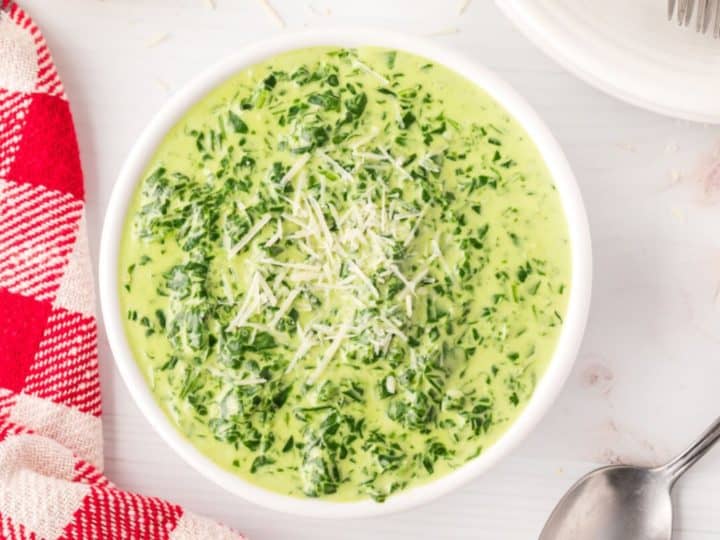
A bowl of creamy spinach soup, an ideal side for lamb chops, is topped with shredded cheese. It's placed invitingly on a white table next to a red and white checkered napkin and a gleaming spoon.
Creamed Spinach is an easy side dish recipe you can quickly make in a pinch. This steakhouse favorite is the perfect creamy spiach accompaniment to your favorite lamb recipes.
Get Full Recipe

Sarah Mock of savoringthegood.com headshot 2022

I am Sarah Mock. Welcome!

Sarah Mock is a classically trained Chef and a graduate of Johnson & Wales University. A culinary blogger for 17 years, Sarah helps the home cook prepare her recipes with professional results.

Get to know me

as seen in:

Logos of Hersheyland, ABC News, and Good Day PA are showcased in a seamless row, providing a snapshot of popular brands.

Hersheyland Nightline Good Day Pa!

The vibrant design showcases the iconic logos of Pinterest, Rachael Ray, and Jell-O set against a bold red background. Sorry, the provided description doesn't offer enough detail to suggest important SEO keywords.

Pinterest Rachael JELL-O


Heaven On Earth Cake

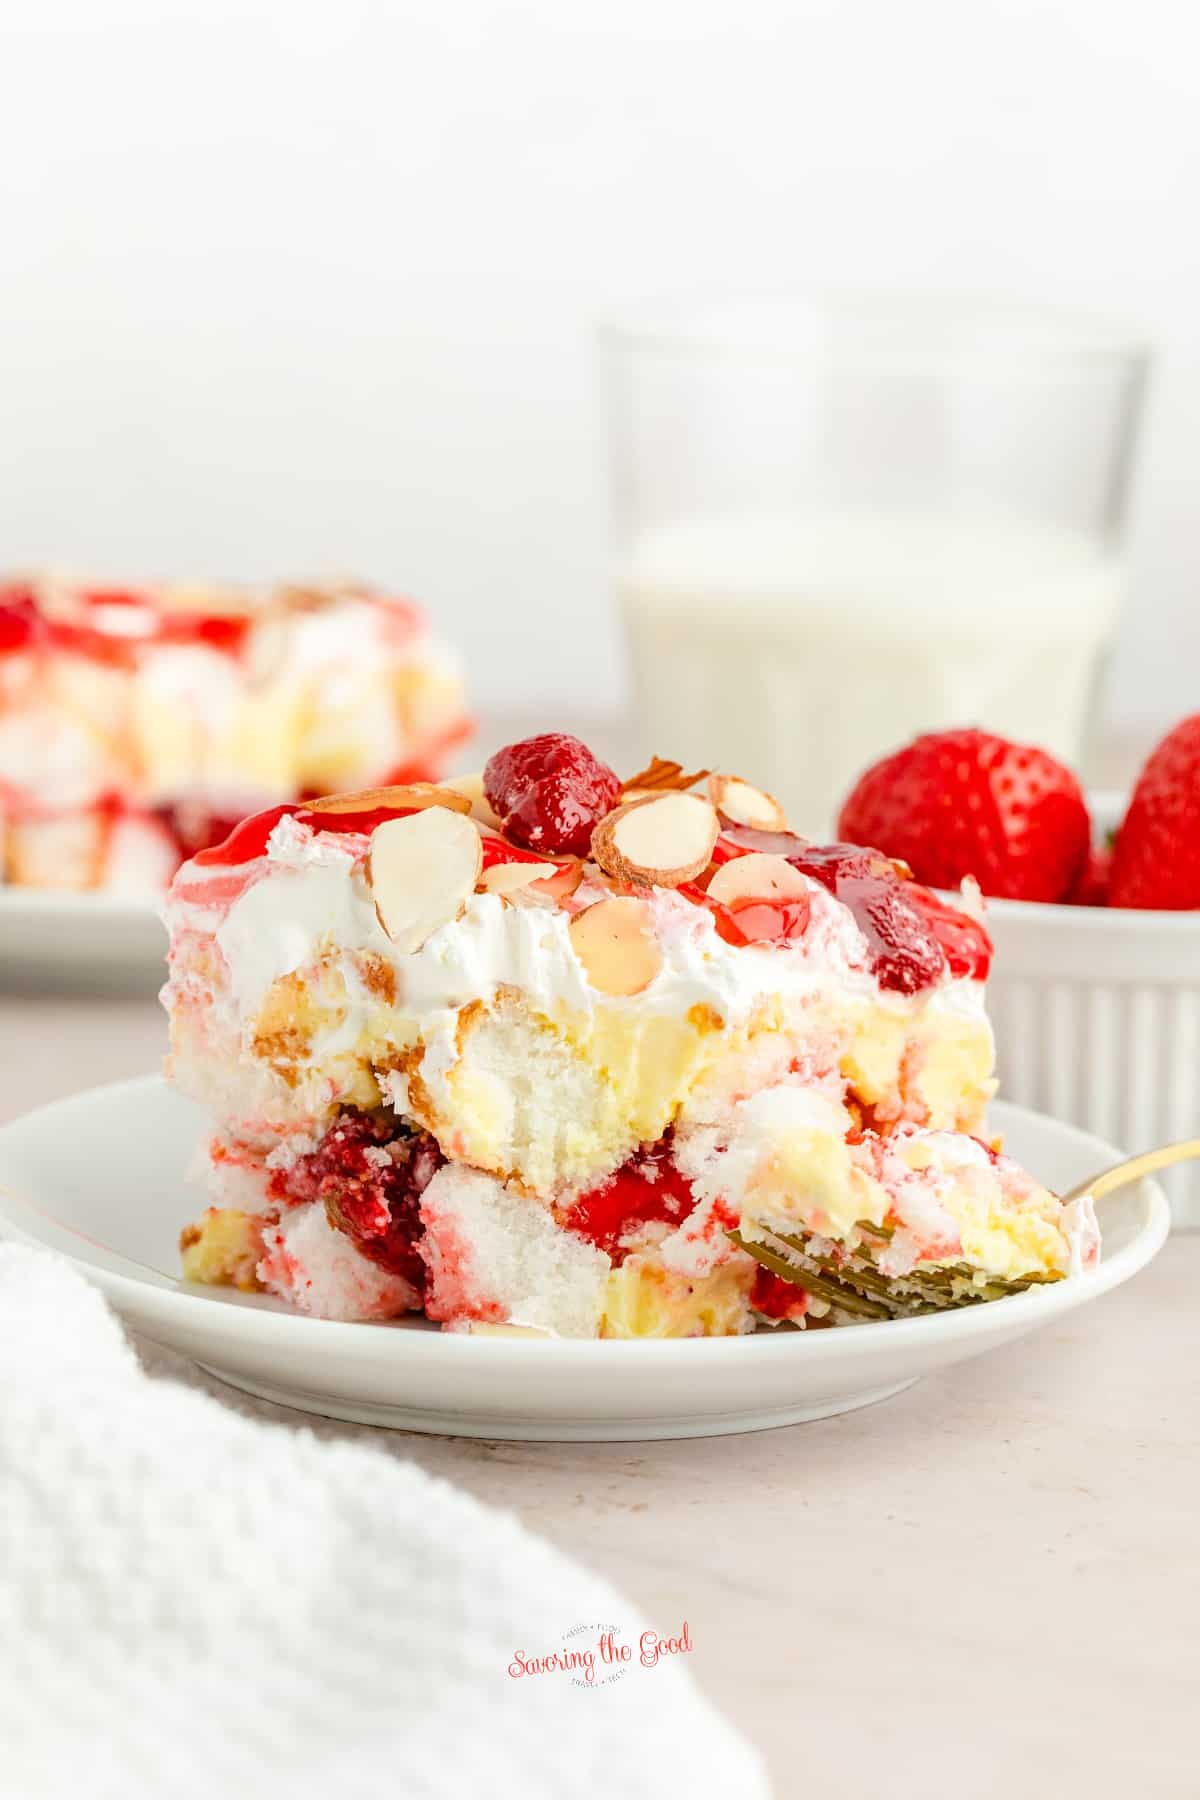
Heaven On Earth Cake (Strawberry Recipe) slice on a small white plate, gold colored fork holding a bite.

If you're anything like me and love a dessert that's light, creamy, and comes together without turning on the oven, then my Heaven on Earth Cake with strawberries is just what you need.

Heaven On Earth Cake (Strawberry Recipe) slice on a small white plate, gold colored fork holding a bite.

This no-bake treat layers airy angel food cake with sweet strawberry pie filling, silky vanilla pudding, and fluffy whipped topping perfect for those hot days when you want to keep the kitchen cool but still impress your guests.

This easy layered dessert can be assembled in a baking dish or showcased in a glass trifle bowl.

Other no-bake desserts you will need to make include no-bake peanut butter pie, blueberry delight, golden graham s'Mores bars and rainbow Jello squares.

Here is why this recipe is amazing:

  • This is the heaven on earth cake recipe with strawberries my grandmother made for my summer birthday party.
  • Keep the oven off and keep your kitchen cool with this no-bake dessert.
  • Switch out the pie filling for a different flavor to make a variation of this heaven on earth cake.

Ingredients:

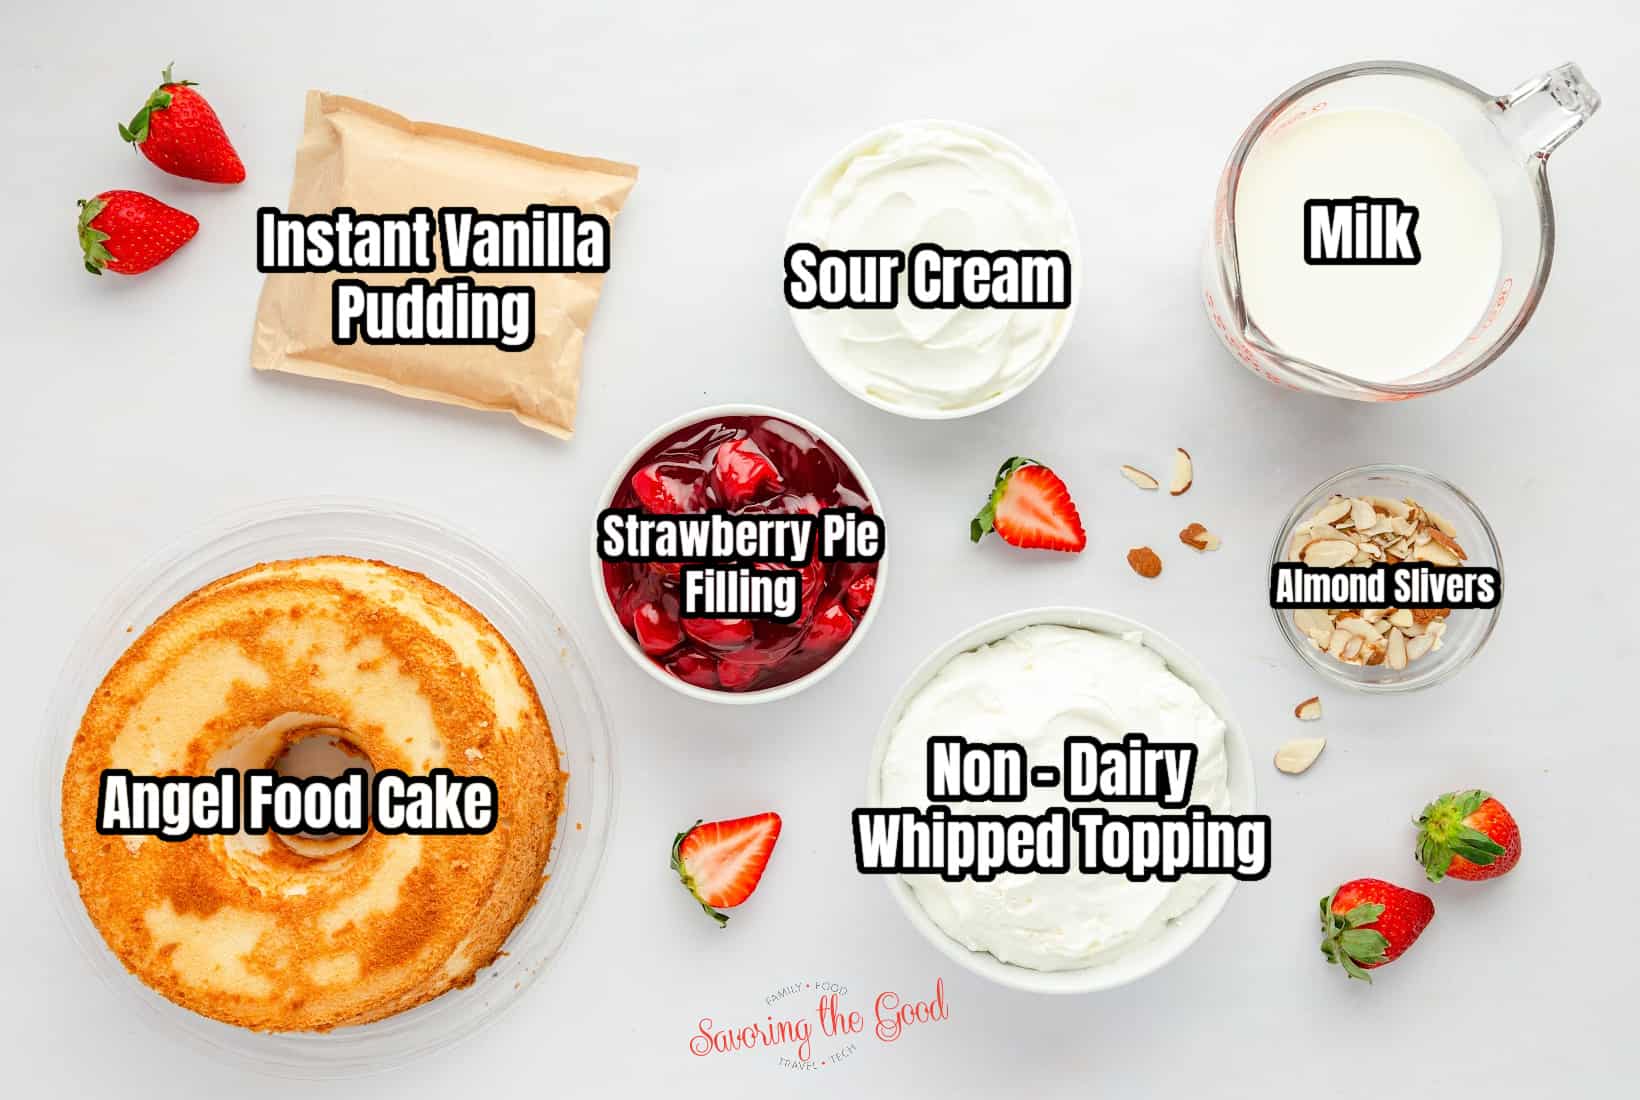
Heaven On Earth Cake ingredients with text overlay labeling each one. vanilla pudding, sour cream, milk, strawberry pie filling, angel food cake, non dairy whipped topping almonds, slivered.

Recipe Card?

To find the full printable recipe with specific measurements and directions CLICK HERE to go to the recipe card.

Ingredient notes:

  • Angel Food Cake - take help from the bakery at the grocery store and use a premade angel food cake.
  • Instant Vanilla Pudding - I use instant vanilla pudding for speed, but if you prefer, a homemade pudding recipe makes the layers even creamier.
  • Sour Cream - Balance out the sweetness of the dessert with a bit of tartness brought by the sour cream.
  • Milk - Dairy milk is used in this recipe to be whisked together with the instant vanilla pudding, substitute in a diary substitute if that is your preference.
  • Strawberry Pie filling - I will use a store-bought pie filling, found in the baking isle, to quickly assemble this easy no bake dessert cake.
  • Non -Dairy Whipped topping - commonly known as Coolwhip, found in the freezer section. Be sure to defrost it completely before spreading it over the dessert.

Substitutions

I suggested purchasing a store-bought angel food cake for this recipe but if you have a homemade angel food cake recipe that you like to use, use that recipe.

Can I use other fruit fillings?

Sour Cherry Pie Filling in a glass ball quart jar. two fresh sour cherries for garnish.

Definitely! I switch it up sometimes with cherry, blueberry, or even lemon pie filling, and it's always delicious.

Instructions

This Heaven on Earth Cake is one of my favorite go-to desserts when I want something delicious without the fuss. The layers of angel food cake, creamy pudding, and fruity strawberry filling come together effortlessly, making it perfect for any occasion. Just follow these simple steps, and you'll have a gorgeous, no-bake dessert.

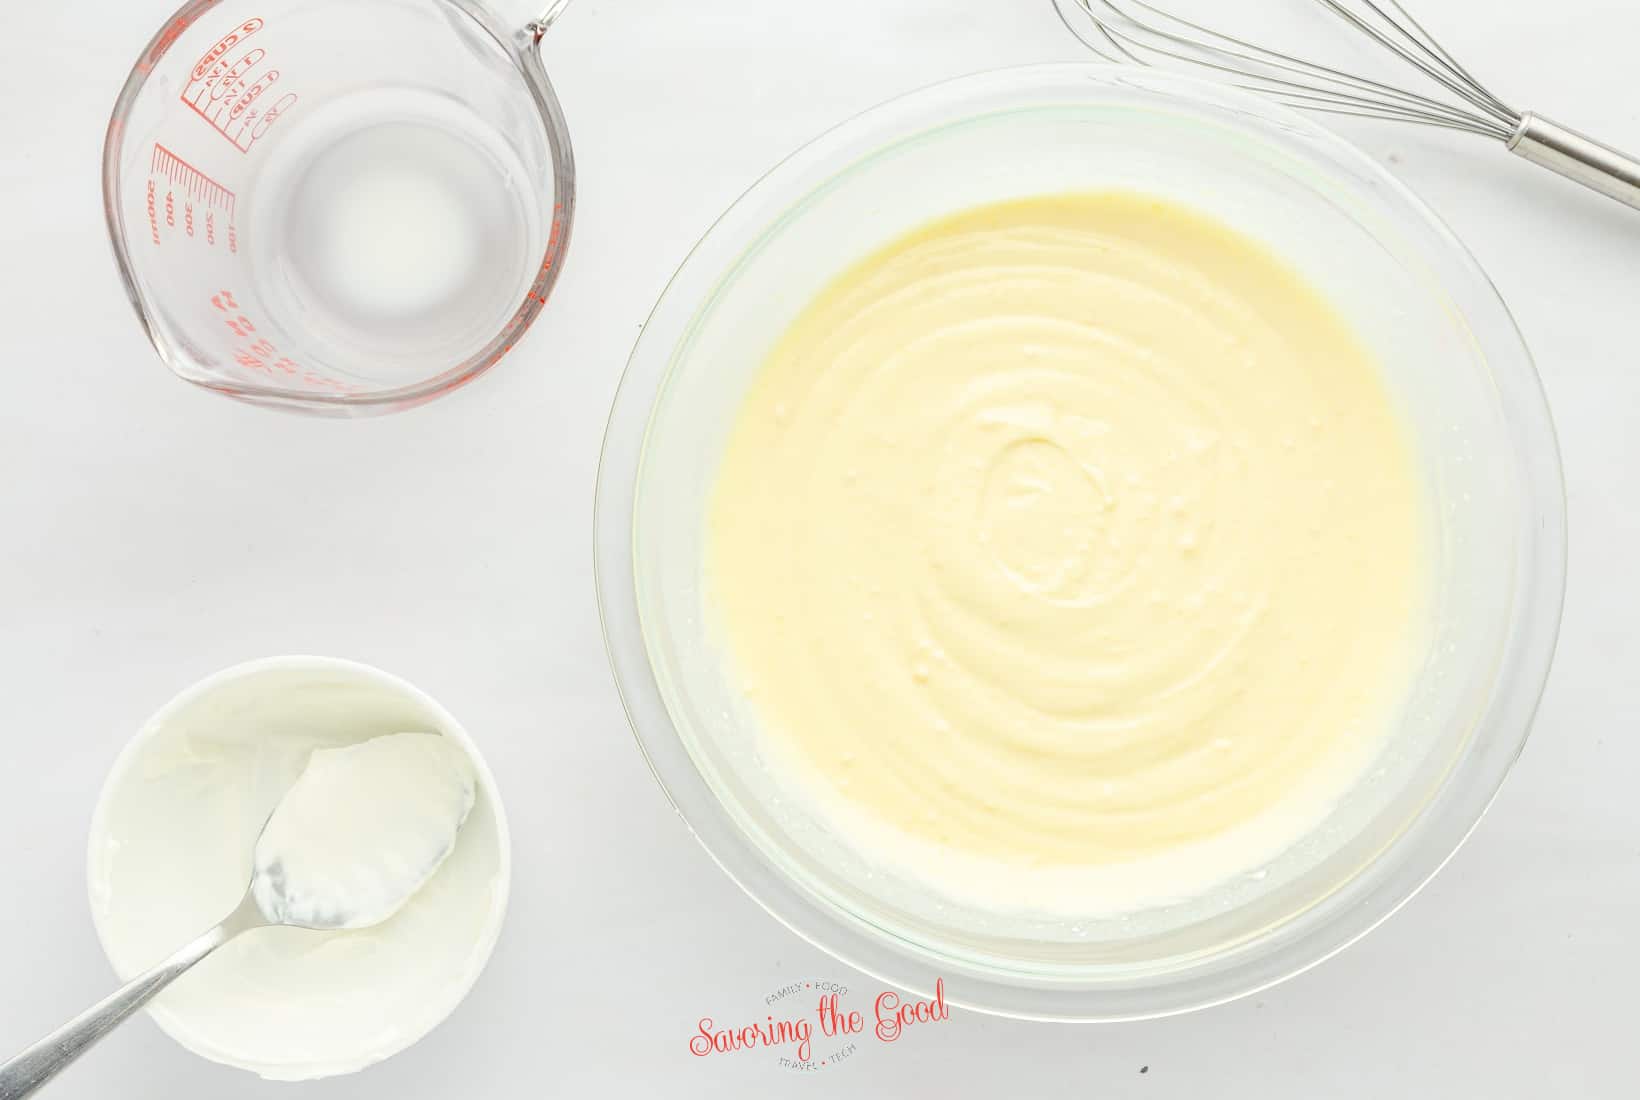
pudding with sour cream added.

Whisk the Pudding Mixture

In a medium bowl, whisk together the instant vanilla pudding mix, milk, and sour cream until smooth and slightly thickened, about 2-3 minutes. Set aside.

cubes of angel food cake cut on a bamboo cutting board.

Cube the Angel Food Cake

Using a serrated knife, cut the angel food cake into 1-inch cubes. Use a gentle sawing motion to keep the cubes from getting crushed.

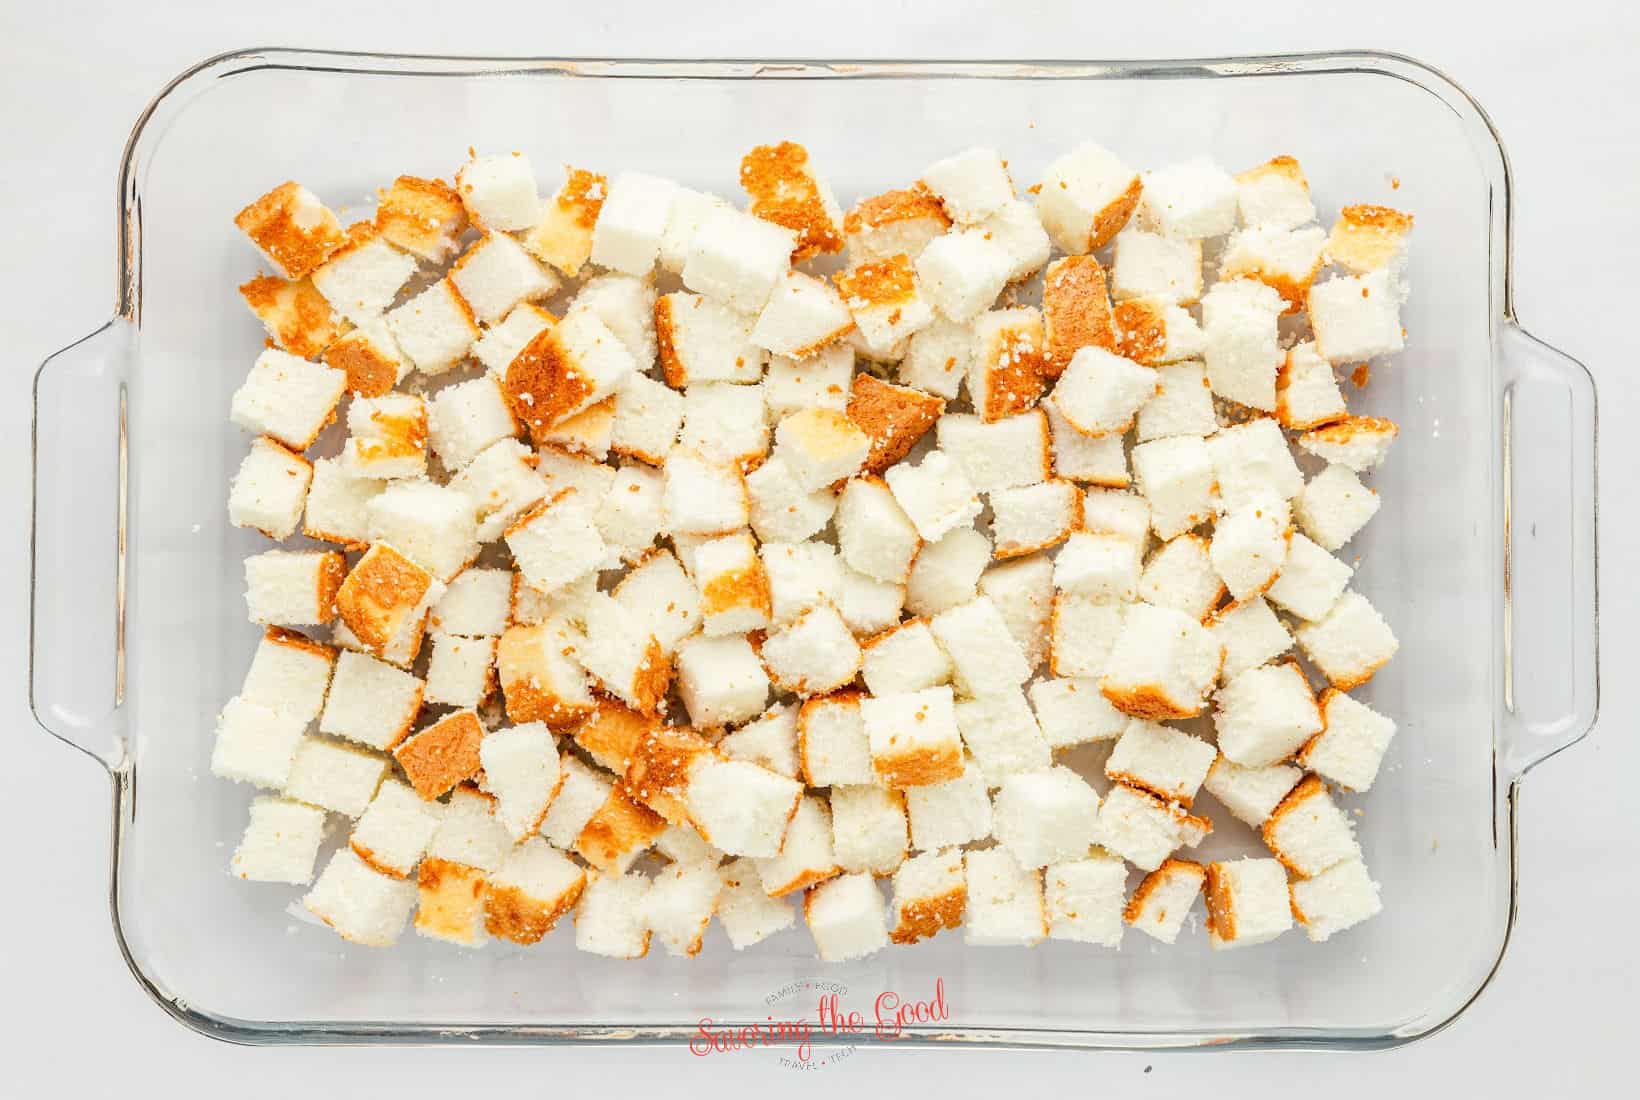
cubes of angel food cake in a glass pan.

Layer the First Cake Cubes

Spread half of the angel food cake cubes evenly in the bottom of a 9x13-inch glass baking dish.

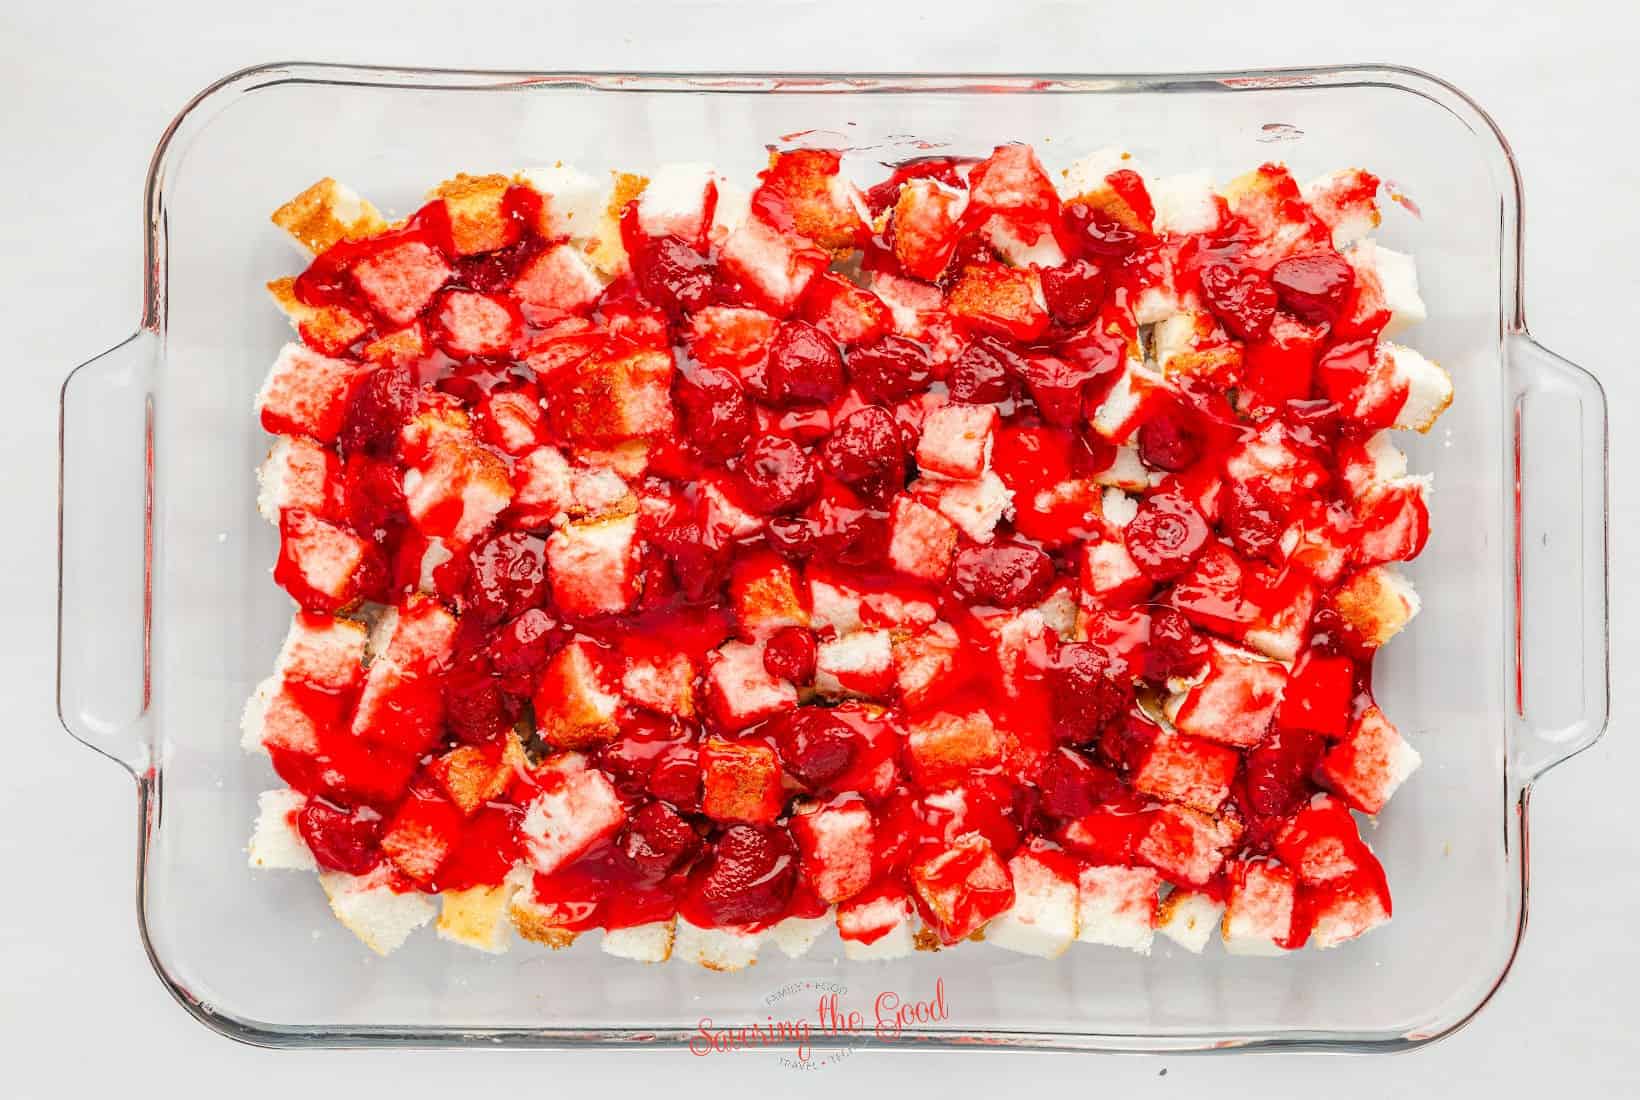
strawberry filling over cubes of angel food cake.

Add Strawberry Pie Filling

Spread about two-thirds of the strawberry pie filling evenly over the cake cubes.

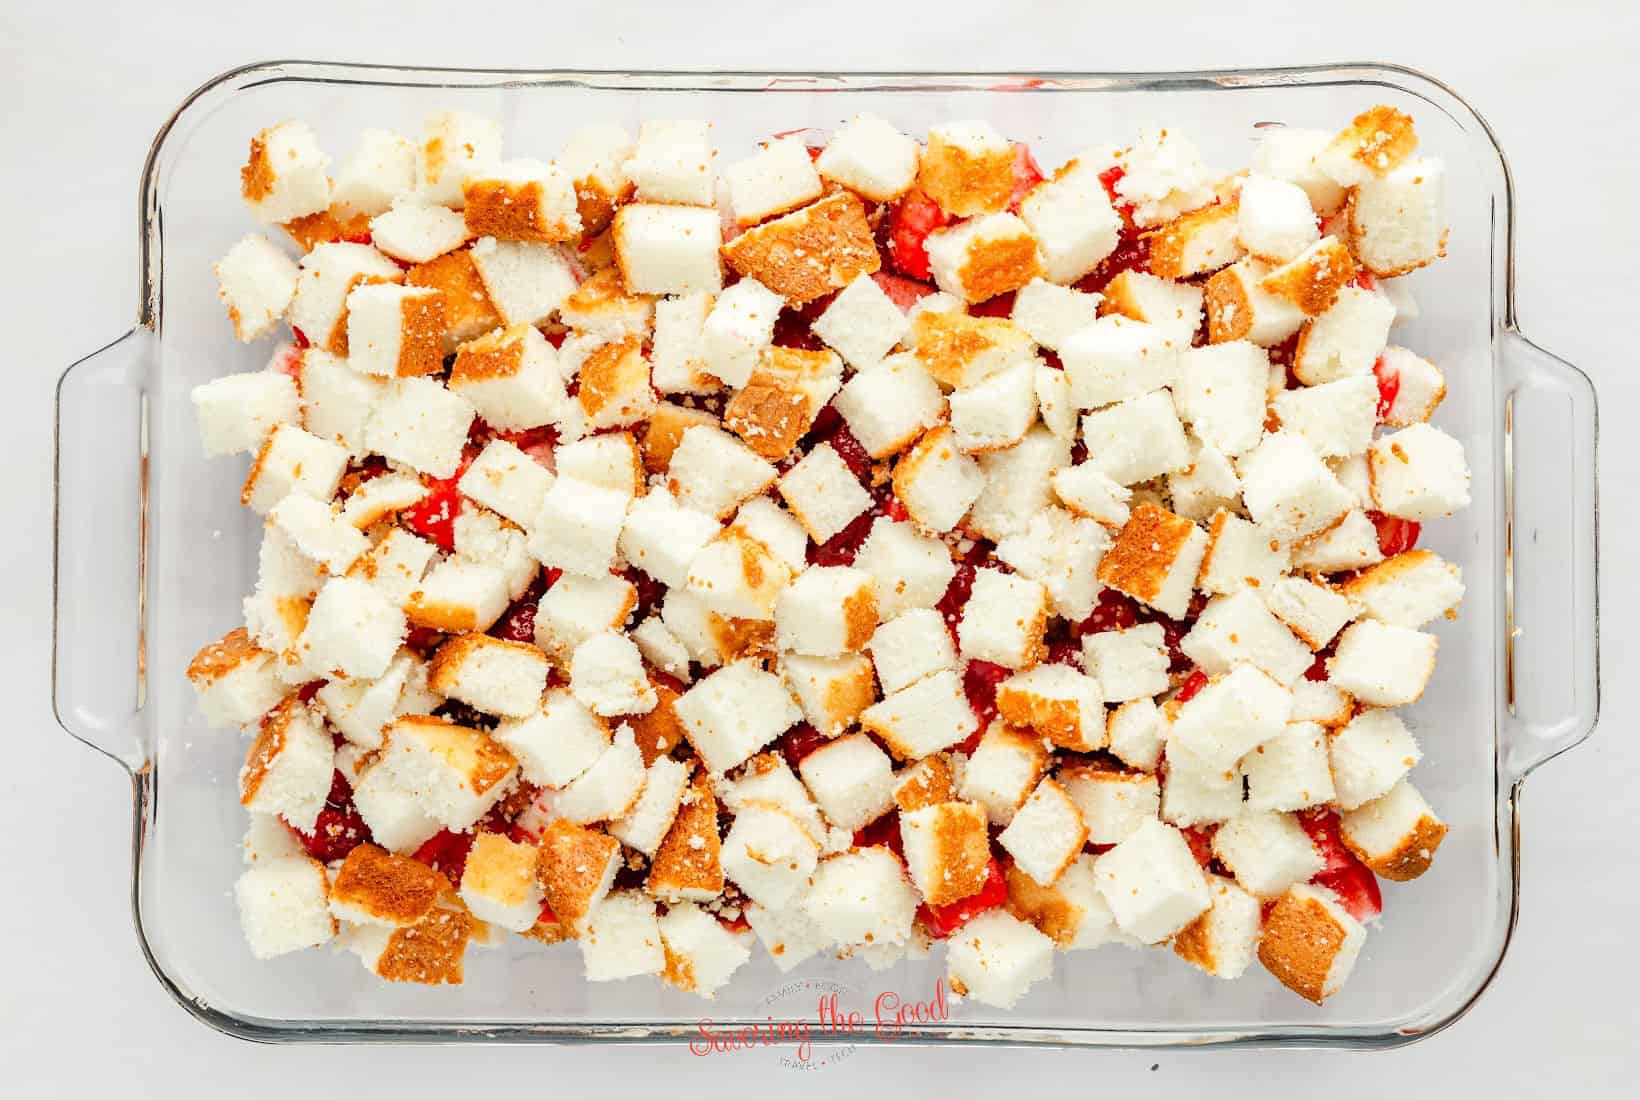
second layer of angel food cake added to the pan.

Add Second Cake Layer

Top the pie filling with the remaining angel food cake cubes, spreading them evenly.

vanilla pudding layer added.

Spread the Pudding Layer

Pour and spread the pudding mixture evenly over the cake layer.

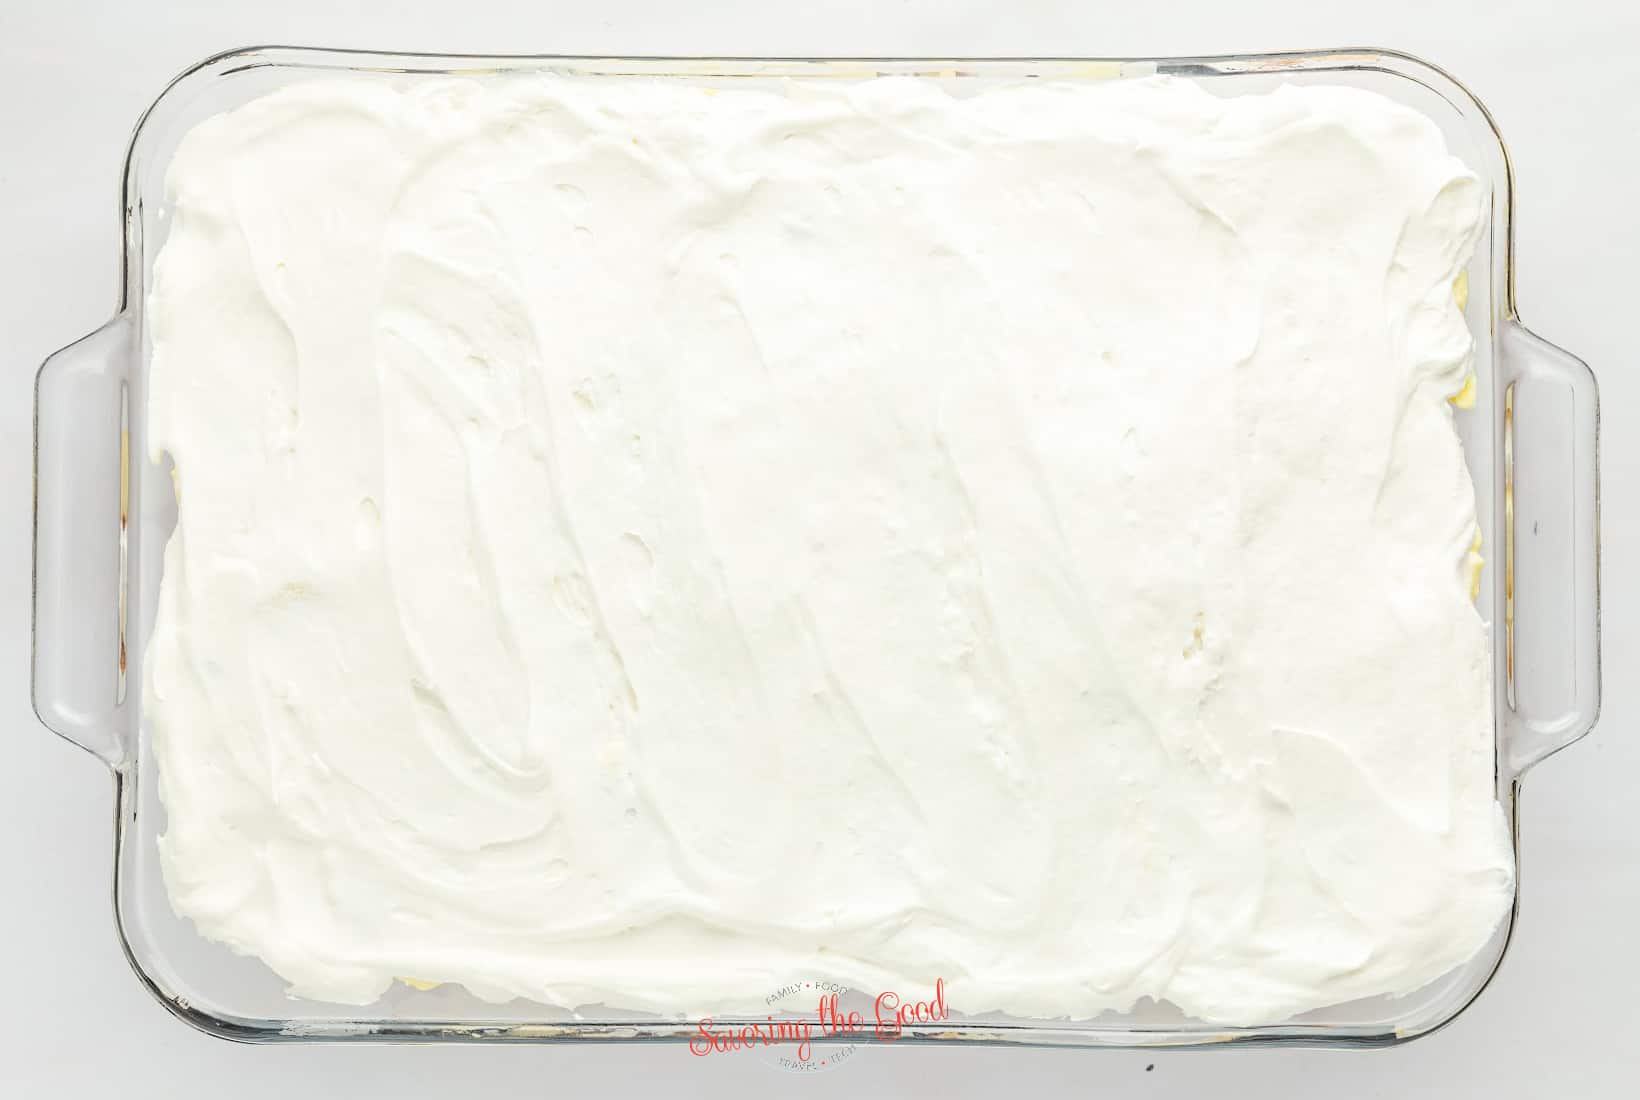
whipped topping layer added.

Add Whipped Topping

Spread the thawed whipped topping (Cool Whip) evenly on top of the pudding layer.

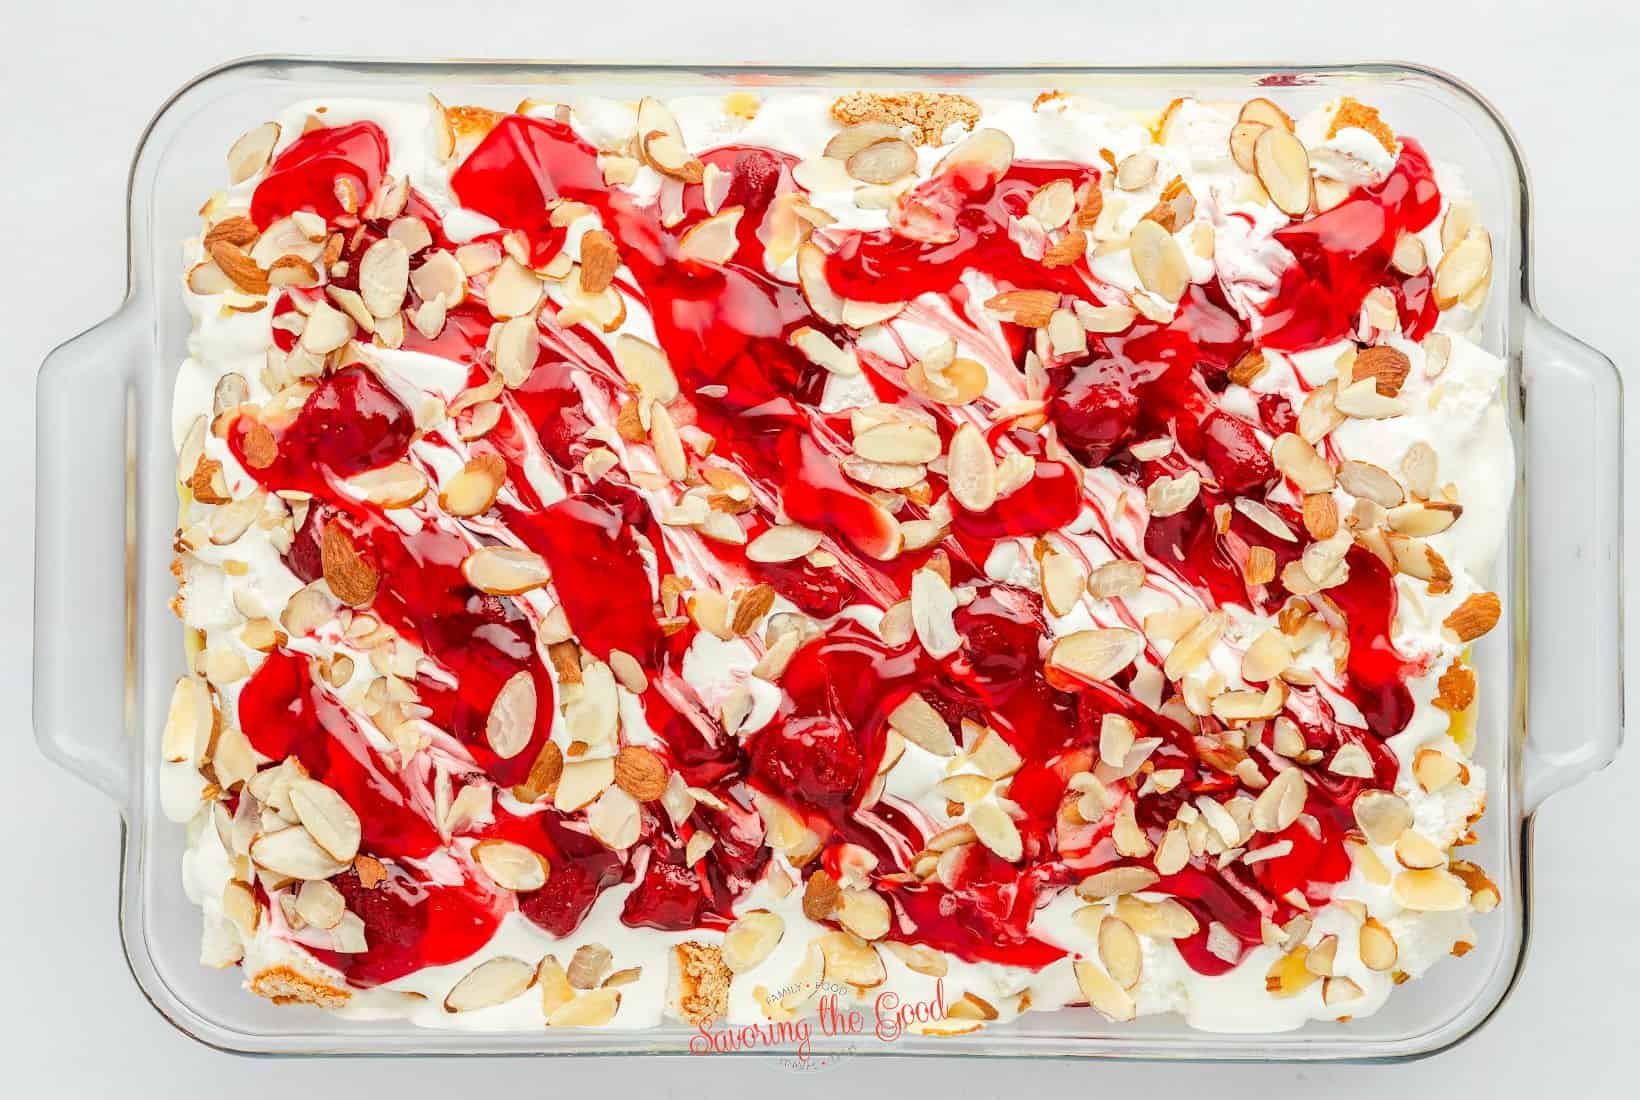
full pan of Heaven On Earth Cake with strawberries in a glass nine by thirteen pan.

Garnish with Remaining Pie Filling

Drop spoonfuls of the remaining strawberry pie filling on top of the whipped topping, then gently swirl it in with a butter knife for a marbled effect.

Chill Before Serving

Refrigerate the assembled cake uncovered for 4-6 hours or overnight to allow the layers to set and the flavors to meld.

Heaven On Earth Cake (Strawberry Recipe) on a plate.

Add Almonds and Serve

Just before serving, sprinkle slivered almonds evenly over the top for a crunchy finish.

Can I make this cake ahead of time?

vertical image of a close up of the layers of Heaven On Earth Cake (Strawberry Recipe) in a glass pan.

Yes! I usually make mine a day ahead. Just cover it loosely with foil or plastic wrap and refrigerate. It tastes even better after the flavors have had time to blend overnight.

Storage Tips

Store leftovers in an airtight container in the refrigerator for up to 2 days. Any longer and it will start to become soggy.
I do not recommend freezing as it does not thaw well.

Chef Tip

If using homemade cake, allow it to fully cool before cutting it into cubes. Use a serrated blade with a sawing motion to cut the cake pieces without flattening them.

How long does it keep?

In my experience, leftovers are best eaten within 2 days because the angel food cake can start to get soggy after that. Store it in an airtight container in the fridge.

Can I freeze Heaven on Earth Cake?

I don't recommend freezing it because the whipped topping and pudding don't hold up well once thawed the texture will suffer.

Can I omit the almonds?

Yes, I sometimes leave them off to accommodate nut allergies, and the cake is still wonderful.

Heaven On Earth Cake (Strawberry Recipe) slice on a small white plate, gold colored fork holding a bite.

Strawberry Heaven On Earth Cake

Heaven on earth cake, with strawberries, is an easy no-bake dessert made with angel food cake, strawberry pie filling, vanilla pudding and whipped topping.
4.74 from 19 votes
Print Pin Rate
Course: Dessert
Cuisine: American
Prep Time: 15 minutes minutes
Chill Time: 6 hours hours
Total Time: 6 hours hours 15 minutes minutes
Servings: 12 Servings
Calories: 279
Author: Sarah Mock

Ingredients

  •  
    3.4 ounce Instant vanilla pudding
  • A white milk carton with a blue label reading 1 ½ Cup Whole Milk
  • sour cream.1 Cup Sour Cream OR greek yogurt
  •  
    14 ounce angel food cake cut into 1-inch cubes
  •  
    21 ounce strawberry pie filling
  •  
    8 ounce non-dairy whipped topping
  •  
    3 tablespoons sliced almonds
US Customary - Metric
Follow Savoring The Good On PinterestFollow @SavoringTheGood or tag #STGRecipes!

Instructions

  • In a medium mixing bowl, whisk together the vanilla pudding, milk, and sour cream until smooth and fully incorporated and it begins to thicken. Set aside.
    3.4 ounce Instant vanilla pudding, 1 ½ Cup Whole Milk, 1 Cup Sour Cream
  • Cut the angel food cake into 1-inch cubes and then evenly layer half of it into the bottom of the baking pan.
    14 ounce angel food cake
  • Spread about ⅔ of the strawberry pie filling on top and then layer the remaining angel food cake over it.
    21 ounce strawberry pie filling
  • Evenly spread all of the vanilla pudding mixture over the cake layer and then top it with the Cool Whip.
    8 ounce non-dairy whipped topping
  • Using a spoon, drop spoonfuls of the remaining strawberry pie filling over the cake. You can spread it around and make some swirls if you desire.
  • Place in the refrigerator uncovered to chill for 4-6 hours, or even overnight for a more flavorful and moist cake. Refrigerating it will also help the layers to set.
  • Right before serving, sprinkle with slivered almonds. Enjoy!
    3 tablespoons sliced almonds
Want to share when you made this recipe?Follow @SavoringTheGood & tag #STGRecipes!
Nutrition Facts
Strawberry Heaven On Earth Cake
Serving Size
 
1 Piece
Amount per Serving
Calories
279
% Daily Value*
Fat
 
7
g
11
%
Saturated Fat
 
3
g
19
%
Trans Fat
 
0.001
g
Polyunsaturated Fat
 
1
g
Monounsaturated Fat
 
2
g
Cholesterol
 
18
mg
6
%
Sodium
 
263
mg
11
%
Potassium
 
155
mg
4
%
Carbohydrates
 
49
g
16
%
Sugar
 
32
g
36
%
Protein
 
5
g
10
%
* Percent Daily Values are based on a 2000 calorie diet.
**Nutritional facts are just estimates. Please utilize your own brand nutritional values to double check against our estimates.
Like this recipe card? Want one for your site?Check out WP Recipe Maker!

Sarah Mock of savoringthegood.com headshot 2022

I am Sarah Mock. Welcome!

Sarah Mock is a classically trained Chef and graduate of Johnson & Wales University. A culinary blogger for 16 years Sarah helps the home cook prepare her recipes with professional results.

Get to know me

as seen in:

Logos of Hersheyland, ABC News, and Good Day PA are showcased in a seamless row, providing a snapshot of popular brands.

Hersheyland Nightline Good Day Pa!

The vibrant design showcases the iconic logos of Pinterest, Rachael Ray, and Jell-O set against a bold red background. Sorry, the provided description doesn't offer enough detail to suggest important SEO keywords.

Pinterest Rachael JELL-O

How to Can Homemade Cranberry Juice

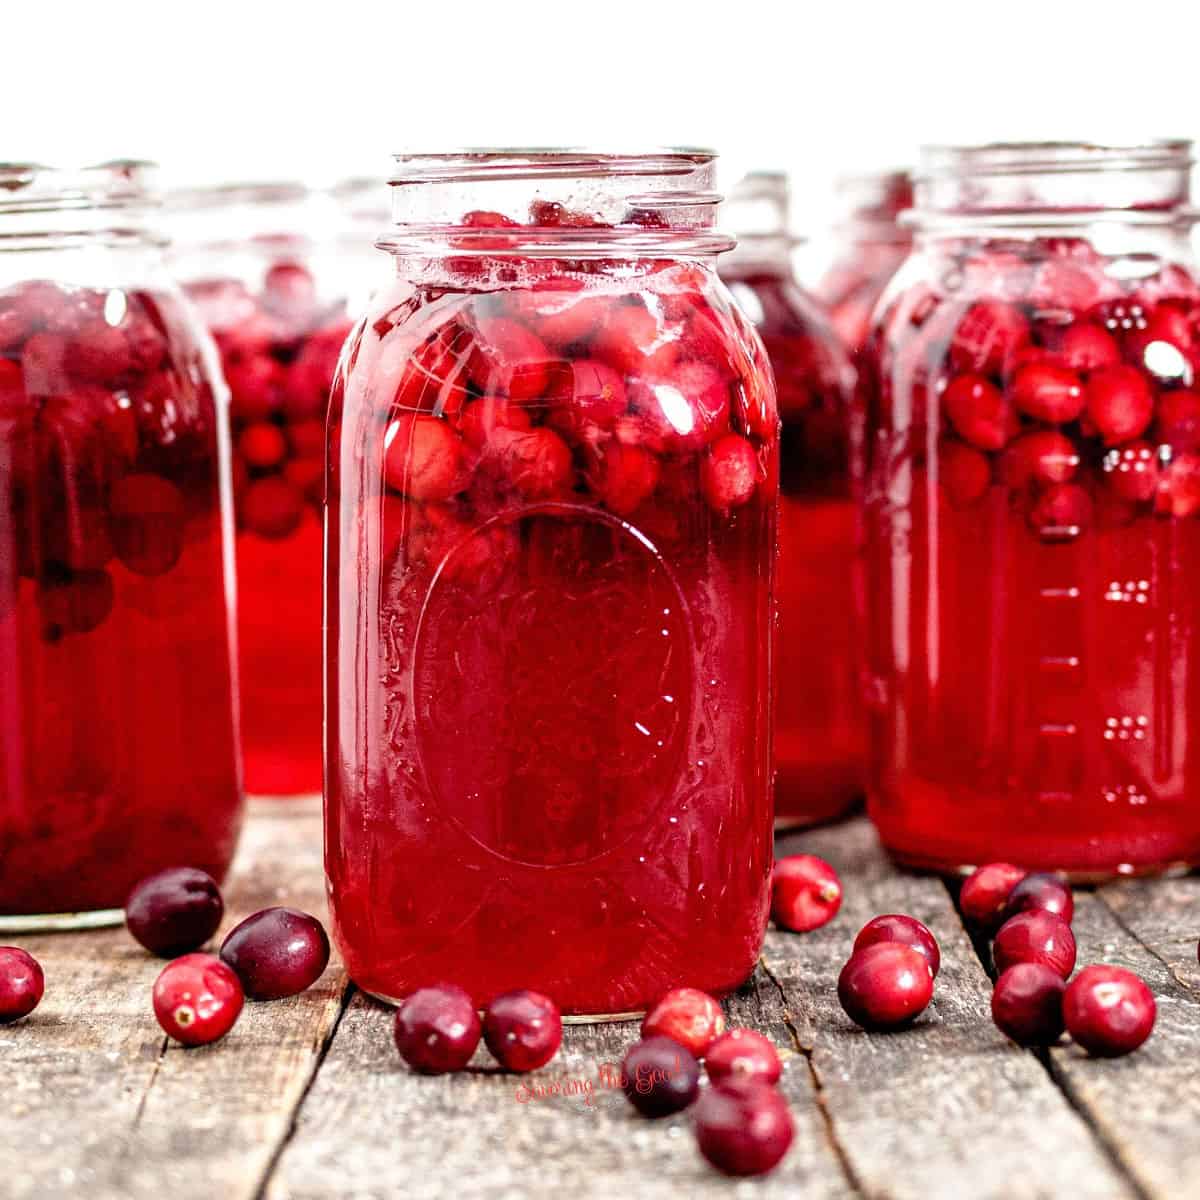
canned cranberry juice.

Homemade cranberry juice is a celebration of bold, tart flavor and pure, natural refreshment, made easily with just a handful of fresh cranberries, water, and the sweetener of your choice. Canning your own cranberry juice lets you capture the vibrant color and zesty taste of the season in every jar, while controlling the sweetness and skipping all the artificial extras found in store-bought bottles.

canned cranberry juice.

It takes just 20 minutes of water bath canning to make your own shelf-stable canned cranberry juice. Skip the high fructose corn syrup or artificial sweetener and use fresh whole berries and a sweetener of your choice. 

Make multiple quarts of fresh cranberry juice for less than the price of one store-bought jar.

Ingredients needed:

cranberry juice ingredients, fresh cranberies, sugar, in bowls, text overlay labels.

Recipe Card?

To find the full printable recipe with specific measurements and directions CLICK HERE to go to the recipe card.

  • Cranberries- fresh cranberries are what I use in this recipe tutorial but frozen cranberries will also work if fresh is not available in your area.
  • Sugar - I should say sweetener instead of sugar. Honey can be substituted in place of sugar.

Substitutions

  • Add-ins - add a cinnamon stick, orange peel, or an apple piece to give the cranberry juice another flavor profile.

Canning Cranberry Juice

With just a little prep and some simple canning tools, you'll be stocking your pantry with a homemade juice that's as beautiful on the holiday table as it is nourishing and refreshing any time of year. Whether served chilled over ice, warmed as a festive cider, or sipped straight for a tart pick-me-up, this homemade cranberry juice recipe is a wholesome tradition worth savoring.

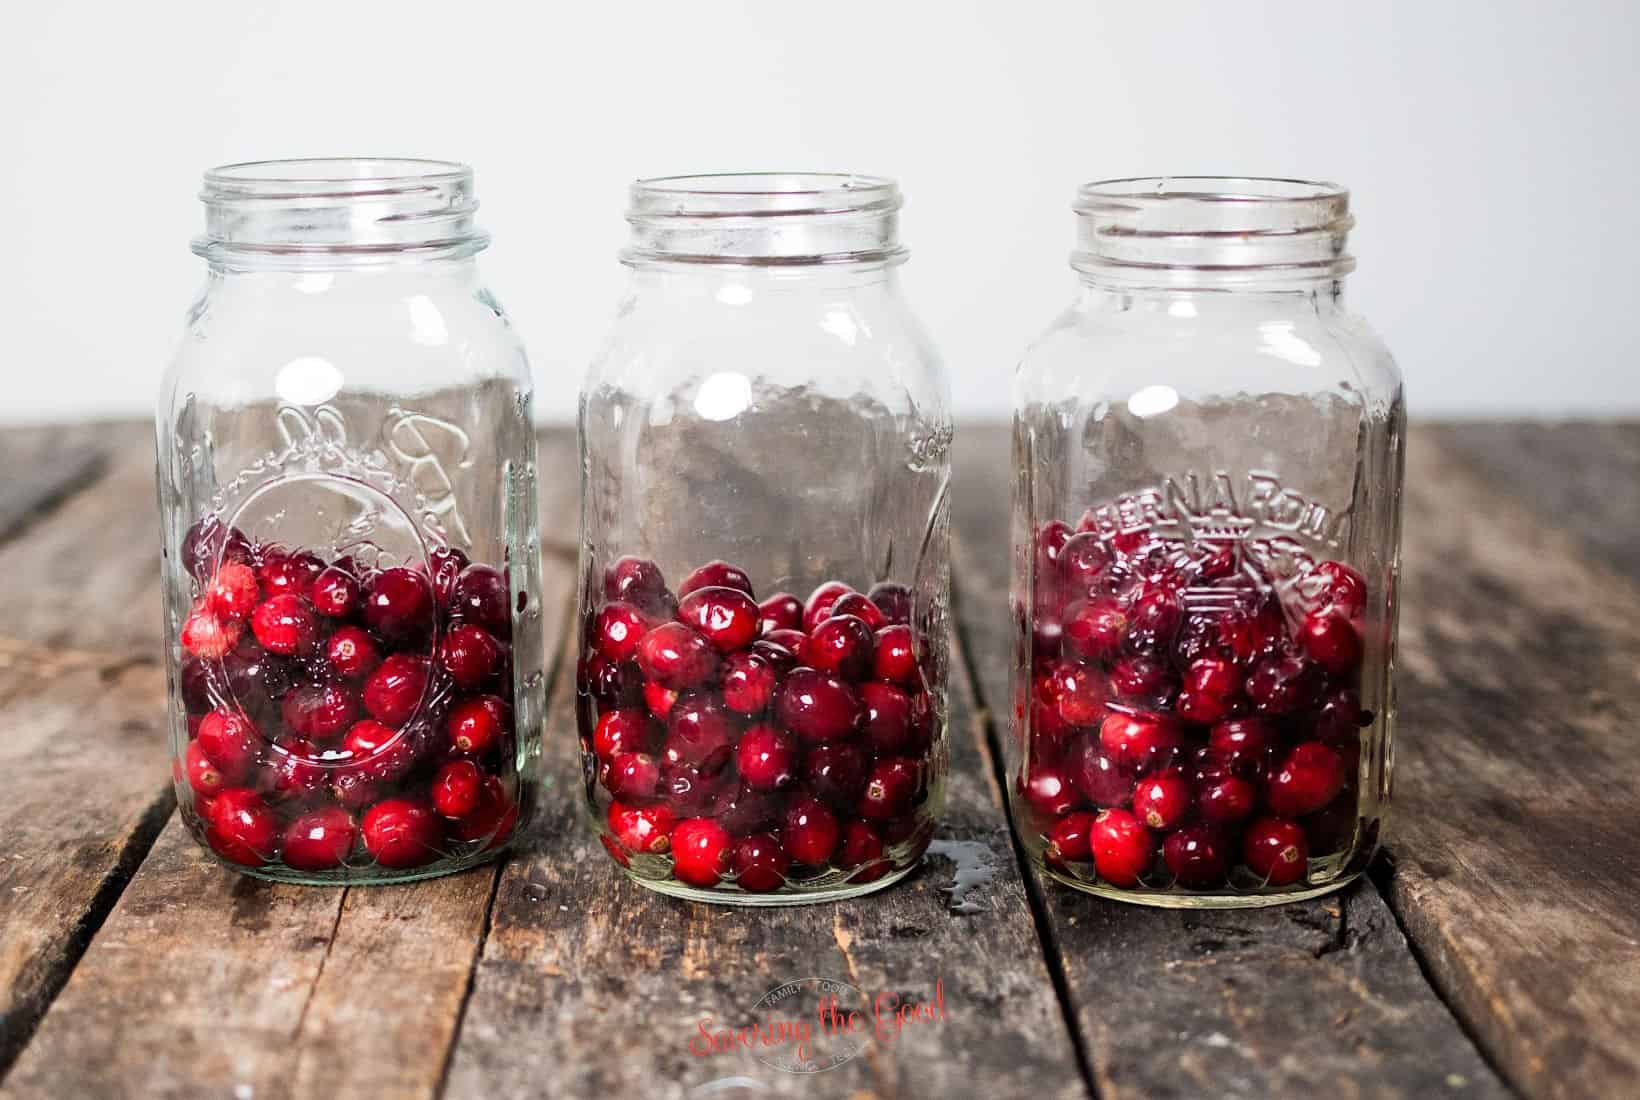
fresh, washed cranberries in quart jars.

Add Cranberries

Add whole cranberries to clean quart canning jars. If adding any spices, apple slices or orange zest, include them in this step.

Top Tip

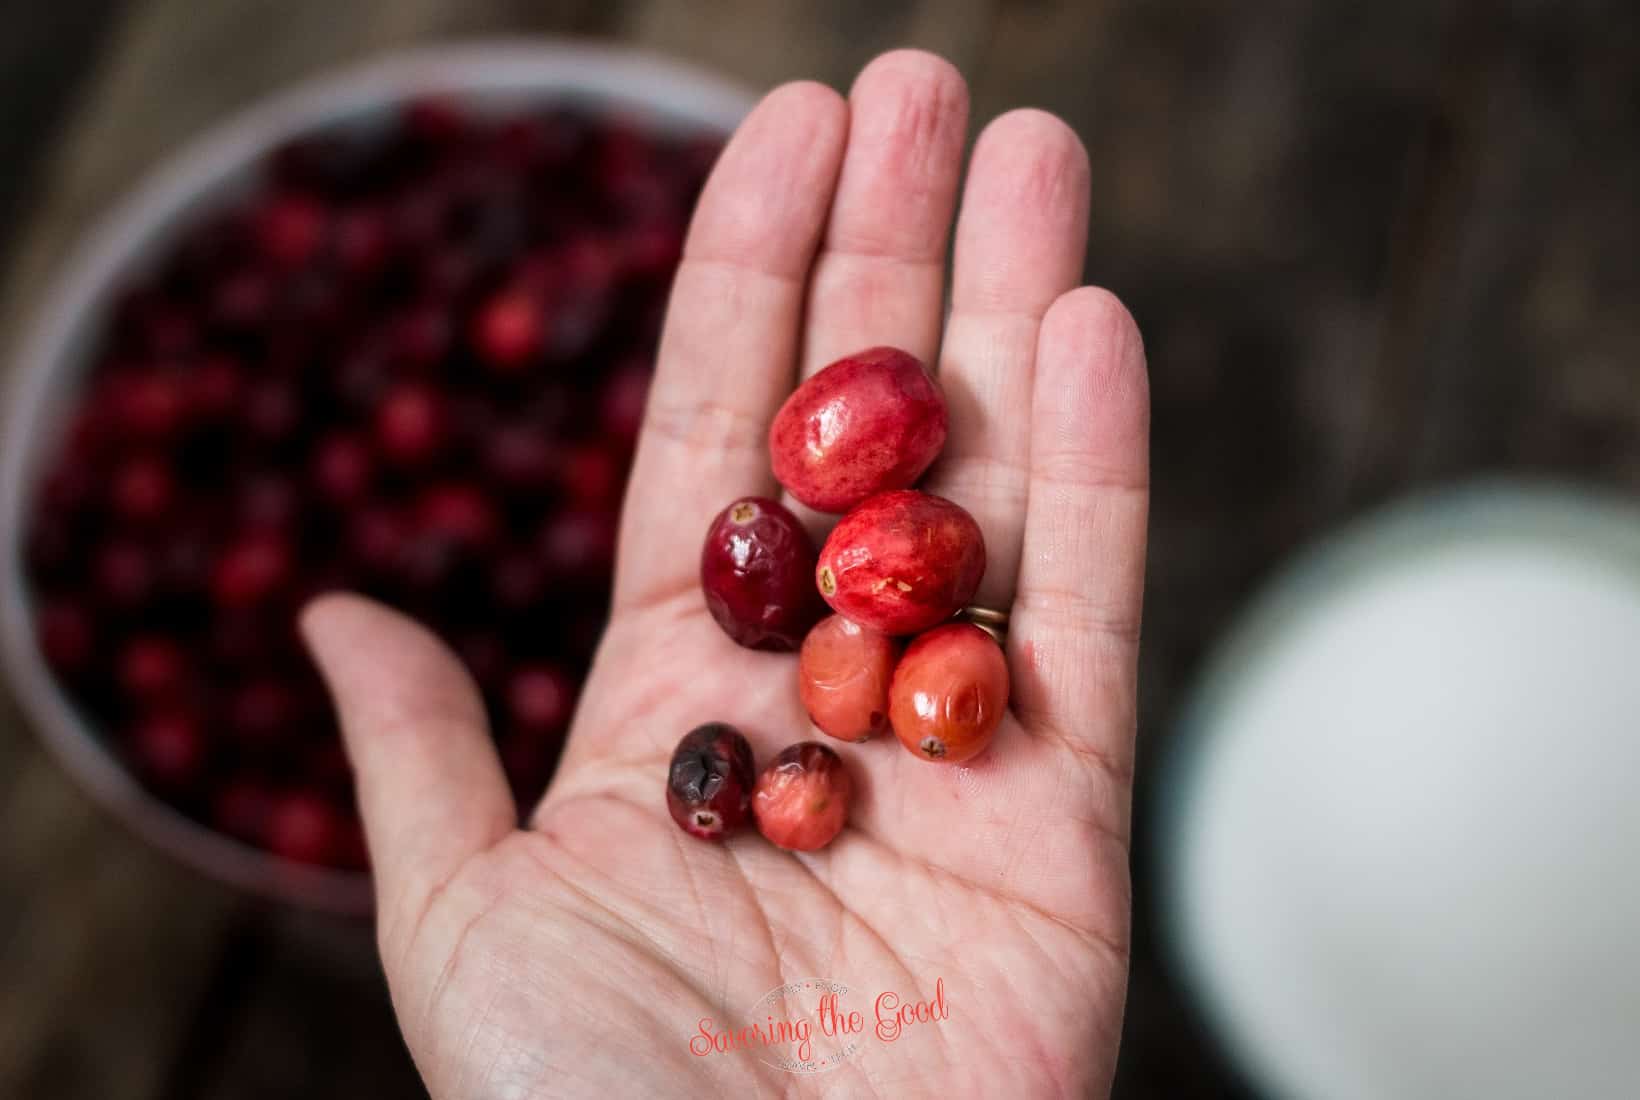
hand holding bruised fresh cranberries.

Be sure to wash cranberries before adding them to the clean jars. You will be surprised how much bog dirt, leaves and even little sticks are in the cranberry bags. Also, remove any bruised to soft berries.

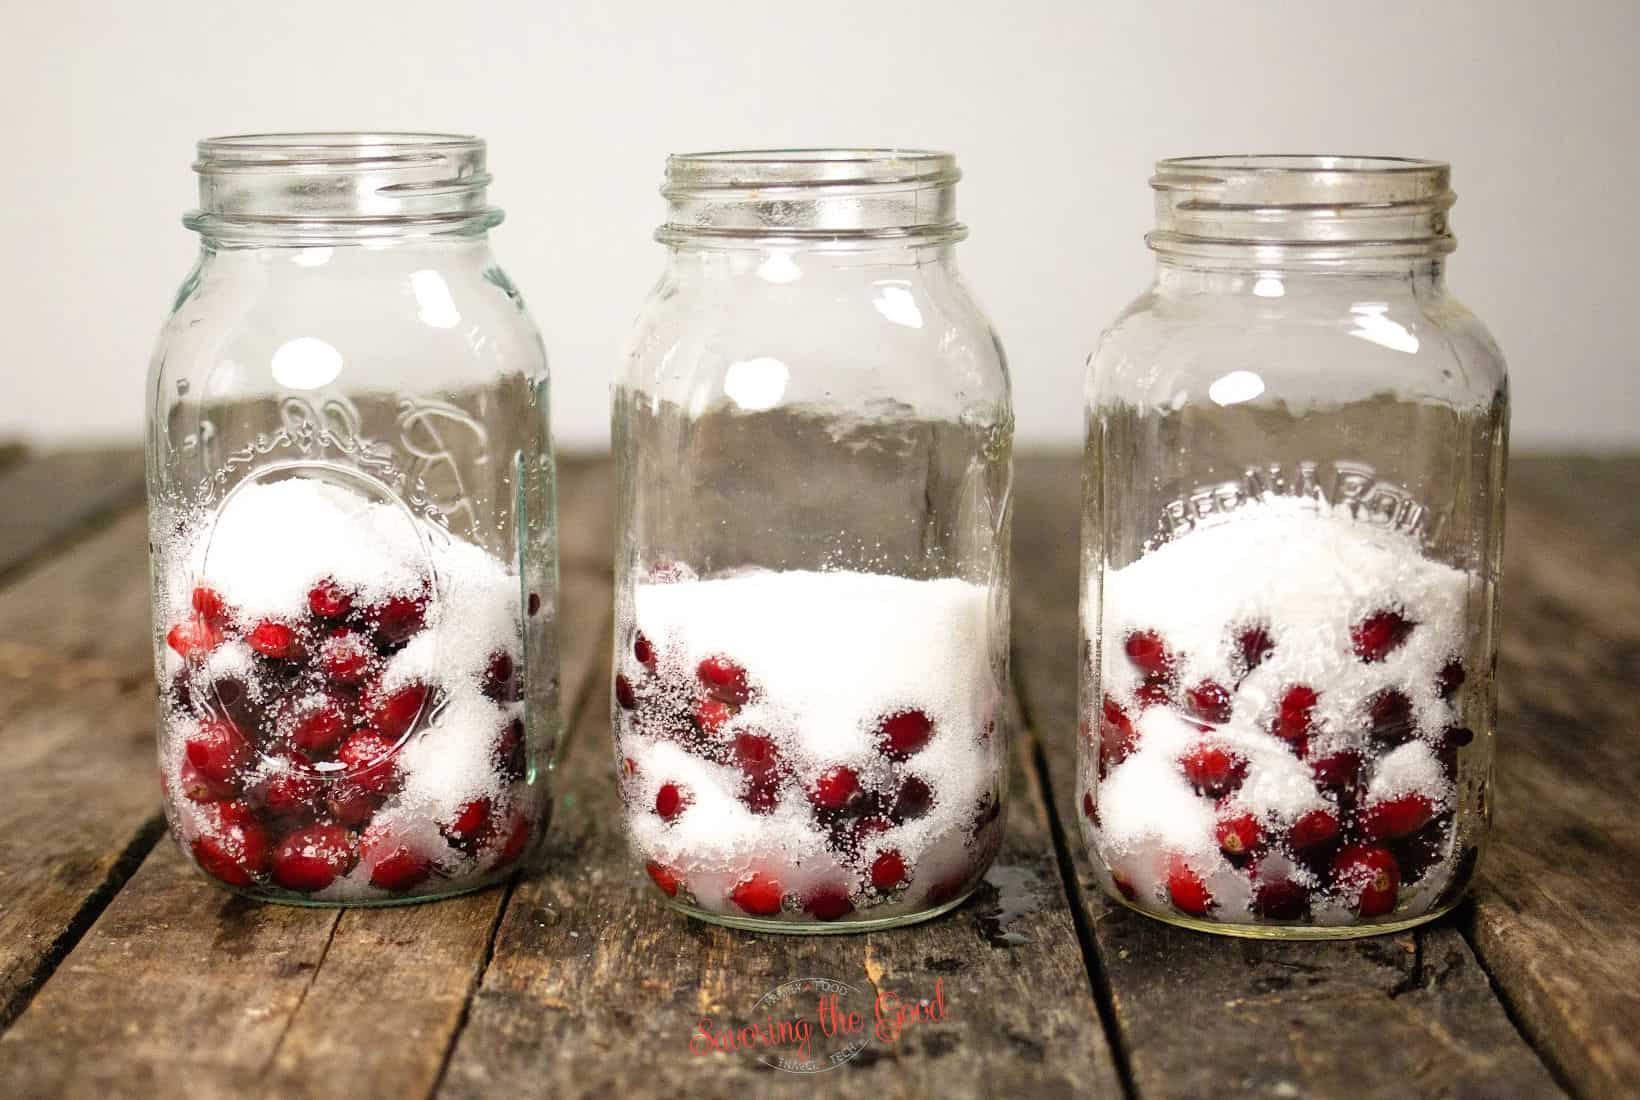
sugar covering fresh cranberries in clear quart jars.

Add Sugar

To the cranberries add the sugar. Adjust to your taste.

3 fresh cranberry juice ingredients in jars, before lids added.

Fill the jars with water

I just water from my refrigerator because it is filtered. If you like your tap water, use your tap water. Fill the jars with a ½ inch headspace.

sugar, water, fresh cranberries in clear quart jars closed with 2 part ring.

Add the lid and ring

Wipe rims of the jars before adding a clean lid and a canning ring. Finger tighten the screw bands.

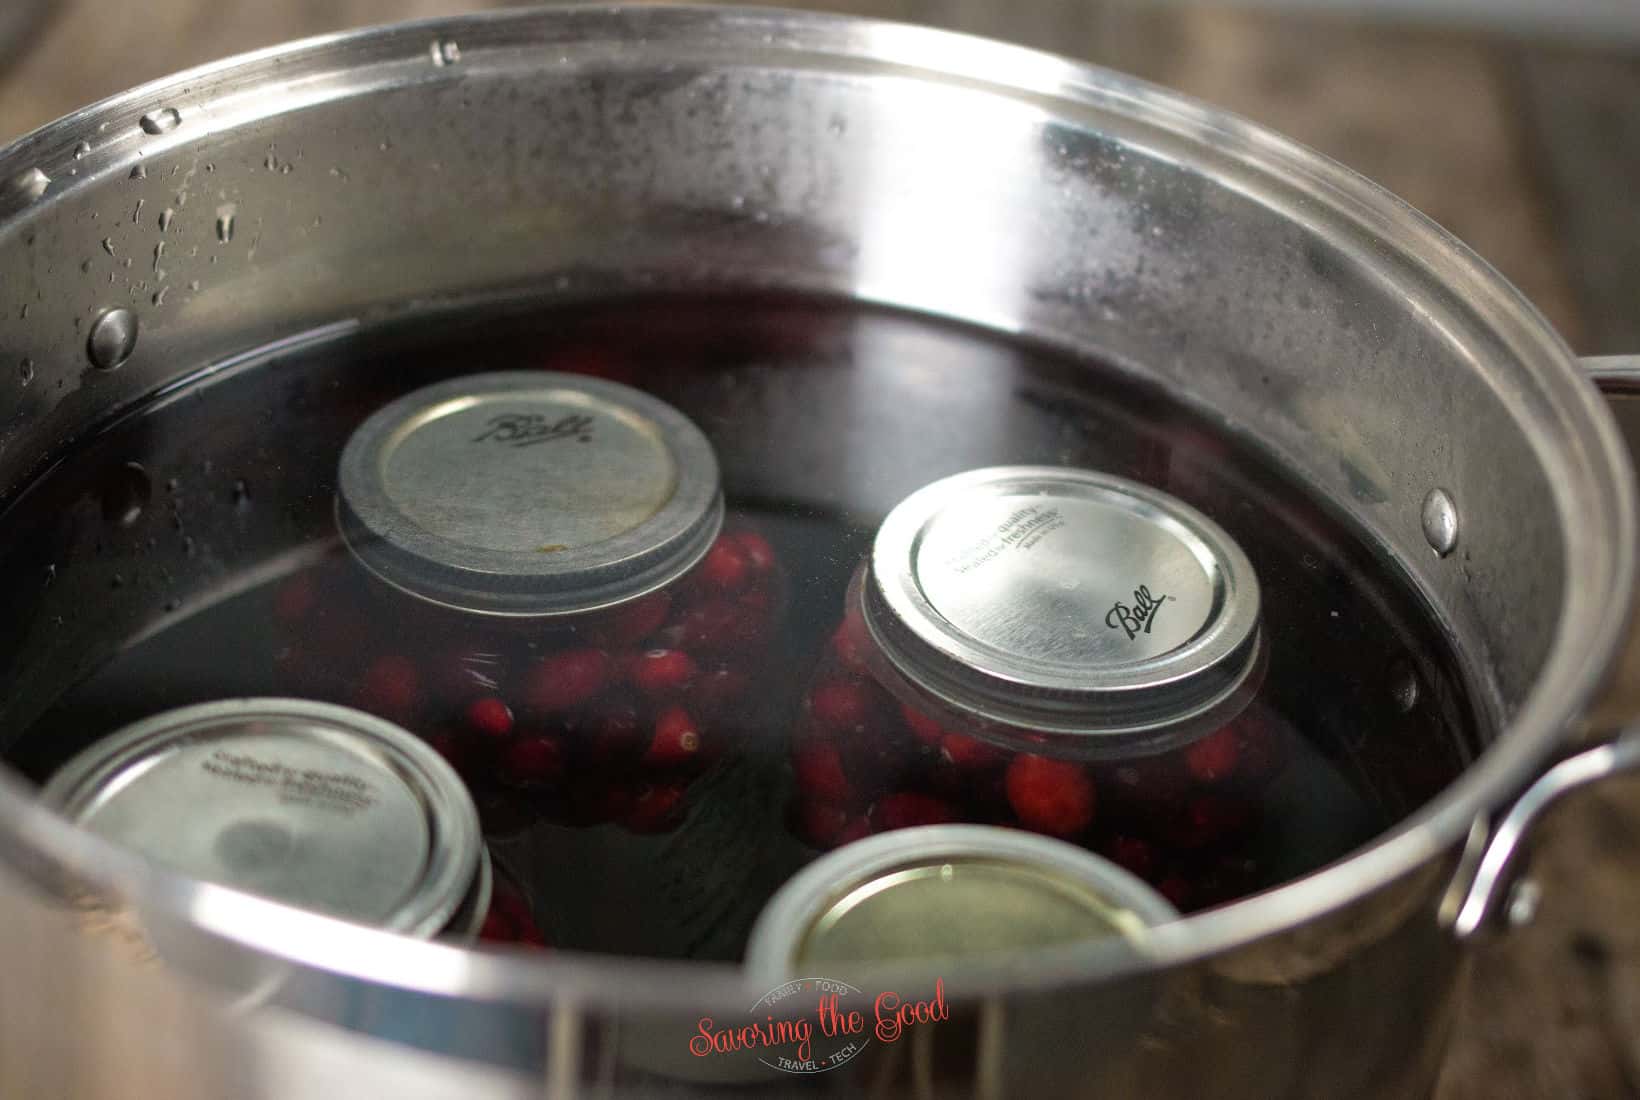
4 quart jars of cranberry juice processing in the water bath canner.

Canning

  • Lower the jars into a cool water bath, making sure the water level is at least 2 inches above the top of the jars.
  • Turn the heat to high and bring the canner to a full rolling boil.
  • Once it has reached a boil, process pints for 20 minutes over medium-high heat.
4 jars of cranberry juice fresh out of the canner.

Cooling

Remove the jars to a heat-safe surface and allow them to come to room temperature.

There will be a separation of the sugar, cranberry extraction and burst cranberries. 

canned cranberry juice.

Check lids

Once the hot jars have cooled, check the lids to make sure they do not have any give to them. Give the jars a good shake to incorporate the sugar syrup in the bottom with the rest of the cranberry juice. The sugar syrup will continue to extract the cranberry juice in the jar as the jars sit on the shelf.

canned cranberry juice.

Enjoy!

To enjoy your cranberry juice, open the jars and pour the contents through a fine mesh strainer to remove the cooked cranberries before serving the delicious juice.

Did you make this recipe?

Do you have feedback that would be helpful to others? If so can help this small business owner by leaving a rating and a review in the comments section? Thank you for being part of the Savoring The Good Community. ~ Sarah

canned cranberry juice.

Canning Cranberry Juice

A straightforward cranberry juice recipe perfect for canning. Capture the tart, refreshing taste of fresh cranberries with this easy homemade juice and preservation method.
5 from 3 votes
Print Pin Rate
Course: Canning Recipes
Cuisine: American
Prep Time: 5 minutes minutes
Cook Time: 20 minutes minutes
Water Heat Time: 30 minutes minutes
Total Time: 55 minutes minutes
Servings: 4 quarts
Calories: 454
Author: Sarah Mock

Ingredients

  •  
    6 Cups cranberries Fresh
  • A 4-pound bag of Domino granulated pure cane sugar with a yellow and white design, showing nutrition information and branding-perfect for sweetening recipes like rhubarb sour or your favorite desserts.2 Cups Sugar or sweetener of choice
  •  
    Water
US Customary - Metric
Follow Savoring The Good On PinterestFollow @SavoringTheGood or tag #STGRecipes!

Instructions

  • Add cranberries to clean quart canning jars. If adding any spices, apple slices or orange zest, include them in this step.
    6 Cups cranberries
  • To the cranberries add the sugar. In this recipe, I added ½ cup of sugar per jar. I think next batch I will cut that back to ¼ cup. Adjust to your taste.
    2 Cups Sugar
  • Fill the jars with water. I just water from my refrigerator because it is filtered. If you like your tap water, use your tap water. Fill the jars to within ½ inch of the top.
    Water
  • Wipe the rim of the jar before adding a clean lid and a canning ring. Finger tighten.
  • Lower the jars into a cool water bath, making sure the water level is at least 2 inches above the top of the jars. Turn the heat to high and bring the canner to a boil. Once it has reached a boil, process them for 20 minutes.
  • Remove the jars to a heat-safe surface and allow them to come to room temperature. There will be a separation of the sugar, cranberry extraction and burst cranberries.
  • Once the jars have cooled, check the lids to make sure they do not have any give to them. Give the jars a good shake to incorporate the sugar syrup in the bottom with the rest of the cranberry juice. The sugar syrup will continue to extract the cranberry juice in the jar as the jars sit on the shelf.

Notes

For best flavor results, allow the juice to sit in a cool dry place for a minimum of 4-6 weeks before opening. That being said, I have opened them after a few days and they were delicious. They were MORE delicious after a month.
Be sure to wash the cranberries before adding them to the jars. You will be surprised how much bog dirt, leaves and even little sticks are in the cranberry bags. Also, remove any bruised to soft cranberries.
Want to share when you made this recipe?Follow @SavoringTheGood & tag #STGRecipes!
Nutrition Facts
Canning Cranberry Juice
Serving Size
 
1 quart
Amount per Serving
Calories
454
% Daily Value*
Fat
 
1
g
2
%
Saturated Fat
 
0.01
g
0
%
Polyunsaturated Fat
 
0.1
g
Monounsaturated Fat
 
0.03
g
Sodium
 
4
mg
0
%
Potassium
 
122
mg
3
%
Carbohydrates
 
118
g
39
%
Sugar
 
106
g
118
%
Protein
 
1
g
2
%
* Percent Daily Values are based on a 2000 calorie diet.
**Nutritional facts are just estimates. Please utilize your own brand nutritional values to double check against our estimates.
Like this recipe card? Want one for your site?Check out WP Recipe Maker!

While I love using my homemade cranberry juice for cocktails, my kids will use it in one of these many mocktails with cranberry juice.

Reader Tip

Spice it up by adding:

  • 1 ½ cups cranberries
  • 1 Tablespoon Dried elderberries
  • ½ teaspoon Chinese 5 spice
  • 2 Tablespoons lime juice
  • ½ palled ginger, sliced
  • 1 cup sugar

Added boiling water and stirred to mix sugar so I didn't end up with a hard lump of sugar…

From Dina

5 Days To Canning Confidence

Storage Tips

For best flavor results, allow the tart juice to sit in a cool dark place for a minimum of 4-6 weeks before opening. That being said, I have opened them after a few days and they were delicious. They were MORE delicious after a month.

Homemade cranberry juice will elevate your cranberry and vodka cocktail to the next level. Drink it straight out of the glass knowing that your canned cranberry juice has less sugar than grocery store-bought cranberry juice. I have been combining equal parts of cranberry juice and tonic for a refreshing drink while I write this cranberry juice recipe for you. 

Frequently asked questions, answers and tips:

Do you have to use sugar at all?

Yes. You need to use at least ¼ cup of sugar per quart of juice so that the sugar pulls the juice out of the cranberries. Much like sugar pulls juice from strawberries to make strawberry syrup, sugar will also pull cranberry juice from cranberries to make juice.

Can frozen cranberries be used?

If you are not able to find fresh cranberries, frozen cranberries can be substituted. No need to adjust the measurements.


Sarah Mock of savoringthegood.com headshot 2022

I am Sarah Mock. Welcome!

Sarah Mock is a classically trained Chef and a graduate of Johnson & Wales University. A culinary blogger for 17 years, Sarah helps the home cook prepare her recipes with professional results.

Get to know me

as seen in:

Logos of Hersheyland, ABC News, and Good Day PA are showcased in a seamless row, providing a snapshot of popular brands.

Hersheyland Nightline Good Day Pa!

The vibrant design showcases the iconic logos of Pinterest, Rachael Ray, and Jell-O set against a bold red background. Sorry, the provided description doesn't offer enough detail to suggest important SEO keywords.

Pinterest Rachael JELL-O


What To Serve With Pork & Sauerkraut (21 Sides)

New Year's Day means pork and sauerkraut to bring good luck in the new year. But what do you serve with pork and sauerkraut? These are the best side dishes to serve with your New Year's meal.

Start your meal with the best pork and sauerkraut recipe my grandma passed me. If the oven recipe is not in your plans you can make a crockpot pork and sauerkraut version. And if you want the most tender pork loin roast, make my sous vide pork and sauerkraut recipe.

I do suggest that if you have people who are not a fan of this traditional Pennsylvania Dutch meal make one of these pork loin crock pot recipes.

Mom will have a few hot dogs and apple juice for the kids and some homemade applesauce made with granny smith apples because she knows the kids are not fans of the tangy sauerkraut. Kids know when all things sauerkraut have touched their food.

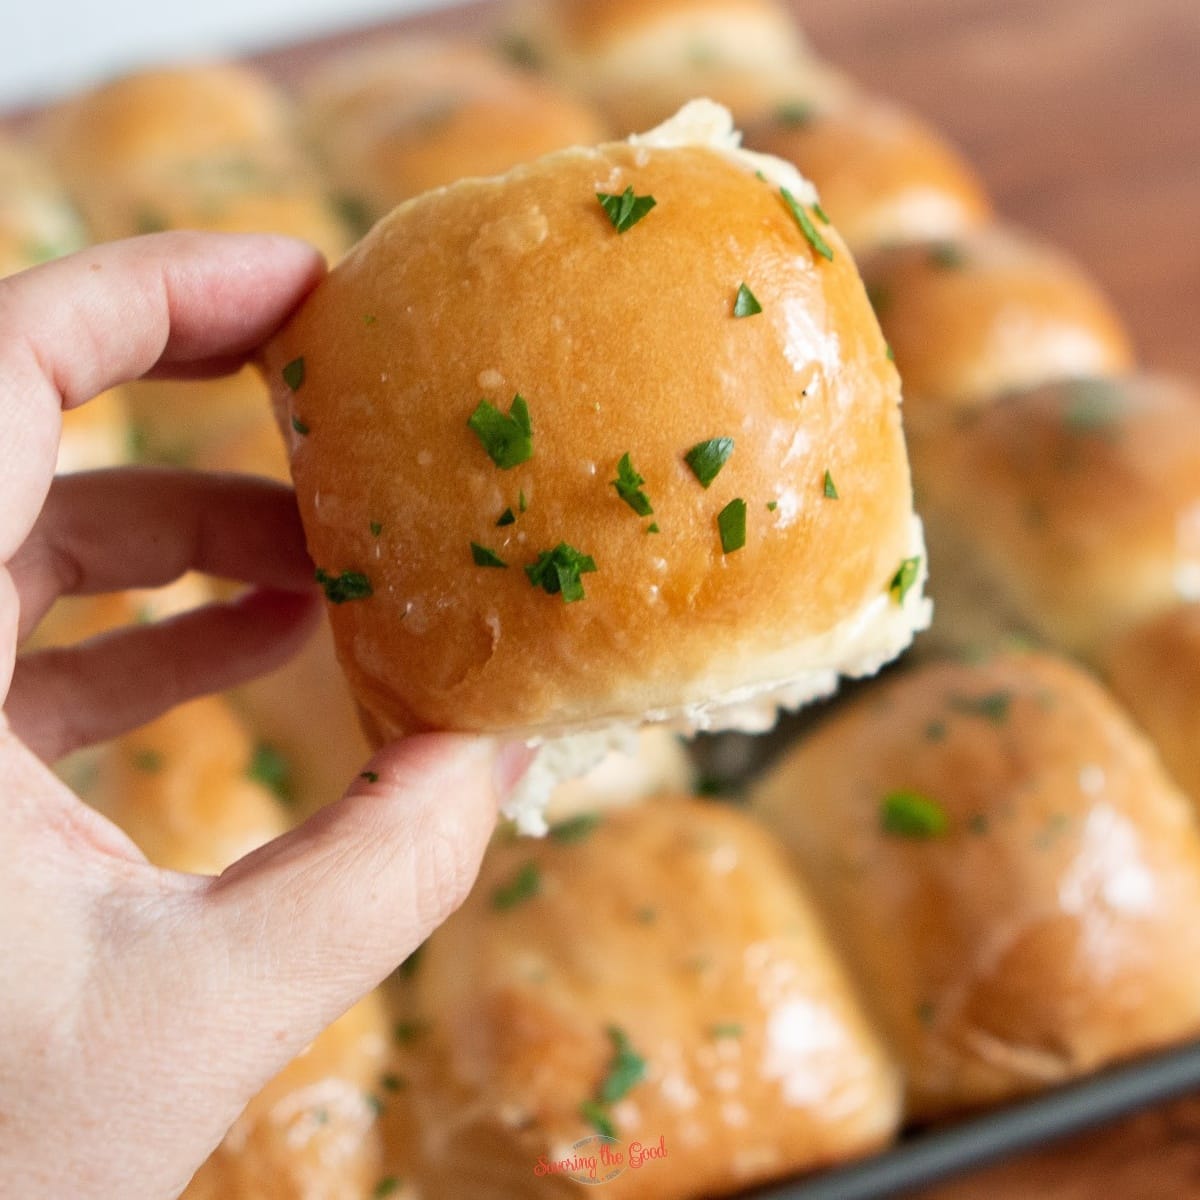
For sure we will have corn from the freezer and Aunt Cindy will make Rhodes rolls, because they are so easy! Beyond a simple dish of wide egg noodles smothered in butter, the following are traditional sides you can serve with pork and sauerkraut.

Amish Broccoli Salad with Cauliflower, Bacon & Raisins

Amish Broccoli salad hero image. square.
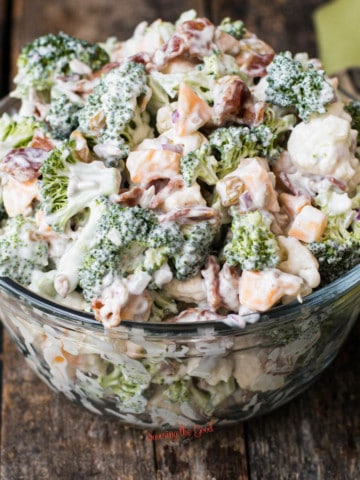
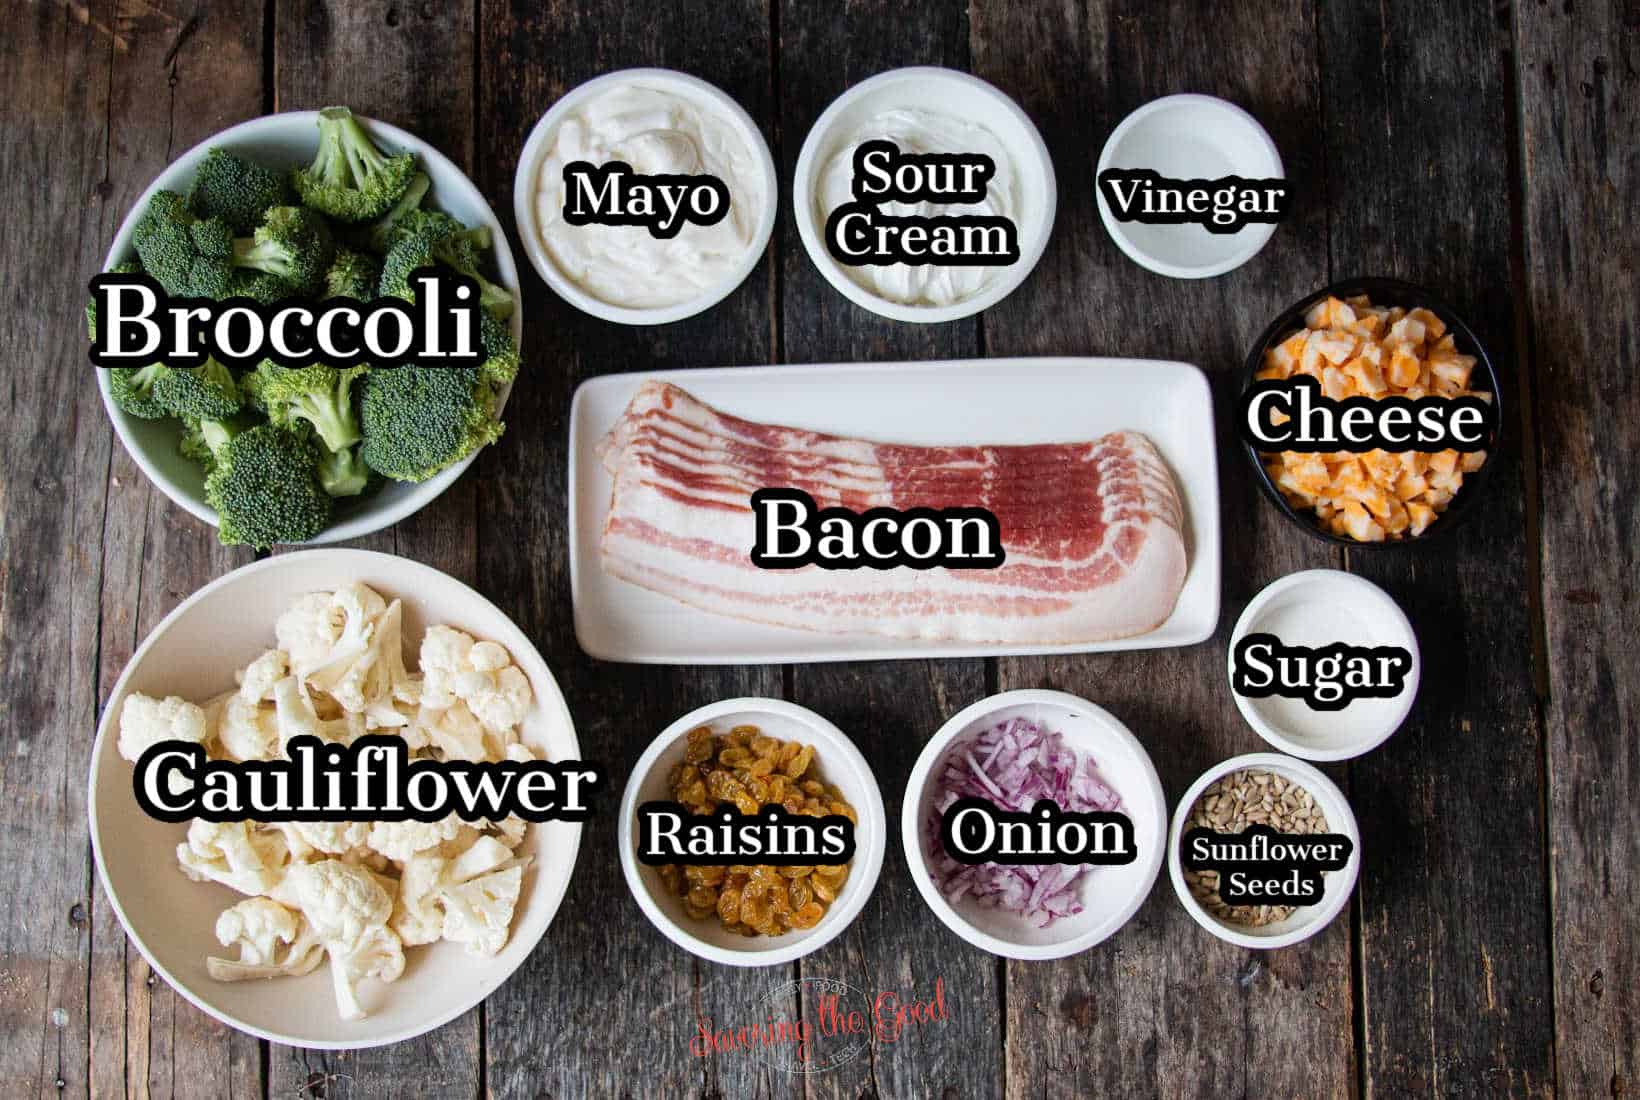
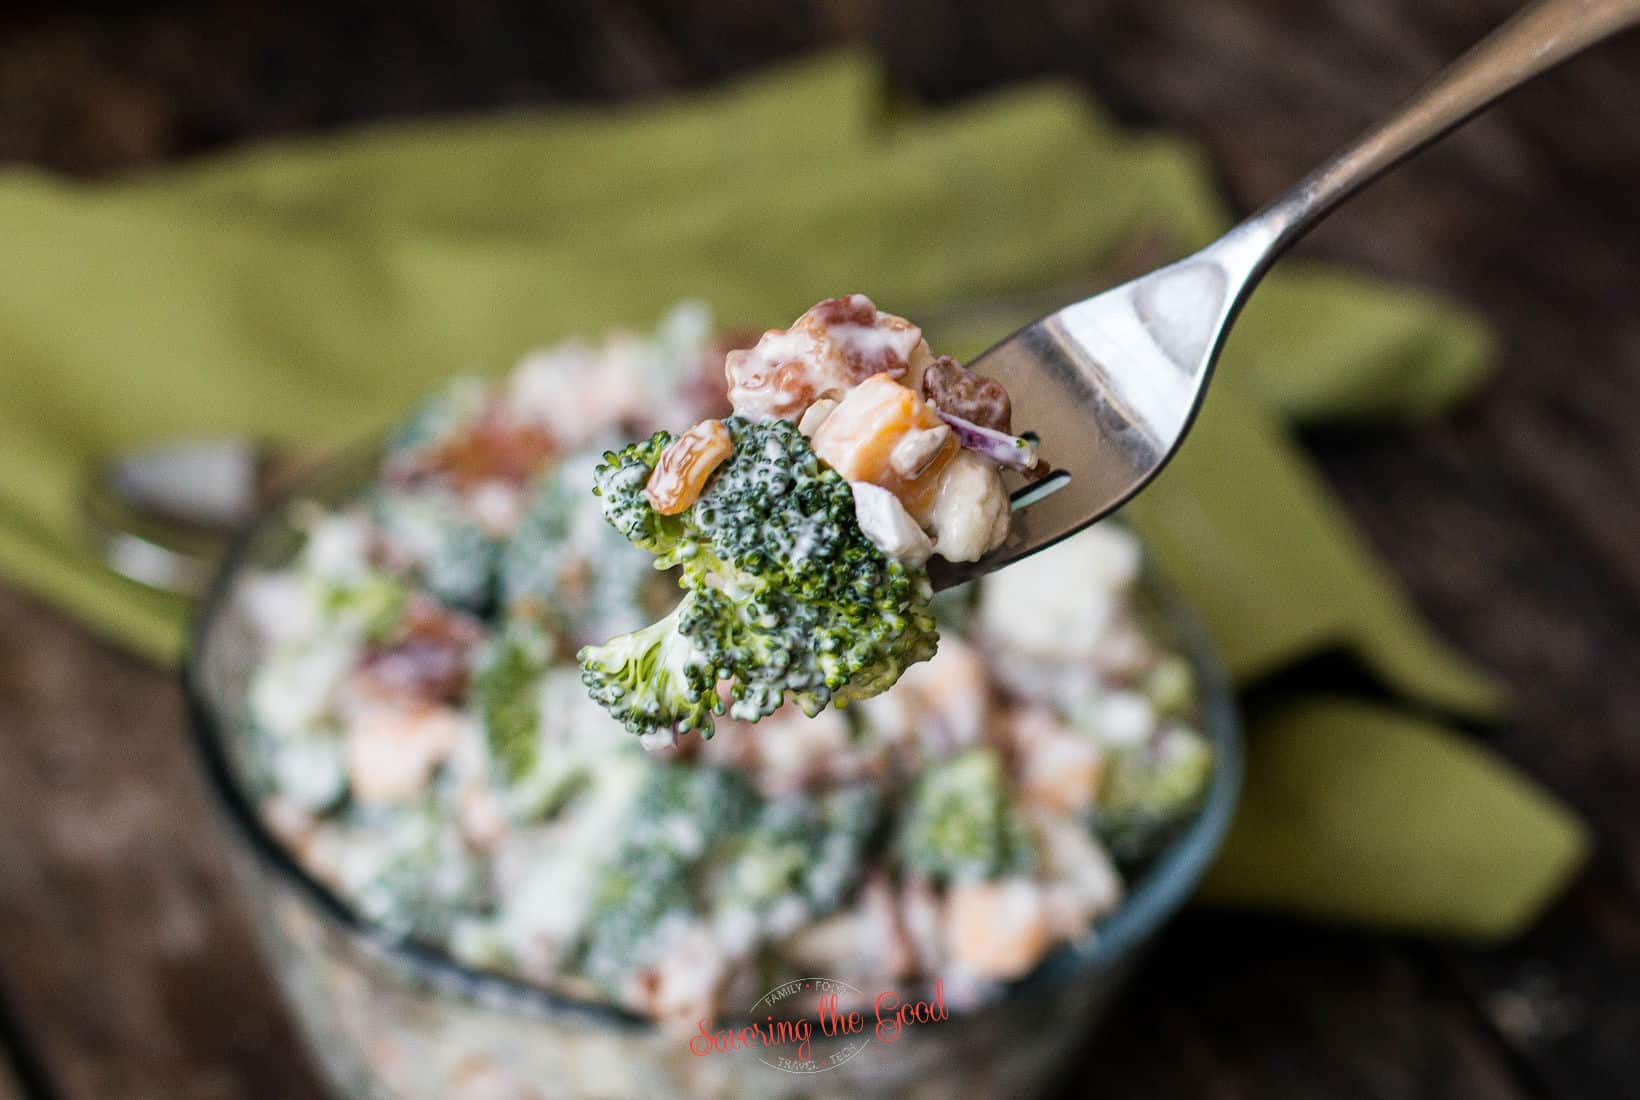
Traditional Amish broccoli and cauliflower salad recipe is a great way to enjoy chopped fresh broccoli florets and cauliflower florets at the peak of their freshness and flavors.
Get Full Recipe

Classic Hot Bacon Dressing (Pennsylvania Dutch Style)

Hot Bacon Dressing square image
Hot Bacon Dressing is also known as Pennsylvania Dutch hot bacon dressing, is the unexpected sweet, tangy and bacon-filled dressing that will dress up a simple spinach salad.
Get Full Recipe

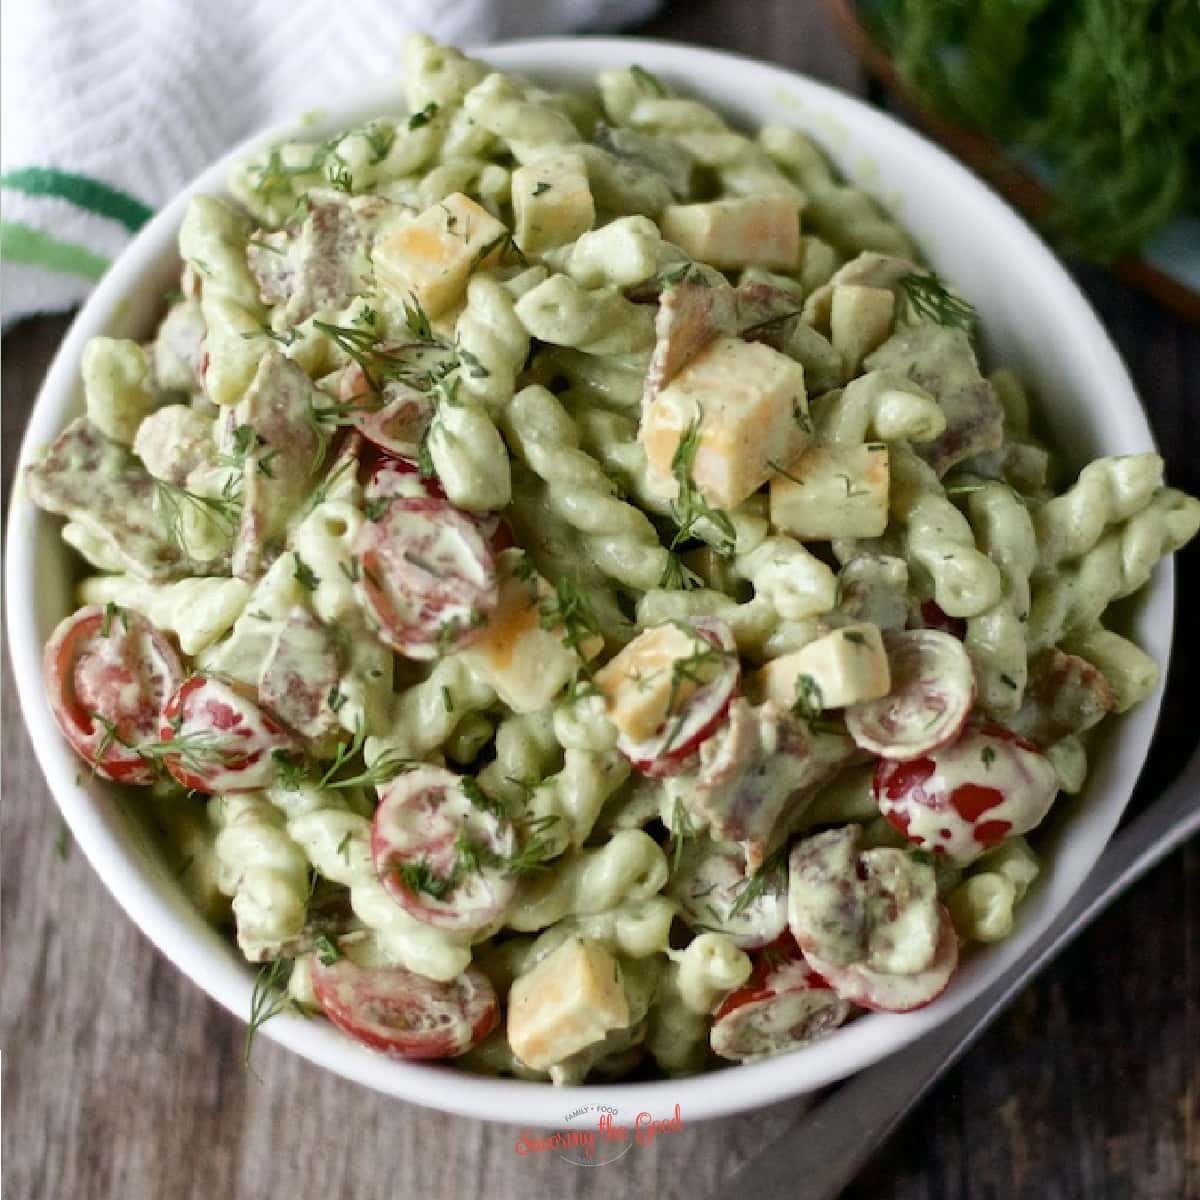
Dill Pickle Pasta Salad with Bacon and Cheese

Dill pickle pasta salad in a white bowl.
This creamy dill pickle pasta salad is packed with bacon, cheese, and tangy pickles. Perfect for summer picnics and potlucks-easy to make ahead.
Get Full Recipe

Crispy Oven-Roasted Brussels Sprouts with Parmesan

Crispy Brussels Sprouts on a sheetpan square image
Crispy Brussels Sprouts are the keto low-carb side dish that will turn everyone into a brussel sprout lover. This recipe for smashed brussel sprouts with parmesan cheese have crispy, cheezy edges and oven-roasted caramel goodness.
Get Full Recipe

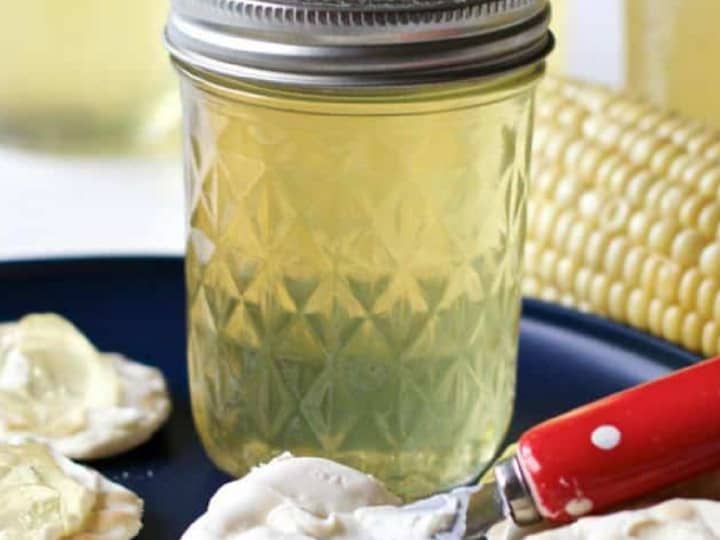
Corn Cob Jelly

corn cob jelly.
Use your leftover corn cobs and make old school corn cob jelly. The sweet corn kissed jelly adds a layer of sweet corn flavor to your favorite biscuits, corn bread, pancakes or what ever you like!
Get Full Recipe

Seasonal Favorite

Baked lattice top crust on an apple pie made with the Crisco pie crust recipe, showing flaky layers in the fluted edge.

This is my award-winning Crisco pie crust recipe; flaky, tender, and made with simple ingredients you already have.

Crisco Pie Crust

German Potato Salad with sausage

You'll love how creamy this savoury/smoky salad is! This German Sausage & Potato Salad recipe is the perfect summer side for your BBQs.
Get Full Recipe

Perogy Potato Salad (gluten-free)

If you are looking for potluck ideas and love perogies, you will love this perogy potato salad!
Get Full Recipe

Stuffed Cabbage Rolls

stuffed cabbage roll , tight shot with sauce
One of the comfort foods of my youth are stuffed cabbage rolls, also called Halupki. This is my family's cabbage roll recipe and you will be surprised how easy they are to make. This is the ultimate comfort food from the old country.
Get Full Recipe

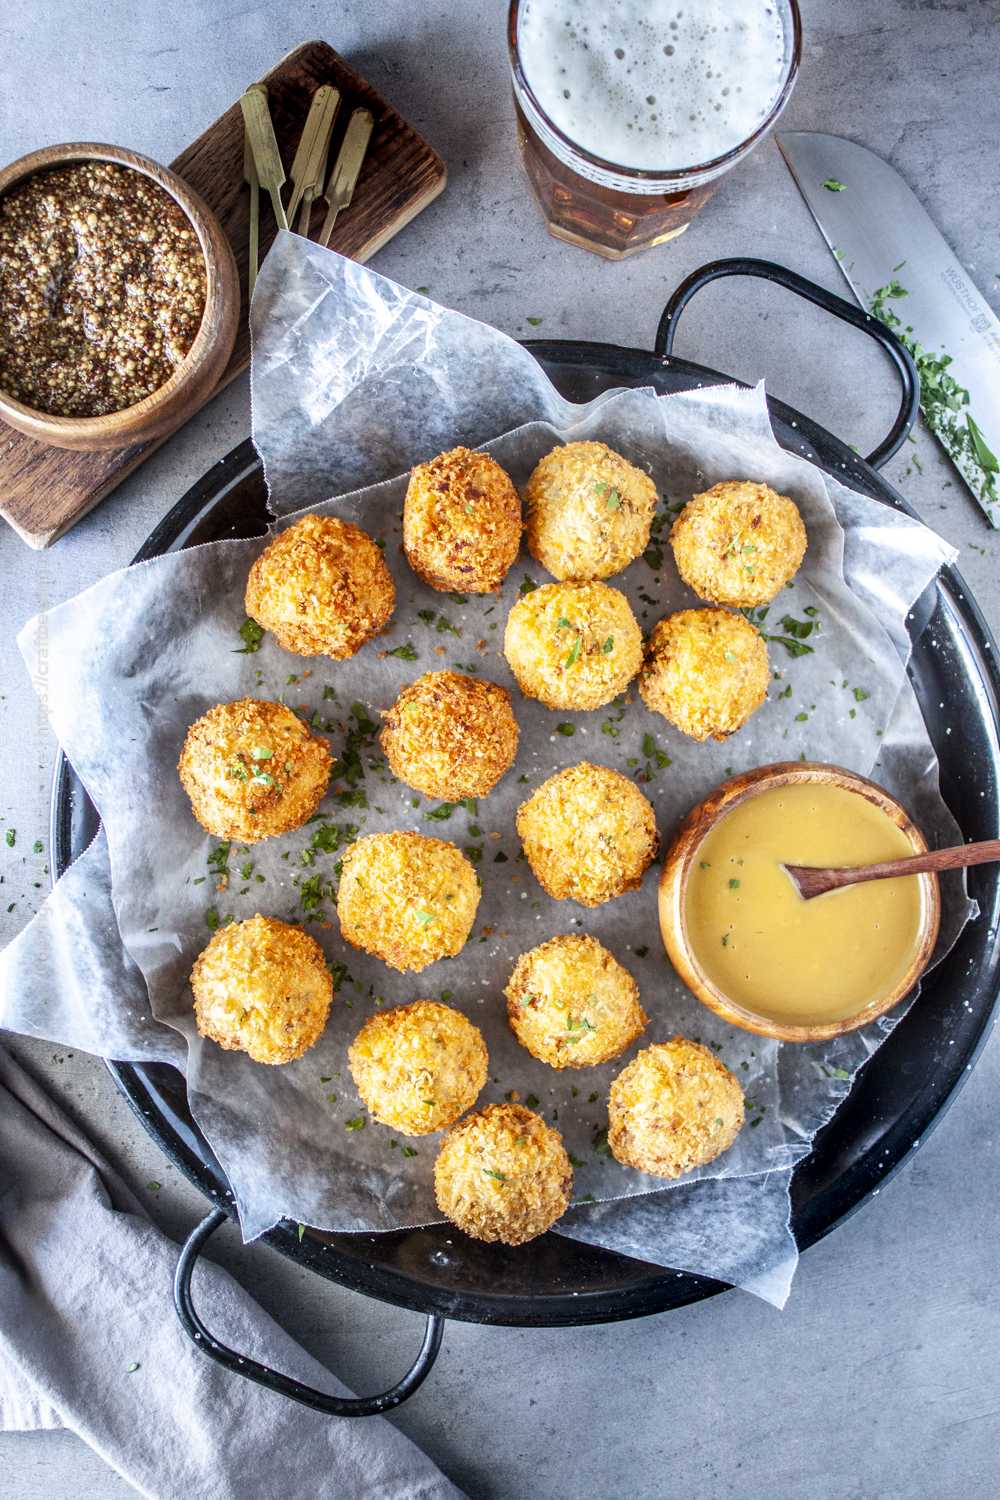
Sauerkraut Balls | Fried or Baked

Sauerkraut Balls | Fried or Baked
Sauerkraut fritters are crispy all-in-one bites of sauerkraut and bratwurst. A delicious spin on German beer garden food & great game day appetizer.
Get Full Recipe

Twice Baked Potato Casserole With Bacon

twice baked potato casserole recipe square image
Twice baked potato casserole is the easy cold weather comfort food recipe with all the flavors of a stuffed potato. Crisp bacon, cheddar cheese, sour cream and green onions fill every fork full of this kid friendly recipe.
Get Full Recipe

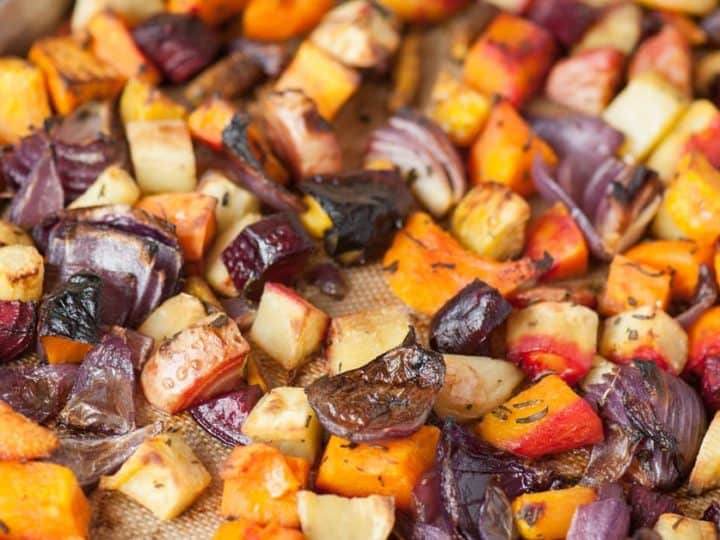
Roasted Root Vegetables

Fall is the perfect time to enjoy a rainbow of Roasted Root Vegetable as a perfect side dish to any weekday family dinner or holiday meal.
Get Full Recipe

Roasted Beets and Sweet Potatoes

This Roasted Beets and Sweet Potatoes recipe is a delish holiday side dish with root vegetables marinated in ginger, honey and orange zest!
Get Full Recipe

German Eggs in Mustard Sauce

A quick recipe for German Eggs in Mustard sauce - leftover hard boiled eggs in a creamy mustard sauce with dill.
Get Full Recipe

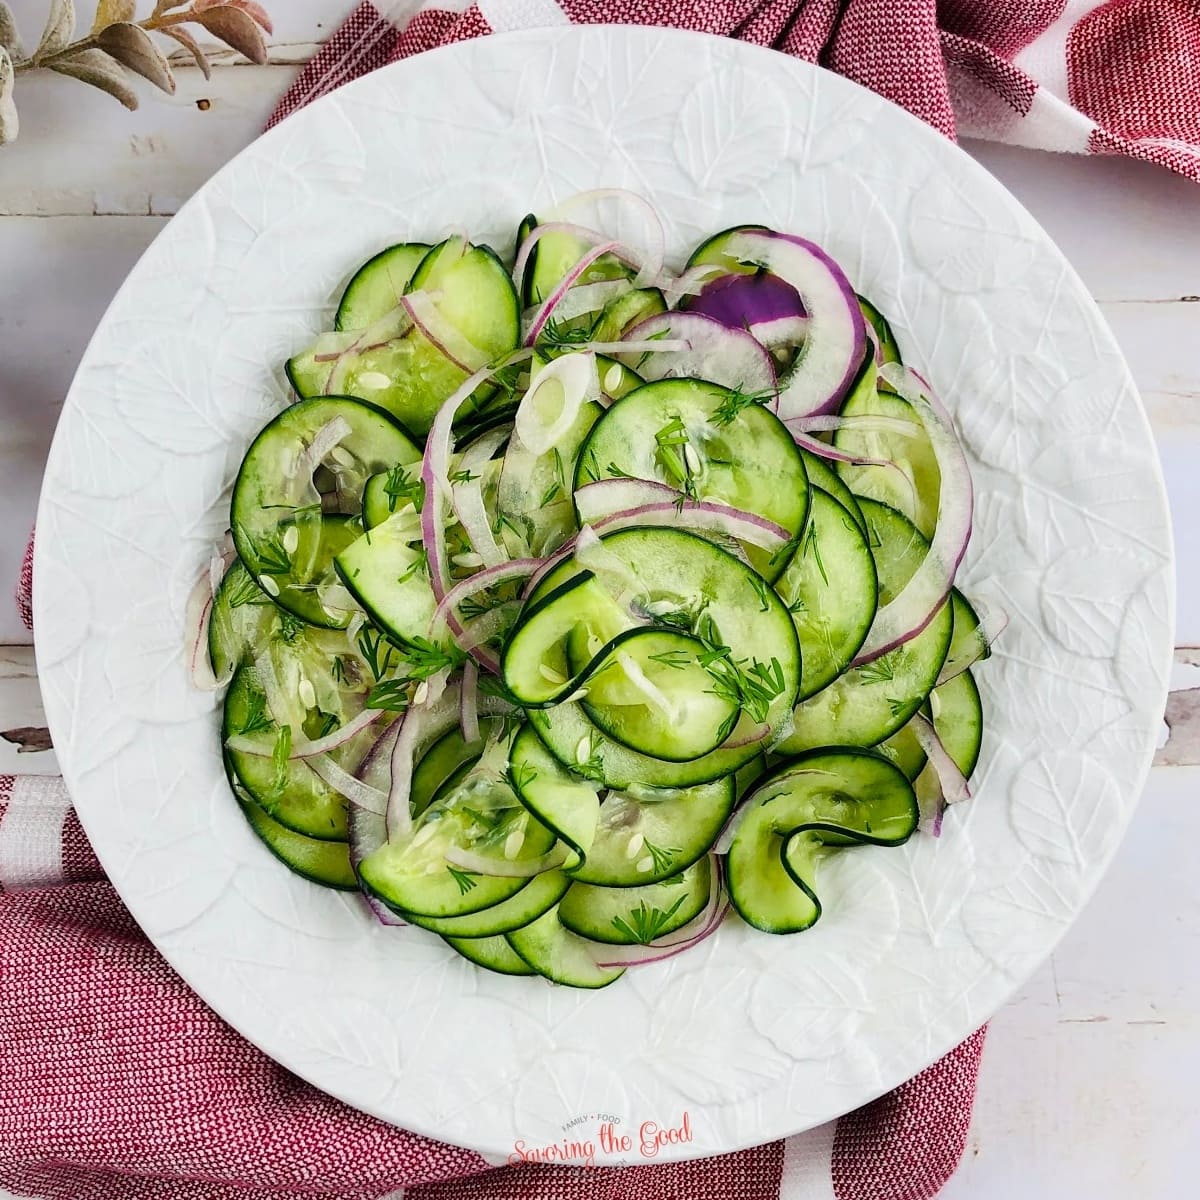
Cucumber Onion Salad

cucumber onion salad recipe on a white plate square image
This cucumber onion salad features crisp English cucumbers, fresh dill & thinly sliced red onion tossed with a sweet & tangy vinegar dressing.
Get Full Recipe

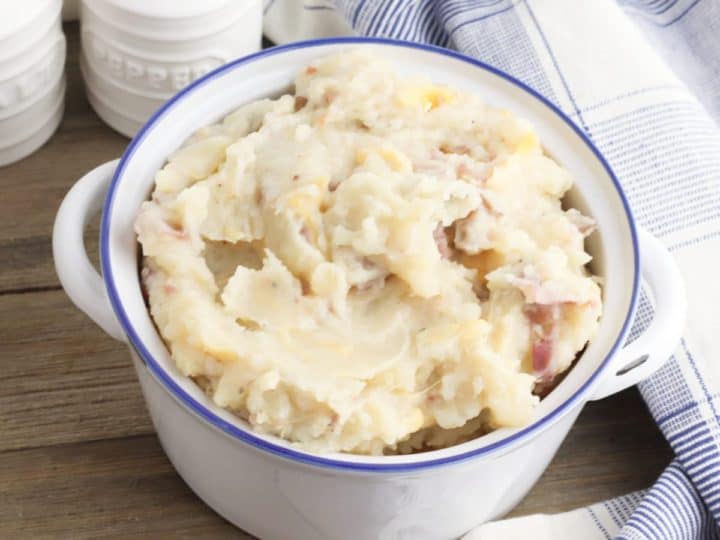
Slow Cooker Loaded Mashed Potatoes

Simple slow cooker loaded mashed potatoes are packed with flavor thanks to the sour cream, cheese, and bacon.
Get Full Recipe

Instant Pot Mashed Potatoes

These Instant Pot Mashed Potatoes are faster and just as tasty as stovetop mashed potatoes.
Get Full Recipe

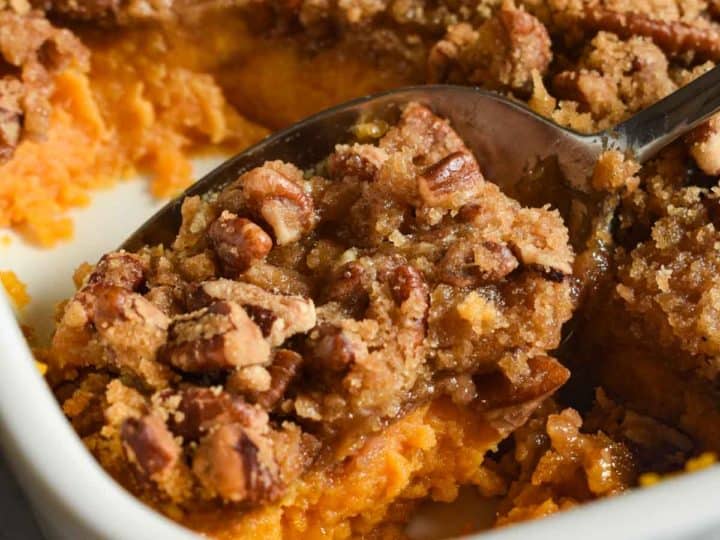
Sweet Potato Casserole with Pecan Topping

Sweet Potato Casserole with Pecan Topping is the perfect holiday side dish! It's got smooth mashed sweet potatoes & a crunchy pecan streusel!
Get Full Recipe

Twice Baked Potatoes - Make Ahead and Freezer Friendly!

A drool-worthy side dish, these Twice Baked Potatoes are SO good! Make a lot and freeze some for another day (instructions included for freezing below!)
Get Full Recipe

Funeral Potatoes Recipe

Funeral Potatoes, otherwise known simply as potato casserole, is a cheesy and creamy side dish with a crunchy top!
Get Full Recipe

Old-Fashioned Apple Dumplings

Whole apples are wrapped in pastry and baked with plenty of spices and a delicious syrup for these Old-Fashioned Apple Dumplings
Get Full Recipe

Baked Apples

Delicious Baked Apples could be my favorite warm, dessert, stuffed with cinnamon sugar, nut filling and baked until warm and caramelized.
Get Full Recipe


Sarah Mock of savoringthegood.com headshot 2022

I am Sarah Mock. Welcome!

Sarah Mock is a classically trained Chef and graduate of Johnson & Wales University. A culinary blogger for 15 years Sarah helps the home cook prepare her recipes with professional results.

Get to know me

as seen in:

Logos of Hersheyland, ABC News, and Good Day PA are showcased in a seamless row, providing a snapshot of popular brands.

Hersheyland Nightline Good Day Pa!

The vibrant design showcases the iconic logos of Pinterest, Rachael Ray, and Jell-O set against a bold red background. Sorry, the provided description doesn't offer enough detail to suggest important SEO keywords.

Pinterest Rachael JELL-O

45 Meals Using Shredded Chicken

This collection of shredded chicken recipes will give you great ideas for an easy weeknight dinner. Busy weeknights just got simpler when your weekly meal prep includes an easy shredded chicken recipe.

This collection of shredded chicken recipes will give you great ideas for an easy weeknight dinner. Busy weeknights just got simpler when your weekly meal prep includes an easy shredded chicken recipe.

It doesn't matter if you start with a store-bought rotisserie chicken, use a pressure cooker to cook chicken quickly or make a large batch of crockpot shredded chicken! Your dinner tonight should be one of these best shredded chicken recipes.

It doesn't matter if you start with a store-bought rotisserie chicken, use a pressure cooker to cook chicken quickly or make a large batch of crockpot shredded chicken! Your dinner tonight should be one of these best shredded chicken recipes.

Plus, with tips on how to meal prep and freeze shredded chicken, these recipes are perfect for busy weeknights or meal planning. Don't miss out on these easy weeknight dinners with shredded chicken.

How To Make Shredded Chicken

Make a big batch of cooked chicken and shred it using one of these three chicken shredding methods. I find that cooked chicken breast is the easiest to shred but boneless skinless chicken thighs will have the most flavor.

  • Two Fork Method: Place chicken on a cutting board, and use two forks to pull at the meat in opposite directions going against the grain of the meat.
  • Mixer: Place chicken in a stand mixer fitted with the paddle attachment or use a hand mixer with the beaters in place. Turn the mixer to a low speed and gradually increase the mixer speed as the chicken shreds.
  • Blender or Food Processor: Place leftover chicken in the blender or a food processor fitted with the blade attachment and pulse it at a low speed. Pulse until your desired texture of the shredded chicken is reached.

Crock-Pot Shredded Chicken Recipes

The simplicity of a slow cooker allows even busy cooks to make delicious shredded chicken recipes for endless easy recipes possibilities

Slow Cooker Chicken Enchilada Casserole Recipe

A Crockpot chicken enchilada casserole soup, featuring a hearty bowl of chicken enchilada soup topped with shredded cheese, sour cream, sliced black olives, and cilantro.
Easy, slow cooker chicken enchilada casserole featuring chicken, tortillas, enchilada sauce, and lots of cheese will be your next favorite crock pot recipe. 
Get Full Recipe

Crockpot Mexican Corn and Chicken Soup

crockpot mexican corn soup
This crockpot Mexican corn soup has layers of flavor that include shredded chicken, black beans, creamed corn, Mexican spices as well as a creamy broth. Top this easy slow cooker soup with your choice of fresh squeezed lime, avocado, cilantro, sour cream and jalapeño. Crockpot Mexican corn and chicken soup is sure to bring your favorite fiesta flavors to your table.
Get Full Recipe

Crockpot Chicken Alfredo

Chicken and pasta in a crock pot.
credit: valentinascorner.com
The BEST Crockpot Chicken Alfredo recipe, so easy to make! Juicy shredded chicken and pasta in a creamy homemade Alfredo Sauce. This is a great recipe for busy dinners and easy cleanups.
Get Full Recipe

Slow Cooker Buffalo Chicken Dip

A person is dipping a spoon into a bowl of shredded chicken buffalo dip.
credit: wondermomwannabe.com
This Slow Cooker Buffalo Chicken Dip is the perfect game-day appetizer! It's so easy to make and always a hit with family and friends.
Get Full Recipe

Slow Cooker Hot Honey Chicken Sandwiches

Slow Cooker Hot Honey Chicken Sandwiches
credit: persnicketyplates.com
An easy, spicy dinner idea made right in the crock pot. Pulled chicken cooked in a hot honey sauce and then piled onto your favorite bun. The perfect slow cooker meal for any time of year!Probably in my top 10 of favorite shredded chicken dinner recipes.
Get Full Recipe

Crock Pot Creamy Chicken Noodle Soup

A bowl of chicken noodle soup with carrots and noodles.
credit: thisisnotdietfood.com
A hearty soup loaded with shredded chicken, veggies and egg noodles all in a creamy chicken chicken broth.
Get Full Recipe

Slow Cooker Chicken Burrito Bowl

A bowl of mexican chicken rice with avocado, corn and lime.
credit: joyousapron.com
Flavorful, Mexican-inspired shredded chicken cooked in a Crockpot combined with rice, beans, corn, avocado, a squeeze of lime juice and drizzled with a delicious cilantro lime dressing. It's a simple chicken burrito bowl dinner packed with so much yum!
Get Full Recipe

Slow Cooker Chicken Teriyaki

Pulled pork in a white bowl with green onions.
credit: www.tosimplyinspire.com
This easy Slow Cooker Chicken Teriyaki recipe is cooked with chicken breasts or thighs with honey, garlic, soy sauce that makes the perfect homemade sauce. Serve it in a bowl over rice with a vegetable like broccoli for a healthy balanced meal.This is one of the best recipes with shredded chicken.
Get Full Recipe

Slow Cooker Cream Cheese Chicken

A bowl of chicken salad in front of an instant pot.
credit: simplystacie.net/
Slow Cooker Cream Cheese Chicken simmers in a cream cheese sauce with Italian seasoning, garlic, celery seed and cream of mushroom soup.
Get Full Recipe

Olive Garden Copycat Chicken Gnocchi Soup

A bowl of chicken chowder with carrots and spinach.
credit: persnicketyplates.com
Super easy Chicken Gnocchi Soup made in the crockpot - filled with shredded chicken, gnocchi, and spinach.
Get Full Recipe

Slow Cooker Honey Garlic Chicken

Pulled pork in a white bowl with a spoon.
credit: tosimplyinspire.com
A simple and absolutely delicious meal to have ready when you get home in the evening. Serve over rice with a side of broccoli or zucchini.Modify your meta description by editing it right here
Get Full Recipe

Slow Cooker Salsa Verde Chicken

Shredded chicken in a pot with lemon juice.
credit: ovebakesgoodcakes.com
Chicken breasts slow-cooked in salsa verde sauce making the perfect addition to tacos, burritos, and so many other dishes!
Get Full Recipe

Instant Pot Shredded Chicken Recipes

I have these recipes separated into different sections to help you find the recipe that fits the cooking method you want to use. I also have a great list of chicken quarters recipes you will want to check out!

Instant Pot BBQ Shredded Chicken

Instant pot pulled pork sliders.
credit: wondermomwannabe.com
This Instant Pot BBQ Shredded Chicken is one of the easiest IP recipes! Just 2 ingredients and the Instant Pot does all the work. Turns out perfect every time!
Get Full Recipe

Instant Pot Chicken Taco Soup

A bowl of chicken and corn soup in front of an instant pot.
credit: onewholesomelife.com
This Instant Pot Chicken Taco Soup recipe is packed full of protein. It's a savory broth filled with lean chicken breast, bean, corn, and spices.
Get Full Recipe

Instant Pot Shredded Chicken Tacos Recipe

Chicken tacos with guacamole and guacamole on a red plate.
credit: pipandebby.com
These are the BEST instant pot shredded chicken tacos! Using only 4 ingredients, the meat is flavorful, tender and juicy every time.
Get Full Recipe

Instant Pot Chicken Enchilada Tacos

Chicken tacos with guacamole and salsa on a wooden cutting board.
credit: wondermomwannabe.com
These Instant Pot Chicken Enchilada Tacos are a tasty way to shake up Taco Tuesday. They're full of flavor and so easy to make!
Get Full Recipe

Instant Pot Thai Chicken Rice Bowls

Instant Pot Thai Chicken Rice Bowls
credit: wondermomwannabe.com
These Instant Pot Thai Chicken Rice Bowls are packed with traditional Thai flavors and unbelievably easy to make. Perfect for dinner or lunch!
Get Full Recipe

Instant Pot Shredded Chicken - 6 Flavor Variations

Shredded chicken in a bowl with lemons and parsley.
credit: theflavoursofkitchen.com
Instant Pot Shredded Chicken is moist, juicy and quick to make. I have 6 exciting flavours of shredded chicken along with the video for you, perfect to add in salads, soups, wraps, tacos or anything that calls for cooked chicken.
Get Full Recipe

Instant Pot "Crack" Chicken Chili

Mexican chicken casserole on a spoon.
credit: .thechunkychef.com
Creamy Crack Chicken Chili made in 30 minutes in the Instant Pot. Made with simple ingredients, it's the perfect weeknight dinner the whole family loves!
Get Full Recipe

Instant Pot Honey Garlic Chicken

A bowl of rice with chicken and broccoli.
credit: easyweeknightrecipes.com
You'll love this sweet and savory Instant Pot Honey Garlic Chicken recipe. It's better than takeout and ready in an instant - well, less than 30 min!
Get Full Recipe

Shredded Chicken Casserole Recipes

Looking for and easy dinner with shredded chicken? From classic comfort dishes like chicken pot pie and enchiladas to more unique recipes like chicken shawarma and Greek chicken lettuce wraps, there's something for everyone.

Chicken Casserole with Doritos

Dorito Chicken Casserole in a black bowl next to a pan of Dorito Chicken Casserole
Dorito chicken casserole is an easy chicken casserole that my family loved.  This is a cheesy chicken dish that has the crunch of Doritos and the spice of rotel tomatoes.
Get Full Recipe

Easy Sour Cream Chicken Enchiladas (Family-Friendly!)

glass pan of Sour Cream Chicken Enchiladas with a serving spoon to the right side
This is my favorite sour cream chicken enchiladas recipe! My family loves Mexican food and I love how easy this chicken enchilada casserole is to make.
Get Full Recipe

Buffalo Chicken Dip Egg Rolls (Air Fryer & Stovetop Instructions)

one buffalo chicken dip egg roll sliced open, showing texture inside stacked on top of other egg rolls
This buffalo chicken dip egg roll recipe is the combination of all the buffalo chicken dip ingredients, wrapped in an egg roll wrapper and fried to a crips.
Get Full Recipe

Chicken Broccoli Rice Casserole

chicken broccoli rice casserole square image.
This simple chicken broccoli rice casserole recipe is ready in under 45 minutes and is the easiest weeknight meal.
Get Full Recipe

Buffalo Chicken Tater Tot Casserole

A white dish with tater tots and sour cream.
credit: justisafourletterword.com
If you love buffalo chicken dip, this buffalo chicken tater tot casserole is a great way to take those flavors to the next level.
Get Full Recipe

Easy Chicken Pot Pie with Biscuits

A casserole dish with a spoonful of chicken and dumplings.
credit: iheartrecipes.com
Want a different take on chicken pot pie? This recipe uses biscuits instead of crust, and is so easy to make for your whole family! Packed with lots of flavor!
Get Full Recipe

Chicken Bacon Ranch Casserole

A casserole dish filled with cheese and bacon.
credit: thediaryofarealhousewife.com
This Chicken Bacon Ranch Casserole is loaded with creamy Alfredo sauce, ranch seasoning, chicken, bacon, and baked with cheese. The perfect comfort food.
Get Full Recipe

Easy Chicken Spaghetti

A fork is being used to pick up spaghetti on a plate.
credit: carlsbadcravings.com
Easy Chicken Spaghetti on your table in 20 minutes with NO canned soups! Sassy, saucy, cheesy, creamy addictive comfort food you will CRAVE!
Get Full Recipe

Chicken Parmesan Pasta Bake

A wooden spoon holding a casserole with pasta and cheese.
credit: thegirlinspired.com
Enjoy this chicken parmesan pasta bake in a casserole dish that is ready in just 35 minutes, but has the same great traditional flavors. It's cheesy, filling, and topped with toasty breadcrumbs.
Get Full Recipe

Chicken Cordon Bleu Casserole

A casserole dish topped with cheese and sour cream.
credit: Cooks Well With Others
This easy recipe for Chicken Cordon Bleu Casserole was sinfully delicious and was devoured by my family in record time.
Get Full Recipe

Seasonal Favorite

Baked lattice top crust on an apple pie made with the Crisco pie crust recipe, showing flaky layers in the fluted edge.

This is my award-winning Crisco pie crust recipe; flaky, tender, and made with simple ingredients you already have.

Crisco Pie Crust

Leftover Shredded Chicken Recipes

Shredded Chicken Empanadas

A plate with four fried empanadas on it.
credit: morethanyoucanchew.com
Handmade, traditional empanadas stuffed with delicious shredded chipotle chicken, black beans, peppers and onions. Guaranteed to have you coming back for more!
Get Full Recipe

Recipe For BBQ Chicken Pizza

Bbq chicken pizza on a baking sheet.
credit: Modernmealmakeover.com
This Recipe For BBQ Chicken Pizza is the absolute best! You will love how easy and delicious this recipe for BBQ Chicken Pizza is .
Get Full Recipe

Green Chile Chicken Enchiladas

Avocado enchiladas in a white baking dish.
credit: Easy Chicken Recipes
Creamy, cheesy with an addictive salsa verde, these Green Chile Chicken Enchiladas don't mess around! Easy to make and oh so satisfying to eat!
Get Full Recipe

Southern Style Chicken Salad Recipe

A sandwich with lettuce and tomato on a cutting board.
credit: reneeskitchenadventures.com
Southern Style Chicken Salad Recipe is boneless, skinless chicken breasts are poached in a "secret" ingredient, then pulsed in a food processor with seasonings, crisp vegetables, pickle relish, and hard boiled eggs to make the ultimate chicken salad sandwich spread.
Get Full Recipe

Chicken Dumpling Soup

Chicken noodle soup in a white bowl with a spoon.
credit: lenaskitchenblog.com
Not only is this the best chicken dumpling soup, but it's a quick and easy family-friendly dinner. You won't be able to get enough of the comforting chicken soup and drop dumplings!
Get Full Recipe

Easy Mexican Chicken Casserole

A spoonful of mexican casserole in a white dish.
credit: shesnotcookin.com
This Mexican chicken casserole brings together the best of Mexican flavors and the ease of casserole cooking.
Get Full Recipe

BBQ Chicken Tostadas - quick and easy dinner recipe!

A group of food on a pan.
credit: cupcakesandkalechips.com
Enjoy this BBQ Chicken Tostadas recipe even on busy nights! Made with only 4 basic ingredients, it's quick, easy, and sure to please!
Get Full Recipe

Shredded Chicken and Gravy

A bowl of mashed potatoes and chicken.
credit: altandlavender.com
This 3-ingredient shredded chicken and gravy recipe is ridiculously tasty for how few ingredients it has! You can make this easy meal in the oven or Crockpot for a tasty family meal.
Get Full Recipe

White Chicken Chili

A bowl of McCormick white chicken chili topped with grated cheese, cilantro, avocado slices, lime wedges, a tortilla chip, and a dollop of sour cream sits on a wooden table with a spoon and napkin.
This White Chicken Chili recipe is thick & creamy, with shredded chicken, white beans, corn & just the right amount of spice!
Get Full Recipe

Appetizers Using Shredded Chicken

Buffalo Chicken Cheese Balls

Bacon meatballs with toothpicks on a wooden board.
credit: crayonsandcravings.com
Buffalo chicken cheese balls with cream cheese, chicken, shredded cheddar, buffalo sauce, ranch seasoning, and bacon are a tasty finger food.
Get Full Recipe

Crockpot White Chili Chicken Dip

A bowl of dip surrounded by tortilla chips.
credit: simplystacie.net
Crockpot White Chili Chicken Dip is packed with Mexican flavor from cilantro, cumin, green chiles, white beans, and taco seasoning.
Get Full Recipe

Buffalo Chicken Bites

Buffalo chicken wings on a plate with celery and ketchup.
credit: wondermomwannabe.com
Buffalo chicken bites are a flavor packed appetizer that are perfect for parties and game day. It will be hard to keep this finger food on the tray!
Get Full Recipe

7 Layer Dip with Shredded Taco Chicken (Baked Dip)

A person taking a fork out of a casserole dish.
credit: Smells Like Home
Boring taco dip gets transformed into a baked 7 layer dip recipe by adding a flavorful shredded chicken taco layer! Just the hot dip every party needs!
Get Full Recipe

Shredded Chicken Nachos

Nachos in a baking dish with black beans and avocado.
credit: Scarlati Family Kitchen
These shredded chicken nachos are super easy and baked in the oven. Just 15 minutes to make and loaded with all of your favorite toppings!
Get Full Recipe

Cheesy Buffalo Chicken Quesadillas

A quesadilla with a sauce on a wooden surface.
credit: razzledazzlelife.com
Cheesy Buffalo Chicken Quesadillas are layers of shredded chicken, cream cheese, mozzarella cheese, and hot sauce between crispy tortillas.
Get Full Recipe

Honey Lime Chicken Taquitos

A plate of food on a table.
credit: togetherasfamily.com
Honey Lime Chicken Taquitos are baked in the oven for that crispy exterior without deep frying! Sweet & spicy honey lime chicken taquitos.
Get Full Recipe

Air Fryer BBQ Chicken Roll-Ups

A person dipping a piece of pizza into a bowl of sauce.
credit: airfryerattiffanys.com
Easy BBQ chicken roll-ups with BBQ sauce, shredded chicken, melted mozzarella, and sliced red onions all baked in rolled-up pizza dough.
Get Full Recipe

Creamy Chicken Caesar Dip

A casserole dish with tortilla chips and cheese.
credit: sweetandsavorymeals.com
Chicken Caesar Dip made with shredded rotisserie chicken is the ultimate dip! Creamy, cheesy and hearty, the dip will be the highlight of any party!
Get Full Recipe

Easy Shredded Rotisserie Chicken Sliders

A plate of sliders with onions, lettuce, and pickles.
credit: cozycravings.com
These easy Shredded Rotisserie Chicken Sliders are so good with spicy mayo, shredded chicken, and all the best toppings.
Get Full Recipe

Sarah Mock of savoringthegood.com headshot 2022

I am Sarah Mock. Welcome!

Sarah Mock is a classically trained Chef and a graduate of Johnson & Wales University. A culinary blogger for 17 years, Sarah helps the home cook prepare her recipes with professional results.

Get to know me

as seen in:

Logos of Hersheyland, ABC News, and Good Day PA are showcased in a seamless row, providing a snapshot of popular brands.

Hersheyland Nightline Good Day Pa!

The vibrant design showcases the iconic logos of Pinterest, Rachael Ray, and Jell-O set against a bold red background. Sorry, the provided description doesn't offer enough detail to suggest important SEO keywords.

Pinterest Rachael JELL-O

Cube Steak Recipes

A collage of four dishes: crispy fried chicken strips, a stuffed sandwich with beef and vegetables, a skillet dish featuring cubed steak with mushrooms, and mashed potatoes topped with meat and gravy.

These cubed steak recipes are the best way to get a delicious meal on the table on a busy weeknight. The whole family will gather around the dinner table to enjoy a hearty home-style dinner with an easy cube steak recipe as the centerpiece.

A collage of four dishes: crispy fried chicken strips, a stuffed sandwich with beef and vegetables, a skillet dish featuring cubed steak with mushrooms, and mashed potatoes topped with meat and gravy.

Cube steak, sometimes labeled as minute steak, is an inexpensive, flavorful cut of beef that's pre-tenderized. Home cooks will pound a beef cube steak thin with a meat mallet or meat tenderizer but your local butcher or meat counter at the grocery store will probably use a meat tenderizing machine.

Recipes For Cube Steak

Listed below is a variety of recipes to suit any taste or occasion, so you can enjoy the flavor and convenience of cubed steak anytime. So why not give it a try and see what all the fuss is about?

Smothered Philly Cheese Cubed Steak

Open-faced sandwiches with melted cheese, mushrooms, and green bell peppers on a baking sheet bring a twist to traditional cubed steak recipes.
On busy days, a pan filled with mouthwatering Smothered Philly Cheese Cubed Steak will hit the proverbial spot. They're succulent, tender and packed with flavor, with the bonus of taking mere minutes to prepare. Serve these smothered cheese steaks stacked on a toasted garlic-butter hoagie roll!
Get Full Recipe

Steak Fingers Recipe

Crispy fried chicken tenders in a basket with a red and white checkered cloth, reminiscent of classic cubed steak recipes, served alongside a small cup of peppered dipping sauce.
A tried-and-true Steak Fingers Recipe that always yields good flavor, crispy strips of beef fried to perfection! Easy to make and loved by kids AND adults!
Get Full Recipe

Cube Steaks with the BEST Mushroom Gravy

A skillet of cooked chicken breasts topped with mushrooms, onions, and herbs in a rich brown sauce offers a delightful twist on classic cubed steak recipes.
Cube Steak is a tenderized beef steak seared in beef broth, onion and garlic powder then made with the BEST Mushroom Gravy recipe.
Get Full Recipe

Oven Cube Steak

Savor delicious cubed steak recipes with tender steaks cooked to perfection, smothered in rich mushroom gravy and garnished with fresh parsley.
Oven cube steak is one of those recipes that is so simple, that you're amazed how delicious it is. Easy Oven Cube Steak I'm here to say this is one of the easiest recipes I ever made. Incidentally, I was a bit dubious that something so simple and with so few ingredients could be !
Get Full Recipe

Easy Keto Low Carb Chicken Fried Steak and Gravy + VIDEO

A breaded chicken cutlet with creamy gravy is elegantly served on a bed of mashed potatoes, garnished with herbs, on a white plate. Reminiscent of classic cubed steak recipes, the dish is beautifully set against purple fabric and accompanied by a gravy dish in the background.
This Easy Keto Low Carb Chicken Fried Steak is made with tenderized cube steaks, almond flour, grated parmesan cheese, salt and pepper, with no pork rinds. You can substitute those if you wish. This dish is drizzled in white country gravy that can you cook with sausage if you wish.
Get Full Recipe

Easy Swiss Steak

A delicious cubed steak recipe featuring a Swiss steak smothered in rich tomato sauce, accompanied by vibrant carrots and fresh parsley, all served over a bed of creamy mashed potatoes.
Easy Swiss Steak can be cooked in the oven or the slow cooker. Tender beef in a rich tomato gravy is great over rice, noodles or mashed potatoes and green beans!
Get Full Recipe

Seasonal Favorite

Baked lattice top crust on an apple pie made with the Crisco pie crust recipe, showing flaky layers in the fluted edge.

This is my award-winning Crisco pie crust recipe; flaky, tender, and made with simple ingredients you already have.

Crisco Pie Crust

Chili Lime Cube Steaks

Plate with glazed steak from a cubed steak recipe, roasted potatoes, and a fresh salad of cucumbers, tomatoes, corn, and lime wedges.
A spicy and sweet Chili Lime Cube Steaks recipe is perfect for a fast and healthy family dinner. So quick and easy, it takes only 10 minutes!
Get Full Recipe

Bistec Ranchero (Mexican Beef Ranch Style)

A clay pot filled with a savory stew of cubed steak, potatoes, onions, and green peppers simmering in a rich brown sauce.
Bistec ranchero is a traditional Mexican dish that is rich in flavors medium heat and texture. It is made with thinly sliced beef, a smoky tomato sauce, and
Get Full Recipe

Bistec Encebollado (Puerto Rican Steak and Onions)

Plate of savory liver and onions, accompanied by a pot of fluffy rice and crispy fried plantains resting on a paper towel, reminiscent of beloved cubed steak recipes.
Bistec encebollado, Puerto Rican steak and onions, is an easy and economical family style dinner made with tender stewed cubed steak.
Get Full Recipe

Cube Steak Recipe with Gravy (Crockpot Cube Steak or Stove Top)

A skillet holds four tender Salisbury steaks nestled in a rich brown onion gravy-a delightful addition to your collection of cubed steak recipes. A wooden spatula rests inside the pan.
This easy stove top or Crock Pot cube steak is a simple recipe that uses minimal ingredients for maximum flavor. I made mine keto by using homemade cream of mushroom soup! Below you will find instructions to make this cube steak in the crock pot to on the stove top!
Get Full Recipe

Cube Steak Parmesan

A plate of spaghetti topped with a breaded cubed steak patty, covered in melted cheese and tomato sauce, garnished with herbs.
If you're looking for a quick dinner recipe, flavorful slow cooker Cube Steak Parmesan is the answer. Serve with your favorite pasta and sauce.
Get Full Recipe

Instant Pot Cube Steak

A plate featuring cubed steak with rich mushroom sauce, accompanied by boiled potatoes and a sprinkle of parsley as garnish. A fork rests on the nearby striped napkin.
Instant Pot cube steak with potatoes and mushrooms cooked in a flavorful brown gravy together. This cube steak recipe is a dump and start meal.
Get Full Recipe

Philly Cheesesteak Quesadilla Recipe

A stack of cheese and vegetable quesadillas with crispy, golden-brown tortillas, garnished with chopped cilantro, is a delightful twist on cubed steak recipes.
Philly Cheesesteak Quesadillas are filled with beef and melted cheese in a toasted tortilla. An easy, make-ahead quesadilla recipe done in under 30 minutes.
Get Full Recipe

Seasonal Favorite

Baked lattice top crust on an apple pie made with the Crisco pie crust recipe, showing flaky layers in the fluted edge.

This is my award-winning Crisco pie crust recipe; flaky, tender, and made with simple ingredients you already have.

Crisco Pie Crust

Italian Cube Steak Parmesan

A plate of spaghetti topped with baked cube steak parmesan sits next to a casserole dish showcasing cubed steak recipes in rich sauce. A jar of sauce and a block of cheese complete the mouthwatering scene.
Looking for easy weeknight meal cube steak recipe? This Italian Parmesan Crusted Steak is yummy even your kids will love it!
Get Full Recipe

Parmesan-Crusted Cubed Steaks with Zucchini Ribbons

Parmesan-Crusted Cubed Steaks with Zucchini Ribbons
A Parmesan cheese and bread crumb coating give these Cubed Steaks a familiar crunch, while beautiful zucchini ribbons provide a fresh side dish.
Get Full Recipe

Pepper Jack Steak Sandwiches

Savor the delight of a cheesesteak sandwich featuring tender cubed steak and melted cheese, all cooked to perfection in a skillet, elegantly presented on a checkered cloth.
Cube Steak, grilled onions, buttery toasted sub rolls, melted pepper jack, & delicious creamy ranch cilantro dressing create for the best steak sandwich.
Get Full Recipe

Instant Pot Cubed Steak

A square white plate showcases a delightful meal: fluffy mashed potatoes and gravy, crisp green beans, a buttery biscuit, and a succulent portion of steak with gravy inspired by classic cubed steak recipes.
Instant Pot Cubed Steak is a great way to get a delicious and hearty meal on the table in no time! This recipe is perfect for busy weeknights.
Get Full Recipe

Air Fryer Cube Steak

A plate featuring two perfectly cooked steak pieces, reminiscent of popular cubed steak recipes, is accompanied by a vibrant serving of green peas.
Make this savory marinated cube steak in your air fryer in a flash! We'll show you how to turn an inexpensive beef cut into a delicious dinner. The key to a tender and delicious air fryer cube steak is this simple marinade.
Get Full Recipe

Fried Cube Steak

Enjoy a classic dish with our cubed steak recipe: Begin by coating your steak in flour, then dip it in buttermilk. Fry until golden brown and serve hot for a delicious meal.
Cube steak is best floured and pan fried in a cast iron skillet. Tender and delicious, this meal cooks quickly so it's perfect for a weeknight meal. This is Southern comfort food at its best! Wouldn't this be delicious served with mashed potatoes?
Get Full Recipe

Country Fried Steak Sliders with Caramelized Onions

Three sliders with caramelized onions and cheese on a plate, crafted from cubed steak recipes for an extra savory twist.
Easy Country Fried Steak Sliders with Caramelized Onions will elevate your next tailgate to the knockout level!
Get Full Recipe

Chef Tip

Be sure to store any leftovers in an airtight container and store in the refrigerator for up to five days. Reheat any leftovers in a large skillet over medium-high heat or until heated through.

How do you cook cube steak so it's not tough?

Here are 5 tips on how to keep the cubed steak from becoming tough and leathery in texture.

  • Tenderize the meat: Use a meat mallet or a fork to tenderize the cube steak before cooking. Manual tenderizing will help break down the tough meat strands and make it more tender.
  • Marinate the meat: Marinating the cube steak in a mixture of oil, vinegar, and spices for a few hours before cooking can help to tenderize the meat and add flavor.
  • Low and slow: Cube steak is best cooked slowly over low heat. This will help to break down the meat strands and make them more tender.
  • Don't overcook: Cube steak should be cooked to an internal temperature of 145°F. Overcooking can make it tough and dry.
  • Slice against the grain: When serving, be sure to slice the cube steak against the grain.

Sarah Mock of savoringthegood.com headshot 2022

I am Sarah Mock. Welcome!

Sarah Mock is a classically trained Chef and graduate of Johnson & Wales University. A culinary blogger for 15 years Sarah helps the home cook prepare her recipes with professional results.

Get to know me

as seen in:

Logos of Hersheyland, ABC News, and Good Day PA are showcased in a seamless row, providing a snapshot of popular brands.

Hersheyland Nightline Good Day Pa!

The vibrant design showcases the iconic logos of Pinterest, Rachael Ray, and Jell-O set against a bold red background. Sorry, the provided description doesn't offer enough detail to suggest important SEO keywords.

Pinterest Rachael JELL-O


Small Potato Recipes

baby potatoes recipes.

You know those little bags of small potatoes that always seem to end up in your cart? Same. These small potato recipes are my favorite ways to turn them into something delicious.

baby potatoes recipes.

Whether I am looking to roast them in the oven, toss them in the air fryer, or grill them in foil packets, these easy recipes prove small potatoes can make a big impression.

Sometimes I would rather eat a plate full of side dishes than a proper meal. Not a mini potato dish but my twice-baked potato casserole is also a huge hit!

Tips for Cooking Small Potatoes

  • No peeling needed: Their thin skins add flavor and texture.
  • Cut evenly: For even cooking, halve or quarter larger ones.
  • Season generously: Potatoes love salt and fat-don't skimp on olive oil and seasoning.
  • Use high heat: Roast at 425°F or air fry at 400°F for crispy results.
  • Mix varieties: Red, gold, and purple potatoes make a colorful side.

Sous Vide Potatoes with Rosemary

Sous vide cooking is more than just steaks. Sous vide potatoes are the perfect side dish to your favorite entree. These potatoes are infused with flavor, creamy on the inside and crisp on the outside. You may never roast a potato again!
Get Full Recipe

Perfect Thyme Skillet Potatoes

Close-up of roasted baby potato slices with herbs, garnished with sprigs of thyme and stirred with a wooden spoon.
These Thyme Skillet Potatoes are perfectly crispy on the outside yet creamy on the inside and prepared in under 30 minutes in a skillet!
Get Full Recipe

Cashew Parm Smashed Red Skin Potatoes (Whole30/Paleo)

A delightful dish featuring smashed roasted baby potatoes, crowned with crispy bacon bits, grated Parmesan, and fresh parsley. Perfect for those searching for irresistible baby potatoes recipes.
Crispy/buttery smashed red skin potatoes with cashew parmesan cheese, garlic and crispy bacon. This is a great side dish, or enjoy solo.
Get Full Recipe

Mini Potatoes With Goat Cheese & Balsamic Vinegar

Close-up of chocolate dessert cups topped with whipped cream and caramel sauce, arranged in rows on a wooden board, reminiscent of the meticulous arrangement found in baby potatoes recipes.
Get adventurous with your next appetizer and make these delicious Mini Potatoes With Goat Cheese & Balsamic Glaze
Get Full Recipe

Roasted Garlic Butter Parmesan Potatoes

A bowl of roasted baby potatoes with crispy edges, garnished with chopped herbs from our favorite baby potatoes recipes collection.
Roasted Garlic Potatoes Recipe - Looking for the perfect side for your meal? These epic roasted garlic potatoes with parmesan are crispy and golden on the outside and fluffy on the inside. Ba…
Get Full Recipe

Roasted Potatoes And Veggies

A bowl of roasted vegetables featuring baby potatoes, vibrant bell peppers, and onions. Nearby, sliced red and yellow peppers mingle with baby potatoes on a wooden board. A red cloth and spoon lie alongside this delightful scene.
These roasted potatoes and veggies are not only quick and easy but they taste so good, your family will want this delicious side dish every night!
Get Full Recipe

Ultra Crispy Smashed Potatoes

Golden-brown crispy smashed baby potatoes recipes, garnished with chopped herbs and sea salt on a baking sheet.
Meet your new favourite way with spuds - crispy SMASHED POTATOES! Crazy crispy on the outside and fluffy on the inside, they taste like buttery french fries - but crisper!
Get Full Recipe

Garlic Ranch Potatoes

Delight in roasted golden baby potatoes seasoned with aromatic herbs and spices, all perfectly arranged on a baking sheet.
Garlic Ranch Potatoes - The best and easiest way to roast potatoes with fresh garlic and ranch. After this, you'll never want to roast potatoes any other way!
Get Full Recipe

Seasonal Favorite

Baked lattice top crust on an apple pie made with the Crisco pie crust recipe, showing flaky layers in the fluted edge.

This is my award-winning Crisco pie crust recipe; flaky, tender, and made with simple ingredients you already have.

Crisco Pie Crust

Potato Salads with Small Potatoes

Loaded Ranch Potato Salad

Close-up of a creamy potato salad featuring baby potatoes, crispy bacon, and chopped green onions.
Creamy Ranch Potato Salad is a tasty twist on the classic. Made with pantry staples and minimal prep, the whole family will love this recipe!
Get Full Recipe

Ultimate Potato Salad Recipe

A bowl of creamy potato salad features tender baby potatoes with diced bacon, red onion, celery, and herbs.
This zesty Potato Salad is my FAVORITE cookout recipe! Plus added tips on how to get the perfect potato texture, prevent a "wet" potato salad, and more!
Get Full Recipe

Hearty Meals Using Small Potatoes

Crispy Roasted Mini Potatoes

A delicious take on baby potatoes recipes: small baked potatoes topped with melted cheese and chives, served on a plate with a bowl of sour cream in the background.
Baked Mini Potatoes are an easy and delicious appetizer for holidays, parties and special occasions. Top with your favorite baked potato fixings!
Get Full Recipe

Greek Lemon Potatoes (Oven Roasted)

Roasted baby potato wedges seasoned with herbs in a white baking dish.
Greek roasted potatoes, packed full of garlic and lemon to make the most tender and delicious potato side dish, you'll love this recipe!
Get Full Recipe

Oven Roasted Baby Potatoes with Garlic

A baking sheet with assorted roasted baby potatoes, showcasing delicious recipes, sits on a wooden surface.
One of the easiest and most flavorful vegan side dishes, these oven roasted little potatoes with garlic will blow you away!
Get Full Recipe

Crispy Roasted Potatoes with Parmesan and Basil

A white bowl brimming with roasted baby potatoes is garnished with fresh herbs and accompanied by a fork-an inviting dish that exemplifies the art of baby potatoes recipes.
Crispy roasted potatoes with parmesan are tossed in basil, a little garlic powder, olive oil, and parmesan cheese. Baked until golden brown and crispy.
Get Full Recipe

Baked Ranch Potatoes, Baked Cheesy Red Potatoes

A tantalizing close-up of baby potatoes, perfectly roasted and topped with melted cheese, garnished with a sprinkle of fresh chives.
These baked cheesy ranch potatoes have just 4 ingredients and they're perfect for dinner; whether it's for the family or a party!
Get Full Recipe

Cheesy Mini Gratin Dauphinois Potato Stacks

A plate of stacked potato gratins, crafted from tender baby potatoes, is elegantly topped with a sprinkle of fresh parsley.
Cheesy Mini Gratin Dauphinois Potato Stacks - these little gems are like mini individual serves of au gratin potatoes, made in a muffin tin!
Get Full Recipe

Oven Roasted & Crispy Baby Potatoes

Oven Roasted Baby Potatoes

A white oval dish filled with roasted baby potatoes, a delightful choice from your favorite baby potatoes recipes, garnished with parsley and rosemary.
EASY Oven Roasted Baby Potatoes are creamy, buttery and PERFECT every time. The BEST Roasted Potatoes recipe for every occasion! Just FOUR ingredients!
Get Full Recipe

Hasselback Mini Potatoes

Sliced roasted baby potatoes with garlic cloves and thyme sprigs on a baking tray.
Fun and delicious, these Hasselback Mini Potatoes are a fun side dish for any meal. They're like tater tots for grown ups :)
Get Full Recipe

Spicy Masala Baby Potatoes

A bowl of spiced baby potatoes, a star in many baby potatoes recipes, garnished with dried red chilies and fresh cilantro. Forks are placed alongside.
15 minutes spicy baby potatoes recipe is a simple and quick delicious boiled baby potatoes tossed freshly ground spices and tamarind. This gluten free and vegan masala baby potato roast recipe is exactly what you need to pamper yourself on lazy weekends. Serve it as a starters appetizers or main cou…
Get Full Recipe

Spicy Tiny Potatoes

Chile Garlic Potatoes

A bowl of baby potatoes in red sauce, garnished with sliced green onions, offers a delightful addition to your favorite recipes. A yellow napkin and spoon are neatly arranged beside the bowl.
Chile Garlic Potatoes are an easy potato side dish using baby potatoes in a sweet and spicy sauce.
Get Full Recipe

Honey Sesame Chilli Potato

A plate of spicy roasted baby potatoes garnished with green onions, placed on a floral-patterned platter. Gold and black utensils are beside the dish on a wooden surface. Perfect for those seeking flavorful baby potatoes recipes.
Honey Sesame Chilli Potato Recipe is an delicious Indo Chinese party appetizer made with baby potatoes.  Crispy on the outside and soft on the inside, coated with delicious saucy sweet and spicy flavours makes a perfect side dish along with a asian meal.
Get Full Recipe

Thai Style Potatoes

A yellow dish filled with roasted mixed baby potatoes garnished with herbs and garlic slices. Nearby are bowls of chili peppers, sauce, and garlic, making it a perfect addition to your favorite baby potatoes recipes.
These Thai style potatoes taste amazing with a sweet and spicy vegetarian Nam Jim. Easily adjust the spice level to your tastes.
Get Full Recipe

Spicy Bombay Potatoes

A bowl of seasoned baby potatoes garnished with cilantro, surrounded by skewers and scattered herbs, offers a delightful twist to classic baby potato recipes.
These Spicy Bombay Potatoes or Masala Aloo, are a great appetizer or an easy side dish to any meal. Make them as a one-pot dish in just 20 minutes!
Get Full Recipe

Jalapeno Popper Potato Skins

Baked baby potato slices topped with cheese, jalapeño slices, and dollops of sour cream on a baking sheet.
Jalapeno Popper Potato Skins are bite-sized potatoes filled with 3 types of cheese, 2 types of jalapeno, bacon, and a cool dollop of sour cream. Perfect for a snack or party appetizer!
Get Full Recipe

Small Potatoes Made in Air Fryer, Instant Pot, Slow Cooker

Ninja Foodi Grill Potatoes

A bowl of roasted baby potatoes topped with herbs and grated cheese on a white tablecloth, with a wooden spoon beside it.
These Ninja Foodi Grill Potatoes are such an easy side. With parmesan and fresh rosemary, this dish is always a hit.
Get Full Recipe

Crock Pot Garlic Potatoes

A pot of seasoned baby potatoes, sprinkled with parsley, transforms this simple dish into a delightful recipe choice.
Full of flavor, these crock pot potatoes are one of the most delicious side dishes you will ever make! Your family will enjoy the buttery garlic flavor and velvety tenderness in every bite!
Get Full Recipe

Instant Pot Baby Potatoes

A bowl of roasted baby potatoes, a staple in delicious baby potato recipes, is garnished with herbs and placed on a white wooden surface, with a spoon resting beside it.
You only need 5 minutes and 7 ingredients to make buttery Instant Pot Baby Potatoes, a side dish the family will love!
Get Full Recipe

Air Fryer Breakfast Potatoes

A plate of roasted baby potatoes garnished with green onions and herbs, with two serving spoons on the side.
These Air Fryer Breakfast Potatoes are crispy on the outside, fluffy in the middle, and coated in loads of spices. These are the perfect side dish for Sunday brunch, but honest can easily be served as a dinner side as well.
Get Full Recipe

Cheesy Little Potato Soup

A bowl of creamy potato soup, crafted from tender baby potatoes and topped with chopped green onions, is served in a sleek black dish.
Today's reicpe is a magnificent and easy Cheesy Potato Soup. I lightened it up a bit not making the broth to thick and rich for a nice spring/summer soup.
Get Full Recipe

Crock Pot Potatoes and Onions

Discover one of the best baby potatoes recipes with this slow cooker dish featuring halved baby potatoes, sliced onions, and savory broth.
Soft fork tender baby red potatoes and sliced Vidalia onions slow cooked in brown butter and broth, perfect as a warm holiday side dish.
Get Full Recipe
Do you need to peel small potatoes?

Nope! Their skins are thin and tender; just wash them well.

Can I use small potatoes in soup or stew?

Absolutely. Their size makes them perfect for chunkier soups like cowboy soup or chowder.

How do I store cooked small potatoes?

Refrigerate leftovers in an airtight container for up to 4 days. Reheat in the oven or air fryer for the best texture.


Sarah Mock of savoringthegood.com headshot 2022

I am Sarah Mock. Welcome!

Sarah Mock is a classically trained Chef and a graduate of Johnson & Wales University. A culinary blogger for 17 years, Sarah helps the home cook prepare her recipes with professional results.

Get to know me

as seen in:

Logos of Hersheyland, ABC News, and Good Day PA are showcased in a seamless row, providing a snapshot of popular brands.

Hersheyland Nightline Good Day Pa!

The vibrant design showcases the iconic logos of Pinterest, Rachael Ray, and Jell-O set against a bold red background. Sorry, the provided description doesn't offer enough detail to suggest important SEO keywords.

Pinterest Rachael JELL-O

Cranberry Orange Bread Recipe

orange cranberry bread with orange icing, sliced.

This cranberry orange bread recipe is full of fresh cranberries, and orange zest and has a simple orange glaze. Orange cranberry loaf is a quick bread with a delightful balance of tart and sweet, perfect for an easy Christmas food gift.

orange cranberry bread with orange icing, sliced.

Cranberries are a super fruit and I love to bake with them. Apple cranberry pie is on our Thanksgiving table each year and my daughter will make her 3 ingredient cranberry sauce with them.

✨ Here is why this recipe is amazing:

  • Use the option of fresh cranberries or frozen cranberries and make this cranberry bread year-round.
  • Perfect for making ahead, keeping in the freezer and pulling out when guests come over.
  • A thick slice pairs wonderfully with a cup of coffee or tea.
  • Make the bread in mini loaf pans and add to your baby shower brunch ideas.

🍊 Ingredients needed:

cranberry bread ingredients with text overlay.

Here is a visual overview of the ingredients in the recipe. Scroll down to the recipe at the bottom for quantities.

📝 Ingredient for cranberry orange loaf:

  • Sugar - white granular sugar.
  • Orange - the orange is going to be zested and the juice is squeezed for use in the bread as well as the icing.
  • Butter - unsalted butter is used in this recipe because there is an additional salt in the batter. Room-temperature butter is best.
  • Eggs - large eggs are used.
  • Flour - all-purpose flour is perfect for this recipe. Read up on why different flours are needed in different recipes in my baking definitions post.
  • Milk - I use 2% milk in this recipe but whole or skim milk can be used.
  • Salt - kosher or flake salt is used in this recipe. Table salt is to 'salty' for this recipe.
  • Cranberries - whole fresh cranberries are what I use. See the note below about using dried cranberries.

🔄 Substitutions

If you have buttermilk instead of regular dairy milk, that will add another layer of tang to this recipe. Substitute non-dairy kinds of milk as you normally would a substitute.

Dried cranberries can be used in place of fresh ones. Use ⅔ cup of sweetened dried cranberries but I like to rehydrate them with about ¼ cup of water or orange juice for 10 minutes or warm them in your chosen liquid for 30 seconds in the microwave. Drain and pat dry before adding the rehydrated cranberries to the batter.

Nuts: This is more of an addition than a substitution. Add ½-3/4 cup of chopped nuts to the batter when you fold in the cranberries. Bake as directed. Be sure to toast the nuts first to bring out their full flavor.

Helpful Kitchen Tools

parchment paper in a loaf pan.
  • Microplane - A Microplane will take off the orange part of the rind of the orange without cutting into the white part of the peel. The orange contains the essential orange oil and the white will be bitter.
  • Parchment Paper - Parchment paper is used to line the baking pan to help release the baked loaf from the bread ban. By leaving the paper a bit long, the cranberry bread can be easily lifted from the pan and clean-up is a breeze!

🔪 How to make Cranberry Orange Bread, basic instructions

icing coated cranberry bread, sliced on a slate serving dish.
  1. Infuse the sugar by blending the orange zest with the sugar.
  2. Add the butter to the bowl and cream the butter into the sugar/orange zest mixture. Beat on medium-high for 3 minutes.
  3. Add the eggs, one at a time, incorporating fully before adding the second.
  4. Whisk together the flour, salt, and baking powder. Add half the flour mixture to the batter, stir to incorporate.
  5. Add the orange juice and the milk and stir to combine.
  6. Add the rest of the flour, stirring to combine, scraping the bowl.
  7. Fold in the cranberries.
  8. Pour into a prepared loaf pan.
  9. Bake at 350 for 45-50 minutes or until a toothpick comes out clean.
  10. Whisk together the glaze ingredients and pour over the cooled bread.

📷 How to make Cranberry Bread, photo instructions

orange zest infused into the sugar.

1. In a mixing bowl, with the paddle attachment or beaters in place, blend together the sugar and the orange zest. This will infuse the sugar and will give the bread a hint of orange flavor throughout the finished orange bread.

butter, sugar and orange zest fully blended.

2. Add the room-temperature butter to the infused sugar and beat on medium-high speed until 2-3 minutes or until light and fluffy.

first egg added to the butter and sugar mixture.

3. Add one of the eggs.

first egg fully incorporated into the bread batter.

4. Stir to combine the egg.

second egg added to the batter.

5. Add the second egg to the batter.

second egg added to the mixture.

6. Fully incorporate the second egg.

first part of the flour added to the cake batter.

7. In a separate bowl, whisk together the flour, salt and baking powder. Add ½ the flour mixture to the bowl.

batter in the mixing bowl.

8. Stir to combine.

orange juice and milk added to the batter.

9. Add the orange juice and the milk.

flour added to the batter.

10. Add the second half of the flour mixture to the batter.

flour fully incorporated into the batter.

11. Fully incorporate the flour into the batter, be sure not to over mix.

fresh cranberries added to the batter.

12. Add the fresh cranberries to the bowl.

cranberries added to the batter.

13. If using a stand mixer with a paddle, turn on the mixer for 3 rotations. If using a hand mixer, fold the cranberries in by hand with a spatula or wooden spoon.

cranberry orange bread batter spread in a prepared baking pan.

14. Spread the batter in a prepared loaf pan. See Chef's note below for a tip on how to prepare the pan.

A loaf of cranberry orange bread rests on parchment paper, cooling on a wooden surface.

Allow the bread to cool completely before adding the orange glaze.

🥣 Make the Orange Drizzle

sliced cranberry orange bread.

In a bowl, stir together the powdered sugar and the reserved orange zest. Slowly add a few teaspoons of orange juice until smooth and pourable. Pour the glaze over the cooled bread. Allow the glaze to set and a crust to form before slicing.

Storage Tips

Allow the bread to cool completely before wrapping in plastic wrap or storing in an air-tight container.

The bread can be made and frozen in a freezer-safe bag, with as much air removed as possible. If freezing, it is best not to add the orange glaze icing to the bread before freezing. Add the orange drizzle after thawing.

📝 Frequently asked questions, answers and tips:

Can frozen cranberries be used?

If you can not find fresh cranberries, you can use frozen cranberries. I will toss the frozen cranberries with a few tablespoons of flour before folding them into the batter. Bake the bread for an additional 10 minutes if using frozen cranberries.

Chef Tip

second loaf pan pressing the parchment paper in a loaf pan.

Prepare a loaf pan by spraying with a nonstick pan spray and dusting with a few tablespoons of flour. But I find that lining the pan with parchment paper will help with easy cleanup.

To get the parchment paper to properly fit in the loaf pan, use a second pan to press the parchment paper into your baking pan. Remove the top pan before adding the batter to the parchment-lined pan.

parchment paper in a loaf pan.
orange cranberry bread with orange icing, sliced.

Cranberry Orange Bread

This cranberry orange bread recipe is full of fresh cranberries, and orange zest and has a simple orange glaze.
No ratings yet
Print Pin Rate
Course: Bread Recipes
Cuisine: American
Prep Time: 6 minutes minutes
Cook Time: 50 minutes minutes
Cooling: 1 hour hour
Total Time: 1 hour hour 56 minutes minutes
Servings: 10 slices
Calories: 261
Author: Sarah Mock

Ingredients

Cranberry Bread Ingredients

  • A 4-pound bag of Domino granulated pure cane sugar with a yellow and white design, showing nutrition information and branding-perfect for sweetening recipes like rhubarb sour or your favorite desserts.¾ Cup Sugar
  •  
    Zest of 1 large orange divided
  • A rectangular 8 oz package of Kerrygold Pure Irish Butter, unsalted, with a green and gold label and Irish grass-fed cow branding-perfect for creating delicious Saint Patrick's Day cupcakes.6 tablespoon Butter softened
  • A single brown chicken egg, perfect for making Chicken Cordon Bleu, stands upright on a white background.2 Egg room temperature
  • A white milk carton with a blue label reading ¼ Cup milk
  •  
    ¼ Cup orange juice from the orange
  • A 5-pound bag of King Arthur Baking Company unbleached bread flour with 12.7% protein content, labeled for ideal use in bread, pizza crust, and rolls-perfect for creating hearty sides like homemade loaves to serve alongside a comforting slowcooker sausage casserole.1 ½ Cup Flour, All Purpose
  • A Morton Salt container with a blue label featuring a girl in a yellow dress holding an umbrella, with salt pouring out of a container-an essential ingredient for perfectly seasoning dishes like Chicken Cordon Bleu.¼ teaspoon salt
  • A can of Rumford Baking Powder, 8.1 oz (230g), with red label, showing baked goods like Cherry Scones, and a 1 teaspoon Baking Powder
  •  
    1 ½ Cup fresh cranberries

Orange Glaze Ingredients:

  • A 4-pound bag of Domino Confectioners Sugar labeled as 10-X powdered pure cane sugar in yellow and blue packaging-perfect for creating festive Saint Patrick's Day cupcakes.1 Cup Powdered Sugar
  •  
    1 ½ tablespoon freshly squeezed orange juice from the orange
  •  
    1 teaspoon orange zest from the orange above
US Customary - Metric
Follow Savoring The Good On PinterestFollow @SavoringTheGood or tag #STGRecipes!

Instructions

  • Infuse the sugar by blending the orange zest with the sugar.
    ¾ Cup Sugar, Zest of 1 large orange
  • Add the butter to the bowl and cream the butter into the sugar/orange zest mixture. Beat on medium-high for 3 minutes.
    6 tablespoon Butter
  • Add the eggs, one at a time, incorporating fully before adding the second.
    2 Egg
  • Whisk together the flour, salt, and baking powder. Add half the flour mixture to the batter, stir to incorporate.
    1 ½ Cup Flour, All Purpose, ¼ teaspoon salt, 1 teaspoon Baking Powder
  • Add the orange juice and the milk and stir to combine.
    ¼ Cup milk, ¼ Cup orange juice
  • Add the rest of the flour, stirring to combine, scraping the bowl.
  • Fold in the cranberries.
    1 ½ Cup fresh cranberries
  • Pour into a prepared loaf pan.
  • Bake at 350 for 45-50 minutes or until a toothpick comes out clean.

Icing Instrucitons

  • Whisk together the glaze ingredients and pour over the cooled bread.
    1 Cup Powdered Sugar, 1 teaspoon orange zest, 1 ½ tablespoon freshly squeezed orange juice
Want to share when you made this recipe?Follow @SavoringTheGood & tag #STGRecipes!
Nutrition Facts
Cranberry Orange Bread
Serving Size
 
1 slice
Amount per Serving
Calories
261
% Daily Value*
Fat
 
8
g
12
%
Saturated Fat
 
5
g
31
%
Trans Fat
 
0.3
g
Polyunsaturated Fat
 
1
g
Monounsaturated Fat
 
2
g
Cholesterol
 
52
mg
17
%
Sodium
 
128
mg
6
%
Potassium
 
114
mg
3
%
Carbohydrates
 
45
g
15
%
Sugar
 
28
g
31
%
Protein
 
3
g
6
%
* Percent Daily Values are based on a 2000 calorie diet.
**Nutritional facts are just estimates. Please utilize your own brand nutritional values to double check against our estimates.
Like this recipe card? Want one for your site?Check out WP Recipe Maker!

Sarah Mock of savoringthegood.com headshot 2022

I am Sarah Mock. Welcome!

Sarah Mock is a classically trained Chef and graduate of Johnson & Wales University. A culinary blogger for 16 years Sarah helps the home cook prepare her recipes with professional results.

Get to know me

as seen in:

Logos of Hersheyland, ABC News, and Good Day PA are showcased in a seamless row, providing a snapshot of popular brands.

Hersheyland Nightline Good Day Pa!

The vibrant design showcases the iconic logos of Pinterest, Rachael Ray, and Jell-O set against a bold red background. Sorry, the provided description doesn't offer enough detail to suggest important SEO keywords.

Pinterest Rachael JELL-O

Pizza Sauce

canning tomato sauce.

Canning pizza sauce with fresh tomatoes is a simple way to have homemade pizza sauce in your pantry.

canning tomato sauce.

Combine ripe tomatoes, spices and a bit of citric acid or lemon juice and you have a delicious, easy pizza sauce for homemade pizza night. Before you know it you have homemade pizza sauce with fresh tomatoes!

Tomatoes are one of my favorite summer fruits. Yes, a tomato is a fruit. Oven-roasted tomato soup, canning diced tomatoes, and making tomato paste are all things I make during tomato season.

Ingredients needed:

15 pounds of fresh ripe tomatoes in a cardboard box.

Recipe Card?

To find the full printable recipe with specific measurements and directions CLICK HERE to go to the recipe card.

Traditionally Roma tomatoes, san Marzano tomatoes or another variety of paste tomatoes are the type of tomatoes used to make a pizza sauce from fresh tomatoes due to them having the best flavor. All of these variety of tomatoes are fabulous and I encourage you to use them if you can find them. This year those tomato plants did not make it past the bugs so we went with these fresh red tomatoes that I found at my local farm stand.

A basic tomato sauce is just tomatoes, citric acid and a touch of salt. But to add more layers of flavor to your tomato sauce to turn it into a pizza sauce you will want to add seasoning. I have 2 seasoning blends for you to choose from. See the recipe card below for detailed measurements.

Best Homemade Pizza Sauce Recipe

Fresh tomatoes are preferred but this pizza sauce recipe is perfect if you want to use up the tomatoes you have in the freezer.

fresh tomatoes quartered.

Wash Tomatoes

Wash and cut fresh tomatoes into quarters. Remove any bad spots.

top down photo of a large pot with quartered tomatoes.

Chop

Add the chopped tomatoes to a large stockpot or large enamel pot.

quartered tomatoes piled up in a pan to cook.

Heat

Cover the tomatoes and heat the tomatoes over high heat.

tomatoes boiling and cooking.

Simmer

Allow the tomatoes to simmer, stirring occasionally.

fresh tomatoes cooking down in a pan.

Simmer Till Soft

Simmer for 15 or until the tomatoes have become soft and tender.

set up for milling the tomatoes.

Food Mill

Prepare a food mill by placing it over a stock pot and using a ladle to transfer the hot tomatoes into the hopper of the food mill. 

spent tomato skins and seeds on a plate.

Toss

Discard the tomato skins and seeds.

tomato sauce in a pot.

Return

Return the pressed tomato pulp and juice back into the stock pot.

spices in a pot of cooked tomatoes for sauce.

Season

Add the seasoning blend, if desired.

wooden spoon stirring tomato sauce showing reduction.

Boil & Reduce

Bring the sauce to a boil, and reduce it to a simmer, stirring occasionally. Allow the sauce to reduce by half. This should take around 45 minutes. Stir in the citric acid or lemon juice and salt, if desired.

3 jars of canning jars filled with pizza sauce.

Store

Once your desired consistency is reached, cool completely and store in an air-tight container. If canning, follow the instructions below.

Did you make this recipe?

Do you have feedback that would be helpful to others? If so can help this small business owner by leaving a rating and a review in the comments section? Thank you for being part of the Savoring The Good Community. ~ Sarah

canning tomato sauce.

Pizza Sauce with Canning Instructions

Canning pizza sauce with fresh tomatoes is a simple way to have a delicious pizza sauce on hand for homemade pizza night.
4.65 from 17 votes
Print Pin Rate
Course: Canning Recipes
Cuisine: Italian
Prep Time: 20 minutes minutes
Cook Time: 40 minutes minutes
canning: 40 minutes minutes
Total Time: 1 hour hour 40 minutes minutes
Servings: 3 quarts
Calories: 478
Author: Sarah Mock

Ingredients

Tomato Sauce

  •  
    15 pounds Tomatoes fresh, ripe
  • citric acid1 ½ Teaspoon Citric Acid or lemon juice
  • A Morton Salt container with a blue label featuring a girl in a yellow dress holding an umbrella, with salt pouring out of a container-an essential ingredient for perfectly seasoning dishes like Chicken Cordon Bleu.1 Tablespoon Salt Optional

Italian Seasoning Blend

  • A bottle of McCormick Oregano Leaves with a red cap and label, containing dried oregano.2 Tablespoon Oregano dried
  •  
    2 Tablespoon Dried Basil
  • A bottle of McCormick Garlic Powder with a red lid and green label, featuring the brand logo and 1 Tablespoon Garlic Powder
  • A bottle of McCormick Thyme Leaves seasoning with a red cap and label displaying the brand name and product type-perfect for adding fragrant flavor to your turkey shepherd's pie.2 teaspoons Thyme
  •  
    2 teaspoons Crushed red pepper flakes

Creole Seasoning Blend

  • A bottle of McCormick smoked paprika with a red cap and label, featuring images of paprika peppers and text highlighting its rich, sweet flavor and non-GMO status-a perfect spice to add smoky depth to your favorite slowcooker sausage casserole.1 Tablespoon Paprika
  •  
    1 Tablespoon Hot Paprika
  •  
    1 Tablespoon cayenne pepper
  • A bottle of McCormick Oregano Leaves with a red cap and label, containing dried oregano.1 Talespoon Oregano
  • A bottle of McCormick Garlic Powder with a red lid and green label, featuring the brand logo and 2 teaspoons Garlic Powder
  • A plastic container of McCormick Onion Powder with a red lid and a green label stating 2 teaspoons Onion Powder
  • A 6 oz container of McCormick Pure Ground Black Pepper with a red lid and a 2 teaspoons Black Pepper
  • A bottle of McCormick Thyme Leaves seasoning with a red cap and label displaying the brand name and product type-perfect for adding fragrant flavor to your turkey shepherd's pie.2 teaspoons Thyme
  •  
    1 teaspoons celery seeds
  •  
    1 teaspoons white pepper
US Customary - Metric
Follow Savoring The Good On PinterestFollow @SavoringTheGood or tag #STGRecipes!

Instructions

  • Wash and cut fresh tomatoes into quarters. Remove any bad spots.
  • Add the chopped tomatoes to a large stockpot or large enamel pot.
    15 pounds Tomatoes
  • Cover the tomatoes and heat the tomatoes over high heat.
  • Allow the tomatoes to simmer, stirring occasionally.
  • Simmer for 15 or until the tomatoes have become soft and tender.
  • Prepare a food mill by placing it over a stock pot and using a ladle to transfer the hot tomatoes into the hopper of the food mill.
  • Turn the food mill to remove the skins and seeds.
  • Discard the tomato skins and seeds.
  • Return the pressed tomato pulp and juice back into the stock pot.
  • Add the seasoning blend, if desired.
    2 Tablespoon Oregano, 2 Tablespoon Dried Basil, 1 Tablespoon Garlic Powder, 2 teaspoons Thyme, 2 teaspoons Crushed red pepper flakes, 1 Tablespoon Salt
  • Bring the sauce to a boil, and reduce it to a simmer, stirring occasionally. Allow the sauce to reduce by half. This should take around 45 minutes. Stir in the citric acid or lemon juice and salt, if desired.
    1 ½ Teaspoon Citric Acid
  • Once your desired consistency is reached, cool completely and store in an air-tight container. If canning, follow the instructions below.

Canning Instructions

  • While your sauce is reducing prepare your jars.
  • Ladle the hot tomato sauce into hot jars, leaving ½ inch of headspace.
  • Remove any air bubbles and wipe the rim of the jar.
  • Center a new lid on the jar, apply the ring and finger tighten.
  • Place the jar in the boiling water bath canner.
  • Fill all the mason jars, returning each one to the water bath.
  • Process the pint jars for 35 minutes or process quart jars for 40 minutes, adjusting for altitude. Turn off the heat, allow the jars to stand for 5 minutes then remove the jars and allow to cool on a heat-safe surface.

Notes

If you don't have a food mill but still want to have a sauce without skins and seeds in it, you can! Follow my instructions on how to remove the skins and seeds from tomatoes in my canning diced tomato post.
After the seeds and skins are removed, continue with this recipe as written. When you get to the food mill step, use a hand immersion blender or a food processor to puree the cooked tomatoes.
Want to share when you made this recipe?Follow @SavoringTheGood & tag #STGRecipes!
Nutrition Facts
Pizza Sauce with Canning Instructions
Serving Size
 
1 jar
Amount per Serving
Calories
478
% Daily Value*
Fat
 
6
g
9
%
Saturated Fat
 
1
g
6
%
Polyunsaturated Fat
 
2
g
Monounsaturated Fat
 
1
g
Sodium
 
2471
mg
107
%
Potassium
 
5717
mg
163
%
Carbohydrates
 
102
g
34
%
Sugar
 
61
g
68
%
Protein
 
23
g
46
%
* Percent Daily Values are based on a 2000 calorie diet.
**Nutritional facts are just estimates. Please utilize your own brand nutritional values to double check against our estimates.
Like this recipe card? Want one for your site?Check out WP Recipe Maker!

Not Thick Enough?

Keep in mind that the sauce will thicken as it cools, but as a rule, you can adjust the thickness of the sauce by increasing or decreasing the time the sauce reduces on the stove.

Canning Instructions

pizza sauce, canning instructions, facebook image.
  1. While your sauce is reducing prepare your jars. See my canning 101 post for more canning information.
  2. Ladle the hot tomato sauce into hot jars, leaving ½ inch of headspace.
  3. Remove any air bubbles and wipe the rim of the jar.
  4. Center a new lid on the jar, apply the ring and finger tighten.
  5. Place the jar in the boiling water bath canner.
  6. Fill all the mason jars, returning each one to the water bath.
  7. Process the pint jars for 35 minutes or process quart jars for 40 minutes, adjusting for altitude. Turn off the heat, allow the jars to stand for 5 minutes then remove the jars and allow to cool on a heat-safe surface.

Frequently asked questions, answers and tips:

How do I get a thicker sauce?

This recipe calls for reducing the sauce by half but if that is not the consistency of thick sauce you are looking for, just increase the time and reduce the sauce more. I will reduce my sauce by almost ¾ to get the sauce thickness I like for my pizza sauce.

Chef Tip

If you don't have a food mill but still want to have a sauce without skins and seeds in it, you can! Follow my instructions on how to remove the skins and seeds from tomatoes in my canning diced tomato post.

After the seeds and skins are removed, continue with this recipe as written. When you get to the food mill step, use a hand immersion blender or a food processor to puree the cooked tomatoes.

Italian Seasoning Blend

Customize the flavor profile of the sauce by adjusting the spice blend to your tastes.

spices on a plate with text overlays.
  • Dried oregano
  • Dried basil
  • Garlic powder
  • Dried thyme
  • Crushed red pepper flakes (optional)

Creole Seasoning Blend

  • Sweet paprika
  • Hot paprika
  • Cayenne pepper
  • Dried oregano
  • Garlic powder
  • Onion powder
  • Ground black pepper
  • Dried thyme
  • Celery seed
  • Ground white pepper

Canning Supplies Needed:

canning jars clean and ready to be heated before the canning process
  • Canning Jars - Be sure they are canning jars. I use a 4 ounce Ball canning jar for this recipe. Glass jars do not equal canning jar.
  • Lids.- These can not be reused from batch to batch. Get new lids.
  • Rings - These are used to keep the lids tight to the jars are they process in the hot water bath.
  • Wide-Mouth Funnel - Great way to get your product IN the jar…not on the counter
  • Lid Wand - This is essential for safely getting the sterilized lids on the jars without burning your fingertips!
  • Ladle - Needed to get your hot recipe, pickling liquid or juice in the jars. (A heat-safe mug can be used in a pinch)
  • Clean Cloth - These are used to wipe the rim of the jar before the lid is applied.
  • Large Pot - A large pot that can accommodate canning jars PLUS 1-2 inches of water.
  • Tongs or Jar Lifters - ESSENTIAL for getting the jars out of the simmering water.

Sarah Mock of savoringthegood.com headshot 2022

I am Sarah Mock. Welcome!

Sarah Mock is a classically trained Chef and graduate of Johnson & Wales University. A culinary blogger for 15 years Sarah helps the home cook prepare her recipes with professional results.

Get to know me

as seen in:

Logos of Hersheyland, ABC News, and Good Day PA are showcased in a seamless row, providing a snapshot of popular brands.

Hersheyland Nightline Good Day Pa!

The vibrant design showcases the iconic logos of Pinterest, Rachael Ray, and Jell-O set against a bold red background. Sorry, the provided description doesn't offer enough detail to suggest important SEO keywords.

Pinterest Rachael JELL-O


Make Your Own Garlic Powder

garlic powder homemade.

Homemade garlic powder is one of those simple projects that instantly makes you feel like a more confident, intentional cook. With just fresh garlic, a bit of patience, and a few easy steps, you can create a fragrant, flavorful powder that leaves store-bought jars in the dust.

garlic powder homemade.

This recipe walks you through each stage from slicing to roasting, drying to grinding, so you end up with rich, aromatic garlic powder that brightens everything from weeknight dinners to special-occasion meals.

Making your own ingredients can be a great way to save money and stockpile pantry staples. The cost per ounce is usually lower when you make your own homemade ingredients.

I will keep homemade bread crumbs, dried sage, tomato paste, and dried orange peels on hand when I find the freshest ingredients that I want to preserve.

  • Just one ingredient is needed!
  • A great way to use up extra garlic cloves.
  • Always have garlic powder in the house.

Ingredients needed:

50 cloves of garlic in a tin foil pouch.

Recipe Card?

To find the full printable recipe with specific measurements and directions CLICK HERE to go to the recipe card.

Chef Tip

Take advantage of the pre-peeled garlic found at the grocery store to save time peeling garlic cloves.

Helpful Kitchen Tools

  • Silpat mat - this is a non-stick mat and will help peel the garlic off.
  • Blendtec - this is the highspeed blender that I have and LOVE.
  • Air Fryer - I used my air fryer on the dehydrate setting. An oven will also work.

How to make Garlic Powder

ground garlic powder in a jar.
  1. Peel the garlic and remove the root end.
  2. Roast or smoke the garlic (optional).
  3. Puree the garlic.
  4. Spread in an even layer on a non stick mat.
  5. Dry on the lowest setting.
  6. Pulse or crush the dried garlic until in a powder form.
  7. Store in a closed container.

Seasonal Favorite

Baked lattice top crust on an apple pie made with the Crisco pie crust recipe, showing flaky layers in the fluted edge.

This is my award-winning Crisco pie crust recipe; flaky, tender, and made with simple ingredients you already have.

Crisco Pie Crust

Garlic Powder Recipe Variations

This recipe calls for smoking the garlic first but I also have included instructions for how to make garlic powder in your oven or if you want to use a food dehydrator. Also, you could use garlic confit or roasted garlic to make homemade garlic powder. Just watch to be sure the paste is fully dehydrated and dry before making it into a powder.

Making Smoked Garlic Powder

To add another layer of flavor to your garlic powder, smoke it in your smoker for at least 3 hours on the lowest temperature. Pre smoking garlic is delicious for when you are going to be making garlic powder.

garlic being pulled out of the skins.

Remove Skin

If using fresh bulb garlic, remove each clove from the papery skin and slice off the root end.

50 cloves of garlic in a tin foil pouch.

Smoke

If smoking the garlic, add it to a foil packet, poeg holes in the foil, and smoke for 3 hours.

smoked garlic cloves in a foil pouch on the grill.

Check for texture

Make sure the garlic is soft and pliable. If not, continue to smoke.

smoked garlic in the bottom of a blender, blending started.

Pulse

Add the softened garlic to a blender and pulse until well blended.

purred garlic paste being spread on a sil pat mat with a yellow spatula.

Spread Out

Using a silicone spatula, spread the pureed garlic on a nonstick mat.

pureed garlic spread in an even layer.

Make Even

Be sure the garlic is spread in an even layer to ensure all the garlic is dried at the same time.

garlic paste drying out on a non stick mat.

Bake

Bake at the lowest temperature your oven will go. Cook for 6 hours, depending on the thickness of the garlic paste.

garlic paste drying out, showing bend but not break.

Does It Snap?

Check the garlic to see if it bends and snaps or just snaps. We want a snap, no bend.

garlic paste dried out showing the clean break.

Bake again if needed

Continue to bake/dry until the garlic snaps.

dried garlic chips in the bottom of a high speed blender .

Blend

Add broken pieces to the blender cup, close it and pulse until it is powdered.

side by side images showing the garlic powder being blended.

Grind

Pulse until you have reached your desired powder texture.

Store in an air-tight container and use within a year.

Oven Instructions

  1. Peel the garlic and remove the root end of the garlic.
  2. Slice the garlic into thin slices or crush it and lay it on a lined baking sheet and bake on the lowest oven temperature for 2 hours. Check to see if the garlic is dry and crisp.
  3. Continue to bake until the garlic slices snap when cracked.
  4. Pulse the dried garlic in a food processor or high-powered blender until powdered.
  5. Store in an air-tight container for up to a year.

Food Dehydrator

  1. Peel the garlic and remove the root end of the garlic.
  2. Slice the garlic into thin slices or crush it and lay it on the trays of your dehydrator in an even layer.
  3. Set the dehydrator to the lowest setting and dehydrate the garlic.
  4. After 4 hours, check to see if the garlic is dry and crisp.
  5. Continue to dehydrate until the garlic slices snap when cracked.
  6. Pulse the dried garlic in a food processor or high-powered blender until powdered.
  7. Store in an air-tight container for up to a year.

Granulated Garlic vs Garlic Powder

Both granulated garlic and garlic powder start with fresh garlic cloves. The two have a different texture. The main difference is that the granulated garlic will have a coarse texture and the garlic powder will be a fine powder. Both are great in salad dressings, dry rubs, and have an intense garlic flavor.

Storage Tips

  • Be sure the garlic is completely cooled if using a high-speed blender before storing it in an air-tight container.
  • If you want to be sure that all the moisture is out of the garlic powder add a small packet of silica gel packet to the jar.

Frequently asked questions, answers and tips:

Why is the temperature so low?

The low temperature used when drying garlic to make garlic powder will ensure that the flavor of the garlic will stay intense. Low and slow is the key.

Do you have to smoke the garlic before making garlic paste?

You do not need to smoke the garlic but it does add another layer of flavor.

Can this recipe be doubled?

For sure! This recipe calls for 50 cloves of garlic but you can make as much as you want. The number of garlic is not what is important, the technique is.

garlic powder homemade.

Garlic Powder: DIY Garlic Powder in Oven or Dehydrator

Make fresh, potent garlic powder at home with just garlic and a grinder. It's stronger and cleaner tasting than store‑bought.
5 from 1 vote
Print Pin Rate
Course: Ingredients
Cuisine: American
Keyword: how to make garlic powder
Prep Time: 15 minutes minutes
Cook Time: 6 hours hours
Total Time: 6 hours hours 15 minutes minutes
Servings: 36 teaspoons
Calories: 6
Author: Sarah Mock

Ingredients

  • Whole garlic bulb with white papery skin, lying on its side against a plain white background-a perfect aromatic addition to your next slowcooker sausage casserole.50 cloves Garlic
US Customary - Metric
Follow Savoring The Good On PinterestFollow @SavoringTheGood or tag #STGRecipes!

Instructions

  • If using fresh bulb garlic, remove each clove from the papery skin and slice off the root end.
    50 cloves Garlic
  • If smoking the garlic, add it to a foil packet, poling hold in the foil, and smoke for 3 hours. (Optional) Make sure the garlic is soft and pliable. If not, continue to smoke.
  • Add the softened garlic to a blender and pulse until well blended.
  • Using a silicone spatula, spread the pureed garlic on a nonstick mat.
  • Be sure the garlic is spread in an even layer to ensure all the garlic is dried at the same time.
  • Bake at the lowest temperature your oven will go. Cook for 6 hours, depending on the thickness of the garlic paste.
  • Check the garlic to see if it bends and snaps or just snaps. We want a snap, no bend.
  • Continue to bake/dry until the garlic snaps.
  • Add broken pieces to the blender cup, close it and pulse until it is powdered.
  • Pulse until you have reached your desired powder texture.
  • Store in an air-tight container and use within a year.

Notes

Homemade Garlic Powder Oven Instructions
  1. Peel the garlic and remove the root end of the garlic.
  2. Slice the garlic into thin slices or crush it and lay it on a lined baking sheet and bake on the lowest oven temperature for 2 hours. Check to see if the garlic is dry and crisp.
  3. Continue to bake until the garlic slices snap when cracked.
  4. Pulse the dried garlic in a food processor or high-powered blender until powdered.
  5. Store in an air-tight container for up to a year.
Making Garlic Powder In Food Dehydrator
  1. Peel the garlic and remove the root end of the garlic.
  2. Slice the garlic into thin slices or crush it and lay it on the trays of your dehydrator in an even layer.
  3. Set the dehydrator to the lowest setting and dehydrate the garlic.
  4. After 4 hours, check to see if the garlic is dry and crisp.
  5. Continue to dehydrate until the garlic slices snap when cracked.
  6. Pulse the dried garlic in a food processor or high-powered blender until powdered.
  7. Store in an air-tight container for up to a year.
Want to share when you made this recipe?Follow @SavoringTheGood & tag #STGRecipes!
Nutrition Facts
Garlic Powder: DIY Garlic Powder in Oven or Dehydrator
Serving Size
 
1 teaspoon
Amount per Serving
Calories
6
% Daily Value*
Fat
 
0.02
g
0
%
Saturated Fat
 
0.004
g
0
%
Polyunsaturated Fat
 
0.01
g
Monounsaturated Fat
 
0.001
g
Sodium
 
1
mg
0
%
Potassium
 
17
mg
0
%
Carbohydrates
 
1
g
0
%
Sugar
 
0.04
g
0
%
Protein
 
0.3
g
1
%
* Percent Daily Values are based on a 2000 calorie diet.
**Nutritional facts are just estimates. Please utilize your own brand nutritional values to double check against our estimates.
Like this recipe card? Want one for your site?Check out WP Recipe Maker!


Sarah Mock of savoringthegood.com headshot 2022

I am Sarah Mock. Welcome!

Sarah Mock is a classically trained Chef and a graduate of Johnson & Wales University. A culinary blogger for 17 years, Sarah helps the home cook prepare her recipes with professional results.

Get to know me

as seen in:

Logos of Hersheyland, ABC News, and Good Day PA are showcased in a seamless row, providing a snapshot of popular brands.

Hersheyland Nightline Good Day Pa!

The vibrant design showcases the iconic logos of Pinterest, Rachael Ray, and Jell-O set against a bold red background. Sorry, the provided description doesn't offer enough detail to suggest important SEO keywords.

Pinterest Rachael JELL-O

Asian Bowl Recipes

rice bowl recipes. Square image. featured image.

Are you looking for inspiration for some absolutely mouthwatering rice bowl recipes? If so then this is the list for you! With a wide variety of options from Korean bibimbap and Japanese sushi style to Mexican themed and even flavorful Indian cuisine. 

rice bowl recipes. Square image. featured image.

These rice bowl dinners are easy and have delicious toppings. Choose from chicken rice bowls, vegan rice bowls and other delicious recipes.

Korean Rice Bowl Recipes

From teriyaki chicken to spicy shrimp, there's a flavor for every taste bud.

These easy-to-make grain bowl dishes are perfect for busy weeknights weeknight dinners or lazy weekends.

Ginger Garlic Bulgogi Bowl

Ginger Garlic Bulgogi Bowl with garnishes.

Bulgogi bowls are super delicious and satisfying, especially this recipe with ginger, garlic, fluffy white rice, spicy kimchi, a fried egg, crispy chili beef, and sliced fresh cucumber. Bulgogi is a traditional Korean dish that literally translates to "fire meat" and it's extremely flavorful!

Korean Ground Beef and Rice Bowl

Korean Beef Bowl with kim chi.

If you're looking for Korean beef rice bowls that are simple and flavorful this is the recipe for you! With onions, avocado oil, scallions, and sesame broccoli what's not to love? You can whip this up in 15 minutes for a delicious and quick weeknight meal. 

Tuna Mayo Deopbap Bowl

Tuna Mayo Deopbap in a dark Bowl.

Next time you want to get Korean restaurant-style food but don't feel like leaving the house, give this tuna Mayo deopbap recipe a try. This Korean-inspired meal is so good, you'll be making it all of the time! They're perfect for home or to-go lunch any time of the year. 

Soy Sesame Bibimbap

Soy Sesame Bibimbap with garnishes.

Soy sesame bibimbap is a savory rice bowl with thinly sliced Bulgogi Korean beef, mixed vegetables, kimchi, gochujang, and more. The best vegetables to use include julienned cucumber, zucchini radish, gim (edible seaweed), mushrooms, dorangi (bellflower root), soybean sprouts, green onions, and gosari (bracken fern stems).

Korean Chicken Rice Bowl

Korean Chicken Rice Bowl own white surface.

Korean chicken rice bowls are like a nutritious Asian take-out-inspired dish with sweet and tangy ingredients. With boneless skinless chicken breast, this whole grain bowl is the meal to choose when you want to keep it really yummy.

Vegetarian Bibimbap

Vegetarian Bibimbap bowl.

If you love bibimbap-style bowls but want to keep it vegetarian try this. It's perfectly flavored with miso paste alongside a traditional Gochujang sauce! As well as soy, sesame, and stir fry veggies. This meal is ready in less than 20 minutes.

Bokkeumbap Fried Rice

Bokkeumbap Fried Rice bowl with chop sticks on the bowl.

Bokkeumbap is a popular traditional Korean fried rice dish using Doenjang and Gochujang pastes. Made with red chilies, fermented soybeans, rice and salt resulting in a fiery heat and mild sweetness. 

Korean BBQ Salmon

Korean BBQ Salmon bowl.

Many of these can be made with any type of rice, including cooked brown rice or cooked white rice but the vegetarian in my house likes to serve them over cauliflower rice.

Sweet & Spicy Ginger Tofu Bowl

Sweet _ Spicy Ginger Tofu Bowl.

Don't shy away from tofu recipes! This sweet and spicy ginger tofu rice bowl is just what you need for your next plant based meal. For best results use firm or extra firm tofu for a tasty texture mixed with amazing ingredients like ginger garlic & molasses. 

Black Bean Onion Pilaf

Black Bean Onion Pilaf in bowls.

If you like black beans and onions this simple, hearty meal is right up your alley. This vegetarian rice bowl takes 15 minutes to prep, 25 minutes to cook, and is perfect for the whole family. 

Broccoli Brown Rice Bowl

Broccoli Brown Rice bowl with sauce to the side.

This recipe also has broccoli, coconut bacon, and almond satay sauce! Plus it's vegan, gluten free, meal prep friendly, and packed with plant-based protein. Make sure to use gluten-free tamari instead of soy sauce to keep it GF!

Baked Tempeh With Brown Rice 

Baked Tempeh With Brown Rice.

I absolutely adore tempeh, it's so much better than tofu in my personal opinion because the texture is crunchy and almost meaty. This rice bowl recipe uses marinated baked tempeh, cabbage slaw and broccoli making it absolutely delicious. 

Instant Pot Fajita Rice Bowl

Instant Pot Fajita Rice Bowl with spoon in the bowl.

Break out your instant pot and get ready to make fajita rice packed with juicy chicken, creamy cheese, your favorite toppings, and Southwest flavors. This recipe is suitable for gluten free diets and includes Weight Watchers points. 

Teriyaki Chickpea Rice 

Teriyaki Chickpea Rice bowl in a white bowl.

The most amazing vegetarian bowl with rice, teriyaki chickpeas, stir-fried vegetables and topped with ginger peanut sauce. They are easy to make in advance for show-stopping meals all your quick weeknight dinner together.

Sriracha Baked Tofu

Sriracha Baked Tofu bowl on a white surface.

You will love this delicious rice bowl featuring sriracha baked tofu over rice topped with edamame, avocado and carrot. If you're looking for an outstanding vegan rice bowl that's packed with flavor and nutrition, this sriracha tofu meal is sure to do the trick! It's perfect for a quick weeknight meal but it's lovely for guests too.

Lemongrass Tofu Buddha Bowl

Lemongrass Tofu Buddha Bowl on a dark surface.

Lemongrass Buddha bowls feature tofu tossed in a sweet garlicky lemongrass honey soy sauce served with fresh veggies over rice. The best part about this meal is that the whole thing is on the table in 30 minutes or less.

Indian Rice Bowl Recipes

Chicken Pulao Rice 

Chicken Pulao Rice bowl.

Good chicken is amazing in almost any form like a side dish, snack, or main course. Just like this chicken pulao with rice! This traditional Indian cooking method utilizes absorption with a specific amount of water. With fantastic herbs and spices as well this meal will not disappoint. 

Vegan Butter Chickpeas 

Vegan Butter Chickpeas bowl.

Vegetarian meals are popular in Indian cuisine. Like this butter chickpea rice bowl using creamy yogurt and fragrant spices. It's then finished off in a single skillet with a tomato-based sauce and ready in just 10 minutes!

Squash Chickpea Curry Rice 

. Squash Chickpea Curry Rice bowl.

This recipe is so simple and so tasty. After you taste one bite you'll be adding this one to your go-to dinner recipes asap! With butternut squash, chickpea curry, spinach, brown rice and green chutney!

Japanese Rice Bowl Recipes

Shrimp Rice Bowls

Shrimp _ Rice Bowls.

I love a good, hearty shrimp recipe and if it is bursting with nutrition and pretty to look at, bingo! This seafood rice bowl has so much going for it. The goodness of jalapeño, cilantro, grated cotija cheese, and more comes together in a beautiful medley of aromatics and spices. 

Teriyaki Salmon Bowls

Teriyaki Salmon Bowls.

How can you not love a scrumptious pan-seared salmon glazed in a homemade teriyaki sauce? Especially when it's served on top of a bowl of rice with lots of colorful, veggies.  A new and creative way to serve seafood dinner at home!

Teriyaki Chicken Rice Bowls

Teriyaki Chicken Rice Bowls for two.

You just have to make these easy chicken teriyaki bowls because they are so yummy, simple to make, and well-balanced. They are great for meal-prep, weekday dinners, or on-the-go lunch. The best part is you can easily make them ahead of time like Sunday evening!

Chicken & Egg Rice 

Chicken _ Egg Rice bowl.

If you're looking for a top notch Japanese chicken and rice bowl recipe you've found the best one. Donburi has a delicious bowl of steamed white rice with extra broth that soaks through everything, adding loads of umami flavor!

Spicy Crab Sushi Bowl

Spicy Crab Sushi Bowl .

Sushi is hands down my favorite food, no ifs, ands or buts. That's why I make this spicy crab sushi bowl all the time. No need to drop a 60+ dollar bill going out to eat sushi anymore, these homemade ideas are simple.

Tuna Poke Bowl

Tuna Poke Rice Recipe on a blue surface.

If you want to enjoy the flavors of a fresh sushi roll in the comfort of your home, make this tuna poke rice. Perfect for meal prep, lunch or dinner. With all your favorite Japanese ingredients like tuna, rice, avocado, cucumber and a flavorful sauce.

Unagi Don Unadon 

Unagi Don Unadon bowl.

Unagi sauce is so good! If you've ever had an eel sushi roll you've likely tasted unagi. If I had to describe the flavor it's like a Japanese twist on American BBQ sauce but better. Take that sauce and serve with eel, steamed rice and top with nori, sesame seeds, and scallions.

Ikura Donburi

Ikura Donburi rice bowl.

If you really adore Japanese seafood then you're likely familiar with ikura. Salmon roe fish eggs marinated and served with rice and wasabi is actually easy enough to make at home. As a whole this dish is rich, briny, earthy, balanced, decadent, and fluffy! 

Yellowtail Sashimi Bowl

Yellowtail Sashimi Bowl with garnishes.

I had to add a few recipes for sushi themed rice bowls because I just love this style of Japanese cuisine so much. Yellowtail sashimi bowls take just a few minutes to assemble and make the best meal for any time any day. All you have to do is cook the rice and assemble. 

Spicy Salmon Sushi In A Bowl 

Spicy Salmon Sushi In A Bowl .

Spicy salmon sushi roll rice bowl is a fabulous homemade restaurant quality dish. No need to leave the house either, enjoy the sushi experience at your very own dinner table. Results include a mixture of creamy, crunchy, spicy, and sour flavors. 

Mexican Recipes

Buffalo Chicken Bowl 

Moving on to Mexican style bowls, this Buffalo chicken dish is super flavorful. Just get some thinly sliced boneless skinless chicken breast, broccoli slaw mix, blue cheese crumbles, buffalo sauce and some seasonings and get cookin. 

Chicken Burrito Bowl

Chicken burritos in a bowl of rice are next in the list for Mexican inspired rice recipes! This one is ready in 30-minutes with chicken breasts, corn, pinto beans, rice, lettuce, salsa, sour cream, and cheddar cheese. Tip: use cilantro lime rice for added flavor. 

Chipotle Shrimp Fajita Rice 

Shrimp fajita rice is ready in 30-minutes or less. It's a quick and easy meal that the entire family can enjoy. With rice, sauteed vegetables, and a cilantro lime Greek yogurt sauce.

Mexican Beans & Rice 

Make it mild or spicy to serve with enchiladas, tacos or chicken. Ingredients include: olive oil, long grain rice, whole canned black beans,, diced onions, green bell peppers, and so much more!

Enchilada Rice Bowls

Enchilada rice bowls are whipped up quickly and easily in your instant pot. It's a great side dish or you can add some meat for a full course meal. With ingredients like olive oil, chili powder, cumin, parsley, enchilada sauce, and more what's not to adore? 

Taco Rice Bowl 

A vegetarian taco in a bowl, crushed tortilla chips, and lettuce? Yes please! It's gluten free and full of different textures and flavors that you will devour. So if you want a meatless, quick and easy weeknight dinner idea for the whole family try taco rice bowls! 

Asian Rice Bowl Recipes

Bang Bang Shrimp 

Moving on to Chinese inspired rice bowls and I just had to start with bang bang shrimp. This recipe has ingredients like crunchy cucumbers and creamy avocado making it super scrumptious. This dish was also inspired by the Bonefish Grill.

Crockpot Sweet & Sour Chicken 

Who doesn't love sweet and sour flavored chicken meals? When you combine chicken breasts, sweet pineapple, zesty red and green bell peppers, tangy onions, and a sour, flavorful sauce your result is sure to be number one. 

Beef & Broccoli Rice Bowls 

Beef and broccoli stir fry is a classic Chinese cuisine recipe. And this one won't disappoint with an extremely addictive sauce. It's budget friendly and a lovely homemade takeout style dish. Your family members will be grateful when you serve them this meal. 

Kung Pao Tofu Rice 

This Kung Pao recipe is a fantastic way to eat tofu. It's a Chinese inspired stir fry, well seasoned, packed with vegetables, and toasted in a lovely brown sauce. Make it a little spicy with some chili pepper flakes. 

Ground Beef & Broccoli 

Ground beef and broccoli rice bowls are super simple, budget friendly, and full of flavor. Ready in under 30 minutes and mistake-proof, this recipe will have you licking the bowl!

Frequently asked questions, answers and tips:

Are rice bowls good for you?

Just like any kind of recipe a rice bowl can be good or not so good for you depending on the toppings you put in it. Rice by itself is a nutritious whole grain and if you want to make the bowl more filling, add baked meat, minimal oils, and lots of steamed vegetables! 

Reader Favorites

  • Pear butter in a glass canning jar with spices to the side and a whole pear to the right of the jar
    Pear Sauce Recipe
  • lasagna roll up on a serving fork coming out of the full pan, cheese pulling
    Lasagna Roll Ups Recipe
  • Four tacos filled with shredded meat from a delicious Mojo Pork Recipe, garnished with cilantro, and accompanied by lime wedges on a white plate.
    Mojo Pork Recipe
  • Sous vide eggs on toast, broken to show the runny yolk
    Sous Vide Poached Eggs: 60°C or 63°C


Sarah Mock of savoringthegood.com headshot 2022

I am Sarah Mock. Welcome!

Sarah Mock is a classically trained Chef and graduate of Johnson & Wales University. A culinary blogger for 15 years Sarah helps the home cook prepare her recipes with professional results.

Get to know me

as seen in:

Logos of Hersheyland, ABC News, and Good Day PA are showcased in a seamless row, providing a snapshot of popular brands.

Hersheyland Nightline Good Day Pa!

The vibrant design showcases the iconic logos of Pinterest, Rachael Ray, and Jell-O set against a bold red background. Sorry, the provided description doesn't offer enough detail to suggest important SEO keywords.

Pinterest Rachael JELL-O

25 Bone-In Chicken Breast Recipes That Stay Juicy Every Time

A collage of pictures of chicken and vegetables in a pot.

Looking for the best bone-in chicken breast recipes? You've landed in the right place. Cooking chicken breast on the bone means juicier, more flavorful meat every time, especially when you leave the skin on. The bone helps retain moisture while the skin locks in all that natural flavor.

A collage of pictures of chicken and vegetables in a pot.

Whether you prefer air-fried, oven-baked, grilled, or slow-cooked, this collection of recipes has something for every craving. Each one is simple enough for a weeknight dinner yet tasty enough to impress guests. Let's dig into these tried-and-true bone-in chicken breast ideas that are guaranteed to turn out tender and delicious.

Depending on the chicken recipe, sometimes boneless skinless chicken breasts can be dry and tough. You also will want to try my collection of chicken quarter recipes and this authentic Jamaican jerk chicken. Chicken can be made in so many delicious flavors!

Air Fryer Bone-In Chicken Breast

Air fryer bone-in chicken breast recipes are perfect when you want crispy skin and juicy meat with minimal effort. These recipes use simple seasonings and pantry staples so even a beginner cook can make flavorful chicken in under 30 minutes.

1. Air Fryer BBQ Chicken

Grilled bone-in chicken breast with a golden glaze served alongside roasted broccolini on a white plate-a delicious addition to your collection of Bone In Chicken Breast Recipes.

Easily use your air fryer to make this tasty BBQ bone-in chicken breast! It comes out quick, crispy, juicy, and flavorful straight out the air fryer basket. All you need to season and flavor is kosher salt, pepper, and your favorite BBQ sauce.

2. Air Fryer With All Purpose Seasoning

Two seasoned, cooked chicken breasts sit inside the basket of an air fryer, perfect for those seeking quick and flavorful bone in chicken breast recipes.

This simple air fried chicken, seasoned with all purpose spices, is definitely a winning meal. It's ready in less than 30 minutes and perfectly paired with your favorite side dish. You can utilize this recipe for a healthy family dinner, meal prep, and even dinner parties. 

3. AIP Air Fryer Breast

Roasted bone-in chicken breast served on a white plate with lemon slices and fresh herbs, accompanied by a fork and knife-a delicious addition to your collection of Bone In Chicken Breast Recipes.

Chicken in the air fryer comes out marvelous and juicy and full of flavor every single time. Plus this one is AIP, paleo and Whole30 compliant. You will love the fresh flavors of lemon, garlic, thyme, olive oil, and sea salt.

Oven Baked Split Chicken Breast Recipe

Oven-baked bone-in chicken breast recipes are ideal when you want hands-off cooking with big flavor. These split chicken breast dinners roast up with crispy skin, juicy meat, and plenty of pan juices you can spoon over rice, potatoes, or vegetables.

Add some spice with a jerk seasoning or keep it classic with a lemon herb marinade. With so many options, you'll never get bored of this delicious and healthy protein source.

4. Garlic Soy Roasted With Mushrooms

Garlic Soy Roasted With Mushrooms_.

This roasted garlic soy mushrooms recipe is quick, delicious, and the perfect way to make chicken. So gather up 4 lbs bone-in split breasts, baby bella mushrooms, butter, soy sauce, garlic, oregano, and crushed red peppers and get to cookin'.

5. Lemon Herb Chicken Rice Pilaf

Lemon Herb Chicken Rice Pilaf .

This lemon herb poultry with rice pilaf is crispy on the outside and tender, juicy and flavorful on the inside. This game-changing recipe is easy and fantastic for entertaining or just a nutritious ,easy dinner. 

6. Baked Bone In Chicken And Potatoes

Garlic Soy Roasted With Mushrooms_.

Oven baked chicken and potatoes is one dinner the whole family will love. Bone in chicken recipes do take a bit longer to cook but it's well worth it. Serve it with steamed vegetables, a salad, or even soup! 

7. Corn Meal Crusted Chicken

Corn Meal Crusted Chicken.

The cornmeal crust of this baked chicken is so delicious because it's mixed with fresh Rosemary. It will cook to a golden brown perfection yet still remain juicy and tender inside. 

8. Bone In Chicken Ditalini Soup

Bone In Chicken Ditalini Soup.

Just because you're making soup doesn't mean you shouldn't utilize juicy bone-in chicken breast! This healthy low sodium broth is packed with tasty carrots and celery too. Other ingredients needed include: onions, canola oil, parsley, salt, pepper, and ditalini pasta. 

9. Oven BBQ Chicken

Oven BBQ Chicken.

This BBQ sauce recipe is made from scratch with mouthwatering flavors! It's the perfect addition to crispy tender poultry baked to perfection. Serve up with a side of mashed potatoes and some biscuits. This is one of my FAVORITE bone-in breast recipes with sauce.

10. Oven Roasted Bone-In Chicken Breast & Potatoes

Sheet Pan Chicken Potatoes With Chimichurri .

It's time to bust out your favorite sheet pan, chicken, potatoes, and Chimichurri! Chimichurri is an Argentinian sauce that's popular in South America. It's an uncooked sauce/ marinade composed of fresh herbs, olive oil, garlic, and vinegar. Don't forget to use aluminum foil or parchment paper on your rimmed baking sheet for easier clean up.

11. Brined Herb Bone In Chicken Breasts

Brined Herb Bone In Chicken Breasts_.

The only thing tastier than a classic bone in chicken breast recipe is one that's also brined! The easy brine is what makes this poultry so amazing. All you need is garlic, rosemary, thyme, lemon, salt, pepper, warm, water and sugar. 

12. Roasted Rosemary Breast & Gravy

Roasted Rosemary Breast _ Gravy

Oven roasted Rosemary chicken with gravy can't be beat! With only 10 minutes of prep time and 45 minutes of cook time it's ready to serve in less than an hour. It's the perfect dish for company too. 

13. Roasted Chicken Breast with Crispy Chicken Skin

Roasted Chicken Breast.

Never bake dry bland split chicken breast again with bone in, skin on roasted breast meat recipes! Like this one with a high cooking temperature and an elevated rack you can't go wrong. Simply serve it up by slicing it off the bone and fanning out on the plate.

[feast_advanced_jump_to]

Split Chicken Breasts in the Crock Pot 

Slow cooker bone-in chicken breast recipes are all about easy comfort food. Just add your chicken breasts and a few ingredients to the crock pot in the morning and come home to tender, fall-off-the-bone meat that's great over rice, pasta, or with a simple veggie side.

14. Crock Pot Balsamic Chicken

Crock Pot Balsamic Chicken.

When you have the time to do it, slow cooking your poultry is well worth the wait. This balsamic breast only needs 5 minutes of prep and super easy ingredients. You can just transfer everything in your crock-pot before work and come home to a comforting dinner.

15. Slow Cooker Chicken Casserole 

Slow Cooker Chicken Casserole .

Stuffing is my favorite recipe during the holidays and we should normalize making it more often! Like this crockpot casserole with creamy sauce and stuffing mix! It's super tasty and the kids love it too! 

Seasonal Favorite

Baked lattice top crust on an apple pie made with the Crisco pie crust recipe, showing flaky layers in the fluted edge.

This is my award-winning Crisco pie crust recipe; flaky, tender, and made with simple ingredients you already have.

Crisco Pie Crust

Whole Chicken Breast Bone-In Recipes (Instant Pot)

Instant Pot bone-in chicken breast recipes give you the best of both worlds: fast cook times and juicy results. These pressure cooker meals layer in bold flavors like Marsala wine or curry spices while keeping the chicken moist, tender, and perfect for spooning sauce over mashed potatoes, rice, or noodles.

16. Instant Pot Chicken Marsala

Instant Pot Chicken Marsala

If you are looking to change up your weekly meal rotation, this chicken Marsala is the one to try. It's great for a busy weeknight but also still really flavorful. You certainly won't be disappointed with these classic Italian flavors. 

17. Instant Pot Chicken Curry

Instant Pot Chicken Curry .

This chicken curry will instantly become your new favorite family dish. If you've never had curry this bone-in recipe is the one to start with. The flavors will knock your socks off plus this particular recipe is actually really healthy. This is one of the BEST chicken breast with bone recipes I have made recently!

18. Stuffed Balsamic Chicken Breast

Stuffed Balsamic Chicken Breast .

When you butterfly and stuff these baked bone-in chicken breasts you end up with a mouthwatering recipe. Packed with cheese, tomatoes and sweet basil and then cooked in a sweet balsamic vinegar.

Stove Top Bone In Chicken Recipes

Stovetop bone-in chicken breast recipes are great when you want everything cooked in one pot. You'll build flavor right in the pan with spices, beans, and vegetables so you end up with a complete meal and succulent chicken without turning on the oven.

19. One Pot Sazon Chicken & Black Beans

In pan chicken with vegetables.

Sazon chicken with black beans is the bright vibrant one pot meal you have to cook for the family! Use bone-in skin-on chicken breasts and Sazon, a Hispanic spice mix of coriander, cumin, achiote, garlic powder, oregano, salt & black pepper and once you taste this dish it will become your new go-to seasoning. 

20. One Pan Chicken With Vegetables

One Pot Sazon Chicken _ Black Beans .

With vegetables like sweet potatoes, Yukon golds, bell peppers, onions, and Brussels sprouts this one pan meal has everything you need and love. This cooking method infuses the chicken meat and veggies making them absolutely delectable! You might want to make extra portions because this one will get gobbled up quickly! 

21. Boiled Bone In Chicken Breast for Shredded Chicken

Boiled Bone In Chicken Breast.

Boiling some bone-in chicken breast is the perfect way to set yourself up for meal time success! That's because you can incorporate it in so many ways. Shredded chicken, diced, sliced, it's great for dips, soups, chicken salad, tacos, and so much more. 

23. Southern Stewed Tender Chicken

Southern Stewed Chicken

If you're looking for your new favorite dinner to make this fall or winter, southern stewed chicken is where it's at. While it's not a 'quick' meal, it's one that's well worth the wait. Low and slow will have this poultry melting right off of the bone!

Grilled Bone-In Chicken Recipes

Grilled bone-in chicken breast recipes are a delicious way to get smoky, crispy skin and juicy meat at the same time. These dishes are great for warm-weather dinners or cookouts and pair perfectly with simple sides like pasta salad, grilled vegetables, or corn on the cob.

24. Grilled Chicken Pesto Pasta 

Grilled Pesto Pasta.

These grilled chicken breasts have a crispy skin, are healthy, flavorful, juicy, tender, and so tasty. Quick to make and serve up with potatoes, vegetables or any side of choice. All you need is 2 chicken breasts, olive oil, spices, farfalle pasta, pesto, tomato, basil, and Parmesan! 

25. Cornell Chicken Barbecue

Cornell chicken BBQ.

Cornell quarter chicken on the gas grill is one of my favorite way to make poultry recipes because it is so tasty. So gather up your oil, vinegar, eggs, and seasoning and get to your grill! 

Frequently asked questions, answers and tips:

How long to cook chicken breast, bone in?

When cooking bone-in chicken breast, depending on the method you're using, it will take about 35-45 minutes. You can check with an instant read thermometer to check for doneness. The chicken is done when the internal temperature of the chicken reaches 165 degrees F (74°C) on an instant-read thermometer when inserted into the thickest part of the breast meat. 

Are bone-in chicken breasts better than boneless?

Bone-in, skin-on chicken breasts stay juicier because the bone and skin help protect the meat from drying out. They're especially good for roasting, grilling, and air frying when you want tender meat and crispy skin in one recipe.

A blue Thermapen digital thermometer from ThermoWorks, displaying 70.0, lies on a wooden table near a plate of grilled meat. The ThermoWorks logo and a "Shop Now" button are also visible, inviting you to explore the precision of this essential kitchen tool.

On sale for you today!

Sarah's Favorite Thermometer

Never question the temperature of your food again!

Get 15% off today

Chef Tip

Save the leftover bones to make homemade chicken broth.


Sarah Mock of savoringthegood.com headshot 2022

I am Sarah Mock. Welcome!

Sarah Mock is a classically trained Chef and a graduate of Johnson & Wales University. A culinary blogger for 17 years, Sarah helps the home cook prepare her recipes with professional results.

Get to know me

as seen in:

Logos of Hersheyland, ABC News, and Good Day PA are showcased in a seamless row, providing a snapshot of popular brands.

Hersheyland Nightline Good Day Pa!

The vibrant design showcases the iconic logos of Pinterest, Rachael Ray, and Jell-O set against a bold red background. Sorry, the provided description doesn't offer enough detail to suggest important SEO keywords.

Pinterest Rachael JELL-O


Knorr Spinach Dip

knorr spinach dip in a bread bowl.

Knorr spinach dip is a creamy, crowd-pleasing appetizer made with Knorr vegetable recipe mix, frozen spinach, sour cream, and mayonnaise. This easy dip comes together in minutes, chills until perfectly flavorful, and I love to serve it with bread, crackers, or fresh vegetables.

knorr vegetable spinach dip in a bread bowl with torn bread.

This one's on my Thanksgiving appetizer menu every year so don't forget a second box of spinach for a batch of artichoke spinach dip. Grab your slow cooker and add my recipe for Crock Pot Cowboy Soup to your game day menu!

How to Make Knorr Spinach Dip

Knorr spinach dip is made by mixing thawed frozen spinach with Knorr vegetable recipe mix, sour cream, and mayonnaise. After chilling for at least 2 hours, the flavors meld into a creamy, crowd-pleasing dip that's perfect with bread, crackers, or fresh vegetables.

  1. Chop water chestnuts and green onions (if using); thaw and squeeze dry the spinach.
  2. In a large bowl, combine sour cream, mayonnaise, Knorr Vegetable Recipe Mix, spinach, and mix-ins.
  3. Cover and chill 2 hours to overnight.
  4. Stir and serve in a bread bowl with bread cubes and veggie crudités.

Why You'll Love This Spinach Dip:

  • 10-minute prep with simple pantry ingredients.
  • Classic, nostalgic flavor everyone recognizes and adores.
  • Chills beautifully and is the ideal make-ahead party dip.

Ingredients:

spinach dip ingredients, mayo, fresh water chestnuts, spinach, knoor veg soup mix, sour cream with text overlays.

Recipe Card?

To find the full printable recipe with specific measurements and directions CLICK HERE to go to the recipe card.

Substitutions And Variations

  • Swap some mayo for Greek yogurt for a lighter dip (start 50/50).
  • Add chopped water chestnuts for crunch.
  • Stir in sliced green onions for a fresh bite.
  • Serve in a bread bowl for a fun presentation.
knorr spinach dip in a bread bowl.

KNORR Veggie Spinach Dip Recipe (& Bread Bowl Instructions)

A packet of Knorr vegetable recipe mix combined with sour cream, mayonnaise, minced fresh water chestnuts, chopped spinach and chopped scallions to make one of my favorite spinach dips ever!
5 from 1 vote
Print Pin Rate
Course: Dips & Salsas
Cuisine: American
Keyword: Knorr Spinach Dip
Prep Time: 15 minutes minutes
Chill Time: 2 hours hours
Total Time: 2 hours hours 15 minutes minutes
Servings: 32 servings
Calories: 77
Author: Sarah Mock

Ingredients

  •  
    1 10 ounce frozen spinach thawed, cooked, excess moisture drained
  • sour cream.16 Ounces Sour Cream
  • A jar of Hellmann's Real Mayonnaise with a blue lid, labeled 1 Cup Mayonnaise
  •  
    1 packet Knorr Vegetable Recipe Mix
  •  
    1 8 ounce can water chestnuts drained and chopped
  •  
    3 green onions chopped (optional)
US Customary - Metric
Follow Savoring The Good On PinterestFollow @SavoringTheGood or tag #STGRecipes!

Instructions

  • Cook the frozen spinach in the microwave for 2 minutes or until heated through. Using a paper towel, and a mesh strainer, press the excess moisture out. Discard the excess liquid.
    1 10 ounce frozen spinach
    hand pressing excess moisture out of cooked spinach in a cllander using a paper towel.
  • Dice the fresh water chestnuts into small pieces.
    1 8 ounce can water chestnuts
    fresh water chestnuts chopped on a wooden cutting board, chef knife to the side.
  • Finely chop the cooked spinach.
    chopped cooked spinach on a cutting board with a chef kife to the side.
  • Add all the ingredients to a large bowl.
    1 10 ounce frozen spinach, 16 Ounces Sour Cream, 1 Cup Mayonnaise, 1 packet Knorr Vegetable Recipe Mix, 3 green onions, 1 8 ounce can water chestnuts
    Knorr Spinach Dip ingredients in a glass bowl.
  • Using a silicone scraper or wooden spoon, stir all the ingredients until combined. Be sure all the ingredients are thoroughly distributed throughout.
    spinach vegetable dip combined in a glass bowl with a silicone scraper.
  • Chill in the refrigerator for at least 2 hours before serving. Overnight is preferred.
    spinach vegetable dip in a clear rectangle storage container.

How to prep a bread bowl:

  • Using a serrated bread knife cut out the top and remove the inside of the bread bowl.
    round bread bowl with the cop cut out showing how to cut on an angle.
  • Pull out the inside of the bread, and slice off the excess of the top.
    round bread with the inside of the bread bowl puled out.
  • Break up the bread into bites sized pieces.
    round bread with the inside of the bread bowl puled out.
  • Fill the hollowed-out bread bowl with the dip and surround it with the bread cubes.
    Knorr Spinach Dip in a bread bowl on a copper charger plate.
Want to share when you made this recipe?Follow @SavoringTheGood & tag #STGRecipes!
Nutrition Facts
KNORR Veggie Spinach Dip Recipe (& Bread Bowl Instructions)
Serving Size
 
2 tablespoons
Amount per Serving
Calories
77
% Daily Value*
Fat
 
8
g
12
%
Saturated Fat
 
2
g
13
%
Trans Fat
 
0.01
g
Polyunsaturated Fat
 
3
g
Monounsaturated Fat
 
2
g
Cholesterol
 
11
mg
4
%
Sodium
 
68
mg
3
%
Potassium
 
22
mg
1
%
Carbohydrates
 
1
g
0
%
Sugar
 
1
g
1
%
Protein
 
0.4
g
1
%
* Percent Daily Values are based on a 2000 calorie diet.
**Nutritional facts are just estimates. Please utilize your own brand nutritional values to double check against our estimates.
Like this recipe card? Want one for your site?Check out WP Recipe Maker!

Step-by-step Instructions

hand pressing excess moisture out of cooked spinach in a cllander using a paper towel.

Prep the Spinach

Thaw and squeeze out all excess water from frozen spinach.

Mix the Base

Combine sour cream and mayonnaise in a large bowl.

Knorr Spinach Dip ingredients in a glass bowl.

Add Flavor

Stir in Knorr vegetable recipe mix and spinach until evenly combined.

spinach vegetable dip in a clear rectangle storage container.

Chill and Serve

Cover and refrigerate at least 2 hours before serving.

Did you make this recipe?

Do you have feedback that would be helpful to others? If so can help this small business owner by leaving a rating and a review in the comments section? Thank you for being part of the Savoring The Good Community. ~ Sarah

Storage Tips

spinach vegetable dip in a clear rectangle storage container.
  • Store leftover spinach dip in an airtight container in the refrigerator for 3-4 days.
  • If it looks a bit "wet" after chilling, that's the dried vegetables rehydrating; just stir and serve.
  • Not recommended for freezing (texture becomes watery/grainy).

How I serve this spinach dip

horizontal image of Knorr Spinach Dip in a bread bowl.

My favorite type of bread bowl to serve the dip in is the pumpernickel flavor. It pairs perfectly with this creamy dip. But pumpernickel bowls are only available in my area during the winter holiday season.

Carrot sticks, broccoli florets, cauliflower florets, zucchini sticks and other fresh vegetables as well as toasted crostinis or crackers are other items to serve when I make this dip. But I love the classic bread.

How to serve spinach dip recipe in a bread bowl:

My mom always served the Knorr vegetable dip in a bread bowl. Back in the day, she had to special order it from the bakery manager at the grocery store. Thankfully, they are more readily available these days.

round bread bowl with the cop cut out showing how to cut on an angle.

Remove the Bread Top

Using a serrated bread knife cut out the top and remove the inside of the round loaf.

tight shot of a bread bowl with the excess bread pulled out.

Hollow the Loaf

Pull out the bread inside, leaving a ¾-inch wall.

round bread with the inside of the bread bowl puled out.

Make Bread Cubes

Cut or tear the removed bread into bite-size pieces.

Knorr Spinach Dip in a bread bowl on a copper charger plate.

Fill

Spoon the dip into the bread bowl and surround with bread cubes and veggies.

Seasonal Favorite

Baked lattice top crust on an apple pie made with the Crisco pie crust recipe, showing flaky layers in the fluted edge.

This is my award-winning Crisco pie crust recipe; flaky, tender, and made with simple ingredients you already have.

Crisco Pie Crust

Recipe FAQs, answers and tips:

Why does the vegetable dip look runny?

If the dip looks 'wet' or the dried vegetables look like they are in a puddle, that is because they are just rehydrating. Give the dip a quick stir and you are all set to serve.tight shot of Knorr Spinach Dip showing how the dip weeps.

Chef Tip

I love bread cubes with this dip! I purchase a second bread bowl and cube it up so there is enough bread to dip into this dip.


Sarah Mock of savoringthegood.com headshot 2022

I am Sarah Mock. Welcome!

Sarah Mock is a classically trained Chef and a graduate of Johnson & Wales University. A culinary blogger for 17 years, Sarah helps the home cook prepare her recipes with professional results.

Get to know me

as seen in:

Logos of Hersheyland, ABC News, and Good Day PA are showcased in a seamless row, providing a snapshot of popular brands.

Hersheyland Nightline Good Day Pa!

The vibrant design showcases the iconic logos of Pinterest, Rachael Ray, and Jell-O set against a bold red background. Sorry, the provided description doesn't offer enough detail to suggest important SEO keywords.

Pinterest Rachael JELL-O

Air Fryer Tater Tots (Crispy Air Fryer Tater Tots)

Tater Tots In Air Fryer.

Air fryer tater tots are ready in 15 minutes, crispy golden brown on the outside and perfectly cooked on the inside.

Once you have made frozen tater tots in the air fryer, you will never use your oven to make tots again!

Tater Tots In Air Fryer.

While you have your air fryer out you are going to want to make my recipe for philly cheesesteak egg rolls, and a few goat cheese medallions to add to your salad throughout the week.

Don't forget to bookmark my Thanksgiving egg rolls and buffalo chicken dip egg roll recipes. Air fryer onion rings are a big hit every time I make them. All are air fryer friendly.

  • Take help from frozen tater tots to get crunchy tots on the table in minutes. No prep is needed!
  • Skip heating up the oven and your kitchen by using your countertop air fryer.
  • The perfect side dish or a great appetizer for game day.
  • Frozen air-fried tater tots are so much easier to make in the air fryer than in your oven.
  • Tots come out crispy every time, unlike soggy tots that you get from using a microwave.

Ingredients needed:

frozen tater tots in an air fryer basket.

You guessed it! Use your favorite brand of frozen tater tots. Don't discount the store brand because sometimes the store brand is a national brand in a different bag.

Ingredient notes:

Air frying tater tots is a lighter version versus deep frying tater tots in oil. The outside is still crispy and golden brown and there is less residual fat when using an air fryer.

If you are keeping a gluten-free diet, be sure to read the ingredient label on your bag of tots. Some companies will use a gluten binder when making their tater tots and you would want to be sure that your tots will agree with you.

Substitutions

Veggie tots are now available in most grocery stores. A great way to get extra vegetables into your meal plan but the vegetables are in tot form!

How to cook tater tots in the air fryer

small white bowl of cooked tater tots on a wooden survace, air fryer in the background.
  1. Preheat the air fryer to 400F.
  2. Add frozen tater tots to the air fryer basket.
  3. Cook for 5 minutes, shake basket and cook for an additional 5 minutes.
  4. Serve hot.

Seasonal Favorite

Baked lattice top crust on an apple pie made with the Crisco pie crust recipe, showing flaky layers in the fluted edge.

This is my award-winning Crisco pie crust recipe; flaky, tender, and made with simple ingredients you already have.

Crisco Pie Crust

Making Air Fryer Tater Tots Crispy

frozen tater tots in an air fryer basket.

Preheat

Preheat your air fryer to 400 F. Add frozen tots in a single layer, as much as possible.

golden brown tater tots in an air fryer baset.

First Cook

Cook for 5 minutes and after 5 minutes, shake the basket or use a pair of tongs to turn the tots.

tots in an air fryer.

Second Cook

Air fry for an additional 5 minutes allowing the tots to take on a golden color and become crisp

close up image of cooked tater tots in a white bowl, side of ketchup, orange towel.

Serve

Serve while the tots are still hot.

Storage Tips

When storing frozen tater tots, be sure to remove as much air from the bag as possible. Air and moisture are what lead to freezer burn.

When storing cooked tater tots, be sure to allow them to cool completely before storing in an air tight container in the refrigerator. By storing warm tots, moisture can collect in the storage container, making the tots soggy.

What to serve with tater tots

air fryer oven basket with cooked tots with a side of ketchup.

I am not going to suggest that you can make a meal out of air-fried frozen tater tots but I have made a meal out of tater tots cooked in the air fryer! There is no judgment here.

Serve with classic ketchup, ranch dressing, as a side for burgers or chicken nuggets. I make tots and include them in the tacos when I make tacos with my Cuban Pork.

Dipping sauces for crispy air fryer tater tots

  • chick fil a sauce, copycat,in a white ramekin, waffle fry being dipped into the sauce.
    Homemade Copycat Chick Fil A Sauce Recipe

Tips to make frozen tater tots in an air fryer

Do you need to season tater tots?

Depending on the brand and depending on your seasoning preferences, tater tots don't need much seasoning. A sprinkle of table salt, while they are still hot, can always be added but the choice is up to you.

What should I season tater tots with?

If you choose to add an extra layer of seasoning to your tater tots and want to go beyond the typical salt I would suggest Old bay seasoning, Jerk seasoning, herbs de Provance, taco seasoning, Seasoned salt or any other dry seasoning you love. Start with a light sprinkle on hot tots and add more to your liking.

Popular Air Fryer Recipes

  • Air fryer chicken roasted to perfection inside the basket, boasting a golden-brown, crispy skin.
  • A bowl of crispy air-fried kale chips on a table.
  • Air fryer Glazed salmon fillet over a bed of rice with asparagus on the side, garnished with sesame seeds and green onions.
  • Broccoli in an air fryer on a marble countertop.
  • air fryer breakfast potatoes square image.
  • air fryer lamb chops.
See more Air Fryer Recipes →

Chef Tip

tots in an air fryer.

I will put my leftover tots in a cold air fryer and then preheat the oven to 350. By the time the air fryer has heated, the tater tots are reheated. Results will vary.

A batch of golden-brown tater tots in an air fryer basket, perfect as a tasty side dish for hamburgers on a wooden surface.

Tater Tots Air Fryer Recipe

Air fryer tater tots are ready in 15 minutes, crispy golden brown on the outside and perfectly cooked on the inside.
5 from 1 vote
Print Pin Rate
Course: Side Dish
Cuisine: American
Cook Time: 10 minutes minutes
Total Time: 10 minutes minutes
Servings: 11 servings
Calories: 130
Author: Sarah Mock

Ingredients

  • 1 32 ounce bag Tater tots
US Customary - Metric
Follow Savoring The Good On PinterestFollow @SavoringTheGood or tag #STGRecipes!

Instructions

  • Preheat your air fryer to 400 °F (204 °C). Add frozen tots in a single layer, as much as possible.
    1 32 ounce bag Tater tots
  • Cook for 5 minutes and after 5 minutes, shake the basket or use a pair of tongs to turn the tots.
  • Air fry for an additional 5 minutes allowing the tots to take on a golden color and become crisp.
  • Serve while the tots are still hot.
Want to share when you made this recipe?Follow @SavoringTheGood & tag #STGRecipes!
Nutrition Facts
Tater Tots Air Fryer Recipe
Serving Size
 
1 serving
Amount per Serving
Calories
130
% Daily Value*
Fat
 
7
g
11
%
Saturated Fat
 
1
g
6
%
Sodium
 
360
mg
16
%
Carbohydrates
 
15
g
5
%
* Percent Daily Values are based on a 2000 calorie diet.
**Nutritional facts are just estimates. Please utilize your own brand nutritional values to double check against our estimates.
Like this recipe card? Want one for your site?Check out WP Recipe Maker!


Sarah Mock of savoringthegood.com headshot 2022

I am Sarah Mock. Welcome!

Sarah Mock is a classically trained Chef and graduate of Johnson & Wales University. A culinary blogger for 15 years Sarah helps the home cook prepare her recipes with professional results.

Get to know me

as seen in:

Logos of Hersheyland, ABC News, and Good Day PA are showcased in a seamless row, providing a snapshot of popular brands.

Hersheyland Nightline Good Day Pa!

The vibrant design showcases the iconic logos of Pinterest, Rachael Ray, and Jell-O set against a bold red background. Sorry, the provided description doesn't offer enough detail to suggest important SEO keywords.

Pinterest Rachael JELL-O

Pumpkin Whoopie Pie Recipe

pumpkin whoopie pie stack, square image.

Pumpkin Whoopie Pies are the pumpkin version of the Amish whoopie pies that I grew up with in Lancaster county. These are pumpkin pie flavored cake-like cookies filled with fluffy cream cheese whoopie pie filling.

pumpkin whoopie pie stack, square image.

Add this to your menu of Amish country recipes. Amish broccoli salad, Amish chicken corn soup, peanut butter pie, hot bacon dressing and fastnachts are top of my list when someone asks me for an Amish recipe.

Ingredients needed:

pumpkin whoopie pie ingredients.

Recipe Card?

To find the full printable recipe with specific measurements and directions CLICK HERE to go to the recipe card.

What makes this recipe work:

  • These are my son's favorite whoopie pie!
  • This whoppie pie filling is made with a fluffy cream cheese icing filling instead of a marshmallow fluff.
  • Nothing beats these homemade whoopie pies and a cold glass of milk.
  • Skip the whoopie pie pan, you might be tempted to buy it because all you truly need is a baking sheet lined with parchment.
  • Full of pumpkin flavor and filled with a sweet cream cheese icing, beaten until smooth and fluff.

Helpful Kitchen Tools

  • Pastry Bag The pastry bags are strong and sturdy enough to hold still things and you can be comfortable using them to frost cakes, cookie, cupcake treat pops, chocolates, buttercream, macarons and more.
  • Baking Pan. - A must-have item for both beginners and experts alike, every baker requires a sturdy and quality cookie pan. 
  • Parchment Paper - made of heavy-duty, grease proof, nonstick paper which is chlorine-free and compostable. No pan greasing is needed and it is microwave-safe.

How to make Perfect Pumpkin Whoopie Pies

vertical image of a stack of pumpkin whoppie pies on a clear glass serving platter.

Make the Pumpkin Cookies

  1. Preheat the oven to 350 degrees f and line cookie sheets with parchment paper. 
  2. In the large bowl of a stand mixer, cream together butter, brown sugar, and white sugar until light and fluffy.
  3. In a separate small bowl whisk together flour, baking soda, salt and pumpkin spice. 
  4. Add in eggs and pumpkin.
  5. Add flour mixture into the pumpkin mixture mixing until everything is blended. 
  6. Pipe batter onto prepared cookie sheet in circles with a 2 inch diameter about 2 inches apart. 
  7. Bake 8-10 minutes or until the cookies appear dry.
  8. Cool completely. 

Make The Whoppie Pie Filling

  1. Cream together the cream cheese and butter. 
  2. Add vanilla and powdered sugar ½ a cup at a time mixing well between each.

Assemble the Whoppie Pies

  1. Fill a pastry bag with the filling and pipe frosting onto the flat side of half of the cookies, and top with another cookie to create a sandwich. 
  2. Store in an airtight container

Making Whoopie Pies with Pumpkin

stack of pumpkin whoopie pies with the top one having a bite taken out of it, white plate.

Preheat the oven to 350 and line baking sheets with parchment paper. 

cream together butter, brown sugar, and white sugar until well mixed.
whisk together flour, baking soda, salt and pumpkin spice.
  1. In a large mixing bowl, with an electric mixer, at medium-high speed cream together butter, brown sugar, and white sugar until well mixed. 

2. In a medium size separate bowl whisk together flour, baking soda, salt and pumpkin spice. 

Add in eggs and pumpkin and continue mixing until everything is well incorporated.
Add dry ingredients into the pumpkin mixture mixing until everything is blended.

3. Add canned pumpkin and eggs, and continue mixing until everything is well incorporated. 

4. Add dry ingredients into the pumpkin mixture mixing until everything is blended. 

Place batter in a piping bag with the end cut off or fitted with a round tip.
baked pumpkin whoopie pie shells, ever other one flipped over on a cooking rack.

5. Place the batter in a piping bag with the end cut off or fitted with a round tip. Pipe batter onto prepared cookie sheet in circles with a 2 inch diameter about 2 inches apart. Alternatively, you can scoop out rounds of dough with a cookie scoop.

6. Bake 8-10 minutes or until the cookies appear dry. Remove cookies and place on a cooling rack. Allow cookies to cool completely. 

cream cheese and butter in a mixing bowl.
vanilla and part of the powdered sugar added to the cream cheese and butter mixture.

7. Place the cream cheese and butter in a mixing bowl and cream together with an electric mixer. 

8. Add vanilla and continue mixing until well blended. Add in powdered sugar ½ a cup at a time mixing well between each. Use 1 ½ - 2 cups of powdered sugar depending on how thick you want the frosting. 

bowl of cream cheese icing filling in a bowl with the shells off to the side, piping bag between them.
baked pumpkin whoopie pie shells, ever other one flipped over on a cooking rack.

9. Fit a pastry bag with a wide, open tip or if using a disposable bag, snip off about an inch of the tip.

10. Arrange the completely cooled whoopie pie cookies on a wire rack or clean surface in two rows. One row rounded side up, one side flat side up.

pumpkin whoopie pie shells filled with filling.
8 filled pumpkin whoppie pies on a cooling rack.

11. Fill a pastry bag with the filling and pipe frosting onto the flat side of half of the cookies, and top with another cookie to create a sandwich. 

12. Store in a closed container

Did you make this recipe?

Do you have feedback that would be helpful to others? If so can help this small business owner by leaving a rating and a review in the comments section? Thank you for being part of the Savoring The Good Community. ~ Sarah

How to store pumpkin whoopie pies?

Remember, before storing, ensure that the whoopie pies have completely cooled down to room temperature to avoid moisture buildup inside the container. Proper storage will help maintain their taste and texture.

  • Room Temperature Storage: If you plan to consume the whoopie pies within a day or two, you can store them at room temperature. Place them in an airtight container with layers of parchment paper between the layers of whoopie pies to prevent them from sticking together.
  • Refrigeration: For longer storage, place the whoopie pies in an airtight container and store them in the refrigerator. This can extend their shelf life to around 3-5 days. Again, using parchment paper between layers is recommended.
  • Freezing: If you want to store them even longer, you can freeze pumpkin whoopie pies. Wrap each whoopie pie individually in plastic wrap and then place them in a freezer-safe container or a resealable plastic bag. They can be stored in the freezer for up to 2-3 months.
  • Thawing: When you're ready to enjoy a frozen whoopie pie, take it out of the freezer and let it thaw in the refrigerator or at room temperature. This will prevent condensation from making the whoopie pie soggy.

Do pumpkin whoopie pies need to be refrigerated?

Yes, pumpkin whoopie pies should be refrigerated if you plan to store them for more than a day or two. Refrigeration helps to prevent the growth of bacteria and extends the shelf life of the whoopie pies. Place them in an airtight container and store them in the refrigerator. If you're planning to consume them within a day, you can keep them at room temperature, but for longer storage, refrigeration is recommended.

Can you freeze pumpkin whoopie pies?

Freezing is a great way to keep a batch of pumpkin whoopie pies on hand for future enjoyment. you can freeze pumpkin whoopie pies to extend their shelf life. Follow these steps:

  1. Wrap Individually: Wrap each pumpkin whoopie pie individually with plastic wrap. This helps prevent freezer burn and keeps them fresh.
  2. Airtight Container or Bag: Place the wrapped whoopie pies in an airtight container or a resealable plastic freezer bag. Make sure to remove as much air as possible from the bag before sealing it.
  3. Label and Date: It's a good practice to label the container or bag with the date you're freezing them. This helps you keep track of how long they've been in the freezer.
  4. Freeze: Put the container or bag in the freezer. Pumpkin whoopie pies can typically be frozen for 2-3 months while maintaining their quality.
  5. Thawing: When you're ready to enjoy a frozen whoopie pie, take it out of the freezer and let it thaw in the refrigerator or at room temperature. Thawing in the fridge helps prevent condensation from affecting the texture.

Frequently asked questions, answers and tips:

Can these be made ahead?

Yes! Whoppie Pies are a great make-ahead cookie. Wrap in plastic wrap and store in a cool, dry place for up to a week.

pumpkin whoopie pie stack, square image.

Pumpkin Whoopie Pies with Cream Cheese Filling

These are pumpkin flavored cake-like cookies filled with fluffy cream cheese whoopie pie filling.
5 from 2 votes
Print Pin Rate
Course: Cookie Recipes
Cuisine: American
Prep Time: 10 minutes minutes
Cook Time: 11 minutes minutes
Cooling Time: 1 hour hour
Total Time: 1 hour hour 21 minutes minutes
Servings: 30 Pies
Calories: 158
Author: Sarah Mock

Ingredients

For the Cookies-

  • A 5-pound bag of King Arthur Baking Company unbleached bread flour with 12.7% protein content, labeled for ideal use in bread, pizza crust, and rolls-perfect for creating hearty sides like homemade loaves to serve alongside a comforting slowcooker sausage casserole.1 ½ Cup Flour, All Purpose
  • Arm & Hammer Pure Baking Soda box, 8 oz size, with text promoting it as America's #1 trusted brand and stating 1 teaspoon Baking Soda
  • A Morton Salt container with a blue label featuring a girl in a yellow dress holding an umbrella, with salt pouring out of a container-an essential ingredient for perfectly seasoning dishes like Chicken Cordon Bleu.½ teaspoon Salt
  •  
    1 ½ teaspoon Pumpkin Spice
  • A rectangular 8 oz package of Kerrygold Pure Irish Butter, unsalted, with a green and gold label and Irish grass-fed cow branding-perfect for creating delicious Saint Patrick's Day cupcakes.½ Cup Butter Softened
  • A 4-pound bag of Domino granulated pure cane sugar with a yellow and white design, showing nutrition information and branding-perfect for sweetening recipes like rhubarb sour or your favorite desserts.½ Cup Sugar
  • Domino Light Brown Sugar box, 16 oz, featuring a slice of Blackberry Dump Cake topped with whipped cream and berries, and a Non-GMO Project Verified label in the bottom right corner.¼ Cup Brown Sugar
  •  
    1 Cup Pumpkin Puree
  • A single brown chicken egg, perfect for making Chicken Cordon Bleu, stands upright on a white background.2 Egg

For the Frosting-

  • Box of Kraft Philadelphia Original Cream Cheese, 8 oz (226g), silver packaging with blue and white logo, and renewable energy label on the left-perfect for making delicious Lemon Cheesecake Bars.4 oz Cream Cheese softened
  • A rectangular 8 oz package of Kerrygold Pure Irish Butter, unsalted, with a green and gold label and Irish grass-fed cow branding-perfect for creating delicious Saint Patrick's Day cupcakes.4 tablespoon Butter softened
  • A 4-pound bag of Domino Confectioners Sugar labeled as 10-X powdered pure cane sugar in yellow and blue packaging-perfect for creating festive Saint Patrick's Day cupcakes.1 ½ - 2 Cup Powdered Sugar
  •  
    1 teaspoon Vanilla
  • A Morton Salt container with a blue label featuring a girl in a yellow dress holding an umbrella, with salt pouring out of a container-an essential ingredient for perfectly seasoning dishes like Chicken Cordon Bleu.Pinch of Salt
US Customary - Metric
Follow Savoring The Good On PinterestFollow @SavoringTheGood or tag #STGRecipes!

Instructions

  • Preheat the oven to 350 °F (177 °C) and line baking sheets with parchment paper.
  • In a medium size bowl whisk together flour, baking soda, salt and pumpkin spice.
    1 ½ Cup Flour, All Purpose, 1 teaspoon Baking Soda, ½ teaspoon Salt, 1 ½ teaspoon Pumpkin Spice, Pinch of Salt
  • In a large bowl, with an electric hand or stand mixer, cream together butter, brown sugar, and white sugar until well mixed.
    ½ Cup Butter, ½ Cup Sugar, 4 oz Cream Cheese, ¼ Cup Brown Sugar
  • Add in eggs and pumpkin and continue mixing until everything is well incorporated.
    2 Egg, 1 Cup Pumpkin Puree
  • Add dry ingredients into the pumpkin mixture mixing until everything is blended.
  • Place batter in a piping bag with the end cut off or fitted with a round tip. Pipe batter onto prepared cookie sheet in circles with a 2 inch diameter about 2 inches apart.
  • Bake 8-10 minutes or until the cookies appear dry. Remove cookies and place on a cooling rack.
  • Allow cookies to cool completely.
  • To make the frosting-
  • Place the cream cheese and butter in a mixing bowl and cream together with an electric mixer.
    4 oz Cream Cheese, 4 tablespoon Butter
  • Add vanilla and continue mixing until well blended.
    1 teaspoon Vanilla
  • Add in powdered sugar ½ cup at a time mixing well between each. Use 1 ½ - 2 cups of powdered sugar depending on how thick you want the frosting.
    1 ½ - 2 Cup Powdered Sugar
  • Pipe frosting onto the bottom side of half of the cookies, and top with another cookie to create a sandwich.
Want to share when you made this recipe?Follow @SavoringTheGood & tag #STGRecipes!
Nutrition Facts
Pumpkin Whoopie Pies with Cream Cheese Filling
Serving Size
 
1 pie
Amount per Serving
Calories
158
% Daily Value*
Fat
 
6
g
9
%
Saturated Fat
 
4
g
25
%
Trans Fat
 
0.2
g
Polyunsaturated Fat
 
0.3
g
Monounsaturated Fat
 
2
g
Cholesterol
 
27
mg
9
%
Sodium
 
129
mg
6
%
Potassium
 
38
mg
1
%
Carbohydrates
 
25
g
8
%
Sugar
 
19
g
21
%
Protein
 
1
g
2
%
* Percent Daily Values are based on a 2000 calorie diet.
**Nutritional facts are just estimates. Please utilize your own brand nutritional values to double check against our estimates.
Like this recipe card? Want one for your site?Check out WP Recipe Maker!


Sarah Mock of savoringthegood.com headshot 2022

I am Sarah Mock. Welcome!

Sarah Mock is a classically trained Chef and graduate of Johnson & Wales University. A culinary blogger for 15 years Sarah helps the home cook prepare her recipes with professional results.

Get to know me

as seen in:

Logos of Hersheyland, ABC News, and Good Day PA are showcased in a seamless row, providing a snapshot of popular brands.

Hersheyland Nightline Good Day Pa!

The vibrant design showcases the iconic logos of Pinterest, Rachael Ray, and Jell-O set against a bold red background. Sorry, the provided description doesn't offer enough detail to suggest important SEO keywords.

Pinterest Rachael JELL-O

Pumpkin Snickerdoodles Recipe

pumpkin snickerdoodle cookie stack.

Pumpkin snickerdoodles, made without eggs, are the best snickerdoodles! This snickerdoodle cookie recipe gives you chewy snickerdoodles with all the pumpkin spice flavor that you love each fall season.

pumpkin snickerdoodle cookie stack.

These cookies are inspired by my pumpkin muffins made with cake mix and pair well with the Hershey Kiss Peanutbutter blossom cookies. Check out all the cookie recipes I have here for you to make! All with easy instructions and photos.

  • These are the perfect cookie for when you want a classic snickerdoodle but also want something that is pumpkin spice without wanting a PSL.
  • An easy recipe for homemade snickerdoodles that have a soft texture and a sweet cinnamon flavor.
  • This easy snickerdoodle recipe uses simple ingredients that you may already have in your pantry.

Ingredient For the Best Pumpkin Snickerdoodle Cookies

pumpkin snicker doodle ingredients on a marble surface in bowls with labels on them. flour, salt, baking soda, brown sugar, sugar, cream of tartar, vanilla, butter, pumpkin spice, canned pumpkin.

Recipe Card?

To find the full printable recipe with specific measurements and directions CLICK HERE to go to the recipe card.

Ingredient notes:

  • Butter - make sure it is softened to room temperature and I use unsalted butter for this recipe.
  • Brown Sugar - use light brown sugar but if you have dark brown sugar it will work but have a deeper sweetness to the flavor.
  • Pumpkin Puree - this is a canned pumpkin, not pumpkin pie filling. There is extra sugar and spice in the pumpkin pie filling.
  • Vanilla - I make my own vanilla extract because store-bought can be so expensive.
  • Flour - all-purpose flour. Ready why different recipes call for different types of flour in my post on baking definitions.
  • Pumpkin Spice - a blend of ground Cinnamon, nutmeg, cloves, allspice and ginger.

Substitutions

  • Swap out the butter for vegan butter to make vegan snickerdoodles.
  • Switch out the pumpkin pie spice for cinnamon to make the classic cinnamon-sugar mixture instead of doubling down on the pumpkin spice flavor.

How to make eggless snickerdoodle cookies with pumpkin

white plate with a stack of cookies, coffee in a white cup in the background.
  1. In a large mixing bowl beat together the butter and sugars until light and fluffy. About 2 minutes.
  2. Scrape down the bowl and add the pumpkin and vanilla, stirring to combine.
  3. In a separate small bowl combine the flour, pumpkin pie spice, cream of tartar and salt.
  4. Gradually add the dry ingredients to the wet ingredients and stir until a snickerdoodle cookie dough forms.
  5. Cover the dough and chill in the refrigerator for 4 hours or up to overnight.
  6. Preheat your oven to 350 and prepare baking she with non stick pan spray or line it with parchment paper.
  7. Make a cinnamon sugar mixture by combining the pumpkin spice and sugar.
  8. Using a small scoop, portion out the chilled cookie dough and roll into round dough balls.
  9. Roll the rounded cookie dough balls in the flavored cinnamon sugar coating, shaking to coat all sides.
  10. Place the coated balls on your prepared baking sheets, spacing them 2 inches apart.
  11. Bake for 11-13 minutes.
  12. Remove the pan from the hot oven and allow the cookies to remain on the hot cookie pan for an additional 5 minutes.
  13. Remove to a cooling rack and cool completely before storing in an airtight container.

Seasonal Favorite

Baked lattice top crust on an apple pie made with the Crisco pie crust recipe, showing flaky layers in the fluted edge.

This is my award-winning Crisco pie crust recipe; flaky, tender, and made with simple ingredients you already have.

Crisco Pie Crust

How to make Pumpkin snickerdoodles

Glass bowl containing light brown, creamy Pumpkin Snickerdoodle cookie dough mixture on a white marble surface.
pumpkin added to the butter and sugar in a clear glass bowl with a handle.
  1. In a large bowl, using an electric mixer or stand mixer cream together butter, ½ cup brown sugar and ¼ cup white sugar until well mixed. 

2. Add in pumpkin and vanilla, and continue mixing until well blended. 

flour mixture in a white bowl.
flour mixture being added to the pumpkin mixture.

3. In a separate bowl whisk together flour, 1 ½ teaspoon pumpkin spice, cream of tartar, baking soda and salt. 

4. Add the flour mixture to the pumpkin mixture gradually, mixing between each addition until all the flour has been incorporated. 

cookie dough in a glass mixing bowl, well combined.

5. Cover the bowl and refrigerate for at least 4 hours. 

7. When ready to bake- Preheat the oven to 350 and line your cookie sheet with parchment paper. 

sugar and cinnamon in a white bowl, ready to be combined.
cookie dough ball rolled in cinnamon sugar in the bowl of cinnamon and sugar.

8. Stir together the ¼ cup sugar and 2 teaspoon pumpkin spice in a small bowl or shallow dish

9. Scoop dough out 1 tablespoon at a time and roll into a ball. Place ball in the sugar and pumpkin spice mixture and roll around to cover. Place on your prepared baking sheet

pumpkin snickerdoodles on a baking sheet lined with parchment paper, ready to be baked.
stack of cookies on a white plate.

10. Continue rolling the dough into balls and coating with the sugar mixture, placing them about 2 inches apart on your baking sheet. 

11. Bake for 11-13 minutes or until the top begins to crack. For best results allow the cookies to cool on the baking sheet for 5 minutes and then move to a wire cooling rack to cool completely. 

Storage Tips

Once your cookies have cooled completely, keep them in an airtight container or Zip top bag at room temperature for up to five days. To freeze baked cookies, store in a freezer-safe container or Ziplock bag for up to six months.

Frequently asked questions, answers and tips:

How do I store Snickerdoodle cookies?

Once your cookies have cooled completely, keep them in an airtight container or Zip top bag at room temperature for up to five days. To freeze baked cookies, store in a freezer-safe container or Ziplock bag for up to six months.

How do I keep my snickerdoodles soft?

Keep them stored in an air tight container. Additionally, add a piece of plain white bread before you close the container.

Chef Tip

Don't forget to add a piece of plain white bread to your cookie storage box. It will help keep the snickerdoodles nice and soft.

pumpkin snickerdoodle cookie stack.

Pumpkin Snickerdoodle Cookies (No Eggs)

Soft, moist, and spiced pumpkin snickerdoodle cookies rolled in cinnamon sugar for a classic fall flavor and a tender crumb.
No ratings yet
Print Pin Rate
Course: Cookie Recipes
Cuisine: American
Prep Time: 10 minutes minutes
Cook Time: 13 minutes minutes
Chill time: 4 hours hours
Total Time: 4 hours hours 23 minutes minutes
Servings: 36 cookies
Calories: 66
Author: Sarah Mock

Ingredients

  • A rectangular 8 oz package of Kerrygold Pure Irish Butter, unsalted, with a green and gold label and Irish grass-fed cow branding-perfect for creating delicious Saint Patrick's Day cupcakes.½ Cup Butter softened
  • Domino Light Brown Sugar box, 16 oz, featuring a slice of Blackberry Dump Cake topped with whipped cream and berries, and a Non-GMO Project Verified label in the bottom right corner.½ Cup Brown Sugar packed
  • A 4-pound bag of Domino granulated pure cane sugar with a yellow and white design, showing nutrition information and branding-perfect for sweetening recipes like rhubarb sour or your favorite desserts.¼ Cup Sugar
  •  
    ⅓ Cup Pumpkin Puree
  •  
    1 Teaspoon Vanilla
  • A 5-pound bag of King Arthur Baking Company unbleached bread flour with 12.7% protein content, labeled for ideal use in bread, pizza crust, and rolls-perfect for creating hearty sides like homemade loaves to serve alongside a comforting slowcooker sausage casserole.1 ½ Cup Flour, All Purpose
  •  
    1 ½ Teaspoon Pumpkin Spice
  •  
    1 Teaspoon Cream of Tartar
  • Arm & Hammer Pure Baking Soda box, 8 oz size, with text promoting it as America's #1 trusted brand and stating ½ Teaspoons Baking Soda
  • A Morton Salt container with a blue label featuring a girl in a yellow dress holding an umbrella, with salt pouring out of a container-an essential ingredient for perfectly seasoning dishes like Chicken Cordon Bleu.¼ Teaspoons Salt

For rolling the cookies-

  • A 4-pound bag of Domino granulated pure cane sugar with a yellow and white design, showing nutrition information and branding-perfect for sweetening recipes like rhubarb sour or your favorite desserts.¼ Cup Sugar
  •  
    2 Teaspoons Pumpkin Spice
US Customary - Metric
Follow Savoring The Good On PinterestFollow @SavoringTheGood or tag #STGRecipes!

Instructions

  • In a large bowl, using an electric mixer or stand mixer cream together butter, ½ cup brown sugar and ¼ cup white sugar until well mixed.
    ½ Cup Butter, ½ Cup Brown Sugar, ¼ Cup Sugar
  • Add in pumpkin and vanilla, continue mixing until well blended.
    ⅓ Cup Pumpkin Puree, 1 Teaspoon Vanilla
  • In a separate bowl whisk together flour, 1 ½ teaspoon pumpkin spice, cream of tartar, baking soda and salt.
    1 ½ Cup Flour, All Purpose, 1 ½ Teaspoon Pumpkin Spice, 1 Teaspoon Cream of Tartar, ½ Teaspoons Baking Soda, ¼ Teaspoons Salt
  • Add the flour mixture to the pumpkin mixture gradually, mixing between each addition until all the flour has been incorporated.
  • Cover the bowl and refrigerate for at least 4 hours.
  • When ready to bake-
  • Preheat the oven to 350 and line your cookie sheet with parchment paper.
  • Stir together the ¼ cup sugar and 2 teaspoon pumpkin spice in a small bowl or shallow dish
    ¼ Cup Sugar, 2 Teaspoons Pumpkin Spice
  • Scoop dough out 1 tablespoon at a time and roll into a ball. Place ball in the sugar and pumpkin spice mixture and roll around to cover. Place on your prepared baking sheet.
  • Continue rolling the dough into balls and coating with the sugar mixture, placing them about 2 inches apart on your baking sheet.
  • Bake for 11-13 minutes or until the top begins to crack.
  • Allow to cool on the baking sheet for 5 minutes and then move to a wire cooling rack to cool completely.

Notes

Swap out the butter for vegan butter to make vegan snickerdoodles.
Switch out the pumpkin pie spice for cinnamon to make the classic cinnamon-sugar mixture instead of doubling down on the pumpkin spice flavor.
Want to share when you made this recipe?Follow @SavoringTheGood & tag #STGRecipes!
Nutrition Facts
Pumpkin Snickerdoodle Cookies (No Eggs)
Serving Size
 
1 Cookie
Amount per Serving
Calories
66
% Daily Value*
Fat
 
3
g
5
%
Saturated Fat
 
2
g
13
%
Trans Fat
 
0.1
g
Polyunsaturated Fat
 
0.1
g
Monounsaturated Fat
 
1
g
Cholesterol
 
7
mg
2
%
Sodium
 
53
mg
2
%
Potassium
 
30
mg
1
%
Carbohydrates
 
10
g
3
%
Sugar
 
6
g
7
%
Protein
 
1
g
2
%
* Percent Daily Values are based on a 2000 calorie diet.
**Nutritional facts are just estimates. Please utilize your own brand nutritional values to double check against our estimates.
Like this recipe card? Want one for your site?Check out WP Recipe Maker!


Sarah Mock of savoringthegood.com headshot 2022

I am Sarah Mock. Welcome!

Sarah Mock is a classically trained Chef and graduate of Johnson & Wales University. A culinary blogger for 15 years Sarah helps the home cook prepare her recipes with professional results.

Get to know me

as seen in:

Logos of Hersheyland, ABC News, and Good Day PA are showcased in a seamless row, providing a snapshot of popular brands.

Hersheyland Nightline Good Day Pa!

The vibrant design showcases the iconic logos of Pinterest, Rachael Ray, and Jell-O set against a bold red background. Sorry, the provided description doesn't offer enough detail to suggest important SEO keywords.

Pinterest Rachael JELL-O

Tailgate Party Food Ideas and Recipes

A collage of tailgating recipes featuring different snacks and dips.

Tailgate food is the best part of the game! These are the best tailgating food ideas for when you are planning your next tailgate party.

Tailgating foods.

Kick-off football season with the best tailgate recipes that will keep your guests happy until the big game starts. Football games should kick off with the best finger foods, the sauciest buffalo wings, the most epic of hot dogs, the classic buffalo chicken dip, game day crock pot recipes and other tempting game-day foods.

Game-Day Tailgate Food Ideas

Get ready to make the most epic of tailgate menus with these ideas for tailgating food. Whether you are a fan of the nfl, the college football game or the peewee playoffs, football fans will cheer for the perfect tailgate food.

Buffalo Chicken Dip

Buffalo Chicken Egg Rolls

The classic blend of shredded chicken, franks Hot Sauce, Cream cheese, Ranch dressing, and blue cheese crumbles is a staple in my house. Game day or not!

Classic Buffalo Chicken Dip Variations

  • Crockpot Buffalo Chicken Dip
  • Buffalo Chicken Dip Egg Rolls
  • Instant Pot Buffalo Chicken Dip

Beer Cheese Dip

Served hot or cold with a variety of foods to dip in it, it will be a crowd favorite at your next party!  It can be served both hot and cold and can also be adapted to a crockpot! You can use regular, hard pretzels or soft, pretzels. 

Boat Dip

Boat Dip recipe square image

Easily transported and pairs well with pork skins, veggies and chips. Combine Rotel, sour cream, taco seasoning, and shredded cheese for this super simple, very flavorful tailgating dip.

Smoked Shotgun Shells

a grate full of Smoked Shotgun Shells brushed with BBQ sauce and the bacon is crisp.

Use uncooked manicotti noodle shells and stuff them with a mixture of ground beef, spicy ground sausage, cream cheese, and shredded cheddar cheese then wrap them in bacon.

Smoke them and then paint them with barbecue sauce to finish the whole thing off. Make these ahead and pop on the smoker or grill when you set up your epic tailgating spot.

Smoked Pineapple

horizontal image of tajin coated, smoked pineapple laying down showing color.

With minimal additional work, you can have an amazing smoked pineapple as a side dish, dessert or snack to serve alongside your smoked meats. I suggest making 2 for your football tailgate. These will be the HIT of the party!

Rotel Dip

hand holding rotel dip on a scoop chip.

Rotel sausage cream cheese dip is a crowd pleaser and has the perfect balance of heat, meat and spice. Rotel dip made in a crockpot is the ultimate appetizer for game day and is an easy dip to make.

Mexican Corn Dip

Easy Mexican Corn Dip in a red rimmed bowl with chips

All the flavors of Mexican street corn is a family favorite and usually disappear faster than it should.

This easy appetizer features Mexicorn, roasted green chilies as well as shredded cheese. I serve my Mexican corn dip with Fritos but scoopable tortilla chips will work.

Pizza Dip

Cast Iron Grilled Pizza Dip Recipe

All your favorite flavors of pizza without the crust! Warm and melted this saucy, cheesy dip is a favorite every time I serve it.
Scoop up the sauce, cheese and toppings with a tortilla chip or a pretzel stick.

Cold Crab Dip

This easy cold crab dip recipe is a great way to enjoy the flavors of summer without a lot of work. Bring it to the tailgate and share with your friends!

Seasonal Favorite

Baked lattice top crust on an apple pie made with the Crisco pie crust recipe, showing flaky layers in the fluted edge.

This is my award-winning Crisco pie crust recipe; flaky, tender, and made with simple ingredients you already have.

Crisco Pie Crust

Taco Egg Rolls

fried tex mex egg roll with beeg, cheese, corn, tomatoes, cream cheese black beans, cut open on the bias to show texture. Sitting on a pile of the rest of the the golden egg rolls

Dip these southwest egg rolls are perfect dipped in salsa, guacamole, sour cream or any combination of these condiments.
Perfect for football games, appetizer parties or anytime you get a craving for a non-traditional egg roll!

Chipped Beef Dip

overhead shot of Chipped Beef Dip

Cream cheese, dried beef, garlic and Worcestershire, is one of our favorite hot dips to serve for game day!
I will serve the chipped beef dip with anything crunchy and able to scoop up the dip. Fritos, corn chips, slices of toasted baguette or pumpernickel slices are always a good idea.

Cuban Mojo Pork Tacos

Three birria tacos garnished with cilantro on a white plate, accompanied by lime wedges—perfect for spicing up your tailgating recipes.

Pork shoulder marinated in a blend of citrus juices, garlic, cumin, cilantro, olive oil and oregano. Make the pork ahead of time in the crock pot and you will have enough AMAZING pork to serve to everyone at the tailgate.
Sear the meat on a cast iron skillet to get the amazing crunchy edges before stuffing soft taco shells full of the pot and topping with cilantro, sour cream and a squeeze of fresh lime juice.

Crockpot Mississippi pot roast

mississippi pot roast crockpot recipe

In a slow cooker combine chuck roast with ranch dressing mix, au jus mix, butter and peperoncini to make a delicious crockpot meal. Serve over baked potatoes or french fries for one of the best tailgating goods you will have!
I also have an Instant Pot Mississippi Pot Roast if you would rather use your pressure cooker.

Cream Cheese Sausage Balls

Creamy meatballs on a white plate.

This is a bake ahead tailgate appetizer unless you are in an RV or have access to an oven. Allthough, a toaster oven or an air fryer would work too.
This recipe calls for 1 part hot pork sausage and 1 part mild pork sausage. If you like more of a spicy appetizer, feel free to use all hot sausage.

Black Bean Salsa

black bean corn salsa on a chip square

Easy to make and full of delicious flavors of black beans, corn, tomato, red onion, lime and some jalapeno for a nice heat!
I added chopped avocado and diced mango for a bit of tropical sweetness, but leave it out if you like.

Alabama Fire Snack Crackers

alabama fire crackers square

These are the spicy mini saltine crackers that will keep you coming back for more! So delicious, I would recommend baking a double batch so you have enough for whoever stops by for a tailgating snack.

Classic Potato Salad

A bowl of potato salad, perfect for tailgating recipes, topped with sliced hard-boiled eggs and sprinkled with paprika.

What is a tailgate without potato salad?! Go with a classic. Patty Labelle potato salad, more specifically!

Crispy Air Fryer Chicken Wings

Image Credit: Chef Lola's Kitchen

There is no need to make a batter, so no extra dishes and mess. These air fryer chicken wings are crispy and delicious on the outside and tender on the inside. 

Pomegranate Honey Wings

Image Credit: GrandBaby-Cakes

The wing glaze is meant to be thick, sticky, and full of flavor. Pomegranate juice and honey create the perfect coating on spicy game-time wings.

Honey Garlic Jerk Chicken Wings 

Image Credit: GrandBaby-Cakes

Chicken Wings are magically air fried to golden-brown perfection, then tossed in a homemade honey garlic glaze. After each bite the sticky, spicy, and sweet sauce sticks to your lips and, instantly, you'll find yourself going back in for more. 

Jalapeño Poppers

image credit: Fun Money Mom

Not only do they taste amazing but with just four ingredients, this easy recipe is guaranteed to become one of your go-to appetizers for any occasion!
Even if you're not a fan of spicy food, you'll love these because they have just a little heat without going overboard.

Philly Cheesesteak Jalapenos Poppers

Image credit: Balancing Motherhood

These are super easy, perfectly cheesy and deliciously spicy appetizer for your next party or gathering. Serve them as they are or drizzle them with a little hot sauce for a little added kick of heat. You will be amazed at how fast they'll disappear! 

Cowboy Caviar

Image credit: To Simply Inspire

A colorful blend of fresh ingredients and mild spices with a touch of lime juice. Serve the healthy dip with your favorite tortilla chips for an appetizer that is ready in less than 15 minutes.

7 Layer Taco Dip

Deliciously creamy and topped with layers of flavor, this taco dip with ground beef is perfect for tailgating.Doritos Taco Salad
This one-pan salad is perfect for tailgating! Taco salad is a dish your whole team will love!

Roasted Chili Corn Salsa

glass bowl filled with Chipotle Corn Salsa and a wooden spoon to serve

Game Day is not complete without this fresh side dish. My homemade chipotle corn salsa is made with fire-roasted poblano peppers, frozen sweet corn, red onion, and cilantro along with fresh lemon and lime juice.
Serve the corn salsa with tortilla chips, alongside a burrito bowl or with any of your favorite Mexican food.

Seasoned Ranch Cheese Cracker

Seasoned Ranch Cheese Crackers

This recipe was even BETTER than the seasoned ranch oyster cracker recipe we had been using. Why? Because of the cheese crackers. They added one more layer of cheesy goodness to the flavors we had already love.

Homemade pretzel dogs

image credit: Far From Normal

These pretzel dogs can be made with any hot dog. So if you love an all beef hot dog, a traditional or bun length hot dog, or even a vegetarian hot dog you can use them to make these!

Broccoli Bacon Salad

horizontal image of Amish broccoli salad in a clear glass serving bowl, green cloth napkin the the background.

Add a vegetable dish to your tailgating menu. This one has not only broccoli but cauliflower, bacon and cheese! What is not to love!?

Dill Pickle Pasta Salad

Dill Pickle Pasta Salad square image

This dill pickle pasta salad recipe is the perfect side dish for tailgating parties. A wonderful balance of brine, crunch, salt and creaminess this pasta salad is made with a simple homemade dill ranch dressing that is also perfect as a dip for fresh vegetables. 

Buffalo Cauliflower Dip

All the flavors of your favorite chicken wings-minus the chicken! This party hit is flexible too. You can swap whole-milk Greek yogurt for the sour cream, or Monterey Jack or mild cheddar for the Colby cheese.

Blackstone Nachos

If you are planning a gathering for the big game or just hanging out by the pool, make these Blackstone nachos. 

Get The Recipe

Cheeseburger Sliders

Get The Recipe

BLT PINWHEELS

If you love a good BLT, these bacon, lettuce, and tomato pinwheels will be your favorite new afternoon snack, tasty lunch, or easy appetizer recipe. With a great look and a crowd-pleasing flavor combination, these savory treats are ideal for game day parties and potlucks.

Get The Recipe

More Easy Tailgate Food:

Slow Cooker Sweet and Spicy Meatballs

Everyone needs a good meatball recipe and these slow cooker spicy meatballs are delicious!

Whether you love sweet and spicy meatballs for an appetizer or want to use them in a meal, these are easy to make and definitely yummy.

Get The Recipe

Slow Cooker Buffalo Chicken Meatballs

This Slow Cooker Buffalo Chicken Meatballs Recipe is a healthier version of a favorite party time snack. This is an appetizer recipe your guests will love so you might want to double it!

Get The Recipe

PULL APART PIGS IN A BLANKET

Get The Recipe

CHEESY GROUND BEEF EMPANADAS

These cheesy ground beef empanadas are full of deliciously seasoned ground beef, loaded with two types of cheese and then baked to perfection. The flaky pie crust that surrounds the meat and cheese is so flaky and golden brown.

Get The Recipe

SMOKED QUESO DIP

A kicked up version of your favorite cheese dip with TONS of great flavor. Cheese dip loaded with sausage, spicy jalapeños and a delicious smoky flavor from cooking on the grill. Great dip for cookouts, camping, parties, and tailgating in the Fall.

Get The Recipe

Air Fryer Deviled Eggs

Serve these bite-sized deviled eggs for a snack, bring them to a potluck, or add them to your menu for all types of gatherings, parties, and special occasions. They are sure to be a hit!

Get The Recipe

Baked Buffalo Wings

Skip the deep fryer! While we love the simplicity of air-fried wings this recipe is great for a bigger batch and they come out perfectly crisp in the oven.

Get The Recipe

HONEY BUFFALO HOT WINGS

These hot wings are coated in a flavorful rub then smothered in a perfect marriage of honey, molasses and honey hot wings sauce AKA the best Buffalo wings ever! 

Get The Recipe

Grilled Chicken Wings

This grilled wings recipe is buffalo-style for hot wing lovers, but it includes easy variations for other dry-rubbed & marinated wings. Perfect for summer parties, game day, or casual dinners at home, you'll turn to this grilled chicken wings recipe over & over again!

Get The Recipe

Easy Guacamole Recipe

This easy recipe shows you step by step how to make guacamole at home to RAVE reviews. My family loves guacamole and will use any excuse to dollop it on top of a recipe, or grab a bag of chips to snack on it.

Get The Recipe

Hot Vidalia Onion Dip

So much flavor comes from just these five ingredients. It's like a creamy savory souffle however this one you enjoy with Stone Wheat Thins (crackers) or Stacy's plain pita chips or even better those flat pretzels, you know Pretzel Crisps.

Get The Recipe

CARAMELIZED FRENCH ONION DIP

French onion dip is a game day favorite dip recipe made from sour cream, mayonnaise, caramelized onions, garlic, chives and parsley. It's creamy, full of herbs and guaranteed to get devoured pretty darn fast.

Get The Recipe

FRIED MAC AND CHEESE BITES

Get The Recipe

SLOW COOKER PHILLY CHEESESTEAK SLOPPY JOES

Get The Recipe

Dill Pickle Ham and Cheese Sliders

Get The Recipe

Baked Artichoke Dip

Get The Recipe

KNORR SPINACH DIP

Get The Recipe

Golden graham s'mores bars

An easy no bake treat to make when you want a s'more but don't want to turn on the oven or roast a marshmallow. Make 2 pans and pass them out as you leave the tailgate and head to the game!

Black Bottom Cupcakes

Black Bottom Cupcakes

These homemade chocolate cupcakes have a rich chocolate cake base and a creamy cheesecake filling in the middle of the cupcake complete with miniature chocolate chips baked together in a mini cupcake paper.
Perfect for making ahead and stored in an airtight container before passing out as a tailgate dessert.

Fruity Pebble Treats

close shot of fruity pebbles treats, out of focus in the background, square image

Nutella rice krispie treats 

image credit: we are far from normal

These are heaven folks…sweet tooth satisfying, crunchy, chewy, delicious heaven.

Cold Weather Tailgating Foods

When the weather takes a turn for the cold it is time to pull out your menu of cold weather tailgate recipes. Have a stack of bowls and spoons handy when you hand out these warm and comforting fall tailgate food.

Mexican corn soup

Layers of flavor include shredded chicken, black beans, creamed corn, Mexican spices as well as a creamy broth.
Top this easy slow cooker soup with your choice of freshly squeezed lime, avocado, cilantro, sour cream, and jalapeño.

Autumn Squash Soup

panera autumn squash soup with garnish in a white bowl horizontal image

This is a copycat Panera autumn squash soup recipe and while it is not exact (who can replicate Panera anyway?) it is delicious, creamy and full of fall flavors.

Maryland Crab Soup

maryland crab soup with lump crab meat, carrot, broth, tomatoes, peppers in a bowl.

Maryland crab soup is a vegetable-based crab soup recipe instead of a cream-based crab soup.

Lasagna Soup

One Pot Lasagna Soup in a white bowl. square image close shot

This comforting soup is ready in 30 minutes and has all the classic lasagna flavors you love without turning on the oven.

Appetizer Recipes

  • fried tex mex egg roll with beeg, cheese, corn, tomatoes, cream cheese black beans, cut open on the bias to show texture. Sitting on a pile of the rest of the the golden egg rolls
    Taco Egg Rolls (Air Fryer or Fried)
  • A white bowl filled with watermelon cubes, topped with crumbled feta cheese, fresh mint leaves, and a drizzle of balsamic glaze.
    Feta Cheese and Watermelon Salad
  • A glass baking dish filled with baked pizza dip featuring pepperoni and cheese, with a bowl of sliced bread in the background.
    Pizza Dip Recipe
  • Boat Dip recipe square image
    Boat Dip Recipe (TikTok-Inspired)
See more Appetizer Recipes →


Sarah Mock of savoringthegood.com headshot 2022

I am Sarah Mock. Welcome!

Sarah Mock is a classically trained Chef and graduate of Johnson & Wales University. A culinary blogger for 15 years Sarah helps the home cook prepare her recipes with professional results.

Get to know me

as seen in:

Logos of Hersheyland, ABC News, and Good Day PA are showcased in a seamless row, providing a snapshot of popular brands.

Hersheyland Nightline Good Day Pa!

The vibrant design showcases the iconic logos of Pinterest, Rachael Ray, and Jell-O set against a bold red background. Sorry, the provided description doesn't offer enough detail to suggest important SEO keywords.

Pinterest Rachael JELL-O

Cake Mix Chocolate Chip Cookies Recipe

Chocolate Chip Cake Mix Cookies, square image.

Chocolate chip cake mix cookies are the easiest four-ingredient cookies you can make. From baking pan to plate in under 10 minutes these quick cookies will be gobbled up in no time.

Chocolate Chip Cake Mix Cookies, square image.

These cookies would go great on a holiday cookie tray along with my homemade Pittsburgh nut roll, soft caramels (don't forget the sea salt!), Hershey Kiss Cookies (a classic!) and oreo cookie balls.

  • Simple pantry ingredients are all you need to have chocolate chip cookies out of the oven in under 10 minutes.
  • Use your favorite yellow cake mix from Duncan Hines, betty crocker, store brand or even a homemade cake mix.
  • A box of cake mix is the main ingredient and they are usually on sale so this is a frugal dessert to make.
  • These cookies can be easily be mixed by hand. No mixer is needed!

4 Ingredients needed to make cake mix cookies

A box of yellow cake mix, a bowl of vegetable oil, chocolate chips, and two eggs are arranged on a marble surface—everything you need for delicious Chocolate Chip Cake Mix Cookies.

Recipe Card?

To find the full printable recipe with specific measurements and directions CLICK HERE to go to the recipe card.

Variations on this cake mix chocolate chip cookie

Switch out the chocolate chips for peanut butter chips, butterscotch chips or white chocolate chips. To make these a cake mix chocolate chip cookie with nuts, swap out ½ of the chocolate chips for your favorite nut. I love walnuts but pecans would also be a delicious option. Just be sure to toast the pecans first to bring out the full flavor.

Use a chocolate cake mix in place of the yellow cake mix and switch out the milk chocolate chips for white chocolate chips to make a chocolate/chocolate chip cake mix cookie.

How to make chocolate chip cake mix cookies:

aqua plate of Chocolate Chip Cake Mix Cookies on a floral table cloth.
  1. Preheat your oven to 350 °F degrees Fahrenheit, and line a baking sheet with parchment paper. Set aside.
  2. Mix together cake mix, eggs, and vegetable oil, until well combined and cookie dough has formed.
  3. Fold in the chocolate chips.
  4. Use a cookie scoop to scoop the dough onto the parchment paper.
  5. Bake for 9-10 minutes, until the bottoms of the cookies are golden brown.

Making Chocolate Chip Cake Mix Cookies

Preheat oven

Preheat oven to 350 °F and line a baking sheet with parchment paper.

cake mix, eggs and oil in a white bowl, top down image.

Mix The Ingredients

In a large mixing bowl, add together the cake mix, eggs, and vegetable oil.

cake mix dough for cake mix cookies, mixed in a bowl.

Stir

Use a wooden spoon, spatula or a large spoon and stir until well combined and cookie dough has formed.

chocoalte chips added to the cookie dough batter in a bowl.

Add Chips

Add the milk chocolate chips.

mixed cookie dough.

Incorporate

Fold in the chocolate chips until they are fully incorporated. Do not overmix.

cookie dough on parchment paper.

Scoop

Use a 1 inch cookie scoop to scoop the dough onto the parchment paper, about 2 inches apart.

plate of cookies, blue plate, top down image.

Bake

Bake for 9-10 minutes, until the bottoms of the cookies are golden brown.

Storage Tips

Allow the cookies to cool completely before storing in a Ziploc bag or other air-tight storage container.

Seasonal Favorite

Baked lattice top crust on an apple pie made with the Crisco pie crust recipe, showing flaky layers in the fluted edge.

This is my award-winning Crisco pie crust recipe; flaky, tender, and made with simple ingredients you already have.

Crisco Pie Crust

Frequently asked questions, answers and tips:

Can I use coconut oil instead of vegetable oil?

Coconut oil is a great substitute for vegetable oil in this recipe. Just know that the cookies will spread out more and be thinner than what is pictured in these photos. But they will be yummy!

Top Tip

Use a chocolate cake mix in place of the yellow cake mix and switch out the milk chocolate chips for white chocolate chips to make a chocolate/chocolate chip cake mix cookie.

Chocolate Chip Cake Mix Cookies, square image.

Chocolate Chip Cake Mix Cookies

Chocolate chip cake mix cookies are the easiest four-ingredient cookies you can make. From baking pan to plate in under 10 minutes these quick cookies will be gobbled up in no time.
No ratings yet
Print Pin Rate
Course: Cookie Recipes
Cuisine: American
Prep Time: 5 minutes minutes
Cook Time: 22 minutes minutes
Total Time: 27 minutes minutes
Servings: 12 cookies
Calories: 218
Author: Sarah Mock

Ingredients

  •  
    1 Box yellow cake mix
  • A single brown chicken egg, perfect for making Chicken Cordon Bleu, stands upright on a white background.2 Egg
  • A 24 fl oz bottle of Wesson vegetable oil with a clear plastic body, white cap, and label featuring fried chicken and product details-perfect for preparing delicious dishes like chipotle carnitas or classic fried favorites.½ Cup Vegetable Oil
  •  
    1 Cup milk chocolate chips
US Customary - Metric
Follow Savoring The Good On PinterestFollow @SavoringTheGood or tag #STGRecipes!

Instructions

  • Preheat your oven to 350 °F (177 °C) degrees fahrenheit, and line a cookie sheet with parchment paper. Set aside.
  • In a large mixing bowl, mix together cake mix, eggs, and vegetable oil, until well combined and cookie dough has formed.
    1 Box yellow cake mix, 2 Egg, ½ Cup Vegetable Oil
  • Fold in milk chocolate chips.
    1 Cup milk chocolate chips
  • Use a 1 inch cookie scoop to scoop the dough onto the parchment paper, about 2 inches apart.
  • Bake for 9-10 minutes, until the bottoms of the cookies are golden brown.

Notes

Switch out the chocolate chips for peanut butter chips, butterscotch chips or white chocolate chips. To make these a cake mix chocolate chip cookie with nuts, swap out ½ of the chocolate chips for your favorite nut. I love walnuts but pecans would also be a delicious option. Just be sure to toast the pecans first to bring out the full flavor.
Use a chocolate cake mix in place of the yellow cake mix and switch out the milk chocolate chips for white chocolate chips to make a chocolate/chocolate chip cake mix cookie.
Want to share when you made this recipe?Follow @SavoringTheGood & tag #STGRecipes!
Nutrition Facts
Chocolate Chip Cake Mix Cookies
Serving Size
 
1 cookie
Amount per Serving
Calories
218
% Daily Value*
Fat
 
5
g
8
%
Saturated Fat
 
3
g
19
%
Trans Fat
 
0.1
g
Polyunsaturated Fat
 
0.2
g
Monounsaturated Fat
 
1
g
Cholesterol
 
30
mg
10
%
Sodium
 
328
mg
14
%
Potassium
 
30
mg
1
%
Carbohydrates
 
42
g
14
%
Sugar
 
24
g
27
%
Protein
 
3
g
6
%
* Percent Daily Values are based on a 2000 calorie diet.
**Nutritional facts are just estimates. Please utilize your own brand nutritional values to double check against our estimates.
Like this recipe card? Want one for your site?Check out WP Recipe Maker!

Sarah Mock of savoringthegood.com headshot 2022

I am Sarah Mock. Welcome!

Sarah Mock is a classically trained Chef and graduate of Johnson & Wales University. A culinary blogger for 15 years Sarah helps the home cook prepare her recipes with professional results.

Get to know me

Pumpkin Muffins with Cake Mix

Pumpkin Muffins with Cake Mix stack of muffins.

Pumpkin muffins with cake mix are a moist, spiced fall treat that comes together with three ingredients: yellow cake mix, canned pumpkin, and pumpkin pie spice. No eggs, oil, or milk needed; the pumpkin does that job on its own. You're looking at about 10 minutes of prep and a 22 to 25 minute bake.

Pumpkin Muffins with Cake Mix stack of muffins.

These pumpkin muffins earn a spot on my Thanksgiving table every year. For a savory roll alongside them, I reach for Rhodes rolls because they come out perfect every time, and a batch of whipped butter is good on both.

Sarah Mock of savoringthegood.com headshot 2022

What I Learned Testing This Recipe:

  • This batter is thicker than a normal muffin batter, closer to a stiff cookie dough. If your whisk stops moving through it, switch to a rubber scraper; a dry pocket of cake mix left in the bottom of the bowl means a dense spot in the finished muffin.
  • No eggs, oil, or milk go into this batter, and that's intentional, not a corner cut. Canned pumpkin already has the moisture and fat to do that job; adding more liquid gives you a muffin that never fully sets in the middle.
  • That 22 to 25 minute bake window matters more than it looks like it should. I've pulled these too early more than once chasing a lighter-colored top, and ended up with a gummy center; the toothpick test is more reliable than color on this one.
  • Because there's no oil in the batter itself, an ungreased tin will grab onto these muffins. Paper liners or a well-greased pan are not optional here.

Why This Cake Mix Pumpkin Muffin Recipe Works

  • This recipe leans on the cake mix to do double duty. It's already balanced with sugar, leavening, and salt, so pumpkin and spice are the only real decisions left to make.
  • Skipping the eggs, oil, and milk isn't a shortcut you're missing out on. Canned pumpkin has enough moisture and fat built in to replace all three, which is also why these muffins stay moist a day or two later.
  • It's also an easy one to hand to a kid in the kitchen, and it's a natural addition to a fall breakfast spread since it uses pantry staples you likely already have on hand for pie season.

Ingredients:

This recipe only asks for three things, so the choice you make with each one matters more than usual.

yellow cake mix, pumpkin pie spice, canned pumpkin, all with text overlay.
  • Yellow Cake Mix - use a standard 15.25 oz box. The sugar, leavening, and salt are already balanced for you, so resist the urge to add extra of either.
  • Canned Pumpkin - grab pumpkin puree, not pumpkin pie filling. Pie filling already has sugar and spice mixed in, which throws off both the sweetness and the texture of this batter.
  • Pumpkin Pie Spice - this is where the fall flavor actually comes from, since the cake mix itself is neutral. Out of it? See the swap below.

Recipe Card?

To find the full printable recipe with specific measurements and directions CLICK HERE to go to the recipe card.

Substitutions

Here's what you can swap in this recipe if you need to.

  • Gluten-Free - swap in a gluten-free yellow cake mix, cup for cup. It's formulated to behave like the regular mix, so nothing else about the method changes.
  • Chocolate Pumpkin Muffins - fold in ½ cup of chocolate chips once the batter comes together, for a sweeter version.
  • No Pumpkin Pie Spice - use a spice cake mix in place of the yellow cake mix. You'll get a similar warm spice flavor without buying a separate jar of spice.

Instructions

A 12-cup muffin pan lined with white paper cupcake liners is placed on a marble countertop, ready to be filled with delicious Pumpkin Muffins with Cake Mix batter.

Prep and preheat

Preheat your oven to 350F and line a 12-cup muffin tin with paper liners, or spray it well with non-stick spray.

A glass bowl on a marble surface contains a pile of flour and a mound of pumpkin puree, ready to be mixed together for easy Pumpkin Muffins with Cake Mix.

Mix the batter

In a large bowl, combine the cake mix, canned pumpkin, and pumpkin pie spice.

This is what it should look like

whisk mixing cake mix, pumpkin puree and spices in a glass bowl.

The batter will be thick, closer to cookie dough than muffin batter; switch to a rubber scraper if your whisk is not as efficient.

A muffin tin filled with white paper liners, each holding a portion of orange batter for Pumpkin Muffins with Cake Mix, sits on a marble surface.

Scoop and bake

Divide the batter evenly among the muffin cups and bake at 350F for 22 to 25 minutes. 

When are they done?

A stack of Pumpkin Muffins with Cake Mix in white paper liners sits on a white plate, with a blurred orange pumpkin and red cloth in the background.

You're looking for a toothpick that comes out clean and tops that spring back lightly when touched. The tops will look matte rather than shiny when they're done.

Storage Tips

Here's how to keep these fresh once they've cooled.

  • Store cooled muffins in an airtight container at room temperature for up to 2 days, or in a closed container in the refrigerator for up to 5 days.
  • To freeze, wrap cooled muffins individually in plastic wrap and place them in a freezer bag for up to 3 months. Thaw at room temperature or warm in the microwave in 20-second bursts.

Can I freeze pumpkin cake mix muffins?

Yes. Wrap cooled muffins individually and freeze in a freezer bag for up to 3 months. Thaw at room temperature or warm briefly in the microwave before serving.

Frequently asked questions about pumpkin muffins made with cake mix, answers and tips:

Do I need to add the additional cake ingredients?

For this recipe, you dot now need to add any additional eggs, water, oil or butter. Just the powdered cake mix is needed.

No pumpkin pie spice in the pantry?

No Problem! Switch out the yellow cake mix for a spice cake mix.

Why are these muffins so moist?

Canned pumpkin is doing the job eggs, oil, and milk usually do in a boxed cake mix recipe. It is high in moisture and has just enough natural fat and sugar to keep these muffins soft for days, which is also why you do not need to add any of those extra ingredients.

What should I serve with pumpkin cake mix muffins?

A simple cream cheese frosting or a smear of whipped butter is my go-to. For breakfast, they are good enough on their own alongside a cup of coffee.

Can I freeze pumpkin cake mix muffins?

Yes. Wrap cooled muffins individually and freeze in a freezer bag for up to 3 months. Thaw at room temperature or warm briefly in the microwave before serving.

Pumpkin Muffins with Cake Mix stack of muffins.

Pumpkin Cake Mix Muffins

Pumpkin muffins made with cake mix combine canned pumpkin puree, a box of cake mix and a bit of pumpkin pie spice mix for an easy and delicious fall cake mix muffin.
5 from 3 votes
Print Pin Rate
Course: Bread Recipes
Cuisine: American
Prep Time: 5 minutes minutes
Cook Time: 25 minutes minutes
Total Time: 30 minutes minutes
Servings: 12 muffins
Calories: 160
Author: Sarah Mock

Ingredients

  • 1 box yellow cake mix you DO NOT need the ingredients on the back
  • 1 15 oz. can of pumpkin puree
  • 1 Teaspoon Pumpkin pie spice
US Customary - Metric
Follow Savoring The Good On PinterestFollow @SavoringTheGood or tag #STGRecipes!

Instructions

  • Preheat your oven to 350 °F (177 °C) degrees
  • Spray a muffin tin with non-stick spray and add cupcake liners to the muffin cups and spray the liners with non-stick spray as well.
  • In a large mixing bowl, whisk together cake mix, pumpkin puree, and pumpkin pie spice. The dough will be thick.
    1 box yellow cake mix, 1 15 oz. can of pumpkin puree, 1 Teaspoon Pumpkin pie spice
  • Use a cookie scoop to scoop dough into the muffin tin, dividing evenly between the 12 cups.
  • Bake for 22-25 minutes, until a toothpick inserted in the middle of a cupcake comes out clean.
Want to share when you made this recipe?Follow @SavoringTheGood & tag #STGRecipes!
Nutrition Facts
Pumpkin Cake Mix Muffins
Serving Size
 
1 muffin
Amount per Serving
Calories
160
% Daily Value*
Fat
 
1
g
2
%
Saturated Fat
 
1
g
6
%
Trans Fat
 
0.1
g
Polyunsaturated Fat
 
0.1
g
Monounsaturated Fat
 
0.3
g
Sodium
 
314
mg
14
%
Potassium
 
23
mg
1
%
Carbohydrates
 
36
g
12
%
Sugar
 
19
g
21
%
Protein
 
2
g
4
%
* Percent Daily Values are based on a 2000 calorie diet.
**Nutritional facts are just estimates. Please utilize your own brand nutritional values to double check against our estimates.
Like this recipe card? Want one for your site?Check out WP Recipe Maker!

Sarah Mock of savoringthegood.com headshot 2022

I am Sarah Mock. Welcome!

Sarah Mock is a classically trained Chef and a graduate of Johnson & Wales University. A culinary blogger for 17 years, Sarah helps the home cook prepare her recipes with professional results.

Get to know me

as seen in:

Logos of Hersheyland, ABC News, and Good Day PA are showcased in a seamless row, providing a snapshot of popular brands.

Hersheyland Nightline Good Day Pa!

The vibrant design showcases the iconic logos of Pinterest, Rachael Ray, and Jell-O set against a bold red background. Sorry, the provided description doesn't offer enough detail to suggest important SEO keywords.

Pinterest Rachael JELL-O

Smoked Pineapple Recipe

Smoked Pineapple

Smoked pineapple is the easiest side dish or dessert to make on your smoker that will impress your friends and excite your tastebuds.

Smoked Pineapple

The perfect compliment to smoked meats, fish, and other smoker recipes a whole smoked pineapple is what you will be in adding to your smoker every time you fire up your favorite RecTec smoker, Traeger, Pit Boss pellet grill or whatever you are using to smoke your favorite recipes.

Leave the pineapple top, or crown, intact for a show-stopping centerpiece for your next cookout. Remove the outer skin, or rind to allow the natural sugars of the ripe pineapple to be exposed to the smoke and take on a smoky flavor all while slowly concentrating their sweet pineapple flavor thanks to the lower smoking temperatures.

Here is why this recipe is amazing:

  • With minimal additional work, you can have an amazing smoked pineapple as a side dish, dessert or snack to serve alongside your smoked meats.
  • Switch the coating on the pineapple from nothing to brown sugar and cinnamon to tajin to a chai spice blend to whatever your culinary creativity will come up with.
  • Being a graduate of Johnson & Wales University I have Chef friends in different culinary industries across the country. This is one of those recipes that is Chef inspired, but home cook happening.

Smoked pineapple is just awesome!

Smoked pineapple is just awesome! Tried it the first time as side dish and my family and friends loved it. Even the next day it is delicious. Recommend if you have a smoker give it a try, you won't be disappointed!

- Vince G ~ Pinterest

Ingredients needed to smoke a pineapple:

pineapple, sharp knife and cutting board.

The basic ingredients for a beautiful smoked pineapple is a ripe golden pineapple and a sharp knife. But there are many ways to switch up and play with flavor profiles with this easy smoker recipe.

Recipe Card?

To find the full printable recipe with specific measurements and directions CLICK HERE to go to the recipe card.

Ingredient notes:

  • Pineapple - a whole pineapple is used in this recipe. Choose a pineapple that is firm to the touch, yet ripe. Avoid a pineapple with blemishes.

Substitutions

I smoke a whole pineapple but if you are not able to find a whole pineapple near you, use canned pineapple rings or even fresh pineapple rings from the deli. Just be sure to drain the pineapple slices, and pat dry with paper towels to remove excess liquid before adding any sugars, spices, or additional seasoning. 

Variations on the smoked pineapple recipe

brown sugar and cinnamon coated on a raw pineapple, resting on a cutting board.

Here are a few variations to a plain whole smoked pineapple. If this is your first time smoking a pineapple, I encourage you to start with the plain or naked version. Then move on to one of the following seasoning suggestions. These are just a few as I am sure there are as many variations as your mind can imagine.

Brown Sugar and Cinnamon Smoked Pineapple

Combine ½ cup brown sugar and 1 tablespoon of ground cinnamon. Coat the pineapple with the brown sugar and cinnamon mixture before smoking.

Tajan Coated Smoked Pineapple

Use 3-4 tablespoons of Tajan to coat your pineapple before smoking. The amount of seasoning that is required will depend on the size of the pineapple and your seasoning preferences.

Fireball Soaked Smoked Pineapple

This is a variation that my Chef friend, Bill Twaler, C.E.C., told me about. I will make it next time I have a bottle of cinnamon whisky in the house. Soak your peeled pineapple in fireball whiskey or your other favorite cinnamon-flavored whiskey for 12-24 hours. I find that a zip-lock bag with the air removed works well when marinating.

Tequila and Lime Smoked Pineapple

Zest and juice 2 limes and add the zest and lime juice tequila to a zip-top bag, submerge a cut pineapple for 12-24 hours before smoking.

Helpful Kitchen Tools

Sharp knife - I use a 8" or 10" long chef knife to remove the outside of the pineapple before smoking it. A straight blade is preferred versus a serrated knife.

Cutting board - when setting up your cutting board be sure to place a damp paper towel or wet cloth under the cutting board to ensure that the cutting board is unable to slide across the countertop surface.

How to make smoked pineapple

cinnamon, brown sugar, plain and tajin coated peeled pineapples on small white plates, ready for smoking.
  1. Leaving the pineapple top intact, if you choose, remove the outside of the pineapple but always leave the bottom of the pineapple attached.
  2. If seasoning, cover the exposed fruit with your chosen seasoning.
  3. Preheat your smoker to ultra-low, 180, whichever is the lowest.
  4. Place the pineapple on the grill grates and smoke for 1 hour.
  5. Raise the temperature to 250 and continue to smoke for an additional 3 hours or until your desired doneness.

Making smoked pineapple

chef knife showing how to jut the shoulder off of a pineapple.
Chef knife cutting the outside of a pineapple off.
  1. Start by removing the top shoulder of the outside of the pineapple, slicing toward the top of the pineapple but stopping short of removing the top of pineapple. 

2. Continue by sliding the knife down the sides of the pineapple, removing the outer rind.

Chef knife, female hand cutting off the outside of a pineapple.
horizontal image of a peeled pineapple, pineapple top in place.

3. Work your way around the pineapple, taking off the outside of the pineapple, using the eyes of the pineapple as a guide to where to slide your knife.

4. If you missed some of the pineapple eyes, now is the time to slice them out.

female hand shaking tajin on a peeled pineapple, ready for smoking.
3 peeled pineapples on a pellet smoker, ready to be cooked.

5. If seasoning, completely coat the cut pineapple with your chosen season.

6. Preheat your smoker to ultra-low, 180, whichever is the lowest, and place the pineapples on the grates.

horizontal image of tajin coated, smoked pineapple laying down showing color.
plain Smoked Pineapple, brown sugar and cinnamon Smoked Pineapple, and tajin Smoked Pineapple on white plates next to a smoker grill.

7. Smoke on low for 1 hour and then increase the heat temperature to 250 and continue to cook the smoked pineapple for 3 hours or until you have reached your desired doneness.

How To Serve

There are so many ways to serve your amazing smoked pineapple! I serve slices alongside my smoked brisket, or chop it up to add it to coleslaw when I make my crock pot pulled pork sandwiches, dice up some to add to chipotle corn salsa, and most recently I have been adding it to my cuban pork tacos and next to smoked shotgun shells I have been known to add a slice to my ice water or even to a rum punch cocktail or two.

Chef Tip

3 Smoked Pineapples with different seasonings on them in a smoker box, pineapple tops still in tact.

If you are limited on space, don't have the height in your smoker or your smoker is already full, pineapples can fit nicely in a smoke box adjacent to your smoker.

Pineapples can be laid on their side to smoke, or the pineapple crowns can be removed to make more room. The choice is up to you.

FAQ's and Tips

Is smoked pineapple good?

Smoked pineapple is so delicious and has a unique flavor profile. The smoky aroma and flavor imparted during the smoking process complement the natural sweetness of the pineapple, creating a savory-sweet combination.
The heat from smoking can also caramelize the sugars in the fruit, adding depth and complexity to its taste.
Many people enjoy smoked pineapple as a standalone snack or use it as an ingredient in various dishes. It can be incorporated into salads, grilled alongside meats, added to pizzas or burgers, or used as a topping for desserts. The smoky flavor of the pineapple can provide an interesting twist to both savory and sweet recipes.

Smoked Pineapple

Smoked Pineapple

Smoked pineapple is the easiest side dish or dessert to make on your smoker that will impress your friends and excite your tastebuds.
4.41 from 5 votes
Print Pin Rate
Course: Appetizer, Smoker Recipe
Cuisine: American
Prep Time: 10 minutes minutes
Cook Time: 4 hours hours
Total Time: 4 hours hours 10 minutes minutes
Servings: 4 servings
Calories: 113
Author: Sarah Mock

Ingredients

  • 1 Pineapple
US Customary - Metric
Follow Savoring The Good On PinterestFollow @SavoringTheGood or tag #STGRecipes!

Instructions

  • Leaving the pineapple top intact, if you choose, remove the outside of the pineapple but always leave the bottom of the pineapple attached.
    1 Pineapple
  • If seasoning, cover the exposed fruit with your chosen seasoning.
  • Preheat your smoker to ultra-low, 180 °F (82 °C), whichever is the lowest.
  • Place the pineapple on the grill grates and smoke for 1 hour.
  • Raise the temperature to 250 °F (121 °C) and continue to smoke for an additional 3 hours or until your desired doneness.

Notes

Brown Sugar and Cinnamon Smoked Pineapple
Combine ½ cup brown sugar and 1 tablespoon of ground cinnamon. Coat the pineapple with the brown sugar and cinnamon mixture before smoking.
Tajan Coated Smoked Pineapple
Use 3-4 tablespoons of Tajan to coat your pineapple before smoking. The amount of seasoning that is required will depend on the size of the pineapple and your seasoning preferences.
Fireball Soaked Smoked Pineapple
This is a variation that my Chef friend, Bill Twaler, C.E.C., told me about. I will make it next time I have a bottle of cinnamon whisky in the house. Soak your peeled pineapple in fireball whiskey or your other favorite cinnamon-flavored whiskey for 12-24 hours. I find that a zip-lock bag with the air removed works well when marinating.
Tequila and Lime Smoked Pineapple
Zest and juice 2 limes and add the zest and lime juice tequila to a zip-top bag, submerge a cut pineapple for 12-24 hours before smoking.
Want to share when you made this recipe?Follow @SavoringTheGood & tag #STGRecipes!
Nutrition Facts
Smoked Pineapple
Serving Size
 
1
Amount per Serving
Calories
113
% Daily Value*
Fat
 
0.3
g
0
%
Saturated Fat
 
0.02
g
0
%
Polyunsaturated Fat
 
0.1
g
Monounsaturated Fat
 
0.03
g
Sodium
 
2
mg
0
%
Potassium
 
247
mg
7
%
Carbohydrates
 
30
g
10
%
Sugar
 
22
g
24
%
Protein
 
1
g
2
%
* Percent Daily Values are based on a 2000 calorie diet.
**Nutritional facts are just estimates. Please utilize your own brand nutritional values to double check against our estimates.
Like this recipe card? Want one for your site?Check out WP Recipe Maker!

Sarah Mock of savoringthegood.com headshot 2022

I am Sarah Mock. Welcome!

Sarah Mock is a classically trained Chef and graduate of Johnson & Wales University. A culinary blogger for 16 years Sarah helps the home cook prepare her recipes with professional results.

Get to know me

as seen in:

Logos of Hersheyland, ABC News, and Good Day PA are showcased in a seamless row, providing a snapshot of popular brands.

Hersheyland Nightline Good Day Pa!

The vibrant design showcases the iconic logos of Pinterest, Rachael Ray, and Jell-O set against a bold red background. Sorry, the provided description doesn't offer enough detail to suggest important SEO keywords.

Pinterest Rachael JELL-O

Bacon‑Wrapped Smoked Shotgun Shells

smoked shotgun shells recipe stack.

Smoked shotgun shells are a family favorite whenever the pellet smoker is running. Each bite layers smoky bacon, seasoned meat, and gooey cheese inside tender pasta, making them perfect for game day or weekend gatherings. They're simple to prep, big on flavor, and always the first thing to disappear from the appetizer table.

A blue plate with a stack of smoked shotgun shells sits next to the barbecue grill, giving off a smoky aroma

Whether you're using a Traeger, Rec-Tec, or your trusty oven, this smoked shotgun shells recipe is sure to become a favorite. Perfect for feeding a crowd or impressing your neighbors at the next cookout!

This worked exactly as written, thanks!

★★★★★~ Joy P. 2025

Make a batch of these when you are making a smoked pineapple, smoked brisket or a whole smoked turkey! Give your guests a smoked appetizer while the main event is cooking.

Why this delicious appetizer is amazing:

  • The addition of the cream cheese and ground sausage will give added moisture to the beef stuffing!
  • The perfect appetizer for when you are smoking your favorite recipe and need a snack while you wait.
  • Bacon slowly renders, softening and cooking the shells while cooking to a crisp.

Ingredients:

Smoked Shotgun Shells Ingredients , manicotti shells, hot sausage, cream cheese, shredded cheese, regular cut bacon, ground beef, BBQ Sauce on a wooden surface with text overlay.

Recipe Card?

To find the full printable recipe with specific measurements and directions CLICK HERE to go to the recipe card.

Instructions

  • For an added kick of flavor add a few tablespoons of your favorite spice or BBQ rub to the meat filling.
  • Cheese - Sharp cheddar cheese, Monterey jack cheese, mozzarella cheese, jalapeno cheese or smoked gouda cheese would be delicious.
  • Use cannelloni shells if you are not able to find manicotti shells.
silicone brush brushing on BBQ sauce onto a single Smoked Shotgun Shell.
mixed meats, cream cheese, cheese in a glass bowl.

Prepare the Filling

In a medium bowl, combine ground beef, hot Italian sausage, cream cheese, and shredded cheddar cheese. Mix until evenly combined.

a clear pastry bag filled with meat mixture, filling a manacotti shell with meat.

Stuff the Shells

Using a piping bag or spoon, fill each uncooked manicotti shell with the meat mixture. Press firmly to ensure the shell is fully packed.

Stuffing Tip

14 Smoked Shotgun Shells manacotti stuffed and resting on a baking sheet.

The meat will shrink as it cooks so don't be afraid to over-fill the shells.

female hand demonstrating how to wrap the bacon around the stuffed manacotti shell for Smoked Shotgun Shells Recipe

Wrap with Bacon

Wrap each stuffed shell with a slice of bacon, ensuring the entire shell is covered. Tuck the ends of the bacon underneath to secure.

14 bacon wrapped, stuffed Smoked Shotgun Shells on a baking sheet.

Refrigerate

Place the bacon-wrapped shells on a baking sheet, cover with plastic wrap, and refrigerate for at least 6 hours (or up to 48 hours).

smoked shotgun shells brushed with BBQ sauce, smoke billowing around them.

Smoke the Shells

  1. Preheat your smoker to 250°F using hickory or applewood pellets.
  2. Place the shells on the smoker grate and smoke for 1 hour.
  3. Brush each shell with BBQ sauce, increase the smoker temperature to 300°F, and cook for an additional 20-30 minutes, basting and flipping occasionally, until the bacon is crisp and the internal temperature reaches 165°F.

Did you make this recipe?

Do you have feedback that would be helpful to others? If so can help this small business owner by leaving a rating and a review in the comments section? Thank you for being part of the Savoring The Good Community. ~ Sarah

smoked shotgun shells recipe stack.

Bacon Wrapped Shotgun Shells (Smoker or Oven)

Shotgun shells recipe perfection: stuffed pasta shells, smoky bacon, melted cheese, and sticky BBQ sauce all in one bite‑sized appetizer for game day or backyard get‑togethers.
4.77 from 55 votes
Print Pin Rate
Course: Appetizer
Cuisine: American
Keyword: smoked shotgun shells
Prep Time: 30 minutes minutes
Cook Time: 2 hours hours
Chilling: 6 hours hours
Total Time: 8 hours hours 30 minutes minutes
Servings: 14 Shells
Calories: 641
Author: Sarah Mock

Ingredients

  • A white foam tray filled with raw ground beef, arranged in loose, squiggly strands.1 Pound Ground Beef
  •  
    1 Pound Italian Sausage, bulk sausage
  • Box of Kraft Philadelphia Original Cream Cheese, 8 oz (226g), silver packaging with blue and white logo, and renewable energy label on the left-perfect for making delicious Lemon Cheesecake Bars.4 Ounces Cream Cheese
  •  
    1 Cup Shredded cheddar cheese
  •  
    1 package Manicotti shells
  •  
    1 Pound Bacon
  •  
    1 Cup BBQ sauce
US Customary - Metric
Follow Savoring The Good On PinterestFollow @SavoringTheGood or tag #STGRecipes!

Instructions

Step 1: Prepare the Filling

  • In a medium bowl, combine ground beef, hot Italian sausage, cream cheese, and shredded cheddar cheese. Mix until evenly combined.
    1 Pound Ground Beef, 1 Pound Italian Sausage, bulk sausage, 4 Ounces Cream Cheese, 1 Cup Shredded cheddar cheese

Step 2: Stuff the Shells

  • Using a piping bag or spoon, fill each uncooked manicotti shell with the meat mixture. Press firmly to ensure the shell is fully packed.
    1 package Manicotti shells

Step 3: Wrap with Bacon

  • Wrap each stuffed shell with a slice of bacon, ensuring the entire shell is covered. Tuck the ends of the bacon underneath to secure.
    1 Pound Bacon

Step 4: Refrigerate

  • Place the bacon-wrapped shells on a baking sheet, cover with plastic wrap, and refrigerate for at least 6 hours (or up to 48 hours).

Step 5: Smoke the Shells

  • Preheat your smoker to 250°F using hickory or applewood pellets.
  • Place the shells on the smoker grate and smoke for 1 hour.
  • Brush each shell with BBQ sauce, increase the smoker temperature to 300°F, and cook for an additional 20-30 minutes, basting and flipping occasionally, until the bacon is crisp and the internal temperature reaches 165°F.
    1 Cup BBQ sauce

Notes

Can these be made without a smoker?
For sure! No smoker is needed. You are able to make them on the grill using the temperatures listed on the recipe card. The only thing you will be missing is the smoky flavor. Add a stop or two of liquid smoke to your sauce if you would like to have a smoky flavor without a smoker.
Want to share when you made this recipe?Follow @SavoringTheGood & tag #STGRecipes!
Nutrition Facts
Bacon Wrapped Shotgun Shells (Smoker or Oven)
Serving Size
 
1 shell
Amount per Serving
Calories
641
% Daily Value*
Fat
 
55
g
85
%
Saturated Fat
 
22
g
138
%
Trans Fat
 
0.4
g
Polyunsaturated Fat
 
5
g
Monounsaturated Fat
 
23
g
Cholesterol
 
95
mg
32
%
Sodium
 
597
mg
26
%
Potassium
 
270
mg
8
%
Carbohydrates
 
21
g
7
%
Sugar
 
8
g
9
%
Protein
 
15
g
30
%
* Percent Daily Values are based on a 2000 calorie diet.
**Nutritional facts are just estimates. Please utilize your own brand nutritional values to double check against our estimates.
Like this recipe card? Want one for your site?Check out WP Recipe Maker!


If you're putting together a small spread, Chili Cheese Dip is an easy addition that fits right in. Or make a batch of grilled wings to round out the appetizers.

Seasonal Favorite

Baked lattice top crust on an apple pie made with the Crisco pie crust recipe, showing flaky layers in the fluted edge.

This is my award-winning Crisco pie crust recipe; flaky, tender, and made with simple ingredients you already have.

Crisco Pie Crust

Oven Instructions

No smoker? No problem! You can still enjoy these delicious bacon-wrapped shotgun shells by baking them in the oven.

pan of smoked shotgun shells.

Instructions:

  1. Prepare the Filling:
    In a medium bowl, mix the ground beef, hot Italian sausage, cream cheese, and shredded cheddar cheese until well combined.
  2. Stuff the Shells:
    Using a piping bag or spoon, fill each uncooked manicotti shell with the meat mixture. Press firmly to ensure the shell is fully packed.
  3. Wrap with Bacon:
    Wrap each stuffed shell with a slice of bacon, making sure the entire shell is covered. Tuck the ends of the bacon underneath to secure.
  4. Refrigerate:
    Place the bacon-wrapped shells on a baking sheet, cover with plastic wrap, and refrigerate for at least 6 hours (or up to 48 hours).
  5. Preheat the Oven:
    Preheat your oven to 325°F. Place a heat-safe cooking rack on top of a rimmed baking sheet. For easy cleanup, line the baking sheet with foil or parchment paper.
  6. Add Smoky Flavor (Optional):
    If you'd like a smoky flavor, mix 1-2 teaspoons of liquid smoke into your BBQ sauce.
  7. Bake the Shells:
    • Arrange the shells on the prepared rack.
    • Brush each shell with BBQ sauce from edge to edge.
    • Bake for 30 minutes.
  8. Flip and Baste:
    • Carefully flip each shell and brush with more BBQ sauce.
    • Bake for an additional 25-35 minutes, or until the internal temperature of the meat reaches 165°F and the bacon is crispy.
  9. Finish with Sauce:
    Brush one last layer of BBQ sauce over the shells before serving.

Tips For Success

smoked shot gun shell pasta wrapped in bacon, cut in half with a pair of tongs holding it.
  • Crispy Bacon: For extra-crispy bacon, broil the shells for 1-2 minutes at the end of baking. Keep a close eye to prevent burning!
  • Moisture Check: If the pasta edges look dry, brush them with extra BBQ sauce during baking.
  • Serving Suggestion: Serve with extra BBQ sauce or ranch dressing for dipping.

Storage Tips

Be sure to cover the shells with plastic wrap or keep them in a zip-top bag for up to 48 hours before smoking.

Reheating Instructions

If you have any leftovers, you can microwave them on 50% power in 30-second increments until heated through. But I found the best way to reheat is in the oven.

Frequently asked questions, answers and tips:

Can these be made without a smoker?

For sure! No smoker is needed. You are able to make them on the grill using the temperatures listed on the recipe card. The only thing you will be missing is the smoky flavor. Add a stop or two of liquid smoke to your sauce if you would like to have a smoky flavor without a smoker.

Why are the edges of the pasta shell so crispy?

If the edges of the shells are not kept moist enough, they will dry out. Be sure the bacon is touching the entire pasta. Extra sauce can also be brushed on the shells as they are in the final cook.

How do I prevent the pasta from drying out?

Ensure the bacon is tightly wrapped around the shells, and baste them with BBQ sauce during cooking to keep them moist.

Chef Tip

female hand demonstrating how to wrap the bacon around the stuffed manacotti shell for Smoked Shotgun Shells Recipe

When wrapping the shell with bacon you will get the best wrap by aligning the bacon with the angle of the cut edge of the shell.


Sarah Mock of savoringthegood.com headshot 2022

I am Sarah Mock. Welcome!

Sarah Mock is a classically trained Chef and a graduate of Johnson & Wales University. A culinary blogger for 17 years, Sarah helps the home cook prepare her recipes with professional results.

Get to know me

as seen in:

Logos of Hersheyland, ABC News, and Good Day PA are showcased in a seamless row, providing a snapshot of popular brands.

Hersheyland Nightline Good Day Pa!

The vibrant design showcases the iconic logos of Pinterest, Rachael Ray, and Jell-O set against a bold red background. Sorry, the provided description doesn't offer enough detail to suggest important SEO keywords.

Pinterest Rachael JELL-O


Mojo Pork Recipe

Four tacos filled with shredded meat from a delicious Mojo Pork Recipe, garnished with cilantro, and accompanied by lime wedges on a white plate.

Use your crockpot to help make the best Cuban mojo pork recipe! A pork shoulder marinated in a blend of citrus juices, garlic, cumin, cilantro, olive oil and oregano.

Four tacos filled with shredded meat from a delicious Mojo Pork Recipe, garnished with cilantro, and accompanied by lime wedges on a white plate.

Another delicious recipe with a similar flavor profile you are going to want to make is Green Chile Stew. Love it on cold winter nights.

Cuban-Style Pork Roast Ingredients

mojo pork ingredients, crockpot, pork shoulder, cilantro, onion, olive oil, garlic, orange, orange juice, lemon Juice, herbs, Limes with text overlay labeling them.

Recipe Card?

To find the full printable recipe with specific measurements and directions CLICK HERE to go to the recipe card.

  • Pork shoulder - I am using a bone-in pork shoulder because I find the bone adds another layer of flavor to the dish but boneless pork is sometimes on a better sale so I will use that cut of meat.
  • Cilantro - I use a whole bundle of fresh cilantro in this recipe. Be sure to wash out any sand or dirt before adding it to the marinade.
  • Orange and Limes - Zest the orange and limes before juicing them or slicing them to use in the marinade.
  • Oregano - fresh oregano is pictured here but that is because I have is growing fresh in the herb garden. In the off season I will use dried.
  • Garlic cloves - I am calling for 8 cloves but if you want more...go for it. If you have extra garlic make some garlic powder. 

After cooking overnight, sear the flavorful pieces of Cuban pork in a screaming hot skillet to get the delicious crispy edges of indicative of the classic mojo Cuban pork.

My family loves this slow cooker pork recipe to make tacos, quesadillas, sliders or even over eggs for a fabulous protein-packed breakfast option.

Can I use something other than a pork shoulder?

I am using a bone-in pork shoulder but a boneless pork shoulder would also be delicious in this recipe. Additionally, if you have pork butt cut of meat or a pork shoulder that will work for this recipe. My traditional pork shoulder in the crock-pot is in heavy rotation in my menu plan when pork is on sale.

I don't always have fresh oranges, limes or lemons to juice for this recipe. By taking help from bottled juices from the store it will cut back on my food costs when citrus is not in season for me.

If you are not a fan of orange juice, you can substitute in more lime juice or switch it out for grapefruit juice. Just be sure to choose citrus because the acid helps tenderize as well as flavor the pork.

How To Make Cuban Pork Recipe

pork shoulder cubed on a cutting board.

Cut Pork

Cut the pork into large chunks.

orange and lime being zested.

Prepare the citrus

Zest the orange and the lime, and squeeze the juice from both or slice to add to the marinating bag.

garlic cloves being chopped on a cutting board.

Chop

Chop the garlic and dice the onion.

onions and garlic added to the marinade bag.

Add to bag

Add all the chopped ingredients along with the herbs, spices and olive oil to a large zip-top bag.

pork pieces in a bag of mojo marinate.

Add pork chunks

Add the chopped pork to the bag.

cuban mojo pork and marinade in a gallon zip top bag.

Remove air from bag

Close the bag, remove as much air as possible from the bag, and massage the bag to endure all surfaces of the meat are covered.

bag of pork marinading.

Marinade

Store in the refrigerator for at least 8 hours but not exceeding 24 hours.

top down image of mojo pork in a slow cooker.

Add to slow cooker

When ready to cook the pork, add all the ingredients from the bag to the slow cooker.

A slow cooker filled with a Mojo Pork Recipe, including sliced lemons, herbs, and chunks of meat in a broth. The cooker is placed on a wooden surface.

Cook on low

Cook on low for 8-12 hours or on high for 4-6 hours.

piece of cuban mojo pork in a pair of tongs.

Check for doneness

The pork will be super tender when it is done. Be sure to save any juices and drippings from the crockpot to make a sauce to go with your pork.

a smoking hot cast iron pan.

Finishing instructions

To finish the pork, bring a few tablespoons of canola oil to the point of smoking in a cast iron or heavy bottom pan.

pieces of mojo pork searing in a cast iron pan.

Sear

Add the pork pieces in a single layer and allow them to sear for 1-2 minutes.

beautiful mojo pork seared in the cast iron pan.

Turn

Turn the pork over and sear on the other side. The edges will be crispy and delicious when they are done!

cuban mojo pork tacos facebook.

Serve

Serve with your favorite rice, potatoes or taco shells as pictured above.

Did you make this recipe?

Do you have feedback that would be helpful to others? If so can help this small business owner by leaving a rating and a review in the comments section? Thank you for being part of the Savoring The Good Community. ~ Sarah

A large black and silver Crockpot filled with mixed vegetables and sauce is set to the "Low" heating option.

Sarah's recommendation

7 qt. Crock-Pot

Perfect for Chicken, Roasts and Meals for 8+ people.

Buy on Amazon

How to make Cuban roast pork in the oven

4 cuban pork mojo pork tacos on a white plate.
  1. Marinate the pork just as described in the recipe:
    • Cut pork shoulder into large chunks
    • Combine with citrus juices/zest, garlic, onion, cilantro, oregano, and olive oil
    • Marinate for 8-24 hours (don't exceed 24 hours as the citrus will make the meat mushy)
  2. Oven cooking instructions:
    • Preheat oven to 325°F (165°C)
    • Place pork and marinade in a deep roasting pan or Dutch oven
    • Cover tightly with foil or a lid. By covering the pan it will allow the meat to self baste, as it would in a slow cooker. 
  3. Cooking time:
    • Cook for about 3-3.5 hours for a 4-5 pound roast
    • Cook until internal temperature reaches 190°F (88°C) for tender, shreddable meat
    • Check occasionally - if liquid gets too low, add a bit of chicken broth
  4. Finishing steps (same as original):
    • Heat a cast iron skillet until smoking hot
    • Add a few tablespoons of canola oil
    • Sear pieces of the cooked pork for 1-2 minutes per side until crispy

Storage Tips

Be sure the meat has cooled to room temperature before storing in an air tight container in the refrigerator.

Reheating Instructions

Reheat the pork in a skillet over medium-high heat until heated through. If you have any leftover sauce or drippings add a few tablespoons of that to the pan to keep the meat moist.

Frequently asked questions, answers and tips:

Do I need to trim the fat cap from my pork?

I leave the fat cap in tact when cooking in the crockpot. It adds flavor and moisture to the recipe.

Can I pre-sear the meat before adding it to the slow cooker?

You are welcome to presear the meat before adding it to the slow cooker. I do say that color equals flavor! But in this instance I sear after the meat is cooked to give it extra crispy edges. You can do either but if you don't have time to presear, the oils and citrus juices will keep the pork extra tender and juicy.

Chef Tip

cooked mojo pork in a crock pot.

If you would like to have a thicker sauce to serve with your Mojo Pork, 30 minutes before the end of the cooking, whisk together a tablespoon of cold water and a tablespoon of cornstarch to make a cornstarch slurry. Add the slurry to the slow cooker. Turn the temperature to high and cook on high for the remaining 30 minutes.

Four tacos filled with shredded meat from a delicious Mojo Pork Recipe, garnished with cilantro, and accompanied by lime wedges on a white plate.

Mojo Pork (Citrus, Garlic, Cuban Slow Cooker Recipe)

Use your crockpot to help make the best Cuban mojo pork recipe! A pork shoulder marinated in a blend of citrus juices, garlic, cumin, cilantro, olive oil and oregano.
5 from 2 votes
Print Pin Rate
Course: Crock-Pot Recipes, Pork Recipes
Cuisine: Cuban
Prep Time: 8 hours hours
Cook Time: 8 hours hours
Total Time: 16 hours hours
Servings: 8 servings
Calories: 304
Author: Sarah Mock

Ingredients

  •  
    4 pound pork shoulder
  •  
    1 orange zested and sliced
  •  
    ½ Cup orange juice
  • A whole, uncut green lime with a textured peel on a white background-the perfect citrus for crafting a classic Gimlet.2 limes zested and sliced
  • Whole garlic bulb with white papery skin, lying on its side against a plain white background-a perfect aromatic addition to your next slowcooker sausage casserole.8 cloves Garlic chopped
  • A single whole yellow onion with dry, papery skin, photographed against a white background-the perfect flavorful addition to your next Crockpot Hash brown Casserole.1 onion chopped
  • A plastic bottle of ReaLemon 100% Lemon Juice with a yellow cap, a lemon-shaped top, and images of lemons on a green label-perfect for adding a burst of citrus flavor to your favorite recipes like Lemon Cheesecake Bars.½ Cup Lemon Juice
  • A 500ml bottle of California Olive Ranch Global Blend Extra Virgin Olive Oil with green and blue labeling, indicating a blend from Argentina, Portugal, Chile, and California-perfect for drizzling over your favorite shrimp avocado salad.¼ Cup olive oil
  • A 6 oz container of McCormick Pure Ground Black Pepper with a red lid and a 1 Tablespoon Black Pepper freshly ground
  • A plastic container of McCormick ground cumin with a red lid, featuring a yellow label that says 1 Teaspoon cumin
  •  
    ¼ Cup fresh oregano leaves or ½ teaspoon dried
  •  
    1 bunch Cilantro or 1 teaspoon coriander powder
US Customary - Metric
Follow Savoring The Good On PinterestFollow @SavoringTheGood or tag #STGRecipes!

Instructions

  • Cut the pork into large chunks.
    4 pound pork shoulder
  • Zest the orange and the lime, and squeeze the juice from both or slice to add to the marinating bag.
    1 orange, ½ Cup orange juice, 2 limes
  • Chop the garlic and dice the onion.
    1 onion, 8 cloves Garlic
  • Add all the chopped ingredients along with the herbs, spices and olive oil to a large zip-top bag.
    ½ Cup Lemon Juice, ¼ Cup olive oil, 1 Tablespoon Black Pepper, ¼ Cup fresh oregano leaves, 1 bunch Cilantro, 1 Teaspoon cumin
  • Add the chopped pork to the bag.
    4 pound pork shoulder
  • Close the bag, remove as much air as possible from the bag, and massage the bag to endure all surfaces of the meat are covered.
  • Store in the refrigerator for at least 8 hours but not exceeding 24 hours.
  • When ready to cook the pork, add all the ingredients from the bag to the slow cooker.
  • Cook on low for 8-12 hours or on high for 4-6 hours.
  • The pork will be super tender when it is done. Be sure to save any juices and drippings from the crockpot to make a sauce to go with your pork.
  • To finish the pork, bring a few tablespoons of canola oil to the point of smoking in a cast iron or heavy bottom pan.
  • Add the pork pieces in a single layer and allow them to sear for 1-2 minutes.
  • Turn the pork over and sear on the other side. The edges will be crispy and delicious when they are done!
  • Serve with your favorite rice, potatoes or taco shells as pictured above.

Notes

If you would like to have a thicker sauce to serve with your Mojo Pork, 30 minutes before the end of the cooking, whisk together a tablespoon of cold water and a tablespoon of cornstarch to make a cornstarch slurry. Add the slurry to the slow cooker. Turn the temperature to high and cook on high for the remaining 30 minutes.
Want to share when you made this recipe?Follow @SavoringTheGood & tag #STGRecipes!
Nutrition Facts
Mojo Pork (Citrus, Garlic, Cuban Slow Cooker Recipe)
Serving Size
 
1 portion
Amount per Serving
Calories
304
% Daily Value*
Fat
 
17
g
26
%
Saturated Fat
 
4
g
25
%
Polyunsaturated Fat
 
2
g
Monounsaturated Fat
 
9
g
Cholesterol
 
93
mg
31
%
Sodium
 
108
mg
5
%
Potassium
 
636
mg
18
%
Carbohydrates
 
10
g
3
%
Sugar
 
4
g
4
%
Protein
 
28
g
56
%
* Percent Daily Values are based on a 2000 calorie diet.
**Nutritional facts are just estimates. Please utilize your own brand nutritional values to double check against our estimates.
Like this recipe card? Want one for your site?Check out WP Recipe Maker!

Sarah Mock of savoringthegood.com headshot 2022

I am Sarah Mock. Welcome!

Sarah Mock is a classically trained Chef and a graduate of Johnson & Wales University. A culinary blogger for 17 years, Sarah helps the home cook prepare her recipes with professional results.

Get to know me

as seen in:

Logos of Hersheyland, ABC News, and Good Day PA are showcased in a seamless row, providing a snapshot of popular brands.

Hersheyland Nightline Good Day Pa!

The vibrant design showcases the iconic logos of Pinterest, Rachael Ray, and Jell-O set against a bold red background. Sorry, the provided description doesn't offer enough detail to suggest important SEO keywords.

Pinterest Rachael JELL-O


Bacardi Rum Punch for a Crowd

rum punch recipe with garnishes, square image.

Rum punch with Bacardi is a sweet, fruity, and refreshing cocktail made with white rum, fresh watermelon, orange juice, and squeezed lime juice. This is the kind of pitcher drink you make once and get asked for every backyard cookout, pool party, and summer gathering after that. It comes together in 5 minutes and serves a crowd without any fuss.

rum punch recipe with garnishes, square image.

The color alone is reason enough to add this to my red white and blue mixed drinks lineup; that watermelon red is hard to beat. It also has a permanent spot on my best Bacardi rum punch recipes list. A summer without a pitcher of frozen strawberry daiquiris or a blood orange margarita on the table is not a summer I want any part of.

Ingredients needed:

You only need 4 ingredients to make this rum punch, and the watermelon does most of the heavy lifting on flavor.

ingredients for Rum Punch with watermelon. bacardi rum, limes for fresh lime juice, orange juice, whole watermelon to be juiced.

Recipe Card?

To find the full printable recipe with specific measurements and directions CLICK HERE to go to the recipe card.

Substitutions

Switch out the light rum for dark rum, coconut rum or spiced rum to make your own version of this watermelon rum punch recipe.

Bacardi white rum is the base of this recipe; its light, clean flavor lets the watermelon and citrus shine without competing.

Dark rum adds a deeper, oaky warmth with hints of vanilla and ginger; it works well if you want a more complex flavor profile.

Coconut rum pulls this punch in a tropical direction; think less backyard cookout, more beach bar.

Spiced rum adds warmth and subtle spice notes that pair surprisingly well with the sweetness of fresh watermelon.

Flavored rums give you a wide range of options; mango, pineapple, or passion fruit rum all work here and each one changes the direction of the drink.

Making watermelon rum punch

Slices of watermelon placed inside a blender, ready to be blended for a refreshing Rum Punch Bacardi twist.

Prep the watermelon

Peel and chop your seedless watermelon into rough chunks. You do not need to be precise here; you are blending everything. Add the watermelon to your blender.

Chunks of watermelon in a blender with an open bottle of Bacardi white rum being poured inside, perfect for crafting a refreshing Rum Punch.

Add the rum and citrus

Pour the Bacardi white rum, orange juice, and freshly squeezed lime juice directly into the blender. Fresh lime juice makes a real difference here; bottled lime juice is flat and thin by comparison.

A blender filled with frothy pink Rum Punch Bacardi, viewed from above, with the blender blade visible in the center.

Blend until smooth

Place the lid on the blender and blend for about 60 seconds. You are looking for a completely smooth, evenly colored liquid with no chunks of fruit remaining.

Strain if needed

If you prefer a pulp-free punch, pour the blended mixture through a fine-mesh sieve before serving. Press gently with a spoon to get all the juice out, then discard the pulp. This step is optional but makes for a cleaner pour.

A red cocktail in a curved glass, garnished with a watermelon slice and lime, with striped straws. Bacardi rum bottle, lime, and watermelon are in the background.

Serve over ice

Fill glasses with fresh ice, pour the rum punch over the top, and garnish with a slice of fresh watermelon and a wedge of lime. Serve immediately.

Chef Tip

If you are making this for a party, blend the watermelon alone first, strain it, and then combine the watermelon juice with the rum and citrus in a large pitcher. It skips the pulp issue entirely and makes it easy to scale up for a crowd without running the blender six times.

Did you make this recipe?

Do you have feedback that would be helpful to others? If so can help this small business owner by leaving a rating and a review in the comments section? Thank you for being part of the Savoring The Good Community. ~ Sarah

Seasonal Favorite

Baked lattice top crust on an apple pie made with the Crisco pie crust recipe, showing flaky layers in the fluted edge.

This is my award-winning Crisco pie crust recipe; flaky, tender, and made with simple ingredients you already have.

Crisco Pie Crust

Helpful Kitchen Tools

mixology tools.
  • Cocktail shaker - useful if you are making single servings instead of a full pitcher batch.
  • Large Punch Container - perfect for self-serve at parties.
  • Fine-mesh sieve - for a pulp-free, clean pour.
  • Small cutting board
  • Paring knife
  • Hurricane glasses - This hurricane glasses set will make a modern statement in your bar, adding a touch of class and elegance.

Frequently asked questions, answers and tips:

While I try to share all the information you need to make this recipe in your home with restaurant-quality results, there still may be a question or two. Or these are questions I have received from the community about this recipe. I do my best to answer them as clearly as I can. I hope this helps.

Can I make this rum punch ahead of time?

Yes. Blend the watermelon, orange juice, and lime juice together and store in the refrigerator for up to 24 hours. Add the rum just before serving so the alcohol does not break down the fresh citrus flavor over time.

Can I make a non-alcoholic version?

Absolutely. Leave out the rum and add a splash of sparkling water or ginger ale when you pour over ice. You get all the color and fresh watermelon flavor without the alcohol.

Do I have to use fresh watermelon?

Fresh watermelon gives the best flavor and color. Frozen watermelon chunks work in a pinch, especially if you want an icier texture without diluting the drink with extra ice.

Why is my rum punch watery?

The most common reason is too much ice added to the blender. Keep the ice in the glass, not the blender, unless you are specifically going for a frozen version.

How long does leftover rum punch keep?

Store any leftover punch (without ice) in a sealed container in the refrigerator for up to 2 days. Give it a good stir before serving again; the watermelon juice will settle.

rum punch recipe with garnishes, square image.

Rum Punch Bacardi Recipe (with Watermelon)

Ready in 5 minutes, this easy Watermelon rum punch is delicious any time of the year but especially on a hot day, it is very refreshing.
5 from 1 vote
Print Pin Rate
Course: Cocktails
Cuisine: American
Keyword: Rum Punch Bacardi
Prep Time: 5 minutes minutes
Cook Time: 0 minutes minutes
Total Time: 5 minutes minutes
Servings: 4 Drinks
Calories: 202
Author: Sarah Mock

Ingredients

  •  
    4 Cups seedless watermelon
  •  
    1 Cup white rum
  •  
    ½ Cup orange juice
  • A whole, uncut green lime with a textured peel on a white background-the perfect citrus for crafting a classic Gimlet.¼ Cup fresh squeezed lime juice
  •  
    Ice
  •  
    Fresh watermelon slices and lime slices for garnish
US Customary - Metric
Follow Savoring The Good On PinterestFollow @SavoringTheGood or tag #STGRecipes!

Instructions

  • Add peeled, chopped seedless watermelon to the blender.
    4 Cups seedless watermelon
  • Add the white rum to the blender.
    1 Cup white rum
  • Pour orange juice.
    ½ Cup orange juice
  • Squeeze fresh lime juice, adding the fresh juice to the blender.
    ¼ Cup fresh squeezed lime juice
  • Place the cover on the blender and blend for one minute or until the cocktail is blended.
  • Add fresh ice to a glass, pour the rum punch over the glass and garnish with fresh fruit.
    Ice, Fresh watermelon slices and lime slices for garnish

Notes

To have watermelon juice without any pulp, blend the watermelon alone first, and strain through a fine-mesh sieve. Discard the pulp. Return the strained watermelon juice to the blender, add other ingredients, and blend.
Want to share when you made this recipe?Follow @SavoringTheGood & tag #STGRecipes!
Nutrition Facts
Rum Punch Bacardi Recipe (with Watermelon)
Serving Size
 
1 drink
Amount per Serving
Calories
202
% Daily Value*
Fat
 
0.3
g
0
%
Saturated Fat
 
0.03
g
0
%
Polyunsaturated Fat
 
0.1
g
Monounsaturated Fat
 
0.1
g
Sodium
 
3
mg
0
%
Potassium
 
251
mg
7
%
Carbohydrates
 
16
g
5
%
Sugar
 
12
g
13
%
Protein
 
1
g
2
%
* Percent Daily Values are based on a 2000 calorie diet.
**Nutritional facts are just estimates. Please utilize your own brand nutritional values to double check against our estimates.
Like this recipe card? Want one for your site?Check out WP Recipe Maker!

Sarah Mock of savoringthegood.com headshot 2022

I am Sarah Mock. Welcome!

Sarah Mock is a classically trained Chef and a graduate of Johnson & Wales University. A culinary blogger for 17 years, Sarah helps the home cook prepare her recipes with professional results.

Get to know me

as seen in:

Logos of Hersheyland, ABC News, and Good Day PA are showcased in a seamless row, providing a snapshot of popular brands.

Hersheyland Nightline Good Day Pa!

The vibrant design showcases the iconic logos of Pinterest, Rachael Ray, and Jell-O set against a bold red background. Sorry, the provided description doesn't offer enough detail to suggest important SEO keywords.

Pinterest Rachael JELL-O


Pineapple Glazed Ham

Glazed Ham With Pineapples

This pineapple glazed ham is the centerpiece of your holiday table! Brown sugar, honey, and pineapple juice reduce into a sticky glaze that gets brushed on in four rounds, caramelizing directly onto pineapple rings and maraschino cherries pinned to every side of a spiral-cut ham. Five ingredients, one pan, and the most impressive thing on the Easter or Christmas table - and it is far easier than it looks.

Glazed Ham With Pineapples

This easy recipe has 5 simple ingredients and one of them is the precut spiral ham.

Slice it off the bone at the table for a dramatic presentation, or pre-slice and arrange on a platter for a brunch buffet. Either way, plan for leftovers - they are just as good the next day in sandwiches, soup, or a quick ham and potato hash.

What Makes This Pineapple Glazed Ham Worth Making

  • Five ingredients, all grocery store staples - no specialty items, no advance ordering. Pick up a spiral ham on sale and you have everything else in your pantry already.
  • The four-round basting method builds real caramelization - each round of glaze reduces and intensifies, giving you a sticky, glossy exterior that a single-glaze ham cannot match.
  • The pineapple rings and maraschino cherries do double duty - they are the garnish AND they infuse the ham with sweetness as they bake, making every slice more flavorful than the last.
  • It feeds a crowd without the stress - a 4-6 pound spiral ham serves 8-10 people and the hands-on time is minimal. The oven does most of the work.

Ingredients for Baked Ham With Pineapple Brown Sugar Glaze:

ingredients for baked ham with pineapples and cherries, ha,. brown sugar, maraschino cherries, pineapple rings, pineapple juice, honey.

Recipe Card?

To find the full printable recipe with specific measurements and directions CLICK HERE to go to the recipe card.

Substitutions

  • To make a bourbon brown sugar pineapple glazed ham switch out half the pineapple juice for your favorite bourbon.
  • Pineapple chunks can be swapped out for the pineapple rings. I will do this when I know that there will be a kid's table. The kids love the bites of roasted pineapples with a maraschino cherry on top of the ham.
  • A different type of ham such as whole, bone-in ham can be used in place of the spiral ham. I like the spiral-cut ham because it makes for easy slicing and serving at the table.
  • Add a tablespoon of dijon mustard or whole grain mustard to the ham glaze for an added layer of flavor. Optional but your ham will be yummier when you use this glaze.

Can I Use Smoked Ham or Boneless Ham?

A smoked spiral ham is the most common choice and what this recipe was tested with. The smoke flavor works beautifully with the sweetness of the brown sugar pineapple glaze - they complement rather than compete. A boneless ham is easier to slice cleanly but does not hold the pineapple rings as securely since there is no bone structure to anchor around. Use longer toothpicks and angle them more aggressively if going boneless. A whole bone-in uncut ham retains moisture slightly better during the long bake time but requires scoring the surface in a diamond pattern before pinning the pineapple rings so the glaze has somewhere to penetrate and the toothpicks have purchase.

Can I use fresh pineapple instead of canned?

Canned pineapple rings work better for this recipe for two reasons. First, canned rings are uniform in size which makes them easier to pin evenly around the ham. Second - and more importantly - fresh pineapple contains bromelain, an enzyme that breaks down protein. Applied directly to ham and baked for an extended time, fresh pineapple can make the surface of the meat mushy. Canned pineapple has been heat-processed which deactivates bromelain, making it the safer and more practical choice here.

Pineapple Glazed Ham

baked honey brown sugar ham with pineapples and cherries.
  1. Add the brown sugar glaze ingredients to a pan. Allow to simmer and reduce while you prepare the spiral ham.
  2. Using wooden toothpicks, secure the pineapple slices to the ham with a maraschino cherry in the center of each ring of pineapple.
  3. Place the prepared ham in a roasting pan, add water to the bottom of the pan, cover the ham with foil and bake for 45 minutes at 350.
  4. Remove the foil, and baste with the brown sugar glaze. Bake for an additional 10 minutes. Repeat 3 times for a total of an additional 40 minutes bake time.
  5. Serve hot with your favorite side dishes.

Why Four Rounds of Glazing Matters

Most glazed ham recipes apply one coat of glaze and call it done. This recipe uses four rounds - remove the foil, brush the glaze, bake uncovered for 10 minutes, repeat three times. Each round reduces the glaze slightly, building a deeper caramel color and a more concentrated flavor layer. By the fourth round the pineapple rings are caramelized, the cherries are glossy, and the edges of every ham slice have that sugary, slightly crispy finish that makes this worth making every single year.

How to Make the Brown Sugar Pineapple Glaze

brown sugar and honey in a heavy bottom pan for glaze
pineapple juice being added to the brown sugar glaze.
  1. In a saucepan add the honey and the brown sugar.

2. Add the juice from canned pineapple to the pan, stir to dissolve the brown sugar bring to a simmer over medium-high heat.

brown sugar glaze in an all-clad pan.
brown sugar glaze in a glass cup with a basting brush in the glaze.

3. Allow the honey brown sugar glaze to boil for 1 minute and start to reduce.

4. The honey glaze will thicken as it cools.

pineapple rings on a ham in a white pan.
pineapple rings afixed to a ham with pineapple.

5. Place the ham in a deep baking dish and using wooden toothpicks, secure the pineapple rings to the ham. Preheat the oven to 350.

6. If the pineapples, overlap, that is fine. They will shrink and cook down slightly as the ham bakes.

pineapple rings and cherries held in place with wood picks on a sliced ham.
baked ham with pineapple rings and cherries, in a shite pan starting to take on colors.

7. Add a maraschino cherry to the center of each pineapple ring. Add 1 cup of water to the pan, cover with foil and bake for 45 minutes.

8. After the first bake time, remove the foil from the ham and adjust the toothpicks in the cherries and pineapple rings if they have slipped.

basting brush brushing on brons sugar glaze onto the pineapple rings.
Baked Glazed Ham With Pineapples in a white baking dish.

9. Using a basting brush, brush the brown sugar honey glaze over the ham, pineapples and cherries. Leaving the foil off of the ham, place the ham back in the oven and allow the glaze to reduce and caramelized on the ham for 10 minutes.

10. Repeat the basting and baking 3 times for a total of 40 additional baking time.

Internal Temperature for Ham

Spiral-cut hams are fully cooked before they leave the store - what you are doing in this recipe is reheating and glazing. The USDA recommends reheating fully cooked ham to an internal temperature of 140°F before serving. Use an instant-read thermometer inserted into the thickest part of the ham, away from the bone, to confirm. At 350°F, plan for approximately 12-15 minutes per pound for the initial covered bake before glazing begins.

Storage Tips

Once you have completely cooked any leftovers, you can store this easy baked ham in the refrigerator for 3-5 days, or in the freezer for up to 2 months. Be sure to store in air-tight containers.

Reheating Instructions for this Pineapple Glazed Ham Recipe

horizontal image of slices of baked ham with pineapples, cherries, potatoes and salad on the plate.

Wrap the leftover ham slices in foil and add a splash of water, pineapple juice or extra glaze before closing the foil and reheat the ham in a 325°F oven for no more than 10 minutes per pound. Check to be sure the ham reaches an internal temperature of 140°F.

Can I make pineapple glazed ham ahead of time?

Yes...and it reheats beautifully. Bake and glaze the ham completely, let it cool, then cover tightly and refrigerate for up to 2 days. To reheat, wrap the ham loosely in foil with a splash of pineapple juice or water to keep it moist, and warm in a 325°F oven until it reaches 140°F internally. Apply one final brush of glaze in the last 10 minutes to freshen the caramelized finish.

Glazed Ham FAQs, answers and tips:

How Much Ham Per Person?

I will plan on about ¾ lb. per person for a bone-in ham, so an 8 lb. ham will feed about 10-11 people. It also depends on how many side dishes you will be serving.

What does glazing a ham do?

By adding a brown sugar glaze to ham, it is helping to lock in the moisture, adds a layer of caramel flavor, color, and adds extra sweetness. The extended bake time with the thin layer of glaze will give the edges of the ham slices a sugary crispy edge.

How do I keep the pineapple rings and cherries in place while baking?

Use wooden or bamboo toothpicks one through the center of each maraschino cherry and into the pineapple ring, then angled down into the ham. Press them in at a slight downward angle so they grip as the ham contracts during baking. After the first 45-minute covered bake, check and reset any that have shifted before the glazing rounds begin. Remove all toothpicks before serving.

What temperature should pineapple glazed ham be cooked to?

Spiral-cut hams are fully cooked before you purchase them, so you are reheating rather than cooking from raw. The USDA recommends an internal temperature of 140°F for reheated fully cooked ham. Insert an instant-read thermometer into the thickest part of the meat, away from the bone, to get an accurate reading.

Should I use the glaze packet that comes with the ham?

Skip it. The packet that comes with most grocery store spiral hams is a small amount of pre-mixed powder that produces a thin, one-note sweet glaze. The brown sugar, honey, and pineapple juice glaze in this recipe produces a significantly richer, more complex result - and the four-round basting method caramelizes it in a way no packet glaze can replicate. Throw the packet out and use this one instead.

What to Serve with Pineapple Glazed Ham

horizontal image of a plate of honey baked ham with pineapples, a slice taken out of the ham.
  • Rhodes Rolls - Try this recipe with the best frozen dinner rolls when you want to make homemade rolls without the work!
  • Oven Roasted Asparagus - Roasting asparagus is a quick and easy way to enhance the delicate flavors of the asparagus and give the asparagus tips a bit of char.

Leftover Ham Recipes

  • Ham Pot Pie - This is an easy ham pot pie recipe that uses homemade ham pot pie dough squares, leftover ham cubed and diced potatoes. Made in the Pennsylvania Dutch tradition of slippery ham pot pie where there is a boiled dough instead of a top flaky crust.
  • Ham and Potato Crockpot Soup - Set your crockpot in the morning and come home to delicious soup your whole family will love.
  • Hoppin' John - made in a slow cooker, is a traditional New Year's Recipe but is perfect for any time you are craving slow cooker black-eyed peas.
Glazed Ham With Pineapples

Glazed Ham with Pineapple and Cherries

Brown Sugar glazed baked ham with pineapple and maraschino cherries is a delicious combination of sweet and salty for a holiday dinner that feeds a crowd.
4.80 from 5 votes
Print Pin Rate
Course: Pork Recipes
Cuisine: American
Prep Time: 10 minutes minutes
Cook Time: 45 minutes minutes
Cooking Glaze: 40 minutes minutes
Total Time: 1 hour hour 35 minutes minutes
Servings: 10 People
Calories: 297
Author: Sarah Mock

Ingredients

  •  
    4-6 Pounds ham
  •  
    1 can pineapple rings
  •  
    1 Jar maraschino cherries
  • A 16 oz bottle of Dutch Gold Pure Honey from clover blossoms with a flip-top cap and certification label on the front.½ Cup Honey
  • Domino Light Brown Sugar box, 16 oz, featuring a slice of Blackberry Dump Cake topped with whipped cream and berries, and a Non-GMO Project Verified label in the bottom right corner.½ Cup Brown Sugar
  •  
    1 Cup pineapple juice reserved from the can of pineapple rings
US Customary - Metric
Follow Savoring The Good On PinterestFollow @SavoringTheGood or tag #STGRecipes!

Instructions

  • In a saucepan add the honey and the brown sugar.
  • Add the pineapple juice to the pan, stir to dissolve the brown sugar bring to a simmer over medium-high heat.
  • Allow the honey brown sugar glaze to boil for 1 minute and start to reduce.
  • The honey glaze will thicken as it cools.
  • Place the ham in a deep baking dish and using wooden toothpicks, secure the pineapple rings to the ham. Preheat the oven to 350 °F (177 °C)
  • If the pineapples, overlap, that is fine. They will shrink and cook down slightly as the ham bakes.
  • Add a maraschino cherry to the center of each pineapple ring. Add 1 cup of water to the pan, cover with foil and bake for 45 minutes.
  • After the first bake time, remove the foil from the ham and adjust the toothpicks in the cherries and pineapple rings if they have slipped.
  • Using a basting brush, brush the brown sugar honey glaze over the ham, pineapples and cherries. Leaving the foil off of the ham, place the ham back in the oven and allow the glaze to reduce and caramelized on the ham for 10 minutes.
  • Repeat the basting and baking 3 times for a total of 40 additional baking time.
Want to share when you made this recipe?Follow @SavoringTheGood & tag #STGRecipes!
Nutrition Facts
Glazed Ham with Pineapple and Cherries
Serving Size
 
1 serving
Amount per Serving
Calories
297
% Daily Value*
Fat
 
7
g
11
%
Saturated Fat
 
2
g
13
%
Polyunsaturated Fat
 
1
g
Monounsaturated Fat
 
3
g
Cholesterol
 
85
mg
28
%
Sodium
 
2450
mg
107
%
Potassium
 
567
mg
16
%
Carbohydrates
 
31
g
10
%
Sugar
 
29
g
32
%
Protein
 
30
g
60
%
* Percent Daily Values are based on a 2000 calorie diet.
**Nutritional facts are just estimates. Please utilize your own brand nutritional values to double check against our estimates.
Like this recipe card? Want one for your site?Check out WP Recipe Maker!

Sarah Mock of savoringthegood.com headshot 2022

I am Sarah Mock. Welcome!

Sarah Mock is a classically trained Chef and a graduate of Johnson & Wales University. A culinary blogger for 17 years, Sarah helps the home cook prepare her recipes with professional results.

Get to know me

as seen in:

Logos of Hersheyland, ABC News, and Good Day PA are showcased in a seamless row, providing a snapshot of popular brands.

Hersheyland Nightline Good Day Pa!

The vibrant design showcases the iconic logos of Pinterest, Rachael Ray, and Jell-O set against a bold red background. Sorry, the provided description doesn't offer enough detail to suggest important SEO keywords.

Pinterest Rachael JELL-O

Amish Broccoli Salad

Amish Broccoli salad hero image. square.

This easy Amish broccoli salad is a delicious side dish perfect for summer gatherings or potlucks. Packed with fresh broccoli, cauliflower, crispy bacon, and a creamy, tangy dressing, it's a flavorful and customizable recipe that comes together in minutes. Plus, it's a great way to use seasonal produce at its peak!

Amish Broccoli salad hero image. square.

If you love broccoli you will want to read my guide on how to cook broccoli, try the Asian broccoli side dish and my chicken broccoli rice casserole.

Broccoli and Cauliflower Ingredients Needed:

ingredients to make Amish broccoli salad.. ½ pound bacon, chopped and cooked crisp 4 cups broccoli, chopped about 1 head 4 cups cauliflower, chopped about 1 head ¾ cup raisins, golden raisins are used in this recipe ½ cup finely diced red onion ⅓ cup sunflower seeds, salted (use any extra to make sunflower butter) 1 cup mayonnaise ¾ cup sour cream 2 Tablespoons vinegar 2 Tablespoons sugar ½ teaspoon salt 1 cup cheese crumbles.

Recipe Card?

To find the full printable recipe with specific measurements and directions CLICK HERE to go to the recipe card.

How to make Amish broccoli salad recipe

This Amish broccoli salad pairs perfectly with grilled chicken, burgers, or sandwiches. It's also a great make-ahead dish for picnics, potlucks, or BBQs!

fork with all the Amish broccoli salad ingredients on it, bite shot.
bacon crisping in a hot cast iron pan

Cook the Bacon

  • In a heavy bottom or cast iron pan, cook the chopped bacon until crisp.
  • Reserve bacon fat if using it in the dressing.
horizontal image of Amish broccoli salad in a bowl, with bacon on top.

Prepare the Vegetables

  • While the bacon cooks, chop the broccoli and cauliflower into small, bite-sized pieces.
  • Finely dice the red onion.
small piece of broccoli.

How Big To Chop?

Chop the broccoli and cauliflower into small, uniform pieces for the best texture.

liquid bacon fat being poured into the dressing, ready to be mixed.

Make the Dressing

  • In a medium bowl, whisk together the mayonnaise, sour cream, vinegar, sugar, and salt.

(If using, stir in the reserved bacon fat until well combined.)

all ingredients tossed together in a bowl.

Assemble the Salad

In a large bowl, combine the broccoli, cauliflower, red onion, raisins, sunflower seeds, cheese crumbles, and cooked bacon.

salad dressing being poured over the broccoli salad ingredients.

Toss and Serve

  • Pour the dressing over the salad and toss until everything is evenly coated.
  • Refrigerate in an airtight container until ready to serve.

Flavor Tip

Let the salad chill for at least 30 minutes before serving to allow the flavors to meld.

Sarah's Suggestion:

Don't be afraid to tweak this recipe to suit your taste! Swap out the raisins for dried cranberries, or add a handful of diced bell peppers for extra crunch. This salad is all about making it your own.

Storage

Store the salad in an airtight container in the refrigerator for up to 3 days. Stir well before serving.

Make-Ahead Tip

Prepare the salad and dressing separately, then combine just before serving to keep the vegetables crisp.

Amish Broccoli salad hero image. square.

Amish Broccoli Salad with Cauliflower, Bacon & Raisins

Traditional Amish broccoli and cauliflower salad recipe is a great way to enjoy chopped fresh broccoli florets and cauliflower florets at the peak of their freshness and flavors.
5 from 1 vote
Print Pin Rate
Course: Side Dish
Cuisine: American
Keyword: amish broccoli salad
Prep Time: 10 minutes minutes
Cook Time: 10 minutes minutes
Total Time: 20 minutes minutes
Servings: 9 Cups
Calories: 590
Author: Sarah Mock

Ingredients

  •  
    ½ pound Bacon chopped and cooked crisp, 2 Tablespoons grease reserved (optional)
  •  
    4 Cups broccoli chopped about 1 head
  •  
    4 Cups cauliflower chopped about 1 head
  •  
    ¾ Cup raisins golden raisins are used in this recipe
  •  
    ½ Cup finely diced red onion
  •  
    ⅓ Cup sunflower seeds salted
  • A jar of Hellmann's Real Mayonnaise with a blue lid, labeled 1 Cup Mayonnaise
  • sour cream.¾ Cup Sour Cream
  • A clear plastic bottle of Heinz distilled white vinegar with a white cap and colorful vegetables on the label.2 Tablespoons vinegar
  • A 4-pound bag of Domino granulated pure cane sugar with a yellow and white design, showing nutrition information and branding-perfect for sweetening recipes like rhubarb sour or your favorite desserts.2 Tablespoons Sugar
  • A Morton Salt container with a blue label featuring a girl in a yellow dress holding an umbrella, with salt pouring out of a container-an essential ingredient for perfectly seasoning dishes like Chicken Cordon Bleu.½ Teaspoon salt
  •  
    1 Cup cheese crumbles
US Customary - Metric
Follow Savoring The Good On PinterestFollow @SavoringTheGood or tag #STGRecipes!

Instructions

  • In a heavy bottom or cast iron pan, cook the chopped bacon until crisp. Reserve bacon fat if using it in the dressing.
  • While the bacon is cooking, chop the raw broccoli, head of cauliflower, finely dice the onion and break the sharp cheddar cheese into small pieces.
  • Add all the raw salad ingredients to a big bowl.
  • In a separate bowl combine the sugar, salt, vinegar and then whisk in the mayo and the sour cream.
  • Add the bacon fat to the dressing, if using.
  • Add the cooked bacon to the salad and toss to combine.
  • Pour all the dressing over the broccoli salad, stir to combine and make sure all the vegetables are evenly coated.
  • Store in an airtight container in the refrigerator until ready to serve.

Notes

To make your Amish broccoli salad extra flavorful, add 2 Tablespoons of liquid bacon grease to the dressing. Be sure to incorporate it well before pouring the dressing over the rest of the Amish broccoli salad.
Want to share when you made this recipe?Follow @SavoringTheGood & tag #STGRecipes!
Nutrition Facts
Amish Broccoli Salad with Cauliflower, Bacon & Raisins
Serving Size
 
1 cup
Amount per Serving
Calories
590
% Daily Value*
Fat
 
55
g
85
%
Saturated Fat
 
18
g
113
%
Trans Fat
 
0.05
g
Polyunsaturated Fat
 
15
g
Monounsaturated Fat
 
18
g
Cholesterol
 
57
mg
19
%
Sodium
 
534
mg
23
%
Potassium
 
473
mg
14
%
Carbohydrates
 
20
g
7
%
Sugar
 
6
g
7
%
Protein
 
7
g
14
%
* Percent Daily Values are based on a 2000 calorie diet.
**Nutritional facts are just estimates. Please utilize your own brand nutritional values to double check against our estimates.
Like this recipe card? Want one for your site?Check out WP Recipe Maker!

Sarah Mock of savoringthegood.com headshot 2022

I am Sarah Mock. Welcome!

Sarah Mock is a classically trained Chef and graduate of Johnson & Wales University. A culinary blogger for 15 years Sarah helps the home cook prepare her recipes with professional results.

Get to know me

Easy M&M Cookie Bars

M&M cookie bars stacked on eachother on a white plate, square image.

M&M cookie bars are thick, chewy, and loaded with chocolate chips and colorful candy. This easy recipe takes 30 minutes from start to finish and skips the cake mix shortcut for better texture and flavor.

M&M cookie bars stacked on eachother on a white plate, square image.

These bars work for any occasion. Swap the M&M colors to match holidays, birthdays, or team colors.

I add this recipe to my rotation of cookie recipes during the holidays. The dough is forgiving and the bars travel well to potlucks and bake sales.

Why this recipe works for me:

These M&M cookie bars deliver bakery texture without the fuss of dropping individual cookies. You spread the dough in one pan, bake, and cut into squares.

The recipe uses pantry staples. Butter, sugar, flour, eggs. You control the mix-ins, so swap the chocolate chips for butterscotch, peanut butter, or white chocolate if that suits your crowd better.

Ingredients needed for this M&M cookie bars recipe:

Chocolate chip cookie ingredients on a marble table.

Ingredient notes:

  • Butter: Unsalted butter at room temperature creams properly with the sugar. Salted butter works in a pinch; just reduce the added salt to ½ teaspoon.
  • Flour: All-purpose flour gives the right structure. Bread flour makes the bars too tough. Cake flour makes them too soft.
  • Chocolate chips: Semi-sweet is the standard, but dark chocolate, milk chocolate, butterscotch, peanut butter, or white chocolate chips all work. Pick what you like.
  • M&M's: Regular size works best. Mini M&M's sink into the batter. Peanut M&M's add crunch but throw off the texture slightly.

Substitutions

The M&M colors in the photos are red, white, and blue for July 4th. Switch them out for any color combination depending on what you have or what you are celebrating.

  • Green and red for Christmas.
  • Pastels for Easter.
  • School colors for game day.
  • Orange and black for Halloween.

How to Make M&M Cookie Bars

A baking sheet lined with parchment paper and evenly coated with butter, perfect for your favorite cookie bars recipe.

Prep the pan

Preheat your oven to 350F. Line a 9x13 inch baking pan with parchment paper and butter the parchment and sides of the pan. This keeps the bars from sticking and makes lifting them out easier.

A metal bowl filled with cookie dough sits next to three brown eggs and a bottle of vanilla extract on a white countertop, ready for your favorite cookie bars recipe.

Cream the butter and sugars

Add the butter, brown sugar, and granulated sugar to the bowl of a stand mixer. Beat with the paddle attachment on medium speed for 2-3 minutes until the mixture is light, fluffy, and pale in color. Scrape down the sides of the bowl with a rubber spatula.

A mixing bowl with cookie dough, three raw eggs, and vanilla extract on top, ready to be blended for the perfect cookie bars recipe.

Add eggs and vanilla

Add the vanilla extract and eggs to the creamed butter mixture. Mix on medium speed until fully incorporated and smooth, about 1 minute.

A bowl of flour and a whisk next to it.

Mix the dry ingredients

In a separate large bowl, whisk together the flour, baking powder, baking soda, and salt until evenly combined.

A bowl of flour and a bowl of flour next to each other.

Combine wet and dry

Add the dry ingredients to the wet ingredients in three additions, mixing on low speed after each addition until just combined. Stop the mixer and scrape down the sides of the bowl as needed. Do not overmix or the bars will be tough.

A mixing bowl with cookie dough, chocolate chips, and a few candy-coated chocolates being stirred with a wooden spoon-perfect for starting your favorite cookie bars recipe.

Fold in the mix-ins

Add the chocolate chips and 1 cup of the M&M's to the dough. Fold them in with a spatula or wooden spoon until evenly distributed.

A rectangular baking sheet filled with unbaked cookie dough mixed with red, blue, and white candy pieces and chocolate chips-perfect for your next festive cookie bars recipe.

Spread the dough

Transfer the dough to your prepared baking pan. Use a spatula or your hands to press the dough into an even layer, spreading it all the way to the edges and corners of the pan.

A baking sheet filled with unbaked cookie dough topped with red, white, and blue candy-coated chocolate pieces-perfect for trying out your favorite cookie bars recipe.

Top with M&M's

Sprinkle the remaining 1 cup of M&M's evenly across the top of the dough. Press them gently into the surface so they stick during baking.

Bake

Bake for 20-25 minutes. The bars are done when the edges are set and golden brown and the center looks barely underdone. It will firm up as it cools. If you overbake, the bars will be dry.

A baked cookie bars recipe topped with red, white, and blue M&M candies in a rectangular pan.

Cool completely

Let the bars cool completely in the pan on a wire rack before cutting. This takes about 1 hour. Cutting them warm makes them crumble and fall apart.

Six rectangular cookie bars with red, white, and blue M&M's and chocolate chips on a baking tray; some loose candies are scattered around-perfect for any festive gathering or to try your favorite cookie bars recipe.

Cut into squares

Once cooled, lift the bars out of the pan using the parchment paper. Cut into 24 squares with a sharp knife. For clean cuts, dip your knife in hot water and wipe it dry between each cut.

Storage Tips

Store M&M cookie bars in an airtight container at room temperature for up to 5 days.

Refrigerate them in an airtight container for up to 1 week. Bring to room temperature before serving or warm briefly in the microwave for 10-15 seconds.

Freeze the bars in a single layer on a baking sheet until solid, then transfer to a freezer-safe container or zip-top bag. Freeze for up to 3 months. Thaw at room temperature for 1-2 hours before serving.

Make-Ahead Instructions

  • You can make the dough up to 2 days ahead.
  • Press it into the prepared pan, cover tightly with plastic wrap, and refrigerate.
  • Bring to room temperature for 15 minutes before baking.
  • You can also freeze the unbaked dough in the pan for up to 1 month. Cover tightly with plastic wrap and aluminum foil.
  • Bake from frozen, adding 5-10 minutes to the baking time.

Serving Ideas:

  • Wrap individually for bake sales or lunchboxes.
  • Serve with a scoop of vanilla ice cream.
  • Drizzle with caramel and dollop on a scoop of homemade whipped cream.
Sarah Mock of savoringthegood.com headshot 2022

Sarah's Culinary Insight

  • For extra flavor, sprinkle the top of the dough with flaky sea salt before baking. The salt balances the sweetness and brings out the chocolate flavor.
  • Use room temperature butter. Cold butter will not cream properly and your bars will be dense. Leave the butter on the counter for 1-2 hours before starting.
  • Do not skip lining the pan with parchment paper. It prevents sticking and makes cleanup easier.
  • Press the dough firmly into the pan. Gaps and uneven layers cause uneven baking.

Did you make this recipe? Do you have feedback that would be helpful to others? If so can you help this small business owner by leaving a rating and a review in the comments section? Thank you for being part of the Savoring The Good Community. ~ Sarah

Frequently asked questions, answers and tips:

Can I make these without a stand mixer?

Yes. Use a hand mixer or mix by hand with a wooden spoon. It takes more arm strength but the results are the same.

Why are my cookie bars cakey instead of chewy?

You probably overbaked them or added too much flour. Measure flour by spooning it into the measuring cup and leveling it off, not scooping directly from the bag. Pull the bars from the oven when the center still looks slightly underdone.

How do I know when they are done?

The edges should be set and golden brown. The center should look barely underdone and will jiggle slightly when you shake the pan. It firms up as it cools.

Can I use a different pan size?

A 9x13 inch pan is standard. An 8x8 or 9x9 pan makes thicker bars; increase baking time by 5-10 minutes. A larger pan makes thinner bars; reduce baking time by 5 minutes.

Can I double this recipe?

Yes. Use two 9x13 pans or one half-sheet pan. Baking time stays the same.

Can I use salted butter?

Salted butter works in a pinch; just reduce the added salt to ½ teaspoon.

M&M cookie bars stacked on eachother on a white plate, square image.

M&M Cookie Bars

M & M cookie bars are the easy cookie bar recipe you need when you want an easy dessert recipe with few ingredients.
5 from 1 vote
Print Pin Rate
Course: Cookie Recipes
Cuisine: American
Keyword: m & m cookie bars
Prep Time: 15 minutes minutes
Cook Time: 25 minutes minutes
Total Time: 40 minutes minutes
Servings: 24 bars
Calories: 277
Author: Sarah Mock

Ingredients

  • A rectangular 8 oz package of Kerrygold Pure Irish Butter, unsalted, with a green and gold label and Irish grass-fed cow branding-perfect for creating delicious Saint Patrick's Day cupcakes.1 Cup Butter softened
  • Domino Light Brown Sugar box, 16 oz, featuring a slice of Blackberry Dump Cake topped with whipped cream and berries, and a Non-GMO Project Verified label in the bottom right corner.1 ½ Cup Brown Sugar packed
  • A 4-pound bag of Domino granulated pure cane sugar with a yellow and white design, showing nutrition information and branding-perfect for sweetening recipes like rhubarb sour or your favorite desserts.½ Cup Sugar
  • easy sous vide vanilla extract2 Teaspoons Vanilla Extract
  • A single brown chicken egg, perfect for making Chicken Cordon Bleu, stands upright on a white background.3 Egg
  • A 5-pound bag of King Arthur Baking Company unbleached bread flour with 12.7% protein content, labeled for ideal use in bread, pizza crust, and rolls-perfect for creating hearty sides like homemade loaves to serve alongside a comforting slowcooker sausage casserole.3 Cups Flour, All Purpose
  • A can of Rumford Baking Powder, 8.1 oz (230g), with red label, showing baked goods like Cherry Scones, and a 1 Teaspoon Baking Powder
  • Arm & Hammer Pure Baking Soda box, 8 oz size, with text promoting it as America's #1 trusted brand and stating 1 Teaspoon Baking Soda
  • A Morton Salt container with a blue label featuring a girl in a yellow dress holding an umbrella, with salt pouring out of a container-an essential ingredient for perfectly seasoning dishes like Chicken Cordon Bleu.1 Teaspoon Salt
  •  
    2 Cups M&M’s
  •  
    2 Cups Chocolate Chips
US Customary - Metric
Follow Savoring The Good On PinterestFollow @SavoringTheGood or tag #STGRecipes!

Instructions

  • Preheat oven to 350 °F (177 °C) Line a 9x13 inch baking pan with parchment paper and butter the parchment and sides of the pan. This keeps the bars from sticking and makes lifting them out easier.
  • Add the butter, brown sugar, and granulated sugar to the bowl of a stand mixer. Beat with the paddle attachment on medium speed for 2-3 minutes until the mixture is light, fluffy, and pale in color. Scrape down the sides of the bowl with a rubber spatula.
    1 Cup Butter, ½ Cup Sugar, 1 ½ Cup Brown Sugar
  • In a separate large bowl, whisk together the flour, baking powder, baking soda, and salt until evenly combined.
    3 Cups Flour, All Purpose, 1 Teaspoon Baking Powder, 1 Teaspoon Baking Soda, 1 Teaspoon Salt
  • Add the vanilla extract and eggs to the creamed butter mixture. Mix on medium speed until fully incorporated and smooth, about 1 minute.
    2 Teaspoons Vanilla Extract, 3 Egg
  • Add the dry ingredients to the wet ingredients in three additions, mixing on low speed after each addition until just combined. Stop the mixer and scrape down the sides of the bowl as needed. Do not overmix or the bars will be tough.
  • Add the chocolate chips and 1 cup of the M&M's to the dough. Fold them in with a spatula or wooden spoon until evenly distributed.
    2 Cups Chocolate Chips, 1 Cup M&M's
  • Transfer the dough to your prepared baking pan. Use a spatula or your hands to press the dough into an even layer, spreading it all the way to the edges and corners of the pan.
  • Sprinkle the remaining 1 cup of M&M's evenly across the top of the dough. Press them gently into the surface so they stick during baking.
    1 Cup M&M's
  • Bake for 20-25 minutes. The bars are done when the edges are set and golden brown and the center looks barely underdone. It will firm up as it cools. If you overbake, the bars will be dry.
  • Let the bars cool completely in the pan on a wire rack before cutting. This takes about 1 hour. Cutting them warm makes them crumble and fall apart.
  • Once cooled, lift the bars out of the pan using the parchment paper. Cut into 24 squares with a sharp knife. For clean cuts, dip your knife in hot water and wipe it dry between each cut.
  • Store in an airtight container.

Notes

For an added layer of flavor, sprinkle the top of the dough with a sprinkle of flaky sea salt before baking.
To get clean cuts on your bar cookies, dip your knife in hot water and wipe it dry before each cut.
Store M&M cookie bars in an airtight container at room temperature for up to 5 days.
Refrigerate them in an airtight container for up to 1 week. Bring to room temperature before serving or warm briefly in the microwave for 10-15 seconds.
Freeze the bars in a single layer on a baking sheet until solid, then transfer to a freezer-safe container or zip-top bag. Freeze for up to 3 months. Thaw at room temperature for 1-2 hours before serving.
Want to share when you made this recipe?Follow @SavoringTheGood & tag #STGRecipes!
Nutrition Facts
M&M Cookie Bars
Serving Size
 
1 bar
Amount per Serving
Calories
277
% Daily Value*
Fat
 
12
g
18
%
Saturated Fat
 
7
g
44
%
Trans Fat
 
0.3
g
Polyunsaturated Fat
 
0.5
g
Monounsaturated Fat
 
2
g
Cholesterol
 
43
mg
14
%
Sodium
 
226
mg
10
%
Potassium
 
62
mg
2
%
Carbohydrates
 
40
g
13
%
Sugar
 
27
g
30
%
Protein
 
3
g
6
%
* Percent Daily Values are based on a 2000 calorie diet.
**Nutritional facts are just estimates. Please utilize your own brand nutritional values to double check against our estimates.
Like this recipe card? Want one for your site?Check out WP Recipe Maker!

Sarah Mock of savoringthegood.com headshot 2022

I am Sarah Mock. Welcome!

Sarah Mock is a classically trained Chef and a graduate of Johnson & Wales University. A culinary blogger for 17 years, Sarah helps the home cook prepare her recipes with professional results.

Get to know me

as seen in:

Logos of Hersheyland, ABC News, and Good Day PA are showcased in a seamless row, providing a snapshot of popular brands.

Hersheyland Nightline Good Day Pa!

The vibrant design showcases the iconic logos of Pinterest, Rachael Ray, and Jell-O set against a bold red background. Sorry, the provided description doesn't offer enough detail to suggest important SEO keywords.

Pinterest Rachael JELL-O


Red White and Blue Drinks

4th of july drink recipes.

The best red white and blue mixed drinks and patriotic cocktails are served on the 4th of July and Memorial Day. Here are easy patriotic holiday drinks to serve at the neighborhood fourth of July celebration and other summer celebrations.

4th of july drink recipes.

1 Red White and Blue Layered Cocktail

Layers of grenadine, lemonade, vodka and blue curacao make for a pretty and festive 4th of July cocktail!

2 Red White and Blue Lemonade Vodka Slush

Break out the blender because you are going to be mixing up 3 different slushy drinks to make this patriotic-inspired layered vodka slush. Leave out the vodka to make it kid-friendly.

3 Pop Rocks Shooters

Red or blue Pop Rocks candy, Grenadine, Half and half and Maui Blue Hawaiian Schnapps together with a bar spoon is what you need to make these independence day party shooters!

4 Stars and Stripes. Red, White, and Blue Shot

Pour your grenadine into your cocktail glass first and then the blue curacao on top of the grenadine into the glass and then pour the peach schnapps gently on top. 

5 Patriotic Bomb Pops Cooler

No tie-dye effect with this patriotic drink! Check out her secret to get those lovely layers.

6 Patriotic Layered Smoothie

Not all fourth of July drinks need to be full of alcohol! This red white and blue drink is a fruit smoothie perfect for a hot summer day.

7 Non-Alcoholic Red, White, And Blue Layered Jello Shooters

These cool-looking red, white, and blue layered jello dessert shooters are great to take to a 4th of July party for both the kids and the adults. Kids can help make them too!

8 PATRIOTIC RED, WHITE & BLUE ITALIAN CREAM SODAS

It is a super festive as the drink naturally separates into red, white and blue colors. It's perfect for Memorial Day, 4th of July, or anytime you feel like being patriotic!

9 RED, WHITE, AND BLUE LEMONADE

A very simple recipe for lemonade and the strawberries and blueberries make this non-alcoholic beverage red, white, and blue. The lemonade is both sweet and tart. The berries add just a hint of flavor.

10 Red White & Berry Slushie

Frozen flavored malt beverage with a blend of blue raspberry, cherry and citrus flavors, makes this a perfectly refreshing and cooling drink to enjoy anytime this summer.

11 Firecracker Margarita

Hint: Cherry pop rocks are redder!

12 Firecracker Spritzer

The layering isn't that hard, because when you pour grenadine is heavy enough to sink to the bottom of any cocktail.

13 RED WHITE AND BLUE PINA COLADA

Red White and Blue Pina Colada is such a great flavor combination that gets even better as the layers bleed together.  Think classic Pina Colada flavors with strawberry and Blue Curacao! 

14 Sparkling Red, White and Blue Sangria

To start, stir together white wine, strawberries, blueberries, raspberries and orange in a large pitcher but the real sparkle comes with how the garnishes come together.

15 Red White and Blue Frozen Sangria

A blended frozen sangria with raspberries as the red layer.

16 CAPTAIN AMERICA COCKTAIL

Pro tip: Place a spoon with the bowl facing down against the side of the glass, and slowly pour in the vodka mixture over the back of a spoon.

17 Patriotic Limeade

A fun and light recipe perfect for 4th of July BBQs or picnics. It's slightly unexpected yet absolutely refreshing - and incredibly simple to make!

18 July 4th Cocktail

The best part is that it can be made ahead of time and each layer can be stored in the freezer. Then, when you're ready to serve, add the colorful layers into a glass!

19 Labor Day Cocktail

The bright red, white and blue colors of this Labor Day cocktail make it perfect for the Fourth of July too.

20 Blue Cocktails

This blue cocktail is also known as an ocean breeze cocktail. Whatever you call it, it is an easy tropical drink that's quick to make in either a single serving or a large batch!

21 CHERRY BOMB COCKTAIL

The cherry bomb cocktail is one of my go-to july cocktails. Cherry lovers will all agree.

22 SMIRNOFF RED, WHITE, AND BERRY VODKA COCKTAIL

Smirnoff's red white and berry vodka cocktail combine Smirnoff's Red, White, and Berry vodka with the berry lemonade Sparkling Ice water.

Seasonal Favorite

Baked lattice top crust on an apple pie made with the Crisco pie crust recipe, showing flaky layers in the fluted edge.

This is my award-winning Crisco pie crust recipe; flaky, tender, and made with simple ingredients you already have.

Crisco Pie Crust

23 Red, Blue and White Layer Drink


Let me let you in on a little secret for layered drinks. SUGAR! Yep, the trick is the sugar content. Sugar has a high density so ingredients with the highest sugar content will sink and you can create these wonderful layers.

24 Blue Margaritas

This cocktail is perfect for your 4th of July festivities - that blue will fit perfectly into your red, white and blue decor! I also love that margaritas are cocktails you make in a cocktail shaker - it adds some fun and flare to any gathering!

25 Captain America Kids Drink

Blue Gatorade is a great swap for the kool-aide. Even use a zero sugar one if you want to reduce the sugar content in the layered 4th of July drink. 

26 Blue Shot of Jello

To get jello shots out of the cup, use your tongue or finger, or use the lid of the cup like a spoon. 

27 July 4th Bomb Pop Drinks

Make this one for kids or adults using easy store-bought ingredients. In fact, the kids version only uses two items!

28 Patriotic Cocktail

This red, white and blue cocktail is inspired by a summery twist on the margarita made with tequila and fresh watermelon-and is the perfect way to toast to America's birthday. 

29 Patriotic Shot

Here's a shot for you while you salute the Red, White & the Blue on the 4th of July! 

30 All American Cocktail

American Cocktail is the patriotic drink you need for Memorial Day and the 4th of July. Just five simple ingredients and easy to make.

31. All American Alcoholic Drink Punch

½ part white rum, ½ part coconut rum, 1 part cranberry juice, 1 part blue Gatorade, 1 part lemon-lime soda. Fill dispenser ½ way with ice, pour in both rums and the cranberry juice. Pour Gatorade straight on the ice and allow it to separate then pour the lemon lime soda over the ice.

32. Kid-Friendly July 4th Layered Red White and Blue Drink

Layered drinks in red, white, and blue- perfect for the 4th of July, Memorial Day, or any summer barbecue! Non-alcoholic and kid-friendly for your next party!

33. Kid-Friendly Patriotic Punch

Snip the ends off of a Twizzlers candy and place in the drink for a straw. For some added fun, you could take some of the red, white, and blue Twizzlers PULL 'N' PEEL candy to add a little edible bow or tie to your straw.

34. Firecracker Float (Kid Friendly)

This is a fun Fourth of July twist on the classic root beer float recipe! The kids love this because it sounds like fireworks while they drink it. 

35. RED, WHITE & BLUE JELL-O ICE CUBES (THEY DON'T MELT!!)

Fill a glass with these Red, White & Blue Jell-O Ice Cubes and you've got the coolest drinks for your Memorial Day and 4th of July picnics and parties! These fun frozen cubes are colorful, and tasty and they don't melt!


Sarah Mock of savoringthegood.com headshot 2022

I am Sarah Mock. Welcome!

Sarah Mock is a classically trained Chef and a graduate of Johnson & Wales University. A culinary blogger for 17 years, Sarah helps the home cook prepare her recipes with professional results.

Get to know me

as seen in:

Logos of Hersheyland, ABC News, and Good Day PA are showcased in a seamless row, providing a snapshot of popular brands.

Hersheyland Nightline Good Day Pa!

The vibrant design showcases the iconic logos of Pinterest, Rachael Ray, and Jell-O set against a bold red background. Sorry, the provided description doesn't offer enough detail to suggest important SEO keywords.

Pinterest Rachael JELL-O


Cheesy Chicken Broccoli Rice Casserole

chicken broccoli rice casserole square image.

This simple chicken broccoli rice casserole recipe is a comfort food ready in under 45 minutes and is the easiest weeknight meal. A classic recipe that the whole family will enjoy.

chicken broccoli rice casserole square image.

Make a pan of Rhodes rolls to serve with this chicken and rice casserole. For dessert, I would suggest a refrigerator eclair cake (just be sure to make the dessert the day before) or pop in a blackberry dump cake served with a scoop of black raspberry ice cream.

Ingredients:

ingredients for chicken broccoli rice casserole, cheese, cream of chicken soup, raw chicken, eggs, broccoli, white rice with text overlay.

Recipe Card?

To find the full printable recipe with specific measurements and directions CLICK HERE to go to the recipe card.

Substitutions

broccoli added to the baking dish showing a wooden spoon stirring.
  • Use rotisserie chicken as a substitute for the chicken breasts. There is no need to cook the rotisserie chicken further, just dice it up!
  • Fresh broccoli florets can be substituted for frozen broccoli. Frozen broccoli is already blanched so if using fresh broccoli you are going to want to steam it for about 6 minutes before adding it to your casserole mix. Learn how to cook broccoli in this post.
  • Use chicken stock in place of the water when cooking the rice for added flavor.
  • Substitute in another vegetable such as peas, mixed frozen vegetables or cup up green beans for the broccoli. Use 2 cups.
  • Using cream of mushroom soup instead of cream of chicken soup is a suitable substitution for the casserole recipe.

Instructions:

slice of chicken broccoli rice casserole on a white plate with the rest of the dish in the background.

Prepare rice

Prepare the rice according to the package instructions.

raw chicken cooking in a pan, seam rising.

Heat Pan

  1. In a heavy bottom pan heat 3 tablespoons of olive oil over medium-high heat.
  2. Add the diced chicken in an even layer.
chicken taking on white color while cooking in a pan.

Cook Chicken

Season and cook the chicken until it is no longer pink on the inside and has started to take on a bit of color.

Mix

In a large bowl combine the rice, cooked chicken, cream of chicken soup, broccoli, milk and eggs. Mix everything until thoroughly combined.

all chicken broccoli rice casserole ingredients mixed well and pressed into a 9x13 pan.

Add To A Pan

Spray a 9x13 baking dish with pan spray and press the casserole mixture into it.

female hand adding shredded cheese to the top of the pan before baking.

Cook

Top if shredded cheddar cheese, if using, cover with aluminum foil and cook for 20-30 minutes.

Storage Tips

Store the leftovers in an air-tight container for up to 5 days in the refrigerator.

Reheating Instructions

On a microwave-safe plate, heat the leftovers in 30-second intervals until heated through.

Chef Tip

This casserole can be made ahead up until the point of baking it off. Bake for 40 minutes or until the casserole is heated through if baking a made-ahead casserole.

Can I use brown rice, minute rice, or wild rice in this recipe?

For the chicken casserole recipe, you can use brown rice, minute rice, or wild rice interchangeably based on your preference. Each type of rice will impart a unique texture and flavor to the casserole

How to store leftover chicken broccoli rice casserole

To store leftover chicken broccoli rice casserole, place the rice casserole in an airtight container and refrigerate promptly to maintain freshness and prevent spoilage.

chicken broccoli rice casserole square image.

Chicken Broccoli Rice Casserole

This simple chicken broccoli rice casserole recipe is ready in under 45 minutes and is the easiest weeknight meal.
5 from 7 votes
Print Pin Rate
Course: Chicken Recipes
Cuisine: American
Prep Time: 10 minutes minutes
Cook Time: 30 minutes minutes
Total Time: 40 minutes minutes
Servings: 6 Servings
Calories: 494
Author: Sarah Mock

Ingredients

  •  
    2 chicken breasts halved and diced
  •  
    4 c cooked rice 2 cups raw
  •  
    2 10.5 oz cream of chicken soup
  • A single brown chicken egg, perfect for making Chicken Cordon Bleu, stands upright on a white background.2 Egg
  •  
    12 oz frozen broccoli 2 cups
  • A white milk carton with a blue label reading 1 c milk
  •  
    2 Cups cheddar cheese shredded
US Customary - Metric
Follow Savoring The Good On PinterestFollow @SavoringTheGood or tag #STGRecipes!

Instructions

  • Prepare the rice according to the package instructions.
    4 c cooked rice
  • In a heavy bottom pan heat 3 tablespoons of olive oil over medium-high heat. Add the diced chicken in an even layer. Season and cook the chicken until it is no longer pink on the inside and has started to take on a bit of color.
    2 chicken breasts
  • In a large bowl combine the rice, cooked chicken, cream of chicken soup, broccoli, milk and eggs. Mix everything until thoroughly combined.
    2 chicken breasts, 4 c cooked rice, 2 10.5 oz cream of chicken soup, 2 Egg, 12 oz frozen broccoli, 1 c milk
  • Spray a 9x13 baking dish with pan spray and press the casserole mixture into it.
  • Top if shredded cheddar cheese, if using, cover with aluminum foil and cook for 20-30 minutes.
    2 Cups cheddar cheese
Want to share when you made this recipe?Follow @SavoringTheGood & tag #STGRecipes!
Nutrition Facts
Chicken Broccoli Rice Casserole
Serving Size
 
1 portion
Amount per Serving
Calories
494
% Daily Value*
Fat
 
21
g
32
%
Saturated Fat
 
10
g
63
%
Trans Fat
 
1
g
Polyunsaturated Fat
 
2
g
Monounsaturated Fat
 
6
g
Cholesterol
 
150
mg
50
%
Sodium
 
804
mg
35
%
Potassium
 
634
mg
18
%
Carbohydrates
 
41
g
14
%
Sugar
 
3
g
3
%
Protein
 
34
g
68
%
* Percent Daily Values are based on a 2000 calorie diet.
**Nutritional facts are just estimates. Please utilize your own brand nutritional values to double check against our estimates.
Like this recipe card? Want one for your site?Check out WP Recipe Maker!


Sarah Mock of savoringthegood.com headshot 2022

I am Sarah Mock. Welcome!

Sarah Mock is a classically trained Chef and a graduate of Johnson & Wales University. A culinary blogger for 17 years, Sarah helps the home cook prepare her recipes with professional results.

Get to know me

as seen in:

Logos of Hersheyland, ABC News, and Good Day PA are showcased in a seamless row, providing a snapshot of popular brands.

Hersheyland Nightline Good Day Pa!

The vibrant design showcases the iconic logos of Pinterest, Rachael Ray, and Jell-O set against a bold red background. Sorry, the provided description doesn't offer enough detail to suggest important SEO keywords.

Pinterest Rachael JELL-O

How To Smoke Brisket (Smoked Brisket Recipe)

how to smoke a brisket, sliced brisket on a cutting board

Learn how to smoke a brisket with this easy smoked brisket recipe and you will be enjoying the best brisket, all season long. Smoking a whole beef brisket can be intimidating the first time you try but with these tips and tricks of the trade you will always end up with a perfect brisket.

how to smoke a brisket, sliced brisket on a cutting board

While you are smoking meat toss of corned beef brisket to make homemade pastrami that will rival your favorite deli!

  • Simple ingredients allow the smoke flavor to shine through.
  • Preparation is key. Allowing yourself enough time to properly smoke the meat is key. It takes time for all the connective tissue to break down so be sure to allow yourself an hour per pound of meat when calculating your cook time.
  • When cooking for a large crowd this technique for smoking brisket is able to be used over multiple pieces of brisket, the only thing you are limited by is the size of your smoker.

Ingredients needed:

ingredients for a smoked brisket, 12 lb beef brisket, black pepper, garlic salt, kosher salt.

How to choose a brisket:

When picking out a brisket, my grandmother would hold the middle of the brisket in her flat hand to make sure both sides fell. The bigger the fall the better the meat. She also taught me when picking packaged bacon to chose the package that was soft and liquidy. That meant more bacon meat than bacon fat.

Credit: Reader Jana

Brisket rub recipes:

Coffee Rub:

  • ground coffee
  • kosher salt
  • brown sugar
  • paprika
  • chili powder
  • garlic powder
  • onion powder
  • ground cumin
  • oregano
  • coarse ground black pepper

Measure out equal parts of each of the ingredients, stir to combine and rub on meat.

Classic Smoke Rub:

  • Smoked paprika
  • Sea salt
  • Black pepper
  • Cayenne pepper
  • Onion powder
  • Dried oregano
  • Ground cumin
  • Garlic powder

Measure out 2 parts of all of the rub ingredients with the exception of the cumin and the garlic powder. Those are just one part. Stir to combine and rub on meat.

Texas A & M Brisket Rub

  • ½ cup of canning/pickling salt
  • ¼ cup of paprika
  • 3 Tablespoons of coarse ground pepper
  • 1 Tablespoon of fine ground pepper
  • 2 Tablespoons of onion powder
  • 2 Tablespoons of garlic powder
  • 2 Tablespoons of cayenne pepper
  • 2 Tablespoons of brown sugar (packed)
  • 2 Tablespoons of granulated sugar

What is brisket?

raw beef brisket, cleaned for smoking.

The brisket cut of meat comes from the chest of the steer. This muscle does a lot of work over the life of the animal helping keep their head and neck upright, aiding the animal in getting up and down off the ground as well as all the walking, running and eating that a steer does. The muscle strands are tightly laced and have lots of connective tissue, binging the muscle strands together.

Unlike the beef tenderloin that runs along the underside of the spine and does not have nearly as much connective tissue needing less heat and time to properly cook, a brisket will need extended time in the smoker to get the best results for the most tender brisket.

Best Brisket for smoking

When choosing a whole brisket for smoking you want to purchase a brisket that has both the flat and the point still attached to the brisket. Also known as a 'packer brisket' because the butcher just needed to package up the entire brisket instead of breaking it down for the customer, the whole packer brisket will give you the juiciest, most tender bite of brisket.

For this recipe, we are going to keep the seasonings simple with kosher salt, garlic salt, and ground black pepper. If you want to branch out I will include some other brisket rub options below.

Seasonal Favorite

Baked lattice top crust on an apple pie made with the Crisco pie crust recipe, showing flaky layers in the fluted edge.

This is my award-winning Crisco pie crust recipe; flaky, tender, and made with simple ingredients you already have.

Crisco Pie Crust

Substitutions

I have provided you with 3 different smoked brisket rub recipes. Each one is a little different. I hope you find one that you love or can make to meet your tastes.

horizontal image of rec tec grill with smoke box

Smoker - I have a rectec smoker because I love the auto-feed pellet option but I know others who have big green eggs and others love their traeger smokers. As long as you know how to use your smoker and love the results, that is all that matters.

Large cutting board - if this is your first time trimming up a brisket you may be surprised how big it is! A large cutting board will be helpful for not only trimming and transferring the meat to the smoker but clean the same cutting board and use it to serve your meat.

Chef knife or sharp pairing knife - getting the silver skin removed can be tricky but a sharp knife can be very helpful.

Thermometer - my RecTec has a thermometer that will communicate to an app on my phone alerting me to the internal temperature of the meat but all you really need is a meat thermometer to keep track of the meat temperature.

Butcher paper or foil - There is much debate in the smoking community about foil vs. butcher paper. Choose one and try the other the next time. Use what you find works best for your personal preference.

How to make smoked brisket, basic instructions

  1. Trim and season - Trim off any of the blue/silver skin from the meat but leave the thick layer of fat intact. Season all sides of the brisket liberally with your seasoning. no meat should be showing.
    raw beef brisket, cleaned for smoking.
  2. Rest - Place in the fridge for at least 12 hours, loosely covered with plastic wrap. This will allow the meat to dry out giving it a lovely pellicle before smoking.
  3. Rest and preheat - when ready to smoke pull the meat from the refrigerator and allow the meat to come to room temperature for about an hour. While the meat is coming to room temperature, preheat the smoker to 225 F using wood chips or smoker pellets of your choice.
  4. Smoke - Place your brisket fat side up on your smoker. Smoke your brisket for 30-60 minutes per pound. It typically takes about 12 hours when I smoke a brisket.
  5. Stall and wrap - Once your brisket has reached 160° internal temperature, this will be the stall. It is time to wrap it in foil or butcher paper, tightly and replace it back on the smoker and continue smoking until the thermometer reaches 202 at the thickest part of the meat.
  6. Rest - DONT SKIP THIS STEP. It might be tempting to cut 'just a small piece; off the end. Don't do it. This will give an exit point for all the fabulous juices to escape. Allow the meat to rest for a MINIMUM of 30 minutes but 1 hour is preferred. Keep the meat wrapped in aluminum foil or another layer of paper.
  7. Slice and serve - When slicing the brisket slice it against the grain and enjoy!

Reader Favorites

  • Pear butter in a glass canning jar with spices to the side and a whole pear to the right of the jar
    Pear Sauce Recipe
  • lasagna roll up on a serving fork coming out of the full pan, cheese pulling
    Lasagna Roll Ups Recipe
  • Four tacos filled with shredded meat from a delicious Mojo Pork Recipe, garnished with cilantro, and accompanied by lime wedges on a white plate.
    Mojo Pork Recipe
  • Sous vide eggs on toast, broken to show the runny yolk
    Sous Vide Poached Eggs: 60°C or 63°C

Smoking a brisket, photo instructions

thick sliced brisket.
  1. Trim off any silver skin from the meat but leave the thick layer of fat intact. Silverskin does not break down like the other connective tissues do at this low smoking temperature.
    spice rubbed brisket for smoking. no meat showing.
  2. Season all sides of the brisket liberally with your seasoning. No meat should be showing.
  3. Place in the fridge for at least 12 hours, loosely covered with plastic wrap. This will allow the meat to dry out giving it a lovely pellicle before smoking. A pellicle will allow smoke to better adhere to the surface of the meat during the smoking process.
  4. When ready to smoke pull the meat from the refrigerator and allow the meat to come to room temperature for about an hour. While the meat is coming to room temperature, preheat the smoker to 225 F using wood chips or smoker pellets of your choice.
  5. Place your brisket fat cap up on your smoker. A general rule of thumb is to smoke your brisket for 30-60 minutes per pound. It typically alow about 12 hours when I smoke a brisket. Do not raise the lid of the smoker for at least 4 hours. You are working on getting a lovely smoke ring on the meat with concentrated smoke.
    Sous Vide Brisket on the smoker, fat side up.
  6. Insert a meat thermometer in the thickest portion of the meat, avoiding the fat. Once your brisket has reached 160° internal temperature, this will be the stall. It is time to wrap it in foil or butcher paper, tightly and replace it back on the smoker and continue smoking until the thermometer reaches 202 at the thickest part of the meat.
  7. Rest - DONT SKIP THIS STEP. It might be tempting to cut 'just a small piece; off the end. Don't do it. This will give an exit point for all the fabulous juices to escape. Allow the meat to rest for a MINIMUM of 30 minutes but 1 hour is preferred. Keep the meat wrapped in aluminum foil or another layer of paper.
  8. Slice and serve - When slicing the brisket slice it against the grain and enjoy!

Reheating Instructions

Steam the meat in a pan with ½ inch of water until heated through.

Frequently asked questions, answers and tips:

What type of rub do you put on a brisket before smoking?

In this recipe, I use kosher salt, ground black pepper, and garlic salt. Other seasonings that could be added are brown sugar, paprika, cumin, dried oregano and onion powder just to name a few. The possibilities are endless.

What type of wood is best for smoking a beef brisket?

Different wood pellets or chips will give you different flavors to your brisket. For a bolder flavor, I would suggest oak, hickory, mesquite or a combination of these three with mesquite being the strongest flavor of smoke. For a milder or sweeter smoke flavor, I would suggest fruitwood such as applewood, cherry wood or peach wood. Pecan wood is another lovely option.

Chef Tip

While waiting the hour for the meat to rest, double wrap the meat in layers of foil or butcher paper. Place the meat in a cooler that has been 'preheated' by pouring hot water into the cooler, warming for 15 minutes, and then the water is dumped out. This will help keep the wrapped brisket at a higher temperature for serving versus just letting it rest wrapped on a cutting board.

Side Dishes

  • Two delicious potato stacks of thinly sliced, baked potatoes are garnished with chopped herbs and grated cheese on a ceramic plate.
    Potato Stacks Recipe
  • Buffalo cauliflower bites are roasted florets coated in a tangy red sauce, served on a white plate with a fork and garnished with fresh herbs.
    Buffalo Cauliflower Bites
  • A glass bowl filled with Antipasto Pasta Salad, featuring rotini, sliced pepperoni, cubes of cheese, black olives, lettuce, cherry tomatoes, and creamy dressing.
    Grinder Pasta Salad (Italian Antipasto Style)
  • A fork holds a slice of seasoned roasted baby potato over a pile of roasted potato chunks garnished with fresh herbs and melted cheese.
    Crispy Oven Roasted Baby Potatoes (Roasted Mini Potatoes)
See more Side Dishes →
how to smoke a brisket, sliced brisket on a cutting board

Easy Smoked Brisket

Smoking a whole beef brisket can be intimidating the first time you try but with these tips and tricks of the trade you will always end up with a perfect brisket.
5 from 2 votes
Print Pin Rate
Course: Beef Recipes
Cuisine: American
Prep Time: 8 hours hours
Cook Time: 12 hours hours
Rest Time: 1 hour hour
Total Time: 21 hours hours
Servings: 8 people
Calories: 1055
Author: Sarah Mock

Ingredients

  •  
    12 Pounds medium beef brisket
  • A 6 oz container of McCormick Pure Ground Black Pepper with a red lid and a Black Pepper ground
  • A Morton Salt container with a blue label featuring a girl in a yellow dress holding an umbrella, with salt pouring out of a container-an essential ingredient for perfectly seasoning dishes like Chicken Cordon Bleu.Salt kosher
  •  
    garlic Salt
US Customary - Metric
Follow Savoring The Good On PinterestFollow @SavoringTheGood or tag #STGRecipes!

Instructions

  • Trim and season - Trim off any of the blue/silver skin from the meat but leave the thick layer of fat intact. Season all sides of the brisket liberally with your seasoning. no meat should be showing.
    12 Pounds medium beef brisket, Black Pepper, Salt, garlic Salt
  • Rest - Place in the fridge for at least 12 hours, loosely covered with plastic wrap. This will allow the meat to dry out giving it a lovely pellicle before smoking.
  • Rest and preheat - when ready to smoke pull the meat from the refrigerator and allow the meat to come to room temperature for about an hour. While the meat is coming to room temperature, preheat the smoker to 225 °F (107 °C) using wood chips or smoker pellets of your choice.
  • Smoke - Place your brisket fat side up on your smoker. Smoke your brisket for 30-60 minutes per pound. It typically takes about 12 hours when I smoke a brisket.
  • Stall and wrap - Once your brisket has reached 160 °F (71 °C) internal temperature, this will be the stall. It is time to wrap it in foil or butcher paper, tightly and replace it back on the smoker and continue smoking until the thermometer reaches 202 °F (94 °C) at the thickest part of the meat.
  • Rest - DONT SKIP THIS STEP. It might be tempting to cut 'just a small piece; off the end. Don't do it. This will give an exit point for all the fabulous juices to escape. Allow the meat to rest for a MINIMUM of 30 minutes but 1 hour is preferred. Keep the meat wrapped in aluminum foil or another layer of paper.
  • Slice and serve - When slicing the brisket slice it against the grain and enjoy!
Want to share when you made this recipe?Follow @SavoringTheGood & tag #STGRecipes!
Nutrition Facts
Easy Smoked Brisket
Serving Size
 
1 serving
Amount per Serving
Calories
1055
% Daily Value*
Fat
 
50
g
77
%
Saturated Fat
 
18
g
113
%
Polyunsaturated Fat
 
2
g
Monounsaturated Fat
 
24
g
Cholesterol
 
422
mg
141
%
Sodium
 
538
mg
23
%
Potassium
 
2245
mg
64
%
Protein
 
141
g
282
%
* Percent Daily Values are based on a 2000 calorie diet.
**Nutritional facts are just estimates. Please utilize your own brand nutritional values to double check against our estimates.
Like this recipe card? Want one for your site?Check out WP Recipe Maker!


Sarah Mock of savoringthegood.com headshot 2022

I am Sarah Mock. Welcome!

Sarah Mock is a classically trained Chef and graduate of Johnson & Wales University. A culinary blogger for 15 years Sarah helps the home cook prepare her recipes with professional results.

Get to know me

as seen in:

Logos of Hersheyland, ABC News, and Good Day PA are showcased in a seamless row, providing a snapshot of popular brands.

Hersheyland Nightline Good Day Pa!

The vibrant design showcases the iconic logos of Pinterest, Rachael Ray, and Jell-O set against a bold red background. Sorry, the provided description doesn't offer enough detail to suggest important SEO keywords.

Pinterest Rachael JELL-O

Homemade Copycat Chick Fil A Sauce Recipe

chick fil a sauce, copycat,in a white ramekin, waffle fry being dipped into the sauce.

Make chick-fil-a sauce at home with this copycat recipe using pantry staples. Combine mayo, BBQ sauce, yellow mustard, and a dash of lemon juice to make one of the most popular fry dipping sauces.

chick fil a sauce, copycat,in a white ramekin, waffle fry being dipped into the sauce.

This sauce is a cross between a smoky barbecue sauce and a creamy honey-mustard, with just a hint of acid from the lemon. Make the best copycat Chic-Fil-A sauce at home!

✨ Here is why this copycat chick fil a sauce recipe is amazing:

  • Tastes JUST like Chic-Fil-A sauce!
  • Perfect for dipping more than fries!

🥫 Chick Fil A Sauce Ingredients:

chick fil a sauce ingredients in bowls with text overlay labeling them. BBQ sauce, mayonnaise, mustard, honey, lemon juice.

Here is a visual overview of the ingredients in the recipe. Scroll down to the recipe at the bottom for quantities.

📝 Ingredient notes:

  • Mayonnaise - I use a full-fat mayo and love to use Duke's but use the mayonnaise that your family loves.
  • BBQ-Sauce - for this recipe I used a store-brand barbecue sauce.
  • Mustard - yellow mustard is used in this copycat recipe. See the substitutions for other options.
  • Honey - I will always advocate using local honey because you are supporting a local beekeeper as well as being sure that it is pure honey.
  • Lemon juice - bottled lemon juice is what I used for this recipe. I would say that fresh is not called for like it is in my lemonade popsicles.

🔄 Substitutions

Everyone likes to make their fry sauce their own with a special twist. Your special twist could be switching out dijon mustard or whole grain mustard for the yellow mustard. BUT plain yellow mustard is more authentic.

🔪 How to make chick fil a sauce at home, basic instructions

horizontal tight shot of a waffle fry being dunked into sauce.
  1. In a medium bowl, whisk together all the ingredients until combined.

📷 Making chick-fil-a sauce copycat recipe, photo instructions

female hand dunking a crisp waffle fry into a white ramekin filled with homemade chick fil a sauce.
tight shot of chick fil a sauce ingredients, not mixed, in a glass bowl.
a whisk stirring chick fil a sauce ingredients till blended in a clear glass bowl.

In a medium bowl, add all the ingredients.

Using a whisk, stir together all the sauce ingredients until they are well combined.

tray of crisp waffle fries on a white rectangle serving tray with chick fil a sauce in a white ramekin to the side.

Serve this tangy sauce with your favorite fries, chicken strips and it's even delicious on salads!

Storage Tips

Store in the refrigerator in a sealed container or a squeeze bottle for up to 2 weeks.

🥄 What to serve with yummy Chic-Fil-A sauce:

tray of crisp waffle fries on a white rectangle serving tray with chick fil a sauce in a white ramekin to the side.

The classic waffle fry is what I serve with this CFA sauce. Don't forget about chicken nuggets, a chicken sandwich, use it as a sandwich spread, instead of mayonnaise, sweet potato fries or tater tots! Anything you can dunk or needs a savory spread Chick fil a sauce will be delicious.

Frequently asked questions, answers and tips:

What type of mustard is in Chic-Fil-A sauce?

Simple, yellow mustard is what chic fil a uses to make their special sauce.

Chef Tip

  • Make a double batch so that you can keep the leftovers in the fridge and use it all week.
  • Want it a bit smoky in flavor? Try adding a drop of your favorite liquid smoke to the recipe.
chick fil a sauce, copycat,in a white ramekin, waffle fry being dipped into the sauce.

Chick-Fil-A Sauce

Combine mayo, BBQ sauce, yellow mustard and a dash of lemon juice to make one of the most popular fry dipping sauces.
5 from 1 vote
Print Pin Rate
Course: Dips & Salsas
Cuisine: American
Stir time: 3 minutes minutes
Total Time: 3 minutes minutes
Servings: 10 servings
Calories: 233
Author: Sarah Mock

Ingredients

  • A jar of Hellmann's Real Mayonnaise with a blue lid, labeled 1 c mayo
  • A 16 oz bottle of Dutch Gold Pure Honey from clover blossoms with a flip-top cap and certification label on the front.½ c Honey
  •  
    ½ c bbq sauce
  •  
    4 Tablespoons yellow mustard
  • A plastic bottle of ReaLemon 100% Lemon Juice with a yellow cap, a lemon-shaped top, and images of lemons on a green label-perfect for adding a burst of citrus flavor to your favorite recipes like Lemon Cheesecake Bars.2 Tablespoons Lemon Juice
US Customary - Metric
Follow Savoring The Good On PinterestFollow @SavoringTheGood or tag #STGRecipes!

Instructions

  • In a bowl mix together all the ingredients until smooth. Serve with your favorite fries, chicken and it's even good on salads!
Want to share when you made this recipe?Follow @SavoringTheGood & tag #STGRecipes!
Nutrition Facts
Chick-Fil-A Sauce
Serving Size
 
2 Tablespoons
Amount per Serving
Calories
233
% Daily Value*
Fat
 
17
g
26
%
Saturated Fat
 
3
g
19
%
Trans Fat
 
1
g
Polyunsaturated Fat
 
10
g
Monounsaturated Fat
 
4
g
Cholesterol
 
9
mg
3
%
Sodium
 
356
mg
15
%
Potassium
 
59
mg
2
%
Carbohydrates
 
20
g
7
%
Sugar
 
19
g
21
%
Protein
 
1
g
2
%
* Percent Daily Values are based on a 2000 calorie diet.
**Nutritional facts are just estimates. Please utilize your own brand nutritional values to double check against our estimates.
Like this recipe card? Want one for your site?Check out WP Recipe Maker!

Sarah Mock of savoringthegood.com headshot 2022

I am Sarah Mock. Welcome!

Sarah Mock is a classically trained Chef and graduate of Johnson & Wales University. A culinary blogger for 16 years Sarah helps the home cook prepare her recipes with professional results.

Get to know me

as seen in:

Logos of Hersheyland, ABC News, and Good Day PA are showcased in a seamless row, providing a snapshot of popular brands.

Hersheyland Nightline Good Day Pa!

The vibrant design showcases the iconic logos of Pinterest, Rachael Ray, and Jell-O set against a bold red background. Sorry, the provided description doesn't offer enough detail to suggest important SEO keywords.

Pinterest Rachael JELL-O

Corned Beef on Smoker

whole Smoked Corned Beef on a grill grate, showing the smoked color and crust.

Smoked corned beef brisket is a rosy, tender alternative to the classic boiled version, made by coating a store-bought corned beef in mustard and spices, then smoking it low and slow until it slices clean instead of shredding apart. I started making it this way after getting hooked on the smoke ring and bark you never get from a pot of boiling water. Plan on a full day start to finish: a 2-hour to overnight soak, an overnight rest once it is seasoned, and about 3 to 4 ½ hours of smoke time for a 3-pound brisket.

thinly sliced Smoked Corned Beef piled high on a wooden cutting board.

Smoking a corned beef instead of boiling it also opens up more game day recipe ideas, since you get clean slices for a sandwich board instead of the shredded texture you get from the stovetop.

I first made sous vide corned beef when I was new to cooking with sous vide. Next time I get my hands on a beef brisket, I plan to combine that sous vide technique with the smoking method in this recipe.

Leftover corned beef is perfect for my Reuben tater tots, classic Reuben sandwiches, or any of my other beef recipes.

Why You'll Love This Recipe

  • Starting with a store-bought corned beef means you skip the multi-day brining and go straight to seasoning and smoking.
  • You pick the seasoning blend, so you can build your own smoked brisket flavor instead of relying on the packet that comes with the meat.
  • You control the slice thickness at the end, from deli-thin for sandwiches to thick-cut for a plate.

Ingredients needed for this smoked corned beef recipe:

Corned Beef and spices in a bowl. both sitting on a wooden cutting board.

Ingredient notes:

  • 3 pound corned beef brisket - Buy the vacuum-sealed corned beef from the grocery store meat case; it comes already brined and ready for seasoning. If you cure your own brisket from scratch, just pick this recipe up at the seasoning step.
  • Seasoning packet - This is the packet included with most store-bought corned beef. It works, but it usually leans on pickling spice rather than a true smoked brisket rub; use one of the three rubs below if you want more control over flavor.
  • Yellow mustard - The mustard is not just flavor. It is the glue that holds the dry rub onto the meat through hours in the smoker.

Recipe Card?

To find the full printable recipe with specific measurements and directions CLICK HERE to go to the recipe card.

Smoked Corned Beef Brisket Substitutions

If your corned beef did not come with a spice packet, or you would rather build your own flavor from scratch, here are three rub options, plus what you need to know if you swap out the mustard.

Yellow Mustard vs. Other Binders

Yellow mustard brings sharp acidity that cuts the fat and helps the rub form a proper bark. Whole grain or honey mustard swaps in easily and mellows that sharpness into something rounder, though you lose a little of the tang that makes the bark pop.

Brushing on a dark beer instead skips the acidity altogether and leans the flavor toward malt and caramel. It works, but the bark forms thinner since beer does not hold the rub in place the way mustard does. Stick with mustard, yellow or otherwise, if a firm bark matters to you.

Pick Your Rub

All three rubs below work on this cut; the difference is which flavor lane you want to drive down. Rub #1 leans sweeter from the brown sugar, which balances well if you like some caramelization on the bark. Rub #2 keeps whole peppercorns and coriander seeds, giving you a coarser, more traditional pastrami-adjacent bite. Rub #3 is the simplest of the three and leans hardest into black pepper and garlic, good if you want a straightforward, peppery crust without much sweetness.

Corned Beef Rub Recipe #1

  • 2 tbsp Brown Sugar
  • 2 tbsp Ground Black Pepper
  • 2 tbsp Coriander Powder
  • 2 tbsp Paprika
  • 1 tbsp Garlic Powder
  • 1 tbsp Onion Powder

Corned Beef Rub Recipe #2

  • 2 tablespoons Black Peppercorns
  • ½ tablespoon Coriander Seeds
  • ½ tablespoon Onion Powder
  • 1 teaspoon Dried Thyme
  • 1 teaspoon Paprika
  • 1 teaspoon Garlic Powder

Corned Beef Rub Recipe #3

  • 3 tablespoons ground Black Pepper
  • 2 tablespoons Garlic Powder
  • 1 teaspoon Onion Powder
  • ½ teaspoon ground Coriander Seeds
  • ½ teaspoon ground Mustard Seeds
A blue Thermapen digital thermometer from ThermoWorks, displaying 70.0, lies on a wooden table near a plate of grilled meat. The ThermoWorks logo and a "Shop Now" button are also visible, inviting you to explore the precision of this essential kitchen tool.

On sale for you today!

Sarah's Favorite Thermometer

Never question the temperature of your food again!

Get 15% off today

Smoking a corned beef

Here is that same process broken down in more detail, with photos so you can see what each stage should actually look like.

pile of smoked corned beef.

Unwrap and Drain

Take the corned beef out of its packaging and drain off the liquid brine clinging to the meat. Set the seasoning packet aside; you will use one of the rubs above instead.

A hand holds a large piece of raw beef brisket on a wooden cutting board, trimming fat with a kitchen knife in preparation for smoked corned beef.

Trim the Silver Skin

Run a sharp knife just under the silvery membrane and any thick pockets of hard fat, angling the blade away from the meat as you go. You want the surface smooth enough that the rub can make direct contact with the meat, not the membrane.

A large, raw beef brisket, perfect for smoked corned beef, with some trimmed fat sits on a wooden cutting board next to a knife with a blue handle.

 Leave the Fat Cap

Leave the thicker fat cap on one side of the brisket intact; it bastes the meat as it renders slowly in the smoker.

Soak Out the Salt

Submerge the trimmed brisket in cold water and refrigerate for a minimum of 2 hours, up to overnight. The longer soak pulls more curing salt out of the meat, so if you are sensitive to salt, go the full overnight.

A stainless steel pan with whole spices, including coriander seeds and peppercorns, being toasted over a gas stove flame-perfect for seasoning smoked corned beef.

Toast and Grind the Spices

While the meat soaks, toast your chosen spice blend in a dry pan over medium heat, shaking the pan often, until the spices smell nutty and toasted instead of raw and dusty. Pulse the toasted spices in a small food processor until they turn into a coarse powder.

Can I Skip Toasting The Spices?

Skipping the toast is the one shortcut I would not take; the few batches I rushed by not toasting first taste flatter by comparison, since the dry heat wakes up the oils in the spices before the rub ever touches the meat.

A raw beef roast on a wooden cutting board with diagonal lines of yellow mustard on top, next to a knife, ready to be transformed into flavorful smoked corned beef.

 Pat the Meat Dry

Drain the water and pat the brisket dry on all sides with paper towels. A dry surface helps the mustard and rub grip instead of sliding off.

A raw beef brisket coated with mustard sits on a wooden cutting board next to a knife, ready to be transformed into delicious smoked corned beef on a rustic wooden surface.

Coat with Mustard

Squeeze yellow mustard over the entire brisket, or brush on your favorite dark beer instead, and spread it into an even, thin layer.

A seasoned piece of smoked corned beef rests on a wooden cutting board atop a rustic wooden surface.

Press In the Rub

Dust the mustard-coated brisket with your ground spice mixture and press it firmly into the meat with your palm so it holds.

Wrap and Chill

 Wrap the seasoned brisket tightly in cling wrap and refrigerate it overnight. This rest gives the rub time to work into the surface of the meat instead of just sitting on top of it.

A black and stainless steel rec tec grill outdoor smoker with a digital control panel, placed on a brick patio next to a house.

Preheat the Smoker

The next day, preheat your smoker to 275F using your favorite wood chips or pellets.

A seasoned brisket sits on a metal grill rack inside a smoker, ready to be cooked into savory smoked corned beef perfection.

Load the Smoker

Unwrap the brisket and set it fat side up directly on the grill grate so the rendering fat bastes the meat as it cooks.

fully smoked corned beef showing the rosey color.

Smoke to Temperature

Smoke low and slow until a meat thermometer reads at least 165F, the minimum safe internal temperature for this cut.

Temperature and Texture

I have taken this brisket as high as 185F more than once for a softer, more fall-apart texture, and it has never dried out on me; do not stop at 165F just because it is technically done if that is the texture you want.

pile of sliced smoked corned beef on a cutting board with a knife to the side.

Rest Before Slicing

Pull the brisket off the smoker and let it rest for at least 15 minutes so the juices redistribute through the meat instead of running out onto the cutting board when you slice it.

Here is how to keep leftovers at their best

Wrap the sliced or whole brisket tightly in plastic wrap, or seal it in a zip-top bag, and refrigerate for up to 5 days. Slice off only what you need as you go rather than pre-slicing the whole thing.

Reheating Instructions

Steam the meat in a pan with about ½ inch of simmering water, covered, until heated through. Steaming keeps the slices moist instead of drying them out the way a microwave or dry skillet will.

Sarah Mock of savoringthegood.com headshot 2022

Sarah's Culinary Insight

  • Soak time controls saltiness more than anything else in this recipe. Two hours knocks the sharp edge off; a full overnight soak mellows it out almost completely, so match the soak to how sensitive you are to salt.
  • Toasting the spices before grinding them is the one step I would never skip. Every batch I have made without toasting first tastes flatter and duller by comparison, since the dry heat wakes up the oils before the rub ever touches the meat.
  • 165F is the safety floor here, not the finish line. I have pushed this brisket to 185F more than once for a softer, more shred-friendly texture, and it has never come out dry.
  • Mustard is doing more than adding flavor; it is the glue that holds your rub onto the meat through hours in the smoker. Swap in beer instead and expect a thinner bark, since beer does not grip the rub the same way.
  • Chill the brisket before you slice it. Warm corned beef shreds under the knife instead of slicing clean, so give it an overnight rest in the fridge if you want deli-style slices.

I will chill the meat over night before slicing the meat very thinly. I use an electric meat slicer to get consistent slices of corner beef. Use a very sharp chef knife in place of the meat slicer.

Sliced corned beef with a side of carrots and potatoes on a white plate. A garnish of herbs is sprinkled on top.

Crock-pot

Corned Beef and Cabbage

This traditional one-pot meal combines salt-cured beef brisket with fresh vegetables, cooking low and slow until perfectly done.

Corned Beef and Cabbage

Frequently asked questions, answers and tips:

While I try to share all the information you need to make this recipe in your home with restaurant-quality results, there still may be a question or two. Or these are questions I have received from the community about this recipe. I do my best to answer them as clearly as I can. I hope this helps.

Do I need to soak corned beef before smoking it?

Yes. Corned beef comes packed in a salty curing brine, and soaking it in cold water for at least 2 hours pulls out the sharpest edge of that salt. If you are especially sensitive to sodium, soak it overnight instead.

What internal temperature should smoked corned beef reach?

165F is the minimum safe internal temperature for this cut, checked with a meat thermometer in the thickest part of the brisket. You can carry it further, up to about 185F, if you want a more tender, fall-apart texture.

How long does it take to smoke a corned beef brisket?

Plan on 1 to 1 ½ hours per pound at 275F, so a 3-pound brisket runs roughly 3 to 4 ½ hours. Always cook to temperature, not to the clock, since smoker conditions and brisket thickness both change the timing.

Can I use an electric smoker or a Traeger to make this recipe?

Yes. Any smoker that holds a steady 275F, electric, pellet, or otherwise, will work for this recipe. Follow the same seasoning and temperature steps in the recipe card below regardless of which smoker you use.

Do I need to rinse corned beef before cooking it?

Rinsing alone will not do much, since the salt is cured into the meat and not just sitting on the surface. Soaking in cold water, as this recipe calls for, is what actually pulls the excess salt out.

Should I use a lower-sodium corned beef for this recipe?

You can, and the soak step works with either version. A lower-sodium corned beef needs less soak time since there is less salt to pull out to begin with, so start checking it closer to the 2-hour mark.

Saint Patrick's Day cupcakes with green hats and orange frosting are beautifully decorated with shamrocks and gold buttons, all elegantly arranged on a vibrant green surface.

St. Patrick's Day Cupcakes

Leprechaun Irish Cream Buttercream Cupcakes feature a rich and creamy Irish cream buttercream topped with adorable marshmallow leprechaun hats.

St. Patrick's Day Cupcakes
thinly sliced Smoked Corned Beef piled high on a wooden cutting board.

Smoked Corned Beef Brisket

The slow-smoked brisket starts with a store-bought corned beef brisket and ends with you making the best smoked corned beef recipe.
5 from 1 vote
Print Pin Rate
Course: Beef Recipes
Cuisine: Irish
Prep Time: 8 hours hours
Cook Time: 5 hours hours
Total Time: 13 hours hours
Servings: 12 servings
Calories: 236
Author: Sarah Mock

Ingredients

  •  
    3 lb corned beef
  •  
    3 Tablespoons Mustard
  •  
    3 Tablespoon ground Black Pepper
  • A bottle of McCormick Garlic Powder with a red lid and green label, featuring the brand logo and 2 Tablespoon Garlic Powder
  • A plastic container of McCormick Onion Powder with a red lid and a green label stating 1 Teaspoon Onion Powder
  •  
    ½ Teaspoon ground Coriander Seeds
  •  
    ½ Teaspoon ground Mustard Seeds
US Customary - Metric
Follow Savoring The Good On PinterestFollow @SavoringTheGood or tag #STGRecipes!

Instructions

  • Remove the corned beef from the packaging, draining the excess liquid. Reserve the packet if included.
    3 lb corned beef
    Corned Beef and spices in a bowl. both sitting on a wooden cutting board.
  • Use a sharp knife to remove the silver skin and excess fat. Leave the thick fat cap intact.
    A hand holds a large piece of raw beef brisket on a wooden cutting board, trimming fat with a kitchen knife in preparation for smoked corned beef.
  • Submerge the meat in cold water and allow to soak in the refrigerator for a minimum of 2 hours or up to overnight, depending on how much of the salty brine you would like to soak away from the meat.
    A large, raw beef brisket, perfect for smoked corned beef, with some trimmed fat sits on a wooden cutting board next to a knife with a blue handle.
  • While the meat is soaking, toast the spices in a dry pan. Then pulse the toasted spices in a food processor until pulverized.
    3 Tablespoon ground Black Pepper, 2 Tablespoon Garlic Powder, 1 Teaspoon Onion Powder, ½ Teaspoon ground Coriander Seeds, ½ Teaspoon ground Mustard Seeds
    spices for smoked corned beef in the bowl of a small food processor.
  • Drain the water off the beef and pat the meat dry.
    A raw beef brisket coated with mustard sits on a wooden cutting board next to a knife, ready to be transformed into delicious smoked corned beef on a rustic wooden surface.
  • Cover the meat in mustard or brush on your favorite dark beer. Rub into the meat.
    3 Tablespoons Mustard
    A raw beef brisket coated with mustard sits on a wooden cutting board next to a knife, ready to be transformed into delicious smoked corned beef on a rustic wooden surface.
  • Dust the coated meat with the ground spice mixture and press into the meat.
    A seasoned piece of smoked corned beef rests on a wooden cutting board atop a rustic wooden surface.
  • Wrap the coated meat with plastic cling wrap and chill in the refrigerator overnight.
    side shot of a seasoned corned beef showing the fat cap on top.
  • The next day, preheat your smoker to 275 using your favorite smoker chips or smoker pellets.
    A black and stainless steel rec tec grill outdoor smoker with a digital control panel, placed on a brick patio next to a house.
  • Unwrap the corned beef brisket and place it fat side up on the grill grate.
    A seasoned brisket sits on a metal grill rack inside a smoker, ready to be cooked into savory smoked corned beef perfection.
  • Smoke the meat until the internal temperature is of at least 165. Some recipes will instruct that the internal temperature should be at least 185. 165 in a minimum.
    fully smoked corned beef showing the rosey color.
  • Remove the smoked meat from the smoker, rest for at least 15 minutes to allow the juices to redistribute throughout the meat. Slice.
    pile of sliced smoked corned beef on a cutting board with a knife to the side.

Notes

Corned Beef Rub Recipe #1
  • 2 tbsp Brown Sugar
  • 2 tbsp Ground Black Pepper
  • 2 tbsp Coriander Powder
  • 2 tbsp Paprika
  • 1 tbsp Garlic Powder
  • 1 tbsp Onion Powder
Corned Beef Rub Recipe #2
  • 2 tablespoons Black Peppercorns
  • ½ tablespoon Coriander Seeds
  • ½ tablespoon Onion Powder
  • 1 teaspoon Dried Thyme
  • 1 teaspoon Paprika
  • 1 teaspoon Garlic Powder
Corned Beef Rub Recipe #3
  • 3 tablespoons ground Black Pepper
  • 2 tablespoons Garlic Powder
  • 1 teaspoon Onion Powder
  • ½ teaspoon ground Coriander Seeds
  • ½ teaspoon ground Mustard Seeds
Want to share when you made this recipe?Follow @SavoringTheGood & tag #STGRecipes!
Nutrition Facts
Smoked Corned Beef Brisket
Serving Size
 
4 ounces
Amount per Serving
Calories
236
% Daily Value*
Fat
 
17
g
26
%
Saturated Fat
 
5
g
31
%
Trans Fat
 
1
g
Polyunsaturated Fat
 
1
g
Monounsaturated Fat
 
8
g
Cholesterol
 
61
mg
20
%
Sodium
 
1423
mg
62
%
Potassium
 
381
mg
11
%
Carbohydrates
 
2
g
1
%
Sugar
 
1
g
1
%
Protein
 
17
g
34
%
* Percent Daily Values are based on a 2000 calorie diet.
**Nutritional facts are just estimates. Please utilize your own brand nutritional values to double check against our estimates.
Like this recipe card? Want one for your site?Check out WP Recipe Maker!


Sarah Mock of savoringthegood.com headshot 2022

I am Sarah Mock. Welcome!

Sarah Mock is a classically trained Chef and a graduate of Johnson & Wales University. A culinary blogger for 17 years, Sarah helps the home cook prepare her recipes with professional results.

Get to know me

as seen in:

Logos of Hersheyland, ABC News, and Good Day PA are showcased in a seamless row, providing a snapshot of popular brands.

Hersheyland Nightline Good Day Pa!

The vibrant design showcases the iconic logos of Pinterest, Rachael Ray, and Jell-O set against a bold red background. Sorry, the provided description doesn't offer enough detail to suggest important SEO keywords.

Pinterest Rachael JELL-O

Easter Cocktail with Peeps

easter cocktail with marshmallow peep garnish.

Easter brunch just got a lot more fun! This Easter cocktail is made with chocolate vodka, creme de cacao, caramel drizzle, and heavy cream, shaken together in under 4 minutes and garnished with a Peeps marshmallow perched right on the rim. The sprinkle-rimmed glass makes it the most festive drink on the table and the mocktail version means the kids get their own fancy glass too.

easter cocktail with marshmallow peep garnish.

Pass a tray of these fuzzy easter bunny cocktails at Easter brunch to bring a bit of sweet whimsey to your Easter celebration. I have a non-alcoholic, kiddie cocktail option in the instructions below.

Ingredients needed:

ingredients to make an easter cocktail, caramel vodka, creme de caso, 360 double chocolate, heavy cream, sprinkles, text over them labeling.

Recipe Card?

To find the full printable recipe with specific measurements and directions CLICK HERE to go to the recipe card.

Substitutions

  • Creme de Coco: substitute in Mozart Chocolate Spirit, or Kahlua but know that these substitutions will give your drink more of a chocolate color instead of the white version pictured here.
  • Caramel vodka - Kissed caramel vodka by Smirnoff is what I used in this recipe but it can be left out, adding more caramel drizzle to the glass as a substitute.

How to make an Easter Cocktail

tight shot of a yellow marshmallow peep on the edge of an easter cocktail.
  1. Prepare the rim of the cocktail glass with garnish.
  2. Shake the cocktail ingredients in an ice-filled cocktail shaker.
  3. Drizzle the inside of the cocktail glass with caramel drizzle, and pour the cocktail into the martini glass.
  4. Serve and cheers!

Making Peeps Martini

hero image of a peep cocktail.
  1. Garnish the rim of the glass
    1. Pour a circle of Chocolate Syrup or melted chocolate on a plate.
      clear martini glass being dipped in chocolate.
    1. Press the top edge of the martini glass into the chocolate.
      tight shot of a rim of the easter cocktail glass garnished with chocolate and easter sprinikles.
    2. Pour spring-colored or Easter-themed sprinkles on a plate and press the chocolate-rimmed martini glass.
  2. Mix the Peeps Cocktail
    1. In a cocktail shaker filled half way with ice, add the 360 chocolate vodka, caramel kiss vodka, creme de cocoa and heavy cream.
    2. Close the shaker and vigorously shake the cocktail for at least 30 seconds or until the outside of the shaker is frosty.
      tight shot of a yellow marshmallow peep perched on the edge of a martini glass.
    3. Add a caramel drizzle to the inside of the prepared martini glass and strain the chilled cocktail into the glass.

Mocktail Version

I have nieces and nephews as well as my own kids who loves fun and festive mocktails. There is something about a candy rimmed glass that makes kids want to have a fancy drink too. Here is the alcohol-free version of the perfect easter cocktail.

  1. Prepare your glass as described above. Be sure to use extra caramel into the bottom of the glass.
  2. Pour milk into the prepared glass and add extra sprinkles to the top of the drink.

Can I make this Easter cocktail ahead of time for a crowd?

Yes, with one adjustment. Mix the chocolate vodka, caramel vodka, creme de cacao, and heavy cream together in a pitcher and refrigerate for up to 24 hours. Do not add ice until you are ready to serve - shaking individual portions over fresh ice just before pouring keeps the cream from separating and ensures the cocktail is properly chilled and frothy. Prepare and garnish the glasses when guests arrive.

Frequently asked questions, answers and tips:

Can I substitute any other vodkas in this recipe?

If you have marshmallow vodka or whipped cream vodka you can substitute them or add them to this cocktail to your personal preference.

How do I get the Peeps marshmallow to stay on the rim of the glass?

Use a clean pair of kitchen scissors to snip a small slice into the bottom of the Peep. This creates an opening that fits over the rim of the martini glass. Give the Peep a gentle squeeze as you press it onto the glass - the sticky marshmallow interior grips the rim and holds it in place.

What type of glass should I use for this Easter cocktail?

A standard martini glass works best - the wide, shallow bowl shows off the sprinkle rim and caramel drizzle and gives the Peeps garnish a stable perch. A coupe glass is a close second and has a slightly more elegant look if you are serving at a formal brunch. A stemless wine glass works in a pinch but the effect is not quite the same.

Can I make a non-alcoholic version of this Easter cocktail?

Absolutely - and it is one of the best parts of this recipe. Prepare the sprinkle-rimmed glass exactly as described, add extra caramel drizzle to the inside of the glass, then pour in cold milk and finish with extra sprinkles on top. The garnished glass makes it feel just as festive as the adult version, which means kids at Easter brunch get their own special drink moment too. Might I suggest using a different colored peeps for the non-alcoholic version? It will be easier for everyone to know what is in the glass.

More Reasons to Make This Easter Cocktail

  • Perfect use for Peeps marshmallows that come in many Easter baskets.
  • A fun and festive cocktail to serve to Easter brunch guests.
  • The Easter mocktail version of this peep cocktail is perfect for all the kids at Easter lunch.
Easter dirt cups feature layered dessert with chocolate crumbs, pink and purple cream, and a festive topping of green sprinkles, candy eggs, and yellow marshmallow chicks.

Easter Oreo Dirt Cups

These playful Easter dirt cups come together with just a few simple ingredients for a dessert that's as fun to make as it is to eat!

Oreo Dirt Cups

More Easter recipes:

  • Easter Recipes For A Crowd - Here is my collection of the best Easter dinner ideas including breakfast ideas, brunch ideas, Easter appetizers, main courses, easy side dishes, Easter cookie recipes and other tasty treats to make your Easter celebration memorable and delicious.
  • Nut Roll - also is known as Hungarian nut roll, Slovak nut roll, Polish nut roll, kolache, or even Pittsburgh nut roll. All of these make sense because my Polish grandmother, from Pittsburgh, made these for Easter.
  • Paska Bread - We make this traditional Ukrainian Easter bread recipe every Easter holiday and use any leftovers to make the most delicious french toast.
easter cocktail with marshmallow peep garnish.

Easter Cocktail with Peep Garnish

This Easter cocktail is made with decadent chocolate liquor, rich cream, caramel drizzle and garnished with the iconic Peep marshmallow
5 from 2 votes
Print Pin Rate
Course: Cocktails
Cuisine: American
Prep Time: 3 minutes minutes
Shake time: 1 minute minute
Total Time: 4 minutes minutes
Servings: 1 cocktail
Calories: 96
Author: Sarah Mock

Ingredients

  •  
    2 Ounces White creme de cacao
  •  
    1 Ounce 360 Chocolate vodka
  •  
    1 Ounce Caramel Kiss vodka
  • heavy cream bottle.1 Ounce Heavy Cream
  •  
    caramel sauce drizzle
  •  
    sprinkles garnish
  •  
    choclate garnish
  •  
    marshmallow Peep
US Customary - Metric
Follow Savoring The Good On PinterestFollow @SavoringTheGood or tag #STGRecipes!

Instructions

Garnish the rim of the glass

  • Pour a circle of Chocolate Syrup or melted chocolate on a plate.
  • Press the top edge of the martini glass into the chocolate.
  • Pour spring-colored or Easter-themed sprinkles on a plate and press the chocolate-rimmed martini glass into the garnish.

Mix the Peeps Cocktail

  • In a cocktail shaker filled half way with ice, add the 360 chocolate vodka, caramel kiss vodka, creme de cocoa and heavy cream.
  • Close the shaker and vigorously shake the cocktail for at least 30 seconds or until the outside of the shaker is frosty.
  • Add a caramel drizzle to the inside of the prepared martini glass and strain the chilled Easter Cocktail into the glass.

Notes

  1. Prepare your glass as described above. Be sure to use extra caramel into the bottom of the glass.
  2. Pour milk into the prepared glass and add extra sprinkles to the top of the drink.
Want to share when you made this recipe?Follow @SavoringTheGood & tag #STGRecipes!
Nutrition Facts
Easter Cocktail with Peep Garnish
Serving Size
 
1 drink
Amount per Serving
Calories
96
% Daily Value*
Fat
 
10
g
15
%
Saturated Fat
 
7
g
44
%
Polyunsaturated Fat
 
1
g
Monounsaturated Fat
 
3
g
Cholesterol
 
32
mg
11
%
Sodium
 
8
mg
0
%
Potassium
 
27
mg
1
%
Carbohydrates
 
1
g
0
%
Sugar
 
1
g
1
%
Protein
 
1
g
2
%
* Percent Daily Values are based on a 2000 calorie diet.
**Nutritional facts are just estimates. Please utilize your own brand nutritional values to double check against our estimates.
Like this recipe card? Want one for your site?Check out WP Recipe Maker!

Sarah Mock of savoringthegood.com headshot 2022

I am Sarah Mock. Welcome!

Sarah Mock is a classically trained Chef and a graduate of Johnson & Wales University. A culinary blogger for 17 years, Sarah helps the home cook prepare her recipes with professional results.

Get to know me

as seen in:

Logos of Hersheyland, ABC News, and Good Day PA are showcased in a seamless row, providing a snapshot of popular brands.

Hersheyland Nightline Good Day Pa!

The vibrant design showcases the iconic logos of Pinterest, Rachael Ray, and Jell-O set against a bold red background. Sorry, the provided description doesn't offer enough detail to suggest important SEO keywords.

Pinterest Rachael JELL-O

Easy Strawberry Daiquiri at Home

Strawberry Daiquiri in a hurricane glass with strawberry and lime garnish.

Frozen strawberry daiquiri is the one cocktail I get asked about more than any other once summer hits - and I've made enough of them to know exactly where most people go wrong. The texture problem is almost always the same: too much ice, not enough strawberry. After testing ratios in my Blendtec more times than I can count, the formula that works is letting the frozen fruit do the heavy lifting. Five ingredients, five minutes, one blender. Ready in under 10 minutes.

Strawberry Daiquiri in a hurricane glass with strawberry and lime garnish.

Fresh strawberries, light rum, fresh lime juice, and a touch of simple syrup come together in a blender to create a frosty, fruity drink that's far better than any pre-made mix. And the best part? You don't need fancy bartending skills-just a good blender.

WHY THIS RECIPE WORKS

  • Refreshing & fruity: Fresh strawberries deliver real flavor-not artificial sweetness. This tastes homemade because it is.
  • Perfect consistency: Frozen strawberries (not ice) create that signature slushy texture without watering down the flavor.
  • Scales from one to many: Make a single glass or multiply the recipe for a pitcher-great for entertaining.
  • Bartender-approved ratios: The 2:1:1 strawberry-to-rum-to-lime ratio is the classic daiquiri formula, proven to work every time.

Ingredients needed:

Strawberry Daiquiri ingredients with text overlay. simple syrup, ice, frozen strawberries, lime juice, white rum.

Recipe Card?

To find the full printable recipe with specific measurements and directions CLICK HERE to go to the recipe card.

Ingredient notes:

  • White Rum - Bacardi is the classic choice for daiquiris and what I use here. Look for light or white rum labeled 40% ABV. The rum is the base spirit, so it matters-it should taste good on its own.
  • Frozen Strawberries - Use frozen strawberries (not fresh) for this blended cocktail. They create the right consistency and keep the drink cold without diluting it with ice. If you're freezing your own, here's how to freeze strawberries without them clumping into a brick.
  • Fresh Lime Juice - Always use fresh-squeezed. Bottled lime juice has a metallic taste that will be obvious in a simple daiquiri. You'll need about 2 limes.
  • Simple Syrup - This is just equal parts sugar and water, dissolved and cooled. You can make it homemade simple syrup ahead of time and keep it in the fridge, or use store-bought. (You can also substitute agave nectar in a pinch.)

Helpful Kitchen Tools

  • Blendtec blender - I have the classic blender in white. It is an investment piece so watch for sales. Stainless-steel forged blade with wings for amazingly smooth blends (10x stronger than other blender blades). Note- Blade is not sharp, blade is dull. No more cuts and pokes.
  • Hurricane Cocktail Glasses - These hurricane glasses set will make a modern statement in your bar, adding a touch of class and elegance.

HOW TO MAKE STRAWBERRY DAIQUIRI (3 WAYS)

METHOD 1: FROZEN DAIQUIRI (Classic Blender Version)

A blender with sliced strawberries inside, with white wine being poured from a bottle into the blender.

Add Ingredients to the Blender

Add the frozen strawberries, simple syrup, lime juice, and white rum to your blender. Don't add ice yet-the frozen strawberries will do the job.

A blender containing a red, slushy mixture next to a partially visible bottle on a marble countertop.

Blend Until Smooth

Blend on high for 30-45 seconds until fully pureed with no visible chunks. Here's the trick: listen to the blender, not the timer. When the motor pitch gets higher and cleaner, the strawberries are fully broken down. That's your real cue to move to the next step.

Add Ice & Blend Again

Add 1 cup of ice and blend on high until completely smooth - another 30-45 seconds. The temptation is to add more ice if it seems too thick. Don't. More ice thins the flavor. If the texture is too thick, add a splash of rum instead, not more ice.

2 glasses of Strawberry Daiquiri in glass hurricane glasses with bacardi rum and limes in the background.

Serve

Pour immediately. This drink is at peak texture right out of the blender - it starts separating after about 15 minutes as the ice melts into the strawberry puree. Serve with a straw; it's thick enough that you'll need one.

METHOD 2: ON-THE-ROCKS STRAWBERRY DAIQUIRI (Classic Shaken Version)

This version is lighter and more spirit-forward-the "real" daiquiri that bars serve.

  1. Add Ingredients to a Cocktail Shaker Fill a cocktail shaker with ice. Add 2 oz white rum, 1 oz fresh lime juice, and ½ oz simple syrup. (If using fresh strawberries, add 4-5 sliced strawberries and gently muddle them with the lime juice first.)
  2. Shake Well Shake vigorously for 10-15 seconds until the shaker is frosted on the outside.
  3. Strain - Strain into a coupe glass or cocktail glass filled with fresh ice.
  4. Garnish & Serve Add a strawberry slice and lime wheel. Serve immediately.

Note: This version tastes more like traditional rum and citrus. If you want strawberry flavor to shine through, go back to the frozen version.

METHOD 3: VIRGIN STRAWBERRY DAIQUIRI (Mocktail)

Perfect for designated drivers and non-drinkers.

  1. Blend (Same as Frozen) Use the frozen daiquiri method (Method 1) but skip the rum entirely. Blend frozen strawberries, simple syrup (increase to ¾ oz for sweetness without the rum), and fresh lime juice.
  2. Add Ice & Blend Add ice and blend until smooth.
  3. Optional: Add Strawberry Juice For extra flavor, add 2 oz fresh strawberry juice instead of increasing simple syrup. This makes it more fruity and less cloying.
  4. Serve Pour into a glass and garnish with fresh strawberries and a lime wheel.

INGREDIENT SUBSTITUTIONS & SWAPS

Frozen vs. Fresh Strawberries

Fresh berries force you to compensate with more ice, which dilutes flavor and thins the texture. What you gain by using fresh: nothing meaningful. What you lose: the thick, slushy consistency that defines this drink. If fresh is all you have, hull and quarter them, freeze for at least 2 hours, then proceed as written.

What about other rum types?

White rum is the right call - it's clean, neutral, and lets the strawberry lead. Aged or gold rum adds caramel notes that compete with the fruit. Spiced rum is tested and not recommended - it bulldozes the strawberry flavor entirely. Overproof rum works but cut the lime juice by ¼ oz to keep the balance.

  • White/light rum (40% ABV): Standard, light flavor. Bacardi, Captain Morgan, or any standard white rum works.
  • Silver rum (40% ABV): Slightly more refined, smoother than white. Try Diplomatico or Banks if you want a premium version.
  • Aged/gold rum (40% ABV): Richer, slightly sweet. Bacardi Gold or Appleton adds caramel notes-nice if you want deeper flavor.
  • Spiced rum (35-40% ABV): Skip this. Spiced rum overpowers the strawberry flavor.
  • Overproof rum (>40% ABV): Use ¼ oz less lime juice to balance the alcohol punch.

Can I use bottled lime juice?

This is the one swap that genuinely degrades the drink. Bottled lime juice has a metallic undertone that's subtle in a complex cocktail but obvious in a simple three-ingredient base. If you absolutely must use it, ReaLime is the least offensive option - but use slightly less, it's more concentrated than fresh.

What if I don't have simple syrup?

Agave nectar works as a 1:1 swap and actually dissolves more easily in cold liquid, which matters when you're blending. Honey works but can leave a slight floral note. If you're in a pinch: dissolve 2 tablespoons sugar in 2 tablespoons hot water, cool for 5 minutes, and you're good.

Can I make this without a high-speed blender?

A regular blender will work if you're patient. Blend the strawberries first until completely liquefied, then add the other ingredients. You may get a slightly less smooth texture, and frozen strawberries might take longer to break down. A cheap blender is where this cocktail really shows a difference-you might end up with a slightly gritty texture.

STRAWBERRY DAIQUIRI PITCHER RECIPE (SERVES 4-6)

Planning a party? This pitcher recipe scales beautifully.

Ingredients (Pitcher)

  • 2 cups frozen strawberries
  • 1 cup white rum
  • ½ cup fresh lime juice
  • ¼ cup simple syrup
  • 2 cups ice

Instructions

  1. Blend in Batches - Because of the volume, you'll need to blend in two batches. Add half the frozen strawberries, ½ cup rum, ¼ cup lime juice, and 2 tablespoon simple syrup to your blender. Add 1 cup ice and blend until completely smooth.
  2. Pour into Pitcher - Pour the blended batch into a large pitcher. Repeat with the remaining ingredients.
  3. Stir to Combine - Give the pitcher a good stir to combine both batches.
  4. Serve Immediately - Pour into glasses and garnish. The pitcher will start separating and watering down after 15 minutes, so serve right away.

STORAGE & MAKE-AHEAD

Frozen daiquiris don't store well - that's just the nature of a blended, ice-based cocktail. Here's how to get ahead of prep without sacrificing quality:

  • Ingredients: Store frozen strawberries in the freezer for up to 3 months. Simple syrup keeps in the fridge for 1 month. Fresh limes last about a week in the fridge.
  • Prepared daiquiri: Frozen daiquiris are best served immediately. If you make one and it sits for 20+ minutes, give it a stir. The ice will melt slightly and the strawberry pulp may separate. It's still good, but not as visually pretty.
  • For parties: Make the simple syrup and juice the limes the day before. On party day, blend drinks fresh in 15-30 minute batches so guests get a cold, fresh cocktail.
  • Freezing the prepared mix: You can freeze the blended daiquiri (before adding ice) in an airtight container for up to 1 month. When ready to serve, let it thaw slightly, transfer to the blender, add fresh ice, and blend briefly to restore the texture.
Why is my daiquiri watery?

Either your frozen strawberries have thawed, or you added too much ice. Make sure your strawberries are completely frozen before blending. And don't overfill the blender-ice takes up a lot of space. Try using less ice and blending longer instead.

How do I get the perfect slushy consistency?

The ratio is key: don't skimp on the strawberries. Use the full 1 cup frozen strawberries. Blend the fruit first until it's completely liquefied, then add ice. A high-speed blender makes a huge difference here.

Why is my daiquiri too sweet?

Reduce the simple syrup to ¼ oz. Or use less-sweet rum (skip spiced rum and aged rum). If you want even less sweetness, add an extra ½ oz of lime juice.

How much alcohol is in a strawberry daiquiri?

One frozen daiquiri (2 oz rum) contains about 1.3 standard drinks. It's easy to underestimate because it goes down smooth. Sip mindfully!

Can I make this without a blender?

Not really for the frozen version. But try the on-the-rocks version (Method 2): shake it in a cocktail shaker with ice. If you don't have a shaker, use a mason jar with a tight lid.

How long does a daiquiri stay fresh?

Frozen daiquiris start separating after 15-20 minutes. Shake it to recombine, or just drink it fresh. On-the-rocks daiquiris stay good for about 30 minutes.

Can I use a food processor instead of a blender?

A food processor will chop the strawberries but won't puree them smoothly. You'll end up with a chunky drink. Stick with a blender.

Sarah Mock of savoringthegood.com headshot 2022

Sarah's Culinary Insight

  • Frozen strawberries are non-negotiable for the blended version. Fresh berries plus ice produce a watered-down, icy drink - you lose the thick, slushy texture that makes this worth making.
  • The blender pitch actually changes when you're done. When the motor stops straining and the sound gets higher and cleaner, that's your cue - not the timer.
  • Bottled lime juice will ruin this. The metallic taste is obvious in a simple three-ingredient base. Two fresh limes is all you need and it makes a real difference.
  • Spiced rum sounds like a fun swap. It isn't. It overpowers the strawberry completely and you lose the whole point of the drink. The pitcher version separates fast - 15 minutes and it starts breaking down.
  • Blend in batches as people are ready to drink, not all at once and left to sit.
Strawberry Daiquiri in a hurricane glass with strawberry and lime garnish.

Easy Strawberry Daiquiri

White rum, frozen strawberries, fresh lime juice and simple syrup are blended together to make this easy strawberry daiquiri recipe.
5 from 1 vote
Print Pin Rate
Course: Cocktails
Cuisine: American
Prep Time: 5 minutes minutes
Total Time: 5 minutes minutes
Servings: 2 cocktails
Calories: 199
Author: Sarah Mock

Ingredients

  •  
    1 Cup frozen strawberries
  •  
    1 Ounce simple syrup
  • A green plastic bottle of Realime 100% lime juice with images of limes on the label and a green cap.2 Ounces lime juice
  •  
    4 Ounces white rum
  •  
    1 Cup Ice
  •  
    Fresh strawberries and limes for garnish
US Customary - Metric
Follow Savoring The Good On PinterestFollow @SavoringTheGood or tag #STGRecipes!

Instructions

  • In a blender, combine frozen strawberries, simple syrup, lime juice, and white rum. Blend well.
  • Add ice, and blend until ice is well blended and there are no chunks of ice or strawberries remaining.
  • Pour into two cocktail glasses, and garnish with fresh strawberries or limes. Enjoy!
Want to share when you made this recipe?Follow @SavoringTheGood & tag #STGRecipes!
Nutrition Facts
Easy Strawberry Daiquiri
Serving Size
 
1 cocktail
Amount per Serving
Calories
199
% Daily Value*
Fat
 
1
g
2
%
Saturated Fat
 
1
g
6
%
Polyunsaturated Fat
 
1
g
Monounsaturated Fat
 
1
g
Sodium
 
16
mg
1
%
Potassium
 
153
mg
4
%
Carbohydrates
 
18
g
6
%
Sugar
 
14
g
16
%
Protein
 
1
g
2
%
* Percent Daily Values are based on a 2000 calorie diet.
**Nutritional facts are just estimates. Please utilize your own brand nutritional values to double check against our estimates.
Like this recipe card? Want one for your site?Check out WP Recipe Maker!

Sarah Mock of savoringthegood.com headshot 2022

I am Sarah Mock. Welcome!

Sarah Mock is a classically trained Chef and a graduate of Johnson & Wales University. A culinary blogger for 17 years, Sarah helps the home cook prepare her recipes with professional results.

Get to know me

as seen in:

Logos of Hersheyland, ABC News, and Good Day PA are showcased in a seamless row, providing a snapshot of popular brands.

Hersheyland Nightline Good Day Pa!

The vibrant design showcases the iconic logos of Pinterest, Rachael Ray, and Jell-O set against a bold red background. Sorry, the provided description doesn't offer enough detail to suggest important SEO keywords.

Pinterest Rachael JELL-O


Giada De Laurentiis Chicken Piccata

Chicken Piccata {Giada Recipe} on a plate with a gold colored fork cutting a cutlet.

Chicken piccata is a bright, lemony pan sauce dish that comes together in under 30 minutes; this is my take on Giada De Laurentiis's version, which I've been making and teaching for years. Her method is sound and the technique is classic; what I'm adding here is the why behind each step so you can nail it on the first try.

Chicken Piccata {Giada Recipe} on a plate with a gold colored fork cutting a cutlet.

Serve with pasta, spaghetti, sautéed veggies, or mashed potatoes, and enjoy a simple homemade dinner with your friends and family. Wouldn't marinated mozzarella balls pair so beautifully with this recipe?

Over 24,000 Saves on Pinterest!

This recipe is so popular that it has been saved over 24 thousand times on Pinterest!

Sarah Mock of savoringthegood.com headshot 2022

Sarah's Culinary Insight

  • The butter and oil combination is intentional; butter alone burns at high heat, oil alone doesn't give you the flavor. Together they give you a golden sear without scorching.
  • Do not skip deglazing. Those browned bits stuck to the pan after the chicken comes out are where most of the flavor lives. The stock lifts them; the lemon brightens them
  • When you whisk in the final butter, work quickly and keep the heat on medium-low. Too hot and the sauce breaks; too cold and the butter pools instead of emulsifying into a silky finish.
  • Reduce the sauce to half before adding that final butter. If you rush it, the sauce will be thin and watery instead of glossy and coating.
  • Capers are salty! Taste your sauce before adding any extra salt.

Ingredients needed:

Chicken piccata has a short ingredient list; every one of them is doing specific work in the dish.

ingredients for giadas chicken piccata, flour, chicken breast, capers, olive oil, lemon juice, etc. in bowls with text overlay describing.

Recipe Card?

To find the full printable recipe with specific measurements and directions CLICK HERE to go to the recipe card.

Loved it! Did add some artichoke hearts. Will make this again. Thanks. ★★★★★ Sara

The chicken tasted fabulous! Would not change anything in the recipe. Thank you!

- ★★★★★ H. Tsai

Thank you so much for this recipe!! It was the best chicken piccata I've ever had either at home or out at a restaurant. The lemon was not overpowering, and the ingredients were spot on to make a fabulous meal. I served it with mashed potatoes and green beans

- ★★★★★ Janet T.

Make Chicken Piccata Like Giada

Butterfly and pound the chicken.

Cut each breast in half horizontally so you have two thin cutlets per breast. They should be around ¼ inch thick. Thin and even is the goal; thick spots take longer to cook and the edges dry out before the center is done.

Four raw, thinly pounded pieces of meat, prepared for Chicken Piccata, are coated in flour and arranged side by side on a metal baking tray.

Season and dredge.

Season both sides with salt and freshly ground black pepper, then press each cutlet into flour until well coated on all sides. Shake off the excess; you want a thin, even coating, not a thick crust.

Heat the pan.

Heat a large skillet over medium heat and melt 2 tablespoons of butter with the olive oil. Watch for the foam on the butter to subside; that's your signal the pan is ready. If the butter browns immediately, your heat is too high, start again.

Two floured beef steaks frying in bubbling butter in a stainless steel pan, reminiscent of the technique used in Chicken Piccata, viewed from above.

Sear the chicken.

Add the cutlets without crowding the pan; if they're touching, they'll steam instead of sear. Cook 3 to 4 minutes per side until light golden brown. You're not cooking them through entirely here; they'll finish in the sauce.

Four cooked, breaded fish fillets are arranged on a white plate with a blue floral pattern.

Remove chicken to a plate.

A metal pan filled with creamy Chicken Piccata sauce and capers sits on a cooling rack over a white textured surface.

Build the sauce.

In the same pan, add chicken stock, lemon juice, and capers. As the liquid hits the pan, use a wooden spoon or spatula to scrape up every browned bit from the bottom. Those bits are flavor; don't leave them behind. Bring to a boil, then reduce to a simmer and let it cook until reduced by half; about 3 to 4 minutes.

A stainless steel pan on a cooling rack contains a rich brown Chicken Piccata sauce with capers and a dollop of butter in the center.

Add Butter.

Reduce heat to medium-low. Add the remaining 2 tablespoons of butter and whisk constantly until it's fully incorporated and the sauce looks glossy and slightly thickened. This technique is called mounting butter; it creates an emulsion that gives the sauce its silky texture. Stop whisking too soon and the butter will separate into greasy pools.

Chicken Piccata {Giada Recipe} on a white plate with a light pink charger under the plate.

Plate and serve.

Return the chicken to the pan for 1 to 2 minutes to warm through, or plate the cutlets and spoon the sauce generously over the top. Finish with chopped fresh parsley.

Now that you have mastered this technique, you can apply it to smothered chicken with a pan gravy. Same method, similar ingredients.

Did you make this recipe?

Do you have feedback that would be helpful to others? If so can help this small business owner by leaving a rating and a review in the comments section? Thank you for being part of the Savoring The Good Community. ~ Sarah

Substitutions

  • Lemon juice: Fresh is worth it here. Bottled lemon juice is more acidic and less bright; the sauce will taste sharp instead of clean. If you're out of fresh lemons, you can use bottled in a pinch, but reduce the amount by about a third and taste as you go.
  • Capers: Green olives, finely chopped, work as a substitute. You gain a similar briny hit but lose the distinctive pop of a caper. I've made it both ways; the olive version is good, the caper version is classic.
  • Chicken stock: White wine is Giada's original and it's excellent; it adds acidity and depth. I use chicken stock in this version because it's what most home cooks have open. If you use wine, go with something dry that you'd actually drink; cooking wine is not worth it.
  • Chicken breasts: Chicken thighs work but they need longer to cook and the texture is different; denser, more forgiving. The sauce pairs well with both. Thin-cut pork chops also work beautifully with this exact sauce. I have a pork tenderloin piccata you might like to try too.

Storage Tips

Leftovers keep for up to 3 days in the refrigerator. Store the chicken and sauce together in an airtight container; the sauce keeps the chicken from drying out.

  • To reheat: warm in a covered skillet over medium-low heat with a splash of chicken stock to loosen the sauce. Do not microwave; the sauce will break and the chicken coating gets rubbery.
  • Freeze: I don't recommend freezing this one. The lemon butter sauce does not hold up after freezing and thawing; it separates and the texture suffers significantly.

Make-Ahead

This one is best fresh, but you can get ahead of the work without sacrificing quality.

  1. Butterfly and dredge the chicken up to 4 hours ahead; place the coated cutlets on a rack over a sheet pan and refrigerate uncovered. The flour coating will set and the sear will be better for it.
  2. Make the sauce ahead and refrigerate separately for up to 2 days.
  3. Sear the chicken to order (takes 8 minutes), reheat the sauce in the same pan, mount the butter fresh, and plate.

BIG NOTE: Do not assemble and reheat the finished dish; the flour coating on the chicken will turn soft and the sauce will lose its emulsion.

Chicken Piccata {Giada Recipe} on a plate with a gold colored fork cutting a cutlet.

Lemon Caper Chicken Piccata (Giada's Recipe)

Giada's chicken piccata recipe is absolutely delicious and so easy that it hardly takes 30 minutes to from pan to plate.
5 from 6 votes
Print Pin Rate
Course: Chicken Recipes
Cuisine: Italian
Keyword: giada chicken piccata
Prep Time: 10 minutes minutes
Cook Time: 20 minutes minutes
Total Time: 30 minutes minutes
Servings: 4 servings
Calories: 364
Author: Sarah Mock

Ingredients

  •  
    2 Chicken Breasts skinless, boneless
  • A 5-pound bag of King Arthur Baking Company unbleached bread flour with 12.7% protein content, labeled for ideal use in bread, pizza crust, and rolls-perfect for creating hearty sides like homemade loaves to serve alongside a comforting slowcooker sausage casserole.½ Cup Flour, All Purpose
  •  
    ¼ Cup capers
  •  
    ½ Cup Chicken Stock low sodium
  • A 500ml bottle of California Olive Ranch Global Blend Extra Virgin Olive Oil with green and blue labeling, indicating a blend from Argentina, Portugal, Chile, and California-perfect for drizzling over your favorite shrimp avocado salad.2 Tablespoon Olive Oil
  • A rectangular 8 oz package of Kerrygold Pure Irish Butter, unsalted, with a green and gold label and Irish grass-fed cow branding-perfect for creating delicious Saint Patrick's Day cupcakes.4 Tablespoon Butter divided
  • A Morton Salt container with a blue label featuring a girl in a yellow dress holding an umbrella, with salt pouring out of a container-an essential ingredient for perfectly seasoning dishes like Chicken Cordon Bleu.½ Teaspoon Salt
  • A 6 oz container of McCormick Pure Ground Black Pepper with a red lid and a ½ Teaspoon Black Pepper
  • A plastic bottle of ReaLemon 100% Lemon Juice with a yellow cap, a lemon-shaped top, and images of lemons on a green label-perfect for adding a burst of citrus flavor to your favorite recipes like Lemon Cheesecake Bars.2 Tablespoon Lemon Juice fresh
  •  
    3 Tablespoon Chopped parsley
US Customary - Metric
Follow Savoring The Good On PinterestFollow @SavoringTheGood or tag #STGRecipes!

Instructions

  • Butterfly chicken breasts and cut them into halves horizontally. The chicken pieces should be around ¼ inch thickness. If they seem to be thick, pound them with a meat hammer to desired thickness.
    2 Chicken Breasts
  • Season chicken with salt and freshly ground black pepper and dredge chicken in all-purpose flour until well coated.
    ½ Teaspoon Salt, ½ Teaspoon Black Pepper, ½ Cup Flour, All Purpose
  • Put a large skillet over medium heat; melt 2 tablespoons butter with 2 tablespoons of olive oil.
    2 Tablespoon Olive Oil, 2 Tablespoons Butter
  • Add the chicken pieces without overcrowding the pan. Cook for 3-4 minutes on each side until the chicken turns light brown in color. Remove and transfer to a plate.
  • In the same pan add chicken stock, lemon juice, and capers. Bring it to boil, scraping up the brown bits from the pan. Let the sauce simmer for a few minutes until reduced to half.
    ½ Cup Chicken Stock, 2 Tablespoon Lemon Juice, ¼ Cup capers
  • Add the remaining 2 tablespoons of butter and whisk vigorously.
    2 Tablespoons Butter
  • Place the chicken on your serving plate (reheat the chicken in the oven if it's cold) and pour the sauce over it. Garnished with chopped parsley.
    3 Tablespoon Chopped parsley

Notes

You can store leftovers in an airtight container for 4 days in the refrigerator or for around 3 months in the freezer. Place the sauce and chicken in separate bags if freezing
Want to share when you made this recipe?Follow @SavoringTheGood & tag #STGRecipes!
Nutrition Facts
Lemon Caper Chicken Piccata (Giada's Recipe)
Serving Size
 
1 cutlet and sauce
Amount per Serving
Calories
364
% Daily Value*
Fat
 
22
g
34
%
Saturated Fat
 
9
g
56
%
Trans Fat
 
0.5
g
Polyunsaturated Fat
 
2
g
Monounsaturated Fat
 
9
g
Cholesterol
 
103
mg
34
%
Sodium
 
858
mg
37
%
Potassium
 
485
mg
14
%
Carbohydrates
 
14
g
5
%
Sugar
 
1
g
1
%
Protein
 
27
g
54
%
* Percent Daily Values are based on a 2000 calorie diet.
**Nutritional facts are just estimates. Please utilize your own brand nutritional values to double check against our estimates.
Like this recipe card? Want one for your site?Check out WP Recipe Maker!

Frequently asked questions, answers and tips:

While I try to share all the information you need to make this recipe in your home with restaurant-quality results, there still may be a question or two. Or these are questions I have received from the community about this recipe. I do my best to answer them as clearly as I can. I hope this helps.

Why did my sauce break and turn greasy?

Two likely reasons: the heat was too high when you added the final butter, or you stopped whisking too soon. Mounting butter requires constant motion and a controlled temperature. If it breaks, remove the pan from heat, add a tablespoon of cold water, and whisk vigorously; it sometimes comes back together.

Can I use chicken thighs instead of breasts?

Yes, but pound them thinner and add 2 to 3 minutes per side. The sauce works beautifully with thighs; the texture is just denser and more forgiving if you overcook slightly.

My chicken coating fell off in the pan. What happened?

The pan wasn't hot enough before the chicken went in, or the chicken was wet before dredging. Pat the cutlets completely dry before seasoning, and wait for the butter foam to subside before adding the chicken.

Can I make this dairy-free?

The butter is structural here, not just flavoring; it's what creates the emulsion. You can use a plant-based butter, but the sauce will be thinner and less glossy. It will still taste good, just different. If you are looking for a vegan and dairy free piccata, I will highly recommend Make It Dairy Free's Cauliflower Piccata!

How do I know when the sauce has reduced enough?

Run a spoon through it; the line should hold for a second before the sauce flows back in. It should look slightly syrupy, not watery. Thin sauce means it needs more time; don't rush it.


Sarah Mock of savoringthegood.com headshot 2022

I am Sarah Mock. Welcome!

Sarah Mock is a classically trained Chef and a graduate of Johnson & Wales University. A culinary blogger for 17 years, Sarah helps the home cook prepare her recipes with professional results.

Get to know me

as seen in:

Logos of Hersheyland, ABC News, and Good Day PA are showcased in a seamless row, providing a snapshot of popular brands.

Hersheyland Nightline Good Day Pa!

The vibrant design showcases the iconic logos of Pinterest, Rachael Ray, and Jell-O set against a bold red background. Sorry, the provided description doesn't offer enough detail to suggest important SEO keywords.

Pinterest Rachael JELL-O


What to Serve Beef Stroganoff with

beef stroganoff side dishes collage with text overlay.

This is a collection of the best side dishes to serve alongside classic beef stroganoff. Normally I will serve buttered egg noodles and sauteed green beans alongside the traditional Russian dish but any of these recipes would be the perfect accompaniment to this hearty meal.

beef stroganoff side dishes collage with text overlay.

Beef stroganoff is a savory rich dish of bites of seared tender beef and caramelized fresh mushrooms covered in a rich sour cream sauce that brings the whole family to the dinner table.

Side Dishes for Beef Stroganoff

Enjoy these 23 savory side dishes that will compliment your beef stroganoff meal.

Steakhouse Red Skin Mashed Potatoes

Mashed potatoes in a white dish with a fork.
These steakhouse style red skin, roasted garlic mashed potatoes are a fantastic way to bring your favourite fancy restaurant dinners, home.
Get the recipe

Broccoli

cooked broccoli in a white bowl
There are several easy ways to cook broccoli. I will teach you how to blanch, steam, boil, broil and sous vide fresh broccoli florets with simple step-by-step instructions.
Get Full Recipe

Sautéed Red Cabbage with Onions & Apples

Sauteed red cabbage in a skillet.
This is a recipe I created after seeing a friend of mine eating something similar before our nutrition class last year. It looked and smelled fantastic and I realized that it would be a great way to add cabbage to my diet since it was a vegetable I liked but rarely ate.
Get Full Recipe

Homemade Garlic Bread

Sliced bread with herbs on a cutting board, perfect for beef stroganoff side dishes.
This easy homemade Garlic Bread is a classic Italian side dish. Try making it with a baguette or by using sliced bread! It is sure to not dissapoint!
Get Full Recipe

Vegan Focaccia

A slice of bread on a cutting board next to a knife.
Vegan focaccia is easy to make with this recipe that needs just 6 ingredients! No kneading necessary! No dairy or eggs. Delicious airy with crusty sides.
Get Full Recipe

Easy Oven Roasted Carrots

Roasted carrots in a white bowl.
An easy no-fail recipe for the best Oven Roasted Carrots! These perfect roasted carrots are sweet with a touch of savory from herbs & spices!
Get Full Recipe

Seasonal Favorite

Baked lattice top crust on an apple pie made with the Crisco pie crust recipe, showing flaky layers in the fluted edge.

This is my award-winning Crisco pie crust recipe; flaky, tender, and made with simple ingredients you already have.

Crisco Pie Crust

Green Bean Casserole With Bacon

Green bean casserole with gravy on a table.
Green bean casserole with bacon and a tasty french fried onion topping. This is a great holiday side dish or a side dish for any meal.
Get Full Recipe

Velvety Cream of Asparagus Soup (Ready in 30 mins)

Bowl of creamy green soup, the perfect side dish for shrimp, topped with three asparagus spears on a wooden surface, next to a spoon and napkin.
This velvety smooth cream of asparagus soup is ready in just 30 minutes! Made with fresh asparagus, onions, and a touch of cream, it's a light yet satisfying soup perfect for any occasion.
Get Full Recipe

Ricotta Gnudi

Ricotta gnudi are dumplings of ricotta cheese, flour, egg yolk and salt, similar to their cousin gnocchi but made with ricotta cheese instead of potato.
Gnudi are delicate, pillowy dumplings of ricotta cheese, flour, egg yolk and salt, similar to their cousin gnocchi but made with ricotta cheese instead of cooked potato.
Get Full Recipe

Rhodes Frozen Dinner Rolls

rhodes roll brushed with butter and fresh parsley
Rhodes rolls are the best frozen dinner rolls to use when you want to make homemade rolls without the work!
Get Full Recipe

Roasted Asparagus with Parmesan

Roasted asparagus recipe on a baking sheet.
Roasting asparagus is a quick and easy way to enhance the delicate flavors of the asparagus and give the asparagus tips a bit of char.
Get Full Recipe

Whole Roasted Baby Potatoes

Roasted potatoes in a bowl with rosemary sprigs.
These Whole Roasted Baby Potatoes with Polenta will become a favourite side dish. They are quickly and easily made and go with many dishes.
Get Full Recipe

Cabbage Salad {Easy & Fresh}

A bowl of slaw with pecans and cranberries.
This easy cabbage salad recipe is super tasty and nourishing too. With a tangy sweet dressing and fresh, zesty flavor, this salad will not disappoint you!
Get Full Recipe

Parmesan Potato Wedges

Roasted potato wedges on a blue plate.
The best side dish ever? This crispy Parmesan potato wedges recipe will have your friends and family singing your praises.
Get Full Recipe

Russian salad (Olivier salad)

A plate of salad with eggs and herbs on a table.
I make the Russian salad with summer vegetables cooked al dente, with a good mayonnaise, some Greek yogurt and a handful of fresh herbs to lighten its taste
Get Full Recipe

Russian Carrot Salad

Carrots in a wooden bowl on a wooden table.
This carrot salad is very popular in the Russian cuisine. The crunchy grated carrots are dressed with oil from caramelized onions and seasoned with coriander and garlic.
Get Full Recipe

Sous Vide Cauliflower - Whole

sous vide cauliflower square image
Sous vide cauliflower, cooked whole, is perfectly cooked from edge to edge and finished off in the oven under a broiler or in an air fryer for a roasted outer crust.
Get Full Recipe

Crispy Oven-Roasted Brussels Sprouts with Parmesan

Crispy Brussels Sprouts on a sheetpan square image
Crispy Brussels Sprouts are the keto low-carb side dish that will turn everyone into a brussel sprout lover. This recipe for smashed brussel sprouts with parmesan cheese have crispy, cheezy edges and oven-roasted caramel goodness.
Get Full Recipe

Russian Sourdough Dark Rye Bread Recipe

A loaf of bread with raisins and wheat.
Russian sourdough dark rye bread has the tang that Russians love. This bread is a hearty bread meant to accompany a main meal soup.
Get Full Recipe

Savory Mashed Sweet Potatoes

A bowl of sweet potato mashed potatoes with butter and sprigs of thyme.
These Savory Mashed Sweet Potatoes are so rich & creamy that they'll melt in your mouth. Seasoned with butter, fresh herbs, & a little spice!
Get Full Recipe

Zucchini Fritters

zucchini fritters
Zucchini fritters are what I make when my garden is producing too much zucchini. Learn my secret to keep zucchini fritter from getting soggy.
Get Full Recipe

Reader Favorites

  • Pear butter in a glass canning jar with spices to the side and a whole pear to the right of the jar
    Pear Sauce Recipe
  • lasagna roll up on a serving fork coming out of the full pan, cheese pulling
    Lasagna Roll Ups Recipe
  • Four tacos filled with shredded meat from a delicious Mojo Pork Recipe, garnished with cilantro, and accompanied by lime wedges on a white plate.
    Mojo Pork Recipe
  • Sous vide eggs on toast, broken to show the runny yolk
    Sous Vide Poached Eggs: 60°C or 63°C

Cookie Recipes

  • Glass jars filled with sugared citrus slices are surrounded by whole citrus fruits and a bowl of sugar on a wooden surface.
    Candied Orange Slices
  • Close-up of biscoff butter cookies topped with chocolate chips and a rectangular spiced biscuit, surrounded by more similar cookies.
    Biscoff Butter Cookie Recipe
  • A plate of chocolate cookies with visible nuts, one cookie partially eaten, stacked on top of each other.
    Dark Chocolate Pecan Cookies
  • Six delightful cornflake candy clusters with sprinkles rest on a pristine white plate.
    Cornflake Candy Recipe
See more Cookie Recipes →

Sarah Mock of savoringthegood.com headshot 2022

I am Sarah Mock. Welcome!

Sarah Mock is a classically trained Chef and graduate of Johnson & Wales University. A culinary blogger for 15 years Sarah helps the home cook prepare her recipes with professional results.
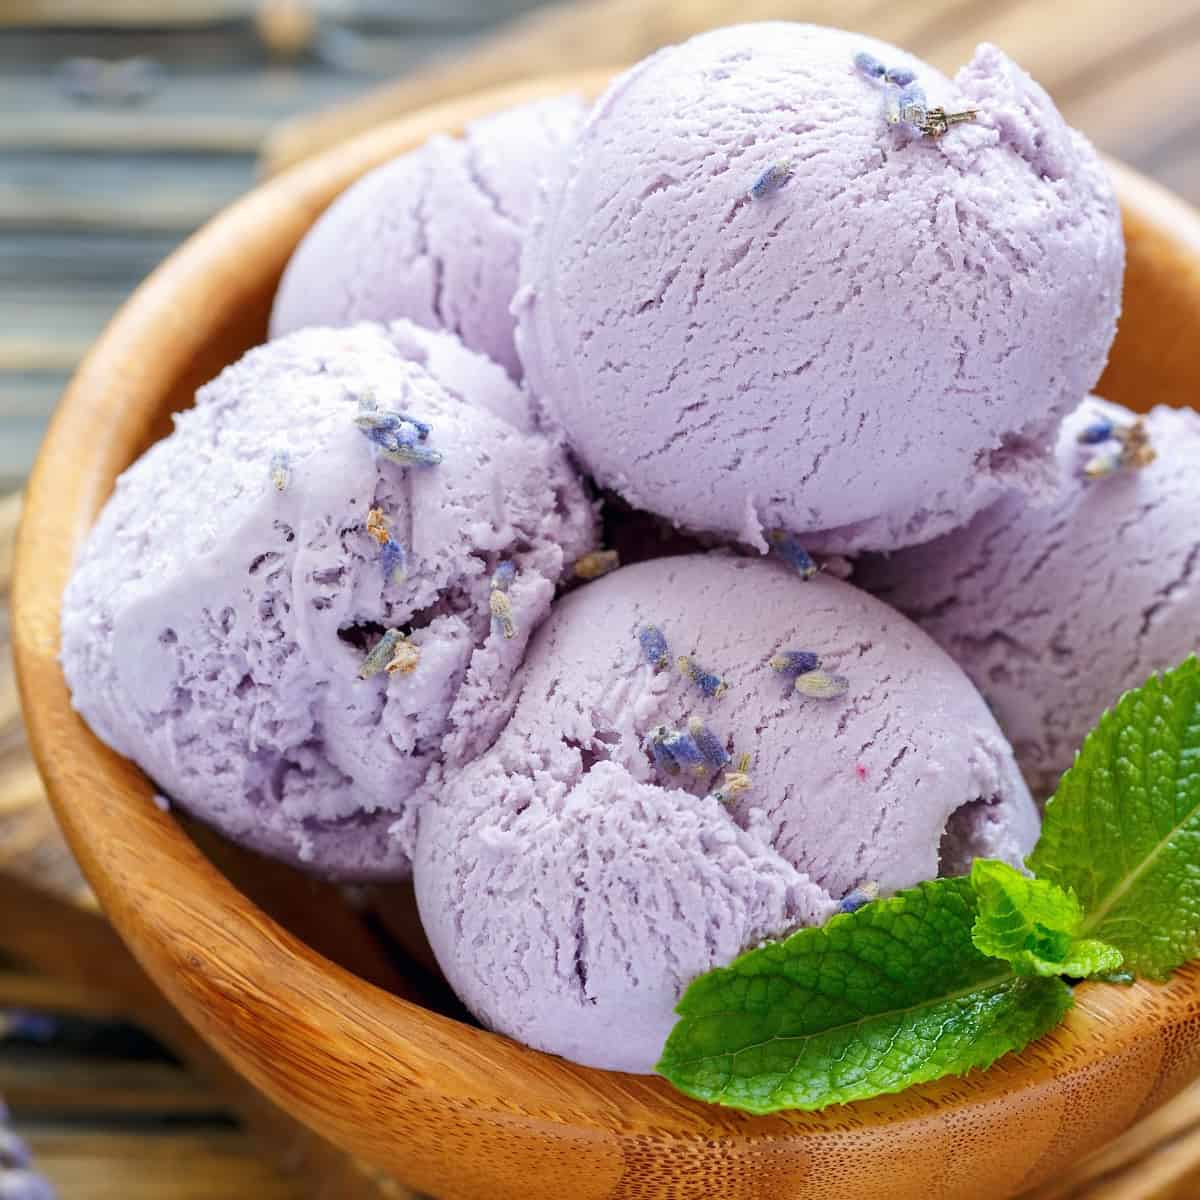
Get to know me

as seen in:

Logos of Hersheyland, ABC News, and Good Day PA are showcased in a seamless row, providing a snapshot of popular brands.

Hersheyland Nightline Good Day Pa!

The vibrant design showcases the iconic logos of Pinterest, Rachael Ray, and Jell-O set against a bold red background. Sorry, the provided description doesn't offer enough detail to suggest important SEO keywords.

Pinterest Rachael JELL-O


Fresh Strawberry Mimosa Recipe

3 strawberry mimosas in stemless flutes with 1/2 strawberry garnish.

Strawberry mimosa is a 3-ingredient sparkling cocktail that takes less than 5 minutes from blender to glass. I make a big batch of the strawberry-orange puree ahead of time for brunches, bridal showers, and Mother's Day mornings; guests pour their own champagne and feel like they're at a restaurant. Ready in 5 minutes flat.

3 strawberry mimosas in stemless flutes with ½ strawberry garnish.

These strawberry mimosas belong on a brunch table with good food around them. Just as cherry scones, Belgian waffles, and bagels with salmon lox and cream cheese round out the spread, a couple of chocolate martinis take the whole thing up a level.

Choosing Your Champagne

The champagne you use changes the whole drink, so this is worth 30 seconds of thought before you open a bottle.

  • Brut is what I reach for. It has less than 12 grams of residual sugar per liter, which means it's dry enough to let the strawberry sweetness do its job without the whole thing tasting like dessert.
  • Extra Brut is bone dry. If you like tart, go for it; if not, the drink might feel sharp.
  • Extra Dry is slightly sweeter than Brut; confusing name, I know. Good middle ground if you want a little more sweetness but not full-on sweet.
  • Demi-Sec is sweet. Paired with the strawberry puree, it can get cloying fast. I would save it for another use.

Recipe Card?

To find the full printable recipe with specific measurements and directions CLICK HERE to go to the recipe card.

Substitutions

Champagne Alternatives - Prosecco is my first swap when I want something lighter and a little more affordable. It's fruitier than Champagne, which plays well with the strawberries. Crémant (French sparkling wine outside the Champagne region) is a great budget option that drinks like the real thing. Sparkling rosé makes this look stunning in the glass and adds a berry-on-berry flavor that works really well.

Orange Juice Alternatives - Peach juice is my favorite swap here; it softens the tartness of the strawberry and makes the drink taste almost tropical. White grape juice keeps it neutral and slightly sweeter. Cranberry juice makes it tart and deep-colored; beautiful for fall or holiday versions. Raspberry puree instead of juice takes it fully berry-forward and skips the citrus note entirely.

Non-Alcoholic Version - Swap the champagne for sparkling white grape juice or a good sparkling cider. Avoid sparkling water here; the flavor is too thin. The puree recipe stays exactly the same.

Strawberry Mimosas

Strawberries in a blender with orange juice being poured in from a container, ready to create delicious Strawberry Mimosas on a marble countertop.

Make the Strawberry Puree

Add 1 cup of fresh strawberries (washed, tops removed) and 1½ cups of orange juice to a blender. Blend on high for 45-60 seconds until completely smooth; you want a pourable liquid, not a thick smoothie. If it looks too thick, add a splash more OJ.

A glass blender pours orange-pink Strawberry Mimosas smoothie into a glass on a marble countertop, with empty glasses nearby.

Fill the Flutes

Pour the strawberry-orange puree into each champagne flute, filling each glass about ⅓ of the way. This is the ratio that keeps the strawberry flavor present without drowning the champagne.

champagne being poured into a strawberry mimosa.

Add the Champagne

Pour champagne slowly down the side of the glass (not straight down the middle) to preserve the bubbles. Fill to the top and watch the two layers fold together.

horizontal image of strawberry mimosas with strawberry garnish on a brightly colored napkin.

Garnish and Serve

Slide a fresh strawberry onto the rim or add an orange slice. Serve immediately; mimosas don't wait.

Virgin Mimosa with Strawberries

strawberry mimosas in stemless flutes on a bright, floral napkin.

The virgin version follows the same process as the original; the only swap is the sparkling grape juice for champagne. Use white sparkling grape juice to keep the color pink and pretty. Red sparkling grape juice works but turns the drink a deep burgundy, which can look muddy next to the strawberry puree.

  1. Blend 1 cup of fresh strawberries (washed, tops removed) with 1½ cups of orange juice on high for 45-60 seconds until completely smooth.
  2. Pour the puree into each champagne flute, filling ⅓ of the way.
  3. Top slowly with sparkling white grape juice, pouring down the side of the glass to preserve the carbonation.
  4. Garnish with a fresh strawberry or orange slice and serve immediately.

Frequently asked questions, answers and tips:

Is champagne and prosecco the same?

Both Champagne and prosecco are sparkling white wines, Champagne is a blend of chardonnay, pinot noir, and pinot meunier grapes grown in the Champagne region of northeast France. Only champagne produced in Champagne can be called and labeled Champagne. Prosecco is a sparkling white wine from Veneto region of Italy and is made from glera grapes.

Can you make strawberry mimosas ahead of time?

The puree, yes; the full drink, no. Blend the strawberry-orange puree up to 24 hours ahead and store it covered in the refrigerator. Pour the champagne right before serving; adding it early kills the bubbles and you get a flat drink.

Can I use frozen strawberries?

Yes, with a trade-off. Frozen strawberries have more water content, so the puree will be thinner and slightly less vibrant in color. Use 3-4 extra berries to compensate and blend a little longer. Fresh is worth it when strawberries are in season.

How many mimosas does one bottle of champagne make?

One standard 750ml bottle makes approximately 6 mimosas at the 1:2 puree-to-champagne ratio used in this recipe. For a brunch of 8-10 people, plan on 2 bottles minimum; 3 if you expect people to come back for a second glass, which they will.

Sarah Mock of savoringthegood.com headshot 2022

Sarah's Culinary Insight

  • Fresh strawberries blend smoother than frozen. Frozen works in a pinch, but the puree turns icy and thin; add 2-3 extra strawberries to compensate for the water content.
  • The puree-to-champagne ratio matters more than people think. 1 part puree to 2 parts champagne keeps the strawberry flavor present without overpowering the sparkle. Go heavier on puree and it tastes like juice with bubbles.
  • Blend it smooth, not chunky. You want a pourable puree, not a smoothie. 45-60 seconds on high in a standard blender does it.
  • Brut is the right call here. The dry champagne balances the sweetness of the strawberries. Demi-Sec makes it taste like candy; Extra Brut makes it taste sharp.
  • Make the puree up to 24 hours ahead. It holds well in the fridge. The color deepens slightly overnight, which actually makes it look better in the glass.
3 strawberry mimosas in stemless flutes with ½ strawberry garnish.

Strawberry Champagne Mimosa

Strawberry mimosas have 3 ingredients and are ready to enjoy in less than 5 minutes
5 from 1 vote
Print Pin Rate
Course: Cocktails
Cuisine: French
Prep Time: 4 minutes minutes
Garnish: 1 minute minute
Total Time: 5 minutes minutes
Servings: 6 cocktails
Calories: 97
Author: Sarah Mock

Ingredients

  • 1 Cup fresh strawberries green tops remove
  • 1 ½ Cup orange juice
  • 750 ml champagne or prosecco
  • Fresh strawberries and orange slices for garnish
US Customary - Metric
Follow Savoring The Good On PinterestFollow @SavoringTheGood or tag #STGRecipes!

Instructions

  • Add strawberries and orange juice to a blender. Blend on high 45-60 seconds until completely smooth.
  • Pour the puree into each champagne flute, filling each glass ⅓ of the way.
  • Fill the rest of the way with champagne, pouring slowly down the side of the glass.
  • Garnish with a fresh strawberry or orange slice and serve immediately.
  • Store any remaining puree covered in the refrigerator for up to 24 hours.
Want to share when you made this recipe?Follow @SavoringTheGood & tag #STGRecipes!
Nutrition Facts
Strawberry Champagne Mimosa
Serving Size
 
1 cocktail
Amount per Serving
Calories
97
% Daily Value*
Fat
 
1
g
2
%
Saturated Fat
 
1
g
6
%
Polyunsaturated Fat
 
1
g
Monounsaturated Fat
 
1
g
Sodium
 
10
mg
0
%
Potassium
 
271
mg
8
%
Carbohydrates
 
10
g
3
%
Sugar
 
8
g
9
%
Protein
 
1
g
2
%
* Percent Daily Values are based on a 2000 calorie diet.
**Nutritional facts are just estimates. Please utilize your own brand nutritional values to double check against our estimates.
Like this recipe card? Want one for your site?Check out WP Recipe Maker!

Sarah Mock of savoringthegood.com headshot 2022

I am Sarah Mock. Welcome!

Sarah Mock is a classically trained Chef and a graduate of Johnson & Wales University. A culinary blogger for 17 years, Sarah helps the home cook prepare her recipes with professional results.

Get to know me

as seen in:

Logos of Hersheyland, ABC News, and Good Day PA are showcased in a seamless row, providing a snapshot of popular brands.

Hersheyland Nightline Good Day Pa!

The vibrant design showcases the iconic logos of Pinterest, Rachael Ray, and Jell-O set against a bold red background. Sorry, the provided description doesn't offer enough detail to suggest important SEO keywords.

Pinterest Rachael JELL-O

Gigi Hadid Pasta Recipe (Spicy Vodka Pasta Recipe)

gigi hadid pasta on a blue plate

Gigi Hadid pasta is the spicy, creamy pasta alla vodka recipe that took over Instagram and Tiktock. This creamy, cheesy pasta dish is on the table in less than 30 minutes. Adjust the level of heat by adding more red pepper flakes.

gigi hadid pasta on a blue plate

I think this sauce would be so dreamy spooned over gnudi. The homemade ricotta pillows would love to take a bath in rosy, creamy vodka sauce. If you love celebrity recipes be sure to try Jennifer Aniston Salad. It is one of my favorite salads!

  • My son, who is not a fan of vodka sauces, loves this recipe! It is amazing what the change of the name of pasta alla Vodka will do for kids!
  • Add your choice of protein to this pasta dish for an amazing entree.
  • My favorite one-pan meal to serve with a bottle of dry red wine.

Ingredients needed to make Gigi Hadid Pasta:

ingredients for gigi hadid pasta with text overlay labeling them. Vodka, red pepper flake, basil, cream, pasta, garlic, onion, tomato paste, butter, parmesan, olive oil.

Recipe Card?

To find the full printable recipe with specific measurements and directions CLICK HERE to go to the recipe card.

Recipe Ingredient notes:

  • Olive oil - yes, there seems like a lot of olive oil in this sauce but trust me when I say it is WORTH IT. Not only does it cook the onions and garlic but it adds a wonderful richness to the sauce.
  • Onion - I am using a small yellow onion but use a large shallot, a small while onion or even a red onion. Gigi Hadid used a purple onion in her video on TikTok.
  • Tomato Paste - I have instructions on how to make homemade tomato paste but for this recipe I am using help from the grocery store and using a 6-ounce can of tomato paste.
  • Parmesan Cheese - I use freshly grated because I like the way it melts in this vodka sauce. If you have the pre-grated or the parmesan in the green can, that will work too.
  • Cream - Gigi Hadid uses heavy cream in her sauce, I use light cream in my sauce. Use the cream that speaks to your heart.
  • Garlic - use fresh garlic in this recipe, I use a Microplane to make sure it is finely grated, but if you have pre-chopped garlic in a jar or garlic confit, both will work. I can teach you how to grow garlic.

Substitutions To Make This Recipe

  • Tomato paste - I am using regular tomato paste but you can also use tomato paste with herbs or use a can of tomato sauce. If you use the tomato sauce, you are going to want to cook out the moisture before adding the cream.
  • Pasta - I use orecchiette because they are like little pasta cups for holding the sauce. Other good substitutions could be rigatoni, penne, bow ties, large macaroni, gnocchi or even a ravioli or tortellini.
  • Vodka - not everyone cooks with alcohol. If you would like to substitute vegetable stock or chicken stock for the Vodka, that would be a great swap.
  • Protein - Add some cooked chicken, sous vide chicken breast, sautéed shrimp, seared scallops or sheet pan salmon would be delicious in this spicy vodka sauce pasta.
  • Cheese - switch out the parmesan for Asiago, Romano or provolone for a little flavor variation.
  • Vegetables -when cooking the onions and garlic, add in some veggies like bell peppers, mushrooms, zucchini, peas or asparagus to get in more vegetables.

Seasonal Favorite

Baked lattice top crust on an apple pie made with the Crisco pie crust recipe, showing flaky layers in the fluted edge.

This is my award-winning Crisco pie crust recipe; flaky, tender, and made with simple ingredients you already have.

Crisco Pie Crust

How to make spicy vodka pasta

full plate of gigi hadid pasta with garnishes on a blue plate.

Boil the pasta.

Boil pasta according to the directions on the package, be sure the water is heavily salted. Reserve ½-1 cup of the pasta water for later use in the sauce.

diced onions in olive oil cooking.

Saute Onions

In a wide bottom pan heat extra virgin olive oil over medium-high heat. Add onions and sauté until they soften and start to take on color.

olive oil, finely diced onions and garlic.

Add garlic

Add chopped garlic and sauté for a minute.

tomato paste added to olive oil, onions for sauce.

Bloom the tomato paste

Stir in red pepper flake and tomato paste, and cook for 5 minutes, stirring frequently.

whisk whisking vodka sauce to blend.

Add the vodka

Add in vodka, stirring and continue to cook for 2-3 minutes.

gigi hadid pasta sauce, in a pan with a whisk.

Stir in cream

Stir in the cream. Whisk until smooth. It will take a few minutes but the oil and cream will start to emulsify with whisking.

Add the reserved pasta water

Add cheese and reserved pasta water, whisking for a minute until the color becomes consistent and rosy in color.

cooked pasta added to vodka sauce in a pan.

Add the pasta

Drain the cooked pasta and add to the vodka sauce.

pasta added to the vodka pasta sauce.

Stir to combine

Stir in pasta and butter. Garnish with fresh chopped basil.

full plate of gigi hadid pasta with garnishes on a blue plate.

Season and serve

Adjust the seasoning with salt pepper and add additional red pepper flake for more heat.

How to make Gigi Hadid Spicy Pasta

  1. Cook pasta in salted water, and save some of the pasta water for the sauce.
  2. Sautee the onions, garlic tomato paste, red pepper flakes in olive oil.
  3. Whisk in the vodka and cream, whisking to combine.
  4. Whisk in the reserved pasta water and add the cooked pasta.
  5. Fold in the pasta, add the butter and stir to combine.
  6. Adjust seasoning and serve, garnished with chopped basil.

Storage Tips

Cool the pasta completely before storing in air-tight containers for up to 5 days in the refrigerator. 

Reader Favorites

  • Pear butter in a glass canning jar with spices to the side and a whole pear to the right of the jar
    Pear Sauce Recipe
  • lasagna roll up on a serving fork coming out of the full pan, cheese pulling
    Lasagna Roll Ups Recipe
  • Four tacos filled with shredded meat from a delicious Mojo Pork Recipe, garnished with cilantro, and accompanied by lime wedges on a white plate.
    Mojo Pork Recipe
  • Sous vide eggs on toast, broken to show the runny yolk
    Sous Vide Poached Eggs: 60°C or 63°C

Reheating Instructions

In a microwave-safe dish reheat the pasta with a splash of water in 30-second intervals, stirring after each interval and repeating until heated through.

Recipe tips:

What pasta does Gigi Hadid use?

Gigi uses a small shell pasta but I use orecchiette because they are like little pasta cups for holding the sauce. Other good substitutions could be rigatoni, penne, bow ties, large macaroni, gnocchi or even a ravioli or tortellini.

How long does it take to make the viral Gigi Hadid's pasta?

If you have all your ingredients chopped ahead Gigi Hadid pasta can be on the table in under 30 minutes.

What is pasta water?

When cooking dried pasta in water the pasta releases statch into the water. This pasta water is wonderful to add to sauces such as vodka sauce to help thin out yet maintain the viscosity of the sauce.

Chef Tip

If your family and friends are not a fan of spicy sauces, leave the red pepper flakes out of this recipe. Give them the option to add the red pepper flakes to their plate when you serve this amazing pasta dish.

gigi hadid pasta on a blue plate

Gigi Hadid Pasta Recipe

Rich. Creamy. Chilli. Cheesy. Delicious.
No ratings yet
Print Pin Rate
Course: Pasta
Cuisine: Italian
Prep Time: 5 minutes minutes
Cook Time: 25 minutes minutes
Total Time: 30 minutes minutes
Servings: 4 servings
Calories: 934
Author: Sarah Mock

Ingredients

  •  
    8 Ounces Pasta orecchiette , rigatoni, penne, bow ties, large macaroni, gnocchi or even a ravioli or tortellini.
  • A 500ml bottle of California Olive Ranch Global Blend Extra Virgin Olive Oil with green and blue labeling, indicating a blend from Argentina, Portugal, Chile, and California-perfect for drizzling over your favorite shrimp avocado salad.½ Cup Olive Oil
  • A single whole yellow onion with dry, papery skin, photographed against a white background-the perfect flavorful addition to your next Crockpot Hash brown Casserole.1 small onion finely chopped
  • Whole garlic bulb with white papery skin, lying on its side against a plain white background-a perfect aromatic addition to your next slowcooker sausage casserole.4 cloves Garlic minced
  • A 6.2 oz plastic container of McCormick Crushed Red Pepper with a red cap and yellow label stating 1 Teaspoon Red Pepper flakes
  • A can of Contadina Roma Tomatoes Paste with Italian Herbs, 6 oz, featuring a woman holding tomatoes and countryside imagery on the label-perfect for adding rich, authentic flavor to your favorite recipes like a slowcooker sausage casserole.6 Ounces Tomato Paste
  •  
    ¼ Cup Vodka
  •  
    ½ Cup Parmesan Cheese shredded
  • heavy cream bottle.1 ½ Cup Heavy Cream heavy is best, light will work
  • A rectangular 8 oz package of Kerrygold Pure Irish Butter, unsalted, with a green and gold label and Irish grass-fed cow branding-perfect for creating delicious Saint Patrick's Day cupcakes.2 Tablespoon Butter
  •  
    Basil leaves garnish
  • Two clear acrylic mills-one filled with coarse salt, the other with whole black peppercorns, both topped with metal knobs-stand side by side on a white background, ready to season your favorite dishes like Shrimp Avocado Salad.salt and pepper to taste
US Customary - Metric
Follow Savoring The Good On PinterestFollow @SavoringTheGood or tag #STGRecipes!

Instructions

  • Boil pasta according to directions on package, being sure the water is heavily salted. Reserve ½-1 cup of the pasta water for later use in the sauce.
  • In a wide bottom pan heat extra virgin olive oil over medium high heat. Add onions and sauté until they soften and start to take on color.
  • Add chopped garlic and sauté for a minute.
  • Stir in red pepper flake and tomato paste, cook for 5 minutes, stirring frequently.
  • Add in vodka, stirring and continue to cook for 2-3 minutes.
  • Stir in Vokda and cream. Whisk until smooth. It will take a few minutes but the oil and cream will start to emulsify with whisking.
  • Add cheese and reserved pasta water, whisking for a minute until the color becomes consistant and rosy in color.
  • Drain the cooked pasta and add to the vodka sauce.
  • Stir in pasta and butter. Garnish with fresh chopped basil.
  • Adjust the seasoning with salt pepper and add additional red pepper flake for more heat.

Notes

Protein - Add some cooked chicken, sous vide chicken breast, sautéed shrimp, seared scallops or sheet pan salmon would be delicious in this spicy vodka sauce pasta.
Cheese - switch out the parmesan for asiago, Romano or provolone for a little flavor variation.
Vegetables -when cooking the onions and garlic, add in some veggies like bell peppers, mushrooms, zucchini, peas or asparagus to get in more vegetables.
Want to share when you made this recipe?Follow @SavoringTheGood & tag #STGRecipes!
Nutrition Facts
Gigi Hadid Pasta Recipe
Serving Size
 
1 Potion
Amount per Serving
Calories
934
% Daily Value*
Fat
 
69
g
106
%
Saturated Fat
 
30
g
188
%
Trans Fat
 
0.2
g
Polyunsaturated Fat
 
5
g
Monounsaturated Fat
 
30
g
Cholesterol
 
124
mg
41
%
Sodium
 
619
mg
27
%
Potassium
 
703
mg
20
%
Carbohydrates
 
56
g
19
%
Sugar
 
10
g
11
%
Protein
 
17
g
34
%
* Percent Daily Values are based on a 2000 calorie diet.
**Nutritional facts are just estimates. Please utilize your own brand nutritional values to double check against our estimates.
Like this recipe card? Want one for your site?Check out WP Recipe Maker!

Sarah Mock of savoringthegood.com headshot 2022

I am Sarah Mock. Welcome!

Sarah Mock is a classically trained Chef and graduate of Johnson & Wales University. A culinary blogger for 15 years Sarah helps the home cook prepare her recipes with professional results.
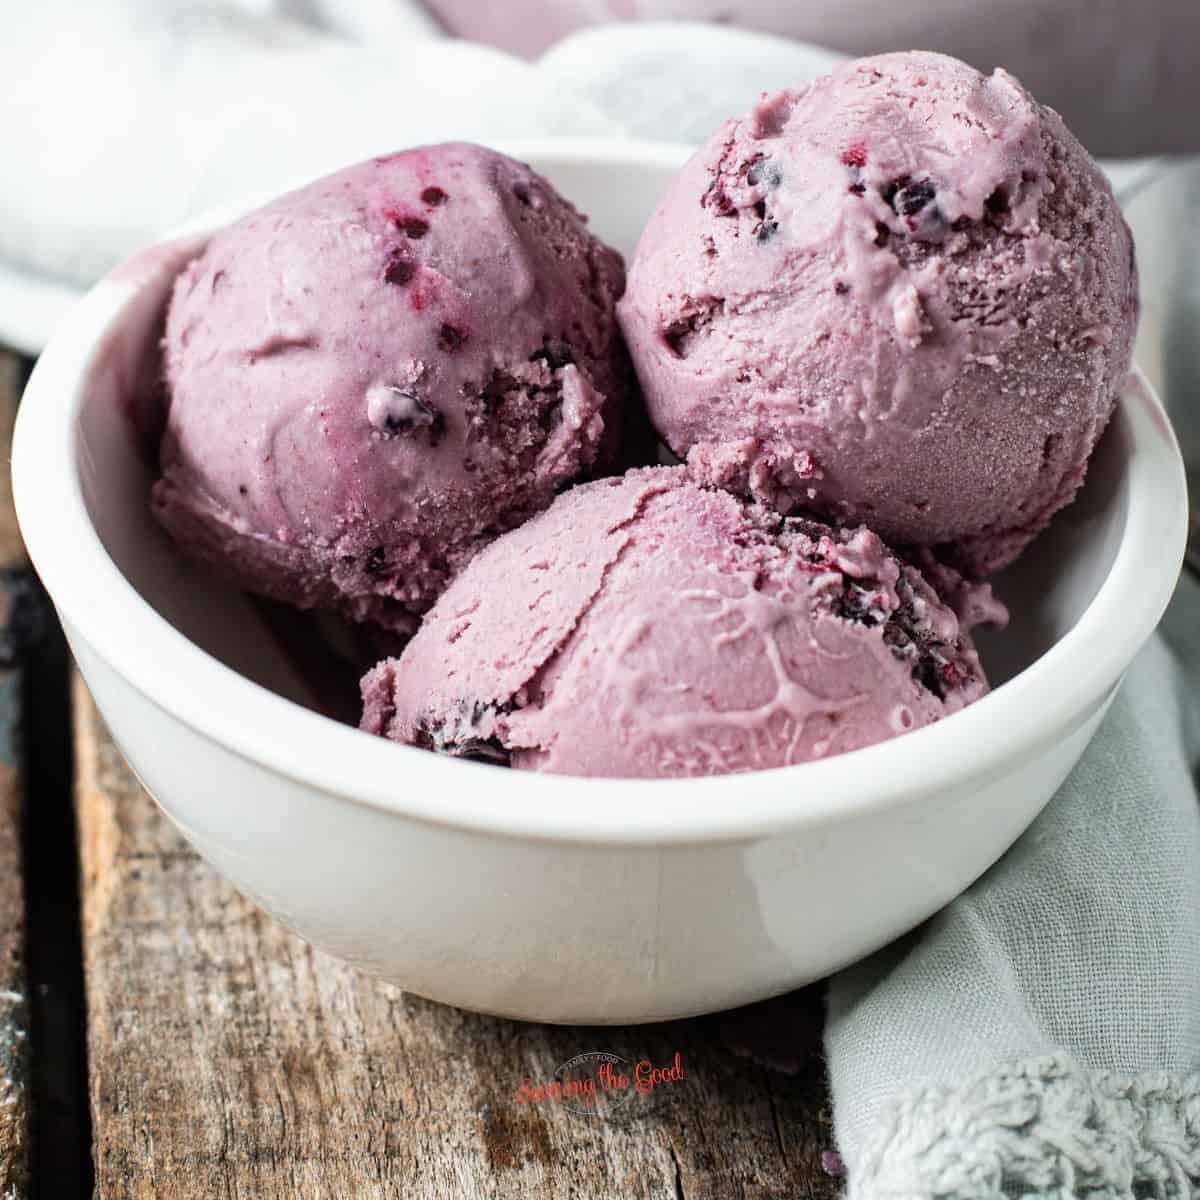
Get to know me

as seen in:

Logos of Hersheyland, ABC News, and Good Day PA are showcased in a seamless row, providing a snapshot of popular brands.

Hersheyland Nightline Good Day Pa!

The vibrant design showcases the iconic logos of Pinterest, Rachael Ray, and Jell-O set against a bold red background. Sorry, the provided description doesn't offer enough detail to suggest important SEO keywords.

Pinterest Rachael JELL-O

Rotel Dip With Sausage

rotel dip

This quick and easy Rotel sausage cream cheese dip is a crowd pleaser and has the perfect balance of heat, meat and spice. Rotel dip made in a crockpot is the ultimate appetizer for game day and couldn't be easier to make.

rotel dip

This Rotel dip is made EVERY game day and EVERY holiday. We also will make chipped beef dip and Philly cheesesteak eggrolls. We LOVE appetizers as a meal. If you love this recipe be sure to check out the other kraft recipes I have on the website.

  • The perfect dip to go with tortilla chips, bagel chips, crackers, or veggies.
  • Everyone love this vevleeta queso dip and the slow cooker makes for easy transportation to parties.

Ingredients needed to make Velveeta Cheese Dip:

ingredients for rotel dip in glass bowls with text overlays. ground beeg, ground pork, velveeta, cream cheese, rotel, chili poweder.

Recipe Card?

To find the full printable recipe with specific measurements and directions CLICK HERE to go to the recipe card.

Substitutions

  • All ground beef or all pork sausage can be used.
  • Use petite, diced tomatoes with green chilis in place of the name brand Rotel.
  • Use Mild, hot, fire rosted Rotel or Serrano Rotel in place of the original Rotel.
  • For a dairy free option leave out the cream cheese and switch out the Velveeta for your favorite dairy free cheese. Wayfare cheddar cheese is my non-dairy cheese of choice for this recipe.

How to make Rotel dip

  1. Start by browning the ground beef and ground sausage in a skillet until cooked through and no longer pink.
  2. While the meats are cooking, cube the Velveeta cheese and the cream cheese.
  3. Once the meat is thoroughly cooked, stir in the cubes of Velveeta cheese and the Rotel.
  4. Transfer the meat mixture into a crockpot or slow cooker and add the rest of the ingredients.
  5. Stir to combine and set on low, cooking for 2 hours, stirring half way through.

Rotel sausage cream cheese dip

hand holding rotel dip on a scoop chip.
  1. In a medium skillet, brown the ground beef and sausage.
    spices over the beef and pork, browning in a cast ironpan.
  2. Season the cooked meat with chili powder, stir to combine.
    cooked season meats for rotel dip in the bottom of a slow cooker insert.
  3. Add the seasoned meat to the bottom of your crockpot.
    all rotel dip ingredients in a crockpot.
  4. Cut the Velveeta and the cream cheese into cubes and add to crockpot insert along with the Rotel tomatoes.
  5. Put the lid on the crockpot and set on low for 2 hours, stirring after the first hour.
    rotel dip in a crockpot.
  6. Stir dip and serve hot with chips and veggies.

Did you make this recipe?

Do you have feedback that would be helpful to others? If so can help this small business owner by leaving a rating and a review in the comments section? Thank you for being part of the Savoring The Good Community. ~ Sarah

2 qt. black crock-pot slow cooker

Sarah's recommendation

2 qt. Crock-Pot

Perfect for hot dips and small meals

Buy on Amazon

What to serve with rotel cream cheese dip

Traditionally tortilla chips, bagel chips, crackers, or veggies are what is served with Rotel cream cheese dip. I also will serve warm sausage and cheese dip over baked potatoes, tatter tots or french fries.

Storage Tips

Store leftover Rotel dip in air tight containers in the refrigerator for up to a week. Rotel sausage cream cheese dip freezes well in freezer safe containers, Be sure to remove as much air as possible from the container to avoid freezer burn.

Seasonal Favorite

Baked lattice top crust on an apple pie made with the Crisco pie crust recipe, showing flaky layers in the fluted edge.

This is my award-winning Crisco pie crust recipe; flaky, tender, and made with simple ingredients you already have.

Crisco Pie Crust

Reheating Velveeta Queso Instructions

I will reheat the sausage queso in a microwave-safe dish in 30-second increments, stirring in between heating until warmed through. Another option is to warm it in a small saucepan on medium heat, stirring, until heated through.

rotel dip

Rotel Dip with Ground Beef and Pork Sausage

This quick and easy Rotel sausage cream cheese dip is a crowd pleaser and has the perfect balance of heat, meat and spice.
5 from 2 votes
Print Pin Rate
Course: Appetizer Recipe
Cuisine: American
Keyword: rotel dip
Prep Time: 10 minutes minutes
Cook Time: 2 hours hours
Total Time: 2 hours hours 10 minutes minutes
Servings: 15 servings
Calories: 246
Author: Sarah Mock

Ingredients

  • A white foam tray filled with raw ground beef, arranged in loose, squiggly strands.1 lb Ground Beef
  •  
    ½ pound Pork sausage
  •  
    1 pound Velveeta
  • Box of Kraft Philadelphia Original Cream Cheese, 8 oz (226g), silver packaging with blue and white logo, and renewable energy label on the left-perfect for making delicious Lemon Cheesecake Bars.8 ounces Cream Cheese
  •  
    10 ounce Rotel Tomatoes
  • A 7.5 oz container of McCormick Dark Chili Powder with a red lid and a label stating 1 Tablespoon Chili powder
US Customary - Metric
Follow Savoring The Good On PinterestFollow @SavoringTheGood or tag #STGRecipes!

Instructions

  • In a medium skillet, brown the ground beef and sausage.
    1 lb Ground Beef, ½ pound Pork sausage
  • Season the cooked meat with chili powder, stir to combine.
    1 Tablespoon Chili powder
  • Add the seasoned meat to the bottom of your crockpot.
  • Cut the Velveeta and the cream cheese into cubes and add to crockpot insert along with the Rotel tomatoes.
    1 pound Velveeta, 8 ounces Cream Cheese, 10 ounce Rotel Tomatoes
  • Put the lid on the crockpot and set on low for 2 hours, stirring after the first hour.
  • Stir dip and serve hot with chips and veggies.

Notes

Store leftover Rotel dip in air tight containers in the refrigerator for up to a week. Rotel sausage cream cheese dip freezes well in freezer safe containers, Be sure to remove as much air as possible from the container to avoid freezer burn.
Want to share when you made this recipe?Follow @SavoringTheGood & tag #STGRecipes!
Nutrition Facts
Rotel Dip with Ground Beef and Pork Sausage
Serving Size
 
1 serving
Amount per Serving
Calories
246
% Daily Value*
Fat
 
19
g
29
%
Saturated Fat
 
9
g
56
%
Trans Fat
 
1
g
Polyunsaturated Fat
 
1
g
Monounsaturated Fat
 
6
g
Cholesterol
 
62
mg
21
%
Sodium
 
655
mg
28
%
Potassium
 
290
mg
8
%
Carbohydrates
 
5
g
2
%
Sugar
 
4
g
4
%
Protein
 
15
g
30
%
* Percent Daily Values are based on a 2000 calorie diet.
**Nutritional facts are just estimates. Please utilize your own brand nutritional values to double check against our estimates.
Like this recipe card? Want one for your site?Check out WP Recipe Maker!


Sarah Mock of savoringthegood.com headshot 2022

I am Sarah Mock. Welcome!

Sarah Mock is a classically trained Chef and graduate of Johnson & Wales University. A culinary blogger for 15 years Sarah helps the home cook prepare her recipes with professional results.

Get to know me

as seen in:

Logos of Hersheyland, ABC News, and Good Day PA are showcased in a seamless row, providing a snapshot of popular brands.

Hersheyland Nightline Good Day Pa!

The vibrant design showcases the iconic logos of Pinterest, Rachael Ray, and Jell-O set against a bold red background. Sorry, the provided description doesn't offer enough detail to suggest important SEO keywords.

Pinterest Rachael JELL-O

Belgian Waffle Recipe (Liege Style)

Belgian Waffle Recipe square image.

This authentic Belgian waffle recipe (aka Liege waffles) is made with a rich yeast dough and pearl sugar, just like the ones you'd find from a Belgian waffle truck.

Belgian Waffle Recipe square image.

My husband and I used to grab these after movie nights when we were dating...and I still remember the warm, crispy outside and caramelized sugar bits. If you're looking for waffles that are chewy, sweet, and bakery-worthy, this is the recipe.

Here is why this recipe is amazing:

  • Buttery, chewy texture with a fluffy center.
  • Caramelized sugar bits from pearl sugar.
  • Perfect for make-ahead breakfasts or brunch boards.
  • Taste just like real Belgian street waffles.

Ingredients needed:

Belgian Waffle Recipe ingredients in bowls with text overlay.

Recipe Card?

To find the full printable recipe with specific measurements and directions CLICK HERE to go to the recipe card.

How to Make Authentic Liege Waffles

yeast blooming with milk in a white bowl.

Bloom the Yeast

Warm the milk to about 110°F. Stir in the sugar and yeast. Let it sit for 5-10 minutes until foamy.

Belgian Waffle dough ball in a mixing bowl.

Mix the Dough

In a stand mixer, combine flour, salt, and softened butter. Add the milk/yeast mixture, eggs, and vanilla. Mix until a smooth dough forms and it pulls away from the sides-about 3-5 minutes.

First Rise

Cover the bowl and let the dough rise in a warm spot until doubled in size, about 1 hour.

Add the Pearl Sugar

Fold in the pearl sugar by hand.

12 balls of Belgian Waffle dough on a white surface showing sugar crystals.

Portion the Dough

Divide into 12 even balls. Place on parchment or a silicone mat and let them proof for 40 minutes.

Authentic Belgian Waffle dusted with powdered sugar.

Cook the Waffles

Preheat your waffle iron to medium. Spray with butter spray, add the dough ball, and cook for 3-5 minutes until golden with crisp caramelized edges.

Please note...

Pearl sugar burns easily. Start low and increase heat as needed.

Overnight Belgian Waffle Dough (Optional Overnight Fermentation)

For the absolute best flavor profile of your Belgian waffle, the dough needs to cold ferment overnight. After the first mix, wrap the dough tightly in plastic and refrigerate for 8-24 hours. Let it come to room temperature before folding in pearl sugar and portioning.

Make-Ahead & Storage Tips

Make Ahead Tip:

Make the dough the night before and refrigerate. You can also cook and freeze the waffles. Perfect for Christmas morning or busy weekdays.

Storage Instructions:

  • Store cooled waffles in the fridge for 3-4 days in an airtight container.
  • Freeze individually wrapped waffles for up to 3 months.

Reheating Instructions

  • Reheat in a toaster or toaster oven for best texture.
  • You can also pop one back in the waffle iron for a just-cooked feel.

Toppings For Waffles

A mouthwatering display of fluffy Belgian waffles with a generous sprinkle of powdered sugar, laid out on a rustic wooden cutting board.
  • Confectioners' sugar - a heavy shake of powdered sugar is always good on waffles
  • Chocolate sauce - make your own or pour from the can. Who doesn't love chocolate sauce on a warm waffle?
  • Whipped cream - I am a fan of making your own fresh whipped cream! Follow the instructions for my keto whipped cream recipe but switch out the keto sweetner for powdered sugar.
  • Warm maple syrup - these liege waffles are special enough for authentic maple syrup!
  • Fresh fruit - fresh cut strawberries come to mind but also a strawberry topping would be delicous.
  • Peanut butter - don't laugh! Peanut butter is ah-mazing spread on warm waffles.

Ways To Serve Belgian Waffles

  • Brunch board - make them ahead and serve on a brunch board with fruit, syrups and spreads.
  • Sandwiches - slice in half, like a bagel and use in place of sandwich bread
  • Chicken and waffles - serve your favorite piece of fried chicken on top of a warm waffle and drizzle with hot honey.
  • Fruit Taco - Fold a large waffle like a taco shell and fill with chopped strawberries and whipped cream or ice cream.

Frequently asked questions, answers and tips:

Is there a substitute for pearl sugar?

I wish I could tell you that there was a secret ingredient that you can substitute for the pearl sugar in Belgian waffles. But the secret ingredient IN Belgian waffles IS pearl sugar. Belgian pearl sugar bag.

Chef Tip

It can be a tricky dance to get your waffle iron hot enough to caramelize the sugar but not so hot that it will burn the sugar. Each waffle iron has its own settings and 'personality'. Start on a lower heat setting and gradually increase the temperature until you find the perfect heat setting that caramelizes the sugar. The first few probably won't be picture-perfect, but they will still be delicious!

Belgian Waffle Recipe square image.

Belgian Waffles

An authentic Belgian waffle is a yeast-raised dough studded with pearl sugar versus a pourable waffle batter. This traditional Liege waffle recipe has a delightful fluffy interior and caramelized bits of sugar.
5 from 1 vote
Print Pin Rate
Course: Breakfast
Cuisine: American
Keyword: belgian waffle
Prep Time: 1 hour hour 50 minutes minutes
Cook Time: 5 minutes minutes
Total Time: 1 hour hour 55 minutes minutes
Servings: 12 waffles
Calories: 236
Author: Sarah Mock

Ingredients

  • A 5-pound bag of King Arthur Baking Company unbleached bread flour with 12.7% protein content, labeled for ideal use in bread, pizza crust, and rolls-perfect for creating hearty sides like homemade loaves to serve alongside a comforting slowcooker sausage casserole.3 Cups Flour, All Purpose
  •  
    1 Cup Belgian Pearl Sugar
  • A single brown chicken egg, perfect for making Chicken Cordon Bleu, stands upright on a white background.2 Egg
  • A rectangular 8 oz package of Kerrygold Pure Irish Butter, unsalted, with a green and gold label and Irish grass-fed cow branding-perfect for creating delicious Saint Patrick's Day cupcakes.1 ½ sticks Butter unsalted
  • A white milk carton with a blue label reading ¼ Cup milk around 110 degrees Fahrenheit
  • A 4-pound bag of Domino granulated pure cane sugar with a yellow and white design, showing nutrition information and branding-perfect for sweetening recipes like rhubarb sour or your favorite desserts.1 tablespoon Sugar
  •  
    2 teaspoon yeast dry, active
  • easy sous vide vanilla extract1 ½ teaspoon Vanilla Extract
  • A Morton Salt container with a blue label featuring a girl in a yellow dress holding an umbrella, with salt pouring out of a container-an essential ingredient for perfectly seasoning dishes like Chicken Cordon Bleu.¼ teaspoon salt
US Customary - Metric
Follow Savoring The Good On PinterestFollow @SavoringTheGood or tag #STGRecipes!

Instructions

  • Start by warming up the milk until lukewarm. The best temperature is around 110 degrees Fahrenheit. Then add the granulated sugar and instant yeast. Let sit for about 5 minutes, until it starts to get foamy and doubles in size.
    ¼ Cup milk, 1 tablespoon Sugar, 2 teaspoon yeast
  • In your mixer add the flour, salt, and softened butter. Mix for a few minutes.
    3 Cups Flour, All Purpose, ¼ teaspoon salt, 1 ½ sticks Butter
  • Add the warm milk mixture, eggs, and vanilla extract to the mixer and let it mix for about 3-5 minutes. Dough should not stick to the side of the bowl anymore.
    2 Egg, 1 ½ teaspoon Vanilla Extract
  • Then add your pearl sugar and fold into the dough.
    1 Cup Belgian Pearl Sugar
  • Cover the mixer bowl with plastic wrap and let it rise for 1 hour.
  • Remove the dough from the mixer bowl and divide in 12 even balls. Put them on a silicone bake tray or parchment paper, so it doesn't stick and let them rise for another 40 minutes.
  • Warm your waffle maker to medium heat and add them one by one, or two by two, depending on how large your waffle maker is. Spray with non-stick butter spray. And put each dough ball in the preheated waffle iron for about 3-5 minutes or until golden brown.
  • Serve warm with confectioners' sugar, or chocolate syrup.

Notes

Substitutes:
  • Pearl sugar: If you can't find pearl sugar, use crushed sugar cubes or Swedish pearl sugar (less heat-resistant, so results vary).
  • Instant yeast: Swap with active dry yeast-just bloom it for longer (10-15 minutes).
  • Milk: Any dairy milk works, or even almond milk in a pinch, though flavor will shift slightly.
Want to share when you made this recipe?Follow @SavoringTheGood & tag #STGRecipes!
Nutrition Facts
Belgian Waffles
Serving Size
 
1 waffle
Amount per Serving
Calories
236
% Daily Value*
Fat
 
13
g
20
%
Saturated Fat
 
8
g
50
%
Trans Fat
 
0.5
g
Polyunsaturated Fat
 
1
g
Monounsaturated Fat
 
3
g
Cholesterol
 
58
mg
19
%
Sodium
 
157
mg
7
%
Potassium
 
56
mg
2
%
Carbohydrates
 
26
g
9
%
Sugar
 
1
g
1
%
Protein
 
5
g
10
%
* Percent Daily Values are based on a 2000 calorie diet.
**Nutritional facts are just estimates. Please utilize your own brand nutritional values to double check against our estimates.
Like this recipe card? Want one for your site?Check out WP Recipe Maker!

Sarah Mock of savoringthegood.com headshot 2022

I am Sarah Mock. Welcome!

Sarah Mock is a classically trained Chef and graduate of Johnson & Wales University. A culinary blogger for 16 years Sarah helps the home cook prepare her recipes with professional results.

Get to know me

as seen in:

Logos of Hersheyland, ABC News, and Good Day PA are showcased in a seamless row, providing a snapshot of popular brands.

Hersheyland Nightline Good Day Pa!

The vibrant design showcases the iconic logos of Pinterest, Rachael Ray, and Jell-O set against a bold red background. Sorry, the provided description doesn't offer enough detail to suggest important SEO keywords.

Pinterest Rachael JELL-O

Sous Vide Filet Mignon

sous vide filet mignon

This sous vide filet mignon recipe will guarantee that this expensive steak cut will be buttery soft on the inside, have an amazingly flavorful crust on the surface, and give the home cook perfect results, every single time.

sous vide filet mignon

If you are here for the first time and are new to sous vide cooing I suggest you read through my sous vide cooking guide. Lots of great information that isn't covered in this post.

Sous vide is a great way of making quick work of pickling too! Sous vide pickled vegetables and sous vide pickled onions are summer time favorites in my house.

  • Sous vide cooking is the Chefs preferred method of getting edge to edge, perfectly cooked meat every time.
  • The gentle, long cook time in a temperature-controlled cooking environment is the best way to give you the most perfect bite of steak you have ever had.
  • With the sous vide method you can leave the meat unattended cooking for up to 4 hours without having to worry about overcooking the tender filet mignon steaks.
  • Make any special occasion exceptional by serving sous-vide steak.
  • Pairs perfectly with many flavorful side dishes! This spicy enoki mushroom recipe is what I served last time I served filet.

Ingredients needed:

2 raw vide filet mignon on a blue plate.

Filet mignon steaks - my grocery store sells them in 8 ounce portions so these could easily be sliced down to 4 ounce portions. 

Recipe Card?

To find the full printable recipe with specific measurements and directions CLICK HERE to go to the recipe card.

Ingredient notes:

sauce ingredients with text overlay, garlic clove, butter, herbs.

If you would like to add additional layers of flavor to your perfect steak, I have a few ingredients that would make the perfect addition and lead to making a delicious sauce.

  • Garlic - fresh garlic, finely minced. Pre-minced garlic in the jar will work as well.
  • Butter - I use salted butter in this recipe.
  • Herbs - Fresh sprig of rosemary.

Substitutions

Red Wine Sauce

Red wine reduction is one of my favorite sauces to pair with filet mignon. Use these ingredients in step 18 of the instructions below. Add the butter, saute the shallots, add the flour. Stir. Add the rest of the ingredients. Whisk and reduce.

  • 4 tablespoons unsalted butter
  • ¾ cup finely chopped shallots, from 2-3 large shallots
  • 2 tablespoons all-purpose flour
  • 1-¼ cups red wine
  • 3 cups beef broth
  • 6 fresh thyme sprigs
  • ¼ teaspoon kosher salt
  • ⅛ teaspoon ground black pepper

Garlic butter

If you are not making a pan sauce to go along with your steak dollop on some homemade garlic butter. Combine the following ingredients:

  • ½ cup unsalted butter softened
  • ¼ cup fresh parsley, chopped
  • 1-1 ½ teaspoon garlic, chopped
  • 2 tablespoons shallot, chopped
  • 1 tablespoon fresh lemon juice
  • ½ teaspoon salt
  • freshly cracked black pepper to taste

Sous Vide Equipment

sous vide set up.
  • Breville Joule Sous Vide - This is the sous vide imersion circulator that I use. I love the wifi feature!
  • Anova Culinary Sous Vide Precision Cooker - Another popular brand of sous vide circulator. I don't have one but many people do and love this brand.
  • Sous Vide Container (3.0 Gallon) - Any container that can tollerate heat will work but I use this sous vide container.
  • Sous Vide Lid for LIPAVI C10 Container - Use with Anova Precision / Nano / Pro, Joule, Instant Pot, Wancle or virtually all other models. Do not accept a bad fit! The smart silicone sleeve on our lid will ensure a snug fit, with NO GAP. Up to a diametre of 2.755 inches
  • Cast Iron Skillet - got to get that HIGH HEAT for an amazing sear and cast iron is the best pan to get that sear.
Using an Anova sous vide machine, a person precisely cooks vacuum-sealed salmon fillets submerged in water, ensuring perfect results right on the countertop.

Let's go shopping!

ANOVA

This third generation sous vide circulator includes dual-band WiFi and a two-line touchscreen display.

Buy it here

How to make sous vide filet mignon

top down image of 2 filet mignons on a blue plate.
  1. Preheat the sous vide water bath to the desired internal temperature of the steak.
  2. Truss each piece of filet to help it keep the traditional filet mignon shape.
  3. Sear all sides of the beef.
  4. Deglaze the pan, optional.
  5. Add the meat and the deglaze to a sous vide bag. (or vacuum seal bag)
  6. Seal the bag or use the water displacement method to remove the air from the bag.
  7. Cook.
  8. Resear the meat in on a high heat pan.If making sauce, add ingredients to the pan and reduce.

Making filet mignon sous vide

sous vide filet mignon cut open to show texture and color, butter melting on top, fork pulling a piece off.
  1. Determine your desired doneness for your steak from the chart below.Make note of the THICKNESS of the steak. This will determine the length of the cooking time. Count on one hour of cook time per inch of meat in thickness.
  2. Truss the steak around the circumference of the cut with a piece of kitchen twine, if desired.
    sous vide set up.
  3. Set your sous vide machine to the desired temperature, allowing it to heat up while you prepare the meat for sous vide.
  4. Preheat a heavy bottom pan or a cast-iron skillet to the point of smoking.
    mayonnaise in a cast iron pan, melting for high heat sear.
  5. Lightly brush your steaks with oilive oil or the high heat oil of your choice or drizzle a few tablespoons in the bottom of the screaming hot skillet.
    2 filet mignons searing in a hot cast iron pan with smoke coming up.
  6. Sear on high heat for one minute per side. Do not move the meat once it comes in contact with the pan. You don't want to break the sear until you are sure you have the color you want.
    seared filet mignon, in a cast iron pan, ready to be cooked further.
  7. The steaks will easily pull away from the pan when they have been properly seared with a nice crust.
  8. Once the steaks have been preseared, remove them to a clean plate.
    sauce ingredients in a cast iron pan, butter, garlic, herbs.
  9. Turn off the heat and deglaze the pan with a few tablespoons of butter, add minced fresh garlic and herbs.
  10. Quickly cook the garlic and the herbs. If the foaming butter cooks away, add a splash of stock, wine, or water to help loosen the fond from the bottom of the pan.
    birds eye view on seared filet mignon with pan drippings in an open vac and seal bag.
  11. Pour the contents of the deglazed pan into a clean bowl to cool for a moment before adding it to the sous vide bag and the preseared steaks.
    seared filet mignon in a food saver bag.
  12. Vac and seal the bag with a vacuum sealer being sure to press the SEAL button as soon as you see the liquid reaching the edge. Not ALL the air will be removed but it will be enough. 🛑STOP HERE IF YOU ARE MEAL PREPPING STEAKS TO COOK AT A LATER TIME.🛑
    sous vide filet mignon cooking in a sous vide machine.
  13. Once the sous vide bath has come up to your desired temperature, add the bagged-up steaks to the water. If you don't have a vac and seal machine, use the water displacement method and secure the bag to the edge of the cooking vessel with a clip. (see instructions below)
  14. Cook for 1 hour per inch of thickness.
  15. After cooking remove the steaks from their cooking bag to a clean plate patting them dry with clean paper towels.
    meat purge from the sous vide bag in a small white bowl.
  16. Reserve the juices, or purge, from the bag to be used in a pan sauce if you are making one.
    second sear of the sous vide filet mignon in a cast iron pan, smoking hot, showing the texture and color of the sear.
  17. Reheat your cast iron pan to smoking hot and sear the steaks on both sides, bringing back the amazingly flavorful crust.
  18. Transfer the sous vide steak to a serving plate and make the sauce.
    sauce reducing in a cast iron pan.
  19. To make the sauce add 3 tablespoons of butter to the hot pan, scrape the fond from the bottom of the pan, add the juices from the sous vide bag. To stretch your sauce add ½ cup to 1 cup of stock or red wine to the pan. Allow the sauce to reduce and thicken.
    horizontal image of a sous vide filet mignon with a pat of butter, white plate, fork and orange napkin to the side.
  20. Spoon the sauce around the steaks, top with salt and black pepper. I also will add a pat of butter for extra richness.

Sous Vide Temperature Chart For Filet Mignon

Choose your preferred internal temperature and doneness for filet mignon below. PLEASE honor the animal and the farmer who raised it by not cooking this delicate cut of meat above medium-rare.

You can also choose a temperature between two doneness temperatures. For example, my family likes steak at 132. We learned this over time and made note of what temperature we cooked the steak and adjusted to meet our preferences.

DonenessTemp FTemp CTime MinimumTime
Max
Rare (1 in/ 2.5 cm)120491 hour4 hours
Rare (2 in /5 cm)120492 hours6 hours
Medium Rare (1 in/ 2.5 cm)13456.51 hour4 hours
Medium Rare (2 in /5 cm)13456.52 hours6 hours
Medium (1 in/ 2.5 cm)140601 hour4 hours
Medium (2 in /5 cm)140602 hours6 hours
Medium Well (1 in/ 2.5 cm)15065.51 hour4 hours
Medium Well (2 in /5 cm)15065.52 hours6 hours
Well Done (1 in/ 2.5 cm)160 +71 +1 hour4 hours
Well Done (2 in /5 cm)160 +71 +2 hours6 hours

Water Displacement vs. Vac and Seal

I have found that the water displacement method is my preferred method of sealing the bag when there is a bone in the meat. There is less chance of a puncture from the bone with water displacement vs. vac and seal.

Water displacement also known as Archimedes' principle is when the pressure of the water forces the air out of the bag. 

To submerge using the water displacement method:

  1. Place the meat in a heavy-duty, zip-top bag and close all but about 1 inch of the zip-top bag.
  2. Submerge the bag in the water allowing the pressure of the water to force the air out.
  3. Just as the water gets to the gap in the bag, close the bag.

If using a vac and seal bag, be sure to double seal the top and bottom seams because this will be a long cook. Look for a vac and seal bag with a side gusset to help accommodate the larger piece of meat.

Depending on how much time I have to reheat the steak, if there is any leftover, I will either resear it on a screaming hot skillet or drop it into the sous vide bath. When I do the sous vide reheat method, I put the meat in then turn on the circulator. By the time the water has come up to temperature, the steak has warmed through.

Frequently asked questions, answers and tips:

Why do you truss a filet mignon when cooking sous vide?

By tying a string or two around the perimeter of the steak will ensure that the steak will maintain the thickness that is associated with filet mignon. Often when vac and sealing a filet, there can be some compression of the meat because it is so tender. The string helps act as a 'supporting structure' in the sous vide bag.

How do I meal prep these steaks ahead of time?

Sous vide is GREAT for meal prepping steaks. One option is to pre-sear and bag up the steaks as instructed in steps 1-12 above. Cook from a frozen state at your desired temperature PLUS ONE HOUR longer than your normal cook.
Another option is to sous vide the steaks to your desired temperature and store in the refrigerator for up to 10 days. Reheat in the sous vide before serving. 

Why is the cooking time so variable with sous vide cooking?

  • There is some 'wiggle room' when it comes to sous vide cooking. You will see cook times written like this: 1-4 hours. That means that the recommended time is 1 hour but not to exceed 4 hours. After 4 hours the protein starts to get mushy. In other cooking methods the window of 'done' and 'over done' can be close. Sous vide cooking will help expand that window up to several hours because of the precise temperature control of the water bath. 
  • Chef Tip

    Start with HOT water in your sous vide machine. Hot tap water will work well enough. This will reduce the time it takes for the sous vide circulator to heat the cooking water.

    sous vide filet mignon

    Sous Vide Filet Mignon

    This sous vide filet mignon recipe will guarantee that this expensive steak cut will be buttery soft on the inside, have an amazingly flavorful crust on the surface, and give you perfect results, every time.
    5 from 2 votes
    Print Pin Rate
    Course: Sous Vide
    Cuisine: French
    Prep Time: 10 minutes minutes
    Cook Time: 1 hour hour
    Sear: 3 minutes minutes
    Total Time: 1 hour hour 13 minutes minutes
    Servings: 2 Servings
    Calories: 158
    Author: Sarah Mock

    Ingredients

    •  
      2 8 ounce Filet mignon steaks
    • A rectangular 8 oz package of Kerrygold Pure Irish Butter, unsalted, with a green and gold label and Irish grass-fed cow branding-perfect for creating delicious Saint Patrick's Day cupcakes.3 Tablespoon Butter salted
    • Whole garlic bulb with white papery skin, lying on its side against a plain white background-a perfect aromatic addition to your next slowcooker sausage casserole.2 cloves Garlic minced
    • A clear bottle of McCormick rosemary leaves with a red cap and beige label, filled with dried rosemary-perfect for adding aromatic flavor to dishes like turkey shepherd's pie.Sprig Rosemary
    US Customary - Metric
    Follow Savoring The Good On PinterestFollow @SavoringTheGood or tag #STGRecipes!

    Instructions

    • Determine your desired doneness for your steak from the chart below.Make note of the THICKNESS of the steak. This will determine the length of the cooking time. Count on one hour of cook time per inch of meat in thickness.
    • Truss the steak around the circumference of the cut with a piece of kitchen twine, if desired.
    • Set your sous vide machine to the desired temperature, allowing it to heat up while you prepare the meat for sous viding.
    • Preheat a heavy bottom pan or a cast-iron skillet to the point of smoking.
    • Lightly brush your steaks with the high heat oil of your choice or drizzle a few tablespoons in the bottom of the screaming hot skillet.
    • Sear on high heat for one minute per side. Do not move the meat once it comes in contact with the pan. You don't want to break the sear until you are sure you have the color you want.
      The steaks will easily pull away from the pan when they have been properly seared with a nice crust.
      Once the steaks have been preseared, remove them to a clean plate.
    • Turn off the heat and deglaze the pan with a few tablespoons of butter, add minced fresh garlic and herbs. 
      Quickly cook the garlic and the herbs. If the foaming butter cooks away, add a splash of stock, wine, or water to help loosen the fond from the bottom of the pan.
    • Cook for 1 hour per inch of thickness.
    • After cooking remove the steaks from their cooking bag to a clean plate patting them dry with clean paper towels. Reserve the juices, or purge, from the bag to be used in a pan sauce if you are making one.
    • Reheat your cast iron pan to smoking hot and sear the steaks on both sides, bringing back the amazingly flavorful crust.
    • Transfer the sous vide steak to a serving plate and make the sauce.
    • To make the sauce add 3 tablespoons of butter to the hot pan, scrape the fond from the bottom of the pan, add the juices from the sous vide bag. To stretch your sauce add ½ cup to 1 cup of stock or red wine to the pan.Allow the sauce to reduce and thicken.
    • Spoon the sauce around the steaks, top with salt and black pepper. I also will add a pat of butter for extra richness.

    Notes

    Red Wine Sauce

    Red wine reduction is one of my favorite sauces to pair with filet mignon. Use these ingredients in making the sauce . Add the butter, saute the shallots, add the flour. Stir. Add the rest of the ingredients. Whisk and reduce.

    • 4 tablespoons unsalted butter
    • ¾ cup finely chopped shallots, from 2-3 large shallots
    • 2 tablespoons all-purpose flour
    • 1-¼ cups red wine
    • 3 cups beef broth
    • 6 fresh thyme sprigs
    • ¼ teaspoon kosher salt
    • ⅛ teaspoon ground black pepper

    Garlic butter
    If you are not making a pan sauce to go along with your steak dollop on some homemade garlic butter. Combine the following ingredients:
    • ½ cup unsalted butter softened
    • ¼ cup fresh parsley, chopped
    • 1-1 ½ teaspoon garlic, chopped
    • 2 tablespoons shallot, chopped
    • 1 tablespoon fresh lemon juice
    • ½ teaspoon salt
    • freshly cracked black pepper to taste
    Want to share when you made this recipe?Follow @SavoringTheGood & tag #STGRecipes!
    Nutrition Facts
    Sous Vide Filet Mignon
    Serving Size
     
    1 steak
    Amount per Serving
    Calories
    158
    % Daily Value*
    Fat
     
    17
    g
    26
    %
    Saturated Fat
     
    11
    g
    69
    %
    Trans Fat
     
    1
    g
    Polyunsaturated Fat
     
    1
    g
    Monounsaturated Fat
     
    5
    g
    Cholesterol
     
    46
    mg
    15
    %
    Sodium
     
    151
    mg
    7
    %
    Potassium
     
    20
    mg
    1
    %
    Carbohydrates
     
    1
    g
    0
    %
    Sugar
     
    1
    g
    1
    %
    Protein
     
    1
    g
    2
    %
    * Percent Daily Values are based on a 2000 calorie diet.
    **Nutritional facts are just estimates. Please utilize your own brand nutritional values to double check against our estimates.
    Like this recipe card? Want one for your site?Check out WP Recipe Maker!

    Sarah Mock of savoringthegood.com headshot 2022

    I am Sarah Mock. Welcome!

    Sarah Mock is a classically trained Chef and graduate of Johnson & Wales University. A culinary blogger for 15 years Sarah helps the home cook prepare her recipes with professional results.

    Get to know me

    Fermented Garlic Honey Recipe

    Honey Fermented Garlic square image

    Fermented garlic honey is a tangy, faintly fizzy garlic and honey recipe made from just two ingredients, left to ferment on the counter instead of just steeping. I keep a jar going year-round for cold and flu season, and after making batch after batch, I have picked up the small details that actually change how it turns out. This takes about 10 minutes of hands-on time, then roughly a month of mostly hands-off fermenting on your counter.

    Honey Fermented Garlic square image

    I keep a jar of this recipe on hand for cold and flu season to help boost my immune system and soothe sore throats when the weather turns cold. Check with your doctor to see if this decision is right for you.

    I grow garlic in my garden to make this recipe along as well as garlic confit for savory recipes. On a good harvest year, I have several bulbs of garlic leftover to make roasted garlic. Once you spread soft cloves of oven-roasted garlic on toast or slices of baguette, you will never go back!

    ⚠️ Warning: Honey garlic should not be given to babies under one year of age.

    Benefits of fermented garlic honey:

    The fermenting process happens at room temperature in a dark spot; you do not need any special equipment to make this.

    Beyond the benefits of honey and garlic on their own, the garlic-infused honey works well stirred into a cup of hot tea, whisked into a salad dressing, or drizzled over roasted vegetables.

    jar full of honey and garlic cloves

    Honey offers an effective and natural alternative to over-the-counter cough medicine. Though time is the most important healer of a sore throat, a spoonful of honey can help relieve the irritation. Source: National Honey Board

    Fermented Garlic Honey vs. a Quick Garlic and Honey Infusion

    Once it is fermented, use the honey and the cloves separately or together.

    Whisk a spoonful of the honey into a salad dressing in place of plain honey for a garlicky depth. Drizzle it over roasted vegetables in the last few minutes of cooking. Stir it into hot tea at the first sign of a sore throat.

    The fermented cloves themselves are softer and milder than raw garlic. Chop one into a marinade, mash it into softened butter, or eat a clove straight off a spoon the way I do!

    Ingredient Notes:

    • Garlic: I use fresh, firm bulbs with the cloves peeled and separated whole. Whole cloves hold their shape and give you that classic candied-garlic bite once the ferment is finished. If you crush a few cloves instead, expect a faster ferment and a softer, slightly mushier texture; see the Cook's Notes below for what I have found when I do that.
    • Honey: Raw, unpasteurized honey is not optional here. It still carries the natural bacteria and wild yeast that pasteurized honey has been heated out of, and that microbial life is what actually drives the fermentation. I use my own raw honey from my hives; if you are buying honey, look for a local beekeeper or a jar labeled raw and unfiltered.

    Recipe Card?

    To find the full printable recipe with specific measurements and directions CLICK HERE to go to the recipe card.

    Substitutions

    Here is what you can swap if you need to adjust this recipe.

    If your grocery store carries pre-peeled garlic, mine comes in a bag in the produce section, you can use that instead of peeling whole bulbs yourself. It saves time on prep, and I have used both without noticing a difference once the cloves are in the honey.

    You can also smash or crush a few cloves before adding them to the jar. I do this from time to time, and that batch ferments noticeably faster because of the extra surface area; the trade-off is that the cloves come out softer and slightly mushier than a whole clove. If you do not care about how the cloves look or feel when you eat them, smashing is fine. If you want the classic whole, golden clove, stick with whole.

    How to Make Fermented Garlic Honey

    Here is exactly how I make this, step by step, using the same loose-lid method every time.

    Fill the jar

    Add the peeled garlic cloves to a clean glass jar.

    Cover with honey

     Pour raw honey over the garlic cloves until they are completely submerged. Run a chopstick or the handle of a spoon through the jar to work out any trapped air pockets.

    ** add additional honey to the jar if the released air drops the level of honey below the garlic cloves.

    Close the lid loosely

    Screw the lid on, but leave it loose enough for gas to escape. This part is not optional; a sealed jar has nowhere for the fermentation gas to go, and that is how you end up with a mess or worse!

    Shake it daily

    Every day or two, tighten the lid, flip the jar over, and shake it to coat every clove in honey. Set it back upright and loosen the lid again before you walk away.

    Watch for the signs

    Within the first week or two, you will start to see tiny bubbles collecting on the surface of the honey and clinging to the cloves. That is fermentation activity, not spoilage.

    clove of garlic after it was fermented in honey, on a white spoon

     Let it finish

    The ferment is ready in about a month. The flavor keeps developing after that: the garlic mellows while staying a bit crisp, and the honey turns noticeably runnier.

    Store it

    Move the finished jar to a cool, dark spot. It will keep for many months, even up to a year.

    Storage Tips

    • Store the finished ferment in a closed container in a dark, cool place.
    • During the first month of fermentation, keep the lid slightly loose so the gasses escaping the garlic can escape the jar instead of building up.
    • Set the jar on a plate or paper plate while it ferments; a bit of honey may "burp" out as it works.

    Seasonal Favorite

    Baked lattice top crust on an apple pie made with the Crisco pie crust recipe, showing flaky layers in the fluted edge.

    This is my award-winning Crisco pie crust recipe; flaky, tender, and made with simple ingredients you already have.

    Crisco Pie Crust

    Frequently asked questions, answers and tips:

    While I try to share all the information you need to make this recipe in your home with restaurant-quality results, there still may be a question or two. Or these are questions I have received from the community about this recipe. I do my best to answer them as clearly as I can. I hope this helps.

    Should I be concerned about botulism?

    Honey is naturally acidic. According to the National Honey Board, the acidity of honey ranges from a pH of about 3.4, with an average of 3.9; the exact acidity depends on the floral source. Botulism spores cannot reproduce at a pH under 4.6, which is well below where honey typically sits.

    Do I need any special fermentation equipment for this?

    No. A clean glass jar is all you need; no airlock, no weights, no special gear.

    Does the jar need to be refrigerated while it ferments?

    No. Fermentation happens at room temperature in a dark spot, like a cabinet or pantry.

    Why did my garlic turn blue or green?

    It is a normal, harmless reaction between sulfur compounds in the garlic and the acid produced during fermentation. It is not mold and does not mean the batch is bad; see the Chef's Notes below.

    My honey is not bubbling. Is something wrong?

    Give it more time first; fermentation with honey can be slow. If it still has not started after a couple of weeks, the most common causes are too much honey relative to garlic, garlic that was very dry to begin with, or honey that turned out to be pasteurized rather than raw. Pasteurized honey will not ferment.

    Can I use minced or chopped garlic instead of whole cloves?

    Yes. It ferments faster because of the extra surface area, but the texture comes out softer and slightly mushier than a whole clove; see the Substitutions section above.

    How long does fermented garlic honey keep once it is finished?

    Stored in a cool, dark place, it holds for many months, even up to a year.

    Is it safe to put raw garlic in honey?

    Yes, as long as you are using raw honey and letting it ferment as described above. Raw honey's low pH is what keeps this safe; see the botulism answer above for the specifics.

    How long should you leave garlic in honey before it's ready?

    About a month for a full ferment. You can technically use it sooner, closer to a week, but the flavor is still developing and the garlic will not have mellowed yet.

    Can I eat fermented garlic honey every day?

    Most people take a clove or a spoonful of the honey daily during cold and flu season. Check with your doctor before adding this to a daily routine, especially if you are on blood thinners or have a garlic allergy.

    Honey Fermented Garlic square image

    Fermented Garlic Honey

    Fermented garlic honey combines raw honey and raw garlic along with a simple fermentation process in a mason jar to make homemade garlic fermented in honey.
    5 from 2 votes
    Print Pin Rate
    Course: Food Tips
    Cuisine: American
    Keyword: Fermented Garlic Honey
    Prep Time: 10 minutes minutes
    Total Time: 10 minutes minutes
    Servings: 40 cloves
    Calories: 31
    Author: Sarah Mock

    Ingredients

    • A 16 oz bottle of Dutch Gold Pure Honey from clover blossoms with a flip-top cap and certification label on the front.1 Cup Honey Raw, unpasturized
    • Whole garlic bulb with white papery skin, lying on its side against a plain white background-a perfect aromatic addition to your next slowcooker sausage casserole.1 Cup Garlic peeled and separated
    US Customary - Metric
    Follow Savoring The Good On PinterestFollow @SavoringTheGood or tag #STGRecipes!

    Instructions

    • To a clean jar, add the peeled garlic cloves.
      1 Cup Garlic
    • Add enough raw honey to completely cover the garlic cloves.
      1 Cup Honey
    • Place the lid on the jar and close the lid loosely, allowing the jar to have a bit of room to 'breathe' as the garlic ferments.
    • Every day or two, tighten the lid on the jar and shake the jar to coat the garlic cloves with honey.
    • Loosen the lid again when you return it to the upright position.
    • You will notice tiny bubbles start to form on the surface of the honey and long the surface of the whole garlic cloves.
    • The honey garlic will be fermented in about a month. The honey ferment flavor will continue to mature over time, the garlic will mellow in intensity while remaining crisp, and the honey will start to thin out and take on a more runny consistency.
    • Store in a cool place for many months or even a year, if not longer.

    Notes

    Ferment for 30 days.
    If your grocery store carries pre-peeled garlic, mine comes in a bag in the produce section, you are able to use that garlic. It takes a little bit out of the prep work of peeling the individual cloves.
    During the first month of fermentation, allow the jar to be slightly loose so that the gasses that escape the garlic as it ferments, can escape the jar.
    Store the jar on a plate or a paper plate during the fermentation process as a bit of the honey my 'burp' out as it ferments.
    Want to share when you made this recipe?Follow @SavoringTheGood & tag #STGRecipes!
    Nutrition Facts
    Fermented Garlic Honey
    Serving Size
     
    2 cloves
    Amount per Serving
    Calories
    31
    % Daily Value*
    Fat
     
    1
    g
    2
    %
    Saturated Fat
     
    1
    g
    6
    %
    Polyunsaturated Fat
     
    1
    g
    Monounsaturated Fat
     
    1
    g
    Sodium
     
    1
    mg
    0
    %
    Potassium
     
    18
    mg
    1
    %
    Carbohydrates
     
    8
    g
    3
    %
    Sugar
     
    7
    g
    8
    %
    Protein
     
    1
    g
    2
    %
    * Percent Daily Values are based on a 2000 calorie diet.
    **Nutritional facts are just estimates. Please utilize your own brand nutritional values to double check against our estimates.
    Like this recipe card? Want one for your site?Check out WP Recipe Maker!
    Sarah Mock of savoringthegood.com headshot 2022

    Sarah's Culinary Insight

    The loose lid is not optional. I have made this both sealed tight and loosely capped with daily burping, and sealed tight is the version I would never recommend; the gas has nowhere to go. Keep the lid loose for the first month, no exceptions.

    Blue or green garlic is not a failure. I have seen it show up in more than one batch, usually just a clove or two. It is a normal reaction between sulfur compounds in the garlic and the acid that builds as the ferment develops; it does not mean the batch is bad.

    Crushing the cloves speeds things up, but you lose the whole-clove look. When I smash a few cloves before adding them to the jar, that batch ferments noticeably faster because of the extra surface area, and the cloves come out softer and slightly mushier. If mouthfeel does not matter to you, smashing works fine.

    I use my own raw honey from my own hives, so I cannot speak firsthand to how a store-bought raw honey or a specialty variety behaves in this ferment. If you are working with a different honey, watch for the same bubbling and thinning; if you do not see either after a couple of weeks, your honey may not be raw enough to ferment.


    Sarah Mock of savoringthegood.com headshot 2022

    I am Sarah Mock. Welcome!

    Sarah Mock is a classically trained Chef and a graduate of Johnson & Wales University. A culinary blogger for 17 years, Sarah helps the home cook prepare her recipes with professional results.

    Get to know me

    as seen in:

    Logos of Hersheyland, ABC News, and Good Day PA are showcased in a seamless row, providing a snapshot of popular brands.

    Hersheyland Nightline Good Day Pa!

    The vibrant design showcases the iconic logos of Pinterest, Rachael Ray, and Jell-O set against a bold red background. Sorry, the provided description doesn't offer enough detail to suggest important SEO keywords.

    Pinterest Rachael JELL-O


    Mississippi Pot Roast Crock Pot

    mississippi pot roast crockpot recipe

    Crockpot Mississippi pot roast is fall-apart tender, rich, and loaded with flavor. My easy slow cooker recipe combines chuck roast, ranch dressing mix, au jus mix, butter, and pepperoncini peppers for a classic Mississippi pot roast that practically cooks itself.

    Oval white dish with shredded Mississippi pot roast crockpot beef in brown gravy, garnished with whole pepperoncini peppers, set on a rustic wooden table with orange napkin and silverware.

    If you love set-it-and-forget-it dinners, this Mississippi pot roast recipe will be a new favorite. You'll get fork-tender beef, a tangy, buttery gravy, and plenty of leftovers that are perfect for sandwiches, baked potatoes, or fries.

    I also have a Mississippi pot roast recipe made in the Instant Pot pressure cooker if you need pot roast on the table in just over an hour. The meat is a bit softer in texture than the slow cooker version.

    My husband loved it!

    Wow! One of the best Pot Roasts I ever made! Will definitely be making this again. Thank you!
    ★★★★★~ Terri (2022)

    What is Mississippi pot roast?

    Mississippi pot roast is a slow cooker pot roast made with a handful of pantry ingredients: chuck roast, dry ranch dressing mix, au jus (or onion soup) mix, butter, and pepperoncini peppers. Everything cooks together low and slow in the crockpot until the beef is incredibly tender and the juices turn into a rich, tangy gravy.

    It's not a traditional pot roast with carrots and potatoes, but more of a cozy, flavorful shredded beef that's perfect piled over mashed potatoes, egg noodles, rice, or crispy french fries.

    Ingredients for Mississippi pot roast:

    mississipi pot roast crock pot ingredients with text overlay

    Recipe Card?

    To find the full printable recipe with specific measurements and directions CLICK HERE to go to the recipe card.

    Substitutions

    If you can't find the Au Jus packet substitute in the French Onions soup mix packet as part of the seasoning.

    • Chuck roast - Look for a good marbled chuck roast. The white marbling is the fat and fat equals flavor.
    • Stock - I use chicken stock, beef stock or even vegetable stock to deglaze the pan when I am searing. If stock is not available water can be substituted.
    • Butter - for a lower-salt recipe use unsalted butter
    • Pepperoncini - I use whole pepperoncini but sliced pepperoncini peppers can be used. Additionally, the hot pepperoncini would add another layer of heat and flavor. Be sure to save the juice from the jar.

    How to make Mississippi pot roast (crockpot)

    This Mississippi pot roast slow cooker method adds one quick step: searing and deglazing, for extra flavor. If you're short on time, use the dump-and-go version below. Have a second slow cooker looking to be used? Toss in ingredients for my Cheesy Potato Soup, and your family will be coming back for seconds.

    cooked mississippi pot roast in a crockpot with juices in the pot

    Sear the meat

    1. Preheat a wide skillet with high sides on high heat and add 1-2 Tablespoons oil to the bottom of the pot.
    2. Sear the meat in the bottom of the pan.
    searing chuck roast in a pan

    Flip The Meat

    Turn meat over and sear on the other sides.

    The meat will easily pull away from the pan when it is properly seared.

    fond of meat in the bottom of a pan

    Transfer

    Remove the meat to a crockpot slow cooker before deglazing the pan.

    deglazing a pan

    Deglaze The Pot

    After the meat is removed from the pan, carefully drain out any excess oil.

    Add the beef broth to the pot, stirring and scraping the bottom of the pan of the stuck on brown bits. Those bits are called fond and are full of flavor and will help enhance the sauce.

    crockpot of roast with mississipi pot roast ingredients on top

    Season

    1. Pour the deglaze liquid over the meat in the slow cooker.
    2. Sprinkle the au jus gravy mix packet and ranch packets over the beef and add the pepperoncini and the juice from the jar of the pepperoncini, and top with the stick of butter.

    Cook

    Close the lid and slow cook on low for 8-12 hours or high for 4-6 hours.

    pieces of cooked roast on a serving plate

    Make the Gravy

    Remove the cooked meat and place on a serving platter.

    flour sprinkled over the sauce in the crockpot ready to be made into a gravy

    Make a Roux

    Turn the heat to high and when the liquid is starting to simmer, sprinkle the flour over the drippings in the pan.

    whisking gravy in a crockpot for mississippi pot roast

    Whisk

    Whisk well until the gravy starts to thicken. Continue to boil for one minute to cook out the starch flavor.

    mississippi pot roast crockpot recipe

    Serve

    Then turn off the pot and add the roast back in or serve the gravy on the side.

    Serve with baked potatoes, mashed potatoes or cooked egg noodles. I would suggest my sous vide potatoes with rosemary.

    Did you make this recipe?

    Do you have feedback that would be helpful to others? If so can help this small business owner by leaving a rating and a review in the comments section? Thank you for being part of the Savoring The Good Community. ~ Sarah

    Dump and Go Instructions

    While I encourage you to sear the meat for extra flavor, you can absolutely make this Mississippi pot roast as a dump-and-go crockpot recipe on busy days.

    1. Add the roast to the Crock pot.
    2. Add the rest of the ingredients leaving out the flour.
    3. Cover and cook on low for 8-12 hours or high for 4-6 hours.
    4. Finish with the gravy making instructions.

    Storage Tips

    • Be sure to cool the extra pot roast completely before storing in an air-tight container in the refrigerator.
    • Use up leftovers within 3 days.
    • I reheat in the microwave but reheating on the stovetop is always a good idea.

    Mississippi pot roast FAQ

    Can I make Mississippi pot roast without searing the meat?

    Yes. Searing adds extra flavor, but you can skip that step and follow the dump-and-go Mississippi pot roast instructions. Just add everything to the crockpot and cook on low for 8-12 hours or high for 4-6 hours.

    Is Mississippi pot roast spicy?

    No, it's more tangy than spicy. Pepperoncini peppers add flavor and a gentle kick, but you can use fewer peppers or mild pepperoncini if you're sensitive to heat. If my kids will eat it...it is NOT spicy!

    What's the best way to serve Mississippi pot roast?

    Serve it over mashed potatoes, egg noodles, rice, or crispy fries. It also makes amazing sandwiches and sliders with a little melted cheese.

    Chef Tip

    My FAVORITE way to serve Mississippi pot roast is over crisp, thick-cut french fries. Kind of like poutine. Check out Thanksgiving poutine for another yummy recipe for poutine.

    mississippi pot roast crockpot recipe

    Crock Pot Mississippi Pot Roast with Pepperoncini and Au Jus

    Mississippi pot roast cooked in crock pot slow cooker makes the most flavorful pot roast.
    5 from 1 vote
    Print Pin Rate
    Course: Beef Recipes
    Cuisine: American
    Prep Time: 15 minutes minutes
    Cook Time: 8 hours hours
    Total Time: 8 hours hours 15 minutes minutes
    Servings: 6 servings
    Calories: 666
    Author: Sarah Mock

    Ingredients

    •  
      1 Chuck Roast 3-4 pounds
    • A 24 fl oz bottle of Wesson vegetable oil with a clear plastic body, white cap, and label featuring fried chicken and product details-perfect for preparing delicious dishes like chipotle carnitas or classic fried favorites.2 Tablespoons Vegetable Oil vegetable oil or olive oil
    •  
      ¼ Cup stock water can be used in place of chicken stock, beef stock
    • Hidden Valley The Original Ranch Seasoning packet, featuring a green landscape and a plate with seasoned chicken and salad. Text on package indicates one packet.1 packet Hidden Valley Ranch Dressing Packet
    •  
      1 packet Au Jus
    •  
      8 individual Pepperoncini
    •  
      ¼ Cup Pepperoncini liquid
    • A rectangular 8 oz package of Kerrygold Pure Irish Butter, unsalted, with a green and gold label and Irish grass-fed cow branding-perfect for creating delicious Saint Patrick's Day cupcakes.1 stick Butter
    US Customary - Metric
    Follow Savoring The Good On PinterestFollow @SavoringTheGood or tag #STGRecipes!

    Instructions

    Sear the meat

    • Preheat a wide skillet with high sides on high heat and add 1-2 Tablespoons oil to the bottom of the pot.
      2 Tablespoons Vegetable Oil, 1 Chuck Roast
    • Sear the meat in the bottom of the pan.
    • Turn meat over and sear on the other sides.
    • The meat will easily pull away from the pan when it is properly seared.
    • Remove the meat to a crockpot slow cooker before deglazing the pan.

    To Deglaze The Pot:

    • After the meat is removed from the pan, carefully drain out any excess oil. Add the stock to the pot, stirring and scraping the bottom of the pan of the stuck on brown bits. Those bits are called fond and are full of flavor and will help enhance the sauce.
      ¼ Cup stock
    • Pour the deglaze liquid over the meat in the slow cooker.
    • Sprinkle the au jus and ranch packets over the beef and add the pepperoncinis and the juice from the jar of the pepperoncinis, and top with butter.
      1 packet Hidden Valley Ranch Dressing Packet, 1 packet Au Jus, 8 individual Pepperoncini, ¼ Cup Pepperoncini liquid, 1 stick Butter
    • Close the lid and cook on low for 8-12 hours or high for 4-6 hours.

    To Make the Gravy:

    • Remove the cooked meat and place on a serving platter.
    • Turn the heat to high and when the liquid is starting to simmer, sprinkle the flour over the drippings in the pan.
    • Whisk well until the gravy starts to thicken. Continue to boil for one minute to cook out the starch flavor.
    • Then turn off the pot and add the roast back in or serve the gravy on the side.
    • Serve with baked potatoes, mashed potatoes or cooked noodles. I would suggest my sous vide potatoes with rosemary.

    Notes

    My FAVORITE way to serve Mississippi pot roast is over crisp, thick-cut french fries. Kind of like poutine. Check out Thanksgiving poutine for another yummy recipe for poutine.
    Want to share when you made this recipe?Follow @SavoringTheGood & tag #STGRecipes!
    Nutrition Facts
    Crock Pot Mississippi Pot Roast with Pepperoncini and Au Jus
    Serving Size
     
    1 serving
    Amount per Serving
    Calories
    666
    % Daily Value*
    Fat
     
    50
    g
    77
    %
    Saturated Fat
     
    23
    g
    144
    %
    Trans Fat
     
    2
    g
    Polyunsaturated Fat
     
    4
    g
    Monounsaturated Fat
     
    22
    g
    Cholesterol
     
    223
    mg
    74
    %
    Sodium
     
    739
    mg
    32
    %
    Potassium
     
    886
    mg
    25
    %
    Carbohydrates
     
    3
    g
    1
    %
    Sugar
     
    1
    g
    1
    %
    Protein
     
    51
    g
    102
    %
    * Percent Daily Values are based on a 2000 calorie diet.
    **Nutritional facts are just estimates. Please utilize your own brand nutritional values to double check against our estimates.
    Like this recipe card? Want one for your site?Check out WP Recipe Maker!

    If you're looking for an easy dessert to finish the meal, my no-bake key lime pie is a reader favorite.


    Sarah Mock of savoringthegood.com headshot 2022

    I am Sarah Mock. Welcome!

    Sarah Mock is a classically trained Chef and a graduate of Johnson & Wales University. A culinary blogger for 17 years, Sarah helps the home cook prepare her recipes with professional results.

    Get to know me

    as seen in:

    Logos of Hersheyland, ABC News, and Good Day PA are showcased in a seamless row, providing a snapshot of popular brands.

    Hersheyland Nightline Good Day Pa!

    The vibrant design showcases the iconic logos of Pinterest, Rachael Ray, and Jell-O set against a bold red background. Sorry, the provided description doesn't offer enough detail to suggest important SEO keywords.

    Pinterest Rachael JELL-O

    Classic Mississippi Pot Roast (Instant Pot Recipe)

    mississippi pot roast in the instant pot square image

    This Mississippi Pot Roast is a game-changer for busy weeknights-tender, flavorful, and ready in a fraction of the time thanks to the Instant Pot. Perfect for family dinners or meal prep!

    mississippi pot roast in the instant pot square image

    Pressure cooker Mississippi pot roast is an easy Instant Pot recipe for beginners.

    Ingredients needed for instant pot Mississippi roast:

    Pot roast is on the table in just over an hour, vs. the 3 to 4 hours it can take cooking in the oven, or 8+ hours in takes in a slow cooker.

    Mississippi Pot Roast (Instant Pot) ingredients with text overlay

    Recipe Card?

    To find the full printable recipe with specific measurements and directions CLICK HERE to go to the recipe card.

    Can I use fresh herbs instead of seasoning packets? 

    Yes, use 1 tablespoon each of dried parsley, dill, and garlic powder for the ranch flavor, and 1 tablespoon beef bouillon for the au jus.

    Make Mississippi pot roast using a pressure cooker

    Two different cooking methods depending on how much time you have. Dump and go, sear and cook methods. Each has benefits.

    chuck roast chunks on a cutting board next to an instant pot

    Prepare the Roast

    If the roast is too large, cut it into 4-6 pieces.

    tongs holding a piece of seared meat

    Sear the Meat

    • Preheat the Instant Pot to Sauté. When the display reads "Hot," add 1-2 tablespoons of oil.
    • Sear the meat on all sides until golden brown, about 3-4 minutes per side.
    • Remove and set aside.
    seared chunks of roast on a plate with tongs

    Deglaze the Pot

    Drain excess oil, then add stock and scrape up the browned bits from the bottom of the pot.

    Mississippi Pot Roast ingredients in the instantpot before the lid is closed

    Pressure Cook

    • Return the meat to the pot. Sprinkle with ranch and au jus packets, then add pepperoncini, juice, and butter.
    • Close the lid, set the steam release knob to Sealing, and pressure cook on High for 60 minutes.
    • Allow a 15-minute natural pressure release, then manually release any remaining pressure.
    Mississippi Pot Roast on a plate

    Remove Meat

    • Remove the cooked meat to a clean plate and make the liquid/drippings into gravy.
    whisking gravy in an instant pot

    Make the Gravy

    Turn on Sauté mode, whisk in flour, and cook until thickened.

    mississippi pot roast crockpot recipe

    Serve

    Serve over mashed potatoes, rice, or thick-cut fries.

    Did you make this recipe?

    Do you have feedback that would be helpful to others? If so can help this small business owner by leaving a rating and a review in the comments section? Thank you for being part of the Savoring The Good Community. ~ Sarah

    Dump and Go Instructions

    1. Add the roast to the Instant pot (still cut it into chunks if it doesn't fit in one piece).
    2. Add the rest of the ingredients leaving out the flour.
    3. Cook on High Pressure for 80 minutes. 15 minute natural release (With a frozen roast increase the cook time to 90 minutes).
    4. Finish with the gravy making instructions.

    Storage Tips for the Beef Roast

    Be sure to cool the extra pot roast completely before storing in an air-tight container in the refrigerator. Use up leftovers within 3 days. I reheat in the microwave but reheating on the stovetop is always a good idea.

    Seasonal Favorite

    Baked lattice top crust on an apple pie made with the Crisco pie crust recipe, showing flaky layers in the fluted edge.

    This is my award-winning Crisco pie crust recipe; flaky, tender, and made with simple ingredients you already have.

    Crisco Pie Crust

    Frequently asked questions about making instant pot Mississippi roast, answers and tips:

    Can I use a frozen roast?

    You can use a frozen piece of meat but I would do the dump and go method. I would also increase the cook time to 90 minutes.

    Chef Tip

    My FAVORITE way to serve Mississippi pot roast is over crisp, thick-cut french fries. Kind of like poutine. Check out Thanksgiving poutine for another yummy recipe for poutine.

    Baked Glazed Ham With Pineapples in a white baking dish.

    Glazed Baked Ham

    Brown Sugar glazed baked ham with fresh pineapple and maraschino cherries

    Glazed Baked Ham

    What other Instant Pot beef recipes should I try?

    For a delicious variety of instant pot beef recipes, consider making Instant Pot beef stew, Instant Pot beef and broccoli, or Instant Pot beef chili. You can add the beef to these recipes using the same method in the given recipe.

    mississippi pot roast in the instant pot square image

    Instant Pot Mississippi Pot Roast (Ready in 1 Hour!)

    Mississippi pot roast cooked in an Instant Pot pressure cooker makes the most flavorful pot roast in a fraction of the time of a crock-pot.
    4.80 from 5 votes
    Print Pin Rate
    Course: Beef Recipes
    Cuisine: American
    Keyword: instant pot mississipi pot roast
    Prep Time: 15 minutes minutes
    Cook Time: 1 hour hour
    Total Time: 1 hour hour 15 minutes minutes
    Servings: 6 servings
    Calories: 666
    Author: Sarah Mock

    Ingredients

    •  
      1 Chuck Roast 3-4 pounds
    • A 24 fl oz bottle of Wesson vegetable oil with a clear plastic body, white cap, and label featuring fried chicken and product details-perfect for preparing delicious dishes like chipotle carnitas or classic fried favorites.2 Tablespoons Vegetable Oil vegetable oil or olive oil
    •  
      ¼ Cup stock water can be used in place of chicken stock, beef stock
    • Hidden Valley The Original Ranch Seasoning packet, featuring a green landscape and a plate with seasoned chicken and salad. Text on package indicates one packet.1 packet Hidden Valley Ranch Dressing Packet
    •  
      1 packet Au Jus
    •  
      8 individual Pepperoncini
    •  
      ¼ Cup Pepperoncini liquid
    • A rectangular 8 oz package of Kerrygold Pure Irish Butter, unsalted, with a green and gold label and Irish grass-fed cow branding-perfect for creating delicious Saint Patrick's Day cupcakes.1 stick Butter
    US Customary - Metric
    Follow Savoring The Good On PinterestFollow @SavoringTheGood or tag #STGRecipes!

    Instructions

    • If your roast is not able to fit into the bottom of the pot, cut into 4-6 pieces.

    Sear the meat

    • Preheat the InstantPot to Sauté. When the display reads "Hot" add 1-2 Tablespoons oil to the bottom of the pot.
      2 Tablespoons Vegetable Oil, 1 Chuck Roast
    • The oil should heat within 30 seconds. Sear the meat on all sides in the bottom of the pan.
    • Turn meat over and sear on the other sides.
    • The meat will easily pull away from the pan when it is properly seared.
    • Remove the meat to a clean plate before deglazing the pan.

    To Deglaze The Pot:

    • after the meat is removed from the pressure cooker, carefully drain out any excess oil. Add the stock to the pot, stirring and scraping the bottom of the pot of the stuck on brown bits. Those bits are full of flavor and will help enhance the sauce.
      ¼ Cup stock
    • Turn off the saute mode of the pot and return the seared meat back to the bottom of the pot and sprinkle the au jus and ranch packets over the beef.
      1 packet Au Jus, 1 packet Hidden Valley Ranch Dressing Packet
    • Add the pepperoncinis and the juice from the jar of the pepperoncinis, and top with cut up butter.
      8 individual Pepperoncini, ¼ Cup Pepperoncini liquid, 1 stick Butter
    • Close lid and set the steam release knob to the Sealing position. Press the Pressure Cook or Manual button (or use dial) then the +/- button to select 60 minutes. High Pressure.
    • When the cook cycle ends, let the Instant Pot sit undisturbed for 15 min to naturally pressure release. (NPR)
    • After the 15 minute release, turn off the pot and manually release the remaining pressure by turning the steam release knob to the Venting position.
    • When the pin in the lid drops back down, open the lid. Remove the cooked meat to a clean plate and make the liquid/drippings into gravy.

    To Make the Gravy:

    • Turn the Sauté function back on.
    • When the liquid is starting to simmer, sprinkle the flour over the drippings in the pan.
    • Whisk well until the gravy starts to thicken. Continue to boil for one minute to cook out the starch flavor.
    • Then turn off the pot and add the roast back in or serve the gravy on the side.
    • Serve with baked potatoes, mashed potatoes or cooked noodles. I would suggest my sous vide potatoes with rosemary.

    Notes

    My FAVORITE way to serve Mississippi pot roast is over crisp, thick-cut french fries. Kind of like poutine. Check out Thanksgiving poutine for another yummy recipe for poutine.
    Want to share when you made this recipe?Follow @SavoringTheGood & tag #STGRecipes!
    Nutrition Facts
    Instant Pot Mississippi Pot Roast (Ready in 1 Hour!)
    Serving Size
     
    1 serving
    Amount per Serving
    Calories
    666
    % Daily Value*
    Fat
     
    50
    g
    77
    %
    Saturated Fat
     
    23
    g
    144
    %
    Trans Fat
     
    2
    g
    Polyunsaturated Fat
     
    4
    g
    Monounsaturated Fat
     
    22
    g
    Cholesterol
     
    223
    mg
    74
    %
    Sodium
     
    739
    mg
    32
    %
    Potassium
     
    886
    mg
    25
    %
    Carbohydrates
     
    3
    g
    1
    %
    Sugar
     
    1
    g
    1
    %
    Protein
     
    51
    g
    102
    %
    * Percent Daily Values are based on a 2000 calorie diet.
    **Nutritional facts are just estimates. Please utilize your own brand nutritional values to double check against our estimates.
    Like this recipe card? Want one for your site?Check out WP Recipe Maker!

    Sarah Mock of savoringthegood.com headshot 2022

    I am Sarah Mock. Welcome!

    Sarah Mock is a classically trained Chef and graduate of Johnson & Wales University. A culinary blogger for 16 years Sarah helps the home cook prepare her recipes with professional results.

    Get to know me

    as seen in:

    Logos of Hersheyland, ABC News, and Good Day PA are showcased in a seamless row, providing a snapshot of popular brands.

    Hersheyland Nightline Good Day Pa!

    The vibrant design showcases the iconic logos of Pinterest, Rachael Ray, and Jell-O set against a bold red background. Sorry, the provided description doesn't offer enough detail to suggest important SEO keywords.

    Pinterest Rachael JELL-O

    Recipes Using Frozen Meatballs (Appetizer Recipes)

    meatball appetizers using frozen meatballs graphic

    Homemade meatballs are delicious when you are making meatball appetizers but sometimes you need to take help from store-bought frozen meatballs.

    meatball appetizers using frozen meatballs graphic

    Frozen Meatball Appetizer Recipes For Party

    These frozen meatball recipes range from classic options like BBQ meatballs and Swedish meatballs to more unique options like buffalo chicken meatball sliders and meatball stuffed mushrooms.

    Some of the recipes require additional of simple ingredients like cheese, vegetables, and sauces, while others simply involve baking or slow-cooking the meatballs in flavorful liquids like grape jelly or teriyaki sauce.

    Each of the recipes has clear instructions and helpful tips, including suggestions for how to adapt the recipes to suit different dietary restrictions or personal preferences. Many of the recipes can be made ahead of time and reheated before serving, making them ideal for entertaining or meal prep.

    Whether you're looking for a simple and classic appetizer or a more creative and adventurous option, there is something for everyone in this collection.

    Helpful Tools:

    crockpot full of lasagna ready to be cooked, top down image
    • Crock-Pot 6-Quart - Digital countdown control lets you program cook times anywhere from 30 minutes up to 20 hours; shifts to warm setting automatically once cook time completes. Easy to use locking lid featuring lid gasket provides extra seal for less mess on the go.
    • Crock-Pot 8 Quart with Little Dipper Food Warmer - Manual Control with HIGH/LOW and WARM cook settings, Includes matching brushed stainless steel Little Dipper Food Warmer, Removable oval stoneware, Dishwasher-safe removable oval stoneware and glass lid
    • Instant Pot Duo Plus 6 Quart - 15 customizable Smart Programs: pressure cook, slow cook, sauté, soup, broth, cake, egg, rice, bean, grain, porridge, oatmeal, sterilize, yogurt and sous vide
    • KitchenAid Digital Countertop Oven with Air Fry - Even-Heat convection technology - heating element design and convection fan ensure the oven is heated to, and stays at the right temperature
    • Rubbermaid Leak-Proof Food Storage - store your leftovers in these clear, leak-proof storage containers. These are the ones I use in my kitchen.

    Seasonal Favorite

    Baked lattice top crust on an apple pie made with the Crisco pie crust recipe, showing flaky layers in the fluted edge.

    This is my award-winning Crisco pie crust recipe; flaky, tender, and made with simple ingredients you already have.

    Crisco Pie Crust

    Appetizer Recipes Using Frozen Meatballs

    These easy appetizers will make for quick weeknight dinners or a great appetizer for game day. Did you know you can make authentic IKEA Sweedish Meatballs?

    Crockpot French Onion Meatballs (Easy Slow Cooker Recipe)

    Crockpot meatballs drenched in melted cheese and infused with the rich flavor of French onion soup, a wooden spoon lifting some out.
    Need a dish that's perfect for parties or a comforting family meal? These Crockpot French Onion Soup Meatballs are bursting with rich, savory flavors and couldn't be easier to make-just toss everything in the slow cooker and let it do the work for you!
    Get Full Recipe

    Crockpot Grape Jelly Meatballs

    Grape-Jelly-Meatballs
    Grape Jelly Meatballs can be served as a main course or an appetizer for game days! These crockpot grape jelly meatballs are easy to make and loved by all!
    Get Full Recipe

    Slow Cooker Cranberry Meatballs

    Sweet and tangy, these slow cooker cranberry meatballs make a delicious appetizer loved by both kids and adults for any party.
    Get Full Recipe

    Sweet Gochujang Meatballs Appetizer - Instant Pot or Regular

    Sweet Gochujang Meatballs appetizer using frozen cocktail meatballs with garlicky maple gochujang sauce. Recipe for Instant pot, Regular and slow cooker.
    Get Full Recipe

    Crockpot Apple Butter Meatballs with Bourbon

    Crockpot-Apple-Butter-Meatballs.
    Make these crockpot apple butter meatballs with bourbon for your next party. They're incredibly easy to make and are bursting with flavor.
    Get Full Recipe

    Grape Jelly Meatballs

    Crockpot grape jelly meatballs are a sweet and spicy party appetizer that takes just 4 ingredients to whip up. These meatballs are always a crowd-pleaser!
    Get Full Recipe

    Meatball Stuffed Shells

    Meatball-stuffed-shells-main-with-spoon
    Pasta shells are filled with a ricotta cheese mixture, topped with marinara sauce and stuffed with Italian style meatballs to make Meatball Stuffed Shells.
    Get Full Recipe

    Bacon Wrapped Meatballs

    These delicious bacon wrapped meatballs are always a crowd pleaser! They're the perfect easy appetizer for any occasion!
    Get Full Recipe

    Hot Pepper Jelly Meatballs

    Frozen meatballs in a sauce on a plate with a fork, served as an appetizer.
    Hot Pepper Jelly Meatballs turns frozen meatballs and 4 other simple ingredients into a sweet and spicy appetizer that friends and family will love! Simply toss the ingredients into the crockpot and your work is done!
    Get Full Recipe

    Cranberry Meatballs Appetizer

    Crockpot cranberry meatballs are tasty party appetizers.
    Get Full Recipe

    Easy Meatball Bites (Wrapped in Crescent Dough)

    These are the easiest and tastiest dough wrapped meatball bites around! Adults and kid alike will marvel at how delicious these are to enjoy!
    Get Full Recipe

    Easy Crockpot Meatballs Recipe

    This easy crockpot meatballs recipe is an easy weekday meal as well as a great game day appetizer.
    Get Full Recipe

    Slow Cooker Teriyaki Meatballs

    Want an easy dinner to throw in the slow cooker? Try this drool worthy recipe for slow cooker teriyaki meatballs along with a pot of rice!
    Get Full Recipe

    Crockpot Meatballs

    Crockpot meatballs are a simple 4-ingredient recipe that combines basic ingredients you have on hand to make an easy meal that's tender, juicy and a fan favorite! Serve them as a meal or as an appetizer for a party - you'll have everyone asking for more!
    Get Full Recipe

    How To Cook Frozen Meatballs In Air Fryer

    air-fryer-frozen-meatballs.
    Air fryer frozen meatballs are easy to cook and make the perfect snack or appetizer and can be coated or dipped into various sauces.
    Get Full Recipe

    5 Minute Instant Pot Party Meatballs

    Instant Pot Party meatballs are made with frozen meatballs, grape jelly, and barbeque sauce to create the perfect appetizer for all your parties that is prepped in less than 5 minutes.
    Get Full Recipe

    Easy Korean Meatballs (Instant Pot)

    Easy-Korean-Meatballs
    These glazed Korean meatballs are easy to prepare and take minutes to cook! Enjoy the flavors of Gochujang, Hoisin & Soy sauce in one delicious, meaty bite.
    Get Full Recipe

    Slow Cooker Swedish Meatball Recipe

    This slow cooker Swedish meatball recipe is made using frozen meatballs, so it goes together in just minutes. The results are tender meatball
    Get Full Recipe

    Hot Pepper Jelly Smoked Meatballs

    Hot Pepper Jelly Smoked Meatballs
    These Hot Pepper Jelly Smoked Meatballs are the perfect appetizer all Summer long. Make these bacon wrapped meatballs on the grill, smoker, or in the oven.
    Get Full Recipe

    Nashville Hot Chicken Meatballs (Slow Cooker)

    Can't handle the heat of a full Nashville Hot Chicken Sandwich? These hot chicken meatballs are tender, delicious, the perfect dose of heat!
    Get Full Recipe

    Crock Pot Hawaiian Meatballs

    Crock Pot Hawaiian Meatballs
    Hawaiian Meatballs smothered in a sweet tangy sauce with pineapple and fresh ginger are cooked low and slow in the crock pot.
    Get Full Recipe

    Meatballs with Chimichurri Sauce

    This South American condiment, ­featuring fresh cilantro and parsley, is more than just a sauce for tossing with meatballs. You'll want plenty for extra dipping.
    Get Full Recipe

    Other Appetizers to try:

    • Fried goat cheese - an easy appetizer, a delicious topping to a salad or served on your favorite burger. This recipe can be made into fried goat cheese disks or fried goat cheese balls. 
    • Cream cheese sausage balls - delicious appetizer, perfect for holiday parties or game day snacking.
    • Brazilian cheese bread recipe - use tapioca flour or tapioca starch and freshly grated parmesan cheese. They are best when they are served warm, fresh out of the oven.
    • Crab corn fritters recipe - With the help of a box of jiffy corn muffin mix this delicious corn fritter recipe is ready for summer parties, backyard barbecues or even game day!
    • Fried pickle spears - one of my favorite Disney Snacks and with this easy copycat recipe, you can now make Disneyland fried pickles any time you want!
    • Buffalo chicken dip egg rolls - the combination of all the buffalo chicken dip ingredients, wrapped in an egg roll wrapper and fried to a crisp.

    🍱 More Recipes To Explore

    Appetizer Recipes

    • A white bowl filled with finely chopped cranberry salsa, garnished with cilantro, sits next to crackers on a white surface-a vibrant and refreshing twist for your next appetizer spread.
      Cranberry Salsa
    • A buffet table with assorted appetizers, including sliders, bruschetta, skewers, shrimp, and vegetable cups, arranged neatly on wooden boards and trays.
      How Many Appetizers Per Person: Serving Guide & Easy Recipes
    • A hand holds a slice of bread topped with a cheesy caramelized onion dip with bacon, with more of the savory dip visible in a dish in the background.
      Caramelized Onion Dip with Bacon
    • A jar filled with marinated mozzarella balls in olive oil, herbs, and spices, placed on a rustic wooden surface.
      Marinated Mozzarella Balls
    See more Appetizer Recipes →

    Sarah Mock of savoringthegood.com headshot 2022

    I am Sarah Mock. Welcome!

    Sarah Mock is a classically trained Chef and graduate of Johnson & Wales University. A culinary blogger for 15 years Sarah helps the home cook prepare her recipes with professional results.

    Get to know me

    Spanish Appetizer Recipes

    Here are some easy Spanish appetizer recipes for your next tapas party. Pair these easy Spanish tapas recipes with a bottle of Spanish red wine and a loaf of fresh, crusty bread and you will make a meal out of these simple recipes.

    Spanish Appetizer Recipes square graphic with text overlay

    It probably was in college when I learned what a Tapa was. Small plates of intensely flavored, mostly savory sometimes sweet, appetizers or snacks. My kind of food! Tapas are native to Spain and can be served warm or cold, depending on the recipe.

    If you are a fan of charcuterie and cheese boards Spanish tapas are for you! Make a few of the recipes and make a meal out of them. Assign a recipe to different friends and have them bring them to a potluck style tapas party.

    More appetizers to try:

    • Fried goat cheese - an easy appetizer, a delicious topping to a salad or served on your favorite burger. This recipe can be made into fried goat cheese disks or fried goat cheese balls. 
    • Cream cheese sausage balls - delicious appetizer, perfect for holiday parties or game day snacking.
    • Brazilian cheese bread recipe - use tapioca flour or tapioca starch and freshly grated parmesan cheese. They are best when they are served warm, fresh out of the oven.
    • Crab corn fritters recipe - With the help of a box of jiffy corn muffin mix this delicious corn fritter recipe is ready for summer parties, backyard barbecues or even game day!
    • Fried pickle spears - one of my favorite Disney Snacks and with this easy copycat recipe, you can now make Disneyland fried pickles any time you want!
    • Buffalo chicken dip egg rolls - the combination of all the buffalo chicken dip ingredients, wrapped in an egg roll wrapper and fried to a crisp.

    Appetizer Recipes From Spain:

    This collection of Spanish appetizer recipes is perfece for those who want to impress their guests with delicious and easy-to-make appetizers. You'll find a variety of recipes, from classic favorites like tortilla española and patatas bravas to more unique options like chorizo-stuffed dates and garlic shrimp.

    Each recipe comes with clear instructions and helpful tips, making it easy to follow along even if you're new to cooking. Whether you're hosting a party or just looking for some new appetizer ideas, this collection has got you covered!

    Warm Olives

    warm olive appetizer in a white bowl with orange peel and rosemary
    This is a super simple recipe that can be made with a few ingredients you probably already have in your pantry such as jarred olives, olive oil, rosemary, garlic, and aromatics. 
    Get Full Recipe

    Easy 4 Minute Olive Tapenade

    Olive tapenade on bread with cheese
    This easy olive tapenade comes together in minutes with olives, garlic, capers, and olive oil for a bold, briny spread that's perfect on crostini, sandwiches, and snack boards.
    Get Full Recipe

    Oven-Roasted Patatas Bravas

    This recipe is inspired by one of my favorite Spanish tapas, Patatas Bravas. Crispy oven-roasted potatoes topped with smokey tomato aioli!
    Get Full Recipe

    Patatas Bravas

    This is a simple patatas bravas recipe with salsa brava sauce. It's one of the most popular snacks in Spain and worth giving a go. Step-by-step photos are included!
    Get Full Recipe

    Pan con Tomate

    Pan con tomate or bread with tomato is a classic Spanish appetizer of ripe tomatoes and toasted bread with olive oil, garlic, and sea salt!
    Get Full Recipe
    Glasses of red sangria with fruit slices and berries, garnished with lemon, sit on a table alongside a plate of fresh fruit.

    Spanish Classic!

    Red Sangria

    Transforms your favorite bottle of red wine into a party-worthy cocktail.

    Red Sangria

    Salmorejo, Two Ways

    Salmorejo is a Spanish dish similar to gazpacho but, a lot thicker, more of a dip like consistency. A cold, salty, garlicky tomato soup with delicious toppings that is best eaten with crusty bread. Sound good?
    Get Full Recipe

    Seasonal Favorite

    Baked lattice top crust on an apple pie made with the Crisco pie crust recipe, showing flaky layers in the fluted edge.

    This is my award-winning Crisco pie crust recipe; flaky, tender, and made with simple ingredients you already have.

    Crisco Pie Crust

    Gambas al Ajillo (Spanish Garlic Shrimp)

    How does a sizzling platter of garlicky shrimp goodness sound? Grab some bread for sopping and cook this Spanish tapas, Gambas al Ajillo!
    Get Full Recipe

    Ceviche Shrimp Cocktail

    This spicy ceviche shrimp cocktail is a delicious appetizer or dip! Low-carb and keto friendly.
    Get Full Recipe

    Manchego Cheese - Fried

    This is an easy recipe for fried manchego cheese tapas. It's a simple Spanish appetizer that can be prepped ahead of time and fried right before serving!
    Get Full Recipe

    Gazpacho-- Cold Spanish Soup

    What is gazpacho? My favorite thing to eat during the summer is Gazpacho, a cold Spanish soup from the South of Spain. For me, eating spoonfuls of
    Get Full Recipe

    Spanish Meatballs (Albondigas Tapas)

    Spanish Meatballs (Albondigas Tapas)
    Spanish Meatballs (or, Spanish Albondigas) cooked in a delicious smoky tomato sauce, make a perfect tapas dish!
    Get Full Recipe

    Authentic Spanish Tortilla

    A Spanish tortilla is a fusion of an omelet and a frittata. It is made of layers and layers of crispy potatoes and onions held together with eggs and cooked with tons of olive oil.
    Get Full Recipe

    Chorizo Sweet Potato Tortilla Bites

    Chorizo Sweet Potato Spanish Tortilla Tapas are a sweet, smoky, spicy twist on the classic Spanish tapas recipe, tortilla Espanola.
    Get Full Recipe

    Spanish Jamón Croquetas

    Spanish Jamón Croquetas are creamy, decadent ham-infused crunch balls.
    Get Full Recipe

    Escalivada (Grilled Vegetables)

    Simple, easy to prep, and easy to cook, escalivada is the perfect side dish for any occasion. Don't just take our word for it, though. Let's get cracking on a recipe for escalivada so you can see just how delicious it is for yourself.
    Get Full Recipe

    Catalan Style Spinach

    A simple Spanish spinach tapas dish from Spain's Catalan region. Serve it as tapas or a vegetable side dish with crusty bread.
    Get Full Recipe

    Albondigas - Spanish Meatballs

    Albondigas, or Spanish Meatballs, served in a rich tomato sauce are perfect for sharing as part of a tapas spread alongside beer or wine.
    Get Full Recipe

    Spanish Omelette (Tortilla Española)

    You just need five ingredients for this easy Spanish potato omelette! It's the perfect budget-friendly dinner with a side salad and bread.
    Get Full Recipe

    Ajillo Mushrooms (Spanish garlic mushrooms)

    Ajillo Mushrooms are an easy mushroom tapas recipe. Rich with garlic and parsley, they are ready in under 10 minutes.
    Get Full Recipe

    Asparagus with Smoked Alioli

    My Spanish dish Asparagus with Smoked Alioli is a marriage made in smoky, creamy heaven. The colour and flavour of Spain on a plate!
    Get Full Recipe

    Spanish Style Silverbeet with Chickpeas

    Taking inspiration from a traditional Spanish tapas dish, silverbeet leaves and stalks are panfried, and mixed with chickpeas, garlic breadcrumbs and fresh tomatoes.
    Get Full Recipe

    Gazpacho - Vegan

    In the summer heat, there are few meals more refreshing than the incredibly tasty chilled soup known as gazpacho, and I have just the recipe for you.
    Get Full Recipe

    Reader Favorites

    • Pear butter in a glass canning jar with spices to the side and a whole pear to the right of the jar
      Pear Sauce Recipe
    • lasagna roll up on a serving fork coming out of the full pan, cheese pulling
      Lasagna Roll Ups Recipe
    • Four tacos filled with shredded meat from a delicious Mojo Pork Recipe, garnished with cilantro, and accompanied by lime wedges on a white plate.
      Mojo Pork Recipe
    • Sous vide eggs on toast, broken to show the runny yolk
      Sous Vide Poached Eggs: 60°C or 63°C

    Appetizer Recipes

    • Crockpot meatballs drenched in melted cheese and infused with the rich flavor of French onion soup, a wooden spoon lifting some out.
      French Onion Meatballs in the Crockpot (Simple Recipe)
    • Close-up of Texas Twinkies-bacon-wrapped jalapeños stuffed with cream cheese and shredded meat-stacked invitingly on a plate.
      Texas Twinkies
    • A bowl of cream cheese and fried dill pickle dip topped with crispy breadcrumbs, accompanied by pretzel chips on the side.
      Fried Pickle Dip Recipe
    See more Appetizer Recipes →

    Sarah Mock of savoringthegood.com headshot 2022

    I am Sarah Mock. Welcome!

    Sarah Mock is a classically trained Chef and graduate of Johnson & Wales University. A culinary blogger for 15 years Sarah helps the home cook prepare her recipes with professional results.

    Get to know me

    as seen in:

    Logos of Hersheyland, ABC News, and Good Day PA are showcased in a seamless row, providing a snapshot of popular brands.

    Hersheyland Nightline Good Day Pa!

    The vibrant design showcases the iconic logos of Pinterest, Rachael Ray, and Jell-O set against a bold red background. Sorry, the provided description doesn't offer enough detail to suggest important SEO keywords.

    Pinterest Rachael JELL-O


    Kentucky Bourbon Balls

    Bourbon Balls Kentucky version with pecan garnish

    This bourbon balls recipe is the Kentucky bourbon balls I learned to make in culinary school. 5 ingredients are all you need to make hand-made homemade balls for the holiday season.

    Bourbon Balls Kentucky version with pecan garnish

    This holiday treat is something my family makes each year to give out as a homemade holiday food gift. This year we added soft, salted caramels to the cookie. New to my cookie tray this year will be Biscoff Butter Cookies.

    • These are sent to the office every year and EVERYONE asks for the recipe.
    • This batch makes a LOT of balls (75 in fact!) but this recipe can be halved or doubled.

    So delicious! A good strong bourbon flavor, but not overwhelming. These are way better than any store-bought ones I have had.

    ★★★★★ ~ Leigh M

    Ingredients needed for old fashioned bourbon pecan balls:

    ingredients for Bourbon Balls on a wooden surface with text overlays

    Recipe Card?

    To find the full printable recipe with specific measurements and directions CLICK HERE to go to the recipe card.

    Ingredient notes:

    • Pecans - chopped and toasted to add extra nutty flavor. Save some for chopped pecans for garnish.
    • Bourbon - use your favorite brand but we all know good bourbon comes from Kentucky. We usually have Maker's mark or Woodford Reserve on our bar cart.
    • Powdered sugar - also known as 10x sugar or confectioners sugar. Read up on other Baking definitions.
    • Butter - I use salted butter but you are welcome to use sweet cream butter. I think the touch of salt helps balance the sweetness.
    • Chocolate - I am using chocolate chips to coat the pecan balls. Other coating chocolate or black chocolate can also be used.

    Garnishes

    bunch of bourbon balls on a piece of parchment
    • Pecan half - use a pecan half for the garnish if you are feeling extra fancy but a broking piece will work as well.
    • Flake Salt - totally optional but salt is the perfect complement to chocolate.
    • Decorative chocolate transfer sheets - when dipping the balls into chocolate, rest them on the transfer sheet. Once set, the decorative chocolate will adhere to the bottom of the ball.
    • Cocoa Powder - dusting of dark cocoa powder makes for a simple topping.

    Substitutions

    • Pecans - walnuts
    • Bourbon - rum
    • Chocolate - white chocolate

    How to make bourbon balls

    pecan Bourbon Balls on a parchment paper with garnished of pecans and salt
    1. Chop the pecans and measure out one cup. Toast the pecans for an added layer of flavor.
      pecans soaking in bourbon
    2. Soak the nuts in the bourbon for a minimum of 2 hours. Overnight if you have the time to get that good bourbon flavor throughout the chopped nuts.
      butter and powdered sugar in a stand mixer
    3. Cream together the softened butter and the powdered sugar.
      pecans and borbon in powdered sugar and butter in a stand mixer
    4. Add in the soaked pecans and bourbon.
      Bourbon Ball ingredients mixed in a stand mixer
    5. Mix until combined. Check to make sure the consistency of the dough is not too sticky or too dry.
      showing the texture of the inside of the Bourbon Balls
    6. It should form a ball when squeezed.
      Bourbon Balls scooped on a tray
    7. Using a medium scoop, portion out the dough onto a clean baking sheet.
    8. Chill the dough for 30 minutes.
      Bourbon Balls rolled in balls
    9. Roll the bourbon balls to a smooth ball.
    10. Return to the fridge and refrigerate for 30 minutes.
    11. Melt chocolate over a double boiler, being sure not to burn the chocolate.
    12. Dip each ball into the chocolate, coating the entire ball, tap to remove excess, and place on parchment paper or the decorative chocolate transfer sheet.
    13. While the chocolate is still soft, garnish with a piece of pecan and a sprinkle of flake salt.
    14. Return to the refrigerator until the chocolate sets.
    15. Store in an air-tight container.

    Did you make this recipe?

    Do you have feedback that would be helpful to others? If so can help this small business owner by leaving a rating and a review in the comments section? Thank you for being part of the Savoring The Good Community. ~ Sarah

    How to store bourbon balls

    Store the finished Kentucky bourbon balls recipes in an air-tight container. I use the Rubbermaid Brilliance Food Storage Containers because they truly are air-tight.

    I also store them in the refrigerator. Allow them to come to room temperature before serving for the best flavor profile.

    Seasonal Favorite

    Baked lattice top crust on an apple pie made with the Crisco pie crust recipe, showing flaky layers in the fluted edge.

    This is my award-winning Crisco pie crust recipe; flaky, tender, and made with simple ingredients you already have.

    Crisco Pie Crust

    Frequently asked questions, answers and tips:

    Can you get drunk on Bourbon Balls?

    It would take a LOT of bourbon balls to get a grown adult drunk. The ratio of alcohol to other ingredients will not get you intoxicated. You probably would get throw up sick before you got drunk.

    Is the alcohol cooked out of bourbon balls?

    This recipe for bourbon balls is a no-bake recipe. There is no heat and the alcohol is not cooked out of the balls.

    Bourbon Balls Kentucky version with pecan garnish

    No-Bake Kentucky Bourbon Balls (5 Ingredients)

    This bourbon balls recipe is the Kentucky bourbon balls I learned to make in culinary school.
    5 from 9 votes
    Print Pin Rate
    Course: Dessert
    Cuisine: American
    Keyword: Kentucky Bourbon Balls
    Prep Time: 2 hours hours
    Cook Time: 30 minutes minutes
    Total Time: 2 hours hours 30 minutes minutes
    Servings: 75 Balls
    Calories: 165
    Author: Sarah Mock

    Ingredients

    •  
      1 Cup chopped pecans
    •  
      1 Cup bourbon
    • A rectangular 8 oz package of Kerrygold Pure Irish Butter, unsalted, with a green and gold label and Irish grass-fed cow branding-perfect for creating delicious Saint Patrick's Day cupcakes.¾ Cup Butter
    • A 4-pound bag of Domino Confectioners Sugar labeled as 10-X powdered pure cane sugar in yellow and blue packaging-perfect for creating festive Saint Patrick's Day cupcakes.3 Pounds Powdered Sugar
    •  
      32 oz chocolate chips
    US Customary - Metric
    Follow Savoring The Good On PinterestFollow @SavoringTheGood or tag #STGRecipes!

    Instructions

    • Chop the pecans and measure out one cup. Toast the pecans for an added layer of flavor.
      1 Cup chopped pecans
      Pecans are toasted in a pan on a stove.
    • Soak the nuts in the bourbon for a minimum of 2 hours. Overnight if you have the time.
      1 Cup bourbon
      pecans soaking in bourbon
    • Cream together the softened butter and the powdered sugar.
      ¾ Cup Butter, 3 Pounds Powdered Sugar
      A stand mixer bowl with cookie dough and a paddle attachment, perfect for whipping up bourbon balls, sits on a rustic wooden surface.
    • Add in the soaked pecans and bourbon.
      A stand mixer bowl with cookie dough and a paddle attachment, perfect for whipping up bourbon balls, sits on a rustic wooden surface.
    • Mix until combined. Check to make sure the consistency of the dough is not too sticky or too dry.
      showing the texture of the inside of the Bourbon Balls
    • It should form a ball when squeezed.
      showing the texture of the inside of the Bourbon Balls
    • Using a medium scoop, portion out the dough onto a clean baking sheet.
      Bourbon Balls scooped on a tray
    • Chill the dough for 30 minutes.
      Bourbon Balls scooped on a tray
    • Roll the bourbon balls to a smooth ball. Return to the refrigerator for 30 minutes.
      A baking sheet with rows of unbaked cookie dough balls, reminiscent of bourbon balls, containing chocolate chips and arranged neatly on a wooden surface.
    • Melt chocolate over a double boiler, being sure not to burn the chocolate.
      32 oz chocolate chips
      melted chocolate in a glass bowl on a white surface.
    • Dip each ball into the chocolate, coating the entire ball, tap to remove excess, and place on parchment paper or the decorative chocolate transfer sheet.
    • While the chocolate is still soft, garnish with a piece of pecan and a sprinkle of flake salt.
      pecan Bourbon Balls on a parchment paper with garnished of pecans and salt
    • Return to the refrigerator until the chocolate sets.
      pecan Bourbon Balls on a parchment paper with garnished of pecans and salt
    • Store in an air-tight container.
    Want to share when you made this recipe?Follow @SavoringTheGood & tag #STGRecipes!
    Nutrition Facts
    No-Bake Kentucky Bourbon Balls (5 Ingredients)
    Serving Size
     
    2 ball
    Amount per Serving
    Calories
    165
    % Daily Value*
    Fat
     
    6
    g
    9
    %
    Saturated Fat
     
    3
    g
    19
    %
    Trans Fat
     
    1
    g
    Polyunsaturated Fat
     
    1
    g
    Monounsaturated Fat
     
    1
    g
    Cholesterol
     
    7
    mg
    2
    %
    Sodium
     
    25
    mg
    1
    %
    Potassium
     
    7
    mg
    0
    %
    Carbohydrates
     
    27
    g
    9
    %
    Sugar
     
    25
    g
    28
    %
    Protein
     
    1
    g
    2
    %
    * Percent Daily Values are based on a 2000 calorie diet.
    **Nutritional facts are just estimates. Please utilize your own brand nutritional values to double check against our estimates.
    Like this recipe card? Want one for your site?Check out WP Recipe Maker!

    Sarah Mock of savoringthegood.com headshot 2022

    I am Sarah Mock. Welcome!

    Sarah Mock is a classically trained Chef and graduate of Johnson & Wales University. A culinary blogger for 15 years Sarah helps the home cook prepare her recipes with professional results.

    Get to know me

    How To Roast Sunflower Seeds

    roasted sunflower seeds on a non stick baking pan square image

    Here are two different ways how to roast sunflower seeds. Roast sunflower seeds in the oven or in a pan on the stovetop. Bring out the amazing nutty flavor with just a bit of heat and time.

    roasted sunflower seeds on a non stick baking pan square image

    I will toast sunflower seeds when I make my Asian ramen noodle salad, or almondina mixed nut raisin thin cookie crisp or roast them before I turn them into sunflower butter. That recipe is very similar to my homemade soy nut butter.

    Ingredients needed:

    raw sunflower seeds in a bag from the store
    • Sunflower seeds - shelled, unsalted

    Recipe Card?

    To find the full printable recipe with specific measurements and directions CLICK HERE to go to the recipe card.

    Helpful Kitchen Tools

    • Rimmed baking sheet
    • Parchment paper

    How to roast raw sunflower seeds

    example of raw sunflower seeds vs roasted sunflower seeds with text overlay

    Dry roasting sunflower seeds will release their natural oils so they smell delicious and look shiny. Toasting raw seeds will take seeds from dull to delicious in a few minutes.

    Roasting sunflower seeds will bring out the delicious nutty flavors. If you have not enjoyed shelled sunflower seeds before, they may have needed to be toasted.

    How To Toast Sunflower Seeds - Oven Method

    1. Preheat the oven to 350 degrees and arrange shelled raw sunflower seeds in a single layer on a rimmed cookie sheet.raw sunflower seeds on a sheet pan ready to be roasted
    2. Toast sunflower seeds in a preheated oven on a baking sheet for 5 minutes.
    3. Open the oven and stir or shake the pan so the nuts brown evenly without burning. The nuts should be starting to toast and start to smell nutty.
      sheet pan of roasted sunflower seeds with a red towel as a hot pad
    4. Continue to roast the seeds in the hot oven for an additional 2-4 minutes. Keep an eye on them until the seeds are golden in color.
      toasted roasted sunflower seeds cooling on a plate
    5. Remove the seeds from the pan and cool on a plate. By transferring them from the pan, they will stop cooking and prevent burning.

    How To Roast Sunflower Seeds- Stovetop Pan Method

    1. In a dry pan, sprinkle the raw sunflower seeds in a single layer.raw sunfowers seeds in a pan on the stove
    2. Set the heat to medium heat and allow the seeds to warm to the touch. About 4 minutes.
    3. Stir, shake or flip the seeds as they continue to toast.
      toasted sunflower seeds in a pan on the stove
    4. Continue to roast the seeds in the pan, continually moving them until the desired golden brown color is achieved.
    5. Remove the seeds and cool on a plate. By transferring them from the pan, they will stop cooking and prevent burning from the carryover heat from the pan.

    How to make Sunflower Seed Butter

    Sunflower butter is a delicious, allergy-friendly alternative to peanut butter and other tree nut kinds of butter. This sunflower butter recipe has no added oil and is ready in less than 5 minutes. Hop on over to my sunflower butter recipe post. 

    How to boil the seeds of whole sunflower kernels to remove the seeds for roasting.

    1. Fill a medium saucepan with water.
    2. Add two tablespoons of table salt and one cup of sunflower seeds with their shells still on.
    3. Bring the water to a boi, reduce the heat to a simmer and let the seeds cook for 15 to 20 minutes.
    4. Drain the seeds and rinse them with cold water.
    5. Spread the seeds out on a baking sheet and let them dry completely.
    6. Once the seeds are dry, use your fingers to crack open the shells and remove the seeds.

    Tips:

    • Make sure to use a medium saucepan so that the seeds have enough room to cook evenly.
    • Rinse the seeds with cold water to stop the cooking process and make them easier to handle.
    • Dry the seeds completely before cracking them open to avoid any moisture that could cause them to spoil.
    • Be patient and take your time when cracking open the shells to avoid crushing the seeds inside.

    Store the seeds

    Store cooled, roasted shelled sunflower seeds in a closed airtight container for 4-5 months in the pantry or up to a year in the freezer.

    Different Seasonings for sunflower seeds:

    • Sweet and spicy: Combine brown sugar, chili powder, ground cumin, cinnamon, ground cloves, cayenne pepper, salt, and dried chili flakes.
    • Spicy: Sprinkle the seeds with chili powder, cayenne pepper, black pepper, red pepper flakes, or a mixture of all of them.
    • Savory: Use salt, garlic powder, or dry barbecue seasoning.
    • Seasoned Salt

    Chef Tip

    Use a piece of parchment paper on the baking tray to help with easy cleanup.

    Frequently asked questions, answers and tips:

    Will roasted sunflower seeds grow?

    No, roasted sunflower seeds will not grow because they have been heat-treated, which destroys the seed's ability to germinate and grow. If you want to grow sunflowers, you will need to start with raw, unroasted sunflower seeds. These can be purchased at a garden center or online seed supplier.

    roasted sunflower seeds on a non stick baking pan square image

    How To Roast Sunflower Seeds (Oven or Skillet)

    Here are two different ways how to roast sunflower seeds. Roast sunflower seeds in the oven or in a pan on the stovetop. Bring out the amazing nutty flavor with just a bit of heat and time.
    4.50 from 2 votes
    Print Pin Rate
    Course: Food Tips
    Cuisine: American
    Prep Time: 1 minute minute
    Cook Time: 8 minutes minutes
    Servings: 8 servings
    Calories: 98
    Author: Sarah Mock

    Ingredients

    • 1 Cup sunflower seeds raw, shelled
    US Customary - Metric
    Follow Savoring The Good On PinterestFollow @SavoringTheGood or tag #STGRecipes!

    Instructions

    Oven Method

    • Preheat the oven to 350 degrees and arrange shelled raw sunflower seeds in a single layer on a rimmed cookie sheet.
      1 Cup sunflower seeds
    • Toast sunflower seeds in a preheated oven on a rimmed baking sheet for 5 minutes.
    • Open the oven and stir or shake the pan so the nuts brown evenly without burning. The nuts should be starting to toast and start to smell nutty.
    • Continue to roast the seeds in the hot oven for an additional 2-4 minutes. Keep an eye on them until the seeds are golden in color.
    • Remove the seeds from the pan and cool on a plate. By removing the seeds from the pan, they will stop cooking and prevent burning.

    Stove Top Pan Method

    • In a dry pan, sprinkle the raw sunflower seeds in a single layer. Set the heat to medium heat and allow the seeds to warm to the touch. About 4 minutes.
    • Stir, shake or flip the seeds in the pan as they continue to toast. Continue to roast the seeds in the pan, continually moving them until the desired golden brown color is achieved.
    • Remove the seeds from the pan and cool on a plate. By removing the seeds from the pan, they will stop cooking and prevent burning from the caryover heat from the pan.
    Want to share when you made this recipe?Follow @SavoringTheGood & tag #STGRecipes!
    Nutrition Facts
    How To Roast Sunflower Seeds (Oven or Skillet)
    Serving Size
     
    2 Tablespoons
    Amount per Serving
    Calories
    98
    % Daily Value*
    Fat
     
    9
    g
    14
    %
    Saturated Fat
     
    1
    g
    6
    %
    Polyunsaturated Fat
     
    4
    g
    Monounsaturated Fat
     
    3
    g
    Sodium
     
    2
    mg
    0
    %
    Potassium
     
    108
    mg
    3
    %
    Carbohydrates
     
    3
    g
    1
    %
    Sugar
     
    1
    g
    1
    %
    Protein
     
    3
    g
    6
    %
    * Percent Daily Values are based on a 2000 calorie diet.
    **Nutritional facts are just estimates. Please utilize your own brand nutritional values to double check against our estimates.
    Like this recipe card? Want one for your site?Check out WP Recipe Maker!

    Sarah Mock of savoringthegood.com headshot 2022

    I am Sarah Mock. Welcome!

    Sarah Mock is a classically trained Chef and graduate of Johnson & Wales University. A culinary blogger for 16 years Sarah helps the home cook prepare her recipes with professional results.

    Get to know me

    as seen in:

    Logos of Hersheyland, ABC News, and Good Day PA are showcased in a seamless row, providing a snapshot of popular brands.

    Hersheyland Nightline Good Day Pa!

    The vibrant design showcases the iconic logos of Pinterest, Rachael Ray, and Jell-O set against a bold red background. Sorry, the provided description doesn't offer enough detail to suggest important SEO keywords.

    Pinterest Rachael JELL-O

    Recipe for Caramels

    soft caramels, salted

    This recipe for caramels is buttery soft and chewy and topped with a sprinkle of sea salt. Caramels are one of the easiest candies you can make at home in under 30 minutes with just 4 ingredients.

    soft caramels, salted

    Caramels were one of the recipes that I learned how to properly make in my first year of pastry school. I will share with you how to avoid getting crystals in your caramels and how to prevent the caramels from burning before you even pour them from the pan.

    This recipe for caramel is a perfect gift to give during the holiday season. You can also give a jar of mulling spices that are just like what you can buy at William Sonoma.

    I would like you to read the recipe through in its entirety before starting to cook the sugar to make the caramel. Boiling sugar can get away from you faster than you think. I want you to be prepared for the next step so you have caramel-making success.

    Ingredients needed:

    ingredients for soft caramels with text overlay

    Helpful Kitchen Tools To Make Caramel

    • Candy thermometer - I use a ThermPro thermometor but a traditional candy thermometer can be used.
    • Silicone basting brush - used when washing down the sides of the pan from sugar crystals.
    • Parchment paper - used to line the pan and to wrap the cut caramels. DO NOT use wax paper. You will not be happy.

    How do you make caramels?

    To successfully make caramels a bit of preparation needs to be done ahead of time to make this recipe. It may seem like the candy thermometer is taking forever and then the next thing you know you are ready to pour molten caramel and you need to move FAST.

    Prepare your pan with a piece of parchment paper and be sure it is buttered on both sides. Fill a clean sink or large bowl with ice water so you can quickly shock the cooking candy and stop the caramelization process. Melt the butter and heat the cream while you bring the water, corn syrup and sugar to a rapid boil.

    Once the temperature reaches 340, remove the pan from the heat and carefully add the melted butter and warm cream. Return it to the heat and whisk constantly until the temperature returns to 249. Plunge the bottom of the pan into the prepared ice bath to stop the cooking process and pour the hot caramel into the prepared pan.

    Cool completely and cut into your desired shapes. Once cooled add sea salt for a garnish and wrap the pieces in wax paper or parchment paper.

    How to make homemade caramels

    preparing the pan for making soft caramels
    1. Prepare the pan. Lightly brush the bottom of a  7.5" x 6" or loaf pan with a few drops of olive oil or melted butter. Press a piece of parchment paper into to pan, pressing the paper into the corners of the pan. The oil or butter will help keep the paper in place.
    2. Prepare a water bath - fill a clean sink with a few inches of water. This will be used to shock the caramel in later steps.
      butter and cream warmed in a bowl
    3. Melt the butter - in a microwave-safe cup or bowl melt the butter and heat the heavy whipping cream for 1 minute. The warming of the butter and cream will help lessen the temperature extreme when the mixture is poured into the hot sugars.
      steps to make soft caramels
    4. Cook the sugar - in a heavy bottom pan combine the water and corn syrup. Gently pour the sugar into the pan, keeping the sugar as close to the water as possible as not to allow the sugar to splash on the side of the pan.
    5. Add the thermometer - add the thermometer to the pan and bring the sugar to a boil. As the sugar starts to boil either cover it with a lid for 1 minute allowing the steam/moisture to fall back into the pan OR using the silicone pastry brush wipe the water on the sides of the pan to dissolve any sugar crystals. The sugar will start to take on a lovely caramel color around the edges. Boil until the thermometer reached 340 F.
    6. Add the cream and butter - AS SOON as the thermometer reaches 340 cut the heat off and SLOWLY pour in the heated heavy cream and butter mixture, gently whisking or stirring constantly. Be CAREFUL because there will be foaming of the hot sugar. Continue to SLOWLY pour the heated whipping cream and butter in a slow steady stream or pour the liquid into the pan in about 6 portions.
    7. Continue to cook - Turn the heat back on to medium heat and continually stir the caramel until it reaches a temperature of 245 degrees. This will give you a soft caramel that pulls a string when you take a bite. I like to continue to heat the caramel to 250. It takes on a lovely warm caramel color and is still soft but less sticky and fluid when eaten.
      shock cooling caramel in a cold water bath
    8. Shock - this is something I learned in culinary school. The heat of the pan will continue to cook the sugar even after the heat is turned off. As soon you have reached your desired temperature or 245 or 250, immediately plunge the bottom of the pan into the prepared water bath. Just 5 seconds is needed. This will help stop the cooking process.
      caramel in a parchment paper lined pan
    9. Pour - immediately pour the caramel into the prepared pan. Allow the pan to cool for 30 minutes at room temperature on a flat surface. Then place the caramels in the refrigerator for 3-4 hours or until cool to the touch. I prefer to allow them to cool overnight.
      cutting soft caramels into a grid
    10. Cut & Wrap - turn the slab on caramels out on a clean surface and using a ruler, mark out one-inch lines. Using a sharp long knife, press the knife into the caramels, cutting them into squares. Wrap in pieces of waxed paper.
      slab of soft caramels cut into squares with sea salt flakes
    11. Salted Caramel - Sprinkle sea salt or another course flake salt over the caramels.

    Storage Tips

    Store cut unwrapped caramels on a closed serving dish in a single layer without the edges touching. Wrapped caramels can be stored at room temperature in their wax paper.

    The higher the humidity, the stickier the caramel will be.

    Clean up tip

    Don't worry about scrubbing the sticky caramel out of the pan. Just add enough water to the pan to cover the caramel residue and bring the pan of water to a rolling boil. The sugars in the caramel will easily dissolve when the water boils making for easy clean-up. The thermometer can be cleaned at the same time.

    Frequently asked questions, answers and tips:

    close shot of a square of salted caramel
    Why did my caramel crystallize when cooled?

    If you have a granular caramel after it is cooled you probably had a grain of sugar or a piece of crystalized sugar drop back into the pan. Crystals will lead to more sugar crystals.

    How to prevent crystallization in caramel

    The key to preventing caramels from crystalizing is to prevent crystals in the first place. carefully pour the sugar into the pan, making sure that sugar doesn't cling to the side of the pan. Using a silicone brush dipped in water, wash down the sides of the pan allowing the sugars to dissolve back into the pan.
    Another option would be to place a lid on the pan when the sugar first starts to boil. Allow the moisture to collect for one minute, and fall back into the pan. This should help dissolve any crystals that have formed on the edge.

    How do you get the caramels out of the 9x13 pan?

    Allow the caramel to cool completely in the pan and then run a knife around the edges of the pan to loosen the caramel.

    Invert the pan onto a cutting board or flat surface and tap the bottom of the pan to release the caramel. Cut the caramel into desired sizes and shapes with a sharp knife.

    If the caramel is still stuck to the pan, you can try placing the pan in a warm water bath for a few minutes to loosen it.

    Chef Tip

    I like to melt some chocolate and spread it in a thin layer on the back of the slab of caramel before cutting them into bite-sized pieces. Be sure the chocolate has set up completely before turning over and cutting.

    soft caramels, salted

    Caramels

    This recipe for caramels is buttery soft and chewy and topped with a sprinkle of sea salt. Caramels are one of the easiest candies you can make at home in under 30 minutes with just 4 ingredients.
    No ratings yet
    Print Pin Rate
    Course: Dessert
    Cuisine: French, German
    Prep Time: 3 minutes minutes
    Cook Time: 15 minutes minutes
    Total Time: 18 minutes minutes
    Servings: 30 pieces
    Calories: 75
    Author: Sarah Mock

    Ingredients

    • A rectangular 8 oz package of Kerrygold Pure Irish Butter, unsalted, with a green and gold label and Irish grass-fed cow branding-perfect for creating delicious Saint Patrick's Day cupcakes.½ Cup Butter salted
    • heavy cream bottle.½ Cup heavy whipping cream
    •  
      ¼ Cup corn syrup
    •  
      2 Tablespoon Water
    • A 4-pound bag of Domino granulated pure cane sugar with a yellow and white design, showing nutrition information and branding-perfect for sweetening recipes like rhubarb sour or your favorite desserts.1 Cup Sugar
    •  
      1 Teaspoon sea salt
    US Customary - Metric
    Follow Savoring The Good On PinterestFollow @SavoringTheGood or tag #STGRecipes!

    Instructions

    • Pepare the pan. Lightly brush the bottom of a  7.5" x 6" or loaf pan with a few drops of olive oil or melted butter. Press a piece of parchment paper into to pan, pressing the paper into the corners of the pan. The oil or butter will help keep the paper in place.
    • Prepare a water bath - fill a clean sink with a few inches of water. This will be used to shock the caramel in later steps.
    • Melt the butter - in a microwave safe cup or bowl melt the butter and heat the heavy whipping cream for 1 minute. The warming of the butter and cream will help lessen the temperature extreme when the mixture is poured into the hot sugars.
      ½ Cup Butter, ½ Cup heavy whipping cream
    • Cook the sugar - in a heavy bottom pan combine the water and corn syrup. Gently pour the sugar into the pan, keeping the sugar as close to the water as possible as not to allow the sugar to splash on the side of the pan.
      2 Tablespoon Water, 1 Cup Sugar, ¼ Cup corn syrup
    • Add the thermometer - add the thermometor to the pan and bring the sugar to a boil. As the sugar starts to boil either cover with a lid for 1 minute allowing the steam/moisture to fall back into the pan OR using the silicone pastry brush wipe water on the sides of the pan to disolve any sugar crystals. The sugar will start to take on a lovely caramel color around the edges. Boil until the thermometer reached 340 F.
    • Add the cream and butter - AS SOON as the thermoemter reaches 340 cut the heat off and SLOWLY pour in the heated heavy cream and butter mixture, gently whisking or stirring constantly. Be CAREFUL because there will be foaming of the hot sugar. Continue to SLOWLY pour the heated whipping cream and butter in a slow steady stream or pour the liquid into the pan in about 6 portions.
    • Continue to cook - Turn the heat back on to medium heat and continually stir the caramel until it reaches a temperature of 245 degrees. This will give you a soft caramel that pulls a string when you take a bite. I like to continue to heat the caramel to 250. It takes on a lovely warm caramel color and is still soft but less sticky and fluid when eaten.
    • Shock - this is something I learned in culinary school. The heat of the pan will continue to cook the sugar even after the heat is turned off. As soon you have reached your desired temperature or 245 or 250, emmeidately plunge the bottom of the pan into the prepared water bath. Just 5 seconds is needed. This will help stop the cooking process.
    • Pour - imediately pour the caramel into the prepared pan. Allow the pan to cool for 30 minutes at room temparature on a flat surface. Then place the caramels in the refirdgerator fo 3-4 hours or until cool to the touch. I prefer to allow them to cool over night.
    • Cut & Wrap - turn the slab on caramels out on a clean surface and using a ruler, mark out one inch lines. Sprinkle sea salt or another course flake salt over the caramels. Using a sharp long knife, press the knife into the caramels, cutting them into squares. Wrap in pieces of waxed paper.
      1 Teaspoon sea salt

    Notes

    I like to melt some chocolate and spread it in a thin layer on the back of the slab of caramel before cutting them into bite-sized pieces. Be sure the chocolate has set up completely before turning over and cutting.
    Want to share when you made this recipe?Follow @SavoringTheGood & tag #STGRecipes!
    Nutrition Facts
    Caramels
    Serving Size
     
    1 caramel
    Amount per Serving
    Calories
    75
    % Daily Value*
    Fat
     
    5
    g
    8
    %
    Saturated Fat
     
    3
    g
    19
    %
    Trans Fat
     
    1
    g
    Polyunsaturated Fat
     
    1
    g
    Monounsaturated Fat
     
    1
    g
    Cholesterol
     
    14
    mg
    5
    %
    Sodium
     
    108
    mg
    5
    %
    Potassium
     
    4
    mg
    0
    %
    Carbohydrates
     
    9
    g
    3
    %
    Sugar
     
    9
    g
    10
    %
    Protein
     
    1
    g
    2
    %
    * Percent Daily Values are based on a 2000 calorie diet.
    **Nutritional facts are just estimates. Please utilize your own brand nutritional values to double check against our estimates.
    Like this recipe card? Want one for your site?Check out WP Recipe Maker!

    Sarah Mock of savoringthegood.com headshot 2022

    I am Sarah Mock. Welcome!

    Sarah Mock is a classically trained Chef and graduate of Johnson & Wales University. A culinary blogger for 15 years Sarah helps the home cook prepare her recipes with professional results.

    Get to know me

    • « Previous Page
    • 1
    • …
    • 3
    • 4
    • 5
    • 6
    • 7
    • …
    • 11
    • Next Page »
    Sarah Mock of savoringthegood.com headshot 2022

    I'm Sarah Mock, Welcome!

    Sarah Mock is a classically trained Chef and graduate of Johnson & Wales University. A culinary blogger for 17 years Sarah helps the home cook prepare her recipes with professional results.

    Get to know me

    Trending Recipes:

    • A close-up of grilled chicken wings stacked on a plate, garnished with parsley, with a side of dipping sauce in the background.
      Grilled Chicken Wings
    • A bowl of taco salad with ground beef, lettuce, tomatoes, black olives, jalapeños, corn, shredded cheese, crushed tortilla chips, red onions, lime wedges, and a dollop of sour cream.
      Dorito Taco Salad
    • A bowl of chili pie topped with shredded cheese, chopped onions, and green onions, surrounded by crunchy Fritos corn chips on a white plate.
      Frito Pie Recipe
    • A stack of crispy cereal bars with a light brown color and a textured surface, reminiscent of cinnamon toast crunch bars.
      Cinnamon Toast Crunch Bars
    See more Football Food →

    Footer

    Sharing this recipe on social media is both encouraged and appreciated. Please share the direct link back to the recipe. Copy/Paste and/or screenshots of the recipe to any social media is strictly prohibited. Content and photographs are copyright-protected. SavoringTheGood®

    As an Amazon Associate, I earn from qualifying purchases.

    ©2026 Savoring The Good® All rights reserved.
    Privacy Policy | Accessibility Policy | About Sarah Mock | About Savoring The Good | Terms Of Service

    Rate This Recipe

    Your vote:


    Let me know what you thought of this recipe to leave your stars. Stuck for what to say? Click one of these inspiration prompts to get you started:

    This worked exactly as written, thanks!
    My family loved this! I just had to share.
    This recipe is delicious but I have a suggestion...
    Could you clarify for me...
    Here is how I included this recipe in m celebration of...
    This recipe was wonderful but can you point me to a recipe for...

    As always, I appreciate you and what you bring to the Savoring The Good community!

    A rating is required
    A name is required
    An email is required