Savoring The Good®

  • All Recipes
  • Football Food
  • Crock-Pot
  • About Sarah
    • About Savoring The Good®
menu icon
go to homepage
  • All Recipes
  • Football Food
  • Crock-Pot
  • About Sarah
    • About Savoring The Good®
subscribe
search icon
Homepage link
  • All Recipes
  • Football Food
  • Crock-Pot
  • About Sarah
    • About Savoring The Good®
×
Savoring The Good > Uncategorized

Hoppin’ John Recipe with Slow Cooker Instructions

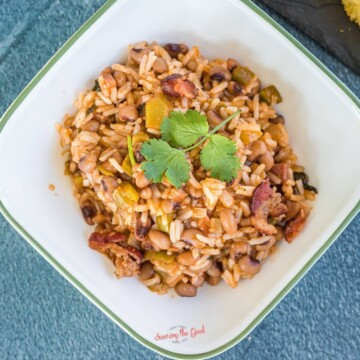
Hoppin’ John (Carolina Peas and Rice) recipe square image

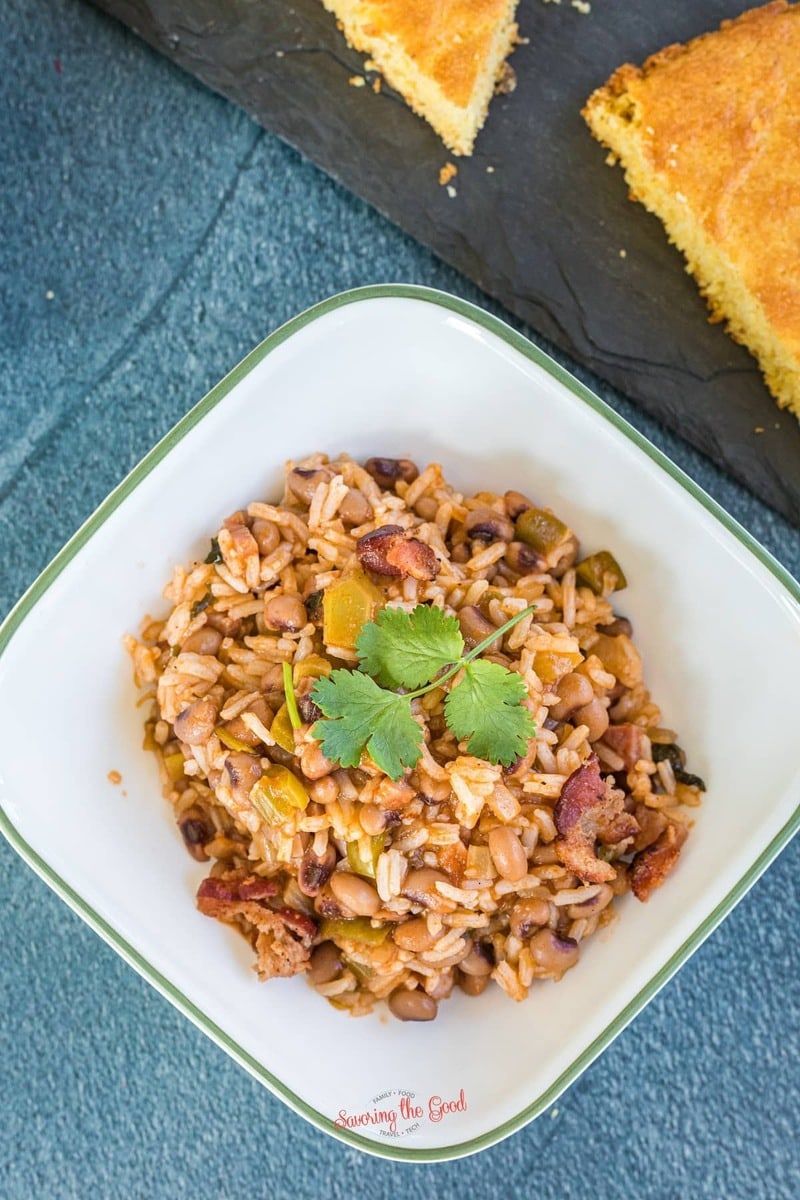
This Hoppin' John recipe, made in a slow cooker, is a traditional New Year's Recipe but is perfect for any time you are craving slow cooker black-eyed peas.
Hoppin' John Recipe with Slow Cooker Instructions hero image

These black-eyed peas and rice are sure to bring you luck in the New Year.

Here is why this slow cooker hoppin' john recipe is amazing:

  • Made in a slow cooker crock-pot this recipe will free up space on the stove for other recipes.
  • Customize it with garnishes of your choice for the perfect bite.
  • A great recipe to use up leftover ham. Also check out ham pot pie, crock pot ham and potato soup, for more delicious ways of using up leftover holiday ham.

Ingredients needed:

hoppin john ingredients on a cutting board
  • Black-Eyed Peas - canned, undrained
  • Onion - sweet or white, diced
  • Celery - washed and diced
  • Bell Pepper - (any color), seeds removed and diced
  • Smoked Ham - cut into small bite-sized pieces, leftover ham is fine
  • Cilantro - chopped (optional but delicious!)
  • Salt and pepper - to taste
  • Cajun Seasoning - check out my Mexican corn dip that also has Cajun seasoning
  • Bay Leaves
  • Garlic - minced or a couple of cloves of garlic confit
  • Spicy Tomato juice - V-8 Juice shown here
  • Diced Tomatoes (optional but adds extra flavors) I use canned diced tomatoes from my garden
  • Long Grain Rice - Jasmine, American long-grain white, brown rice, or Basmati rice

Recipe Card?

To find the full printable recipe with specific measurements and directions CLICK HERE to go to the recipe card.

How to make Hoppin' John in the slow cooker

adding v-8 juice to a slow cooker to make Hoppin' John

Add ingredients.

Add all ingredients except cooked rice to the slow cooker. Stir to combine.

Cook on low for 2-3 hours.

Delicious Rice Cooker Recipes square.

Cook Rice

Meanwhile, cook rice according to package instructions.

Remove bay leaves before serving.
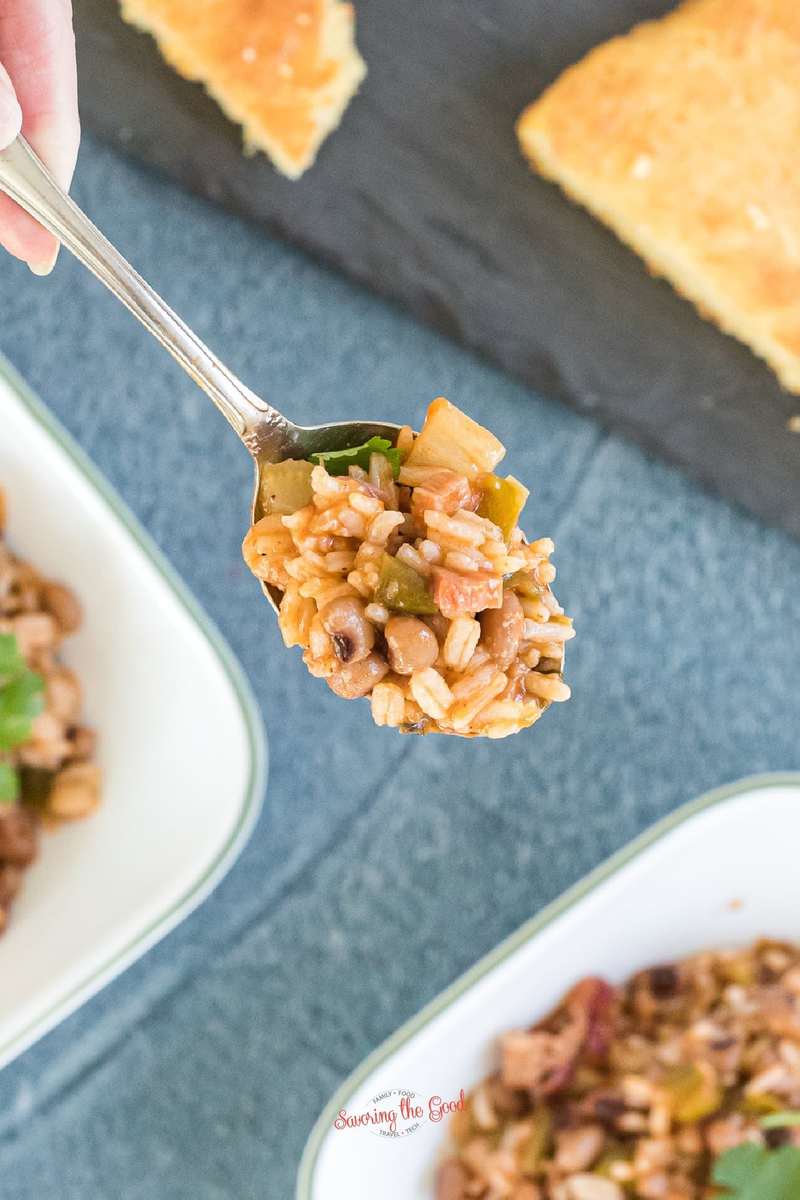
spoonful of Hoppin' John over a blue surface

Serve

Hoppin' John Recipe in a Slow Cooker with rice added

Add Rice

Stir in hot cooked rice or serve Hoppin' John over hot cooked rice and serve.

2 qt. black crock-pot slow cooker

Sarah's recommendation

2 qt. Crock-Pot

Perfect for hot dips and small meals

Buy on Amazon

FAQ's and Tips

How do I store leftovers?

Any leftovers can be refrigerated for up to 4 days and reheated as needed. 

What toppings are good with Hoppin' John?

Chopped green onions tops, chopped cilantro, cherry tomatoes, or crumbled bacon can be used as garnish.

Is there a substitution for ham in this recipe?

6-8 slices of thick bacon strips cooked and broken into small pieces can be substituted for ham.

I am not a fan of black eyed peas. Is there a substitute for black eyes peas in this recipe?

Pinto beans can be used in place of black eyed peas.

Spicy tomato juice does not agree with me. Is there a substitute for the spicy V-8?

Original V-8 can be used instead of spicy for a milder version.adding v-8 juice to a slow cooker to make Hoppin' John

What to serve with Hoppin' John?

I am a fan of serving warm cornbread with Hoppin' John. I like a slice while my kids will crumble the cornbread over the beans.

  • A knife slices into a roasted turkey breast garnished with herbs, displayed on a white platter with sprigs of rosemary on a wooden table.
    What to Serve with Turkey (Best Side Dishes)
  • A glass jar filled with homemade dill pickles, mustard seeds, and spices sits on a wooden surface with more jars and cucumbers in the background.
    Dill Pickle Recipe for Canning
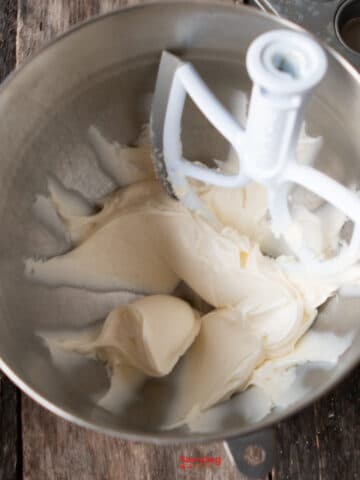
  • Cream cheese and sugar mixture in a stand mixer bowl with a paddle attachment, ready to blend on a wooden surface.
    Cream Cheese Recipes for Appetizers, Dinners, and Desserts
Hoppin' John (Carolina Peas and Rice) recipe square image

Hoppin' John

This Hoppin' John recipe, made in a slow cooker, is a traditional New Year's Recipe but is perfect for any time you are craving slow cooker black-eyed peas.
No ratings yet
Print Rate
Course: Side Dish
Cuisine: German
Prep Time: 10 minutes minutes
Cook Time: 3 hours hours
Total Time: 3 hours hours 10 minutes minutes
Servings: 5 servings
Calories: 200
Author: Sarah Mock

Ingredients

  •  
    1 can 15 ounces Black-Eyed Peas
  • A single whole yellow onion with dry, papery skin, photographed against a white background-the perfect flavorful addition to your next Crockpot Hash brown Casserole.¾ Cups Onion diced
  •  
    3 stalks Celery diced
  •  
    1 small Bell Pepper any color, diced
  •  
    1 Cup Smoked Ham cut into small bite sized pieces
  •  
    ¼ - ½ Cup Cilantro chopped (optional)
  • Two clear acrylic mills-one filled with coarse salt, the other with whole black peppercorns, both topped with metal knobs-stand side by side on a white background, ready to season your favorite dishes like Shrimp Avocado Salad.Salt and pepper
  •  
    1 Teaspoon Cajun Seasoning
  • A pile of dried bay leaves on a white background, perfect for adding depth and aroma to your chipotle carnitas recipes.2 Bay Leaves
  •  
    1 Teaspoon Minced Garlic
  •  
    1 can 6 ounce Spicy V-8 Juice
  •  
    1 can Diced Tomatoes optional
  •  
    1 Cup Cooked Jasmine or Long Grain Rice of choice
US Customary - Metric
Follow Savoring The Good On PinterestFollow @SavoringTheGood or tag #STGRecipes!

Instructions

  • Add all ingredients except cooked rice to the slow cooker.
    1 can, ¾ Cups Onion, 3 stalks Celery, 1 small Bell Pepper, 1 Cup Smoked Ham, ¼ - ½ Cup Cilantro, Salt and pepper, 1 Teaspoon Cajun Seasoning, 2 Bay Leaves, 1 Teaspoon Minced Garlic, 1 can, 1 can Diced Tomatoes
  • Stir to combine
  • cook on low for 2-3 hours.
  • Meanwhile, cook rice according to package instructions.
    1 Cup Cooked Jasmine or Long Grain Rice of choice
  • Remove bay leaves before serving
  • Stir in hot cooked rice and serve.

Notes

How do I store leftovers?
Any leftovers can be refrigerated for up to 4 days and reheated as needed. 
What toppings are good with Hoppin’ John?
Chopped green onions tops, chopped cilantro, cherry tomatoes, or crumbled bacon can be used as garnish.
Want to share when you made this recipe?Follow @SavoringTheGood & tag #STGRecipes!
Nutrition Facts
Hoppin' John
Serving Size
 
1
Amount per Serving
Calories
200
% Daily Value*
Fat
 
2
g
3
%
Saturated Fat
 
1
g
6
%
Cholesterol
 
16
mg
5
%
Sodium
 
538
mg
23
%
Potassium
 
397
mg
11
%
Carbohydrates
 
37
g
12
%
Sugar
 
4
g
4
%
Protein
 
10
g
20
%
* Percent Daily Values are based on a 2000 calorie diet.
**Nutritional facts are just estimates. Please utilize your own brand nutritional values to double check against our estimates.
Like this recipe card? Want one for your site?Check out WP Recipe Maker!

Sarah Mock of savoringthegood.com headshot 2022

I am Sarah Mock. Welcome!

Sarah Mock is a classically trained Chef and graduate of Johnson & Wales University. A culinary blogger for 15 years Sarah helps the home cook prepare her recipes with professional results.

Get to know me

as seen in:

Logos of Hersheyland, ABC News, and Good Day PA are showcased in a seamless row, providing a snapshot of popular brands.

Hersheyland Nightline Good Day Pa!

The vibrant design showcases the iconic logos of Pinterest, Rachael Ray, and Jell-O set against a bold red background. Sorry, the provided description doesn't offer enough detail to suggest important SEO keywords.

Pinterest Rachael JELL-O


Sous Vide Cauliflower Recipe

sous vide cauliflower square image

Sous vide cauliflower, cooked whole, is perfectly cooked from edge to edge and finished off in the oven under a broiler or in an air fryer for a roasted outer crust.

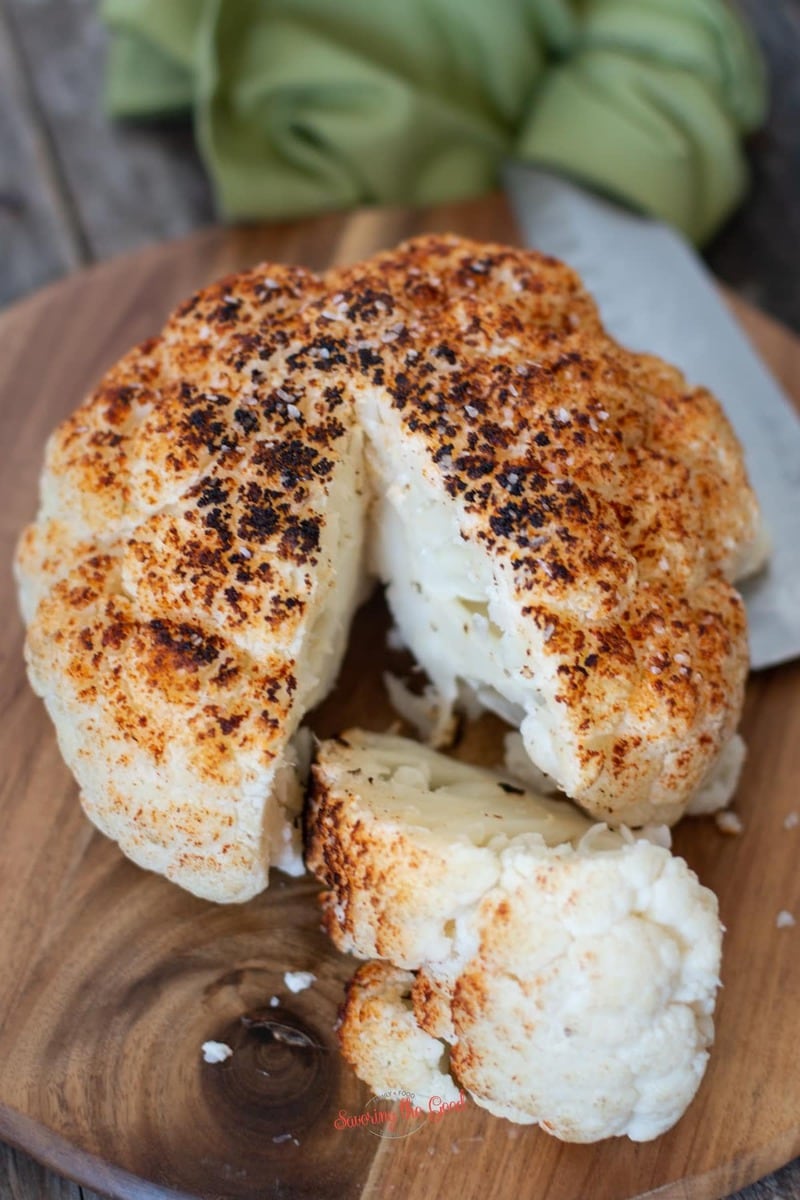
sous vide cauliflower with a slice taken out

Now that you have your sous vide circulator out make up a batch of sous vide hollandaise to pour over your head of sous vide cauliflower. In addition, you can make sous vide asparagus and cook it alongside your cauliflower. Just make note of the time difference.

By cooking a whole cauliflower in a water bath in a bag, with the temperature precision of the circulator, the cauliflower is cooked to a precise temperature ensuring that the outer flouters are the same doneness as the inner stem.

Ingredients needed:

ingredients for sous vide cauliflower

Recipe Card?

To find the full printable recipe with specific measurements and directions CLICK HERE to go to the recipe card.

Materials needed:

2 sous vide cauliflower side by side showing texture
  • Sous vide circulator - I use a Joule by Breville but Anova is another very popular brand.
  • Gallon-size freezer bag - alternatively sous vide vacuum bag and vacuum sealer could be used
  • Weights - something to weigh down the bag in the bath, such as butter knives
  • Sheet pan - for roasting the final product
  • Air Fryer - if not broiling finish the cauliflower in the air fryer

How to sous vide a cauliflower head

  1. First, remove the leaves and the stem of the cauliflower. Leave the flouters intact.
    sous vide cauliflower pre cook horizontal image
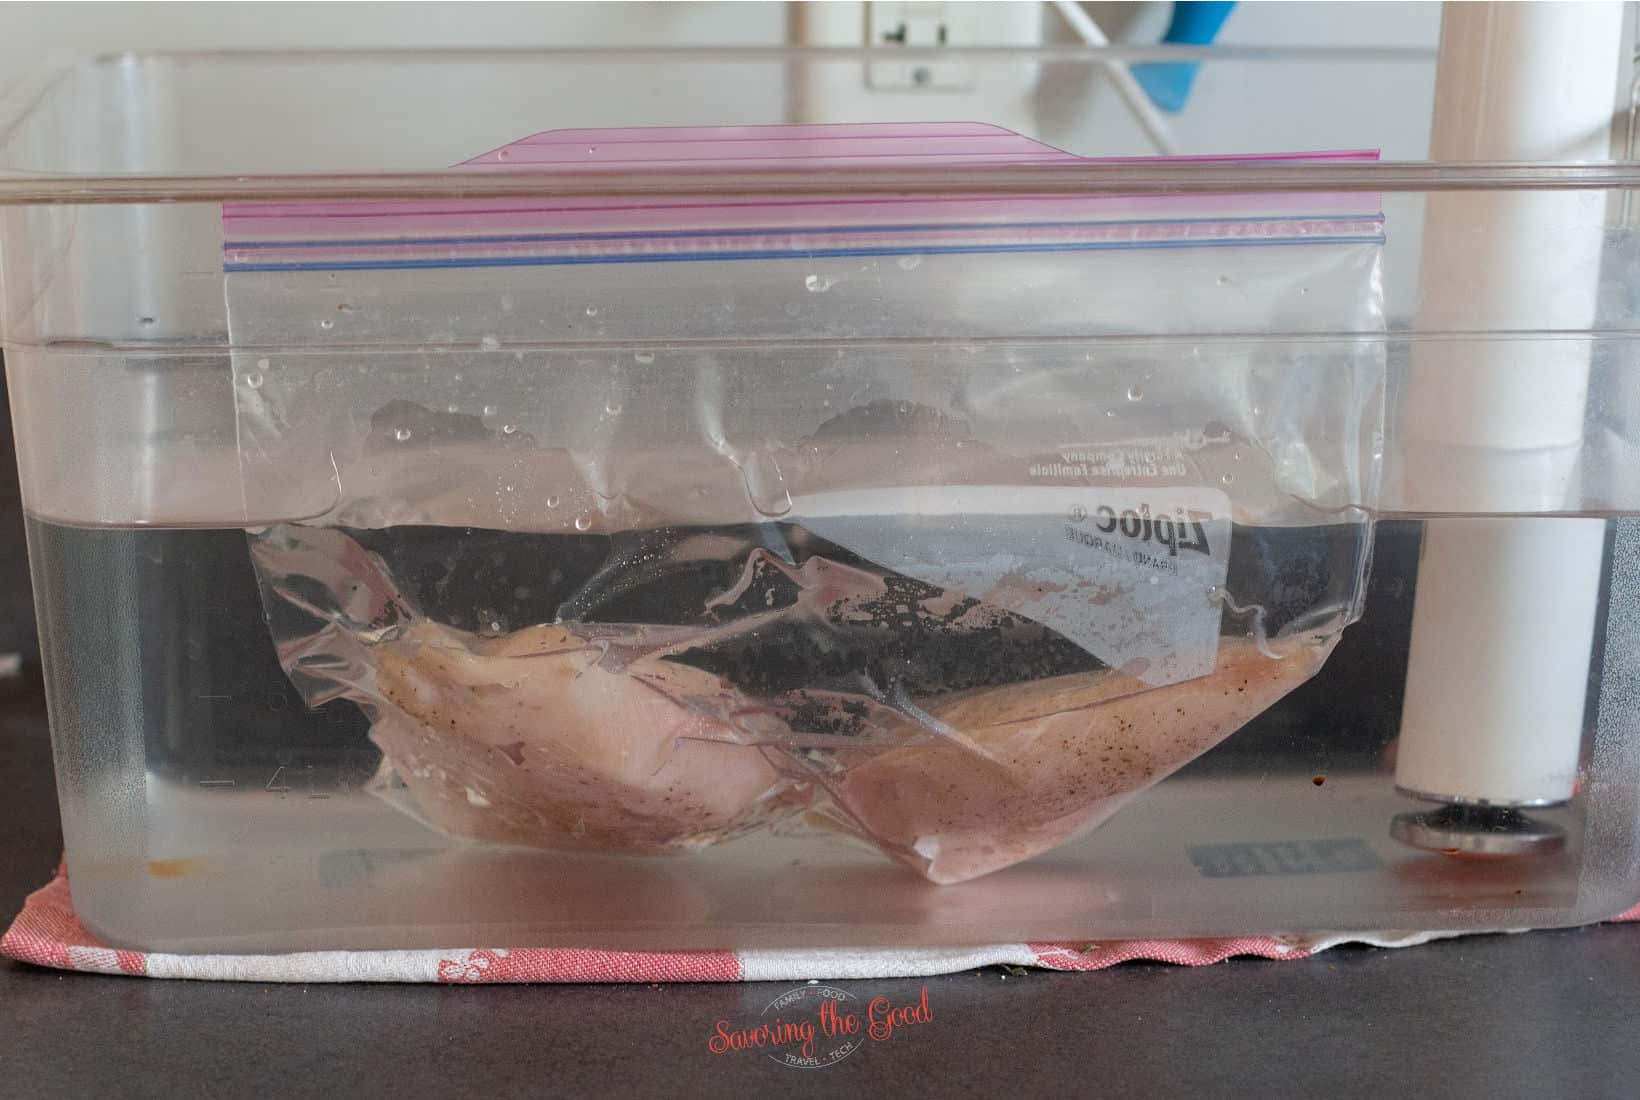
  2. Place the cauliflower in a gallon-sized freezer bag along with enough butterknives or spoons to help keep the cauliflower submerged.
  3. Use the Archimedes principle (water displacement method) to remove the air from the bag before sealing it. I found that if I push the bag down, cauliflower first, knives on top the air pushes out easier. sous vide cauliflower in a water bath post cook
  4. Set the water to 185 and allow the water to come to temp. (I heat the water after the cauliflower is in the water bath because it is safer pushing the cauliflower in the water)
  5. Set the timer for 45 minutes.
  6. Once the time is up, remove the cauliflower from the sous vide and then from the bag.
    coating a cauliflower with mayo for roasting
  7. Place the cauliflower on a sheet pan and brush a thin layer of mayonnaise over the outside of the cauliflower and liberally sprinkle with seasoning.
    sous vide cauliflower whole
  8. Broil for 5-9 minutes or until the outside of the cauliflower takes on color.
  9. Slice and serve with your favorite sauces.
Using an Anova sous vide machine, a person precisely cooks vacuum-sealed salmon fillets submerged in water, ensuring perfect results right on the countertop.

Let's go shopping!

ANOVA

This third generation sous vide circulator includes dual-band WiFi and a two-line touchscreen display.

Buy it here

FAQ's and Tips

Why is there air and water in the bag after cooking?

Cauliflower naturally has water in it as a vegetable. When the vegetable is heated, the cells of the vegetable will release the air and the water as it cooks. This is why you need to weigh down the cauliflower when you first place it in the water bath.sous vide cauliflower in a water bath post cook

Could I vac and seal cauliflower instead of using a gallon zip bag?

Yes you can! But keep in mind that the cauliflower still has air and water in it and will need to be weighed down. If you are not comfortable putting several butter knives or spoons in the bag, be sure to find another way of keeping the bag submerged such as a plate weighed down. 

How do I finish the cauliflower in the air fryer?

Follow the instructions up until placing it in the oven to broil. Heat the air fryer to 390 and then cook for 5-8 minutes, depending on your desired depth of color and crispness. sous vide cauliflower in an air fryer basket

What is the best way to finish the cauliflower?

I am a fan of the air fryer method of finishing the cauliflower because it is more consistent in browning. The broil method is more traditional for browning but a bit more unpredictable. (air fryer results on the right of the photo)comparison of 2 sous vide cauliflower one broil and one air fryer

sous vide cauliflower square image

Sous Vide Cauliflower - Whole

Sous vide cauliflower, cooked whole, is perfectly cooked from edge to edge and finished off in the oven under a broiler or in an air fryer for a roasted outer crust.
4.93 from 13 votes
Print Rate
Course: Sous Vide
Cuisine: French
Prep Time: 5 minutes minutes
Cook Time: 45 minutes minutes
Broil: 7 minutes minutes
Total Time: 57 minutes minutes
Servings: 2 People
Calories: 126
Author: Sarah Mock

Ingredients

  •  
    1 head Cauliflower - whole leaves removed
  • A jar of Hellmann's Real Mayonnaise with a blue lid, labeled 1 Tablespoon Mayonnaise
  •  
    1 Teaspoon Seasoning paprika, salt and pepper
US Customary - Metric
Follow Savoring The Good On PinterestFollow @SavoringTheGood or tag #STGRecipes!

Instructions

  • First, remove the leaves and the stem of the cauliflower. Leave the flouters intact.
    1 head Cauliflower - whole
  • Place the cauliflower in a gallon-sized freezer bag along with enough butterknives or spoons to help keep the cauliflower submerged.
  • Use the Archimedes principle (water displacement method) to remove the air from the bag before sealing it. I found that if I push the bag down, cauliflower first, knives on top the air pushes out easier.
  • Set the water to 185 and allow the water to come to temp. (I heat the water after the cauliflower is in the water bath because it is safer pushing the cauliflower in the water)
  • Set the timer for 45 minutes. Once the time is up, remove the cauliflower from the sous vide and then from the bag.
  • Place the cauliflower on a sheet pan and brush a thin layer of mayonnaise over the outside of the cauliflower and liberally sprinkle with seasoning.
    1 Tablespoon Mayonnaise, 1 Teaspoon Seasoning
  • Broil for 5-9 minutes or until the outside of the cauliflower takes on color.
  • Slice and serve with your favorite sauces.

Notes

Why is there air and water in the bag after cooking?
Cauliflower naturally has water in it as a vegetable. When the vegetable is heated, the cells of the vegetable will release the air and the water as it cooks. This is why you need to weigh down the cauliflower when you first place it in the water bath.
Could I vac and seal cauliflower instead of using a gallon zip bag?
Yes you can! But keep in mind that the cauliflower still has air and water in it and will need to be weighed down. If you are not comfortable putting several butter knives or spoons in the bag, be sure to find another way of keeping the bag submerged such as a plate weighed down. 
How do I finish the cauliflower in the air fryer?
Follow the instructions up until placing it in the oven to broil. Heat the air fryer to 390 and then cook for 5-8 minutes, depending on your desired depth of color and crispness. 
Want to share when you made this recipe?Follow @SavoringTheGood & tag #STGRecipes!
Nutrition Facts
Sous Vide Cauliflower - Whole
Serving Size
 
1
Amount per Serving
Calories
126
% Daily Value*
Fat
 
6
g
9
%
Saturated Fat
 
1
g
6
%
Trans Fat
 
1
g
Cholesterol
 
3
mg
1
%
Sodium
 
131
mg
6
%
Potassium
 
892
mg
25
%
Carbohydrates
 
16
g
5
%
Sugar
 
6
g
7
%
Protein
 
6
g
12
%
* Percent Daily Values are based on a 2000 calorie diet.
**Nutritional facts are just estimates. Please utilize your own brand nutritional values to double check against our estimates.
Like this recipe card? Want one for your site?Check out WP Recipe Maker!

Sarah Mock of savoringthegood.com headshot 2022

I am Sarah Mock. Welcome!

Sarah Mock is a classically trained Chef and graduate of Johnson & Wales University. A culinary blogger for 16 years Sarah helps the home cook prepare her recipes with professional results.

Get to know me

as seen in:

Logos of Hersheyland, ABC News, and Good Day PA are showcased in a seamless row, providing a snapshot of popular brands.

Hersheyland Nightline Good Day Pa!

The vibrant design showcases the iconic logos of Pinterest, Rachael Ray, and Jell-O set against a bold red background. Sorry, the provided description doesn't offer enough detail to suggest important SEO keywords.

Pinterest Rachael JELL-O

Whole Smoked Turkey Recipe

smoked turkey whole square image

This smoked turkey recipe is perfect for Thanksgiving or any occasion. It delivers juicy, flavorful meat with crispy skin-all made on your grill or smoker. Plus, it frees up your oven for side dishes!

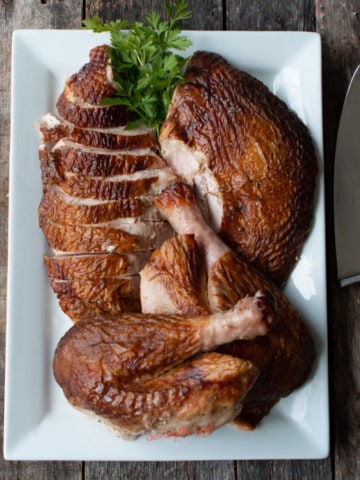
Whole smoked turkey on a cutting board

If you don't have a grill or smoker, try my juicy turkey roulade or spatchcock turkey recipes instead. No matter which recipe you choose, be sure to safely thaw your turkey first. Don't forget to save the carcass for homemade turkey stock!

Why this is my favorite smoker recipe

  • Frees up your oven for other dishes.
  • Customize the smoky flavor with your favorite wood (apple, cherry, hickory, etc.).
  • Perfect for serving a crowd-smoke two smaller turkeys side by side!

Ingredients for a whole smoked turkey:

close up on a raw turkey ready for the grill to me smoked horizontal image

Recipe Card?

To find the full printable recipe with specific measurements and directions CLICK HERE to go to the recipe card.

A blue Thermapen digital thermometer from ThermoWorks, displaying 70.0, lies on a wooden table near a plate of grilled meat. The ThermoWorks logo and a "Shop Now" button are also visible, inviting you to explore the precision of this essential kitchen tool.

On sale for you today!

Sarah's Favorite Thermometer

Never question the temperature of your food again!

Get 15% off today

Seasonal Favorite

Baked lattice top crust on an apple pie made with the Crisco pie crust recipe, showing flaky layers in the fluted edge.

This is my award-winning Crisco pie crust recipe; flaky, tender, and made with simple ingredients you already have.

Crisco Pie Crust

How to prepare a turkey for smoking

  1. Ensure the turkey is fully thawed.
  2. Tuck the wingtips under to stabilize the bird.
    female hands tucking in the turkey wings to stabilize the turkey for smoking on the grill
  3. Stuff the cavity with the onion, apple, and herbs.
    close up on a raw turkey ready for the grill to me smoked horizontal image
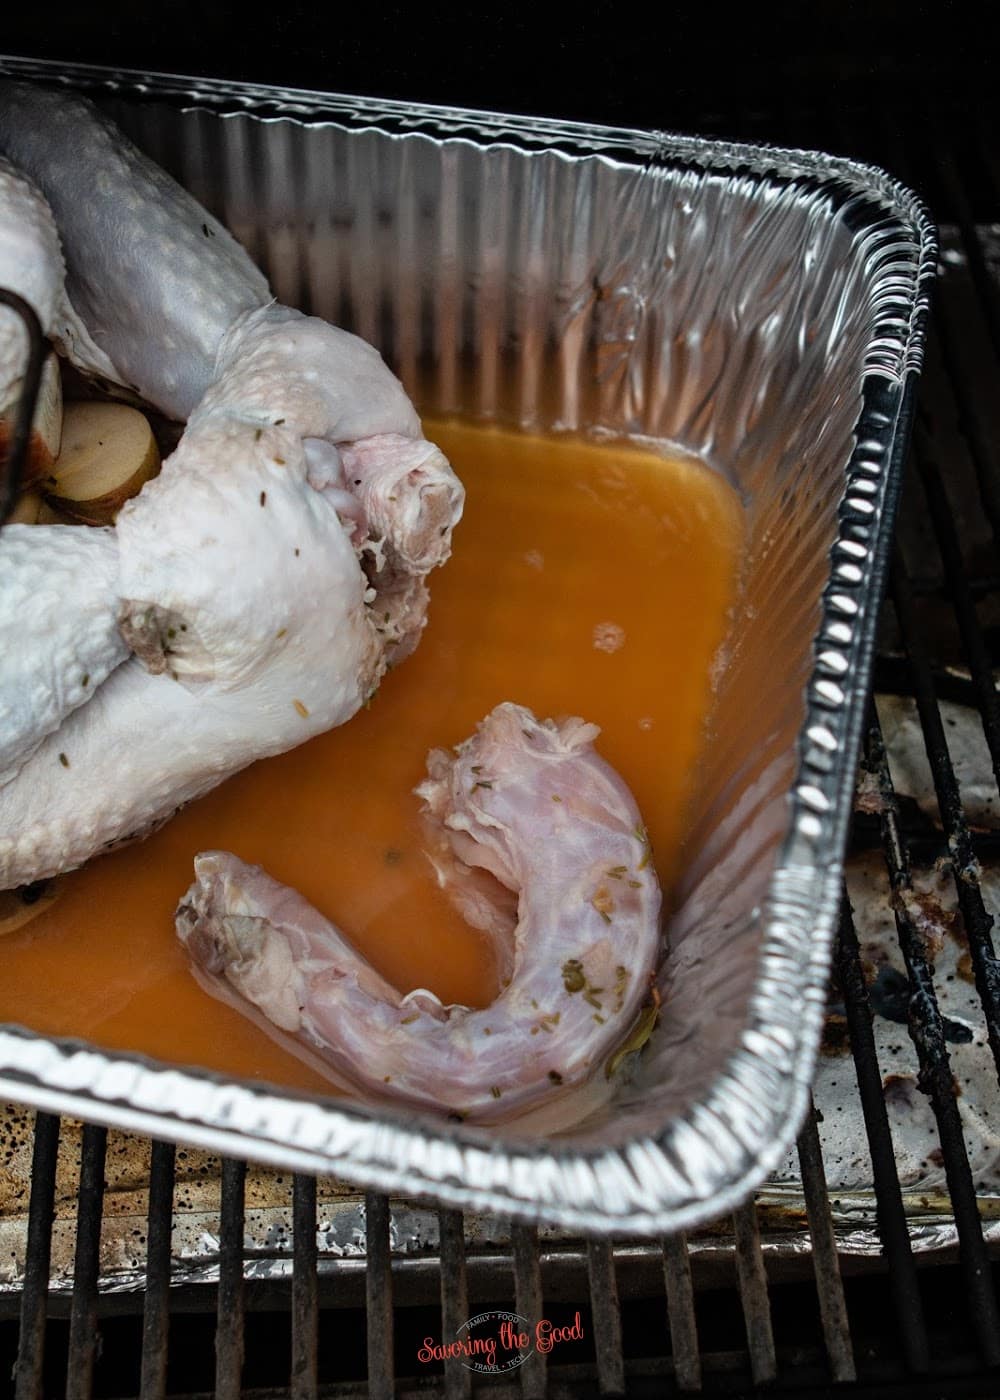
  4. Line a disposable roasting pan with orange slices and place the turkey on top. Pour the juice into the pan and add the turkey neck.
    A turkey neck in a pan on the grill for a Whole smoked turkey

How to smoke a turkey

  1. Preheat your smoker or grill to 225°F.
  2. Insert meat thermometers into the thickest part of the breast and thigh.
  3. Smoke the turkey for 30 minutes per pound, or until the internal temperature reaches 165°F.
  4. Remove the turkey from the smoker, cover it with foil, and let it rest for 15 minutes before carving.
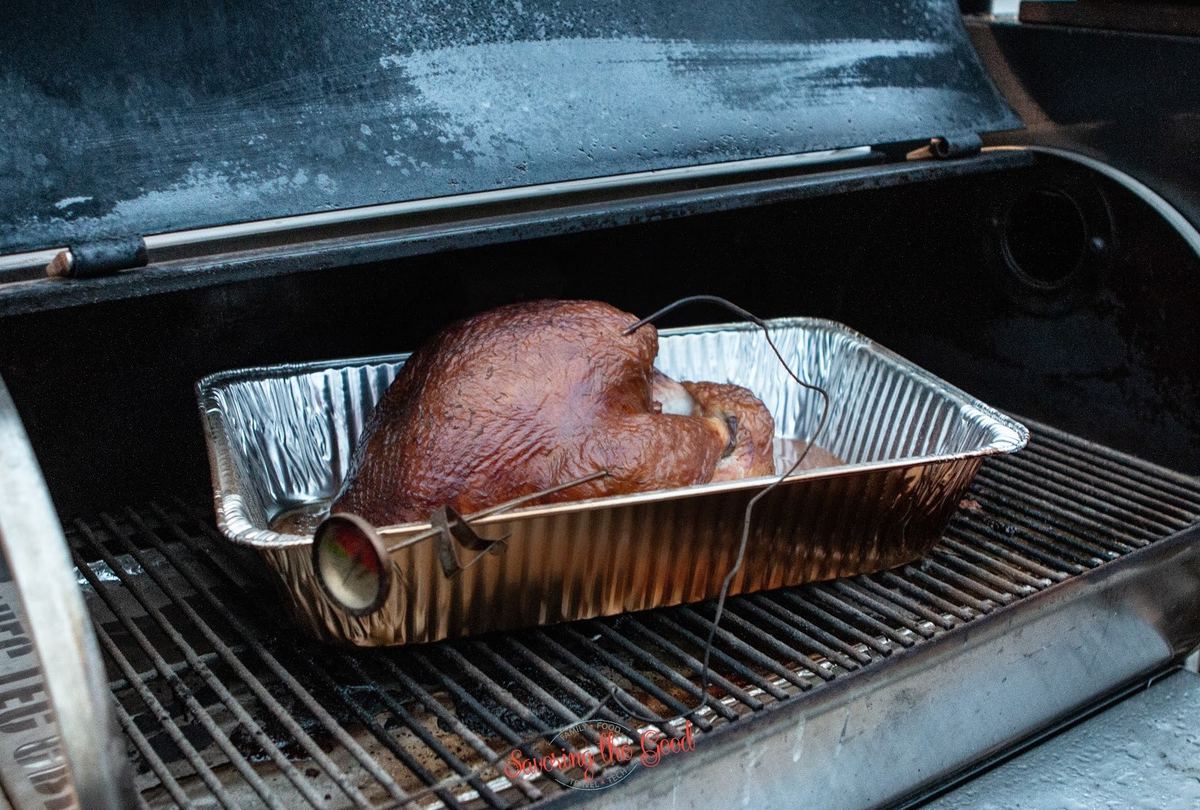
  5. Smoke the whole turkey on the grill or smoker for 30 minutes per pound. Whole smoked turkey on the grill with thermometer in it horizontal image
  6. Once the thermometers have reached an internal temperature of 165 degrees Fahrenheit remove the whole bird from the smoker and cover it with aluminum foil letting the turkey rests for 15 minutes to allow the juices to redistribute. Whole smoked turkey on a cutting board
  7. Transfer the smoked turkey to a cutting board and carve for serving. I am step by step instructions on how to carve a turkey if you needed further instructions.
A glass jar filled with herbs and spices.

Add more flavor!

Turkey Rub

My foolproof blend of savory spices.

Turkey Rub Recipe

Did you make this recipe?

Do you have feedback that would be helpful to others? If so can help this small business owner by leaving a rating and a review in the comments section? Thank you for being part of the Savoring The Good Community. ~ Sarah

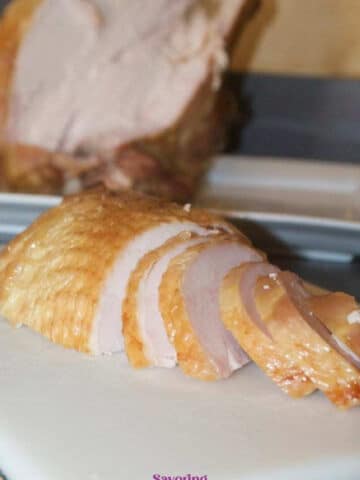
carved turkey on a white platter

Learn a kitchen skill

How To Carve A Turkey

Grab a sharp knife, a large cutting board and your confidence. We are going to do this together.

Learn over here →

Turkey Preparation Essentials

  • A packaged frozen Honeysuckle White young turkey in netting on a wooden surface.
    How to Thaw a Frozen Turkey Safely: Step-by-Step Guide
  • Thanksgiving Turkey Brine. A Dry Mix Recipe
    Turkey Brine (Dry Mix)
  • A person is pouring seasoning into a glass container.
    Best Turkey Rub Recipe
  • smoked turkey whole square image
    Whole Smoked Turkey Recipe
  • spatchcock turkey roasted golden brown, pressed flat on a serving platter, square image
    Spatchcock Turkey (Step-by-Step Photos to Spatchcock a Turkey)
  • Easy Juicy Oven Roasted Brined Thanksgiving Turkey Recipe. Let me walk you through, step by step on how to thaw, brine and roast a delicious Thanksgiving turkey. Once you learn these few easy steps, you will be all set to create delicious Thanksgiving memories around the table.
    Oven Roasted Turkey Recipe
  • entire turkey carved and arranged on a white plater
    How To Carve A Turkey (Photos Instructions)
  • Sliced roasted turkey breast arranged on a white cutting board, with a larger unsliced portion visible in the background.
    How to Carve a Turkey Breast

Frequently asked questions, answers and tips:

How long does it take to smoke a whole turkey?

Plan for 30 minutes per pound at 250°F. For an average-sized turkey, allow at least 7 hours, plus an additional 45 minutes for resting.

Why use a disposable aluminum pan?

The pan holds liquid to create a moist cooking environment and catches drippings for gravy.Whole smoked turkey in a disposable pan horizontal image

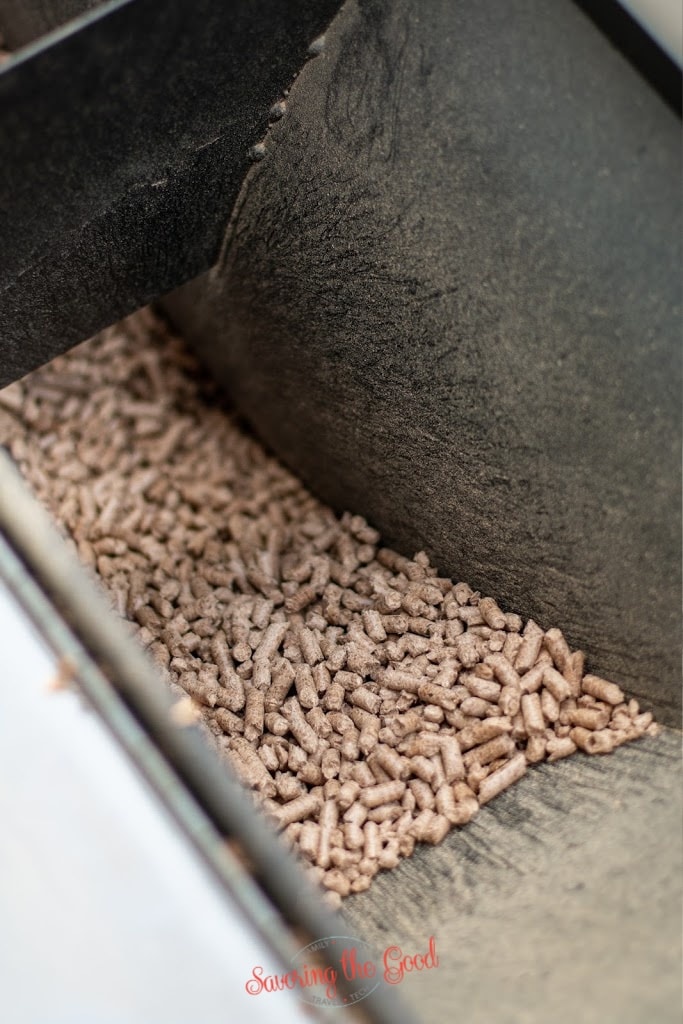
What's the best wood for smoking turkey?

Apple, cherry, mesquite, or a combination work well.wood pellets in the pellet box of a rec tec grill

How much turkey should I plan per person?

Allow 1.5 pounds per person to account for bones and leftovers. Whole smoked turkey cut into pieces

Chef Tip

1 ½ pounds per person will allow everyone to get enough turkey at the Thanksgiving meal and you may even have leftovers the next day. 

smoked turkey whole square image

Thanksgiving Smoked Turkey Recipe (Juicy & Flavorful)

This smoked turkey recipe is the best way to prepare a whole smoked turkey on your grill to serve for Thanksgiving or any time you are wanting delicious smoked turkey.
No ratings yet
Print Pin Rate
Course: Turkey Recipes
Cuisine: American
Keyword: smoked turkey
Prep Time: 30 minutes minutes
Cook Time: 8 hours hours
Rest Time: 15 minutes minutes
Total Time: 8 hours hours 45 minutes minutes
Servings: 10 People
Calories: 32
Author: Sarah Mock

Ingredients

  • 1 15 pound Turkey whole, thawed
  • 1 recipe Dry Turkey Brine Recipe - Optional but adds great flavors and extra moistness.
  • 1 Onion - sliced in half
  • 1 Apple - sliced in half
  • 1 Orange - sliced
  • 1 Cup Juice - apple juice apple cider or orange juice, for the roasting pan
  • Herbs rosemary, sage, parsley
US Customary - Metric
Follow Savoring The Good On PinterestFollow @SavoringTheGood or tag #STGRecipes!

Instructions

How to prepare a turkey for smoking

  • Be sure the turkey is properly and safely thawed. I have several methods of thawing a frozen turkey safely if you are new to cooking a frozen turkey.
    1 15 pound Turkey
  • If you are going to brine the turkey allow an extra day for brining. Follow my brining instructions in another post.
    1 recipe Dry Turkey Brine Recipe - Optional but adds great flavors and extra moistness.

How to smoke a turkey

  • Heat your smoker or grill to 225 F.
  • Tuck the wings under to stabilize the bird and keep the wingtips from burning.
  • Stuff the cavity of the turkey with the apple, onion, and herbs. Line the disposable aluminum pan with orange slices, placing the prepared turkey on top of the orange slices.
    1 Onion - sliced in half, 1 Apple - sliced in half, 1 Orange - sliced, Herbs
  • Pour the apple juice ( or liquid of your choice) along with the turkey neck into the pan.
    1 Cup Juice - apple juice
  • Insert a meat thermometer into the breast as well as the thigh of the bird. Be sure these are oven-safe thermometers. Smoke the whole turkey on the grill or smoker for 30 minutes per pound. Once the thermometers have reached 165 remove the whole smoked turkey from the smoker and cover with foil allowing it to rest for 15 minutes to allow the juices to redistribute.
  • Transfer the smoked turkey to a cutting board and carve for serving.
Want to share when you made this recipe?Follow @SavoringTheGood & tag #STGRecipes!
Nutrition Facts
Thanksgiving Smoked Turkey Recipe (Juicy & Flavorful)
Serving Size
 
8 ounces
Amount per Serving
Calories
32
% Daily Value*
Fat
 
1
g
2
%
Saturated Fat
 
1
g
6
%
Polyunsaturated Fat
 
1
g
Monounsaturated Fat
 
1
g
Cholesterol
 
1
mg
0
%
Sodium
 
2
mg
0
%
Potassium
 
85
mg
2
%
Carbohydrates
 
8
g
3
%
Sugar
 
6
g
7
%
Protein
 
1
g
2
%
* Percent Daily Values are based on a 2000 calorie diet.
**Nutritional facts are just estimates. Please utilize your own brand nutritional values to double check against our estimates.
Like this recipe card? Want one for your site?Check out WP Recipe Maker!


Sarah Mock of savoringthegood.com headshot 2022

I am Sarah Mock. Welcome!

Sarah Mock is a classically trained Chef and graduate of Johnson & Wales University. A culinary blogger for 15 years Sarah helps the home cook prepare her recipes with professional results.

Get to know me

as seen in:

Logos of Hersheyland, ABC News, and Good Day PA are showcased in a seamless row, providing a snapshot of popular brands.

Hersheyland Nightline Good Day Pa!

The vibrant design showcases the iconic logos of Pinterest, Rachael Ray, and Jell-O set against a bold red background. Sorry, the provided description doesn't offer enough detail to suggest important SEO keywords.

Pinterest Rachael JELL-O

Chile Verde Recipe (Stovetop & Slow Cooker Pork Chili Verde)

Chili Verde square image

This homemade Mexican chili Verde recipe had just 5 ingredients!

Chili Verde square image

Sear chunks of pork butt and then simmer in tomatillo salsa and broth until the meat is falling apart fork tender. Finish with a fresh squeeze of lime juice and chopped fresh cilantro for another layer of authentic flavor.

Here is why this pork chile verde recipe works:

  • Using an inexpensive cut of pork and adding lots of flavors to the pot will give you an amazing dinner your family will ask you for seconds.
  • 5 ingredients are all it takes to have dinner ready for you when you get home.
  • Low and slow, this recipe will cook for hours to bring out the best flavors of the ingredients.
  • The leftovers will be even better the next day!

Chili Verde Ingredients:

Gluten-free, low carb, and paleo-friendly everyone will love this Mexican comfort food recipe.

This recipe uses my salsa verde recipe but feel free to use your own or use store-bought salsa. You could also spoon on some roasted chili corn salsa for another layer of flavor.

chili verde ingredients with text descriptions over them

Notes on the ingredients

  • Pork butt - I use a boneless pork butt for ease of cutting. But a bone-in, Boston Butt or Picnic shoulder will work if you want to do some knife work.
  • Salsa verde - I used jars of salsa verde that I can but use your favorite canned salsa verde. Alternatively, you can make your own salsa verde. I will include those instructions below.
  • Chicken Stock - I will pull homemade chicken stock from my freezer but stock in a box will work for this recipe
  • Cilantro - fresh
  • Limes - for the juice and zest

Pork Chili Verde Stovetop instructions:

Cut the pork butt into bite-sized pieces

Removing excess fat as you go.

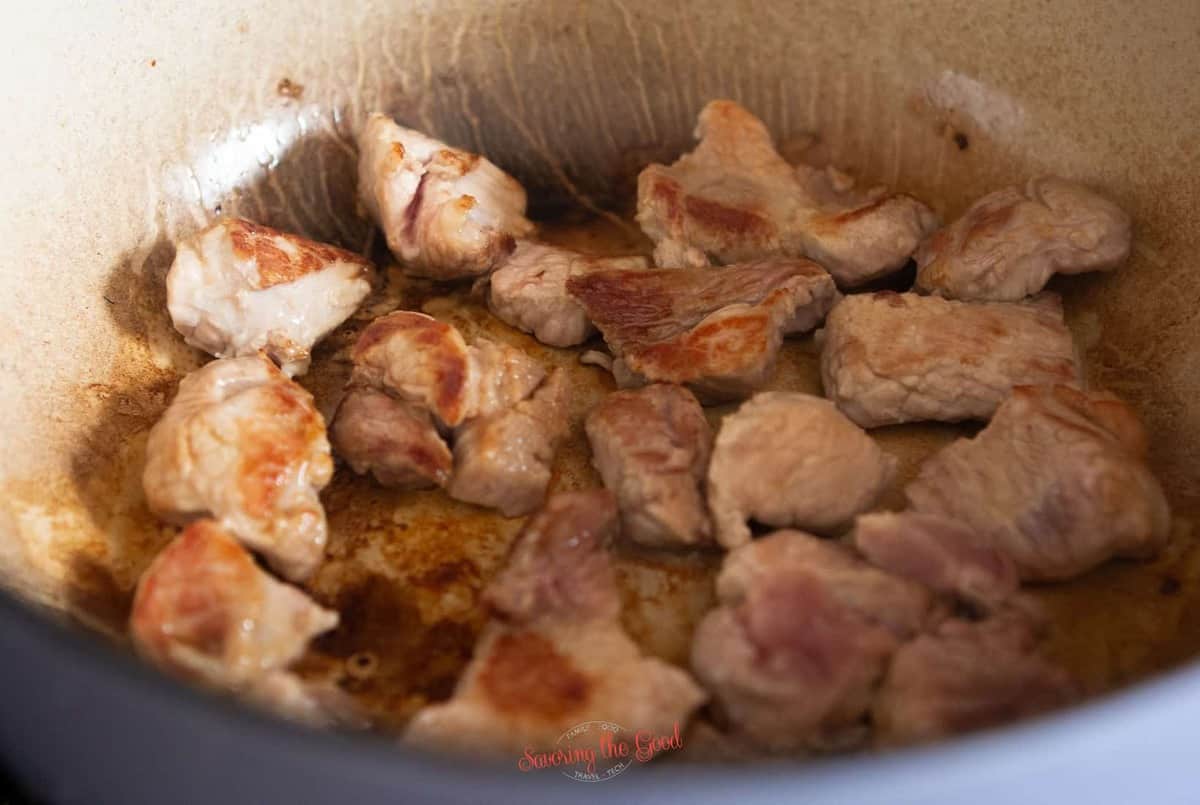
pork butt seared in a pan for chili verde

Sear the outside of the pork chunks on all sides

  • Heat a heavy bottom, dutch oven pan over high heat, and drizzle in a bit of oil.
  • Working in batches, sear the outside of the pork chunks on all sides, taking care not to overcrowd the pan.
pork butt seared, on a plate for chili verde

Place on a clean plate

Remove each batch of seared pork to a clean plate as you work through the batches.

Add back to the pot

Once all the meat is seared replace all the meat and any juices that may have collected back into the pot.

Scrape the bottom of the pan.

Add the salsa verde to the pan, scraping the bottom to loosen any bits and deglaze the pan.

chili verde with exra chicken browed before reduction

Add the chicken stock to the pan and stir to combine.

chili verde in a pot, reduced

Cook and reduce.

  • Bring to a simmer and then reduce to medium-low heat and allow the sauce to reduce by half.
  • This could take up to 3 or 4 hours.
  • As the sauces near full reduction, scrape the bottom of the pan to keep it from burning.
Chili Verde with cilantro and lime juice added

Add lime and cilantro

Before serving stir in the fresh lime juice and lime zest, if you wish.

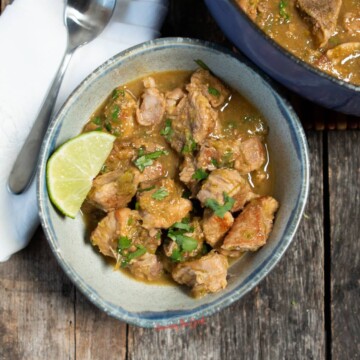
Chili Verde in a bowl with the pot in the background with the rest of the servings

Serve

Did you make this recipe?

Do you have feedback that would be helpful to others? If so can help this small business owner by leaving a rating and a review in the comments section? Thank you for being part of the Savoring The Good Community. ~ Sarah

Chile verde recipe made in the slow cooker:

  1. First cut the pork butt into bite-sized pieces, removing excess fat as you go.
  2. Then heat a heavy bottom, dutch oven pan over high heat, and drizzle in a bit of oil. Working in batches, sear the outside of the pork chunks on all sides, taking care not to overcrowd the pan.
  3. Remove each batch of seared pork to a clean plate as you work through the batches.
  4. Once all the meat is seared replace all the meat and any juices that may have collected back into the pot.
  5. Add the salsa verde to the pan, scraping the bottom to loosen any bits and deglaze the pan.
  6. Transfer the chili verde ingredients to a crock-pot slow cooker and add the chicken stock to the slow cooker and stir to combine.
  7. Place a lid on the slow cooker and set the heat to low. Cook for 6-10 hours on low or 4-6 hours on high.
  8. Stir in the lime juice and the cilantro the last 10 minutes of cooking.

How to make salsa verde for this recipe

I use a couple of pints of my homemade salsa verde for this recipe but when I run out of that, I will grab a couple of jars of canned salsa verde at the grocery store. But what if you want to make salsa verde fresh? A couple of fresh ingredients and about 30 minutes and you have delicious roasted salsa verde for this recipe.

Salsa Verde ingredients:

  • 1 ½ pounds tomatillos, peeled, washed and roughly chopped
  • 5 garlic cloves, peeled and smashed
  • 2 jalapeños, seeds and ribs removed, roughly chopped
  • 2 Anaheim or Poblano chiles (optional but preferred), seeds and ribs removed, roughly chopped
  • Olive oil- for drizzling
  • 1 bunch cilantro, washed and chopped

How to make a chili verde sauce

  1. Preheat the oven to 450. While the oven is preheating, place a rimmed baking sheet in the oven to preheat as well.
  2. Once the oven and pan have come up to temperature, carefully arrange the cut and chopped vegetables on the hot pan and drizzle with olive oil.
  3. Place back in the oven to roast for 30-45 minutes or until the vegetables are soft and the edges are starting to char.
  4. Once cooked, allow the salsa ingredients to cool slightly.
  5. Scrape all the roasted vegetables, as well as the oil from the pan and the fresh cilantro into a blender. Pulse to chop and then blend to an almost liquid consistency
  6. Use in chili verde.

Recipe Tips

Is chile verde sauce spicy?

Chile verde sauce can vary in spiciness, but it's typically on the milder side of the heat scale. It's made with green chilies, such as Anaheim or poblano peppers, which have a mild to moderate level of heat. However, the spiciness can be adjusted to your taste by adding more or fewer spicy peppers like jalapeños.

It's important to note that chile verde sauce is generally not as spicy as some other Mexican or Tex-Mex dishes. It offers a flavorful, savory, and slightly tangy taste with a subtle kick of heat. If you prefer a spicier version, you can always add additional hot peppers or spices to suit your palate.

Can I overcook chile verde?

To avoid overcooking, it's important to strike the right balance between cooking the pork until it's tender and preserving the dish's textures and flavors. Keep these tips in mind, and your chile verde should turn out delicious and perfectly cooked.

Tips to Avoid Overcooking Chile Verde:

  • Use the Right Cut of Pork: Start with a cut of pork that's suitable for slow cooking, like pork shoulder or butt. These cuts can withstand longer cooking times without becoming tough.
  • Monitor Cooking Time: Keep a close eye on the cooking time. Chile verde is best when simmered on low heat for an extended period, usually 2-3 hours. Avoid cooking it for too long, as the meat can become overly tender and lose its texture.
  • Check Meat Tenderness: To prevent overcooking, periodically check the pork's tenderness with a fork. It should be tender enough to easily shred but not so soft that it falls apart.

Ways to Detect Overcooked Chile Verde:

  • Mushy Meat: When chile verde is overcooked, the pork can become mushy and lose its bite. It might disintegrate when stirred or picked up with a fork.
  • Lack of Texture: Overcooked chile verde may have a uniform, somewhat pasty texture rather than the desired combination of tender meat and intact vegetables.
  • Dull Flavor: The flavors in chile verde can become muted if it's overcooked. The sauce may lose its vibrancy, and the dish may taste somewhat bland.
  • Loss of Bright Green Color: The vibrant green color of the sauce can fade when overcooked, becoming more brownish or olive in hue.

How to serve chile verde

I suggest when you serve chili Verde you serve alongside it flour tortillas, fresh if you can find or make them. Also, I will make a batch of white rice or cilantro lime rice. 
I will also have a bowl of lime wedges and another bowl of more chopped fresh cilantro. My daughter will add a squeeze of sour cream and ask for crispy tots. A side dish I will have on the table is Mexican Corn dip and Frito scoops. In keeping with the Mexican-themed meal, I will start a dinner party off with a Mexican Shrimp cocktail. 

  • Two delicious potato stacks of thinly sliced, baked potatoes are garnished with chopped herbs and grated cheese on a ceramic plate.
    Potato Stacks Recipe
  • Buffalo cauliflower bites are roasted florets coated in a tangy red sauce, served on a white plate with a fork and garnished with fresh herbs.
    Buffalo Cauliflower Bites
  • A glass bowl filled with Antipasto Pasta Salad, featuring rotini, sliced pepperoni, cubes of cheese, black olives, lettuce, cherry tomatoes, and creamy dressing.
    Grinder Pasta Salad (Italian Antipasto Style)
Chili Verde square image

Chili Verde Recipe

This homemade Mexican chili Verde recipe is seared chunks of pork butt simmered in tomatillo salsa and broth until fork fall apart tender.
No ratings yet
Print Pin Rate
Course: Pork Recipes
Cuisine: Mexican
Keyword: chili verde, chili verde recipe, pork chili verde recipe
Prep Time: 20 minutes minutes
Cook Time: 3 hours hours
Total Time: 3 hours hours 20 minutes minutes
Servings: 6 People
Calories: 107
Author: Sarah Mock

Ingredients

  •  
    1 3-pound boneless pork butt, but into bite-sized pieces, extra fat removed
  •  
    32 ounces of salsa verde green salsa
  •  
    2 Cups chicken stock
  •  
    oil for sauteeing
  • A whole, uncut green lime with a textured peel on a white background-the perfect citrus for crafting a classic Gimlet.2 limes zested and juices
  •  
    ½ Cup cilantro leaves chopped
US Customary - Metric
Follow Savoring The Good On PinterestFollow @SavoringTheGood or tag #STGRecipes!

Instructions

  • First cut the pork butt into bite-sized pieces, removing excess fat as you go.
    1 3-pound boneless pork butt, but into bite-sized pieces, extra fat removed
  • Then heat a heavy bottom, dutch oven pan over high heat, and drizzle in a bit of oil. Working in batches, sear the outside of the pork chunks on all sides, taking care not to overcrowd the pan.
    oil for sauteeing
  • Remove each batch of seared pork to a clean plate as you work through the batches.
  • Once all the meat is seared replace all the meat and any juices that may have collected back into the pot.
  • Add the salsa verde to the pan, scraping the bottom to loosen any bits and deglaze the pan
    .
    32 ounces of salsa verde
  • Add the chicken stock to the pan and stir to combine
    .
    2 Cups chicken stock
  • Bring to a simmer and then reduce to medium-low heat and allow the sauce to reduce by half. This could take up to 3 or 4 hours.
  • As the sauces nears full reduction, scrape the bottom of the pan to keep it from burning.
  • Before serving stir in the fresh lime juice and lime zest, if you wish.
    2 limes
  • Stir in the chopped fresh cilantro and garnish with more lime and cilantro.
    ½ Cup cilantro leaves
Want to share when you made this recipe?Follow @SavoringTheGood & tag #STGRecipes!
Nutrition Facts
Chili Verde Recipe
Serving Size
 
1
Amount per Serving
Calories
107
% Daily Value*
Fat
 
3
g
5
%
Saturated Fat
 
1
g
6
%
Cholesterol
 
2
mg
1
%
Sodium
 
1203
mg
52
%
Potassium
 
421
mg
12
%
Carbohydrates
 
15
g
5
%
Sugar
 
11
g
12
%
Protein
 
2
g
4
%
* Percent Daily Values are based on a 2000 calorie diet.
**Nutritional facts are just estimates. Please utilize your own brand nutritional values to double check against our estimates.
Like this recipe card? Want one for your site?Check out WP Recipe Maker!

Sarah Mock of savoringthegood.com headshot 2022

I am Sarah Mock. Welcome!

Sarah Mock is a classically trained Chef and graduate of Johnson & Wales University. A culinary blogger for 16 years Sarah helps the home cook prepare her recipes with professional results.

Get to know me

as seen in:

Logos of Hersheyland, ABC News, and Good Day PA are showcased in a seamless row, providing a snapshot of popular brands.

Hersheyland Nightline Good Day Pa!

The vibrant design showcases the iconic logos of Pinterest, Rachael Ray, and Jell-O set against a bold red background. Sorry, the provided description doesn't offer enough detail to suggest important SEO keywords.

Pinterest Rachael JELL-O


Sous Vide Roast Beef Recipe

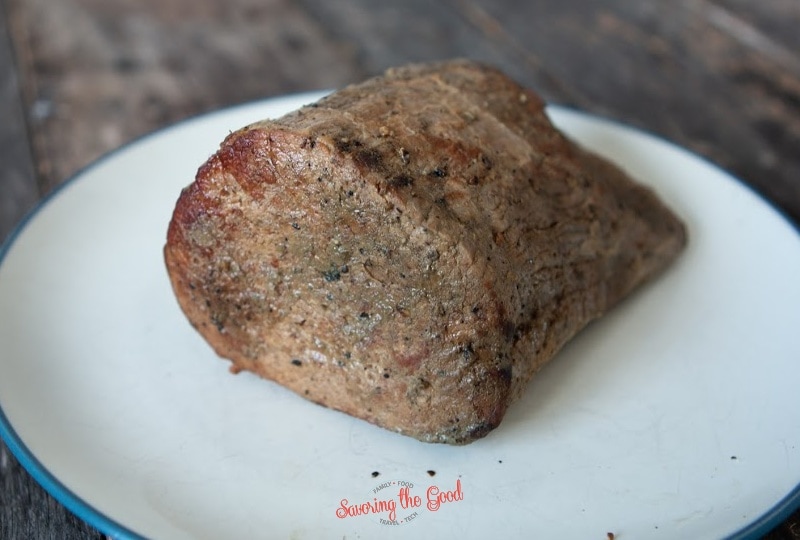
sous vide chuck roast

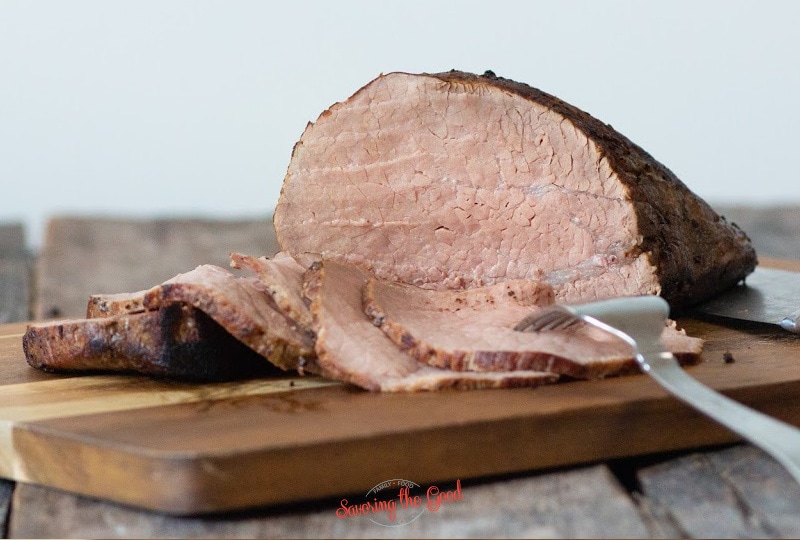
Sous vide chuck roast makes the most delicious sous vide roast beef turning an inexpensive cut of beef into a memorable meal.

sous vide chuck roast

What cut of beef is best for making roast beef?

When you are shopping for the perfect cut of beef to make roast beef using the sous vide cooking method, look for a chuck roast. Chuck roast is a cut of beef that comes from the front of the steer and is very lean and flavorful.

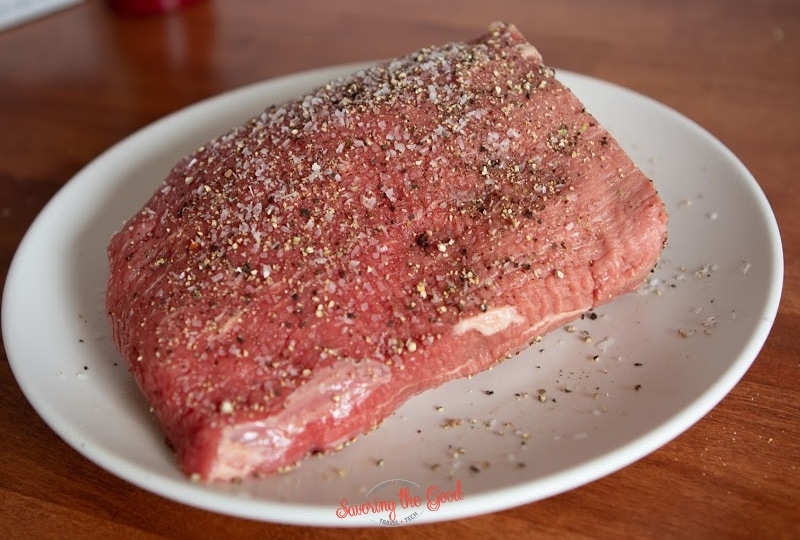
coating all edges of a chruck roast with salt and pepper

Other cuts of beef that can also be used would be a bottom round roast, the eye of round roast, sirloin tip roast. Ask your local butcher for what you are looking for as different cuts can have different names.

Recipe Card?

To find the full printable recipe with specific measurements and directions CLICK HERE to go to the recipe card.

Why Sous Vide Is Perfect for Roast Beef

sous vide chuck roast close horizontal image

Sous vide delivers two game-changing advantages:

  • Precision doneness - Set the exact temperature you want (rare to well-done), and the entire roast cooks evenly-no gray edges or raw centers.
  • Unmatched tenderness - Long, low-temperature cooking breaks down tough collagen without drying out the meat (unlike slow cookers, which can overcook).

(See temperature chart below for your ideal doneness!)

Equipment:

Essential:

  • Sous vide circulator (e.g., Joule or Anova-both work great!).
  • Heavy-duty zip-top bag (or vacuum sealer + bags if you have one).
  • Large pot or container (deep enough to fully submerge the roast).

Nice-to-Have (But Optional):

  • Lidded sous vide container (e.g., 19 Qt with cut-out lid) for efficiency.
  • Vacuum sealer (helpful for freezer prep, but not required).

No vacuum sealer?

Use the water displacement method-just lower the zip-top bag into the water slowly to push out air!

What temperature should you cook a roast?

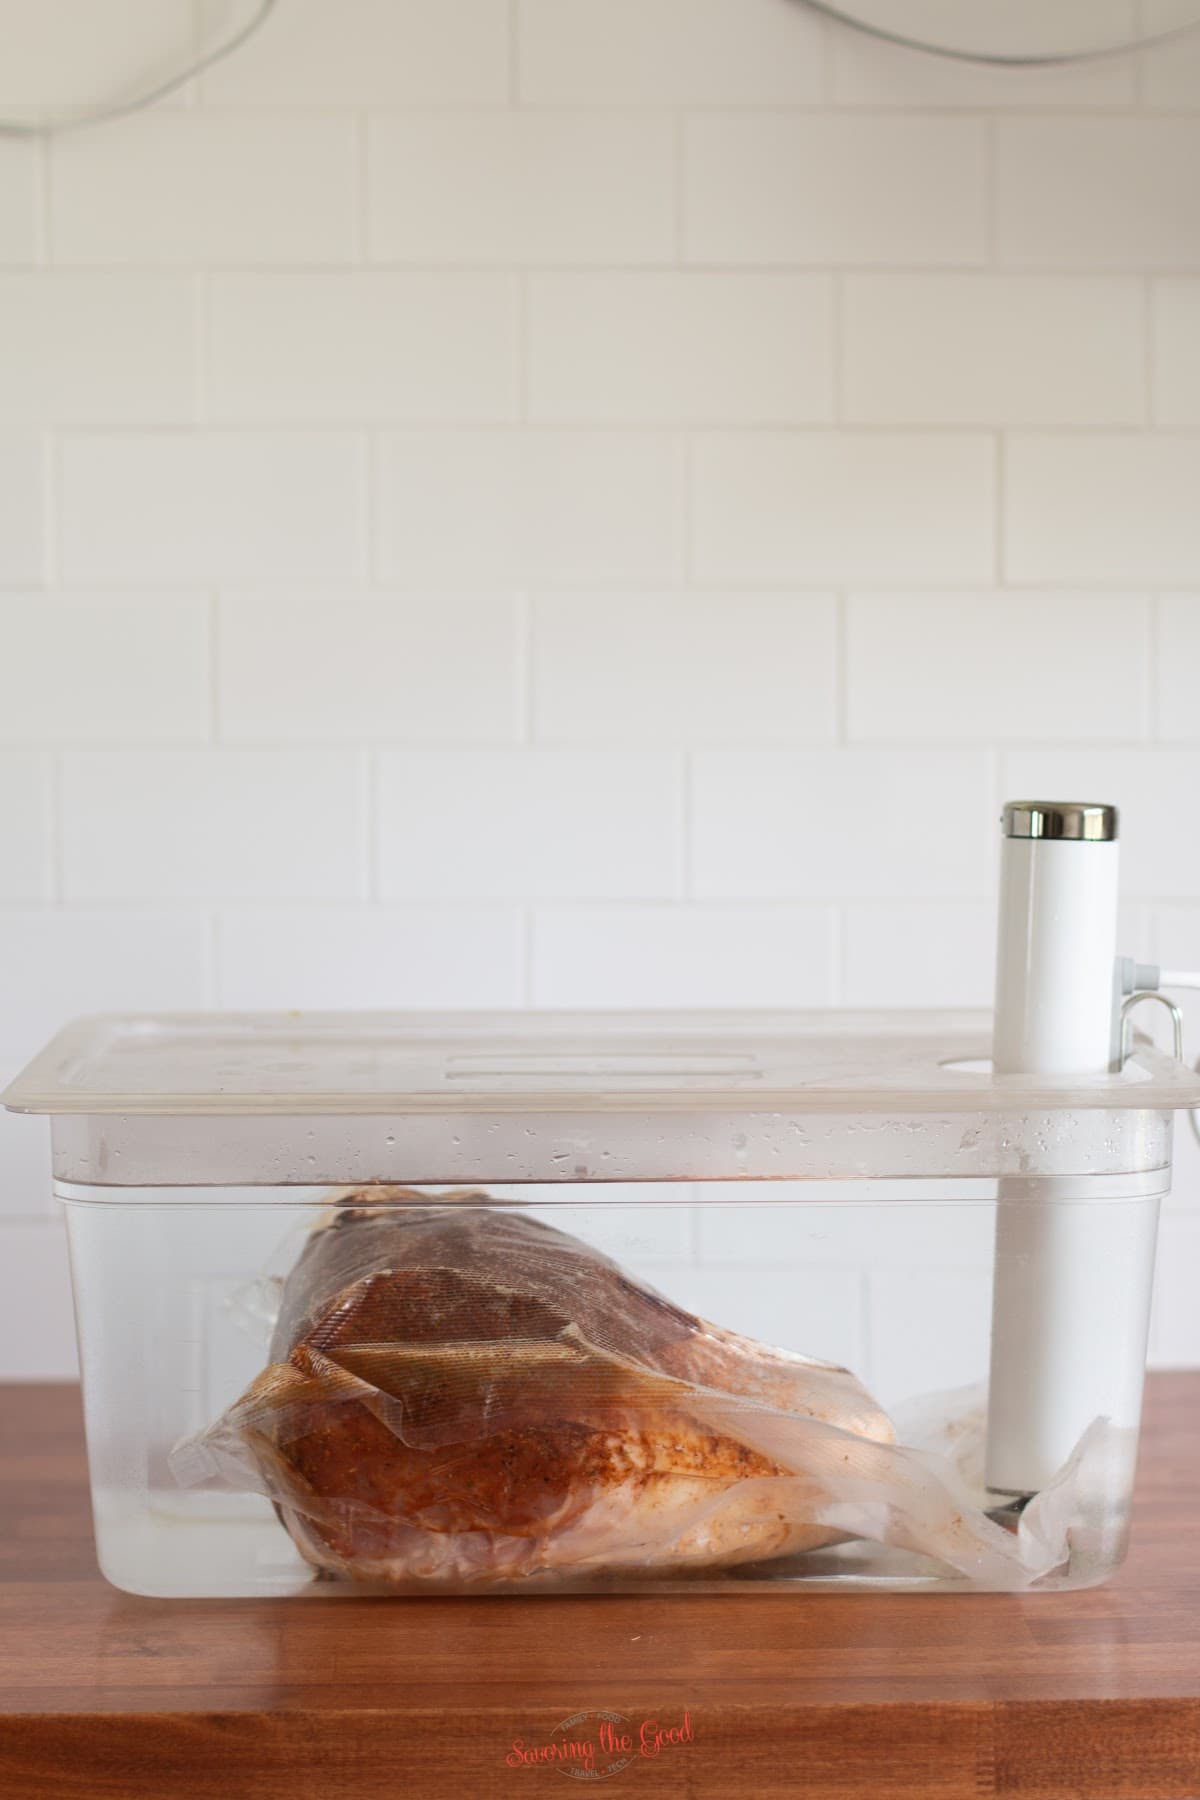
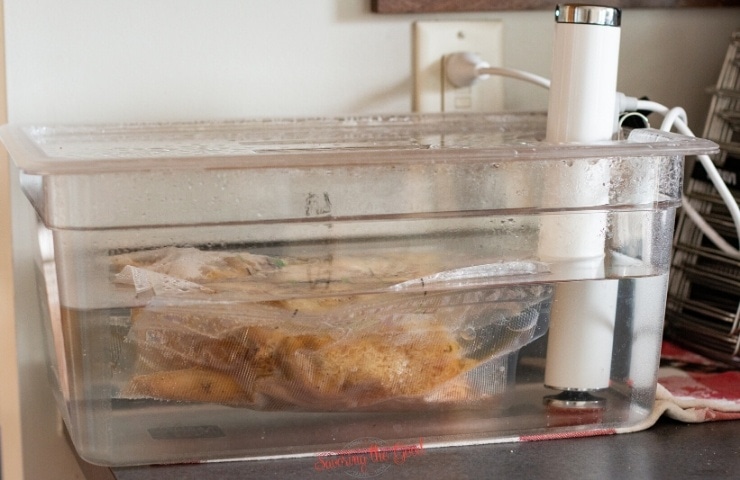
sous vide chuck roast in a chef steps water bath

The temperature you set your sous vide will determine the doneness of your piece of beef from edge to edge, no matter the thickness. My family likes roast cooked to 136.

According to the sous vide supreme cooking guide this is on the high side of medium-rare doneness.

Roast Beef Temperature Chart For Cooking
Doneness for Roast BeefF C
Rare12552
Medium Rare13658
Medium14563
Well15571

Why is the time so long?

You will see that the time varies when using sous vide cooking. Keep in mind that the time will equal the tenderness, especially when it comes to thick or tougher cuts of meat. Typically I recommend 1 hour per inch of thickness as a starting point but with chuck roast being such a big piece of beef I recommend a minimum of 18 hours with (24 hours being my favorite) to get the tenderness that is indicative of roast beef.

Pre-sear or not to pre-sear?

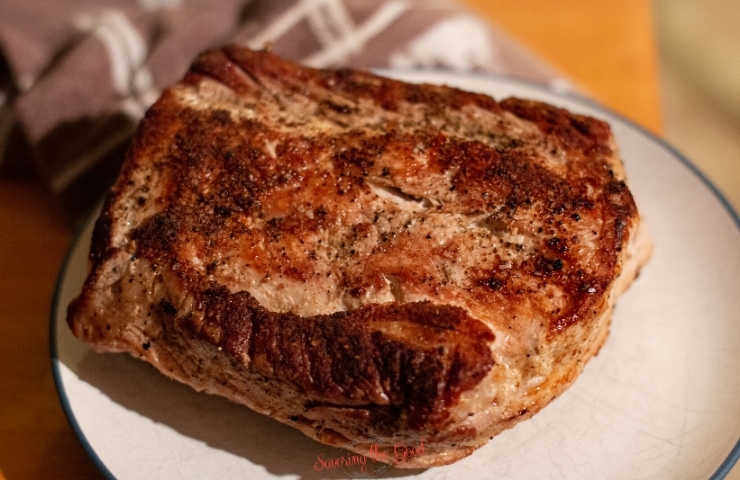
sous vide chuck roast patted dry after cooing, on a plate

I am a big fan of pre-searing meat when there is a long cook. By pre-searing the meat you are adding a layer of flavor to your cook. I see it as a kind of setting up your meat to be basting with flavor when you pre-sear ahead of cooking with sous vide.

How To Pre-Sear:

first sear of sous vide chuck roast before cooking
  1. Allow the meat to come to room temperature for an hour.
  2. Pat the meat dry with paper towels to remove excess moisture.front face of a chuck roast with salt and pepper
  3. Season the meat with salt and pepper over all sides of the beef.
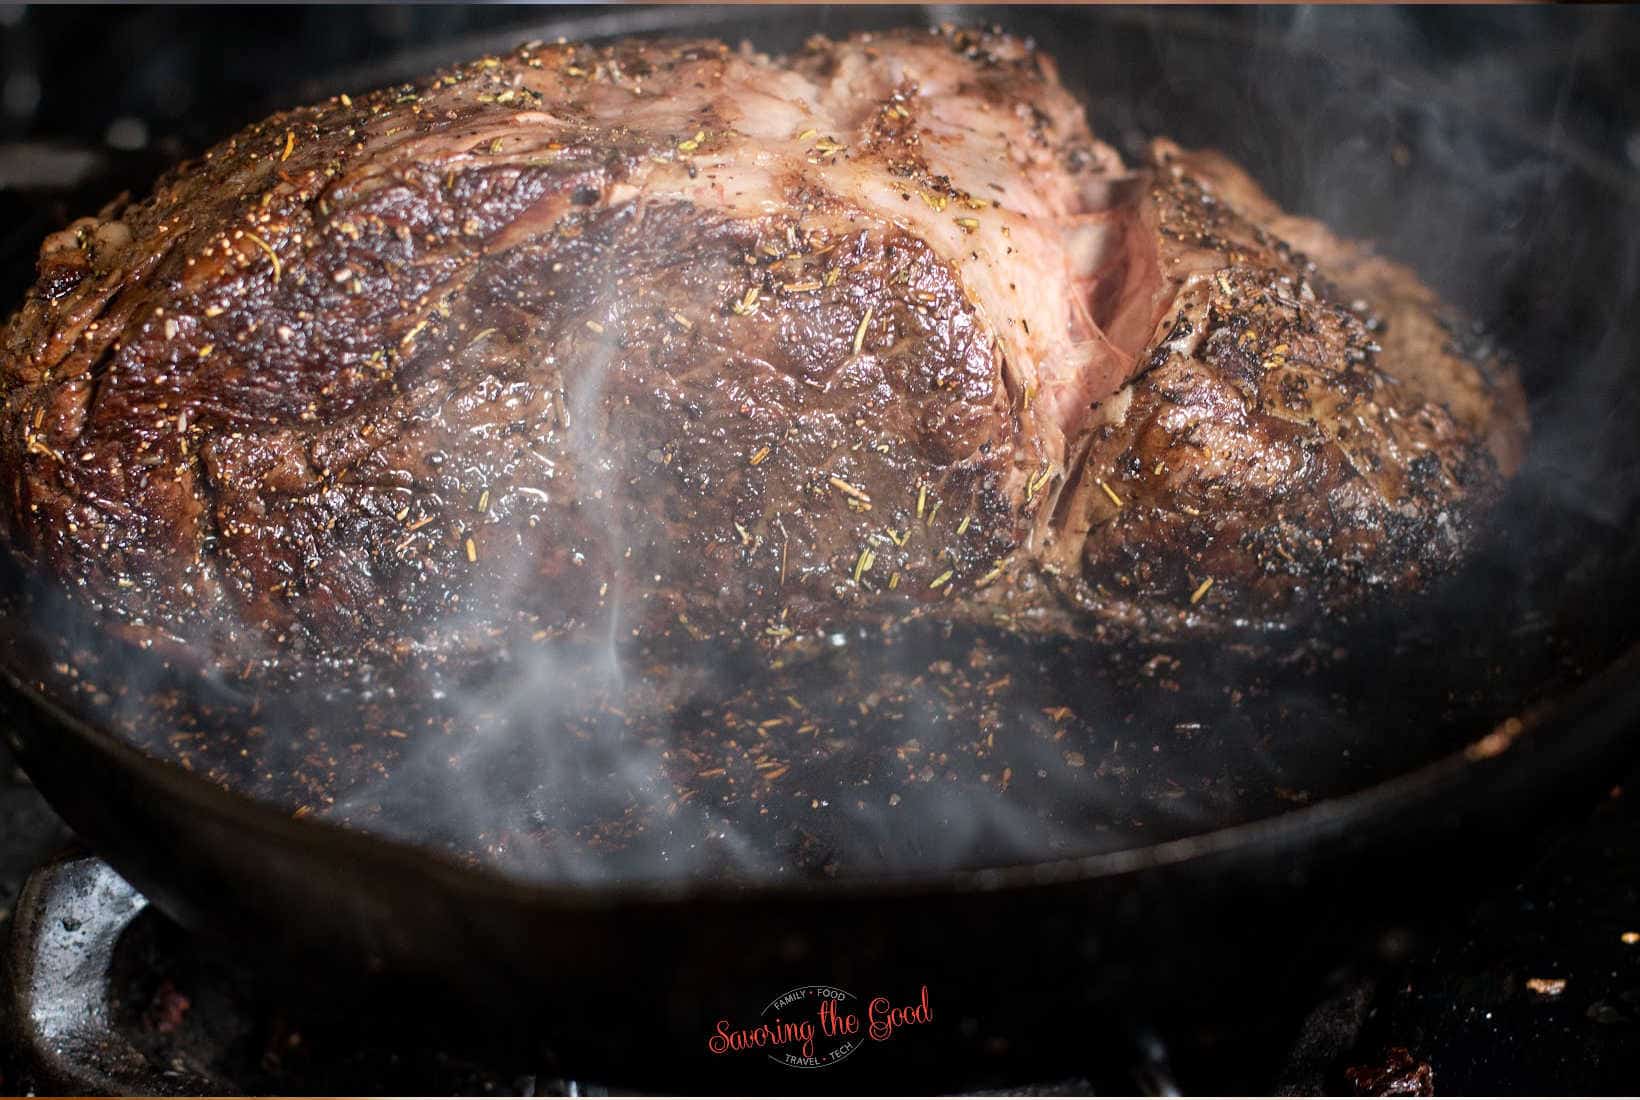
  4. Heat a heavy bottom or cast iron pan to the point of smoking. first sear of sous vide chuck roast before cooking
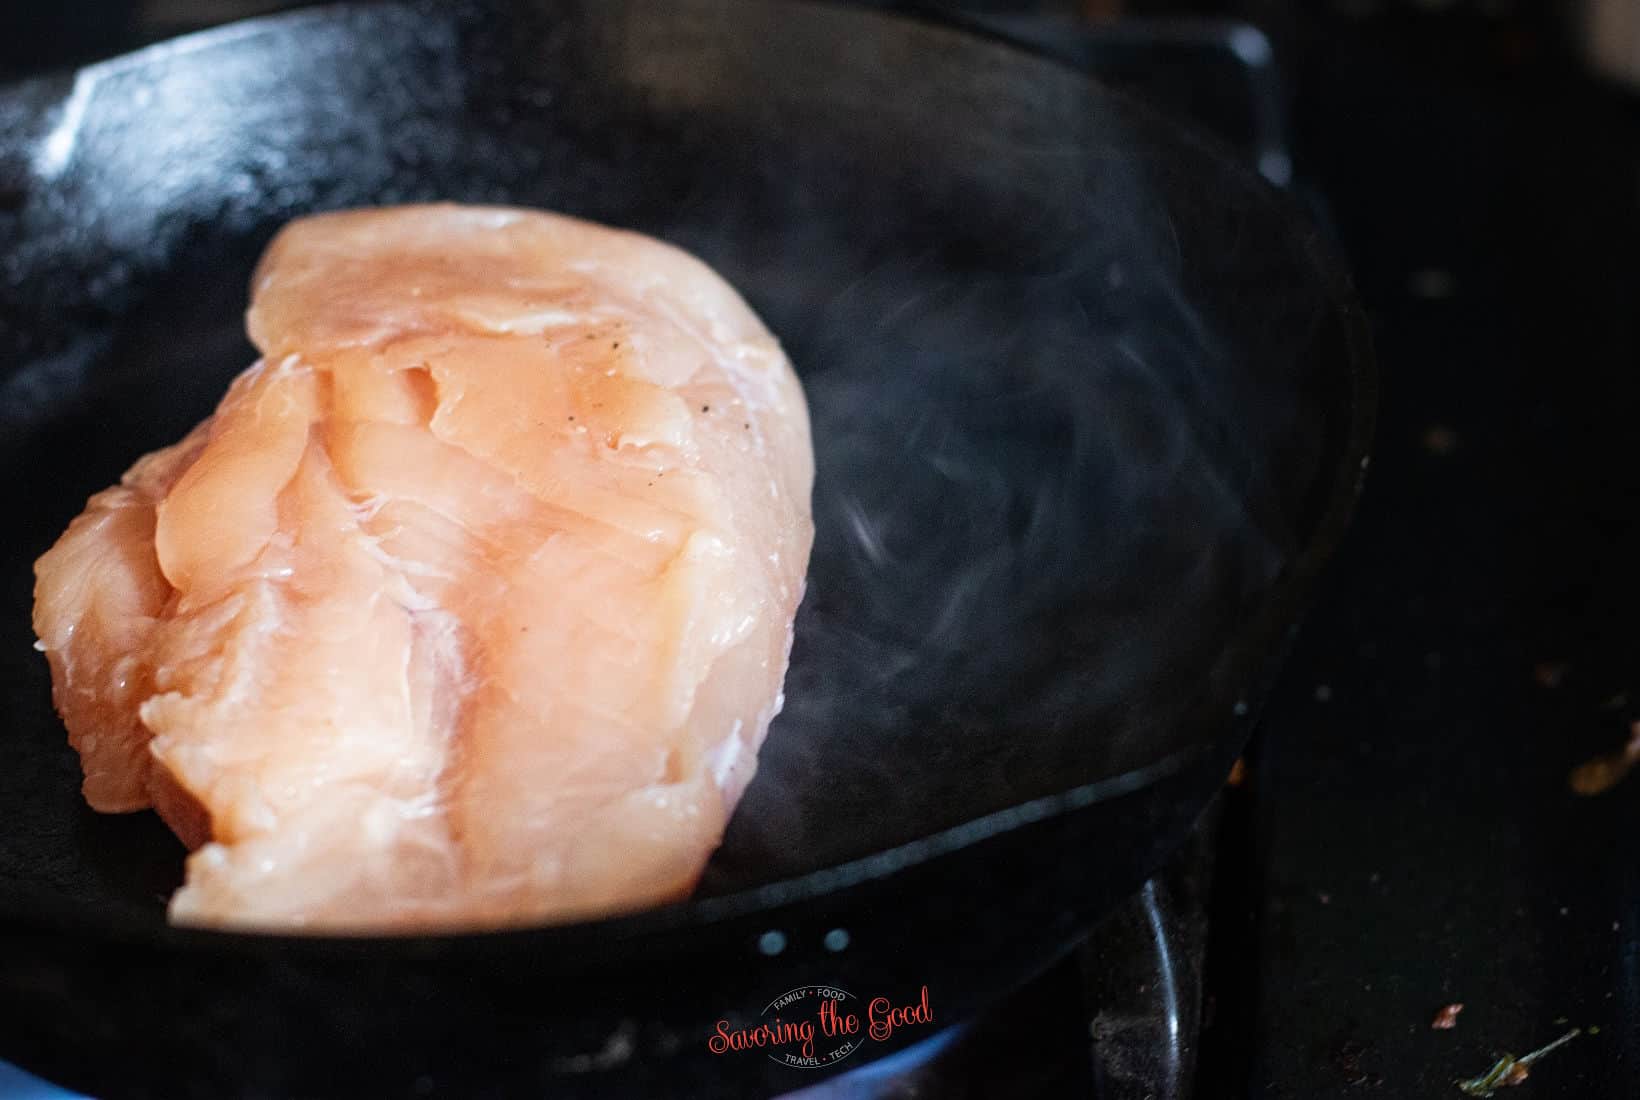
  5. Place the roast cut side down in the pan, allowing it to sear for 2-3 minutes or until it takes on a deep caramel color.
  6. Flip the meat and sear on all sides, rotating the searing side 90 degrees with each flip.

How to sous vide a roast:

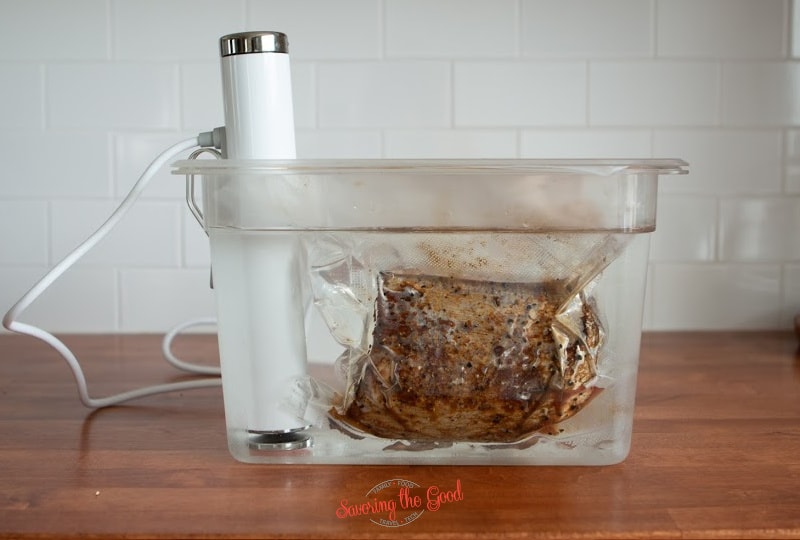
second image of sous vide chuck roast in a sous vide bag in a water bath
  1. Preheat the Sous Vide circulator: Add enough water to the sous vide container or a large pot that the meat will be fully submerged; Set the temperature to your desired doneness, I like: 136°F (58°C).
  2. Pre-sear the roast - if you choose to pre sear the roast, see instructions above.
  3. Add flavoring to the bag - if you are adding additional flavoring add it to the bag.
  4. Place the meat into the sous vide or freezer zip-top bag.
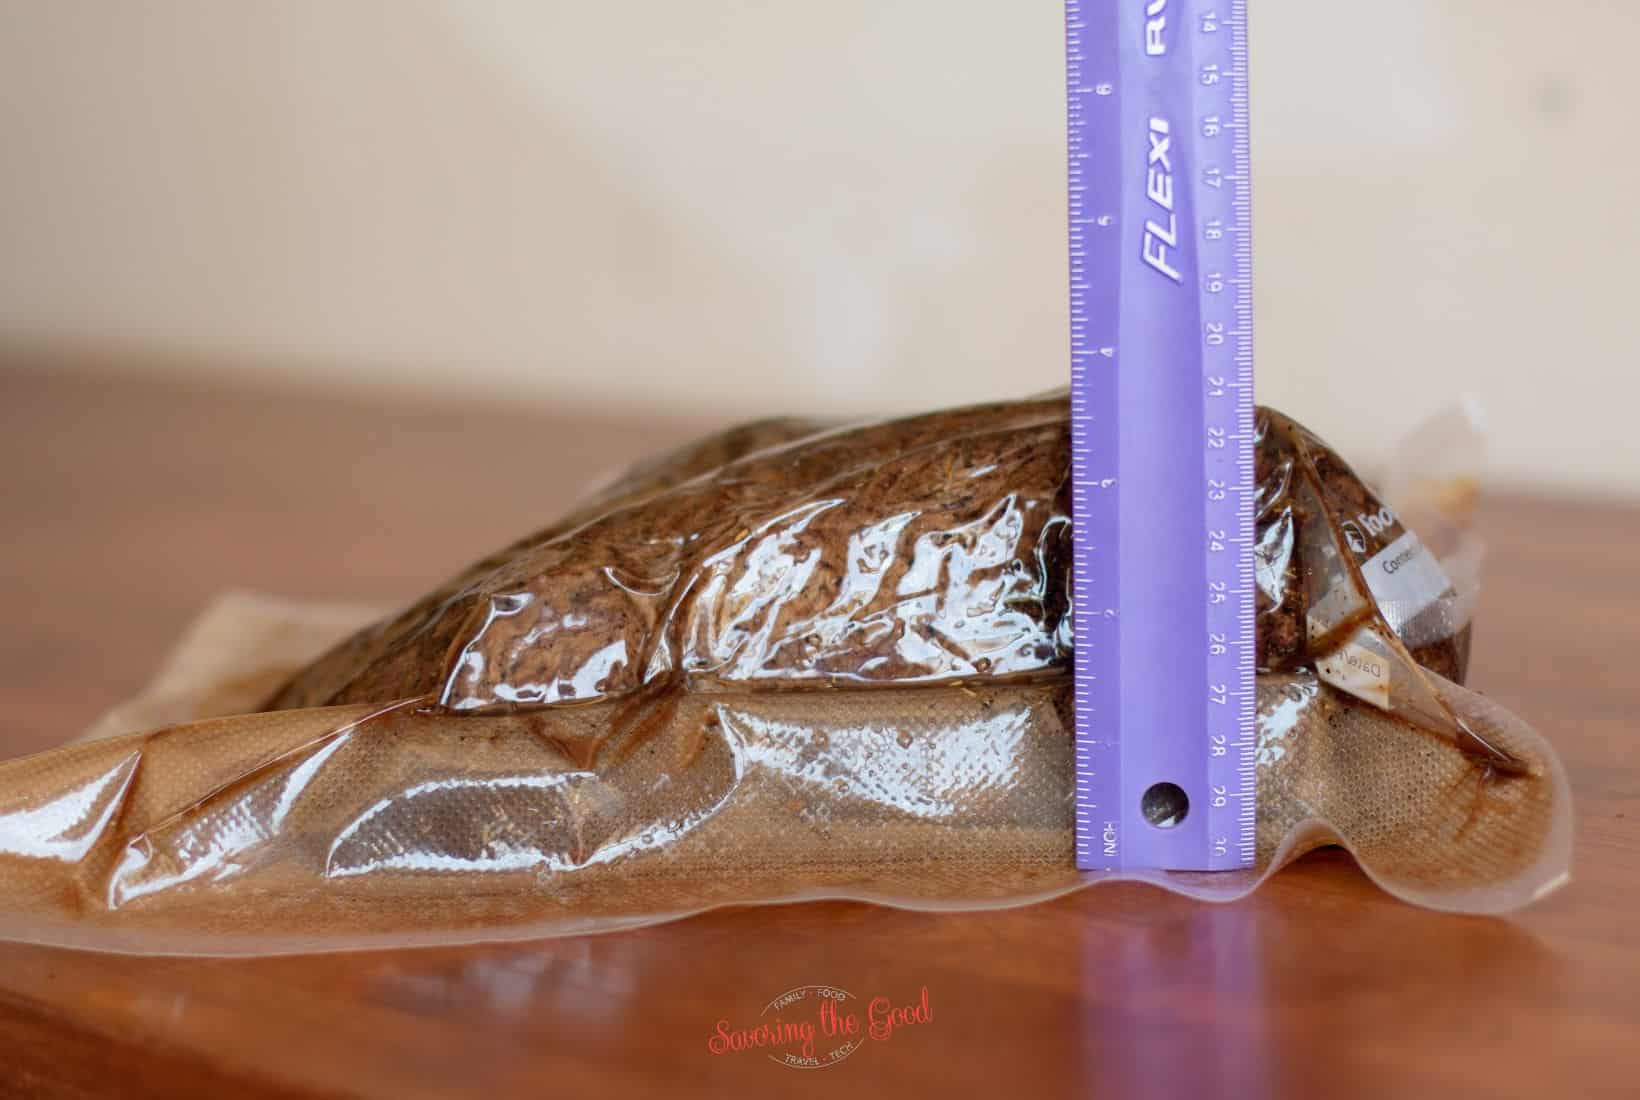
  5. Submerge the bag: using the 'water displacement' technique: close all but one corner of the bag and slowly lower the bag with the roast into the water bath. The pressure of the water will force out the air. close the zip-top bag.
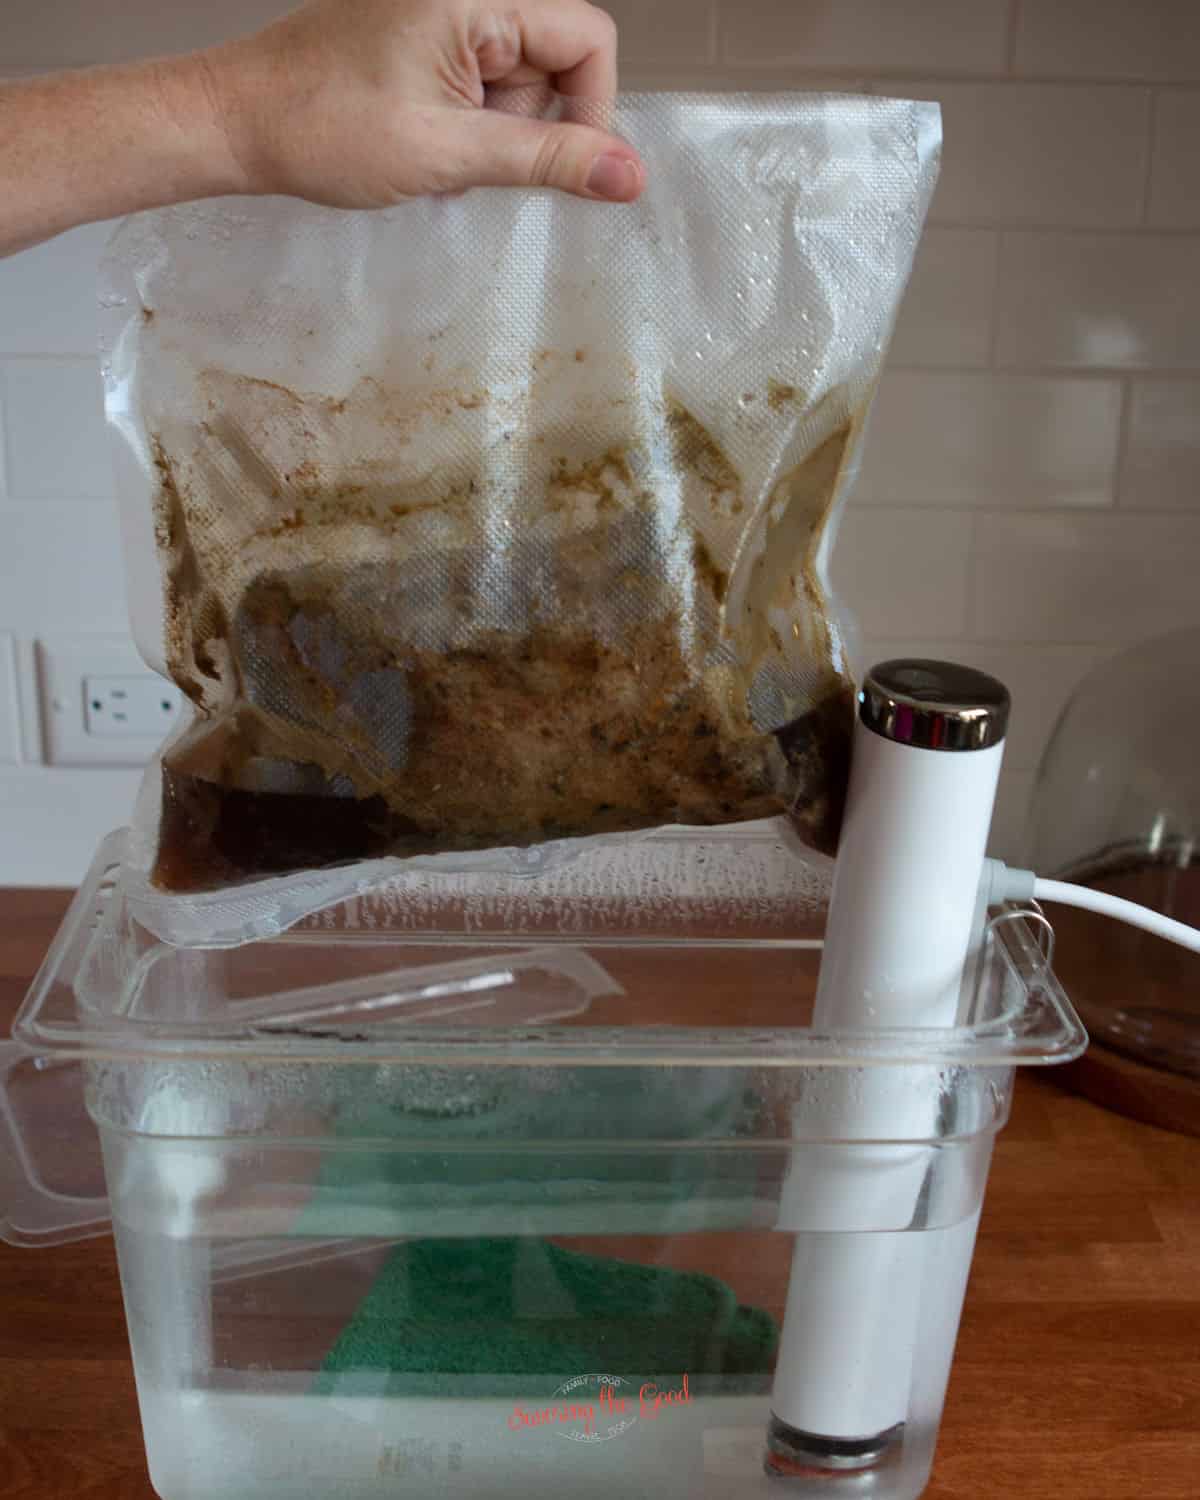
  6. Sous Vide the Chuck Roast: Cook the chuck roast in the sous vide water bath for 24 hours. pulling sous vide chuck roast out of the sous vide batch
  7. Finishing the roast: remove the bag from the water bath and reserve the purge, the liquid in the bag, for making a gravy or adding to sauces. sous vide chuck roast in a sous vide bag, chilling after cooking
  8. Cool the roast: to keep the mayonnaise from sliding off the roast before hitting the pan, chill the chuck roast in a water bath for about 10 minutes. seared sous vide chuck roast showing the coloring
  9. Sear the Roast: Remove the roast from the bag. Pat dry the surface thoroughly with paper towels. sous vide chuck roast lightly coated in mayo before searing
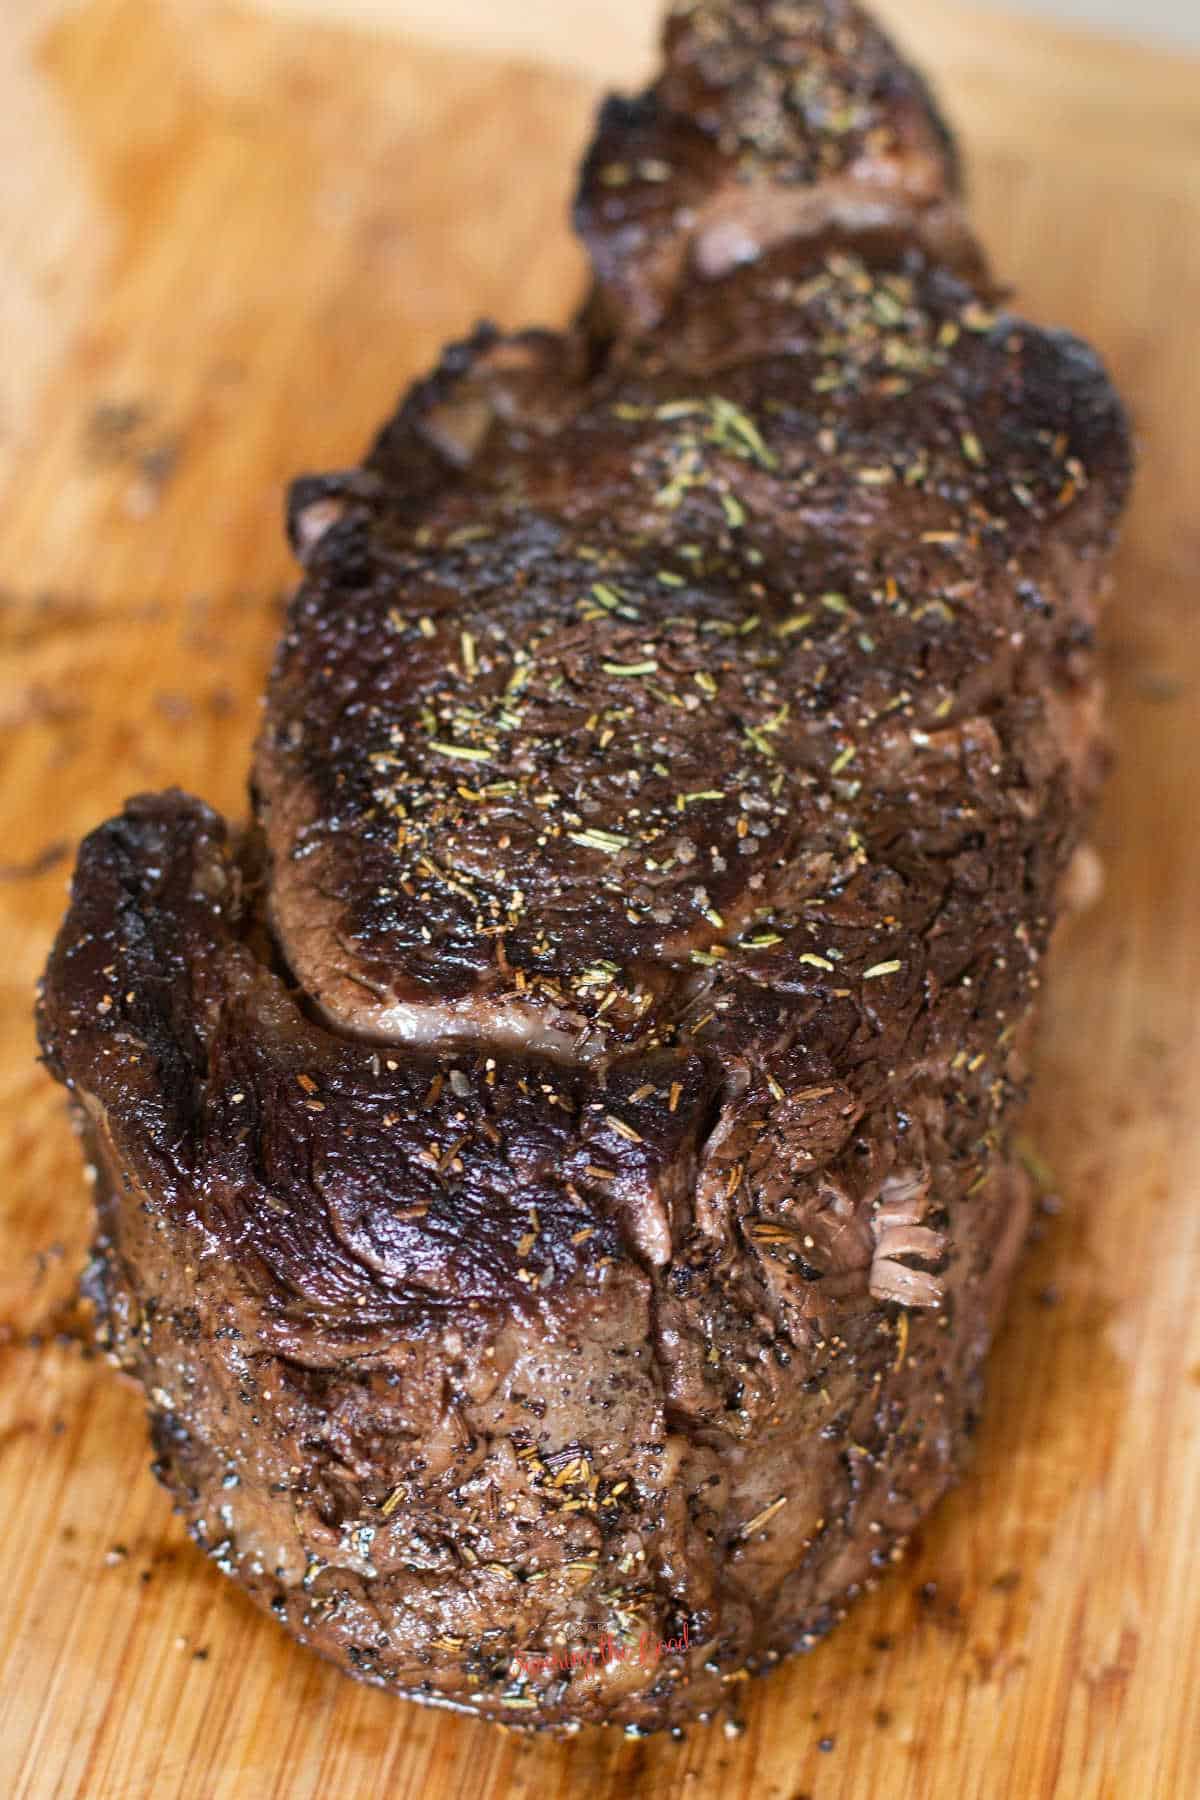
  10. Lightly brush a thin coat of mayonnaise over the surface of the meat. Sear in a screaming hot cast-iron skillet on all sides for 1 minute to get a delicious crust.

Variations:

This is where your culinary creativity comes into play. You can be a purist and just go with salt and pepper, allowing the flavors of the beef to shine through. Or, you can take your sous vide roast beef to another level with additional flavors to enhance your meal.

Here are some suggestions for adding different flavor profiles to your roast. Choose one.

To the bag add:

  • a packet of au jus gravy powder
  • 2 teaspoons garlic powder, 1 tbsp rosemary, minced, ½ tbsp Worcestershire sauce, 1 tsp smoked paprika, ½ tsp mustard powder, ½ tsp onion powder
  • ¾ cup of dry red wine (Cabernet or Pinot Noir),2 cups of beef broth, 1 teaspoon of dried thyme, 1 tablespoon of Worcestershire sauce, 2 bay leaves

FAQ's and Tips

Can you sous vide a frozen chuck roast?

Yes! The beauty of sous vide and this long cook is that you can easily sous vide a frozen chuck roast. I would skip the pre sear and get a good post sear after the cook.

Can I use a sealed vacuum bag instead of a zip top bag?

yes! I will use a vac and seal bag when I am pulling a chuck roast from the freezer to cook it. It is convenient for me to pre sear, cool, vac and seal, freeze and toss in the sous vide water bath. But you are welcome to use a vac and seal bag in place of a zip top bag.

How to reheat the roast:

Once the roast has completed its cook, it can be iced down and reheated at a later time. To reheat using the sous vide, set the circulator to 130 and submerge the roast, in a bag, and heat for 30 minutes. The short amount of time in the water will reheat it, not cook it.
Then sear in a hot skillet to get the crust.

How do you serve sous vide chuck roast?

Slice sous vide chuck roast thin for roast beef sandwiches, french dips, or slick thick for dinner served with roasted vegetables. Serve a 63 degree egg over the beef.

Should you add flavoring to the sous vide bag?

This is where your culinary creativity comes into play. You can be a purist and just go with salt and pepper, allowing the flavors of the beef to shine through. Or, you can take your sous vide roast beef to another level with additional flavors to enhance your meal.

Here are some suggestions if you are looking for inspiration:
a packet of au jus gravy powder
2 teaspoons garlic powder, 1 tbsp rosemary, minced, ½ tbsp Worcestershire sauce, 1 tsp smoked paprika, ½ tsp mustard powder, ½ tsp onion powder
¾ cup of dry red wine (Cabernet or Pinot Noir),2 cups of beef broth, 1 teaspoon of dried thyme, 1 tablespoon of Worcestershire sauce, 2 bay leaves

What cut of beef is best for making roast beef?

When you are shopping for the perfect cut of beef to make roast beef using the sous vide cooking method, look for a chuck roast. Chuck roast is a cut of beef that comes from the front of the steer and is very lean and flavorful.

sous vide chuck roast

24 Hour Roast Beef Sous Vide

Sous vide chuck roast makes the most delicious sous vide roast beef turning an inexpensive cut of beef into a memorable meal.
4.59 from 12 votes
Print Pin Rate
Course: Sous Vide
Cuisine: French
Keyword: sous vide chuck roast, sous vide roast
Prep Time: 10 minutes minutes
Cook Time: 1 day day
Servings: 3 pounds
Calories: 365
Author: Sarah Mock

Ingredients

  •  
    1 3-4 pound chuck roast
  • A Morton Salt container with a blue label featuring a girl in a yellow dress holding an umbrella, with salt pouring out of a container-an essential ingredient for perfectly seasoning dishes like Chicken Cordon Bleu.salt
  • A 6 oz container of McCormick Pure Ground Black Pepper with a red lid and a Black Pepper
  • A jar of Hellmann's Real Mayonnaise with a blue lid, labeled 1 Tablespoon mayonaise
US Customary - Metric
Follow Savoring The Good On PinterestFollow @SavoringTheGood or tag #STGRecipes!

Instructions

  • Preheat the Sous Vide circulator: Add enough water to the sous vide container or a large pot that the meat will be fully submerged; Set the temperature to your desired doneness, I like: 136°F (58°C).
  • Pre-sear the roast - if you choose to pre sear the roast, see instructions above.
    1 3-4 pound chuck roast
  • Add flavoring to the bag - if you are adding additional flavoring add it to the bag.
  • Place the meat into the sous vide or freezer zip-top bag.
  • Submerge the bag: using the 'water displacement' technique: close all but one corner of the bag and slowly lower the bag with the roast into the water bath. The pressure of the water will force out the air. close the zip-top bag.
  • Sous Vide the Chuck Roast: Cook the chuck roast in the sous vide water bath for 24 hours.
  • Finishing the roast: remove the bag from the water bath and reserve the purge, the liquid in the bag, for making a gravy or adding to sauces.
  • to keep the mayonnaise from sliding off the roast before hitting the pan, chill the chuck roast in a water bath for about 10 minutes.
    1 Tablespoon mayonaise
  • Remove the roast from the bag. Pat dry the surface thoroughly with paper towels.
  • Lightly brush a thin coat of mayonnaise over the surface of the meat.
  • Sear in a screaming hot cast-iron skillet on all sides for 1 minute to get a delicious crust.

Notes

Should you add flavoring to the sous vide bag?
This is where your culinary creativity comes into play. You can be a purist and just go with salt and pepper, allowing the flavors of the beef to shine through. Or, you can take your sous vide roast beef to another level with additional flavors to enhance your meal.
Here are some suggestions if you are looking for inspiration:
  • a packet of au jus gravy powder
  • 2 teaspoons garlic powder, 1 tbsp rosemary, minced, ½ tbsp Worcestershire sauce, 1 tsp smoked paprika, ½ tsp mustard powder, ½ tsp onion powder
  • ¾ cup of dry red wine (Cabernet or Pinot Noir),2 cups of beef broth, 1 teaspoon of dried thyme, 1 tablespoon of Worcestershire sauce, 2 bay leaves
Want to share when you made this recipe?Follow @SavoringTheGood & tag #STGRecipes!
Nutrition Facts
24 Hour Roast Beef Sous Vide
Serving Size
 
1
Amount per Serving
Calories
365
% Daily Value*
Fat
 
24
g
37
%
Saturated Fat
 
10
g
63
%
Trans Fat
 
1
g
Polyunsaturated Fat
 
13
g
Cholesterol
 
126
mg
42
%
Sodium
 
171
mg
7
%
Protein
 
37
g
74
%
* Percent Daily Values are based on a 2000 calorie diet.
**Nutritional facts are just estimates. Please utilize your own brand nutritional values to double check against our estimates.
Like this recipe card? Want one for your site?Check out WP Recipe Maker!

Sarah Mock of savoringthegood.com headshot 2022

I am Sarah Mock. Welcome!

Sarah Mock is a classically trained Chef and graduate of Johnson & Wales University. A culinary blogger for 16 years Sarah helps the home cook prepare her recipes with professional results.

Get to know me

as seen in:

Logos of Hersheyland, ABC News, and Good Day PA are showcased in a seamless row, providing a snapshot of popular brands.

Hersheyland Nightline Good Day Pa!

The vibrant design showcases the iconic logos of Pinterest, Rachael Ray, and Jell-O set against a bold red background. Sorry, the provided description doesn't offer enough detail to suggest important SEO keywords.

Pinterest Rachael JELL-O

Homemade Vanilla Bean Paste Recipe

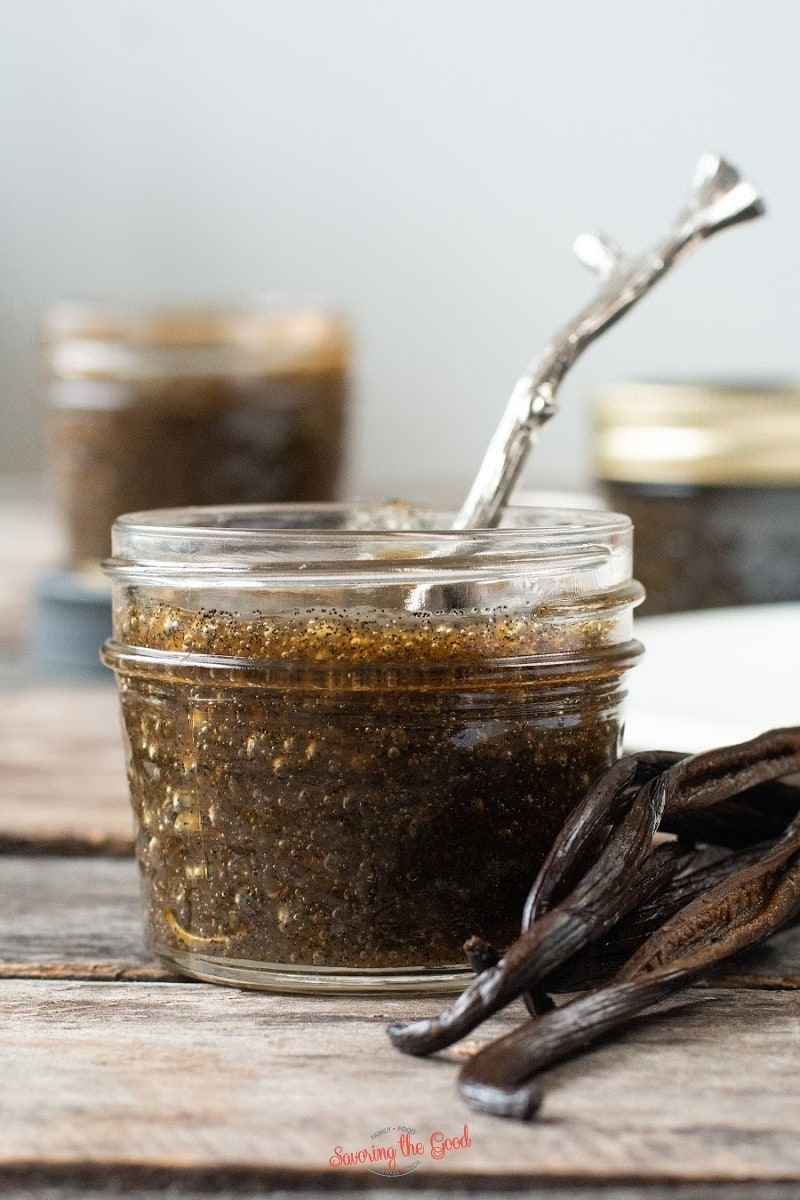
vanilla bean paste with spoon square image

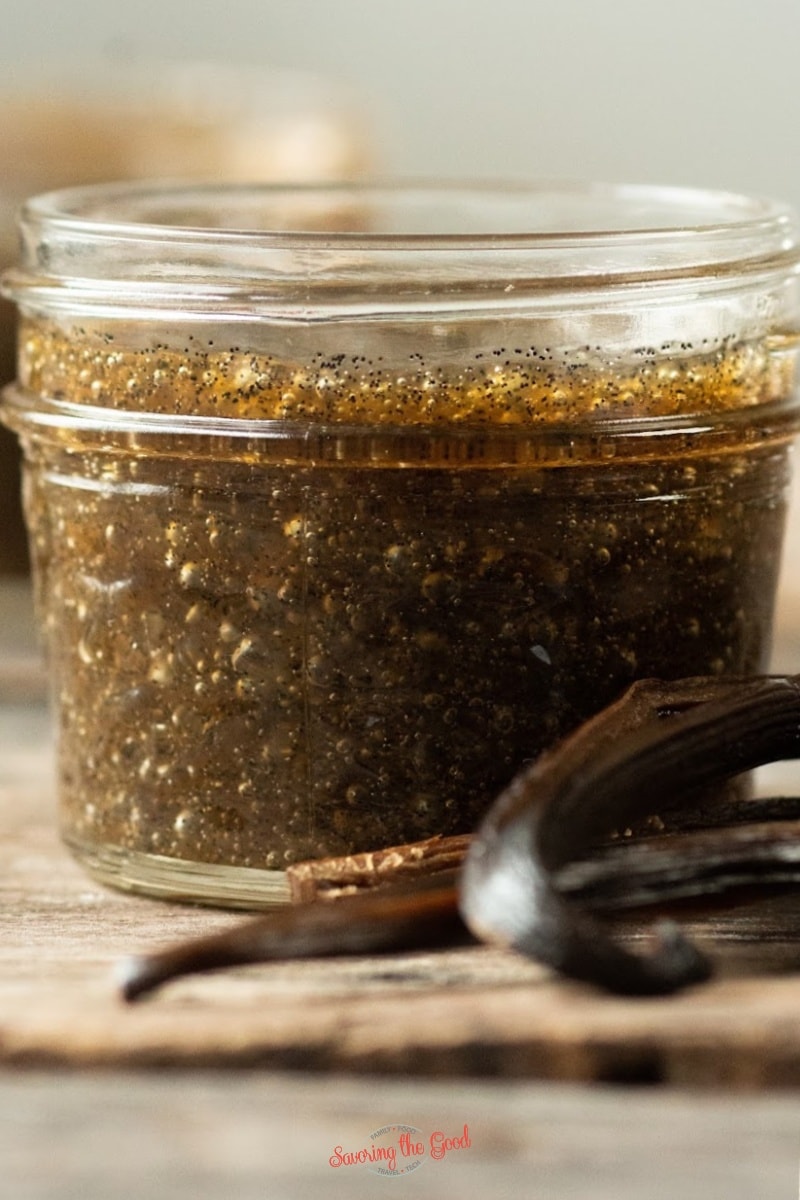
Vanilla bean paste is a thick, almost jelly-like paste that is full of the tiny vanilla flecks called vanilla caviar used in cakes, icings, ice cream and other desserts that call for an intense vanilla flavor.

vanilla bean paste in a small glass jar with spoon

Vanilla paste is made with whole beans and can be used in place of pure vanilla extract.

What is Vanilla Bean paste?

Vanilla bean paste is expensive to purchase because of the number of vanilla beans it takes to make the paste. A little goes a long way in a recipe but the price point is often a barrier to keeping vanilla paste on your pantry shelf.

I am going to show you how I make vanilla bean paste for a fraction of the cost of store-bought vanilla bean paste while maintaining that intense vanilla bean flavor that is so desirable.

tight shot of vanilla bean paste in jar with vanilla beans

Vanilla extract is the vanilla-infused brown liquid made with vodka, rum or other 80 proof alcohol. If you are making your own vanilla extract it can take as little as 8 weeks or for a more true, concentrated flavor 6 months. If you have a sous vide circulator you can make vanilla extract faster with the science of sous vide vanilla extract.

But true vanilla lovers know the value of vanilla paste. Vanilla paste is made from not only the split vanilla bean but the tiny flecks of vanilla called vanilla caviar as well as the pod of the vanilla bean. Vanilla paste is thicker, has a more intense, concentrated vanilla flavor than vanilla extract, and is full of the vanilla bean flecks that are indicative of full profile vanilla desserts.

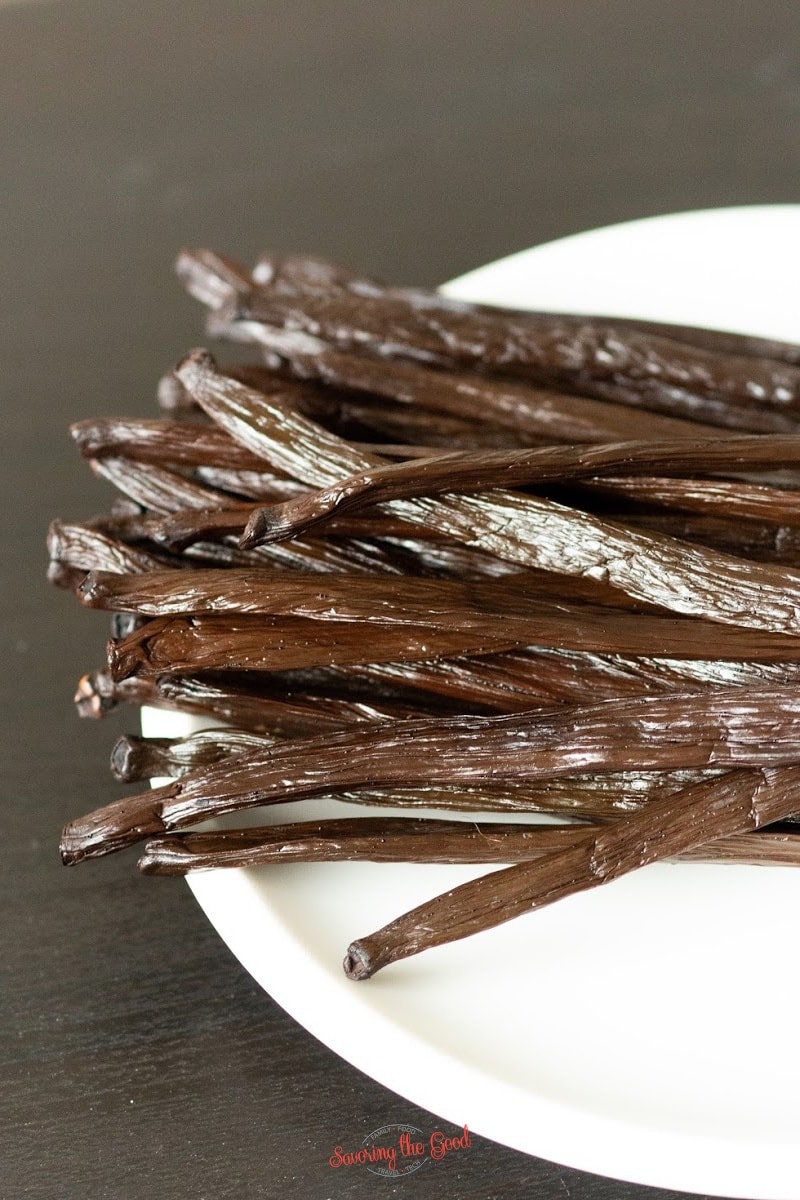
whole vanilla beans on a plate horizontal image

Substitute for vanilla bean paste

If you are out of vanilla bean paste you can use in place of vanilla extract, in equal parts. 1 teaspoon of vanilla bean paste equals 1 teaspoon extract. But know that vanilla bean past has a more complex flavor profile than vanilla extract.

whole vanilla beans on a plate

Where do you buy vanilla beans in bulk?

Vanilla beans are very pricey when you purchase them in the grocery store. Be prepared to pay $10-$20 PER BEAN when you are looking to purchase them at the grocery store. Get a few extra beans and make vanilla bean powder. Just like Starbucks!

But with so many things, there is power of pooling resources and buying in bulk. I found a Facebook group that is a co-op that and the organizer for buying responsibly sourced vanilla beans. The group is Vanilla Bean Co-Op. There are questions to answer before you are allowed into the group.

Read through all the files, all the instructions and learn before you put in an order. You are able to purchase fresh vanilla beans by the ounce, not by the each. Keep in mind different beans from different regions of the world will have different flavor notes, length, width and moisture content. The admins of the group will tell you all about each bean before you purchase them.

To make my recipe of vanilla bean paste you are going to need 4 ounces of vanilla beans. But order as many as you want. This recipe can easily be scaled up.

sharp knife scraping a vanilla bean to remove the vanilla caviar

What do you need to make homemade vanilla bean paste?

  • Vanilla beans
  • Rum - at least 80 proof
  • Sugar - white granular sugar
  • Water -
  • Corn Syrup - this helps prevent crystallization
  • Lemon juice - fresh
  • Xanthan gum -
vanilla bean paste in a 4 ounce glass jar with a spoon in the jar

How to make homemade vanilla bean paste

  1. Start making vanilla bean paste by infusing the rum with split beans. vanilla beans in rum for vanilla bean paste
  2. Split each vanilla bean in half, exposing the vanilla caviar in the middle. Place the rum and vanilla beans together in a large, freezer zip-top bag. Force the air out, close the bag and allow to sit at least seven days. I have done 30 days.... because I forgot about it.
    vanilla infused alcohol in a pan for part of making vanilla bean paste
  3. Pour the liquid off the vanilla beans and into a heavy saucepan or small pot.
    vanilla beans and vanilla carviar in a pan for making vanilla bean paste
  4. Using a sharp knife, scrape the insides of the vanilla beans into the pan, then add empty pods into the pot, too (they contain a natural thickening agent!)
  5. Add the sugar, water, corn syrup, and lemon juice. vanilla bean paste boiling in a pan
  6. Bring the mixture to a boil, stirring constantly with a silicone or rubber spatula.
  7. Boil 5 minutes, string constantly. It will be clumpy, don't panic.
  8. Carefully remove the split vanilla pods from the pan and save to make vanilla extract or vanilla sugar. scraped vanilla bean paste on a red spatula
  9. Carefully add the vanilla bean liquid into a blender or food processor, scraping down the sides of the pan. Be sure there is ample space for blending.
  10. Turn the blender on its lowest speed with the lid on.
  11. Slowly increase the speed until the paste mixture forms waves or a vortex in the blender.
  12. Carefully remove the lid while the machine is running, or take out the top stopper of the blender lid. Tap/dust the xanthan gum over the swirling mixture.
  13. Add the xanthan gum in ¼ tsp. increments, dusting the xanthan gum over the surface of the moving liquid. vanilla bean paste in a blender
  14. Don't add the whole ¼ tsp. at a time or it will clump. Slowly trickle or tap the spoon to make it snow over the mixture as it swirls.
  15. Turn the blender off periodically and check the consistency. If the caviar rises to the surface, you need more xanthan gum.
  16. Once it stops floating to the top, you don't need to add any more. I used ¾ tsp.
  17. Using a jar funnel, pour your vanilla paste into a quart-sized jar. Shake occasionally as it cools to suspend the caviar in the paste.

FAQ's and Tips

What do you do with the leftover vanilla beans?

Once you are done making vanilla bean past do not toss the leftover vanilla beans. There is still life and flavor in the beans. Cover them with vodka and let them sit for 2-6 months in a cool dark place. You will make vanilla extract! Or you can use them to to make vanilla powder sugarspent split vanilla beans after making vanilla paste

What type of rum is best for vanilla bean paste?

As long as you are using rum that is at least 80 proof you will have vanilla bean paste making success. Spiced rum, white or silver rum, gold rum, or even Caribbean rum will work.vanilla beans in rum for vanilla bean paste

vanilla bean paste with spoon square image

Vanilla Bean Paste

Vanilla bean paste is a thick, almost jelly-like paste that is full of the tiny vanilla flecks called vanilla caviar used in cakes, icings, ice cream and other desserts that call for an intense vanilla flavor.
4.74 from 15 votes
Print Rate
Course: Food Tips
Cuisine: French
Keyword: vanilla Bean Paste, vanilla bean paste recipe
Prep Time: 7 days days
Cook Time: 5 minutes minutes
Additional Time: 15 minutes minutes
Total Time: 7 days days 20 minutes minutes
Servings: 16 ounces
Calories: 21
Author: Sarah Mock

Ingredients

  •  
    4 oz. Vanilla beans
  •  
    7 oz. rum divided
  • A 4-pound bag of Domino granulated pure cane sugar with a yellow and white design, showing nutrition information and branding-perfect for sweetening recipes like rhubarb sour or your favorite desserts.10 oz. Sugar
  •  
    8 oz. Water
  •  
    1 ½ Tablespoon corn syrup to prevent crystallization
  •  
    1 Tablespoon fresh lime or lemon
  •  
    ¾ teaspoons xanthan gum
US Customary - Metric
Follow Savoring The Good On PinterestFollow @SavoringTheGood or tag #STGRecipes!

Instructions

  • Start making vanilla bean paste by infusing the rum with split vanilla beans.
    4 oz. Vanilla beans, 7 oz. rum
  • Split each vanilla bean in half, exposing the vanilla caviar in the middle. Place the rum and vanilla beans together in a large, freezer zip-top bag. Force the air out, close the bag and allow to sit at least seven days. I have done 30 days.... because I forgot about it.
  • Pour the liquid off the vanilla beans and into a heavy saucepan or small pot. Using a sharp knife, scrape the insides of the vanilla beans into the pan, then add empty pods into the pot, too (they contain a natural thickening agent!)
  • Add the sugar, water, corn syrup, and lemon juice.
    10 oz. Sugar, 8 oz. Water, 1 ½ Tablespoon corn syrup, 1 Tablespoon fresh lime or lemon
  • Bring the mixture to a boil, stirring constantly with a silicone or rubber spatula.
  • Boil 5 minutes, string constantly. It will be clumpy, don't panic.
  • Carefully remove the split vanilla pods from the pan and save to make vanilla extract or vanilla sugar.
  • Carefully add the vanilla bean liquid into a blender. Be sure there is ample space for blending.
  • Turn the blender on its lowest speed with the lid on.
  • Slowly increase the speed until the paste mixture forms waves or a vortex in the blender.
  • Carfully remove the lid while the machine is running, or take out the top stopper of the blender lid. Tap/dust the xanthan gum over the swirling mixture.
    ¾ teaspoons xanthan gum
  • Add the xanthan gum in ¼ tsp. increments, dusting the xanthan gum over the surface of the moving liquid.
  • Don't add the whole ¼ tsp. at a time or it will clump. Slowly trickle or tap the spoon to make it snow over the mixture as it swirls.
  • Turn the blender off periodically and check the consistency. If the caviar rises to the surface, you need more xanthan gum.
  • Once it stops floating to the top, you don't need to add any more. I used ¾ tsp.
  • Using a jar funnel, pour your vanilla paste into a quart-sized jar. Shake occasionally as it cools to suspend the caviar in the paste.

Notes

What do you do with the leftover vanilla beans?
Once you are done making vanilla bean past do not toss the leftover vanilla beans. There is still life and flavor in the beans. Cover them with vodka and let them sit for 2-6 months in a cool dark place. You will make vanilla extract!
What type of rum is best for vanilla bean paste?
As long as you are using rum that is at least 80 proof you will have vanilla bean paste making success. Spiced rum, white or silver rum, gold rum, or even Caribbean rum will work.
Want to share when you made this recipe?Follow @SavoringTheGood & tag #STGRecipes!
Nutrition Facts
Vanilla Bean Paste
Serving Size
 
1 teaspoon
Amount per Serving
Calories
21
% Daily Value*
Carbohydrates
 
3
g
1
%
Sugar
 
3
g
3
%
* Percent Daily Values are based on a 2000 calorie diet.
**Nutritional facts are just estimates. Please utilize your own brand nutritional values to double check against our estimates.
Like this recipe card? Want one for your site?Check out WP Recipe Maker!

Sarah Mock of savoringthegood.com headshot 2022

I am Sarah Mock. Welcome!

Sarah Mock is a classically trained Chef and graduate of Johnson & Wales University. A culinary blogger for 16 years Sarah helps the home cook prepare her recipes with professional results.

Get to know me

as seen in:

Logos of Hersheyland, ABC News, and Good Day PA are showcased in a seamless row, providing a snapshot of popular brands.

Hersheyland Nightline Good Day Pa!

The vibrant design showcases the iconic logos of Pinterest, Rachael Ray, and Jell-O set against a bold red background. Sorry, the provided description doesn't offer enough detail to suggest important SEO keywords.

Pinterest Rachael JELL-O

Alabama Firecrackers Recipe With No-Bake Option

alabama fire crackers square

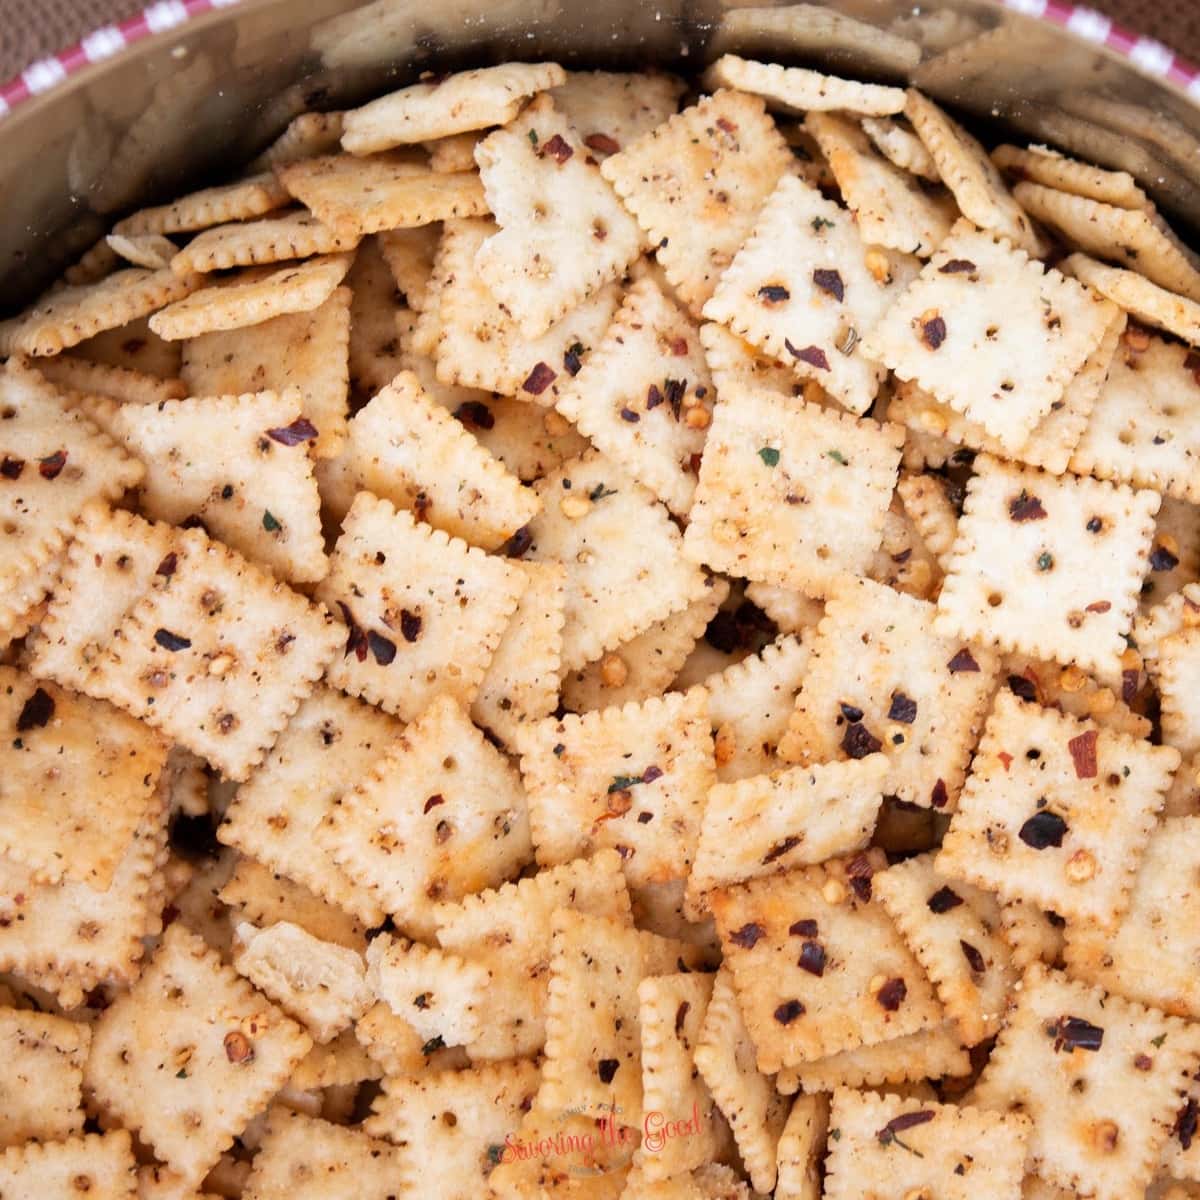
Alabama Firecrackers are the spicy saltine crackers that will keep you coming back for more!

alabama fire crackers square

The spicy cousin to ranch cheese crackers these party crackers have the heat of red pepper flake and added layers of spice with the addition of Tajin seasoning and Ranch dressing mix.

Serve them alongside roasted tomato soup, crushed on top of beanless chili, or alongside your favorite sandwich. They are sure to bring layers of spice and flavor and crispy goodness to any meal.

This easy party appetizer one of my favorite poolside snacks in the summer, holiday homemade food gifts to give and they are always on the buffet at a baby or bridal showers. This addictive recipe can easily be doubled or even tippled if you have a baking sheet big enough to bake them on.

Ingredients needed for Alabama Firecracker recipe:

Recipe Card?

To find the full printable recipe with specific measurements and directions CLICK HERE to go to the recipe card.

Substitutions

  • Saltines - regular size squared is okay if you don't have mini saltine crackers available
  • Oyster Crackers - who doesn't love a seasoned oyster cracker?!
  • Cheez-Its - I Love an extra layer of cheese with this spicy cracker snack.
  • Buttery round crackers - Ritz crackers is a good option
  • Wheat thins - more soaking time may be needed due to the density of the cracker

How to make Alabama Fire Crackers recipe:

alabama firecrackers saltines piled in a white bowl on a wooden kitchen surface
  1. Heat together: In a microwave-safe container warm the oil and all the seasonings for 1 minute.
  2. Stir: stir all the seasonings to combine and further infuse the oil.
  3. Coat the crackers: Spread the crackers on a rimmed baking sheet or in a deep roasting pan. Pour the infused oil over the crackers, scraping out all the seasoning, onto the crackers. Stir to fully coat the crackers.
  4. Rest the crackers: Allow the crackers to rest in the pan for at least an hour, to allow the crackers to absorb the seasoned oil.
  5. Bake the crackers: Bake at 250 for 1 hour, stirring every 15 minutes.
  6. Cool the crackers: Cool completely in room temperature before storing in an airtight container or zip-top bag.

How to Make Fire Crackers Without Baking

  1. Heat together: In a microwave-safe container warm the oil and all the seasonings for 1 minute.
  2. Stir: stir all the seasonings to combine and further infuse the oil.
  3. Coat the crackers: Add the crackers into a 2-gallon ziploc bag. Pour the oil mixture over the crackers, scraping out all the seasoning, onto the crackers. Seal the bag and gently shake the crackers in the bag to coat the crackers.
  4. Rest the crackers: Allow the crackers to rest in the bag overnight to allow the crackers to absorb the oil and seasonings.
  5. Enjoy your party snack: Once the savory crackers have absorbed all the flavorings overnight, they are ready to enjoy!

Why are firecracker crackers a great party snack?

  • Firecracker crackers only need simple ingredients yet it comes out as an excellent party appetizer.
  • Firstly, they are easy to make, requiring minimal effort for a delicious outcome. The simplicity of the ingredients further enhances their appeal.
  • Additionally, these crackers contribute a flavorful and dynamic element to any snack mix.

More popular snack recipes:

  • Paska Bread - We make this traditional Ukrainian Easter bread recipe every Easter holiday and use any leftovers to make the most delicious french toast.
  • Seasoned Ranch Cheese Crackers - BETTER than the seasoned ranch oyster cracker recipe
  • Pulled Pork - Use your slow cooker or Crock-Pot to cook is an easy way to make delicious pulled pork without turning on your oven or stovetop.
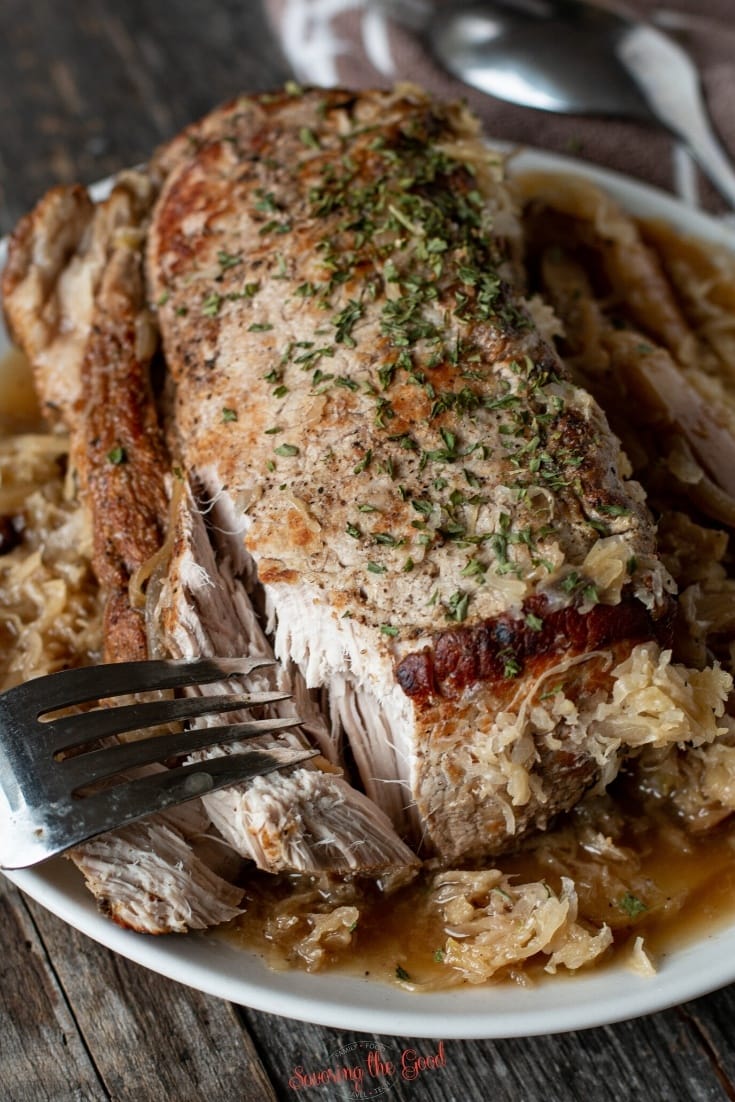
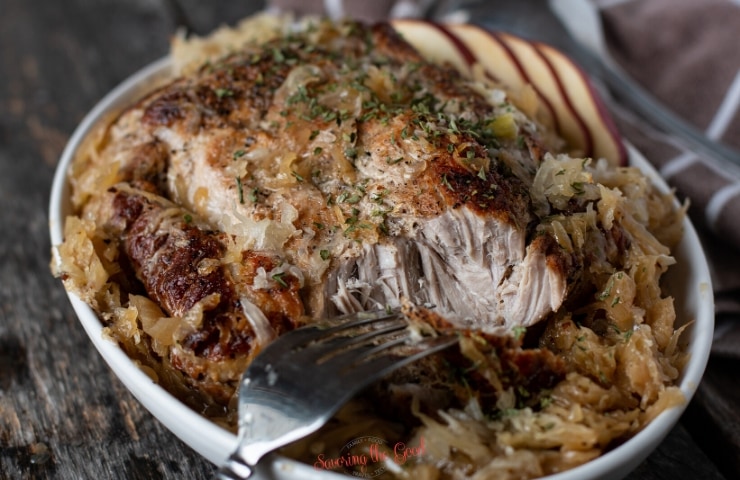
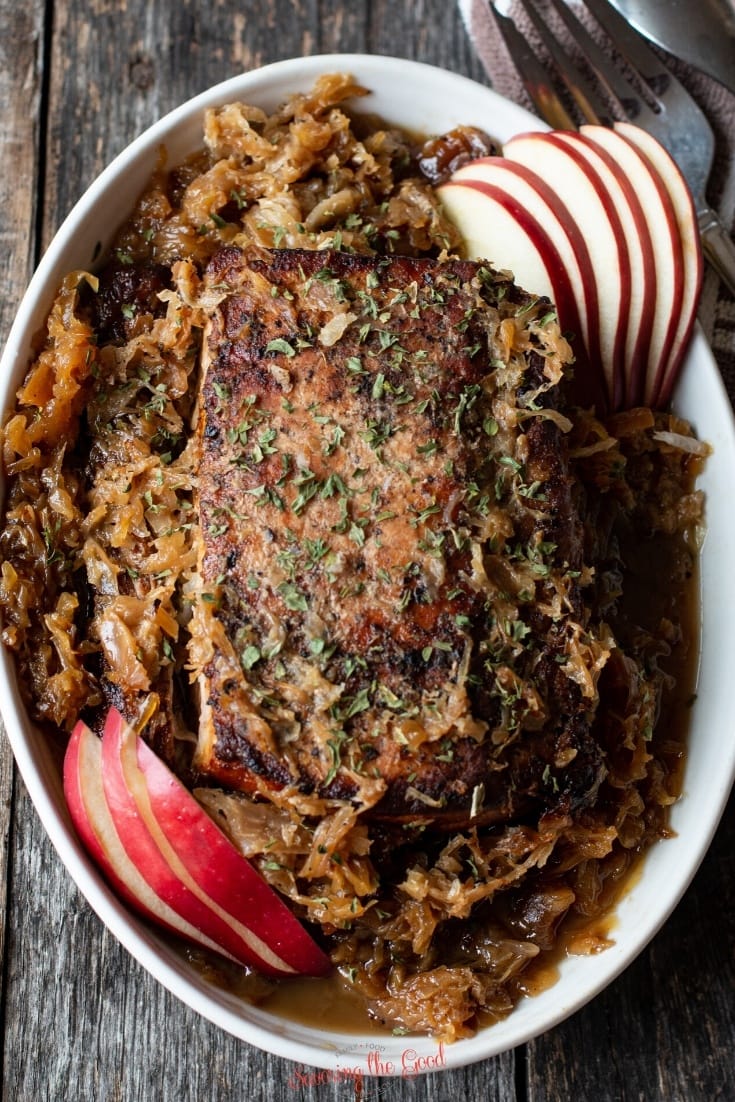
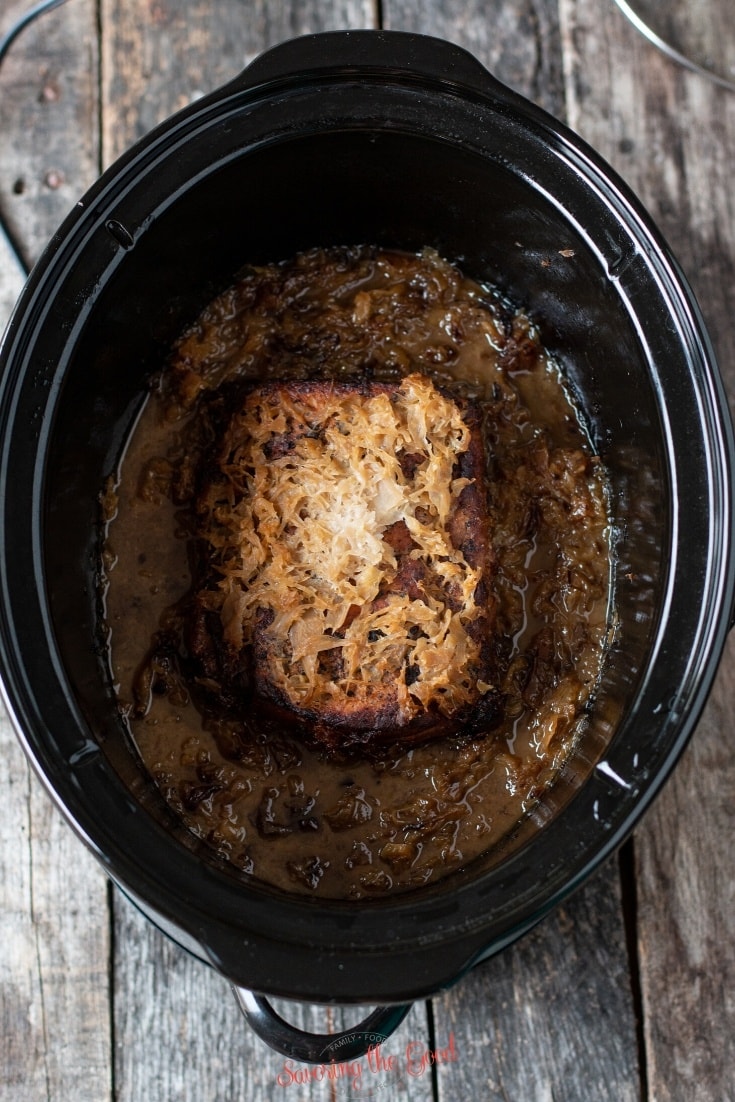
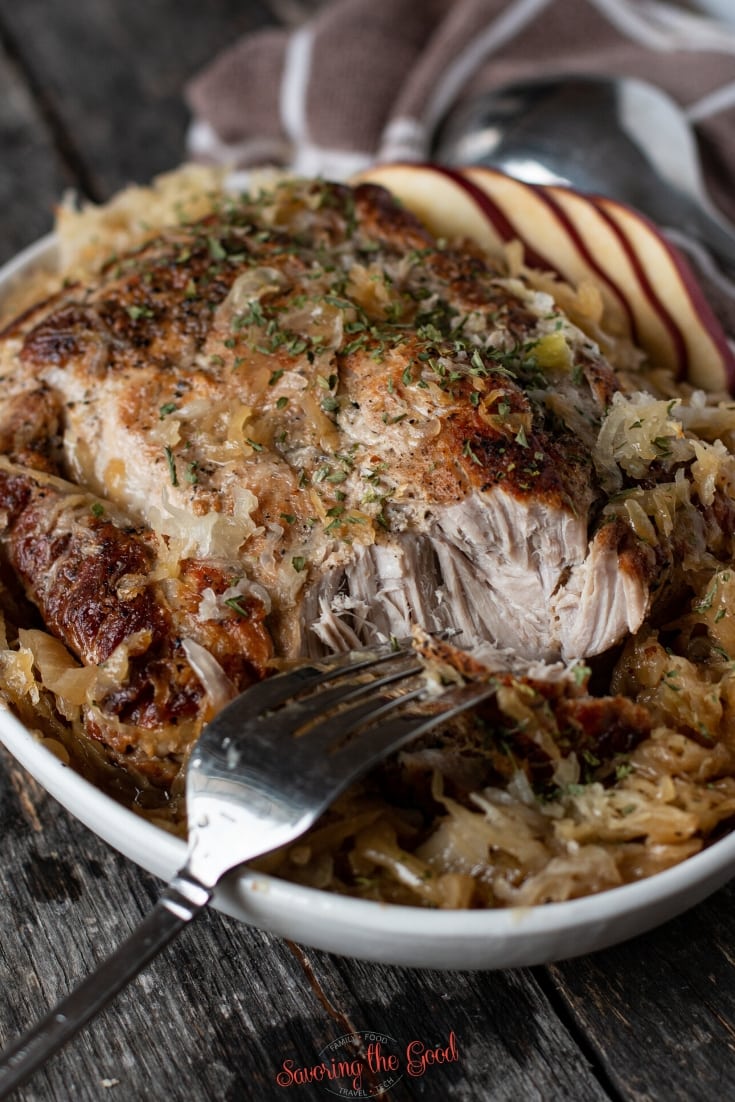
  • Pork and Sauerkraut - traditional oven-roasted pork and sauerkraut recipe that cooked to perfection without drying out. 
  • Pineapple Dump Cake - uses a box of cake mix, canned pineapple, butter and a bit of brown sugar baked in one pan for an easy dessert that is a crowd-pleaser.

Frequently asked questions, answers and tips:

Other Crackers That Can Be Substituted For Saltines:

Saltines - regular size squared
Oyster Crackers - who doesn't love a seasoned oyster cracker?!
Cheez-Its - I Love an extra layer of cheese with this spicy cracker snack.
Buttery round crackers - Ritz is a good option
Wheat thins - more soaking time may be needed due to the density of the cracker

alabama fire crackers square

Alabama Firecrackers

Alabama Firecrackers are the spicy saltine crackers that will keep you coming back for more!
5 from 1 vote
Print Pin Rate
Course: Snacks
Cuisine: American
Keyword: alabama firecrackers recipe, spicy crackers recipe
Prep Time: 1 hour hour
Cook Time: 1 hour hour
Total Time: 2 hours hours
Servings: 42
Calories: 53
Author: Sarah Mock

Ingredients

  •  
    2 boxes mini Saltine crackers
  •  
    1 Cup Grapeseed Oil
  • A plastic container of McCormick Onion Powder with a red lid and a green label stating ½ Teaspoon Onion Powder
  • A 6 oz container of McCormick Pure Ground Black Pepper with a red lid and a ½ Teaspoon Black Pepper
  • Hidden Valley The Original Ranch Seasoning packet, featuring a green landscape and a plate with seasoned chicken and salad. Text on package indicates one packet.2 packets Hidden Valley Ranch Dressing Packet
  •  
    3 Tablespoon Crushed red pepper flakes
  •  
    2 Tablespoon Tajin seasoning
US Customary - Metric
Follow Savoring The Good On PinterestFollow @SavoringTheGood or tag #STGRecipes!

Instructions

  • Heat together: In a microwave-safe container warm the oil and all the seasonings for 1 minute.
    1 Cup Grapeseed Oil, ½ Teaspoon Onion Powder, ½ Teaspoon Black Pepper, 2 packets Hidden Valley Ranch Dressing Packet, 3 Tablespoon Crushed red pepper flakes, 2 Tablespoon Tajin seasoning
  • Stir: stir all the seasonings to combine and further infuse the oil.
  • Coat the crackers: spread the crackers on a rimmed baking sheet or in a deep roasting pan. Pour the infused oil over the crackers, scraping out all the seasoning, onto the crackers. Stir to fully coat the crackers.
    2 boxes mini Saltine crackers
  • Rest the crackers: Allow the crackers to rest in the pan for at least an hour, to allow the crackers to absorb the oil and seasonings.
  • Bake the crackers: Bake at 250 for 1 hour, stirring every 15 minutes.
  • Cool the crackers: Cool completely before storing in an airtight container.

Notes

  • Heat together: In a microwave-safe container warm the oil and all the seasonings for 1 minute.
  • Stir: stir all the seasonings to combine and further infuse the oil.
  • Coat the crackers: Pour the crackers into a 2-gallon ziplock bag. Pour the infused oil over the crackers, scraping out all the seasoning, onto the crackers. Seal the bag and gently turn the bag to coat the crackers.
  • Rest the crackers: Allow the crackers to rest in the bag overnight to allow the crackers to absorb the oil and seasonings.
  • Enjoy your party snack: Once the crackers have absorbed all the flavorings overnight, they are ready to enjoy!
Want to share when you made this recipe?Follow @SavoringTheGood & tag #STGRecipes!
Nutrition Facts
Alabama Firecrackers
Serving Size
 
1
Amount per Serving
Calories
53
% Daily Value*
Fat
 
6
g
9
%
Saturated Fat
 
1
g
6
%
Polyunsaturated Fat
 
5
g
Sodium
 
117
mg
5
%
Carbohydrates
 
1
g
0
%
* Percent Daily Values are based on a 2000 calorie diet.
**Nutritional facts are just estimates. Please utilize your own brand nutritional values to double check against our estimates.
Like this recipe card? Want one for your site?Check out WP Recipe Maker!

Sarah Mock of savoringthegood.com headshot 2022

I am Sarah Mock. Welcome!

Sarah Mock is a classically trained Chef and graduate of Johnson & Wales University. A culinary blogger for 15 years Sarah helps the home cook prepare her recipes with professional results.
Get to know me

Mini Black Bottom Cupcake Recipe

Black Bottom Cupcakes

Black Bottom Cupcakes are a classic dessert straight from my grandmother's church cookbook-fudgy chocolate cupcakes with a creamy cheesecake swirl and mini chocolate chips. Ready in 30 minutes, these mini treats (also called tuxedo cupcakes) are perfect for holidays, parties, or anytime you crave a chocolate-cheesecake combo!

A bitten chocolate chip muffin with cream cheese topping, reminiscent of a black bottom cupcake, sits in an open wrapper, surrounded by whole muffins.

These delicious black-bottom cupcakes are also known as tuxedo cupcakes and I love to enjoy them with a glass of cold milk. Chocolate pizzelles, peanut butter blossom cookies and Pittsburgh nut roll are all holiday cookies that we make every year.

Ingredients needed to make black bottom cupcakes

ingredients in bowls with text overlay labeling the ingredients

Recipe Card?

To find the full printable recipe with specific measurements and directions CLICK HERE to go to the recipe card.

Notes on the ingredients

  • Chocolate Cupcake Ingredients:
    • flour - all-purpose flour works for this recipe. Read why the type of flour matters when you learn baking terms
    • vinegar - white vinegar works but apple cider vinegar can be substituted in.
    • cocoa - unsweetened cocoa powder for baking. Use dark chocolate cocoa powder for rich chocolate cupcakes
    • vanilla - vanilla extract or vanilla bean paste. Learn how to make your own vanilla extract. Cream cheese filling ingredients:
    • cream cheese - full-fat cream cheese... it is the holidays! Go big!
    • mini chocolate chips - because these cupcakes are mini, regular chocolate chips will be too large.
  • Cream cheese filling ingredients:
    • cream cheese - full fat cream cheese... it is the holidays! Go big!
    • mini chocolate chips - because these cupcakes are mini, regular chocolate chips will be too large.

How to make Mini Black Bottom Cupcakes

These Black Bottom Cupcakes are a cherished family recipe-my grandmother made them every Christmas, and now they're my go-to for holidays, parties, or anytime I crave a decadent treat. Ready in just 30 minutes, they combine the best of both worlds: a moist chocolate cupcake base and a creamy cheesecake swirl studded with mini chocolate chips. The recipe makes 48 mini cupcakes, so there's plenty to share (or sneak a few extra for yourself!).

Black Bottom Cupcakes steps
  1. Make the cream cheese filling: In a large bowl, using an electric mixer fitted with the paddle attachment beat the cream cheese, sugar, and salt until light and fluffy. About 2 minutes on medium speed. Black Bottom Cupcakes cream cheese mixture horizontal
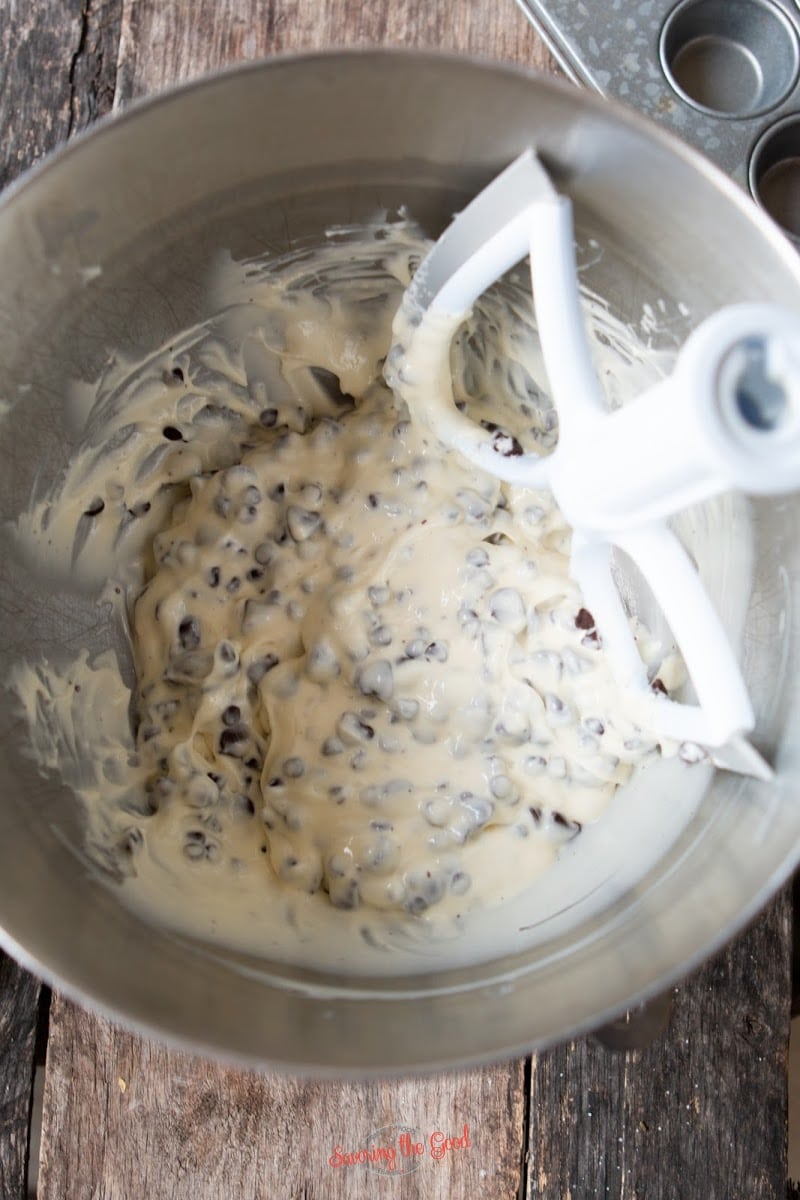
  2. Add the egg and stir until incorporated. Finally, stir in the mini chocolate chips. Black Bottom Cupcakes cream cheese mixture with chocolate chips
  3. Make the chocolate cupcake batter: In a separate bowl, whisk together all the chocolate cupcake dry ingredients until they are blended. About 2 minutes. Black Bottom Cupcakes chocolate batter
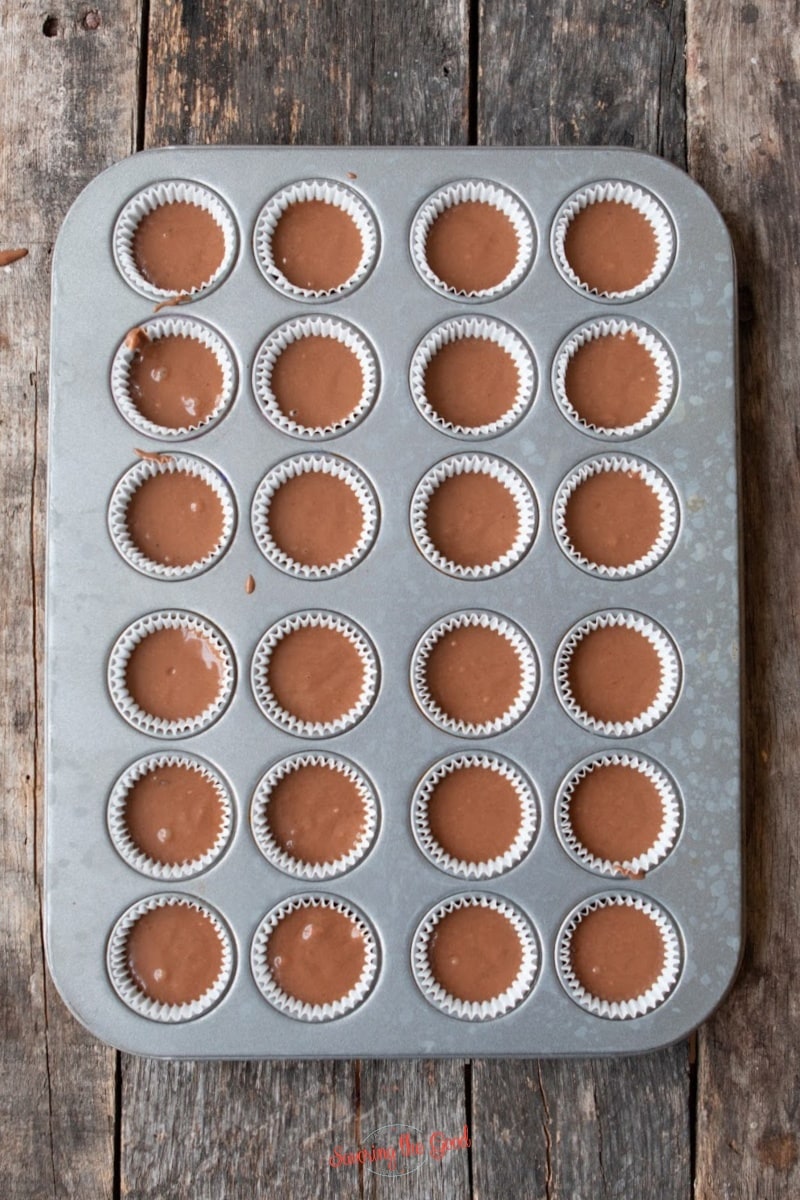
  4. Fill the cupcake liners: line mini muffin tins with paper mini cupcake liners. Give the liners a light spray of non-stick pan sprayBlack Bottom Cupcake chocoalte batter
  5. Use a small scoop to portion out the chocolate batter into each paper liner. The cupcake liner should be filled ⅓ -½ of the way. raw Black Bottom Cupcakes
  6. Top the center of each cupcake with a heaping teaspoon of cream cheese mixture. Black Bottom Cupcakes baked
  7. Bake the black bottoms - Bake the cupcakes for 15-18 minutes at 350 or until the cream cheese centers are just set. Black Bottom Cupcakes on a cooling rack
  8. Cool cupcakes- allow the cupcakes to cool for a few minutes before removing the cupcakes from the pan and cool completely on a wire rack. Chill in the refrigerator for best results

Did you make this recipe?

Do you have feedback that would be helpful to others? If so can help this small business owner by leaving a rating and a review in the comments section? Thank you for being part of the Savoring The Good Community. ~ Sarah

FAQ's and Tips

  • Don't overbake - Keep in mind that when you make these cupcakes there will be a bit of cary-over cooking once the cupcakes are removed from the oven. If the black bottoms are baked too long, they will be dry.
  • Spray the paper liners - I have found that depending on the brand of mini cupcake liners I am able to find, they have a tendency to stick to the cupcakes. So to be on the safe side, I give a light spray of non-stick spray.
  • Don't overfill - don't overfill the liner with the chocolate cake batter. The cream cheesecake filling still needs a place to go and then the whole thing needs to be baked.

Storage Tips

  • Store black-bottom cupcakes in an airtight container with a layer of waxed paper between layers of the cupcakes.
  • This black bottom cupcakes recipe freezes well. Just be sure to allow them to come to room temperature before serving.
  • For the best texture, chill cupcakes for 1 hour before serving. The cheesecake firms up, making them easier to eat
Black Bottom Cupcakes

Black Bottom Cupcakes (Tuxedo Cupcakes)

This recipe for Black Bottom Cupcakes comes straight from the church lady cookbook so you know everyone will love them.
No ratings yet
Print Pin Rate
Course: Dessert Recipes
Cuisine: American
Keyword: black bottom cupcake recipe, black bottoms
Prep Time: 10 minutes minutes
Cook Time: 20 minutes minutes
Total Time: 30 minutes minutes
Servings: 36 cupcakes
Calories: 141
Author: Sarah Mock

Ingredients

Cupcake ingredients:

  • A 5-pound bag of King Arthur Baking Company unbleached bread flour with 12.7% protein content, labeled for ideal use in bread, pizza crust, and rolls-perfect for creating hearty sides like homemade loaves to serve alongside a comforting slowcooker sausage casserole.1 ½ Cup Flour, All Purpose
  • A 4-pound bag of Domino granulated pure cane sugar with a yellow and white design, showing nutrition information and branding-perfect for sweetening recipes like rhubarb sour or your favorite desserts.1 Cup Sugar
  • Arm & Hammer Pure Baking Soda box, 8 oz size, with text promoting it as America's #1 trusted brand and stating 1 Teaspoon Baking Soda
  •  
    1 Cup Water
  • A 24 fl oz bottle of Wesson vegetable oil with a clear plastic body, white cap, and label featuring fried chicken and product details-perfect for preparing delicious dishes like chipotle carnitas or classic fried favorites.⅓ Cup Vegetable Oil
  • A clear plastic bottle of Heinz distilled white vinegar with a white cap and colorful vegetables on the label.1 Teaspoon vinegar
  •  
    ¼ Cup cocoa
  •  
    ½ Teaspoon vanilla

Cream cheese filling ingredients:

  • Box of Kraft Philadelphia Original Cream Cheese, 8 oz (226g), silver packaging with blue and white logo, and renewable energy label on the left-perfect for making delicious Lemon Cheesecake Bars.8 ounce Cream Cheese
  • A 4-pound bag of Domino granulated pure cane sugar with a yellow and white design, showing nutrition information and branding-perfect for sweetening recipes like rhubarb sour or your favorite desserts.⅓ Cup Sugar
  • A single brown chicken egg, perfect for making Chicken Cordon Bleu, stands upright on a white background.1 Egg
  • A Morton Salt container with a blue label featuring a girl in a yellow dress holding an umbrella, with salt pouring out of a container-an essential ingredient for perfectly seasoning dishes like Chicken Cordon Bleu.⅛ Teaspoon salt
  •  
    12 ounce mini chocolate chips
US Customary - Metric
Follow Savoring The Good On PinterestFollow @SavoringTheGood or tag #STGRecipes!

Instructions

Make the cream cheese filling

  • Cream together the softened cream cheese, sugar, and salt until light and fluffy. About 2 minutes. Add the egg and stir until incorporated. Finally, stir in the mini chocolate chips.
    1 Cup Sugar, 8 ounce Cream Cheese, 1 Egg, ⅛ Teaspoon salt, 12 ounce mini chocolate chips

Make the chocolate cake batter

  • In a mixing bowl, blend all the chocolate ingredients until they are blended. About 2 minutes.
    1 ½ Cup Flour, All Purpose, 1 Teaspoon Baking Soda, 1 Cup Water, ⅓ Cup Vegetable Oil, 1 Teaspoon vinegar, ¼ Cup cocoa, ½ Teaspoon vanilla, ⅓ Cup Sugar
  • Line a mini cupcake pan with paper mini cupcake liners. Give the liners a light spray of non-stick pan spray. Use a small scoop to portion out the chocolate batter into each paper liner. The cupcake liner should be filled ⅓-1/2 of the way. Top with a heaping teaspoon of cream cheese mini chocolate chip mixture.
  • Use a small scoop to portion out the chocolate batter into each paper liner. The cupcake liner should be filled ⅓-1/2 of the way. Top with a heaping teaspoon of cream cheese mini chocolate chip mixture.
  • Bake for 15-18 minutes at 350 or until the cream cheese centers are just set.
  • Remove the cupcakes from the pan once able to handle and cool completely on a cooling rack. Chill in the refrigerator for best results.

Notes

  • Don't over bake - Keep in mind that there will be a bit of cary-over cooking once the cupcakes are removed from the oven. If the black bottoms are baked too long, they will be dry.
  • Spray the liners - I have found that depending on the brand of mini cupcake liners I am able to find, they have a tendency to stick to the cupcakes. So to be on the safe side, I give a light spray of non-stick spray.
  • Don't overfill - don't overfill the liner with the chocolate cake batter. The cream cheese cake filling still needs a place to go and then the whole thing needs to be baked.
Want to share when you made this recipe?Follow @SavoringTheGood & tag #STGRecipes!
Nutrition Facts
Black Bottom Cupcakes (Tuxedo Cupcakes)
Serving Size
 
1
Amount per Serving
Calories
141
% Daily Value*
Fat
 
8
g
12
%
Saturated Fat
 
3
g
19
%
Polyunsaturated Fat
 
4
g
Cholesterol
 
12
mg
4
%
Sodium
 
65
mg
3
%
Carbohydrates
 
18
g
6
%
Sugar
 
13
g
14
%
Protein
 
2
g
4
%
* Percent Daily Values are based on a 2000 calorie diet.
**Nutritional facts are just estimates. Please utilize your own brand nutritional values to double check against our estimates.
Like this recipe card? Want one for your site?Check out WP Recipe Maker!

Sarah Mock of savoringthegood.com headshot 2022

I am Sarah Mock. Welcome!

Sarah Mock is a classically trained Chef and graduate of Johnson & Wales University. A culinary blogger for 16 years Sarah helps the home cook prepare her recipes with professional results.

Get to know me

Grandma's Nut Roll Recipe

nut roll recipe

My Pittsburgh grandmother made this nut roll every Christmas AND Easter; it was the one thing everyone at the table was waiting for. This is her recipe, also known as kolachi, Slovak nut roll, Polish nut roll, or walnut roll, depending on which part of Eastern Europe your family came from.

nut roll sliced and fanned out showing texture vertical image

Whatever name you know it by, the recipe is the same: a soft, buttery yeast dough wrapped around a sweet ground walnut filling, baked until golden, and sliced into swirled rounds that taste like every holiday at once. This recipe makes 2 long rolls or 4 smaller ones, your choice, enough to share and enough to freeze for later.
Also on my holiday baking list will be Biscoff Butter Cookies and candied orange slices.

A Christmas and Easter Tradition

Nut rolls are one of the few recipes that show up at both Christmas and Easter tables in Slovak, Polish, and Hungarian households - and for good reason. In Slovakia, nut roll was traditionally part of the ceremonial Easter food basket taken to church for blessing, a practice that goes back generations. In Pittsburgh and across northeastern Ohio, southwestern Pennsylvania, and Cleveland, nut rolls are as synonymous with Easter as ham. If this is your first time making them for Easter, plan ahead - they are better the next day and freeze beautifully, so you can bake them a week in advance.

Nut Roll Dough Ingredients:

2 nut rolls on a baking sheet

This is my grandmother's recipe and this recipe makes 2 long homemade Slovak nut rolls or 4 nut rolls, of a smaller size.

Recipe Card?

To find the full printable recipe with specific measurements and directions CLICK HERE to go to the recipe card.

How to make the yeast dough:

steps 1-4 of making nut roll dough
  1. To make the dough, in the bowl of a stand mixer, add the milk and sprinkle with the yeast and sugar. Allow bubbles to form. It should take about 10 minutes. nut roll dough starting to come together in a bowl
  2. Add the softened butter, sour cream, eggs, 4 cups of flour and salt. Using a dough hook, mix on low speed until a dough is just beginning to form, 1-2 minutes. A dough hook is on my list of must-have attachments for the KitchenAid mixer.nut roll dough clinging to the side of the bowl
  3. Increase the speed on the mixer to medium and let the machine knead the dough until it is smooth and elastic, about 4 minutes more. The dough will be soft and come off the sides of the bowl.nut roll dough on a flour covered surface
  4. Turn the dough out onto a lightly floured surface, dust lightly with additional flour if the dough is sticky, lightly knead the dough by hand to form a smooth ball, then return it to an oiled bowl. nut roll dough at full proof
  5. Cover the bowl with a towel letting the dough rise in a warm place, doubling in size, 50-60 minutes.

To make the walnut filling:

nut roll walnut mixture in a bowl
  1. Melt the butter in a medium saucepan over medium heat.
  2. Remove from the heat and stir in the orange zest, spices, and sugars.
  3. Stir in the walnuts and one egg. Allow the filling aside to cool completely.
  4. Preheat the oven to 350°F, and spray a baking sheet with nonstick spray or line a baking sheet with parchment paper.

Top Tip

Poke 5-6 holes with a chopstick all the way through the roll. This will give the steam a place to escape, preventing the possibility of the nut rolls splitting.

How to roll the dough out

nut roll dough rolled out
  1. Start by dividing the dough in half. Lightly dust the surface with flour and use a rolling pin to roll one half of the dough into a ¼ inch thick rectangle, about 12-by-10 inches. nut mixture on a rolled out dough for nut rolls
  2. With the longer side of the dough facing you spread half of the nut filling over the dough in an even layer, leaving a ½-inch border on the bottom edge. rolled up nut roll
  3. Roll up the nut roll lengthwise like a jelly roll, covering the filling.
  4. Pinch the edge to seal the edge, and transfer the roll to the baking sheet.2 nut rolls on a baking sheet
  5. Repeat the process with the second piece of dough and the remaining filling, leaving at least 4 inches between the rolls on the rimmed cookie sheet. Cover the loaves with a towel and let sit until they are risen slightly, about 35 minutes. 2 nut rolls on a pan with egg wash
  6. When ready to bake, brush the loaves with the egg wash and poke 5-6 holes with a chopstick all the way through the roll and transfer to the oven. This will give the steam a place to escape, preventing the possibility of the nut rolls splitting.
  7. Bake until evenly golden brown, 35-40 minutes.
  8. Remove and transfer to a rack to cool completely. sliced nut roll on a wooden board horizontal
  9. Rolls can be sliced and eaten once cooled, but are better the next day. Use a serrated knife to cut the rolls into 1-inch-thick slices.

Seasonal Favorite

Baked lattice top crust on an apple pie made with the Crisco pie crust recipe, showing flaky layers in the fluted edge.

This is my award-winning Crisco pie crust recipe; flaky, tender, and made with simple ingredients you already have.

Crisco Pie Crust

FAQ's and Tips

head on image of a slice of nut roll showing swirls
Can this recipe be doubled?

Yes - doubled works well and the dough ratios hold up. Do not triple it. When the recipe is tripled, the dough ratios get off and the texture suffers. If you need a large batch for Easter or Christmas, make two separate doubled batches rather than one triple batch.

Why does my nut roll crack?

Cracking usually happens at the final seam when the dough is rolled too thin or has dried out. Keep the dough just above ¼ inch thickness - thinner than that and it cannot hold the tension of the filling as it expands in the oven. If you want extra insurance, leave the edge that becomes the final seam slightly thicker than the rest. Make sure the egg wash goes all the way to every edge, including that final seam, and that the seam is placed face-down on the baking sheet. The chopstick steam vents also help - poking 5-6 holes through the roll gives steam somewhere to go so it does not force its way out through the seam.

Can I freeze nut rolls?

Yes - and this is actually the best way to manage them for the holidays. Let the baked rolls cool completely, then wrap each one tightly in plastic wrap followed by a layer of foil. Freeze for up to 3 months. To serve, thaw overnight at room temperature still wrapped. Slice once fully thawed. The texture holds up remarkably well and many people say the flavor is even better after freezing. My grandmother always pulled hers from the freezer at Christmas - she baked them weeks ahead.

What is the difference between nut roll, kolachi, and walnut roll?

They are all the same thing - the name just depends on where your family is from. Nut roll is the common American name used across Pittsburgh, northeastern Ohio, and southwestern Pennsylvania. Kolachi (also spelled kolache or kolace) is the Slovak and Czech name. Walnut roll is the straightforward English description. Hungarian families call a similar version bejgli. Polish families may call it makowiec when it has a poppy seed filling instead of walnut. Whatever name it goes by, the technique is the same: sweet yeast dough, ground walnut filling, rolled up and baked golden.

Can I make the dough the night before?

Yes. After the first rise, punch the dough down, cover it tightly, and refrigerate overnight. The next day let it come to room temperature for about 30 minutes before rolling it out. The cold fermentation actually improves the flavor of the dough - it develops a slightly more complex, almost buttery depth. This is a great make-ahead strategy for Easter morning when oven time is precious.

What is the best way to slice a nut roll?

Use a serrated knife and wait until the rolls are completely cool - ideally the next day. A serrated knife cuts through the crisp exterior without crushing the soft interior or smearing the walnut filling. Slice into 1-inch rounds.

nut roll recipe

Grandma's Nut Roll

Nut Roll was pulled from the freezer every Christmas by my Pittsburgh grandmother before our arrival. I share with you her nut roll recipe so you can add it to your Christmas Cookie platter.
4.84 from 42 votes
Print Pin Rate
Course: Cookie Recipes
Cuisine: Italian
Keyword: nut roll
Prep Time: 1 hour hour 30 minutes minutes
Cook Time: 45 minutes minutes
Total Time: 2 hours hours 15 minutes minutes
Servings: 2 loaves
Calories: 215
Author: Sarah Mock

Ingredients

Dough Ingredients

  •  
    2 1⁄4 Teaspoons instant dry yeast 1 packet instant dry yeast
  • A white milk carton with a blue label reading ¾ Cup Whole Milk at room temperature
  •  
    4 Cups bread flour
  •  
    1 Teaspoon Kosher salt
  • A 4-pound bag of Domino granulated pure cane sugar with a yellow and white design, showing nutrition information and branding-perfect for sweetening recipes like rhubarb sour or your favorite desserts.3 tbsp. Sugar
  • sour cream.½ Cup Sour Cream
  • A rectangular 8 oz package of Kerrygold Pure Irish Butter, unsalted, with a green and gold label and Irish grass-fed cow branding-perfect for creating delicious Saint Patrick's Day cupcakes.½ Cup Butter softened
  • A single brown chicken egg, perfect for making Chicken Cordon Bleu, stands upright on a white background.1 Egg

Walnut filling:

  • A rectangular 8 oz package of Kerrygold Pure Irish Butter, unsalted, with a green and gold label and Irish grass-fed cow branding-perfect for creating delicious Saint Patrick's Day cupcakes.¼ Cup Butter (½ stick Butter,) cut into cubes
  • A plastic container of McCormick Ground Cinnamon with a red lid and label showing product details in English and Spanish-perfect for adding warm flavor to your favorite recipes, including Keto Granola.½ Teaspoon cinnamon
  •  
    1 Teaspoon finely grated orange zest
  •  
    pinches ground clove
  • A 4-pound bag of Domino granulated pure cane sugar with a yellow and white design, showing nutrition information and branding-perfect for sweetening recipes like rhubarb sour or your favorite desserts.1 Cup Sugar
  • Domino Light Brown Sugar box, 16 oz, featuring a slice of Blackberry Dump Cake topped with whipped cream and berries, and a Non-GMO Project Verified label in the bottom right corner.¾ Cup Brown Sugar
  •  
    3 Cups walnuts finely chopped
  • A single brown chicken egg, perfect for making Chicken Cordon Bleu, stands upright on a white background.2 Egg divided
US Customary - Metric
Follow Savoring The Good On PinterestFollow @SavoringTheGood or tag #STGRecipes!

Instructions

How to make nut roll dough:

  • In the bowl of a stand mixer, add the milk and sprinkle with the yeast and sugar. Allow bubbles to form. It should take about 10 minutes.
    2 1⁄4 Teaspoons instant dry yeast, ¾ Cup Whole Milk, 3 tbsp. Sugar
  • Add the softened butter, sour cream, eggs, 4 cups of flour and salt. Mix on low speed until a dough is just beginning to form, 1-2 minutes.
    4 Cups bread flour, ½ Cup Sour Cream, ½ Cup Butter, 1 Egg, 1 Teaspoon Kosher salt
  • Increase the speed on the mixer to medium and let the machine knead the dough until it is smooth and elastic, about 4 minutes more. The dough will be soft and come off the sides of the bowl.
  • Turn the dough out onto a lightly floured surface, dust lightly with additional flour if the dough is sticky, lightly knead to form a smooth ball, then return it to an oiled bowl.
  • Cover the bowl with a towel and set in a warm place until risen, doubling in size, 50-60 minutes.

To make the walnut filling:

  • Melt the butter in a medium saucepan over medium heat.
    ¼ Cup Butter
  • Remove from the heat and stir in the orange zest, spices, and sugars.
    ½ Teaspoon cinnamon, 1 Teaspoon finely grated orange zest, pinches ground clove, ¾ Cup Brown Sugar, 1 Cup Sugar
  • Stir in the walnuts and one egg. Allow the filling aside to cool completely.
    2 Egg, 3 Cups walnuts
  • Preheat the oven to 350°F, and spray a baking sheet with non stick spray or line a baking sheet with parchment paper.
  • How to roll out the dough for nut roll
  • lightly dust the surface with flour and use a rolling pin to roll one half of the dough into a ¼ inch thick rectangle, about 12-by-10 inches.
  • With the longer side of the dough facing you spread half of the filling over the dough in an even layer, leaving a ½-inch border on the bottom edge.
  • Roll up the nut roll lengthwise like a jelly roll, covering the filling.
  • Pinch the edge to seal the edge, and transfer the roll to the baking sheet.
  • Repeat the process with the second piece of dough and the remaining filling, leaving at least 4 inches between the rolls on the baking sheet. Cover the loaves with a towel and let sit until they are risen slightly, about 35 minutes.
  • When ready to bake, brush the loaves with the egg wash and poke 5-6 holes with a chopstick all the way through the roll and transfer to the oven.
  • Bake until evenly golden brown, 35-40 minutes.
  • Remove and transfer to a rack to cool completely.
  • Rolls can be sliced and eaten once cooled, but are better the next day. Use a serrated knife to cut the rolls into 1-inch-thick slices.

Notes

Can this recipe be doubled?

I would have doubled this recipe with success but do not triple it. The ratios in the dough get off with the dough is tripled.

Why does my nut roll crack?

Nut rolls will crack or have a 'blow out' when the dough is rolled too thin, especially on the final roll. Keep the dough just above ¼ inch in thickness. If you want to have the dough just slighlty thicker at the edge that will be the final roll arroud, that will works. Also don't let the dough dry out and be sure to use an egg wash from edge to edge.
Want to share when you made this recipe?Follow @SavoringTheGood & tag #STGRecipes!
Nutrition Facts
Grandma's Nut Roll
Serving Size
 
2
Amount per Serving
Calories
215
% Daily Value*
Fat
 
11
g
17
%
Saturated Fat
 
3
g
19
%
Polyunsaturated Fat
 
7
g
Cholesterol
 
28
mg
9
%
Sodium
 
108
mg
5
%
Carbohydrates
 
26
g
9
%
Sugar
 
12
g
13
%
Protein
 
5
g
10
%
* Percent Daily Values are based on a 2000 calorie diet.
**Nutritional facts are just estimates. Please utilize your own brand nutritional values to double check against our estimates.
Like this recipe card? Want one for your site?Check out WP Recipe Maker!

Sarah Mock of savoringthegood.com headshot 2022

I am Sarah Mock. Welcome!

Sarah Mock is a classically trained Chef and a graduate of Johnson & Wales University. A culinary blogger for 17 years Sarah helps the home cook prepare her recipes with professional results.

Get to know me

Easy Oreo Truffle Balls Recipe

Oreo Truffles

OREO truffle balls are the ultimate chocolate holiday snack. Classic OREO cookies, cream cheese and melted chocolate make for an easy holiday snack idea that's easy to make ahead.

close up of the details of Oreo Truffle on a white rectangle plate

This post is sponsored by OREO, all opinions are my own.

What ingredients are in an OREO truffle balls?

  • OREO Cookies, Classic. - DO NOT remove the cream filling. The WHOLE cookie is used.
  • Cream cheese - I use regular cream cheese that has been softened
  • Chocolate chips - Chocolate chips for melting for coating the truffles. Chocolate melts can be substituted. Milk chocolate, dark chocolate or white chocolate can all be used.

Garnishes for No-bake OREO truffles

There are a variety of garnishes that can be used when making OREO truffles. Here are a few suggestions to make the truffles more elegant and festive with garnishes:

  • OREO cookie pieces
  • Flake Salt
  • White chocolate curls
  • Piece of nut. - Pecan featured but walnuts or almonds would also be delicious.
  • Decorated chocolate disks

How to make easy OREO truffles

steps to make oreo truffle balls
  1. Soften the cream cheese to room temperature.whole oreo cookies in a food processor for OREO Ball Truffles
  2. Add the Oreos in a food processor.
  3. Pulse the cookies into fine crumbs.OREO Ball Truffle mix with cream cheese in a food processor
  4. Break the cream cheese into pieces and add the cream cheese to the bowl of the food processor.OREO Ball Truffles dough in a food processor
  5. Pulse the crushed cookies and cream cheese until the two combine to form a ball.OREO truffles on a sheet pan
  6. Using a 1-inch scoop, portion out the OREO truffle mixture onto a baking sheet with wax paper, parchment paper, silicone mat or sprayed with non-stick spray.
  7. Chill in the freezer for 15 minutes.
  8. Roll into balls using your hands to form a more consistent 1-inch ball.
  9. Place the cookie balls back in the freezer while you prepare the chocolate for dipping.
  10. Over a double boiler, melt the chocolate chips or chocolate melts until ⅔ of the chocolate is melted.
  11. Remove from the heat and continue to stir until all the chocolate is completely melted.dunking OREO truffle ball in melted chocolate.
  12. Once the chocolate is melted, dip truffles with the melted chocolate, allowing the excess chocolate to drip off the truffle. A slight tapping motion can help with this process.
  13. Place balls on wax paper, silicone mat or decorative chocolate sheet transfer to set the chocolate shell.
  14. As soon as the ball is placed down, garnish the top before the chocolate sets.
  15. Allow the chocolate to set completely before serving or storing in the refrigerator.

How to make these easy decorative chocolate disks

decorative chocolate disk for OREO truffles
  1. Use a decorative chocolate transfer sheet and place it shiny side down on a flat surface.
  2. Spread a thin layer of melted chocolate over a small area of the transfer sheet.making decorative chocolate disks
  3. Just before the chocolate sets completely, use a ½" metal circle cutter to press through the chocolate, forming disks.
  4. Allow the chocolate to set completely before removing it from the transfer sheet.decorative chocolate disk for OREO truffles
  5. Use tweezers to set on the truffle. They melt easily!
Oreo Truffles on a white rectangle plate

FAQs about Oreo Balls

How long are OREO Truffles good for?

OREO Truffles have cream cheese in them, so they need to be kept refrigerated. They will last in the refrigerator wrapped in a closed container for 3-4 weeks. OREO truffles are a great to make as holiday treat.

Is there a good way to add peppermint flavoring in making Oreo truffles?

Yes, adding peppermint flavoring to Oreo truffles is super easy; simply crush oreos, mix with cream cheese, and incorporate peppermint flavoring.

What is the best chocolate to dip Oreo balls?

Dip the balls in premium milk chocolate coating to achieve a delectably smooth finish and a desirable chocolate drip.

Cocktails

  • Four bottles labeled Lavender, Orange, Sour Cherry, and Aromatic are filled with reddish-brown liquid and have black caps, set against a blurred background of jars-perfect for anyone eager to learn how to make bitters at home.
    Homemade Bitters Recipe for Better Cocktails
  • 4th of july drink recipes.
    Red White and Blue Drinks
  • Five shot glasses filled with a light brown liquid, each garnished with a lime wedge, are arranged on a wooden board. Several lime wedges are placed alongside.
    Green Tea Shot Drink Recipe
  • A bottle of pink liquid, known as rhubarb syrup, rests gracefully on large green leaves beside a fresh rhubarb stalk.
    Easy 3-Ingredient Rhubarb Syrup (For Cocktails, Lemonade & More!)
See more Cocktails →
Oreo Truffles

Oreo Truffles

OREO truffle balls are the ultimate chocolate holiday snack. Classic OREO cookies, cream cheese and melted chocolate make for an easy holiday snack idea.
5 from 3 votes
Print Pin Rate
Course: Snacks
Cuisine: American
Keyword: oreo cookie ball recipe, oreo truffle recipe
Prep Time: 45 minutes minutes
Cook Time: 1 minute minute
Servings: 36 truffels
Calories: 144
Author: Sarah Mock

Ingredients

  •  
    36 OREO Sandwich Cookies
  • Box of Kraft Philadelphia Original Cream Cheese, 8 oz (226g), silver packaging with blue and white logo, and renewable energy label on the left-perfect for making delicious Lemon Cheesecake Bars.8 Ounces Cream Cheese
  •  
    16 Ounces chocolate chips
US Customary - Metric
Follow Savoring The Good On PinterestFollow @SavoringTheGood or tag #STGRecipes!

Instructions

  • Soften the cream cheese to room temperature.
    8 Ounces Cream Cheese
  • In the bowl of a food processor, place the OREO sandwich cookies.
    36 OREO Sandwich Cookies
  • Pulse the cookies until they are a fine crumb.
  • Break the cream cheese into pieces and add the cream cheese to the bowl of the food processor.
    8 Ounces Cream Cheese
  • Pulse the crushed OREO cookies and cream cheese until the two combine to form a ball.
  • Using a 1-inch scoop, portion out the OREO truffle mixture onto a baking sheet with waxed paper or silicone mat or sprayed with non-stick spray.
  • Chill in the freezer for 15 minutes.
  • Roll the OREO cookie balls in your hands to form a more consistent 1-inch ball.
  • Place the cookie balls back in the freezer while you prepare the chocolate for dipping.
  • Over a double boiler, melt the chocolate chips or chocolate melts until ⅔ of the chocolate is melted.
    16 Ounces chocolate chips
  • Remove from the heat and continue to stir until all the chocolate is completely melted.
  • Once the chocolate is melted, coated each truffle ball with the melted chocolate, allowing the excess chocolate to drip off the truffle. A slight tapping motion can help with this process.
  • Place on wax paper, silicone mat or decorative chocolate sheet transfer to set the chocolate shell.
  • As soon as the ball is placed down, garnish the top before the chocolate sets.
  • Allow the chocolate to set completely before serving or storing in the refrigerator.
Want to share when you made this recipe?Follow @SavoringTheGood & tag #STGRecipes!
Nutrition Facts
Oreo Truffles
Serving Size
 
2
Amount per Serving
Calories
144
% Daily Value*
Fat
 
9
g
14
%
Saturated Fat
 
4
g
25
%
Polyunsaturated Fat
 
2
g
Cholesterol
 
6
mg
2
%
Sodium
 
77
mg
3
%
Carbohydrates
 
18
g
6
%
Sugar
 
12
g
13
%
Protein
 
1
g
2
%
* Percent Daily Values are based on a 2000 calorie diet.
**Nutritional facts are just estimates. Please utilize your own brand nutritional values to double check against our estimates.
Like this recipe card? Want one for your site?Check out WP Recipe Maker!

Sarah Mock of savoringthegood.com headshot 2022

I am Sarah Mock. Welcome!

Sarah Mock is a classically trained Chef and graduate of Johnson & Wales University. A culinary blogger for 15 years Sarah helps the home cook prepare her recipes with professional results.
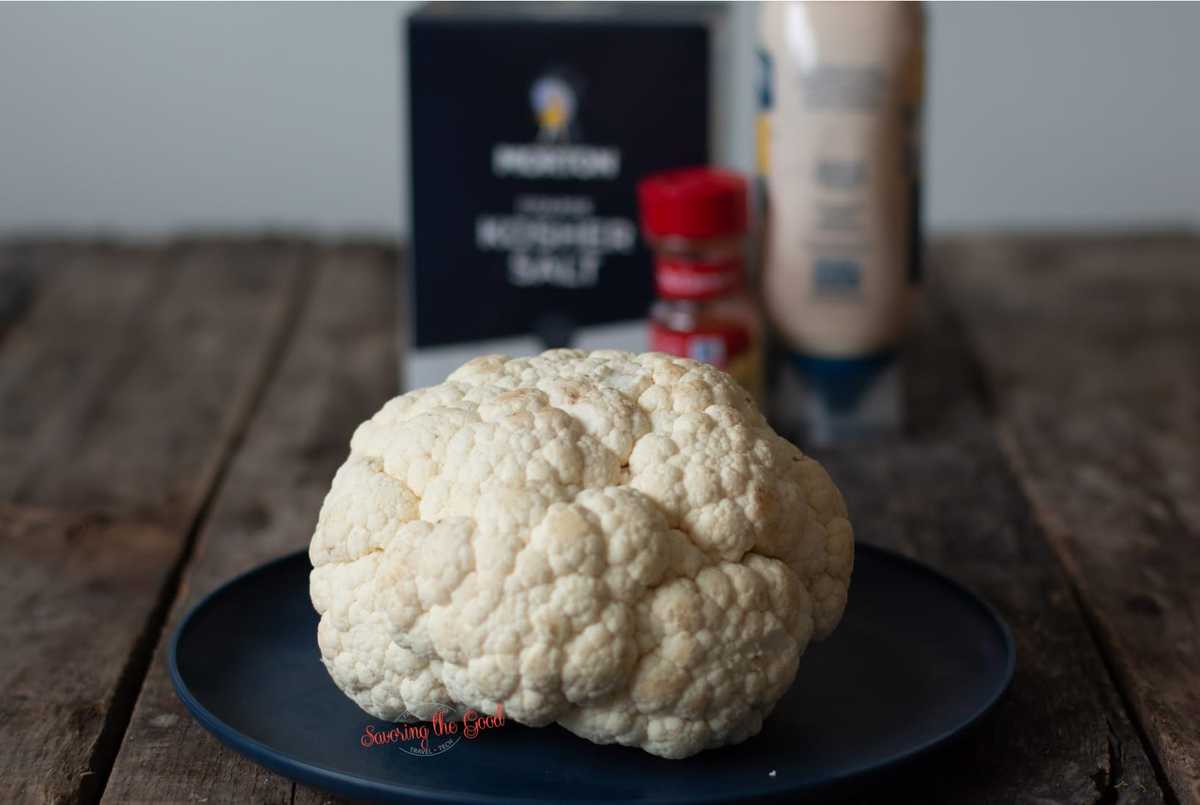
Get to know me

DIY Cocktail Smoker

Cocktail Smoker

Making your own cocktail smoker is easier than you think! This glass smoking cloche is perfect for smoking cocktails at home.

Cocktail Smoker

Every cocktail enthusiast will want this smoke chamber, paired with a handheld portable smoke gun, to infuse their favorite cocktails with real smoke not just smoke flavor.

What is a cocktail smoker?

A cocktail smoker is a glass dome or enclosed smokebox that will hold cold smoke from a handheld smoker. The smoke will infuse the cocktail giving it a lovely smoky flavor with real smoke.

What is needed to make a cocktail smoking cloche?

drilling top hole for DIY Cocktail Smoker.
  • Glass dome with wooden base - (see list of where to purchase one further down the post)
  • Drill bits, 2 in gradual sizes
  • Drill, cordless or corded
  • Masking tape - any tape that can be easily removed. It will be used for marking drill bits for depth.

What is the best cocktail smoking gun?

I have the Breville smoking gun for smoking my cocktails so I can only have experience with that smoking gun. I will list a few others for you to check out.

  • Breville Smoking Gun - Easier, lighter, quieter than traditional smoker accessories; portable indoors and out.
  • CREATIVECHEF Portable Smoke Gun - It is very easy to operate this smoking gun, you only need 2 AA batteries
  • Gramercy Kitchen Cocktail Smoker - handheld smoke infuser is engineered to the perfect size for smoking your meals and drinks with cool INDOOR smoke, transforming your gourmet kitchen skills.
  • MITBAK Portable Handheld Smoking Gun - comes with a long-lasting, rechargeable Lithium-ion battery installed. This battery is very low maintenance, has high energy density and will not lose its charge over time.

Where can I buy a glass dome to make a cocktail smoker?

Here is a list of glass domes that could be used to make a cocktail smoker. Please check to be sure the size will fit your needs.

  • Small 8 Inch Clear Glass Dome Cloche with Rustic Wooden Base
  • Dome with Bamboo Base - 9" x 6"
  • Dome with Wooden Base Dia 5.9 inch
  • Glass Bell Dome Cloche 13"

What type of wood is best for smoking cocktails?

Just like using hard wood to smoke meat, wood chips and shavings used to smoke a cocktail should be untreated and free from chemicals. Shavings should be small enough to fit into the burning chamber of the smoking gun. The best type of wood to smoke is for your smoked cocktails is the one you like! Here are some suggestions of types of wood to use:

  • Hickory
  • Mesquite
  • Applewood
  • Cherrywood
  • Pecan
  • Maple

How to make a DIY cocktail smoking cloche:

How-to-make-a-DIY-cocktail-smoking-cloche
  1. Remove the pedestal, if there is one and if you want the cocktail smoker to not be elevated. It can be left on if you would like an elevated cocktail smoker. measuring a drill bit
  2. Determine the correct size drill bit by comparing it to the diameter of the tip of the smoking gun.
  3. Using a piece of tape, mark on the drill bit to a depth of ¾ of the depth of the wooden base drilling a hole for the DIY Cocktail Smoker.
  4. On the inside of the wooden base, inside the glass groove, using a drill bit, drill a hole straight down, stopping when the tape has reached the surface of the wooden board. drilling the side hole for the DIY Cocktail Smoker
  5. Drill a pilot hole on the side of the wooden base, perpendicular to the hole, stopping once you break the surface and drill into the first hole.
  6. Switch to the drill bit that is the correct diameter corresponding to the diameter of the tip of the smoking gun.
  7. Drill through the pilot hole and make it the correct diameter. DIY Cocktail Smoker filled with smoke
  8. Enjoy your cocktail smoker!

More Cocktail Recipes:

  • How To Make Homemade Bitters
  • Chocolate Martini
  • Bourbon Lemonade
  • Spicy Peach Bourbon Smash
  • Bourbon Cherries
How-to-make-a-DIY-cocktail-smoking-cloche

DIY Cocktail Smoker Cloche

Sarah Mock, savoring a glass of red wine, smiles warmly indoors near a staircase. With her long brown hair and light blouse, she exudes relaxed elegance in this candid headshot.Sarah Mock
Making your own cocktail smoker is easier than you think! This glass smoking cloche is perfect for smoking cocktails at home.
5 from 3 votes

Video

Pin
cocktail smoker, cocktail smoking cloche
prep timePrep 5 minutes minutes
cook timeCook 10 minutes minutes
total timeTotal 15 minutes minutes
Prevent your screen from going dark, toggle to button to the right to turn GREEN

Ingredients
 

  • Glass Dome with wooden base
  • Masking tape

HELPFUL EQUIPMENT

  • Drill
  • Drill Bit

Instructions
 

  • Determine the correct size drill bit by comparing it to the diameter of the tip of the smoking gun.
    measuring a drill bit
  • Using a piece of tape, mark on the drill bit to a depth of ¾ of the depth of the wooden base.
    measuring for depth on a DIY Cocktail Smoker.
  • On the inside of the wooden base, inside the glass groove, using a drill bit, drill a hole straight down, stopping when the tape has reached the surface of the wooden board.
    drilling top hole for DIY Cocktail Smoker.
  • Drill a pilot hole on the side of the wooden base, perpendicular to the hole, stopping once you break the surface and drill into the first hole.
  • Switch to the drill bit that is the correct diameter corresponding to the diameter of the tip of the smoking gun.
    drilling the side hole for the DIY Cocktail Smoker
  • Drill through the pilot hole and make it the correct diameter.
  • Enjoy your cocktail smoker!
    How-to-make-a-DIY-cocktail-smoking-cloche
Five chef hat icons each containing a QR code labeled: Appetizer Recipes, Dessert Recipes, Slow Cooker Recipes, Culinary Skills, and Shop My Kitchen, with SavoringTheGood.com branding.
Show Nutrition Hide Nutrition

Nutrition Disclosure

Nutritional facts are estimates and are provided as a courtesy to the reader. Please utilize your own brand nutritional values to double check against our estimates. Nutritional values are calculated via a third party. Changing ingredients, amounts or cooking technique will alter the estimated nutritional calculations.

QR Code Instructions

Open the camera on your phone and scan the QR code below to go directly back to the full recipes at SavoringTheGood.com


Sarah Mock of savoringthegood.com headshot 2022

I am Sarah Mock. Welcome!

Sarah Mock is a classically trained Chef and graduate of Johnson & Wales University. A culinary blogger for 15 years Sarah helps the home cook prepare her recipes with professional results.
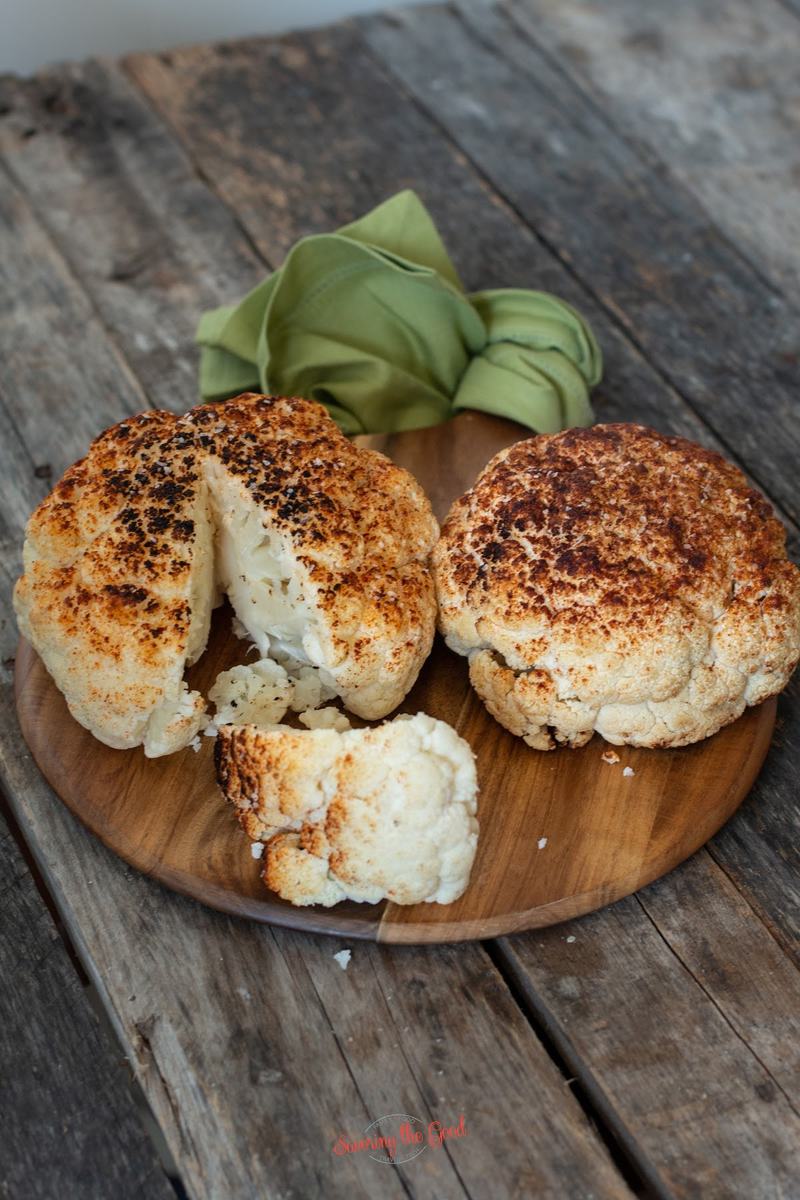
Get to know me

as seen in:

Logos of Hersheyland, ABC News, and Good Day PA are showcased in a seamless row, providing a snapshot of popular brands.

Hersheyland Nightline Good Day Pa!

The vibrant design showcases the iconic logos of Pinterest, Rachael Ray, and Jell-O set against a bold red background. Sorry, the provided description doesn't offer enough detail to suggest important SEO keywords.

Pinterest Rachael JELL-O

Rhodes Rolls Instructions

rhodes roll brushed with butter and fresh parsley

Rhodes rolls are the easiest dinner rolls to use when you want to make homemade rolls without the work!

rhodes roll brushed with butter and fresh parsley

When we would go to Thanksgiving dinner or Christmas supper my aunt would always have the fluffiest, flakiest, perfect pull-apart dinner rolls. I thought for sure she would never share her secret recipe but she did!

I was shocked that my 'make everything from scratch' aunt took some help from frozen Rhodes rolls. This has become my favorite brand of rolls.

two hands tearing open a baked Rhodes Rolls

When you are cooking a big meal such as a Thanksgiving feast, you don't always have the time or space to roll out your own yeast rolls. Having a bag of Rhodes in the freezer has saved me more times than I would like to admit.

Plus, you can make as little or as many as you like! No calculating or hoping you have enough bread dough to make rolls.

How To Make Rhodes Rolls Recipe

Rhodes Rolls with butter and fresh parsley in a sheet pan

There are three different ways to thaw Rhodes rolls. The regular thaw method, the refrigerator thaw method and the speed thaw method.

spraying a sheet pan with pan spray for baking Rhodes Rolls

Prepare Pan

Spray pan with nonstick cooking spray.

Rhodes Rolls frozen on a sheet pan

Arrange Rolls

Place frozen rolls evenly on a pan, and cover with plastic wrap sprayed with cooking spray to keep the wrap from sticking to the rolls while rising.

steps to making Rhodes Rolls

Rise

Allow to rise 3-5 hours in a warm, draft-free, room temperature place, until rolls have doubled in size. Time will vary depending on the temperature of your kitchen.

what happens when plastic wrap sticks to Rhodes Rolls

Carefully remove plastic wrap.

Preheat oven to 350˚F.

Bake for 15-20 minutes, or until golden brown.

Rhodes Rolls with butter and fresh parsley in a sheet pan

Cool

Immediately remove rolls from pan and place your rolls on a wire rack to cool. Brush tops with melted butter, if desired.

How to Thaw Rhodes Rolls: Refrigerator Thaw Method

This is my preferred method for making Rhodes rolls. I place them on a pan and cover them, placing them in the refrigerator before I go to bed.

  1. To prepare rolls, spray your chosen pan with cooking spray.
  2. Place frozen dough balls spaced evenly on your pan. Lightly spray the top of the rolls with nonstick spray and cover with plastic wrap to keep them from sticking to the dough during the rise time.
  3. Place your pan in the refrigerator overnight or all day long if you are making rolls for dinner. Make sure the dough is double in size.
  4. When ready to bake the rolls, remove them from the refrigerator and let them rise 1-2 hours on the counter.
  5. Preheat oven to 350 degrees.
  6. Remove the plastic wrap and bake until golden brown, 13-17 minutes.

Recommended baking pan for rolls:

steps to making Rhodes Rolls
  • 9" x 13" Baking Pan - 20 pull-apart rolls
  • 8" Baking Pan- 9 pull-apart rolls
  • Muffin Tin- 2 rolls per cup
  • 11″ x 17″ Baking Sheet- 35 pull-apart rolls

Speed Thaw Method To Make Rhodes Frozen Dinner Rolls Recipe

  1. Spray your chosen pan with cooking spray.
  2. Place frozen dough on your pan. Lightly spray the top of the rolls with nonstick spray and cover with plastic wrap to keep from sticking to dough while rising.
  3. Preheat the oven to 200 F and turn off once heated.
  4. While the oven is preheating, bring 2 quarts to a boil and pour into a pan on the lowest rack in the oven.
  5. Place the pan of rolls in the oven and allow them to double in size.
  6. Remove the pan of water and carefully remove the plastic wrap.
  7. With the rolls still in the oven, reheat the oven to 350.
  8. Once heated, bake until golden brown. source

Cautions with using the speed thaw method:

  • Only use this method when you are super crunched for time.
  • It is common for some discoloration to occur when using the speed method.
  • Out of all of the baking methods, this method is most likely to have rolls fall.

Bonus tip for getting frozen Rhodes dinner rolls to rise faster:

  • Turn on your oven light, place the rolls inside the oven. Then take a shallow baking dish and add warm water. Place this on the rack just under the rolls. Cover the rolls with a cloth dish towel (preferably cotton cloth) so they don't try out while they are rising.
  • The light provides just a little heat, and the water some humidity. The oven is free from drafts.

Serving Suggestions

baked rhodes rolls with parsley and butter
  1. I melt ¼ cup of salted butter and add a teaspoon of fresh chopped parsley, stirring to combine.
  2. Brush over warm rolls and serve these buttery rolls straight to the dinner table.

Additional toppings options for frozen dinner rolls

  • Whipped Butter
  • Compound butter
  • Roasted Garlic
  • Garlic Confit
what happens when plastic wrap sticks to Rhodes Rolls

Frequently asked questions, answers and tips:

How long does it take for FROZEN Rhodes rolls to take to thaw and rise?

Rhodes rolls take about 10 - 12 hours to thaw in the refrigerator. Before I go to bed at night, I will pull out my rolls and place them in a baking dish that had been sprayed with pan spray and then covered with plastic wrap.

Why should rolls be sprayed with non stick spray?

By spraying rolls with non stick spray the plastic wrap will easily remove from the risen rolls. If you don't you risk the plastic wrap sticking to rolls while rising. The rolls will fall when baking.spraying a sheet pan with pan spray for baking Rhodes Rolls

How long does it take for FROZEN Rhodes rolls take to thaw and rise?

They take about 10 - 12 hours to thaw in the refrigerator. Before I go to bed at night, I will pull out my rolls and place them in a baking dish that had been sprayed with pan spray and then covered with plastic wrap.

How long do Rhodes rolls take to rise once thawed?

Allow enough time for the thawed rolls to rise.  1-2 hours, is needed until rolls double in size. See the thawing methods below. what happens when plastic wrap sticks to Rhodes Rolls

How to reheat rolls.

Bake for 3 minutes in an oven to 350 degrees. or reheat roll in microwave for 15 seconds on high.

rhodes roll brushed with butter and fresh parsley

Rhodes Frozen Dinner Rolls

Rhodes rolls are the best frozen dinner rolls to use when you want to make homemade rolls without the work!
4.84 from 92 votes
Print Pin Rate
Course: Bread Recipes
Cuisine: American
Keyword: rhodes rolls
Prep Time: 12 hours hours
Cook Time: 20 minutes minutes
Total Time: 12 hours hours 20 minutes minutes
Servings: 36
Calories: 85
Author: Sarah Mock

Ingredients

  •  
    36 Rhodes Rolls
  • A rectangular 8 oz package of Kerrygold Pure Irish Butter, unsalted, with a green and gold label and Irish grass-fed cow branding-perfect for creating delicious Saint Patrick's Day cupcakes.3 Tablespoon Butter
  •  
    1 Tablespoon parsley fresh, chopped
US Customary - Metric
Follow Savoring The Good On PinterestFollow @SavoringTheGood or tag #STGRecipes!

Instructions

  • Spray pan with nonstick cooking spray.
  • Place frozen rolls in pan, and cover with plastic wrap sprayed with cooking spray to keep the wrap from sticking to rolls while rising.
    36 Rhodes Rolls
  • Let
    rise 3 to 5 hours in a warm, draft-free place, until rolls double in size.
  • Carefully remove plastic wrap.
  • Preheat oven to 350˚F. Bake for 15-20 minutes, or until golden brown.
  • Immediately remove rolls from pan and place rolls on a wire rack to cool. Brush tops with melted butter, if desired.
    3 Tablespoon Butter, 1 Tablespoon parsley

Notes

Why should rolls be sprayed with non stick spray?
By spraying rolls with non stick spray the plastic wrap will easily remove from the risen rolls. If you don't you risk the plastic wrap sticking and pulling at the dough. The roll will fall when baking.
How to reheat rolls.
Bake for 3 minutes at 350˚F. or reheat roll in microwave for 15 seconds on high.
Bonus tip for getting frozen Rhodes rolls to rise:
  • Turn on your oven light, place the rolls inside the oven. Then take a shallow baking dish and add warm water. Place this on the rack just under the rolls. Cover the rolls with a cloth dish towel (preferably cotton cloth) so they don't try out while they are rising.
  • The light provides just a little heat, and the water some humidity. The oven is free from drafts.
How long does it take for frozen Rhodes rolls to thaw and rise?
Rhodes rolls take about 10 - 12 hours to thaw in the refrigerator. Before I go to bed at night, I will pull out my rolls and place them in a baking dish that had been sprayed with pan spray and then covered with plastic wrap.
How long do Rhodes rolls take to rise?
Allow enough time for the thawed rolls to rise.  1-2 hours, is need for the rolls to rise until rolls double in size. See the thawing methods below. 
Want to share when you made this recipe?Follow @SavoringTheGood & tag #STGRecipes!
Nutrition Facts
Rhodes Frozen Dinner Rolls
Serving Size
 
1
Amount per Serving
Calories
85
% Daily Value*
Fat
 
3
g
5
%
Saturated Fat
 
1
g
6
%
Polyunsaturated Fat
 
1
g
Cholesterol
 
3
mg
1
%
Sodium
 
154
mg
7
%
Carbohydrates
 
13
g
4
%
Protein
 
2
g
4
%
* Percent Daily Values are based on a 2000 calorie diet.
**Nutritional facts are just estimates. Please utilize your own brand nutritional values to double check against our estimates.
Like this recipe card? Want one for your site?Check out WP Recipe Maker!

Sarah Mock of savoringthegood.com headshot 2022

I am Sarah Mock. Welcome!

Sarah Mock is a classically trained Chef and a graduate of Johnson & Wales University. A culinary blogger for 17 years, Sarah helps the home cook prepare her recipes with professional results.

Get to know me

as seen in:

Logos of Hersheyland, ABC News, and Good Day PA are showcased in a seamless row, providing a snapshot of popular brands.

Hersheyland Nightline Good Day Pa!

The vibrant design showcases the iconic logos of Pinterest, Rachael Ray, and Jell-O set against a bold red background. Sorry, the provided description doesn't offer enough detail to suggest important SEO keywords.

Pinterest Rachael JELL-O


Homemade Salmon Lox Recipe (Cured Salmon) aka Gravlax

Salmon Lox Recipe featuring a toasted bagel, cream cheese, fresh dill, capers

This easy salmon lox recipe is the classic cured salmon recipe. Homemade lox salmon takes 6 simple ingredients and tastes better than any store-bought lox salmon!

Salmon Lox Recipe featuring a toasted bagel, cream cheese, fresh dill, capers

Bagels and lox are a brunch favorite in my house and with this incredibly easy recipe, they will be popular in your home too. Wouldn't marinated mozzarella balls pair so beautifully with this recipe?

Homemade Lox Ingredients:

Salmon Lox Recipe ingredients
  • salmon filet, bones removed and skin on
  • peppercorns (whole) - crushed with a mallet - I use a mix of different peppercorns for layers of different flavors but if black is all you have, that will work.
  • dill - fresh is best, roughly chopped. Look in the produce section of your deli or grocery store.
  • vodka - this is used in the traditional Scandinavian recipe so we are going to use it.
  • salt - I use coarse kosher salt but other flake salts will work as well.
  • brown sugar - will add a lovely hint of sweetness to balance out all the salt.

Substitutions

  • Substitute gin for vodka
  • Add juniper berries, lemon zest, orange zest for another layer of flavor.

Can I use frozen salmon?

If you have access to fresh, high-quality salmon, that would be ideal, but frozen can work well too. While fresh salmon might give slightly better results, using frozen salmon can still produce delicious homemade lox. The key is to use good quality salmon and follow the curing process carefully.

That being said there are a few in mind if you opt for a frozen side of salmon:

  • Texture may be slightly softer in the final product.
  • Higher moisture content can affect curing.
  • Frozen salmon requires proper thawing before starting the curing process.
  • Using a frozen salmon may alter final product quality slightly.

If you do use frozen salmon:

  1. Ensure it's high-quality, vacuum-sealed frozen salmon.
  2. Thaw it completely in the refrigerator before starting the curing process.
  3. Pat the salmon dry thoroughly before applying the cure mixture.

How to make homemade lox salmon

crushed peppercorns
  1. First, crush the peppercorns with a mallet or by hitting them with the back of a skillet. lox curing salt mixture
  2. In a medium-sized bowl, combine the crushed pepper, salt, brown sugar, and the vodka, stirring to combine and the mixture is of wet sand consistency.
  3. Place a cooling rack on a rimmed cookie sheet.
  4. Then place the raw salmon, skin side down, on the rack. steps of curing salmon, 4 images in a grid
  5. Start by pressing ½ the salt mixture on the meat of the salmon.
  6. Add ½ the fresh dill, followed by the second ½ of the salt mixture and finishing with the last of the fresh dill on top. Salmon Lox wrapped in plastic, curing
  7. Wrap tightly the entire tray, pan, rack, and salmon in several layers of plastic wrap. (make it as tight as possible.)cans of tomatoes on lox curing for weight
  8. Allow the salmon to rest, in the refrigerator with something pressing down on it and refrigerate for 2-3 days. (yes DAYS) I will place a second baking sheet on top of the wrapped salmon and something heavy like a couple of jars of diced tomatoes, another heavy object or even a brick. No need to flip the salmon.Salmon Lox with salt and spices
  9. Once the days of curing is complete, unwrap the tray of salmon fillet, drain any liquid that has been extracted during the curing process and remove all of the herbs and sugar/salt crust. Rinse salmon by running it under cool running water to cut down on too much of a salty taste. Pat dry with paper towels.using a sharp knife to slice cured salmon
  10. Slice the lox with a long sharp knife and it is ready to serve with your favorite accompaniments.

Seasonal Favorite

Baked lattice top crust on an apple pie made with the Crisco pie crust recipe, showing flaky layers in the fluted edge.

This is my award-winning Crisco pie crust recipe; flaky, tender, and made with simple ingredients you already have.

Crisco Pie Crust

How to serve cured salmon aka gravlax:

Salmon Lox on a cream cheese bagel
  • Lox and bagel with cream cheese - toast the bagel spread on softened cream cheese and add garnishes such as capers, shaved red onion, chopped boiled egg or cucumbers.
  • Chaffle - substitute out a bagel and use a gluten-free, low carb, keto-friendly waffle. Kind of like a salmon sandwich.
  • On deviled eggs
  • In a salmon spread

Frequently asked questions, answers and tips about salmon lox

What kind of salmon is used to make the best lox?

Choose a filet piece of salmon that comes from the thick belly section or the salty, fatty middle section of the fish.

Atlantic salmon, sockeye salmon or king salmon are all great to use when you want to make your own home made lox. I look for salmon that is wild and sustainably caught and I avoid fish that is marked as 'colors added'.side of salmon 1 lb on a plate

Is lox salmon raw or cooked?


Lox, or cured salmon, also known as gravlax, is not cooked in the traditional oven method sense but more of a curing or chemical reaction of cooking. Salmon is cured by being brined in salt and it is a delicious way to enjoy one of my favorite fish. The salt and sugar mixture, along with any other flavors, will penetrate through the fish infusing the fish with flavors and cooking the salmon through an osmosis process. piece of Salmon Lox

Are lox and smoked salmon the same thing?

What is the difference between lox vs gravlax vs smoked salmon?
Lox, gravlax, smoked salmon, and nova are all recipes that call for fresh salmon but each recipe is just a little bit different.

Lox come from the Yiddish word for salmon, laks, and is salt-cured. Before there was refrigeration, salt curing was the method used to preserve the salmon.

Gravlax comes from the Scandinavian word gräva/grave "to dig" and after the salmon has been preserved you 'dig' it out of the salt crust.

Smoked salmon is a side of salmon that has been cured and then cold-smoked. Nova lox is smoked salmon that has a more intense salmon smoky flavor and a deeper coloring, almost orange.

Homemade Lox Tips:

  • My lox is cured on a cooling rack on top of a rimmed baking sheet or baking dish, the excess moisture from the salmon will have a place to collect without making a mess in the refrigerator. The raised surface of the cooling rack will allow the liquids to drain off easily. showing the liquid that comes off of Salmon Lox when curing
  • Collect the liquid that is collected in the pan and use it in seafood sauces or add it to seafood stock. cured piece of salmon
  • Try and choose a piece of salmon that is the same thickness from edge to edge for a more consistent brine flavor.
Salmon Lox Recipe featuring a toasted bagel, cream cheese, fresh dill, capers

Salmon Lox Recipe

Homemade lox takes 6 simple ingredients and tastes better than any store-bought!
4.70 from 23 votes
Print Pin Rate
Course: Seafood Recipes
Cuisine: Mediterranean
Keyword: cured salmon, lox, lox recipe, salmon lox recipe
Prep Time: 10 minutes minutes
Cook Time: 3 days days
Total Time: 3 days days 10 minutes minutes
Servings: 1 lb
Calories: 94
Author: Sarah Mock

Ingredients

  •  
    1 lb salmon sashimi-grade, bones removed and skin on
  •  
    2 Tablespoon mixed peppercorns whole, crushed with a mallet
  •  
    1 Cup fresh dill roughly chopped
  •  
    3 Tablespoon vodka
  •  
    4 Ounces rock salt coarse and flakes work too
  • Domino Light Brown Sugar box, 16 oz, featuring a slice of Blackberry Dump Cake topped with whipped cream and berries, and a Non-GMO Project Verified label in the bottom right corner.4 Ounces Brown Sugar
Follow Savoring The Good On PinterestFollow @SavoringTheGood or tag #STGRecipes!

Instructions

  • First, crush the peppercorns with a mallet or by hitting them with the back of a skillet.
  • In a medium-sized bowl, combine the peppercorns, salt, brown sugar, and the vodka, stirring to combine and the mixture is of wet sand consistency.
  • Place a cooling rack on a rimmed cookie sheet.
  • Then place the raw salmon, skin side down, on the rack.
  • Start by pressing ½ the salt mixture on the meat of the salmon.
  • Add ½ the fresh dill, followed by the second ½ of the salt mixture and finishing with the last of the fresh dill.
  • Tightly wrap the entire tray, pan, rack, and salmon in several layers of food wrap. (make it as tight as possible.
  • Allow the salmon to cure, in the refrigerator with something pressing down on it for 2-3 days. (yes DAYS) I will place a second baking sheet on top of the wrapped salmon and something heavy like a couple of jars or even a brick.
  • Once the days of curing is complete, unwrap the tray of lox, remove all of the dill and sugar/salt mixture by running it under cool running water.
  • Slice the lox with a long sharp knife and serve with your favorite accompaniments.

Notes

  • By curing your lox on a cooling rack on top of a rimmed baking sheet, the excess moisture from the salmon will have a place to collect without making a mess in the refrigerator. The raised surface of the cooling rack will allow the liquids to easily drain off.
  • Collect the liquid that collected in the pan and use it in seafood sauces or add to seafood stock.
  • Try and choose a piece of salmon that is the same thickness from edge to edge for a more consistent brine flavor.
Want to share when you made this recipe?Follow @SavoringTheGood & tag #STGRecipes!
Nutrition Facts
Salmon Lox Recipe
Serving Size
 
1
Amount per Serving
Calories
94
% Daily Value*
Fat
 
4
g
6
%
Saturated Fat
 
1
g
6
%
Polyunsaturated Fat
 
2
g
Cholesterol
 
18
mg
6
%
Sodium
 
2767
mg
120
%
Carbohydrates
 
7
g
2
%
Sugar
 
7
g
8
%
Protein
 
6
g
12
%
* Percent Daily Values are based on a 2000 calorie diet.
**Nutritional facts are just estimates. Please utilize your own brand nutritional values to double check against our estimates.
Like this recipe card? Want one for your site?Check out WP Recipe Maker!


Sarah Mock of savoringthegood.com headshot 2022

I am Sarah Mock. Welcome!

Sarah Mock is a classically trained Chef and a graduate of Johnson & Wales University. A culinary blogger for 17 years, Sarah helps the home cook prepare her recipes with professional results.

Get to know me

as seen in:

Logos of Hersheyland, ABC News, and Good Day PA are showcased in a seamless row, providing a snapshot of popular brands.

Hersheyland Nightline Good Day Pa!

The vibrant design showcases the iconic logos of Pinterest, Rachael Ray, and Jell-O set against a bold red background. Sorry, the provided description doesn't offer enough detail to suggest important SEO keywords.

Pinterest Rachael JELL-O

Canning Diced Tomatoes (Step-by-Step Guide + Food Safety Notes)

homemade canned diced tomatoes square image

Learning how to can diced tomatoes is an easy canning project for beginners.

homemade canned diced tomatoes square image

Follow these step-by-step simple instructions, with just 2 ingredients, and you have preserved garden fresh tomatoes to use in a variety of recipes.

Canning diced tomatoes are the perfect beginner project for those who want to start to learn to water bath can. The basic ingredient is ripe tomatoes and you have the option of using lemon juice or citric acid as the additional acid.

There is no vinegar in this recipe so you have to add a bit of acid to make the tomatoes reach an acid level so they will be shelf-stable. I would use a jar of these diced tomatoes for a super mild Velveeta sausage dip.

A Note on Food Safety

Home canning diced tomatoes is a topic worth addressing directly. The USDA and the National Center for Home Food Preservation (NCHFP) do not have a tested, scientifically validated recipe specifically for water bath canning diced tomatoes. The concern is density - diced tomatoes pack more tightly into a jar than whole or halved tomatoes, which can prevent heat from fully reaching the center of the jar during processing.

This post includes acidification and processing times consistent with USDA guidance for whole and halved tomatoes. If you want to follow a fully tested recipe with no gray areas, the safest path is to use the USDA-approved crushed tomato method, which produces a very similar result and is completely shelf-stable. Instructions for that method are included below.

If you choose to proceed with diced tomatoes, always use bottled lemon juice or citric acid as directed, maintain proper headspace, and process for the full time at your altitude.

Approved Alternative: Crushed Tomatoes

If you want a fully tested, USDA-approved method for preserving fresh tomatoes, crushed tomatoes are the way to go. The result is nearly identical in use, they work in soups, stews, sauces, and dips the same way - and the process is just as simple.

To make crushed tomatoes:

  1. Wash, peel, and core the tomatoes. To peel, score an X in the bottom, blanch in boiling water for 30 to 60 seconds, then transfer to an ice bath and slip the skins off.
  2. Roughly chop or crush about one quarter of the tomatoes and heat them in a large saucepan over medium heat, stirring frequently to release the juice.
  3. Add the remaining tomatoes in batches, stirring continuously, and bring to a boil. Boil gently for 5 minutes.
  4. Add bottled lemon juice or citric acid to each jar before filling: 1 tablespoon bottled lemon juice or ¼ teaspoon citric acid per pint, 2 tablespoons lemon juice or ½ teaspoon citric acid per quart.
  5. Ladle the hot crushed tomatoes into hot jars, leaving ½ inch headspace. Remove air bubbles, wipe rims, and apply lids.
  6. Process pints for 35 minutes and quarts for 45 minutes in a boiling water bath canner at elevations under 1,000 feet. Add processing time for altitude as needed.

Ingredients:

plate of fresh tomatoes for canning

Recipe Card?

To find the full printable recipe with specific measurements and directions CLICK HERE to go to the recipe card.

Can you use fresh lemon juice instead?

Bottled lemon juice is preferred over fresh as it has been tested at the manufacturer as to what the proper acidity level is.

Water bath canning: diced tomatoes

3 canning jars of homemade canned diced tomatoes horizontal image

Wash, sterilize, and heat the canning jars.

Check out my canning 101 post if you need more step-by-step instructions.

Heat the water in the large stockpot

Keep the jars in hot water while you prepare the tomatoes for canning.

Sarah's Kitchen Tip

I turn on my exhaust fan to help eliminate some of the heat and humidity that comes with canning.

Wash and inspect the tomatoes

I grow tomatoes in the garden and when I bring them into the house they have dirt on them. Thoroughly wash tomatoes and remove any bad spots or blemishes on them. Remove the stem and core, if desired.

score a roma tomato

Remove the skin of the tomato

Use a sharp knife to slice and X or score the skin of the tomato, drop the tomato into the simmering water for 30 seconds to a minute.

roma tomatoes in an icebath

Ice Bath

After the skin of the tomato has further cracked and started to separate from the tomato flesh, remove hot tomatoes from the water with a slotted spoon and plunge the tomato into the ice water bath, stopping the blanching process and allowing the skin to easily pull back.

split roma tomato after blanching

Peel the tomatoes

Remove them from the ice water bath and remove the skin from the tomato. They should slip right off.

Peeling Tip

If you get stubborn skin, dunk the tomato back in the water for an additional 15-30 seconds and then back into the ice water.

diced romatoes before canning diced tomatoes

Dice the tomatoes

I do a small to medium dice on my tomatoes as that is what I would normally pick up if I were to buy a can of diced tomatoes at the grocery store. Leave the seeds in the tomato and try and capture as much of the tomato juice in a bowl as you can.

Remove a hot, empty jar from the canner and set it on a towel-lined surface.

adding citric acid to a canning jar

Add Acid

Use ½ teaspoon bottled lemon juice or ¼ teaspoon citric acid per quart jar (see notes for other sizes).

adding fresh tomatoes to a canning jar

Add Tomatoes

Using a funnel, fill the jar with diced tomatoes, including both solids and juice.

removing the airbubbles from a canning jar of diced tomatoes

Remove Air Bubbles

Remove air bubbles with a bubble remover or nonreactive tool (like bamboo or silicone). Re-check for ½-inch headspace.

Wipe the rim clean, apply a new lid, and finger-tighten the ring.

Return the filled jar to the hot water bath using a jar lifter.

Set the timer for 35 minutes for pints and 45 minutes for quarts.

3 canning jars of homemade canned diced tomatoes horizontal image

Cool

After processing is complete, carefully remove the jars from the canner with a jar lifter, and place them on a towel or rack and let the jars cool for 12 to 24 hours.

3 canning jars of homemade canned diced tomatoes horizontal image

Check Lids

If the jars do not flex the lids have sealed correctly. If there is flex on the lid when it is pressed the lid has not sealed.

5 Days To Canning Confidence

Recipes That Use Diced Tomatoes

  • Cabbage Roll Soup
  • Stuffed Cabbage Rolls
  • Maryland Crab Soup

Frequently asked questions, answers, and tips: Smart Uses for Diced Tomatoes in the Kitchen

Why did the tomatoes separate?

When you first pull the jars from the canner you will notice that the diced tomatoes have floated to the top of the jar and the water has sunk to the bottom. This is normal. Once the jars have fully cooled, just shake the tomatoes to reincorporate the water back into the tomatoes.
Separation can occur when using the cold pack method that I call for in this canning technique. The action of the enzymes in the cut room temperature tomatoes will begin to break down the pectin in the tomatoes.  This breakdown results in a yellow red-tinted liquid that can appear in either the top or bottom of the jar. : Iowa State University
To prevent the separations, a hot pack method should be used.canning diced tomatoes showing separation

Can I use diced tomatoes instead of crushed or whole tomatoes?

Yes, with a slight adjustment! If your recipe calls for crushed or whole tomatoes, you can use diced in a pinch, just give them a quick pulse in a blender or food processor. I do this when making sauce for pasta or lasagna and don't have crushed on hand.

Are they already cooked?

Yes they are! The tomatoes are blanched and canned at high heat, which makes them safe to eat and perfect for quick recipes like soups, skillet meals, and slow cooker recipes.

Can I freeze leftover canned tomatoes?

Absolutely! I freeze extras in small containers, souper cubes or zip-top bags and toss them into chili or pasta sauce straight from the freezer. No waste, and it saves a step later.

Best tomatoes for canning?

The best tomatoes for canning should be firm, fresh, free of blemishes, and not affected by frost or pests. I am a fan of using a tomato with fewer seeds as I find they are meatier and less watery. I like to can a Roma tomato, San Marzano tomato or paste tomato.

A hand uses a teal ladle to serve macaroni and cheese from a pot. Overlaid text highlights features: extensive food safety testing, dishwasher safe, and compatible with Souper Cubes for convenient 1 Cup food storage.

Souper Cubes

1 cup portions!

Perfect for freezing leftovers.(As seen on Shark Tank.)

Purchase

Chef Tip

  • Process in a boiling water bath : Pints: 35 minutes Quarts: 45 minutes
  • Store unsealed jars in the refrigerator and use up within 7-10 days.
  • Do not add thickeners or milk to tomatoes or tomato products before processing. Add the ingredients to make stewed tomatoes or tomato soup when you are ready to serve them. from the Penn State Extension
  • Do not add extra peppers, onions, garlic etc. for flavor in this recipe, it will make the acid level be out of balance.
  • Tomatoes may also be processed in a pressure canner.
  • Tomato products with added vegetables or meat require pressure canning.

Seasonal Favorite

Baked lattice top crust on an apple pie made with the Crisco pie crust recipe, showing flaky layers in the fluted edge.

This is my award-winning Crisco pie crust recipe; flaky, tender, and made with simple ingredients you already have.

Crisco Pie Crust
homemade canned diced tomatoes square image

Canning Chopped Tomatoes

Follow these step by step simple instructions, with just 2 ingredients, and you have preserved garden fresh tomatoes to use in a variety of recipes.
5 from 12 votes
Print Pin Rate
Course: Canning Recipes
Cuisine: American
Prep Time: 10 minutes minutes
Cook Time: 45 minutes minutes
Additional Time: 2 minutes minutes
Total Time: 57 minutes minutes
Servings: 4 quarts
Calories: 82
Author: Sarah Mock

Ingredients

  •  
    4 Pounds Roma Tomatoes
  • A plastic bottle of ReaLemon 100% Lemon Juice with a yellow cap, a lemon-shaped top, and images of lemons on a green label-perfect for adding a burst of citrus flavor to your favorite recipes like Lemon Cheesecake Bars.2 teaspoons Lemon Juice divided
Follow Savoring The Good On PinterestFollow @SavoringTheGood or tag #STGRecipes!

Instructions

  • Wash, sterilize, and heat the canning jars. Check out my canning 101 post if you need more step by step instructions.
  • Heat the water in the larges stockpot. I also turn on my exhaust fan to help eliminate some of the heat and humidity that comes with canning. Keep the jars in hot water while you prepare the tomatoes for canning.
  • Wash and inspect the tomatoes - I grow tomatoes in the garden and when I bring them into the house they have dirt on them. Thoroughly wash your tomatoes and remove any bad spots or blemishes on them. Remove the stem and core, if desired.
    4 Pounds Roma Tomatoes
  • Remove the skin of the tomato - Use a sharp knife to slice and X or score the skin of the tomato, drop the tomato into the simmering water for 30 seconds to a minute.
  • After the skin of the tomato has further cracked and started to separate from the tomato flesh, remove it from the water with a slotted spoon and plunge the tomato into the ice water bath, stopping the blanching process and allowing the skin to easily pull back.
  • Once all the tomatoes have been blanched - remove them from the ice water bath and remove the skin from the tomato. They should slip right off. If you get a stubborn skin, dunk the tomato back in the water for an additional 15-30 seconds and then back into the ice water.
  • Dice the tomatoes - I do a small to medium dice on my tomatoes as that is what I would normally pick up if I were to buy a can of diced tomatoes at the grocery store. Leave the seeds in the tomato and try and capture as much of the tomato juice in a bowl as you can.
  • Remove a jar from the canner - place the empty, hot jar on your work surface, protected with a towel.
  • Add lemon juice to the jar
    - if using lemon juice, add ½ teaspoon of lemon juice to the quart jar OR ¼ teaspoon of citric acid to the quart jar if using citric acid.
    See notes if you are canning larger portions.
    2 teaspoons Lemon Juice
  • Place the funnel on the jar and fill the jar with your diced tomatoes. Be sure to get a balance of juice and tomatoes in the jar.
  • Check for air - use your bubble remover tool or a nonreactive scraper, such as bamboo or silicone, to press the tomatoes and remove the air. Check for ½" headspace with the tool, wipe the rim, add a new lid and finger tighten a ring on the jar.
  • Place the jar back in the simmering water - Use the jar lifter to place the filled jar back in the hot water bath.
  • Repeat until all jars have been filled and returned to the hot water bath canner.
  • Set the timer for
    35 minutes for pints
    and
    45 minutes for quarts.
  • After processing is complete, carefully remove the jars from the canner with a jar lifter, and place them on a towel or rack to cool for 12 to 24 hours.
  • Check the lids for flex. If the jars do not flex the lids have sealed correctly. If there is flex on the lid when it is pressed the lid has not sealed.

Notes

Tips for canning diced tomatoes:
  • Process in a boiling water bath : Pints: 35 minutes Quarts: 45 minutes
  • Store unsealed jars in the refrigerator and use up within 7-10 days.
  • Do not add thickeners or milk to tomatoes or tomato products before processing. Add the ingredients to make stewed tomatoes or tomato soup when you are ready to serve them. from the Penn State Extension
  • Do not add extra peppers, onions, garlic etc. for flavor in this recipe, it will make the acid level be out of balance.
  • Tomatoes may also be processed in a pressure canner.
  • Tomato products with added vegetables or meat require pressure canning.
Citric acid is also an option if it is available to you. I keep a 5 lb bag in my cabinet but I do a lot with citric acid in my cooking.
Want to share when you made this recipe?Follow @SavoringTheGood & tag #STGRecipes!
Nutrition Facts
Canning Chopped Tomatoes
Serving Size
 
1
Amount per Serving
Calories
82
% Daily Value*
Fat
 
1
g
2
%
Polyunsaturated Fat
 
1
g
Sodium
 
23
mg
1
%
Carbohydrates
 
18
g
6
%
Sugar
 
12
g
13
%
Protein
 
4
g
8
%
* Percent Daily Values are based on a 2000 calorie diet.
**Nutritional facts are just estimates. Please utilize your own brand nutritional values to double check against our estimates.
Like this recipe card? Want one for your site?Check out WP Recipe Maker!

What supplies are needed for canning tomatoes?

ball canning canning suplies
  • Pint canning jars - I use Ball canning jars, wide mouth or regular mouth will both work for this project. Quart jars can be used if you want to can quarts of diced tomatoes.
  • Canning lids - new lids need to used for each canning project. Be sure to use a wide mouth lid on a wide mouth jar and a regular lid on a regular jar.
  • Canning Rings - check to be sure the corresponding rings are not bent, free from rust, and clean. Rings can be reused whereas lids are a one time use for canning.
  • Large Stock Pot - I use the deepest pot I have. The pot should be deep enough that water covers the jars by 2" when the jars are submerged in the water.
  • Jar lifter, jar funnel, headspace tool - Ball as a canning utensil set that has all three of these in them but they can be purchased separately. PLEASE get a jar lifter. I worked with years without one and it was not safe. Don't be like me.
  • A second pan of simmering water & an ice bath - I have a pan of simmering water ready for when I blanch and peel the skins off of the tomatoes. This is the easiest way to skin a tomato. The bowl of ice water is so you can plunge the tomatoes into, stopping the cooking process and allowing the skin to easily peel away.
  • Towels, cutting board, colander, knife, bowl - The towels are for placing your hot jars on to protect your counter surface and the other items will help in the tomato chopping process.

Sarah Mock of savoringthegood.com headshot 2022

I am Sarah Mock. Welcome!

Sarah Mock is a classically trained Chef and a graduate of Johnson & Wales University. A culinary blogger for 17 years, Sarah helps the home cook prepare her recipes with professional results.

Get to know me

as seen in:

Logos of Hersheyland, ABC News, and Good Day PA are showcased in a seamless row, providing a snapshot of popular brands.

Hersheyland Nightline Good Day Pa!

The vibrant design showcases the iconic logos of Pinterest, Rachael Ray, and Jell-O set against a bold red background. Sorry, the provided description doesn't offer enough detail to suggest important SEO keywords.

Pinterest Rachael JELL-O


Sous Vide Pork Shoulder (Fall-Apart Pulled Pork in 24 Hours)

sous vide pork shoulder recipe on a sheet pan

Sous vide pork shoulder is the stress-free way to make the best-pulled pork. The easy, hands-off technique of sous vide cooking for 24 hours followed by smoking for a few hours with your preferred hardwood will yield a texture of smoked pulled pork that can't be achieved with other traditional cooking methods.

sous vide pork shoulder pulled on a tray

Sous vide cooking is amazing for when you are cooking pork. We have sous vide pork and sauerkraut on New Years Day for good luck, juicy sous vide boneless pork chops are a weeknight favorite all served with a side of sous vide potatoes.

I make this style pulled pork when I am going to have a bunch of people over for a family gathering or I will make it over the weekend to eat off of all week.

What type of pork should be used?

I like to use a bone-in pork butt, also known as a Boston butt, when I am making pulled pork. The butt cut of the pig is actually located in the upper part of the shoulder in front of the front leg. The Boston butt will contain a joint bone and often the shoulder blade. These bones will give additional flavor to the meat but will add to the total weight of the purchase.

Alternatively, a boneless pork butt can be used. There are no bones to work around and the price may be higher for this convenience. Everyone has their preference.

Recipe Card?

To find the full printable recipe with specific measurements and directions CLICK HERE to go to the recipe card.

Ingredient Substitutions

The ingredients here are flexible, as the sous vide method does most of the work, so small changes do not derail the result.

Here is what I suggest for swaps:

  • Bone-in pork butt → boneless pork butt: Both work. Bone-in delivers slightly more flavor in the bag juices. Boneless is easier to fit in a smaller water bath and bags more cleanly. Cook time stays the same.
  • Dry rub → your favorite BBQ rub: Any spice rub works here. The key is applying it generously on all surfaces so there is enough seasoning to penetrate during the long cook and to form a crust during the finish.
  • Smoker finish → oven finish: 300°F for 1.5-2 hours in the oven produces a solid crust, though you'll miss the smoke. Add a teaspoon of smoked paprika to your dry rub to compensate.
  • 165°F (pull-apart) → 145°F (sliceable): If you want the pork to slice rather than shred, for serving over rice or polenta, drop the temperature to 145°F.

Texture Note

Note: at 145°F the pork will not pull into strands, so this is a texture decision, not a substitution.

Dry rub recipes

I would suggest using your favorite dry rub when making your pulled pork or even a rub from your favorite BBQ restaurant. But what if you don't have a recipe? I have you covered. Check out these dry rub recipes and use them as a starting point for amazing smoky pulled pork.

Spicy Dry Rub:

  • 1 tablespoon chili powder
  • 1 tablespoon cumin
  • 1 tablespoon ancho chipotle powder
  • 1 tablespoon garlic powder
  • 1 tablespoon kosher salt
  • 1 tablespoon black pepper
  • 1 teaspoon onion powder
  • 1 teaspoon Mexican oregano
  • 1 teaspoon crushed red pepper
  • 1 teaspoon cayenne pepper

Sweet Texas Dry Rub:

  • ¼ cup light brown sugar
  • 1 tbsp smoked paprika
  • 1 tsp ground cayenne pepper
  • 1 tsp chili powder
  • 1 tbsp salt
  • 1 tsp garlic powder
  • 1 tsp onion powder
  • ½ tsp ground black pepper

Sugar-Free Dry Rub

  • 4 tablespoon kosher salt
  • 4 tablespoon paprika
  • 2 tablespoon black pepper
  • 2 tablespoon garlic powder
  • 2 teaspoon onion powder, toasted preferred
  • 1 teaspoon ground celery seed
  • 1 teaspoon dried oregano
  • 1 teaspoon chipotle powder

Carolina style BBQ rub

  • ¼ cup paprika
  • 2 tablespoons salt
  • 2 tablespoons white sugar
  • 2 tablespoons brown sugar
  • 2 tablespoons ground cumin
  • 2 tablespoons chili powder
  • 2 tablespoons freshly ground black pepper
  • 1 tablespoon cayenne pepper

What are the advantages of sous vide a pork shoulder?

sous vide pulled pork in a bowl

When cooking a tough piece of meat, such as a pork shoulder with lots of connective tissue, a low temperature, over an extended period of time will yield meat that falls apart yet maintains all of the juiciness and flavors that we love in pork shoulder. Sous vide cooking gives you precision temperature control cooking without having to monitor the cook.

  • Meal prep - cook the pork shoulder days ahead and then finish on the grill, smoker or in the oven when you are ready to serve.
  • Stress-free cooking - once the shoulder is in the sous vide, there is no need to attend to it. The circulator will maintain a precise temperature without help from you. Basically it is a 'set it and forget it'.
  • Self-basting - The pork will self baste in its own juices with full contact on all surfaces. Any spice rub you put on the pork will further infuse the meat.
  • Choose your texture - unlike other cooking methods, sous vide cooking will allow you to choose your preferred texture, based on the water temperature.
  • Less smoker/grill time - After the first 2-3 hours on a smoker, the meat is no longer being infused with a smoky flavor. Using a 2-step cooking method, you are still getting the amazing smoky flavor and crust, without leaving it on the grill/smoker for hours on end.

What temperature do you sous vide pork shoulder?

pork shoulder in a vacuum bag in water

The beauty of using sous vide to cook your pork shoulder is you have control over the texture and doneness of the meat. I suggest two different temperatures, depending on your desired doneness. My personal preference is 165°F / 74ºC for pull-apart, shreddable tender pork or use 145°F / 63ºC for pork that is tender but still sliceable.

Step-by-Step Instructions

Sous vide pork shoulder has two phases: the long, hands-off cook and the fast, high-heat finish that builds the crust. The sous vide handles all the actual cooking and the smoker or oven at the end is what makes it look and taste like you spent all day tending a fire. Because you kind of did.

Phase 1: Prep and Season

A large piece of raw sous vide pork shoulder coated with dry seasoning sits on a wooden surface next to a metal spoon and a black bowl.

Dry brine the pork

Pat the pork shoulder dry on all surfaces with paper towels. Apply your dry rub generously, pressing it into every surface, including the sides and any crevices.

Flavor Tip

Do this 1-2 hours before bagging, or up to 24 hours ahead in the refrigerator uncovered. The salt in the rub draws out surface moisture and then pulls it back in, seasoning the meat all the way through.

A vacuum-sealed, seasoned sous vide chuck roast is being cooked in a clear water container using the sous vide method on a wooden surface.

Bag the pork

  1. Place the seasoned pork in a heavy-duty gallon zip-top freezer bag.
  2. Close all but about one inch of the seal.
  3. Slowly lower the bag into your water bath, letting the water pressure push all the air out through the opening.
  4. Seal completely just before the opening reaches the waterline.

Why not vacuum seal?

For bone-in pork shoulder, the water displacement method is strongly recommended over a vacuum sealer as the bone can puncture the bag during sealing.

Phase 2: The Sous Vide Cook

Set your water bath

Fill your sous vide container and set the immersion circulator to 165°F (74°C) for pull-apart, shreddable pulled pork. If you prefer pork that slices rather than shreds, set to 145°F (63°C). Allow the water to reach the target temperature fully before submerging the pork.

Time Saving Tip

Use the hottest tap water your sink will provide to fill your water bath. This will cut down on the time the circulator will take to reach the set temp.

A vacuum-sealed piece of pork cooks in a water bath with a white sous vide immersion circulator on a wooden counter, perfect for those who enjoy precise methods like sous vide pork shoulder.

Cook for 24 hours

Submerge the sealed bag and clip it to the side of the container to keep it fully submerged. Cover with foil or a lid to limit evaporation. Check periodically to ensure the pork stays submerged and to top off water if needed.

sous vide chuck roast in a sous vide bag, chilling after cooking

Ice bath

When the cook completes, transfer the sealed bag immediately to a large bowl of ice water. Chill for 45 minutes minimum.

Food Safety Note

The ice bath step is not optional if you are making ahead as it stops the cooking process and rapidly drops the temperature for safe refrigeration.

Phase 3: The Finish

Prep for the finish

Remove the pork from the bag over a bowl and reserve all the juices from the bag, they are loaded with flavor and can be drizzled over the pulled pork at serving.

A large, seasoned sous vide pork shoulder roast sits in a white dish on a wooden cutting board, with a cloth in the background.

Second season

Pat the exterior of the pork completely dry with paper towels. Apply a fresh coat of dry rub to all surfaces.

sous vide pork shoulder on the smoker

Finish in the smoker or oven

  • Smoker: Set to 300°F with your preferred hardwood. Place the pork directly on the grate and smoke for 1.5-2 hours until a deep, mahogany crust forms on the exterior.
  • Oven: Preheat to 300°F. Place the pork on a rimmed sheet pan and roast for 1.5-2 hours until a firm crust develops.
sous vide pulled pork sandwich

Pull and serve

  • Remove the pork from the smoker or oven. If bone-in, the bone should slide out cleanly.
  • Using two forks or heat-safe gloves, shred the pork into large, tender chunks.
  • Drizzle the reserved bag juices over the pulled pork and toss to combine.
  • Serve immediately.

Water displacement vs. vac and seal

sous vide pork shoulder in a sous vide bath

I have found that using the water displacement method works well for either a bone-in or a boneless pork butt. This is my preferred method of sealing the bag when there is a bone in the meat. There is less chance of a puncture from the bone with water displacement vs. vac and seal.

Water displacement is when the pressure of the water forces the air out of the bag. To submerge your pork using the water displacement method:

  1. Place the meat in a heavy-duty, zip-top bag and close all but about 1 inch of the zip-top bag.
  2. Submerge the bag in the water allowing the pressure of the water to force the air out.
  3. Just as the water gets to the gap in the bag, close the bag.

If using a vac and seal bag, be sure to double seal the top and bottom seams because this will be a long cook. Look for a van and seal bag with a side gusset to help accommodate the larger piece of meat.

Seasonal Favorite

Baked lattice top crust on an apple pie made with the Crisco pie crust recipe, showing flaky layers in the fluted edge.

This is my award-winning Crisco pie crust recipe; flaky, tender, and made with simple ingredients you already have.

Crisco Pie Crust

Make-Ahead Instructions

This is one of the best recipes to plan ahead, as the pork holds beautifully in the refrigerator for days, and having it ready means you can pull a crowd-feeding meal together in under 20 minutes.

  1. Complete the full 24-hour sous vide cook. Do not skip or shorten.
  2. Ice bath immediately. Do not open the bag. Transfer the sealed bag directly into a large bowl of ice water and chill for at least 45 minutes until completely cold. This is a critical food safety step - dropping the temperature rapidly stops any bacterial activity and locks in the juices.
  3. Refrigerate in the sealed bag for up to 5 days. All the juices stay contained in the bag, which means zero flavor loss.
  4. When ready to serve, remove the pork from the bag and reserve all juices. Pat the exterior dry. Apply a fresh layer of dry rub. Finish in the smoker at 300°F for 1.5-2 hours or in the oven at 300°F for the same time until a deep crust forms. Shred and serve.

Chef Tip

Cook multiple pork butts at the same time, cool one completely before freezing it and reheating and smoking at a later date.

Storage Instructions

Pulled pork is arguably better the next day, and it holds exceptionally well, which makes it a meal prep staple worth cooking in bulk.

  • Refrigerator: Pulled pork keeps in an airtight container for up to 5 days. Store the reserved bag juices separately and add them back when reheating to restore moisture.
  • Freezer: Freeze in airtight portions for up to 3 months. Portion before freezing so you can thaw only what you need.
  • Reheating: Add the pulled pork to a covered skillet over medium-low heat with a splash of the reserved bag juices or a small amount of broth. Heat gently, stirring occasionally, until warmed through. As always, I avoid the microwave if possible as it dries the meat out unevenly. If you must microwave, cover loosely and heat in 30-second intervals, adding liquid between each pass.
  • Unshredded (make-ahead in bag): The fully cooked, unshredded pork shoulder can be refrigerated in the sealed bag for up to 5 days before the finishing step. This is the preferred make-ahead method.

How to serve sous vide pulled pork

sous vide pulled pork sandwich

My favorite way to eat pulled pork is fresh off the grill. I love the smoke, the crust and the juiciness that is sous vide pulled pork. But my second favorite way is the serve it piled high on a toasted potato roll, a squeeze of BBQ sauce and a spoonful of coleslaw. But here are more way to serve sous vide pork shoulder:

  • Pulled Pork tacos
  • Pork buns - similar to bao buns but with pulled pork and more of a pizza roll crust instead of the bao dough.
  • Pulled Pork grilled pizza - Follow my directions for grilled buffalo chicken pizza if you need simple grilled pizza directions.
  • Macaroni and cheese topped with pulled pork - talk about a happy mouth! Creamy, cheesy mac and cheese balanced out with the smoky goodness of pulled pork.
  • Pulled pork sliders - perfect for picnics or a packed lunch.
  • Pulled pork bolognese - add another layer of flavor and texture by stirring in leftover pulled pork to your favorite bolognese
Why does sous vide pulled pork cook at 165°F when traditional smoked pulled pork needs to reach 190-205°F?

Great question and one that confuses a lot of people so I tell them to look at the science of the process.

Traditional smoking guides call for 190-205°F because at high heat, you need the meat to reach that internal temperature to break down the collagen into gelatin quickly. With sous vide, the meat holds at 165°F for 24 hours.

The extended time at a lower temperature accomplishes the same collagen breakdown without the rapid moisture loss that comes with high-heat cooking. The result is actually juicier than traditional pulled pork because the lower temperature drives out far less moisture over time.

Can I use a zip-top bag instead of a vacuum sealer?

For bone-in pork shoulder, yes and actually preferred for safety reasons. A vacuum sealer can be punctured by the bone during the sealing process.

Have I personally used a vacuum sealer for this recipe? Yes. Was I super cautious and watched the bone as I vacuumed? Also Yes.

Use a heavy-duty gallon freezer zip-top bag and the water displacement method to remove the air. At 165°F over 24 hours, monitor the bag periodically and reseal if any air works its way in.

What is the difference between 145°F and 165°F for this recipe?

Short answer: Temperature determines texture entirely.

At 145°F, the pork is tender and fully cooked but holds together and it slices cleanly and works well over rice, polenta, or served as a roast. At 165°F, the connective tissue breaks down more completely and the pork shreds apart into strands - classic pulled pork for sandwiches or tacos. Neither is wrong; it is entirely a texture decision based on how you plan to serve it.

Do I have to finish it in a smoker? I do not have one.

My sister does not have a smoker and she tells me the oven works beautifully.

Preheat to 300°F, place the pork on a rimmed sheet pan, and roast for 1.5-2 hours until a firm crust develops on the exterior. To add some smoke flavor without a smoker, add smoked paprika and a small amount of liquid smoke (2 drops to start) to your dry rub before the sous vide cook.

How long can I hold the pork in the refrigerator before finishing it?

Up to 5 days in the sealed bag, unshredded. This is my best make-ahead approach to do the 24-hour cook, ice bath the sealed bag, refrigerate, and finish in the smoker or oven within 5 days. The pork will actually develop slightly more flavor as it rests.

My pulled pork seems dry after reheating. What went wrong?

The most common cause is reheating without adding the reserved bag juices back in. Always save the liquid from the bag - it is concentrated pork flavor and moisture. When reheating, add it back into the pan with the pulled pork over medium-low heat. If you did not save the juices, a splash of chicken or beef broth works as a backup. Avoid the microwave if at all possible - it heats unevenly and drives out moisture fast.

sous vide pork shoulder recipe on a sheet pan

Sous Vide Pulled Pork Shoulder (24 Hour Recipe)

Sous vide pork shoulder is the stress-free way to make the best-pulled pork.
4.76 from 49 votes
Print Pin Rate
Course: Sous Vide
Cuisine: American
Keyword: sous vide pork shoulder recipe, sous vide pulled pork
Prep Time: 10 minutes minutes
Cook Time: 1 day day
Additional Time: 2 hours hours
Total Time: 1 day day 2 hours hours 10 minutes minutes
Servings: 3 lbs
Calories: 678
Author: Sarah Mock

Ingredients

  •  
    1 4-5 lb Pork shoulder
  • A bottle of McCormick smoked paprika with a red cap and label, featuring images of paprika peppers and text highlighting its rich, sweet flavor and non-GMO status-a perfect spice to add smoky depth to your favorite slowcooker sausage casserole.¼ Cup Paprika
  • A Morton Salt container with a blue label featuring a girl in a yellow dress holding an umbrella, with salt pouring out of a container-an essential ingredient for perfectly seasoning dishes like Chicken Cordon Bleu.2 Tablespoon salt
  • A 4-pound bag of Domino granulated pure cane sugar with a yellow and white design, showing nutrition information and branding-perfect for sweetening recipes like rhubarb sour or your favorite desserts.2 Tablespoon Sugar
  • Domino Light Brown Sugar box, 16 oz, featuring a slice of Blackberry Dump Cake topped with whipped cream and berries, and a Non-GMO Project Verified label in the bottom right corner.2 Tablespoon Brown Sugar
  •  
    2 Tablespoon ground cumin
  • A 7.5 oz container of McCormick Dark Chili Powder with a red lid and a label stating 2 Tablespoon chili powder
  • A 6 oz container of McCormick Pure Ground Black Pepper with a red lid and a 2 Tablespoon Black Pepper freshly ground
  •  
    1 Tablespoon cayenne pepper
Follow Savoring The Good On PinterestFollow @SavoringTheGood or tag #STGRecipes!

Instructions

  • Preheat the sous vide water bath to your preferred cooking temperature. My personal preference is 165°F / 74ºC for pull-apart, shreddable tender pork or use 145°F / 63ºC for pork that is tender but still sliceable
    .
  • Coat the pork in your favorite dry rub. (see suggestions below)
  • Place the coated pork in a vacuum seal bag.
  • Submerge the sous vide bag in the water.
  • Cook for 24 hours.
  • Remove from the sous vide, remove from the bag, reserve the juices.
  • Pat the meat dry, add another layer of dry rub.
  • Smoke for 2 hours.
  • Shred the pork.

Finishing in the smoker:

  • Pat the meat dry with paper towels and apply another layer of spice rub.
  • Use your favorite wood for smoking and set the smoker to 300.
  • Smoke for 2 hours or until a delicious crust forms on the pork.
  • Serve and enjoy!

Finishing the pork in the oven:

  • Preheat the oven to 300.
  • Pat the meat dry with paper towels and apply another layer of spice rub.
  • Place the meat on a rimmed cookie sheet and cook for 1 ½-2 hours until a wonderful crust forms on the meat.
  • Pull the pork for sandwiches.

Notes

Spicy Dry Rub:
  • 1 tablespoon chili powder
  • 1 tablespoon cumin
  • 1 tablespoon ancho chipotle powder
  • 1 tablespoon garlic powder
  • 1 tablespoon kosher salt
  • 1 tablespoon black pepper
  • 1 teaspoon onion powder
  • 1 teaspoon Mexican oregano
  • 1 teaspoon crushed red pepper
  • 1 teaspoon cayenne pepper
Sweet Texas Dry Rub:
  • ¼ cup light brown sugar
  • 1 tbsp smoked paprika
  • 1 tsp ground cayenne pepper
  • 1 tsp chili powder
  • 1 tbsp salt
  • 1 tsp garlic powder
  • 1 tsp onion powder
  • ½ tsp ground black pepper
Sugar-Free Dry Rub
  • 4 tablespoon kosher salt
  • 4 tablespoon paprika
  • 2 tablespoon black pepper
  • 2 tablespoon garlic powder
  • 2 teaspoon onion powder, toasted preferred
  • 1 teaspoon ground celery seed
  • 1 teaspoon dried oregano
  • 1 teaspoon chipotle powder
Carolina style BBQ rub
  • ¼ cup paprika
  • 2 tablespoons salt
  • 2 tablespoons white sugar
  • 2 tablespoons brown sugar
  • 2 tablespoons ground cumin
  • 2 tablespoons chili powder
  • 2 tablespoons freshly ground black pepper
  • 1 tablespoon cayenne pepper
Want to share when you made this recipe?Follow @SavoringTheGood & tag #STGRecipes!
Nutrition Facts
Sous Vide Pulled Pork Shoulder (24 Hour Recipe)
Serving Size
 
4 oz
Amount per Serving
Calories
678
% Daily Value*
Fat
 
30
g
46
%
Saturated Fat
 
10
g
63
%
Polyunsaturated Fat
 
4
g
Monounsaturated Fat
 
13
g
Cholesterol
 
247
mg
82
%
Sodium
 
5035
mg
219
%
Potassium
 
1737
mg
50
%
Carbohydrates
 
29
g
10
%
Sugar
 
17
g
19
%
Protein
 
75
g
150
%
* Percent Daily Values are based on a 2000 calorie diet.
**Nutritional facts are just estimates. Please utilize your own brand nutritional values to double check against our estimates.
Like this recipe card? Want one for your site?Check out WP Recipe Maker!

Sarah Mock of savoringthegood.com headshot 2022

I am Sarah Mock. Welcome!

Sarah Mock is a classically trained Chef and a graduate of Johnson & Wales University. A culinary blogger for 17 years, Sarah helps the home cook prepare her recipes with professional results.

Get to know me

as seen in:

Logos of Hersheyland, ABC News, and Good Day PA are showcased in a seamless row, providing a snapshot of popular brands.

Hersheyland Nightline Good Day Pa!

The vibrant design showcases the iconic logos of Pinterest, Rachael Ray, and Jell-O set against a bold red background. Sorry, the provided description doesn't offer enough detail to suggest important SEO keywords.

Pinterest Rachael JELL-O


Candied Jalapeños Recipe (Cowboy Candy)

candied jalapenos recipe in a canning jar square image

Candied jalapeños, aka cowboy candy, is a delicious way to use up jalapeños when your jalapeno plants in the garden have produced more than you know what to do with.

candied jalapenos recipe in a canning jar square image

Sweet and spicy these jalapeno rings are sticky sweet and so delicious.

Sweet candied jalapeno peppers make a great gift next time you need to give to good friends, colleagues and teachers during the holidays. Give jars of this spicy condiment along with cream cheese and your favorite crackers.

The perfect balance of sticky, sweet, jalapeno heat; pour an entire jar over top of cream cheese for an easy appetizer!

Candied Jalapeno Ingredients

Bowls of fresh jalapeños, sugar, and spices hint at a sweet surprise as vinegar glistens nearby-getting ready for the perfect batch of candied jalapeños on a rustic wooden surface.

Recipe Card?

To find the full printable recipe with specific measurements and directions CLICK HERE to go to the recipe card.

  • Fresh jalapenos (21 peppers) - I leave the seeds and membranes attached, remove them if you want less heat
  • Sugar - white sugar
  • Apple cider vinegar - great flavor profile but white vinegar can be substituted
  • garlic powder -
  • celery seed -
  • ground turmeric - adds great yellow color as well as flavor
  • red pepper flakes - add more if you like it hotter (cayenne pepper can be substituted)

HOW TO MAKE CANDIED JALAPEÑOS

Candied jalapeños, aka cowboy candy in a canning jar
  1. Prepare the jalapeno peppers by using a sharp knife to slice the Jalapeño peppers into uniform ⅛ - to ¼-inch jalapeno slices. Be sure to wear food-safe disposable gloves to protect your hands from capsaicin.
  2. In a large pot or dutch oven combine apple cider vinegar, sugar, garlic powder, celery seed, turmeric, and red pepper flakes, bring to a rolling boil.
  3. Reduce to a simmer and cook for 5 minutes, until sugar is completely dissolved and the syrup starts to reduce.
  4. Add jalapeño pepper slices to the boiling syrup and stir to coat completely.
  5. Bring the mixture back up to a boil, then reduce to a simmer and cook for 10 minutes, stirring every few minutes but then stir continually the final 2 minutes.
  6. Remove the candied peppers from the syrup with a slotted spoon and place into half-pint jelly jars.
  7. Carefully pour the leftover syrup into hot jars, cover the hot peppers and allow to cool. Wipe the rims of the jars with a damp paper towel and cover them with two-piece lids and place jars in the refrigerator.
  8. To water bath can the peppers, after pouring the syrup over the candied peppers, leave ¼" headspace, wipe the rim, place on a new lid and finger tighten a ring on the jar. 
  9. Process for 10 minutes in a boiling water bath.

Did you make this recipe?

Do you have feedback that would be helpful to others? If so can help this small business owner by leaving a rating and a review in the comments section? Thank you for being part of the Savoring The Good Community. ~ Sarah

Seasonal Favorite

Baked lattice top crust on an apple pie made with the Crisco pie crust recipe, showing flaky layers in the fluted edge.

This is my award-winning Crisco pie crust recipe; flaky, tender, and made with simple ingredients you already have.

Crisco Pie Crust

Canning instructions:

  1. Place the filled jars in a water bath canner, be sure the jars are covered with 2 inches of water.  
  2. Bring the water to a full rolling boil.  
  3. With the water boiling, set a timer for 10 minutes for half-pint jars or 15 minutes for pints.  
  4. Use canning tongs to transfer the jars to a cooling rack.  
  5. Leave them to cool, undisturbed, for 24 hours.  
  6. When cool, wipe the jars clean with a damp washcloth and label.
  7. Check for sealed jars, store unsealed jars in the refrigerator.

5 Days To Canning Confidence

Ways to serve candied jalapenos

A close-up of candied jalapeños glistens atop a rustic wooden spoon, poised over a bowl.
  • As a topping for a burger or hot dogs
  • Poured over a brick of cream cheese, served with crackers
  • Part of a charcuterie and cheese board.
  • In a grilled cheese sandwich
  • Mixed into potato salad or macaroni salads
  • As a topping on walnut meat cheese fries
  • Added to cornbread
  • As a topping to Mahi-Mahi fist tacos

More jalapeno recipes:

  • Mexican corn dip
  • Tex-Mex eggrolls
  • Mexican Shrimp Cocktail
  • fried tex mex egg roll with beeg, cheese, corn, tomatoes, cream cheese black beans, cut open on the bias to show texture. Sitting on a pile of the rest of the the golden egg rolls
    Taco Egg Rolls (Air Fryer or Fried)
  • A white bowl filled with watermelon cubes, topped with crumbled feta cheese, fresh mint leaves, and a drizzle of balsamic glaze.
    Feta Cheese and Watermelon Salad
  • A glass baking dish filled with baked pizza dip featuring pepperoni and cheese, with a bowl of sliced bread in the background.
    Pizza Dip Recipe
See more Appetizer Recipes →
candied jalapenos recipe in a canning jar square image

Candied Jalapeños

Sweet and spicy these jalapeno rings are sticky sweet and addictively delicious.
4.70 from 30 votes
Print Pin Rate
Course: Canning Recipes
Cuisine: Mexican
Keyword: candied jalapeno recipe, candied jalapenos, cowboy candy, cowboy candy recipe
Prep Time: 5 minutes minutes
Cook Time: 20 minutes minutes
Total Time: 25 minutes minutes
Servings: 2 ½ pints
Calories: 72
Author: Sarah Mock

Ingredients

  •  
    1 pound fresh jalapeños 21 peppers
  • A 4-pound bag of Domino granulated pure cane sugar with a yellow and white design, showing nutrition information and branding-perfect for sweetening recipes like rhubarb sour or your favorite desserts.2 Cups Sugar
  •  
    ⅔ Cup apple cider vinegar
  • A bottle of McCormick Garlic Powder with a red lid and green label, featuring the brand logo and 1 Teaspoon Garlic Powder
  •  
    ½ Teaspoon celery seed
  •  
    ½ Teaspoon ground turmeric
  • A 6.2 oz plastic container of McCormick Crushed Red Pepper with a red cap and yellow label stating ¼ Teaspoon red pepper flakes
Follow Savoring The Good On PinterestFollow @SavoringTheGood or tag #STGRecipes!

Instructions

  • Prepare the jalapenos by using a sharp knife to slice the Jalapeños into uniform ⅛ - to ¼-inch rounds. Be sure to wear food-safe gloves to protect your hands from the capsaicin.
    1 pound fresh jalapeños
  • Prepare canning jars in a hot water bath.
  • In a medium-size pot or dutch oven, bring to a rolling boil, the sugar, apple cider vinegar, garlic powder, celery seed, turmeric, and red pepper flakes.
    2 Cups Sugar, ⅔ Cup apple cider vinegar, 1 Teaspoon Garlic Powder, ½ Teaspoon celery seed, ½ Teaspoon ground turmeric, ¼ Teaspoon red pepper flakes
  • Reduce to a simmer and cook for 5 minutes, until sugar is completely dissolved and the syrup starts to reduce.
  • Add sliced jalapeños and stir to coat completely.
  • Bring the mixture back up to a boil, then reduce to a simmer and cook for 10 minutes, stirring every few minutes but then stir continually the final 2 minutes.
  • Remove the candied peppers from the syrup and place into half-pint jelly jars.
  • Carefully pour the syrup into jars, cover the peppers and allow to cool. Cover with lid and store in the refrigerator.
  • To water bath can the peppers, after pouring the syrup over the candied peppers, leave ¼" headspace, wipe the rim, place on a new lid and finger tighten a ring on the jar. Process for 10 minutes in a boiling water bath.
Want to share when you made this recipe?Follow @SavoringTheGood & tag #STGRecipes!
Nutrition Facts
Candied Jalapeños
Serving Size
 
1
Amount per Serving
Calories
72
% Daily Value*
Sodium
 
1
mg
0
%
Carbohydrates
 
18
g
6
%
Sugar
 
17
g
19
%
* Percent Daily Values are based on a 2000 calorie diet.
**Nutritional facts are just estimates. Please utilize your own brand nutritional values to double check against our estimates.
Like this recipe card? Want one for your site?Check out WP Recipe Maker!


Sarah Mock of savoringthegood.com headshot 2022

I am Sarah Mock. Welcome!

Sarah Mock is a classically trained Chef and graduate of Johnson & Wales University. A culinary blogger for 15 years Sarah helps the home cook prepare her recipes with professional results.
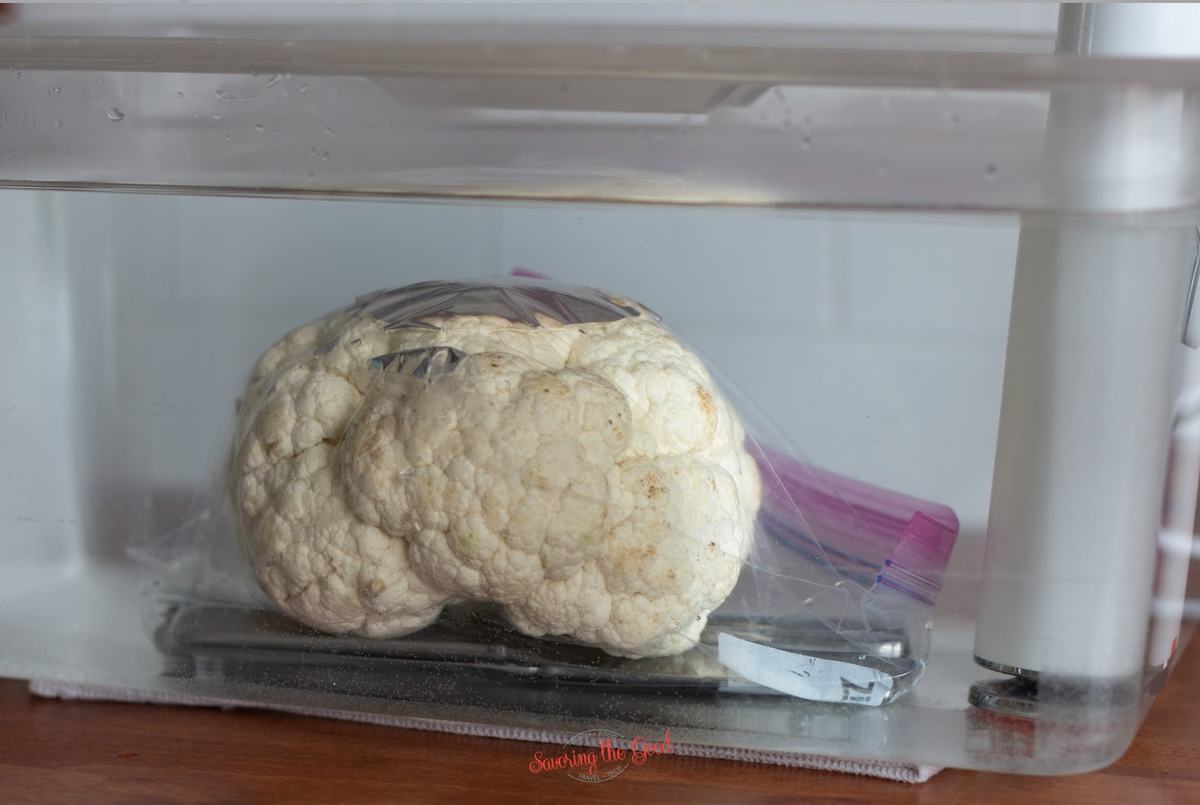
Get to know me

as seen in:

Logos of Hersheyland, ABC News, and Good Day PA are showcased in a seamless row, providing a snapshot of popular brands.

Hersheyland Nightline Good Day Pa!

The vibrant design showcases the iconic logos of Pinterest, Rachael Ray, and Jell-O set against a bold red background. Sorry, the provided description doesn't offer enough detail to suggest important SEO keywords.

Pinterest Rachael JELL-O

Beet Juice Recipe

fresh beet juice in a clear glass

Beet juice recipe is a sweet, earthy, and deeply colored drink made from fresh raw beets; it comes together in minutes with a juicer or a blender and a strainer. I have been growing red beets in my garden for years, and juicing them is one of my favorite ways to use a bumper crop. If you are new to beet juice, this is the recipe to start with; it is straightforward, naturally sweet, and works as a base for every beet juice combination I have ever made.

fresh beet juice in a clear glass

I am such a fan of red beets that I plant them every single year. While some kids were packing bananas in their lunch, I was bringing pickled beets in a Tupperware container. My love for beets is not subtle.

woman hold arm full of fresh picked beets

If you do not grow your own, beets are available year-round in most grocery stores. Boiled beets are another great way to get them into your routine; they are perfect for salads or as a simple snack.

How to Juice Beets:

You do not need to overthink this. The process is fast, the cleanup is the hardest part, and your beets will go from whole to juiced in about 10 minutes.

  1. Wash and prep the beets. Scrub each beet under cold running water to remove all dirt from the skin. Trim the stems and set the leaves aside; those go great in a batch of sautéed beet greens and it is worth not throwing them away.
  2. Size the beets to fit. If a beet is too large to pass through the feeder tube of your juicer, slice it into pieces. You are looking for chunks that feed through without forcing; if you have to muscle it, cut it smaller.
  3. Run the juicer on high. Using the plunger, press the beets through the juicer and catch the juice in a pitcher below. The juice will be a deep ruby red and nearly opaque; that is exactly what you want. A pound of raw beets yields roughly 6 to 8 ounces of juice depending on how fresh and firm they are.
    beet juice being extracted from a juicer
  4. Add lemon juice immediately. Stir in 1 teaspoon of fresh lemon juice as soon as the beets are done. Beet juice oxidizes quickly once it hits air; the lemon slows that process and keeps the color from going dull. Do not skip this step if you are not drinking it right away.

How To Make Beetroot Juice Without A Juicer

A quality juicer is an investment, and if you are not juicing regularly, it may not make sense yet. Here is how to get the same result with a blender and a strainer.

basic beet juice recipe in a clear juice glass
  1. Step 1: Wash, peel, and trim the beets. Remove the leaves and stems. For the no-juicer method, you will want to peel the beets because you are blending the whole thing; the skin can add a slightly bitter, earthy edge that is more noticeable without the juicer filtering it out.
  2. Step 2: Grate the beets. Using a box grater, shred the peeled beet down to fine shreds. This gives the blender more surface area to work with and makes the straining step easier.
  3. Step 3: Blend with lemon juice. Add the shredded beets and 1 teaspoon of fresh lemon juice to a blender or food processor. Pulse until you have a smooth, wet puree; it will look almost like a thick smoothie at this point.
  4. Step 4: Strain the juice. Press the puree through a fine-mesh strainer or two layers of cheesecloth set over a bowl or pitcher. Use the back of a spoon to press every bit of liquid through. What stays behind is the pulp; what goes through is your beet juice. The yield will be slightly less than a juicer produces, but the flavor is just as good.

Beet Juice Recipe Combinations:

Once you have the base beet juice recipe down, mixing in other fruits and vegetables is where it gets interesting. These are combinations I come back to regularly; each one is built around the beet as the foundation with other ingredients layered in for balance.

top down image of juiced beet root in a clear glass
  • Ginger Beet Juice: 2 large raw beets, peeled; 3 to 4 large apples; 1 2-inch piece of fresh ginger, peeled; a large handful of fresh parsley; 1 lemon, juiced. The ginger adds a sharp, warming heat and the apple keeps it from tasting like straight beet.
  • Kale Ginger Beet Juice: 2 beets; 1 lemon, peeled; 1 ½-inch slice of fresh ginger; 1 carrot; 1 cup kale, stems included. This one is earthy all the way through; the lemon is what keeps it from tasting flat.
  • Beet Celery Juice: 2 large raw beets, peeled; 3 large apples; 3 carrots; 2 inches fresh ginger, peeled; 5 stalks celery; 1 lemon. The celery adds a clean, slightly salty note that balances the natural sweetness of the beet and carrot.
  • Garden Basket Beet Juice: 2 beets; 2 carrots; 2 Granny Smith apples; 2 clementines, peeled; 7 strawberries; 1 lemon, juiced; a small piece of fresh ginger, peeled. This is the most fruit-forward of the group; it is sweet, bright, and the one I reach for when I want something that does not taste medicinal.
  • Blueberry Beet Juice: 1 cup blueberries, fresh or frozen; 2 cups kale; 1 medium beet; ½ lemon, peeled; 1-inch piece of fresh ginger, peeled. The blueberries deepen the color even further and add a mild tartness that plays well against the beet.

Juicing Tips Worth Knowing

  • If a beet feels soft or slightly spongy, soak it in cold water overnight before juicing. It will firm back up and juice much more efficiently than a beet that has lost moisture sitting in the produce bin.
  • The stems and leaves are not waste. Both can go through the juicer or into the blender with the rest of your produce; the greens add a slightly bitter, mineral note that works well if you are mixing with apple or ginger.
  • Beet juice stains. Your cutting board, your hands, your countertop, and anything else it touches. Work on a surface you can wipe down easily and rinse your hands immediately after handling cut beets.

How to Store Fresh Beet Juice

Fresh beet juice is best consumed within 24 to 48 hours. Store it in a sealed glass jar or airtight container in the refrigerator; glass is preferable because it does not absorb the color or the smell the way plastic can.

If you need to store it longer, freeze it in ice cube trays, then transfer the frozen cubes to a zip-top freezer bag. Frozen beet juice keeps well for up to 3 months and thaws quickly in the refrigerator overnight.

Give the juice a good stir or shake before drinking; separation is normal and does not mean anything has gone wrong.

What to Know Before You Drink It

Beet juice is naturally high in sugar, which is worth knowing if you are watching your intake. The sugar in beets is natural, but it concentrates when juiced; a glass of beet juice contains more sugar than eating a whole beet because you are removing the fiber that slows absorption.

Your urine or stool may turn a reddish or pinkish color after drinking beet juice. This is called beeturia and it is completely harmless. It can look alarming the first time it happens; now you know what it is.

Beets contain oxalates, which can be a concern for people with a history of kidney stones. If that applies to you, moderate your intake and check with your care provider.

If you are on medication, particularly calcium channel blockers, talk to your doctor before adding large amounts of beet juice to your routine. It is not a common interaction, but it is worth a quick conversation.

Seasonal Favorite

Baked lattice top crust on an apple pie made with the Crisco pie crust recipe, showing flaky layers in the fluted edge.

This is my award-winning Crisco pie crust recipe; flaky, tender, and made with simple ingredients you already have.

Crisco Pie Crust
Sarah Mock of savoringthegood.com headshot 2022

Sarah's Culinary Insight

  • Fresh beets make a real difference here. I have juiced beets at every stage of freshness and the ones that have been sitting in the crisper drawer for two weeks give you a flat, slightly fermented flavor compared to beets juiced within a few days of buying or picking.
  • The lemon juice step is not optional if you are not drinking the juice immediately. Every time I have skipped it, the juice oxidizes within an hour and the color goes from bright ruby to a dull brownish-red. One teaspoon is enough to slow it down significantly.
  • If you are new to beet juice and find the flavor too intense, start with the Garden Basket combination above. It is the most fruit-forward of the group and the one I use when introducing beet juice to someone who is skeptical. It rarely fails to convert them.
  • The no-juicer method takes more effort but the juice is just as good. The one thing I always do is press the cheesecloth or strainer hard; a lot of people strain it gently and leave half the juice behind in the pulp.

Frequently asked questions, answers and tips:

While I try to share all the information you need to make this recipe in your home with restaurant-quality results, there still may be a question or two. Or these are questions I have received from the community about this recipe. I do my best to answer them as clearly as I can. I hope this helps.

Can I drink beet juice every day?

You can, but moderation makes sense. Beets are naturally high in sugar and oxalates; most people do fine with a small glass daily, but if you have kidney concerns or are managing blood sugar, check with your care provider first.

Do I need to peel beets before juicing?

If you are using a juicer, no. Scrub the skin thoroughly and run them through. If you are using the blender method, yes; the skin can add a bitter edge that is more noticeable without the juicer separating it out.

Why does my beet juice taste bitter?

A few things can cause this: old beets that have lost moisture, too much of the stem left on, or blending the skin without straining well. Fresh, firm beets juiced without the stems produce the cleanest, sweetest flavor.

How long does fresh beet juice last in the fridge?

24 to 48 hours in a sealed glass container. After that the flavor starts to turn and the color goes dull. Freeze it if you need it to last longer.

Can I use canned or cooked beets?

You can blend cooked beets with water and strain the result, but it is not the same as fresh juice. Cooking changes the flavor profile and reduces some of the nutrients. It works in a pinch but fresh is the better option when you have it.

What does beet juice taste like?

Raw beet juice is earthy, sweet, and slightly mineral. Some people find it intense on its own; adding apple, ginger, or lemon softens the edge and makes it more approachable if you are new to it.

fresh beet juice in a clear glass

Homemade Beet Juice

Fresh, vibrant beet juice made easy at home with simple ingredients and step-by-step instructions.
5 from 3 votes
Print Rate
Course: Drinks - Non Alcoholic
Cuisine: American
Keyword: beet juice, beet juice recipe
Prep Time: 2 minutes minutes
Cook Time: 0 minutes minutes
Additional Time: 2 minutes minutes
Total Time: 4 minutes minutes
Servings: 1 cup
Calories: 44
Author: Sarah Mock

Ingredients

  •  
    4 beets fresh and washed
  • A plastic bottle of ReaLemon 100% Lemon Juice with a yellow cap, a lemon-shaped top, and images of lemons on a green label-perfect for adding a burst of citrus flavor to your favorite recipes like Lemon Cheesecake Bars.1 Teaspoon Lemon Juice fresh
Follow Savoring The Good On PinterestFollow @SavoringTheGood or tag #STGRecipes!

Instructions

  • Start by washing the beets and removing the stems, saving the stems and leaves to make sautéed beet greens.
  • If the beet is too large to pass through the feeder tube of the juicer, slice the beet into pieces to fit.
  • Turn on the juicer to high and using the plunger, press the beets through the juicer, catching the juice in a pitcher as it is extracted.
  • Add a teaspoon of fresh lemon juice to the beet juice to help minimize oxidation.

Notes

How to make beet juice without a juicer

  1. Wash, peel and remove the leaves and stems from the fresh beets.
  2. Using a box grater, grate the beet to shreds.
  3. In a food processor or blender, pulse the shredded beets and 1 teaspoon fresh lemon juice until smooth.
  4. To strain the beet juice, press the puree through a fine mesh strainer or two layers of cheesecloth.
Want to share when you made this recipe?Follow @SavoringTheGood & tag #STGRecipes!
Nutrition Facts
Homemade Beet Juice
Serving Size
 
1
Amount per Serving
Calories
44
% Daily Value*
Sodium
 
78
mg
3
%
Carbohydrates
 
10
g
3
%
Sugar
 
8
g
9
%
Protein
 
2
g
4
%
* Percent Daily Values are based on a 2000 calorie diet.
**Nutritional facts are just estimates. Please utilize your own brand nutritional values to double check against our estimates.
Like this recipe card? Want one for your site?Check out WP Recipe Maker!


Sarah Mock of savoringthegood.com headshot 2022

I am Sarah Mock. Welcome!

Sarah Mock is a classically trained Chef and a graduate of Johnson & Wales University. A culinary blogger for 17 years, Sarah helps the home cook prepare her recipes with professional results.

Get to know me

as seen in:

Logos of Hersheyland, ABC News, and Good Day PA are showcased in a seamless row, providing a snapshot of popular brands.

Hersheyland Nightline Good Day Pa!

The vibrant design showcases the iconic logos of Pinterest, Rachael Ray, and Jell-O set against a bold red background. Sorry, the provided description doesn't offer enough detail to suggest important SEO keywords.

Pinterest Rachael JELL-O

Homemade Bitters Recipe for Better Cocktails

Four bottles labeled Lavender, Orange, Sour Cherry, and Aromatic are filled with reddish-brown liquid and have black caps, set against a blurred background of jars—perfect for anyone eager to learn how to make bitters at home.

Homemade bitters are a bold, aromatic cocktail ingredient made with high proof alcohol, dried herbs, roots, and spices. A few dashes turn a plain old fashioned, or even a glass of seltzer, into something with real depth.

Four glass bottles with brown liquid, labeled Lavender, Orange, Sour Cherry, and Aromatic, are lined up on a wooden counter with jars of ingredients in the background.

You can make this the traditional way, which takes about a month of infusing, or speed it up to a few hours with a sous vide circulator. Either method gets you the same jar of concentrated flavor; you're only trading time for hands-on work here.

What are bitters?

Bitters are a combination of a strong spirit, high proof alcohol (at least 80 proof), water, herbs, spices, and aromatics. Bitters are strong and intense in flavor with just a few drops or shakes needed when adding to a cocktail to drink. Bitters can be made in just about any edible flavor, giving you an easy way to make a drink your own.

Angostura bitters are the longest-running bitters sold in stores. The original Angostura bitters were used to combat seasickness as well as malaria between 1830 and 1846. Soon after these bitters were used as a cocktail ingredient.

Learning from experts

Sarah Mock of savoringthegood.com headshot 2022

I took a bitters-making class from Emily at Revival Social Club (now closed) here in York during the spring of 2020 when we were all taking classes via zoom. She did a wink wink, nod nod telling me that this is as close to the Angostura bitters recipe as you are going to get without breaking into their secret safe for the recipe.

Spices Used To Make Angostura Bitters (dupe):

homemade bitters spices in bowls

I am giving this recipe in parts so that you can choose your 'part' so you can use a ratio instead of a measurement. For example, I use a single Tablespoon as the 'part' in this recipe. If you want to make a larger batch, use ¼ cup measure as your 'part'. 3 parts = 3 Tablespoons when the single tablespoon is the part. 3 parts = ¾ cup when ¼ cup is the part used.

  • 3 parts gentian root
  • 2 parts angelica root
  • 2 parts cinchona bark
  • 1 part black peppercorn
  • 1 part allspice
  • 1 part cardamom
  • 1 part cinnamon
  • a dash of clove ( I call a dash 5 whole cloves)

How To Customize Your Homemade Bitters Recipe

This is where your imagination can run wild when making your own homemade, flavored bitters. If you can eat it, you can use it to flavor your bitters. Here are my top suggestions for botanicals to flavor your bitters:

  • Lavender - culinary grade lavender buds used in ¼ cup per recipe
  • Orange - Just the orange part of the peel is used. 1 orange peel per recipe
  • Sour Cherries - Fresh or frozen sour cherries are used. ¼ cup per recipe
  • Chocolate - Milk, or dark chocolate is used. ¼ cup per recipe. (70-90% cacao)
  • Sage - Fresh is best. ¼ cup per recipe (5 large leaves)
  • Celery - I use the celery leaves from one bunch of celery
  • Peach - Fresh or frozen peaches can be used. ¼ cup per recipe.
  • Mint - fresh, clean mint is best, variety is up to you. 15 leaves per recipe.

What proof alcohol will work for making bitters?

The alcohol that is used to make bitters needs to be at least 80 proof and I use a corn or grain alcohol. Moonshine, if it is available in your area works wonderfully, but vodka at 80 proof is a good substitute.

How to make cocktail bitters at home

4 jars of house made bitters
  1. First, measure out the herbs and spices.
  2. Using a mortar and pestle, rolling pin and zip top bag, or a Blendtec blender, crush the spices.
  3. Add the herbs and spices to a dry pan, over medium heat, toast the spices until they are warm and fragrant.
  4. Cool the toasted spices and add them to a glass canning jar.
  5. If making a flavored bitter, add the flavors to the jar.
  6. Cover the spices and flavors with 80 proof alcohol.
  7. Screw on a lid and ring and shake the jar.
  8. Allow the mash to marinade for 2 weeks.
  9. After 2 weeks, drain the infused alcohol away from the mash, do not throw away the mash. discarded mash in a mes strainer over a pyrex of bitters
  10. Measure the bitters and add equal part water to the bitters liquid.
  11. Simmer the bitters until they reduce by half.boiling down bitters
  12. Add the reduced water and infused bitter liquid back into the canning jar. Add the original mash back into the jar.
  13. Screw on a lid and ring, shake and allow to marinate for an additional 2 weeks.
  14. After the final 2-week infusion, drain the bitters away from the mash. draining off the homemade bitters in a fine mesh strainer
  15. Discard the mash and store your homemade bitters in a closed container.

How to make sous vide bitters

Making homemade bitters using the sous vide technique will take hours instead of weeks. See the above instructions if you do not have access to a sous vide circulator.

  1. First, measure out the herbs and spices.
  2. Heat the sous vide water bath to 150.
  3. Using a mortar and pestle, rolling pin and zip top bag, or a Blendtec blender, crush the spices.
  4. Add the herbs and spices to a dry pan, over medium heat, toast the spices until they are warm and fragrant. homemade bitters spices in a pan being toasted
  5. Cool the toasted spices and add them to a glass canning jar or a zip-top bag.toasted spices in a small mason jar for homemade bitters
  6. If making a flavored bitter, add the flavors to the jar or bag.
  7. Cover the spices and flavors with 80 proof alcohol.
  8. Screw on a lid and ring and shake the jar or bag.
  9. Lower the zip-top bag into the heated water, with a corner of the bag open, allow the water pressure to press out all the air in the bag, and seal the bag. Or place a closed canning jar into the water bath.
  10. Cook for 2 hours.
  11. After the cooking time, drain the infused alcohol away from the mash, do not throw away the mash.
  12. Measure the bitters and add equal part water to the bitters liquid.
  13. Bring to a boil and simmer the bitters until they reduce by half.
  14. Add the reduced water and infused bitter liquid back into the canning jar. Add the original mash back into the jar.homemade bitters with mash in a jar
  15. Screw on a lid and ring, shake and cook back in the sous vide water bath for an additional 2 hours.
  16. After the final 2-hour infusion, drain the bitters away from the mash.
  17. Discard the mash and store your homemade bitters in a closed container.

Frequently asked questions, answers and tips:

While I try to share all the information you need to make this recipe in your home with restaurant-quality results, there still may be a question or two. Or these are questions I have received from the community about this recipe. I do my best to answer them as clearly as I can. I hope this helps.

How many dashes of bitters do I use in an old fashioned?

Start with 2 to 3 dashes for a classic old fashioned; you can always add one more if you want more bite. My rule of thumb is to taste as you go, since homemade bitters can run a little stronger than store-bought depending on how heavy-handed you were with the spices.

Can I use homemade bitters in place of Angostura?

Yes, homemade bitters work as a substitute for Angostura in almost any classic cocktail. The flavor profile will lean closer to whatever botanicals you added, so an orange or cherry version tastes a little different than the original, but the ratio and dash count stay the same.

How long do homemade bitters last?

Stored in a closed glass container away from direct sunlight, homemade bitters last for years thanks to the high alcohol content. I still have jars from my first batch back in 2020 that taste just as good today.

Why are my bitters cloudy?

A little cloudiness is normal once you add water to the infused alcohol; no need to worry. If you see sediment settling at the bottom of the jar, that just means the spices got crushed a bit fine in the blender, and a coffee filter will clear it right up.

Can I use bitters in non-alcoholic drinks?

Bitters were made for more than cocktails. A few dashes in plain seltzer, tonic water, or even lemonade adds the same complexity you'd get in a mixed drink, without the alcohol content of the pour itself.

Four bottles labeled Lavender, Orange, Sour Cherry, and Aromatic are filled with reddish-brown liquid and have black caps, set against a blurred background of jars—perfect for anyone eager to learn how to make bitters at home.

Cocktails that use bitters:

  • blackberry bourbon lemonade
Homemade Bitters in 4 glass shaker jars

Homemade Aromatic Bitters Recipe

Learn how to make homemade bitters for your favorite handcrafted cocktail, a classic old fashion cocktail or even to add a few shakes of bitters to flavor plain seltzer water. 
4.75 from 8 votes
Print Pin Rate
Course: Cocktails
Cuisine: American
Keyword: bitters recipe
Prep Time: 5 minutes minutes
Cook Time: 10 minutes minutes
Total Time: 15 minutes minutes
Servings: 5 ounces
Calories: 6
Author: Sarah Mock

Ingredients

  • 3 parts gentian root
  • 2 parts angelica root
  • 2 parts cinchona bark
  • 1 part black peppercorn
  • 1 part allspice
  • 1 part cardamom
  • 1 part cinnamon
  • a dash of clove I call a dash 5 whole cloves
  • Grain alcohol
Follow Savoring The Good On PinterestFollow @SavoringTheGood or tag #STGRecipes!

Instructions

  • First, measure out the herbs and spices
  • Using a mortar and pestle, rolling pin and zip-top bag, or a Blendtec blender, crush the spices
  • Add the herbs and spices to a dry pan, over medium heat, toast the spices until they are warm and fragrant.
  • Cool the toasted spices and add ⅓ cup of the spices to a glass canning jar
  • If making a flavored bitter, add the flavors to the jar.
  • Cover the spices and flavors with 80 proof alcohol.
  • Screw on a lid and ring and shake the jar.
  • Allow the mash to marinade for 2 weeks.
  • After 2 weeks, drain the infused alcohol away from the mash, do not throw away the mash.
  • Measure the bitters and add equal part water to the bitters liquid.
  • Simmer the bitters until they reduce by half.
  • Add the reduced water and infused bitter liquid back into the canning jar. Add the original mash back into the jar.
  • Screw on a lid and ring, shake and allow to marinate for an additional 2 weeks.
  • After the final 2-week infusion, drain the bitters away from the mash.
  • Discard the mash and store your homemade bitters in a closed container.

Notes

Infuse: 4 weeks (hands-off)
When adding water to the infused alcohol, it will become cloudy. That is normal. No need to freak out.
  • If you notice sediment in the bottom of the completed bitters jars, this is normal. It could be a sign that the spices got crushed too much in the blender. Strain through a coffee filter if it is too much for you.
  • Shake each jar before using.
  • The recipe calls for ⅓ cup crushed, toasted spices, a flavor such as orange, lavender or cherry and corn alcohol of 80 proof to cover.(about ¾ cup) This recipe can be made in larger batches. Just keep the ratios about the same.
Want to share when you made this recipe?Follow @SavoringTheGood & tag #STGRecipes!
Nutrition Facts
Homemade Aromatic Bitters Recipe
Serving Size
 
1
Amount per Serving
Calories
6
% Daily Value*
* Percent Daily Values are based on a 2000 calorie diet.
**Nutritional facts are just estimates. Please utilize your own brand nutritional values to double check against our estimates.
Like this recipe card? Want one for your site?Check out WP Recipe Maker!

Sarah Mock of savoringthegood.com headshot 2022

I am Sarah Mock. Welcome!

Sarah Mock is a classically trained Chef and a graduate of Johnson & Wales University. A culinary blogger for 17 years, Sarah helps the home cook prepare her recipes with professional results.

Get to know me

as seen in:

Logos of Hersheyland, ABC News, and Good Day PA are showcased in a seamless row, providing a snapshot of popular brands.

Hersheyland Nightline Good Day Pa!

The vibrant design showcases the iconic logos of Pinterest, Rachael Ray, and Jell-O set against a bold red background. Sorry, the provided description doesn't offer enough detail to suggest important SEO keywords.

Pinterest Rachael JELL-O


Red Beet Greens Recipe

Beet Greens in a serving bowl, square image

Did you know that red beet greens and stems are not only edible but they make a delicious sauteed side dish? Don't toss the stems and the leaves from red beets when you are making pickled beets, a glass of beet juice, roasted beets or boiled beets.

sauteed Beet Greens in a serving bowl

10 minutes, fresh beet greens and a few ingredients will make an unexpectedly delicious recipe.

Beet greens would be a great substitute when the recipe calls for spinach, swiss chard, or bok choy, just to name a few. The dark green leaves of the beets can be a bit on the bitter side but add in the sweeter red beet stems, to balance out the bitter. Flavor red beet greens as you would other dark leafy greens with olive oil, red pepper flakes, lemon zest or lemon juice, garlic and season with salt and pepper.

Ingredients needed:

  • Red beet greens, fresh and wash
  • Onion - finely diced. I use white onion in this recipe but red onion or shallot would also pair nicely.
  • Garlic - I love roasted garlic in this recipe but raw will work too
  • Salt - kosher is what I use but use what you have.
  • Olive oil - olive oil is what I reach for first, unless I have bacon fat on hand. Then, Bacon fat is my preferred fat to cook with for this recipe.
  • Red pepper flake - adds a hint of heat. Optional
  • Parmesan Cheese - for sprinkling over as a garnish and an added layer of flavor. Optional
  • Lemon - zest and juice. Optional

How to prepare red beet greens

Beet Greens. on a wooden cutting board
  1. Remove any wilted or brown leaves and any woody stems.
  2. Fill a clean sink with cold water and rinse the greens, allowing the dirt to settle to the bottom of the sink.
  3. Drain the sink and repeat.

How to make beet greens

  1. First, chop the beet stems into 2-inch pieces and chop the dark, leafy greens of the beets into bite-sized pieces. chopped Beet Greens and stems on a wooden cutting board
  2. Next, dice the onion. chopped onion
  3. Then, add a sprinkling of salt to the garlic and smash to make a paste. salt on roasted garlic cloves
  4. Heat oil in a saute pan and saute the onion and garlic until soft and they start to take on a golden color. sauted onion and garlic in a pan
  5. Add the chopped beet stems to the pan and stir to saute them for 3-4 minutes or until they start to soften. Beet Greens steaming in a pan
  6. Add the chopped beet greens to the pan and allow them to wilt for 1-2 minutes, stirring occasionally. chopped Beet Greens in a pan
  7. Season with red pepper flake, lemon juice and zest, if using. adding the greens to the pan
  8. Season with salt and pepper to taste and garnish with parmesan cheese, if using. sauteed Beet Greens in a serving bowl

Seasonal Favorite

Baked lattice top crust on an apple pie made with the Crisco pie crust recipe, showing flaky layers in the fluted edge.

This is my award-winning Crisco pie crust recipe; flaky, tender, and made with simple ingredients you already have.

Crisco Pie Crust
Beet Greens in a serving bowl, square image

Sauteed Beet Greens

10 minutes, fresh beet greens and a few ingredients will make an unexpectedly delicious recipe.
4.75 from 8 votes
Print Pin Rate
Course: Side Dishes
Cuisine: American
Keyword: sauteed beet greens recipe
Prep Time: 5 minutes minutes
Cook Time: 10 minutes minutes
Total Time: 15 minutes minutes
Servings: 2 cups
Calories: 154
Author: Sarah Mock

Ingredients

  •  
    4 Red beet greens and stems washed
  •  
    ½ Onion - finely diced.
  • Whole garlic bulb with white papery skin, lying on its side against a plain white background-a perfect aromatic addition to your next slowcooker sausage casserole.2 cloves Garlic
  • A Morton Salt container with a blue label featuring a girl in a yellow dress holding an umbrella, with salt pouring out of a container-an essential ingredient for perfectly seasoning dishes like Chicken Cordon Bleu.1 Teaspoon Salt
  • A 500ml bottle of California Olive Ranch Global Blend Extra Virgin Olive Oil with green and blue labeling, indicating a blend from Argentina, Portugal, Chile, and California-perfect for drizzling over your favorite shrimp avocado salad.3 Tablespoon Olive oil
  • A 6.2 oz plastic container of McCormick Crushed Red Pepper with a red cap and yellow label stating pinch Red pepper flake
  •  
    2 Tablespoon Parmesan Cheese
  •  
    1 whole Lemon juiced and zested
Follow Savoring The Good On PinterestFollow @SavoringTheGood or tag #STGRecipes!

Instructions

  • First, chop the beet stems into 2-inch pieces and chop the dark, leafy greens of the beets into bite-sized pieces.
  • Next, dice the onion.
  • Then, add a sprinkling of salt to the garlic and smash to make a paste.
  • Heat oil in a saute pan and saute the onion and garlic until soft and they start to take on a golden color.
  • Add the chopped beet stems to the pan and stir to saute them for 3-4 minutes or until they start to soften.
  • Add the chopped beet greens to the pan and allow them to wilt for 1-2 minutes, stirring occasionally.
  • Season with red pepper flake, lemon juice and zest, if using.
  • Season with salt and pepper to taste and garnish with parmesan cheese, if using.

Notes

  1. Remove any wilted or brown leaves and any woody stems.
  2. Fill a clean sink with cold water and rinse the greens, allowing the dirt to settle to the bottom of the sink.
  3. Drain the sink and repeat.
Want to share when you made this recipe?Follow @SavoringTheGood & tag #STGRecipes!
Nutrition Facts
Sauteed Beet Greens
Serving Size
 
1
Amount per Serving
Calories
154
% Daily Value*
Fat
 
11
g
17
%
Saturated Fat
 
2
g
13
%
Polyunsaturated Fat
 
9
g
Cholesterol
 
2
mg
1
%
Sodium
 
928
mg
40
%
Carbohydrates
 
12
g
4
%
Sugar
 
2
g
2
%
Protein
 
5
g
10
%
* Percent Daily Values are based on a 2000 calorie diet.
**Nutritional facts are just estimates. Please utilize your own brand nutritional values to double check against our estimates.
Like this recipe card? Want one for your site?Check out WP Recipe Maker!


Sarah Mock of savoringthegood.com headshot 2022

I am Sarah Mock. Welcome!

Sarah Mock is a classically trained Chef and graduate of Johnson & Wales University. A culinary blogger for 15 years Sarah helps the home cook prepare her recipes with professional results.

Get to know me

as seen in:

Logos of Hersheyland, ABC News, and Good Day PA are showcased in a seamless row, providing a snapshot of popular brands.

Hersheyland Nightline Good Day Pa!

The vibrant design showcases the iconic logos of Pinterest, Rachael Ray, and Jell-O set against a bold red background. Sorry, the provided description doesn't offer enough detail to suggest important SEO keywords.

Pinterest Rachael JELL-O

Whipped Butter Recipe

Whipped Butter Recipe in a black bowl

Whipped butter is so much easier to spread than cold plain butter straight out of the refrigerator. This easy homemade whipped butter recipe is perfect for spreading on homemade bread, warm dinner rolls and hot biscuits.

Whipped Butter Recipe in a black bowl

Add fresh herbs to it for savory whipped butter at home. It is guaranteed that you'll love whipped butter.

Use the paddle attachment of your KitchenAid stand mixer or the beater attachments on your hand mixer to incorporate air into room temperature butter. See more of my must have attachments for KitchenAid mixers here.

This creamy butter will not only be easier to spread but the color will be lighter than stick butter.

What type of butter is best for whipping?

whipped butter in a black bowl with spatula in the background

As long as your butter is real butter and not a butter blend, it will be perfect for whipping. I like unsalted butter whereas others prefer salted butter. The choice is yours depending on what you are going to be serving with your whipped butter or if you are going to be adding flavors to it. See below for more whipped butter variations.

How to soften butter

butter showing finger pressed mark soft butter

Butter will start to melt at 90 degrees f. The average room temperature is between 68 and 72 f. So if your kitchen is at an average room temperature your butter should soften to a whippable consistency within about 30-45 minutes. I prefer to wait 2 hours or even leave it on the counter overnight.

  • Microwave - soften butter in the microwave at 30% power on a microwave-safe place in 15-second increments until soft.
  • Warm Glass - heat a tall glass of water in the microwave, or use hot water from the coffee maker, pour out the water and invert the hot glass over a stick of butter and allow it to gently warm it.
  • Cut up butter - cut the butter into small cubed to allow more surface area to be in contact with the warm air.
  • Pounding - place the cold butter in a heavy plastic zip top bag. Pound the butter with a flat mallet or a rolling pin to help the softening process.

Uses for homemade whipped butter

Light and fluffy hipped butter is always on our Christmas, Thanksgiving, and special occasion dining room table. Easily spread on warm rolls, biscuits, waffles, or even pancakes whipped butter is expected whenever we entertain.

Whipped butter melts so nicely over a baked potato or over roasted sweet potatoes. Corn on the cob calls for slathers of butter and it is lovely on perfectly cooked asparagus.

The best way to make whipped butter:

soft butter in a mixing bowl with a paddle atachment vertical image
  1. First, soften the butter. Letting butter sit on the counter at room temperature for a minimum of 30 minutes, but preferably an hour is best.
  2. Fit a stand mixer with the paddle attachment or use the beaters with a hand mixer.
  3. Add the softened butter to the mixer and stir on low speed to start to blend, 1 minute
  4. Stop the mixer and scrape down the sides of the mixing bowl.
  5. Increase the mixer speed to medium and whip the butter for an additional 2 minutes.

Chef Tip: No Stand Mixer? No Problem!

Add the softened butter to a bowl and whisk by hand for 5 to 7 minutes. Your arm will feel it, but the butter turns pale and fluffy just the same. A hand mixer works too, and cuts that time down to 2 to 3 minutes.

Storing Whipped Butter

Whipped butter needs to live in the fridge, not on the counter.

Keep it in an airtight container and use it within 2 weeks. If you want it to last longer, portion it into a log, wrap tightly, and freeze for up to 3 months; thaw in the fridge before using.

If it ever smells sour or looks separated, toss it. Food safety comes first, and whipped butter is not worth the risk.

Whipped butter recipe variations:

  • Cinnamon butter - ½ cup butter, 2 Tablespoons Sugar, 1 teaspoon cinnamon
  • Herbed butter - 1 stick (½ cup) butter, 3 tablespoons of your favorite fresh chopped herbs
  • Brown sugar cinnamon butter - ½ cup butter, 2 Tablespoons Brown Sugar, ½ teaspoon cinnamon
  • Cranberry, Walnut, Orange Butter - 1 stick (½ cup) butter, 1 tablespoon dried cranberries, chopped, 1 tablespoon walnuts, chopped, zest of 1 orange
  • Roasted Garlic butter - 1 stick (½ cup) Butter, 1 Tablespoon flat-leaf parsley, finely chopped, 3 cloves of roasted garlic (See my recipe for roasted garlic)

Seasonal Favorite

Baked lattice top crust on an apple pie made with the Crisco pie crust recipe, showing flaky layers in the fluted edge.

This is my award-winning Crisco pie crust recipe; flaky, tender, and made with simple ingredients you already have.

Crisco Pie Crust

Frequently asked questions, answers and tips:

What is whipped butter used for?

I use whipped butter for spreading on bread, rolls, and other pastries when I want butter that is easily spreadable. No one likes to spread cold, hard butter on their Thanksgiving roll.

Can you substitute whipped butter for regular butter?

The short answer is no. Whipped butter has a different volume than cold butter that is used for baking. If you are weighing your butter instead of measuring your butter by cups then you are able to use it. But as a ruler whipped butter is not to be substituted for regular butter in baking.

How to Make Whipped Butter
Sarah Mock, savoring a glass of red wine, smiles warmly indoors near a staircase. With her long brown hair and light blouse, she exudes relaxed elegance in this candid headshot.Sarah Mock
5 from 5 votes
Whipped butter is so much easier to spread than cold butter straight out of the refrigerator. 
Print Recipe
Whipped Butter Recipe in a black bowl
Prep TimePrep:30 minutes mins
Cook TimeCook:0 minutes mins
Total TimeTotal:33 minutes mins
servingsServings:1 cup

Ingredients

  • 1 Cup Butter softened

Instructions 

  1. First, soften the butter. Letting butter sit on the counter at room temperature for a minimum of 30 minutes, but preferably an hour is best.
  2. Fit a stand mixer with the paddle attachment or use the beaters with a hand mixer.
  3. Add the softened butter to the mixer and stir on low speed to start to blend, 1 minute
  4. Stop the mixer and scrape down the sides of the bowl.
  5. Increase the mixer speed to medium and whip for an additional 2 minutes.

Nutrition

Serving: 2tablespoons | Calories: 203kcal | Fat: 23g | Saturated Fat: 15g | Polyunsaturated Fat: 7g | Trans Fat: 1g | Cholesterol: 61mg | Sodium: 182mg

Notes

Storage and serving tips
  • Refridgerator - store in a closed container for up to 2 weeks.
  • Room Temperature - let chipped chilled butter sit at room temperature for 30 minutes before serving
  • Countertop - Butter can be left on the countertop for up to 4 hours
  • Freezing butter- Whipped butter can be frozen for up to six months. Thaw in the refrigerator overnight.
Whipped butter recipe variations:
  • Cinnamon butter - ½ cup butter, 2 Tablespoons Sugar, 1 teaspoon cinnamon
  • Herbed butter - 1 stick (½ cup) butter, 3 tablespoons of your favorite fresh chopped herbs
  • Brown sugar cinnamon butter - ½ cup butter, 2 Tablespoons Brown Sugar, ½ teaspoon cinnamon
  • Cranberry, Walnut, Orange Butter - 1 stick (½ cup) butter, 1 tablespoon dried cranberries, chopped, 1 tablespoon walnuts, chopped, zest of 1 orange
  • Roasted Garlic butter - 1 stick (½ cup) Butter, 1 Tablespoon flat-leaf parsley, finely chopped, 3 cloves of roasted garlic (See my recipe for roasted garlic)
CourseCourse: Food Tips
CuisineCuisine: American
KeywordKeyword: whipped butter recipe


Sarah Mock of savoringthegood.com headshot 2022

I am Sarah Mock. Welcome!

Sarah Mock is a classically trained Chef and a graduate of Johnson & Wales University. A culinary blogger for 17 years, Sarah helps the home cook prepare her recipes with professional results.

Get to know me

as seen in:

Logos of Hersheyland, ABC News, and Good Day PA are showcased in a seamless row, providing a snapshot of popular brands.

Hersheyland Nightline Good Day Pa!

The vibrant design showcases the iconic logos of Pinterest, Rachael Ray, and Jell-O set against a bold red background. Sorry, the provided description doesn't offer enough detail to suggest important SEO keywords.

Pinterest Rachael JELL-O

How To Boil Beets

hot to boil beets

Learn how to boil beets. Boiling beets is probably the easiest way to prepare garden fresh beets. If you can boil water, you can learn how to cook beets.

fresh beets in a row

Beets come in a variety of colors including reds, striped and golden in hue. Baby beets are just a beet that has been harvested before it has grown to its full size. They are more tender compared to their full-size counterparts and are perfect for roasting whole for salads or pickling whole for a cheese and charcuterie board.

beet in the ground horizontal

Recipe Card?

To find the full printable recipe with specific measurements and directions CLICK HERE to go to the recipe card.

The fresher, the better when it comes to selecting beets. The best beets will have stems and leaves that have few blemishes and are not wilted. The beet will be smooth on the surface and firm, with no give when pressed. Choose a beet without cracks or bruises. Did you know that you can make beet juice from fresh beets?

How To Boil Beets:

boiling beets
  1. Bring a large pot of water to a boil. Add enough water to cover the beets.
  2. While the water is coming to a boil, trim off the root off the bottom of the beet as well as the stem and leaves. Save the leaves to sautee, if you wish. Scrub the beets if they are especially dirty.red beet with the top and root trimmed off
  3. Bring the water to a boil, place the beets to the pot and boil for 30 to 40 minutes. Depending on the size of the beets, the larger the beets, the longer it will take to cook them.
  4. Insert a sharp knife into the beet to know if you cook them properly and if it easily slides to the center of the beet, you'll know it is cooked.pairing knife inserted into a cooked red beet showcasing done ness
  5. Use tongs or a slotted spoon to remove the beets from the water.
  6. Transfer to a clean plate and allow the beets to cool for 15 minutes or until comfortable to handle.
  7. Remove the skin from the beets by pinching the skin loose from the beet.peeling beets with fingers horizantal image
  8. Finally, slice the beets to your preferred sizes.cooked beets
  9. Store sliced beets in an airtight container for up to 1 week.

Beet peeling tips

  • Peel the beets with your fingertips while the beets are still warm. Once they cool all the way down, it is next to impossible to peel.
  • To avoid getting beet juice stains on your hands, you'll want to wear food-safe gloves.
  • To clean the cutting boards of beet stains, use a combination of lemon juice and salt, rubbing in a circular motion.

Did you make this recipe?

Do you have feedback that would be helpful to others? If so can help this small business owner by leaving a rating and a review in the comments section? Thank you for being part of the Savoring The Good Community. ~ Sarah

How to use boiled beets:

  • pickled beets
  • beet juice
  • sliced on a salad with goat cheese
  • Added to hummus to give bright color and another layer of flavor.

Seasonal Favorite

Baked lattice top crust on an apple pie made with the Crisco pie crust recipe, showing flaky layers in the fluted edge.

This is my award-winning Crisco pie crust recipe; flaky, tender, and made with simple ingredients you already have.

Crisco Pie Crust

Can I steam the beets? How do I know if the beets are done?

Yes, another easy method to cook beets is placing them in a steamer basket above boiling water; allow the beets to steam until they are tender, checking for doneness by inserting a fork or knife into the root vegetables to ensure they are cooked through.

Is it a good idea to roast beets?

Roasting whole beets is a great idea. Serving them as a side, toss them in olive oil before roasting.

What's the best way to cook beets?

The best way to cook them is to add a drizzle of olive oil, sprinkle with salt and pepper, and roast beets in the oven until tender. This method enhances the natural sweetness of the beets while adding a savory touch with the salt and pepper seasoning.

What are some boiled beets recipes worth trying?

Use the boiled beets with a beet salad by tossing boiled beets with a low-calorie balsamic vinaigrette for a side dish. Alternatively, roast boiled beets and mix them with a light balsamic glaze for a satisfying snack that's low in calories and fat.

Can I prepare beets just like other vegetable dishes?

Yes, you can prepare red beets like other vegetables by roasting, boiling, steaming, or sautéing them. Beets is an easy vegetable and can be incorporated into various dishes to suit your preferences.

hot to boil beets

Hot To Boil Beets (Step by Step Instructions Included!)

Boiling beets is probably the easiest way to prepare garden fresh beets. If you can boil water, you can cook a beet.
5 from 3 votes
Print Rate
Course: Side Dishes
Cuisine: American
Keyword: Hot To Boil Beets
Prep Time: 5 minutes minutes
Cook Time: 1 hour hour
Total Time: 1 hour hour 5 minutes minutes
Servings: 5 beets
Calories: 22
Author: Sarah Mock

Ingredients

  • 5 Beets large
Follow Savoring The Good On PinterestFollow @SavoringTheGood or tag #STGRecipes!

Instructions

  • Bring a large pot of water to a boil. There should be enough water to cover the beets.
  • While the water is coming to a boil, trim off the root off the bottom of the beet as well as the stem and leaves Save the leaves to sautee, if you wish. Wash the beets if they are especially dirty.
  • Once the water comes to a boil, add the beets to the pot and boil for 30 to 40 minutes. The larger the beets, the longer it will take to cook them.
  • Insert a sharp knife into the beet and if it easily slides to the center of the beet, it is cooked.
  • Use tongs or a slotted spoon to remove the beets from the water.
  • Transfer to a clean plate and allow them to cool for 15 minutes or until comfortable to handle.
  • Remove the skin from the beets by pinching the skin loose from the beet.
  • Finally, cut the cooled beets to your preferred sizes.
  • Store sliced beets in an airtight container for  up to 1 week.
Want to share when you made this recipe?Follow @SavoringTheGood & tag #STGRecipes!
Nutrition Facts
Hot To Boil Beets (Step by Step Instructions Included!)
Serving Size
 
1
Amount per Serving
Calories
22
% Daily Value*
Sodium
 
39
mg
2
%
Carbohydrates
 
5
g
2
%
Sugar
 
4
g
4
%
Protein
 
1
g
2
%
* Percent Daily Values are based on a 2000 calorie diet.
**Nutritional facts are just estimates. Please utilize your own brand nutritional values to double check against our estimates.
Like this recipe card? Want one for your site?Check out WP Recipe Maker!

Sarah Mock of savoringthegood.com headshot 2022

I am Sarah Mock. Welcome!

Sarah Mock is a classically trained Chef and graduate of Johnson & Wales University. A culinary blogger for 16 years Sarah helps the home cook prepare her recipes with professional results.

Get to know me

as seen in:

Logos of Hersheyland, ABC News, and Good Day PA are showcased in a seamless row, providing a snapshot of popular brands.

Hersheyland Nightline Good Day Pa!

The vibrant design showcases the iconic logos of Pinterest, Rachael Ray, and Jell-O set against a bold red background. Sorry, the provided description doesn't offer enough detail to suggest important SEO keywords.

Pinterest Rachael JELL-O


Sous Vide Beef Tenderloin (Edge-to-Edge Perfect Every Time)

sous vide beef tenderloin

If you've ever spent serious money on a whole beef tenderloin and held your breath hoping it turns out right, my sous vide beef tenderloin recipe is your answer. With precise temperature control and edge-to-edge medium-rare perfection every single time, this is hands-down the best way to cook beef tenderloin for Christmas dinner, holidays, or any special occasion. No guesswork. No overcooking. Just a flawless, restaurant-quality result.

sous vide beef tenderloin

Edge-to-edge consistent doneness, with no chance of overcooking, will take the fear out of cooking this expensive cut of beef. If you don't have the need for a whole beef tenderloin recipe, the same technique is used when you make sous vide filet mignon.

This post was featured on Parade.com in their 'Best Sous Vide Recipes' article.

raw beef tenderloin

This beef tenderloin roast will be the highlight of your Christmas or special occasion meal. Take the stress out of your holiday meal by setting your sous vide to work for you. Rest easy knowing you will be serving this elegant entree without stress. Take your beef tenderloin to the next level this holiday season without leaving this expensive cut of meat to chance.

Pre-searing the beef gives it layers of flavor to enhance the beef as it cooks sous vide. Post cook searing gives the beef the lovely crust and added grilled flavors. Get ready to make your favorite steak meal, ever.

Sous Vide Beef Tenderloin Ingredients

beef tenderloin, raw on a cutting board

Recipe Card?

To find the full printable recipe with specific measurements and directions CLICK HERE to go to the recipe card.

Ingredient Substitutions

Beef tenderloin is one of those cuts where the ingredients list is deliberately short - the quality of the beef and the precision of the method do the work.

  • Whole beef tenderloin → center-cut tenderloin (chateaubriand): The center cut is the most uniform in thickness, which makes for a more even cook. If using a whole loin with the tapered end, fold and tie the thin end back on itself so the thickness is consistent throughout.
  • Kosher salt → flake sea salt: A direct swap with similar results. Flake salt has a larger crystal - use the same volume but expect slightly less salinity. Flake salt on the exterior before the final sear adds a pleasant texture contrast.
  • Fresh herbs → dried herbs: Use one-third the volume. Dried herbs work well in the bag but will not give you the same fresh aromatics.
  • Mayonnaise coating (pre-sear) → high smoke-point oil: The mayonnaise creates a thin, even coating that promotes browning and adds a subtle richness. Any high smoke-point oil works - avocado oil, refined grapeseed, or refined coconut oil.
  • Cast iron → stainless steel skillet: Cast iron holds heat better for a consistent sear. Stainless works but requires more attentive heat management.

What temperature should you set the sous vide for medium-rare beef tenderloin?

The cooking temperatures of the water bath should be the temperature you would like the doneness of the beef to be. The meat will not cook past the set sous vide temperature for beef, because the sous vide water bath is at a constant temperature.

Beef Tenderloin Internal Temperature Chart

DonenessVisualTemperature
RareCool Red Center120-128° F (49-53° C)
Medium RareWarm Pink Center129-134° F (54-57° C)
MediumSlightly Pink Center135-144° F (57-62° C)
Medium WellHint of Pink145-155° F (63-68° C)
Well DoneNo Pink156°+ F (69°+ C)

⚠️ A note on food safety: Cooking beef sous vide at temperatures below 130°F (54°C) carries pasteurization risks if held for an extended time. For a whole beef tenderloin cooked for 3-5 hours, stay at or above 130°F for peace of mind - you'll still get a beautiful, rosy medium-rare result.

How to Cook Beef Tenderloin Sous Vide (Step-by-Step)

This recipe has three phases:

  • the pre-sear
  • the sous vide cook
  • and the re-sear.
    Each one serves a specific purpose. The pre-sear builds flavor, the sous vide delivers edge-to-edge doneness, and the re-sear brings back the crust. Read through all steps before you start.
sous vide beef tenderloin in a waterbath

Phase 1: Prep and Pre-Sear

A raw cut of sous vide beef tenderloin with visible marbling sits on a wooden cutting board.

Trim and prepare the tenderloin

Remove any silver skin or excess connective tissue. Silver skin does not break down during cooking and will cause the loin to curl and tighten.

Should I Truss?

If the tapered end is significantly thinner than the rest of the loin, you can fold it back and tie it with butcher's twine to create a more uniform thickness. Personally, when I sous vide my loin, I don't truss it.

Season generously

Season the tenderloin on all surfaces with kosher salt and freshly ground black pepper. Add any fresh herbs, thyme, rosemary, or a combination, pressing them lightly into the surface.

beef tenderloin being seared in a cast iron skillet

Pre-sear

  1. Heat a cast iron skillet over high heat until smoking.
  2. Add a thin layer of high smoke-point oil or coat the tenderloin
  3. Sear all sides of the loin, about 1 minute per side, until deeply browned. The beef should release naturally from the pan when ready to turn.
A cooked sous vide beef tenderloin with herbs on top sits on a wooden cutting board next to a serving utensil.

Bag the tenderloin

Place the loin in a vacuum-seal bag with any additional herbs or aromatics. Seal using a vacuum sealer or use the water displacement method if using a heavy-duty zip-top freezer bag.

Phase 2: The Sous Vide Cook

Set your water bath

Preheat your sous vide immersion circulator to your desired temperature for doneness. (See Chart) Allow the water to come fully to temperature before adding the beef.

A sous vide machine cooks a vacuum-sealed sous vide beef tenderloin in a clear plastic container filled with water, set on a wooden table with a white tiled wall and a plant in the background.

Cook by thickness

  1. Submerge the sealed bag and clip to the side of the container.
  2. Cook for 1 hour per inch of thickness at the thickest point of the loin, plus 1 additional hour of wiggle room. For a 4-inch loin at its thickest, plan on 4-5 hours. The wiggle room hour gives you flexibility to finish the rest of your meal without stress.

Important food safety note

If cooking at temperatures below 130°F, do not exceed 2.5 hours total cook time. At temperatures 130°F and above, extended times up to 4-5 hours are safe for this cut.

Phase 3: The Second-Sear

sous vide chuck roast in a sous vide bag, chilling after cooking

Ice bath OR rest

If serving immediately, remove the bag from the water bath and rest for 10 minutes before the re-sear. If making ahead, transfer to an ice bath immediately and chill completely before refrigerating.

sous vide beef tenderloin in a bag showing the purge liquid

Pat completely dry

Remove the loin from the bag and pat every surface completely dry with paper towels. Reserve the bag juices for a pan sauce. Any moisture on the surface will steam the meat instead of searing it - a dry surface is non-negotiable for a good crust.

A sous vide beef tenderloin coated with a mustard and herb mixture sits on a white plate with a blue rim.

Apply a coating of herbs and mayonnaise

  1. Heat the cast iron skillet back to smoking hot.
  2. Add a thin layer of mayonnaise and dried herbs to the loin.
second seared sous vide beef tenderloin on a grill

Re-sear

  1. Sear all surfaces of the tenderloin, 1 minute per side, working quickly so you do not raise the internal temperature of the meat. The goal is color and crust only - the beef is already cooked to perfection inside.
sous vide beef tenderloin sliced showing internal texture

Rest and slice

  1. Transfer the tenderloin to a cutting board and rest for 5-10 minutes. Slice against the grain into medallions. The interior should show perfectly consistent doneness from edge to edge with no grey band.

Why is the cooking time so variable with sous vide cooking?

Example: if your loin is 4 inches thick at the thickest point, plan on cooking your meat for 4-5 hours. If the loin is 3 inches thick at the thickest, plan for cooking 3-4 hours cook time.

That additional hour is there as a cushion for you, the chef, to be with your guests as well as get the rest of the dinner party ready without having to stress about worrying if the tenderloin roast is at the perfect temperature or not.

Remember with sous vide cooking method, the temperature is the doneness and the time is the tenderness, with tougher cuts of beef taking much longer to cook than more tender cuts, such as tenderloin or tenderloin steaks.

Using an Anova sous vide machine, a person precisely cooks vacuum-sealed salmon fillets submerged in water, ensuring perfect results right on the countertop.

Let's go shopping!

ANOVA

This third generation sous vide circulator includes dual-band WiFi and a two-line touchscreen display.

Buy it here

Why Use Mayonnaise to Sear Beef Tenderloin?

mayo and herbs in a white bowl for sear

Mayonnaise is the emulsification of eggs and oil. The protein of the eggs and nonstick properties of the oil will give the meat caramelization along with easy release from a super hot cooking surface. (Think 500-700 degrees) The mayo quickly sears and caramelizes while adhering to the protein of the beef.

Mayonnaise is my preferred ingredient to use in the searing process instead of olive oil or melted butter because of the higher smoke point of the mayo. You will get less smoke when using mayo in a hot cast iron pan when searing.

I added garlic powder as well as dried rosemary and salt and pepper to my mayo coating to give the beef a delicious herbed crust.

How to Grill a Whole Beef Tenderloin (No Sous Vide Needed)

second seared sous vide beef tenderloin on a grill

While sous vide beef tenderloin delivers unmatched precision and edge-to-edge doneness, not everyone has an immersion circulator. If you're working without one, grilling a whole beef tenderloin is the next best option - just plan to keep a close eye on your internal temperature with a probe thermometer.

  1. Remove any silver skin or excess connective tissue from the loin, if not already done by the butcher.
  2. If desired, truss the meat with butcher's twine.
  3. Preheat the grill to high heat.
  4. Apply a coating of herbs and mayonnaise to the loin.
  5. Sear the loin on the grill for 30 seconds to 1 minute per side. The meat should easily pull away from the grill when properly seared.
  6. Lower the heat of the grill to medium and insert an oven safe probe thermometer into the center of the loin.
  7. Grill the tenderloin until your desired internal temperature is reached.
  8. Remove from the grill to a carving board, allow to rest for 15 minutes for the meat to rest and the juices to redistribute back into the meat.
  9. Slice into 1 inch slices and serve with a pat of delicious herb butter.

Make-Ahead Instructions

Beef tenderloin is one of the best dinner party recipes precisely because the sous vide method lets you do almost all the work ahead of time. The day-of finish takes less than 10 minutes.

  • Up to 3 days ahead: Complete the pre-sear and the full sous vide cook. Do not open the bag. Transfer the sealed bag to an ice bath and chill for at least 45 minutes until completely cold. Refrigerate in the sealed bag for up to 3 days.
  • Day of: Remove the tenderloin from the bag 30 minutes before serving to take the chill off. Reserve the bag juices for a pan sauce. Pat the exterior completely dry - this is critical for a good re-sear. Sear in a smoking hot cast iron or heavy skillet, 1 minute per side, to bring back the crust. Rest 5-10 minutes before slicing.
  • Freezer: Fully cooked sous vide tenderloin can be frozen in the sealed bag for up to 3 months. Thaw overnight in the refrigerator. Finish with a re-sear as directed above.

Storage Instructions

Cooked beef tenderloin stores well for a few days and reheats beautifully using the sous vide method itself - no other reheating method comes close.

  • Refrigerator: Slice or whole, in an airtight container for up to 3 days.
  • Freezer: Vacuum-sealed in the original bag or a freezer-safe bag for up to 3 months. Thaw overnight in the refrigerator.
  • Reheating: The best method is a quick sous vide reheat - set the water bath to 10°F below your original cook temperature and warm the sealed bag for 20-30 minutes. Finish with a 1-minute sear to restore the crust. Avoid the microwave entirely - it will overcook the edges and destroy the even doneness you worked to achieve.
  • Sliced leftovers: Gently warm in a skillet over medium-low heat with a splash of the reserved bag juices. 30 seconds per side is enough - the goal is warm, not re-cooked.

Sous Vide Beef Tenderloin FAQs

What is beef tenderloin?

Beef tenderloin is located in the middle of the back of the steer, tucked between the sirloin and the ribs of the animal. Filet mignon is a favorite cut of beef and it is cut from the tenderloin. This is the most tender area of beef, due to the lack of movement and exercise this muscle gets.

Tenderloin will have a mild flavor, minimal marbling and can be cut into smaller portions to make a Chateaubriand or cut into individual filet steaks. Leave it whole for an impressive presentation to family and friends.

How much beef should I plan on serving per person?

I like to plan on 6 ounces, or just under ½ pound per person when calculating how much meat to buy for dinner. This is for when the loin is the star and main attraction of the meal and I am serving a single starch and a single vegetable side dish.

If I am serving multiple side dishes along with salad and bread, I will calculate for 4 ounces per person.

When I buy a whole beef tenderloin I am going to get multiple meals for special occasions out of it for my family of 5.

How long to sous vide beef tenderloin

The amount of time it takes to cook your tenderloin using the sous vide method depends on the thickness of the thickest part of the loin. Typically a loin will be about 4 inches thick at the thickness part. I like to allow for an hour of cooking per inch, with an hour 'wiggle room'.

Traditionally, beef tenderloin is seared in a high heat pan to give it a crust and to set the meat followed by a lower temperature cook. By pre-searing the beef in a cast iron pan before placing it in the sous vide bag, you are not only setting the beef but caramelizing the meat to bring out its natural flavors giving the tenderloin flavors to self baste in as it cooks.

Searing it a second time on the grill or back in the cast iron pan will give the beef tenderloin an amazing crust and a full mouth texture experience.

What is sous vide cooking?

Sous vide (pronounced "soo-VEED") is a water bath cooking method where food is sealed in a vacuum bag and cooked at a precise, consistent temperature. Because the water bath never exceeds your set temperature, your sous vide beef tenderloin can never overcook - making it the most foolproof way to cook an expensive cut of beef perfectly every time.

sous vide beef tenderloin

Sous Vide Beef Tenderloin

Follow these easy steps to make sous vide beef tenderloin recipe. Edge-to-edge consistent doneness, with no chance of overcooking, will take the fear out of cooking this expensive cut of beef.
4.46 from 24 votes
Print Pin Rate
Course: Sous Vide
Cuisine: French
Keyword: sous vide beef tenderloin
Prep Time: 10 minutes minutes
Cook Time: 3 hours hours
Additional Time: 4 minutes minutes
Total Time: 3 hours hours 14 minutes minutes
Servings: 6 servings
Calories: 111
Author: Sarah Mock

Ingredients

  •  
    1 beef tenderloin trimmed
  • A jar of Hellmann's Real Mayonnaise with a blue lid, labeled ¼ Cup Mayonnaise
  • A clear bottle of McCormick rosemary leaves with a red cap and beige label, filled with dried rosemary-perfect for adding aromatic flavor to dishes like turkey shepherd's pie.2 Teaspoons Rosemary
  • A bottle of McCormick Garlic Powder with a red lid and green label, featuring the brand logo and ½ Teaspoon Garlic Powder
  • Two clear acrylic mills-one filled with coarse salt, the other with whole black peppercorns, both topped with metal knobs-stand side by side on a white background, ready to season your favorite dishes like Shrimp Avocado Salad.salt and pepper
US Customary - Metric
Follow Savoring The Good On PinterestFollow @SavoringTheGood or tag #STGRecipes!

Instructions

  • Remove any silver skin or excess connective tissue from the loin, if not already done by the butcher.
  • If desired, truss the meat with butchers twine. When I sous vide my loin, I don't truss it.
  • Salt and pepper the outside of the loin and sear on all sides in a hot skillet over medium-high heat, about 1 minute per side. This will set the meat, helping to lock in juices as well as giving the beef extra flavor as it cooks.
    1 beef tenderloin, salt and pepper
  • Allow the meat to cool for a few minutes before placing it in a vac and seal bag or gallon-sized freezer-safe bag, sprinkling with rosemary.
  • Using the water displacement method, slowly lower the bag into the preheated water bath and secure the edge of the bag to the side of your cooking vessel.
  • Cook for 1 hour per inch of thickness of meat, at the thickest point. Example: 3 inch at the thickest = 3 hours cooking.
  • Preheat the grill to high heat.
  • Remove from the water bath, drain the juices in the bag in a separate bowl and save them to add to a sauce, if making one.
  • Pat the meat dry with paper towels and apply a coating of herbs and mayonnaise.
    ¼ Cup Mayonnaise, 2 Teaspoons Rosemary, ½ Teaspoon Garlic Powder
  • Sear the loin on the grill for 30 seconds to 1 minute per side. The meat should easily pull away from the grill when properly seared.
  • Remove from the grill and slice into 1 inch slices. No need to allow the meat to rest with the sous vide method of cooking.

Notes

Why is mayonnaise used as a coating for searing?
Mayonnaise is the emulsification of eggs and oil. The protein of the eggs and nonstick properties of the oil will give the meat caramelization along with easy release from a super hot cooking surface. (Think 500-700 degrees) The mayo quickly sears and caramelizes while adhering to the protein of the beef.
I added garlic powder as well as dried rosemary and salt and pepper to my mayo coating to give the beef a delicious herbed crust.
Doneness Visual Temperature
Rare Cool Red Center 120–128° F (49–53° C)
Medium Rare Warm Pink Center 129–134° F (54–57° C)
Medium Slightly Pink Center 135–144° F (57–62° C)
Medium Well Hint of Pink 145–155° F (63–68° C)
Well Done No Pink 156°+ F (69°+ C)
 
Want to share when you made this recipe?Follow @SavoringTheGood & tag #STGRecipes!
Nutrition Facts
Sous Vide Beef Tenderloin
Serving Size
 
1
Amount per Serving
Calories
111
% Daily Value*
Fat
 
10
g
15
%
Saturated Fat
 
2
g
13
%
Polyunsaturated Fat
 
7
g
Cholesterol
 
16
mg
5
%
Sodium
 
67
mg
3
%
Carbohydrates
 
1
g
0
%
Protein
 
4
g
8
%
* Percent Daily Values are based on a 2000 calorie diet.
**Nutritional facts are just estimates. Please utilize your own brand nutritional values to double check against our estimates.
Like this recipe card? Want one for your site?Check out WP Recipe Maker!

Sarah Mock of savoringthegood.com headshot 2022

I am Sarah Mock. Welcome!

Sarah Mock is a classically trained Chef and a graduate of Johnson & Wales University. A culinary blogger for 17 years, Sarah helps the home cook prepare her recipes with professional results.

Get to know me

as seen in:

Logos of Hersheyland, ABC News, and Good Day PA are showcased in a seamless row, providing a snapshot of popular brands.

Hersheyland Nightline Good Day Pa!

The vibrant design showcases the iconic logos of Pinterest, Rachael Ray, and Jell-O set against a bold red background. Sorry, the provided description doesn't offer enough detail to suggest important SEO keywords.

Pinterest Rachael JELL-O

Easy Methods To Cook Beets - Roast Beets, Boil Beets

beet

Beets are a versatile root vegetable, and so delicious! I will walk you through 5 different delicious ways to cook beets. Boiling, roasting whole, sliced roasted, pickled, juiced, and even sauté beet green tops to make sure there is zero food waste.

beet

Follow this step-by-step picture guide showing you how to cook beets using different cooking techniques. You will never need to buy a can of beets again!

woman hold arm full of fresh picked beets

How to choose beets

The fresher, the better when it comes to selecting beets. The best beets will have stems and leaves that have few blemishes and are not wilted. The beet will be smooth on the surface and firm, with no give when pressed. Choose a beet without cracks or bruises.

3 baby beets

Beets come in a variety of colors including red beets, striped and golden beets in hue. Baby beets are just a beet that has been harvested before it has grown to its full size. They are more tender compared to their full-size counterparts and are perfect for roasting whole for salads or pickling whole for a cheese and charcuterie board.

4 Ways to Cook Beets

Known for their stunning color and nutrient-packed profile, beets are a versatile root vegetable that can elevate your culinary creations. Whether you love beets, don't enjoy beets or are new to this colorful gem, we've got you covered with mouthwatering cooking methods to bring out the best in beets. From roasting to pickling and beyond, these cooking techniques will have you falling in love with beets all over again. Let's dive into the wonderful world of beets and discover the magic they hold for your taste buds!

How to boil beets

boiling beets

Boiling beets is an easy way to prepare beets for salads, snacking or in preparation for juicing them without the use of a juicer.

  1. Bring a large pot of water to a boil. There should be enough water to cover the beets.
  2. While the water is coming to a boil, prepare the raw beets before cooking by trimming off the root off the bottom of the beet as well as the stem and leaves. Save the leaves to sautee, if you wish. Wash the beets if they are especially dirty.red beet with the top and root trimmed off
  3. Once the water comes to a boil, add the beets to the pot and boil over high heat for 30 to 40 minutes. The larger the beets, the longer it will take to cook them.
  4. Insert a sharp knife into the beet and if it easily slides to the center of the beet, it is cooked and the beets are tender.
    pairing knife inserted into a cooked red beet showcasing done ness
  5. Use tongs or a slotted spoon to remove the beets from the water.
  6. Transfer to a clean plate and allow them to cool for 15 minutes or until comfortable to handle.
  7. Remove the skin from the beets by pinching the skin loose from the beet.peeling beets with fingers horizantal image
  8. Finally, cut the cooled beets to your preferred sizes.cooked beets
  9. Store sliced beets in an airtight container for up to 1 week.

How to peel beets

peeling the skin off of a cooked red beet
  • Peel the beets with your fingertips while the beets are still warm. Once they cool all the way down, it is next to impossible to peel.
  • To avoid getting beet stains on your hands, wear food-safe gloves.
  • To clean the cutting boards of beet stains, use a combination of lemon juice and salt, rubbing in a circular motion.

Every time I eat beets, plant beets or cook beets I can't help but think of the Office episode when Jim is taking on the Dwight persona. Bears, beat, battlestar galactic. I can watch this episode over and over!

roasted diced beets with bamboo spoon

How to Roast Whole Beets

baby roasted beets on a cookie sheet pan

I love to use small beets when making roasted beets for salads snacking or as a tasty side dish. The stems are edible, full of nutrients and make a lovely presentation when left attached. Just be sure to completely wash the dirt away and out of the stems.

  1. Wash and peel the beets. If leaving stems intact, trim to a reasonable length and ensure they are free of dirt.
  2. Peel the skin off the beet with a vegetable peeler.
  3. Heat the oven to 400 F.
  4. Place beets in a single layer on a baking sheet and drizzle with olive oil, sprinkle with salt and pepper. Use aluminum foil on the pan for easy cleanup. baby red beets on a tray to be roasted in the oven
  5. Roast in the oven, uncovered for 35 minutes. Check for doneness by inserting a fork or sharp knife into the beet. baby roasted beets on a cookie sheet pan
  6. If the knife or fork does not easily slide to the center of the beet, roast for an additional 10 minutes. Repeat until beets are roasted through.

Roast Beets

  1. Wash the beets and remove the stems and the root end.
  2. Heat oven to 400 F.
  3. Place the beets on a baking sheets and drizzle with olive oil, salt and pepper.
  4. Wrap the beets with foil.
  5. Bake for 1 hour or until a sharp knife easily inserts into the center of the beet.
  6. Once the beets have roasted, remove the foil from the pan and remove the skins of the beets, while still warm, by rubbing with a paper towel.
3 jars of Pickled Beets in Ball Canning Jars

How to pickle beets

  1. Steam the beets.
  2. Make a pickle brine.
  3. Slice the beets.
  4. Fill each jar with sliced beets or whole beets, if they are small.
  5. Pour the cooled brine over the beets, tapping the jar to remove any air pockets.
  6. Place a clean lid and ring on the jar and finger tighten.
  7. Store in the refrigerator over night and taste the next day for pickling.
  8. Use refrigerated beets within a month.
  9. For complete instructions check out my pickled beets tutorial.

How to steam beets

steamed beets starting to be peeled for pickling
  1. Thoroughly wash the beets.
  2. Cut off the leaves but save the stems.
  3. In a wide-bottomed pot, place the beets and the beet stems in a single layer.
  4. Add 1 ½ cups of water.
  5. Turn the heat to high and bring the water to a boil and steam until the beets are fork-tender and the beets are cooked.
  6. Remove the beets from the pot and allow to cool until able to be handled.
  7. Once the beets are cooled enough to handle, slice off the root and the stem end.
  8. The beet skin should peel right of with a bit of rubbing with your thumb or scrape with a butter knife. peeling beets with fingers horizantal image
  9. Slice larger beets for pickling and leave smaller ones whole.
  10. Tip: use gloves to keep your hands from turning beet red. 
roasted whole beets on a plate

How to roast beets, whole

Follow these easy step by step instructions on how to roast beets.
5 from 6 votes
Print Rate
Course: Side Dish
Cuisine: American
Prep Time: 5 minutes minutes
Cook Time: 35 minutes minutes
Servings: 4 servings
Calories: 111
Author: Sarah Mock

Ingredients

  •  
    1 lb beets red, whole
  • A 500ml bottle of California Olive Ranch Global Blend Extra Virgin Olive Oil with green and blue labeling, indicating a blend from Argentina, Portugal, Chile, and California-perfect for drizzling over your favorite shrimp avocado salad.2 tablespoon Olive Oil
  • A Morton Salt container with a blue label featuring a girl in a yellow dress holding an umbrella, with salt pouring out of a container-an essential ingredient for perfectly seasoning dishes like Chicken Cordon Bleu.1 Teaspoon salt
  • A 6 oz container of McCormick Pure Ground Black Pepper with a red lid and a ½ Teaspoon Black Pepper ground
US Customary - Metric
Follow Savoring The Good On PinterestFollow @SavoringTheGood or tag #STGRecipes!

Instructions

  • Heat the oven to 400 F.
  • First, wash the beets. If leaving stems intact, trim to a reasonable length and ensure they are free of dirt.
    1 lb beets
  • Next, peel the outer skin off the beet with a vegetable peeler.
  • Arrange the beets in a single layer on a baking sheet and drizzle with olive oil, sprinkle with salt and pepper.
    2 tablespoon Olive Oil, 1 Teaspoon salt, ½ Teaspoon Black Pepper
  • Roast the beets in the oven, uncovered for 35 minutes. Check for doneness by inserting a fork or sharp knife into the beet.
  • If the knife or fork does not easily slide to the center of the beet, roast for an additional 10 minutes. Repeat until beets are roasted through.
Want to share when you made this recipe?Follow @SavoringTheGood & tag #STGRecipes!
Nutrition Facts
How to roast beets, whole
Serving Size
 
1
Amount per Serving
Calories
111
% Daily Value*
Fat
 
7
g
11
%
Saturated Fat
 
1
g
6
%
Sodium
 
670
mg
29
%
Potassium
 
370
mg
11
%
Carbohydrates
 
11
g
4
%
Sugar
 
8
g
9
%
Protein
 
2
g
4
%
* Percent Daily Values are based on a 2000 calorie diet.
**Nutritional facts are just estimates. Please utilize your own brand nutritional values to double check against our estimates.
Like this recipe card? Want one for your site?Check out WP Recipe Maker!

Sarah Mock of savoringthegood.com headshot 2022

I am Sarah Mock. Welcome!

Sarah Mock is a classically trained Chef and graduate of Johnson & Wales University. A culinary blogger for 16 years Sarah helps the home cook prepare her recipes with professional results.

Get to know me

as seen in:

Logos of Hersheyland, ABC News, and Good Day PA are showcased in a seamless row, providing a snapshot of popular brands.

Hersheyland Nightline Good Day Pa!

The vibrant design showcases the iconic logos of Pinterest, Rachael Ray, and Jell-O set against a bold red background. Sorry, the provided description doesn't offer enough detail to suggest important SEO keywords.

Pinterest Rachael JELL-O

Strawberry Rhubarb Jam

Strawberry Rhubarb Jam Recipe

Strawberry rhubarb jam is a sweet, tangy, garden-fresh preserve that comes together in about 45 minutes and works with fresh or frozen fruit. I grow rhubarb in my backyard and have been making this jam since my first season with a real harvest; it uses less sugar than most recipes and still sets beautifully because of how the pectin and fruit work together. This is the jar people ask about when they see it on my counter.

Strawberry Rhubarb Jam Recipe
Seven jars filled with Strawberry Rhubarb Jam are placed on a striped towel, with lids of varying colors, in a cozy kitchen setting.

Yummy!

Pinterest: ma_christiansen

Homemade Strawberry Rhubarb Jam Ingredients needed:

Strawberry Rhubarb Jam Ingredients
  • Rhubarb - Fresh is best, but frozen works well. If you are using frozen, do not drain it; that liquid is moisture and flavor the recipe is built around. Be sure to make my rhubarb syrup if you have extra stalks.
  • Strawberries - Washed, hulled, and quartered for fresh; thawed frozen strawberries work too. The strawberries carry the sweetness that balances rhubarb's sharp tartness.
  • Sugar - White granular sugar only. Do not substitute brown sugar or honey here; they change the set behavior and the color of the finished jam.
  • Pectin - This is what gives you a reliable gel without cooking the fruit down for hours. Ball canning sells it pre-portioned in boxes or in a resealable jar; either works.
  • Vanilla Extract - A small amount rounds out the fruit flavor and adds a warmth you will notice when you open the jar. I make my own vanilla extract, but store-bought is fine.
  • Butter - Just 1 teaspoon of unsalted butter added at the sugar stage reduces foam significantly. It is optional, but it saves you from skimming.

Recipe Card?

To find the full printable recipe with specific measurements and directions CLICK HERE to go to the recipe card.

Strawberry Rhubarb Jam Recipe

Four empty glass mason jars are placed upside down on a round metal tray in a kitchen, ready to be filled with homemade fig preserves, with a large pot visible in the background.

Prepare Your Canner and Jars

Fill your boiling water bath canner and bring it to a simmer. Keep jars hot in the simmering water until you are ready to fill them; a cold jar going into hot jam is a safety and seal risk. Wash lids in warm soapy water and set aside.

Chopped rhubarb stalks and a knife on a white cutting board, ready for your favorite rhubarb curd recipe, placed on a wooden surface.

Prep the Fruit

Crush strawberries and cut rhubarb into ½-inch pieces. If you are using frozen rhubarb, include all the liquid that has released; that is part of your recipe's moisture balance.

Chopped strawberries and rhubarb for Strawberry Rhubarb Jam fill a large oval yellow pot with a wooden spoon, set on a rustic wooden surface.

Combine Fruit and Pectin

In a heavy-bottomed pot, combine strawberries, rhubarb, and pectin. Stir to combine. The heavy bottom matters here; jam scorches fast on thin pots and you cannot walk away from it.

Strawberry Rhubarb Jam ingredients boiling in a cast iron pot

Bring to a Simmer

Turn heat to medium and bring the mixture to a simmer, stirring occasionally. You are softening the rhubarb until it is fork tender. This can take 10-15 minutes depending on how thick your pieces are. Do not rush it.

Bring to a Full Rolling Boil

Increase the heat and bring the mixture to a full rolling boil, stirring constantly. A full rolling boil cannot be stirred down; it should be churning hard even when you run a spoon through it. This is your pectin activation point.

Close-up of a metal whisk blending mashed strawberries and a small chunk of butter into a thick strawberry jam.

Add Sugar, Vanilla, and Butter

Add all three at once and stir vigorously to dissolve the sugar completely. The mixture will bubble up; keep stirring.

Boil Hard for 1 Minute

Return to a full rolling boil and boil hard for exactly 1 minute, stirring constantly. Set a timer. This 1-minute boil is what activates the pectin and gives you a proper set. Pull off heat immediately when the minute is up.

Two jars of thick strawberry jam with a blue jug.

Fill Jars

Ladle hot jam into hot jars, leaving ¼-inch headspace. Run a thin spatula or bubble remover around the inside of the jar to release air bubbles. Wipe the rim clean, apply the lid, and adjust the band to fingertip tight; not crank tight.

Process in the Canner

Lower jars into the boiling water canner. Process for 10 minutes, adjusting for altitude if needed. Remove and set on a towel to cool undisturbed for 24 hours.

4 jars of Strawberry Rhubarb Jam with toast

Check the Seals

Press the center of each lid. A properly sealed lid will not flex. Any jar that moves or pops should go directly into the refrigerator and be used within 3 weeks.

This post was adapted from the recipe on BallMasonJars.com

Strawberry Recipes

  • A mason jar filled with iced strawberry lemonade, the perfect mocktail with strawberries, garnished elegantly with lemon slices and mint leaves. A red cloth and whole strawberries add a charming touch beside the jar.
    Sparkling Strawberry Mocktail
  • A glass of refreshing strawberry lemonade with ice, garnished with a lemon slice and whole strawberry, placed on a coaster. Other glasses, fresh strawberries, and lemons are in the background.
    Homemade Strawberry Lemonade
  • Close-up of a fresh Strawberry tanghulu on a stick, with a glossy appearance and other blurred strawberries in the background.
    Strawberry Tanghulu Recipe (Candied Strawberries)
  • Two glasses of homemade strawberry tea with straws and fresh strawberries.
    Easy Strawberry Tea with Real Strawberries
  • A glass of strawberry lime juice with a striped straw, garnished with lime slices and mint leaves. Fresh strawberries and lime slices are arranged beside the glass, reminiscent of a delightful Strawberry Agua Fresca Recipe.
    Strawberry Agua Fresca Recipe (Mexican Strawberry Water)
  • How To Freeze Strawberries
    How to Freeze Strawberries Perfectly Every Time
Strawberry Rhubarb Jam in a mason jar

5 Days To Canning Confidence

Make Ahead

This jam is a make-ahead project by design; the whole point of canning is shelf stability. Once processed and sealed, jars keep in a cool, dark place for up to 18 months. For best flavor, let jars rest for at least 24 hours before opening so the jam finishes setting and the flavors come together.

Storage

Sealed, processed jars store in a cool, dark pantry for up to 18 months. Once opened, refrigerate and use within 3 weeks. Any jar that did not seal during processing should go directly into the refrigerator and be treated as an open jar from day one. If you made freezer jam instead of canning, it keeps frozen for up to 1 year and in the refrigerator for 3 weeks once thawed.

FAQ's and Tips

How can I make strawberry rhubarb jam without using pectin?

Combine strawberries, rhubarb, sugar, and lemon juice in a pot, simmering until the mixture thickens. Stirring constantly, make this jam and enjoy spreading a spoonful of the naturally thickened jam on your favorite treats.

Do I have to use pectin in this recipe?

This recipe is written with pectin because it gives you a reliable, consistent set. You can make rhubarb jam without pectin by cooking the fruit longer with sugar and lemon juice until it thickens naturally, but the result is less predictable and typically requires more sugar to compensate for the missing gel structure. If you want to try it, test the set by placing a small spoonful on a cold plate; if it wrinkles when you push it, it is ready.

What if my jam does not set?

Give it 24-48 hours after processing before you call it. Pectin continues to set as the jam cools. If it is still too loose after that, it is likely that the boil was not hard enough or the pectin measurement was off. You can re-process runny jam but it is easier to use it as a syrup over pancakes or ice cream and consider it a win.

Can I skip the water bath canner?

You can make freezer jam instead. Follow all steps through filling the jars, then skip the canning process entirely. Let jars cool on the counter for 24 hours and freeze. Use freezer-safe jars with straight sides. Freezer jam keeps for up to a year frozen and 3 weeks in the refrigerator once opened.

What is the headspace and why does it matter?

Headspace is the empty space between the top of the jam and the lid; ¼ inch for this recipe. Too little headspace and the jam has nowhere to expand during processing, which can prevent a proper seal or push food under the lid. Too much and you trap excess air, which can also interfere with sealing.

Can I double this recipe?

It is not recommended. Jam recipes are tested in single batches because doubling changes the boil behavior and can affect how the pectin sets. If you need more jam, run two batches back to back.

Strawberry Rhubarb Jam Recipe

Classic Strawberry Rhubarb Jam

This strawberry rhubarb jam recipe can be made with fresh or frozen rhubarb and your choice of fresh or frozen strawberries. 
4.78 from 22 votes
Print Pin Rate
Course: Canning Recipes
Cuisine: American
Keyword: Rhubarb strawberry jam recipe, Strawberry Rhubarb Jam
Prep Time: 10 minutes minutes
Cook Time: 20 minutes minutes
Additional Time: 10 minutes minutes
Total Time: 40 minutes minutes
Servings: 6 half pints
Calories: 66
Author: Sarah Mock

Ingredients

  •  
    1-¼ lbs Strawberries hulled and quartered, 4 cups prepared
  •  
    1 -¼ lbs Rhubarb trimmed, sliced into ¼ inch pieces, 4 cups prepared
  •  
    5 ½ Tbsps. Ball® Classic Pectin
  • A 4-pound bag of Domino granulated pure cane sugar with a yellow and white design, showing nutrition information and branding-perfect for sweetening recipes like rhubarb sour or your favorite desserts.3 ½ Cups Sugar
  • easy sous vide vanilla extract1 Teaspoon Vanilla Extract
  • A rectangular 8 oz package of Kerrygold Pure Irish Butter, unsalted, with a green and gold label and Irish grass-fed cow branding-perfect for creating delicious Saint Patrick's Day cupcakes.1 Teaspoon Butter
Follow Savoring The Good On PinterestFollow @SavoringTheGood or tag #STGRecipes!

Instructions

  • Prepare a boiling water bath canner. Heating jars in simmering water until ready to use, but do not boil. Wash lids in warm soapy water and set aside with clean, damage-free bands.
  • Crush strawberries and measure out the berries.
    1-¼ lbs Strawberries
  • Slice rhubarb into ½ inch pieces.
    1 -¼ lbs Rhubarb
  • In a heavy bottom pot combine the strawberries, sliced rhubarb and stir in pectin.
    5 ½ Tbsps. Ball® Classic Pectin
  • Turn heat to medium and bring mixture to a simmer, cook for 10 minutes without boiling, to help soften rhubarb.
  • Once the rhubarb has softened enough to press it down with a spoon, heat to high and bring to a full rolling boil that cannot be stirred down, stirring constantly.
  • Add sugar, vanilla and butter all at once, stirring to dissolve the sugar.
    3 ½ Cups Sugar, 1 Teaspoon Vanilla Extract, 1 Teaspoon Butter
  • Return jam to a full rolling boil. Boil hard 1 minute, stirring constantly.
  • Remove from heat. Skim foam if necessary.
  • Ladle hot jam into a hot jar leaving a ¼ inch headspace.
  • Remove air bubbles. Wipe jar rim.
  • Center lid on jar and apply band, adjust to fingertip tight. Place jar in boiling water canner. Repeat until all jars are filled.
  • Process jars 10 minutes, adjusting for altitude. Remove jars and cool 12-24 hours. Check lids for seal, they should not flex when center is pressed.
  • Any jars that did not properly sealed should be stored in the refrigerator.

Notes

  • Be sure to remove the leaves of the rhubarb, they are not edible.
  • Check the rhubarb to ensure it is spoon or fork tender. It may take longer than 10 minutes to soften.
  • Fresh rhubarb is best but use frozen if that is all you can find. Just be sure to add any liquid that releases from the frozen rhubarb.
  • Serve on a buttered, toasted English muffin.
  • The butter is added to help reduce the foam. It is optional.
Want to share when you made this recipe?Follow @SavoringTheGood & tag #STGRecipes!
Nutrition Facts
Classic Strawberry Rhubarb Jam
Serving Size
 
1
Amount per Serving
Calories
66
% Daily Value*
Sodium
 
3
mg
0
%
Carbohydrates
 
17
g
6
%
Sugar
 
15
g
17
%
* Percent Daily Values are based on a 2000 calorie diet.
**Nutritional facts are just estimates. Please utilize your own brand nutritional values to double check against our estimates.
Like this recipe card? Want one for your site?Check out WP Recipe Maker!
Sarah Mock of savoringthegood.com headshot 2022

Sarah's Culinary Insight

  • Do not drain frozen rhubarb. That liquid is flavor and moisture the recipe accounts for; pour it off and your jam may not set correctly.
  • The rhubarb needs to be truly fork tender before you add the sugar. Rushing this step means you will have firm rhubarb pieces in the finished jam.
  • The butter is optional but worth it. 1 teaspoon cuts down the foam significantly and saves you from skimming.
  • "Full rolling boil that cannot be stirred down" is not a suggestion; it is the activation point for the pectin. If you are not at a hard boil when you start your 1-minute timer, your jam may not set.
  • Any jar that does not seal goes straight to the refrigerator and gets used within 3 weeks.

Sarah Mock of savoringthegood.com headshot 2022

I am Sarah Mock. Welcome!

Sarah Mock is a classically trained Chef and a graduate of Johnson & Wales University. A culinary blogger for 17 years, Sarah helps the home cook prepare her recipes with professional results.

Get to know me

as seen in:

Logos of Hersheyland, ABC News, and Good Day PA are showcased in a seamless row, providing a snapshot of popular brands.

Hersheyland Nightline Good Day Pa!

The vibrant design showcases the iconic logos of Pinterest, Rachael Ray, and Jell-O set against a bold red background. Sorry, the provided description doesn't offer enough detail to suggest important SEO keywords.

Pinterest Rachael JELL-O

Choux Pastry Recipe

over a dozen golden brown choux pastry puffs closely spaced together on a cooling rack.

Pate a Choux, choux pastry, Pâte à Choux, Choux paste, eclair paste are all names for the dough that is used to make the pastry shells for eclairs, cream puffs, swans, croquembouche, profiteroles, Paris-breast, gateau st. honoré and so many more shapes!

finished cream puffs lined up on a dark slate serving board

While I was a teaching assistant at Johnson & Wales University it brought me such joy to see my students successfully make their first pastry recipe. Students would go from overwhelmed to overjoyed by the end of class. Choux paste (the eclair dough name) is such a necessity in the pastry arts and getting it mastered just took a bit of time and some gentle instruction.

If you love eclairs but don't have the time to make them be sure to make eclair cake instead. If you are new to baking you will want to go over my glossary of baking terms to familiarize yourself with the baking definition.

Ingredients needed to make Pâte à Choux

pate choux ingredients in bowls on a wooden surface

Recipe Card?

To find the full printable recipe with specific measurements and directions CLICK HERE to go to the recipe card.

How to make pate a choux:

8 steps of choux pastry steps making the dough
  1. In a medium-sized pan, over medium-high heat bring the sugar, butter, water and milk to just below a simmer. The surface of the liquid will start to wriggle and bubbles will form at the edges.
  2. Turn off the heat and add the flour to the pan, in a steady stream, and stir with a wooden spoon.
  3. Continue to stir until a ball forms and starts to pull away from the pan.
  4. Turn the heat back on to medium-high and continue to stir with the wooden spoon for 1 minute. Steam will be escaping.
  5. Transfer the dough to a mixer fitted with a paddle attachment and turn the machine on low. (see all my favorite attachments for kitchenaid mixers)
  6. With the mixer running allow the dough to release the steam. Continue to stir on low for 5 minutes or until steam can no longer be seen rising from the bowl.
  7. With the mixer running on low, add a single egg.
  8. Allow the egg to become incorporated fully before adding the next egg.
  9. Add all the eggs, one at a time to the batter.
  10. Once all the eggs are incorporated the dough is ready to be piped or scooped.

How to pipe or scoop choux paste

dollop of choux dough on a non stick mat
  1. Line a baking sheet with a silicone baking sheet or parchment paper.
  2. Fit a piping bag with your desired tip and fill the bag, ½ full with the dough.
  3. Pipe rounds of dough about 3 inches in diameter and 1 ½ inches in heights.
  4. To scoop the choux paste, first, dip the cookie scoop in water and then portion out the dough onto the pan.
  5. Keep about 2 inches of space between the portions.

Baking Choux Pastry

  1. Preheat the oven to 425.
  2. Bake the choux pastry for 20 minutes or until the shells are starting to turn golden brown
  3. Lower the heat of the oven to 375 and continue to bake for 5-10 minutes or until the shells are crisp and have a hollow sound when tapped. The cracks in the sides of the pastry should not be showing moisture bubbles.

Choux Pastry Troubleshooting and Tips

choux pastry golden brown on a non stick pan showing top and underside

Shells lack volume

  • Make sure the liquids come to a simmer to ensure the butter fully melts. This is important in marrying the flour and fats together in this pate choux recipe.
  • When adding the flour to the liquids, be sure no lumps of flour form. Stirring constantly will help alleviate flour lumps.
  • Add the eggs slowly. If eggs are added to quickly, they will not absorb into the dough and could curdle or separate the dough.

Why are my shells uneven?

  • Watch for lumps of flour or egg and fully incorporate them to get a more even product.
  • Choose the proper sized tip for the piping the dough. Don't use a small tip for a large tip job. Example: swan necks get a smaller open tip where as eclairs will get a large open, round tip.
  • Be sure the puffs are consistent and evenly spaces. This will lead to even baking and a more consistent product.

Frequently asked questions, answers and tips:

Is choux pastry the same as puff pastry?


Choux pastry and puff pastry are not the same thing. They both puff up, or rise but that is pretty much the only similarity. Choux pastry is made by cooking milk, butter, water and flour together to form a dough and then slowly incorporating eggs into the paste. The steam from eggs, milk and butter will make the pastry rise.

Puff pastry is a laminated dough made up of layers of dough and butter. The dough is rolled out in sheets, folded and repeated multiple times. The steam from the butter will make the pastry rise. Puff pastry is a sheet product whereas chou pastry is a pipped product.

Is pate choux paste hard to make?

Like most things, nothing is hard if you know what you are doing. Making pate choux paste is no exception. Paying attention to a couple key points in the process will give you cream puff making success. I have lots of tips further down in this post.

Why are my pastry shells curved inward and hollow?

An inwardly curved bottom crust on a choux paste shell is probably the result of improper baking. This could be the result of a hot oven causing the crust to rapidly rise and for a crust, making the bottom crust of the shell pull upward and inward. If this happens, lower the temperature of the oven for a more evenly baked product.

Another reason the shells would pull inward would be from a pan treated with pan spray or butter. These non stick agents will form steam under the product, giving the bottom shell a rise, or bump.

Why are my pate choux shells falling and shrinking after baking?

Removing the shells from the oven before the cell structure has fully set is the most common factor in choux shells falling after removal from the oven. Be sure the shells are not only golden in color but are not showing any signs of bubbles in the cracks. 

Can you make choux pastry dough ahead of time?

Yes, you can pipe the dough onto your lined baking sheet and refrigerate it, uncovered, for up to 24 hours before baking. The shells puff up just as well straight from the fridge; give them an extra minute or two in the oven since they're starting out cold. I don't recommend mixing the dough and holding it unpiped; it stiffens as it sits and gets harder to pipe evenly.

Can you freeze baked choux shells?

Baked, unfilled shells freeze well for up to 2 months in an airtight container or freezer bag. Let them cool completely first; freezing warm shells traps steam and turns them soft.

To bring them back, thaw at room temperature and crisp them in a 300F oven for 5 to 8 minutes before filling, if a crisp texture is desired.

How long do filled cream puffs or eclairs last?

Enjoy these within 24 hours of filling. The shell starts pulling moisture from the filling right away, and by day two you lose the contrast between crisp shell and soft filling. Keep filled pastries refrigerated the whole time since the filling contains dairy.

Do you need a stand mixer for choux pastry?

Choux pastry has been made long before stand mixers were invented. A stand mixer makes this easier, but you can mix by hand with a wooden spoon and some patience. Beat the eggs in one at a time just like the recipe describes; it takes more effort to fully work each egg in by hand, but the dough gets there. Watch for streaks of unincorporated egg before you add the next one.

What piping tip should you use for eclairs vs. cream puffs vs. swans?

For cream puffs, use a large round tip, something like a #806, held straight up and down to build height. For eclairs, use a large round or open star tip to pipe straight lines about 4 to 5 inches long. Swans need a small round tip, like a #3 or #4, since the necks are piped thin and have to hold their curve without spreading.

Sarah Mock of savoringthegood.com headshot 2022

Sarah's Culinary Insight

  • Bread flour in place of all-purpose flour: The higher protein builds more structure, so you get taller puffs with a sturdier interior, better suited for shells you're filling with something heavy like pastry cream.The trade-off is a slightly chewier bite instead of the delicate, eggy crumb all-purpose flour gives you. I'd reach for this swap if your shells have been coming out too fragile to fill; otherwise stick with all-purpose for the classic tender bite.

Chef tip:

  • brush the tops of the dough with milk or egg wash to give the shells an added crust
  • Don't spray the pan with pan spray or coat with butter because this will result in a spread-out product instead of a well-risen product.
over a dozen golden brown choux pastry puffs closely spaced together on a cooling rack.

French Choux Pastry

This is the dough that is used to make the pastry shells for eclairs, cream puffs, swans, croquembouche, profiteroles, Paris-breast, gateau st. honoré and so many more shapes!
5 from 2 votes
Print Pin Rate
Course: Dessert Recipes
Cuisine: French
Keyword: pate a choux recipe
Prep Time: 20 minutes minutes
Cook Time: 25 minutes minutes
Total Time: 45 minutes minutes
Servings: 36
Calories: 46
Author: Sarah Mock

Ingredients

  •  
    ½ Cup unsalted butter cut into 8 pieces
  •  
    ½ Cup Water
  •  
    ½ Cup 2% or whole milk
  • A Morton Salt container with a blue label featuring a girl in a yellow dress holding an umbrella, with salt pouring out of a container-an essential ingredient for perfectly seasoning dishes like Chicken Cordon Bleu.¼ Teaspoon salt
  • A 4-pound bag of Domino granulated pure cane sugar with a yellow and white design, showing nutrition information and branding-perfect for sweetening recipes like rhubarb sour or your favorite desserts.2 Teaspoons Sugar
  • A 5-pound bag of King Arthur Baking Company unbleached bread flour with 12.7% protein content, labeled for ideal use in bread, pizza crust, and rolls-perfect for creating hearty sides like homemade loaves to serve alongside a comforting slowcooker sausage casserole.1 Cup Flour, All Purpose
  • A single brown chicken egg, perfect for making Chicken Cordon Bleu, stands upright on a white background.4 Egg
Follow Savoring The Good On PinterestFollow @SavoringTheGood or tag #STGRecipes!

Instructions

  • In a medium-sized pan, over medium-high heat bring the sugar, butter, water, milk and salt to just below a simmer. The surface of the liquid will start to wriggle and bubbles will form at the edges.
    ½ Cup unsalted butter, ½ Cup Water, ½ Cup 2% or whole milk, 2 Teaspoons Sugar, ¼ Teaspoon salt
  • Turn off the heat and add the flour to the pan, in a steady stream, and stir with a wooden spoon.
    1 Cup Flour, All Purpose
  • Continue to stir until a ball forms and starts to pull away from the pan.
  • Turn the heat back on to medium-high and continue to stir with the wooden spoon for 1 minute. Steam will be escaping.
  • Transfer the dough to a mixer fitted with a paddle attachment and turn the machine on low.
  • With the mixer running allow the dough to release the steam. Continue to stir on low for 5 minutes or until steam can no longer be seen rising from the bowl.
  • With the mixer running on low, add a single egg.
  • Allow the egg to become incorporated fully before adding the next egg.
  • Add all the eggs, one at a time to the batter.
    4 Egg
  • Once all the eggs are incorporated the dough is ready to be piped or scooped.

How to pipe or scoop choux paste

  • Line a baking sheet with a silicone baking sheet or parchment paper.
  • Fit a piping bag with your desired tip and fill the bag, ½ full with the dough.
  • Pipe rounds of dough about 3 inches in diameter and 1 ½ inches in heights.
  • To scoop the choux paste, first, dip the cookie scoop in water and then portion out the dough onto the pan.
  • Keep about 2 inches of space between the portions.

Baking Choux Pastry

  • Preheat the oven to 425.
  • Bake the choux pastry for 20 minutes or until the shells are starting to turn golden brown
  • Lower the heat of the oven to 375 and continue to bake for 5-10 minutes or until the shells are crisp and have a hollow sound when tapped. The cracks in the sides of the pastry should not be showing moisture bubbles.

Notes

  • brush the tops of the dough with milk or egg wash to give the shells an added crust
  • Don't spray the pan with pan spray or coat with butter because this will result in a spread out product instead of a well-risen product.
  • shells are done when they are crisp and have a hollow sound when tapped. The cracks in the sides of the pastry should not be showing moisture bubbles.
Want to share when you made this recipe?Follow @SavoringTheGood & tag #STGRecipes!
Nutrition Facts
French Choux Pastry
Serving Size
 
1
Amount per Serving
Calories
46
% Daily Value*
Fat
 
3
g
5
%
Saturated Fat
 
2
g
13
%
Polyunsaturated Fat
 
1
g
Cholesterol
 
28
mg
9
%
Sodium
 
25
mg
1
%
Carbohydrates
 
3
g
1
%
Protein
 
1
g
2
%
* Percent Daily Values are based on a 2000 calorie diet.
**Nutritional facts are just estimates. Please utilize your own brand nutritional values to double check against our estimates.
Like this recipe card? Want one for your site?Check out WP Recipe Maker!


Sarah Mock of savoringthegood.com headshot 2022

I am Sarah Mock. Welcome!

Sarah Mock is a classically trained Chef and a graduate of Johnson & Wales University. A culinary blogger for 17 years, Sarah helps the home cook prepare her recipes with professional results.

Get to know me

as seen in:

Logos of Hersheyland, ABC News, and Good Day PA are showcased in a seamless row, providing a snapshot of popular brands.

Hersheyland Nightline Good Day Pa!

The vibrant design showcases the iconic logos of Pinterest, Rachael Ray, and Jell-O set against a bold red background. Sorry, the provided description doesn't offer enough detail to suggest important SEO keywords.

Pinterest Rachael JELL-O

Golden Grahams S'mores Bars Recipe

A glass dish filled with a mixture of chocolate-covered cereal pieces and melted marshmallows, reminiscent of golden graham s'mores.

Golden grahams s'mores bars are a crispy, gooey, no-bake treat made with golden grahams cereal, mini marshmallows, and milk chocolate chips. I built this one off a classic Betty Crocker recipe, adjusting the marshmallow technique so the bars stay chewy instead of setting up hard and glassy. It takes about 10 minutes of stovetop work, then 2 hours in the refrigerator to set; you never have to turn on the oven or roast a single marshmallow.

A glass dish filled with a mixture of chocolate-covered cereal pieces and melted marshmallows, reminiscent of golden graham s'mores.

These chewy dessert bars were the treats that we took to the Girl Scout meeting and made for the church bake sale. They were made for the sleepover and wrapped in wax paper to take when we were snack parents at the t-ball game.

Fruity pebbles crispy treats are another no bake recipe that my kids LOVE.

Golden Graham Bars Ingredients:

Golden Graham s'Mores ingredients

Recipe Card?

To find the full printable recipe with specific measurements and directions CLICK HERE to go to the recipe card.

Substitutions

  • Corn syrup for the sugar and water Corn syrup replaces the granulated sugar and water in step 2, giving you a smoother syrup that resists graininess. Corn syrup won't crystallize the way granulated sugar sometimes can when it's heated and cooled, so it's a reasonable one-for-one swap; use about ¼ cup in place of the sugar and water. The bars won't taste noticeably different, since the marshmallow and chocolate carry the flavor here, not the sugar syrup.
  • Semisweet or dark chocolate chips for milk chocolate You lose the soft, glossy set milk chocolate gives and gain a firmer, more bittersweet bite. Milk chocolate has more sugar and milk fat, so it stays softer at refrigerator temperature; dark chocolate makes the bars snap more cleanly when you cut them.
  • Large marshmallows instead of miniature Large marshmallows take noticeably longer to melt evenly and are more likely to leave unmelted centers if you don't cut them down first. Miniature marshmallows have more surface area relative to their size, so they melt fast and even over this recipe's stovetop heat. If large marshmallows are all you have, quarter them first so they melt at roughly the same rate as minis.
  • Stale or slightly soft cereal You lose the crisp bite that's the entire point of this bar. The cereal doesn't toast or cook in this recipe, so whatever crunch it has going in is the crunch you get in the finished bar. Taste-test the cereal before you start; it won't perk back up once it's coated in warm marshmallow.

How to make Golden Graham smores bars:

Reserve 1 cup of marshmallows.

Melt

Keep this at medium heat just until the sugar dissolves and the mixture looks smooth. You're not cooking the sugar into a syrup here, just melting it so it blends evenly with the marshmallows in the next step.

A spatula stirs a pot of cooking marshmallows, bringing to mind the gooey delight of golden graham s'mores.

Add

Drop the heat to low as soon as the marshmallows go in. This is the step where boiling turns chewy bars hard and glassy, so stir gently and pull the pot off the heat once the marshmallows are mostly melted with a few small lumps left; they'll finish melting into the mixture off the heat.

Mixing chocolate and cream with a spatula in a bowl, creating a luscious blend reminiscent of golden graham s'mores.

Stir

Stir in the chocolate chips and allow to melt completely.

A pot filled with Golden Graham cereal squares mixed with melted chocolate and marshmallows, being stirred with a wooden spoon, creating a delicious s'mores treat.

Mix

Work quickly once the cereal goes in. Golden Grahams start absorbing moisture from the warm marshmallow coating right away, and you want them evenly coated while they're still crisp, not sitting in the mixture any longer than it takes to stir through.

A close-up of golden graham s'mores cereal bars with melted marshmallow in a glass dish.

Spread

With a rubber spatula, gently spread the coated cereal mixture into a prepared pan sprayed 9 x 13 pan.

A close-up of golden graham s'mores mingling with chocolate-coated cereal pieces and marshmallows in a glass dish.

Chill

Chill in the refrigerator until set.

A square of chocolate cereal and marshmallow dessert, reminiscent of golden graham s'mores, rests on a white plate, with more delightful treats in a glass dish on a rustic wooden surface.

Slice

Slice into bars and you're ready to serve.

Did you make this recipe?

Do you have feedback that would be helpful to others? If so can help this small business owner by leaving a rating and a review in the comments section? Thank you for being part of the Savoring The Good Community. ~ Sarah

Golden Graham s'Mores poured into a pan, ready to be pressed down

Tips for success:

  • Don't bring the marshmallow mixture to a boil, it will harden the bars.
  • Spray the rubber scraper with pan spray to help keep it less sticky.
  • Spray the pan to help the bars release easier.
  • Allow the bars to chill for at least 2 hours in the refrigerator to get a good bar to slice.
  • Press the coated cereal firmly for a more dense bar.
  • Warm a knife under hot water to help get a clean cut.

Storage tips

Store these smore bars in an airtight container as it's totally essential for preventing moisture absorption and excess air exposure.

S'mores Recipe FAQs

What are other popular recipes that use Golden Grahams?

Golden Grahams can be added in a saucepan to craft a mouthwatering cereal bark recipe, blending them with melted chocolate, nuts, and dried fruits. They can also add a crunchy texture to a no-bake cookie recipe.

Can I use corn syrup?

Sure! In your golden smores recipe, you can substitute corn syrup for sweetness to create a treat that showcases your love for s'mores.

Is this the same as the Betty Crocker golden grahams s'mores recipe?

This is my take on the classic Betty Crocker version, adjusted so the marshmallow mixture stays chewy instead of setting up hard. The technique changes; the flavor is still the s'more you remember.

Are these the same as indoor s'mores?

Yes - if you're looking for a way to get s'mores flavor without a campfire or a broiler, this is that recipe. No open flame, no roasting marshmallows one at a time.

A glass dish filled with a mixture of chocolate-covered cereal pieces and melted marshmallows, reminiscent of golden graham s'mores.

Golden Grahams S'mores Bars

Golden graham s'mores bars are an easy no bake treat to make when you want a s'more but don't want to turn on the oven or roast a marshmallow.
4.50 from 4 votes
Print Pin Rate
Course: Dessert Recipes
Cuisine: American
Keyword: golden graham s'mores bar
Prep Time: 5 minutes minutes
Cook Time: 5 minutes minutes
Additional Time: 2 hours hours
Total Time: 2 hours hours 10 minutes minutes
Servings: 12
Calories: 244
Author: Sarah Mock

Ingredients

  •  
    8 Cups Golden Grahams™ cereal
  •  
    5 ½ cups miniature marshmallows 10 oz bag
  •  
    1 ½ Cup milk chocolate chips 9 oz
  • A rectangular 8 oz package of Kerrygold Pure Irish Butter, unsalted, with a green and gold label and Irish grass-fed cow branding-perfect for creating delicious Saint Patrick's Day cupcakes.5 tablespoons Butter
  • A 4-pound bag of Domino granulated pure cane sugar with a yellow and white design, showing nutrition information and branding-perfect for sweetening recipes like rhubarb sour or your favorite desserts.¼ Cup Sugar
  •  
    1 Tablespoon Water
  •  
    1 Teaspoon vanilla
Follow Savoring The Good On PinterestFollow @SavoringTheGood or tag #STGRecipes!

Instructions

  • Reserve 1 cup of marshmallows to fold into the bars.
  • Melt the butter, sugar vanilla and water in a large pot over medium heat, stirring to combine and melt the sugar.
    5 tablespoons Butter, ¼ Cup Sugar, 1 Tablespoon Water, 1 Teaspoon vanilla
  • Add the marshmallows and lower the heat, melting the marshmallows until they are almost completely melted.
    5 ½ cups miniature marshmallows
    A spatula stirs a pot of cooking marshmallows, bringing to mind the gooey delight of golden graham s'mores.
  • Stir in the chocolate chips and allow to melt completely.
    1 ½ Cup milk chocolate chips
    Mixing chocolate and cream with a spatula in a bowl, creating a luscious blend reminiscent of golden graham s'mores.
  • Mix in the cereal and 1 cup of reserved marshmallows, stirring to combine.
    8 Cups Golden Grahams™ cereal
    Close-up of cereal squares mixed with melted chocolate in a bowl.
  • Press the coated cereal into a pan sprayed 9 x 13 pan.
    A close-up of golden graham s'mores cereal bars with melted marshmallow in a glass dish.
  • Chill in the refrigerator until set.
    A close-up of golden graham s'mores mingling with chocolate-coated cereal pieces and marshmallows in a glass dish.
  • Slice into bars and serve.

Notes

[/wprm-tip]
recipe adapted from: https://www.bettycrocker.com/recipes/golden-grahams-smores
Want to share when you made this recipe?Follow @SavoringTheGood & tag #STGRecipes!
Nutrition Facts
Golden Grahams S'mores Bars
Serving Size
 
1
Amount per Serving
Calories
244
% Daily Value*
Fat
 
12
g
18
%
Saturated Fat
 
7
g
44
%
Polyunsaturated Fat
 
4
g
Cholesterol
 
18
mg
6
%
Sodium
 
148
mg
6
%
Carbohydrates
 
31
g
10
%
Sugar
 
16
g
18
%
Protein
 
4
g
8
%
* Percent Daily Values are based on a 2000 calorie diet.
**Nutritional facts are just estimates. Please utilize your own brand nutritional values to double check against our estimates.
Like this recipe card? Want one for your site?Check out WP Recipe Maker!

Sarah Mock of savoringthegood.com headshot 2022

Sarah's Culinary Insight

  • Keep the marshmallow mixture on low heat once you add the marshmallows, and don't let it come to a boil. Boiling drives off moisture and pushes the sugar past soft-ball stage, which is the fastest way to turn these bars glassy and hard instead of chewy.
  • The reserved cup of marshmallows you fold in at the very end (step 5) is doing real work: it leaves small pockets of soft, barely-melted marshmallow scattered through the bar instead of one uniform melted texture all the way through.
  • Milk chocolate chips melt smoother and stay softer at refrigerator temperature than semisweet or dark, which is why they're the better match for a bar you want to bite through cold, straight from the fridge.
  • Golden Grahams lose their crunch fast once they're coated in warm marshmallow, so the goal in step 5 is fully coated, not fully dissolved. Work fast.

Sarah Mock of savoringthegood.com headshot 2022

I am Sarah Mock. Welcome!

Sarah Mock is a classically trained Chef and a graduate of Johnson & Wales University. A culinary blogger for 17 years, Sarah helps the home cook prepare her recipes with professional results.

Get to know me

as seen in:

Logos of Hersheyland, ABC News, and Good Day PA are showcased in a seamless row, providing a snapshot of popular brands.

Hersheyland Nightline Good Day Pa!

The vibrant design showcases the iconic logos of Pinterest, Rachael Ray, and Jell-O set against a bold red background. Sorry, the provided description doesn't offer enough detail to suggest important SEO keywords.

Pinterest Rachael JELL-O

Ikea Meatballs (Copycat Recipe)

Swedish Meatballs in sauce

IKEA Swedish meatballs are tender, savory meatballs simmered in a creamy pan gravy, the same ones served at the IKEA cafeteria. The original recipe from IKEA is written in grams and milliliters; I converted it to standard measurements and caught two errors in the process. I also turned it into a one-pan version so you have less to clean up. Ready in about an hour, most of that is hands-off chill time.

A skillet filled with browned meatballs simmering in a creamy sauce, garnished with chopped parsley, reminiscent of an IKEA Swedish meatballs recipe.

The Ikea recipe was given in grams and milliliters as the metric system used in Sweden. I converted it to standard measurements and checked it to be sure that it converted correctly. I did find 2 mistakes in the recipe given and corrected them.

I also converted the recipe to be a one-pan recipe. I will include the original instructions but I was able to get it all in one pan for easier cleanup! This is the meatball recipe I am referring. Be sure to read about meatball appetizer recipes that use frozen meatballs.

Sarah Mock of savoringthegood.com headshot 2022

What I Learned Testing This Recipe

  • IKEA's gram-to-standard conversion does not always translate cleanly. I found two spots where the math was off and corrected them here.
  • Double cream (48% butterfat) is standard in Sweden and Britain but nearly impossible to find in a US grocery store. Heavy cream is the closest match and what this recipe uses.
  • The one-pan method skips the butter in the sauce entirely; the browned bits left in the pan from searing the meatballs do that work instead.
  • Chilling the shaped meatballs for 2 hours before searing keeps them from falling apart when they hit the hot pan.

Ingredients needed:

swedish meatball ingredients
  • ground beef & ground pork - I use a mix of ground beef and ground pork here because the pork adds fat and moisture that beef alone leaves out. Straight beef meatballs turn out tighter and less tender; the pork keeps the texture soft even after searing and a 30-minute bake.
  • Onion finely chopped -Chop the onion fine so it melts into the meat as it cooks rather than showing up as a bite of raw onion in the middle. Fold it in gently after combining the beef and pork so you don't overwork the meat.
  • breadcrumbs -Breadcrumbs bind the meatballs and keep them tender by soaking up some of the moisture from the milk and egg. If you're making your own, my guide on how to make bread crumbs covers the method I use here.
  • Egg - The egg is the glue holding everything together. Skip it and the meatballs are more likely to fall apart when they hit the hot pan.
  • Whole milk - Whole milk softens the breadcrumbs into a paste before they go into the meat, which is what keeps these meatballs tender instead of dense. Don't swap in a low-fat milk here; the fat is doing real work.
  • salt and pepper -Season the meat mixture itself, not just the outside of the shaped meatballs. Ground meat needs more salt than you'd think to taste seasoned once it's cooked through.

Can I use only ground beef instead of a beef and pork mix?

You can, but the meatballs will be firmer and less juicy. The fat in the ground pork is doing real work here; if beef is all you have, look for a higher fat percentage, like 80/20, to compensate.

Recipe Card?

To find the full printable recipe with specific measurements and directions CLICK HERE to go to the recipe card.

Cream Sauce Ingredients

swedish meatball sauce ingredients
  • olive oil
  • butter *
  • flour, all-purpose
  • vegetable stock
  • beef stock
  • thick double cream **
  • soy sauce
  • Dijon mustard

* butter is used if you do NOT use the one-pan method.

** Heavy cream is substituted for thick double cream

Double cream runs about 48% butterfat, standard in Britain and Sweden, but you will not find it on a typical US shelf. Heavy cream, at 36 to 38% butterfat, is the closest match and what I use here. If you can't find heavy cream, whipping cream (30% butterfat) works too; the gravy will be slightly thinner but still good.

Plate of meatballs in sauce with noodles and asparagus, inspired by a classic Swedish meatballs recipe, placed on a table set with a candle, glass of water, and placemat.

Delicious!👌🏼

Pinterest: Chris D

How do you make IKEA Swedish meatballs?

swedish meatball on a fork with gravy and lingonberry jam
Two hands mixing raw ground meat in a bowl, preparing a savory blend for an authentic IKEA Swedish meatballs recipe. The meat appears to be a combination of red and white colors, possibly indicating a mix of beef and fat.

Combine

Gently combine the ground beef and pork in a bowl using your fingers to break up any lumps.

A bowl containing chopped onions, minced garlic, and raw ground meat, great for perfecting your own IKEA Swedish meatballs recipe.

Fold

Add finely chopped onion, and gently fold in to mix together.

Close-up of a hand mixing ground meat, chopped onions, and breadcrumbs in a metal bowl, reminiscent of preparing homemade IKEA Swedish meatballs.

Add

Add garlic, breadcrumbs, egg, milk and season well with salt and pepper.

A baking sheet with rows of uncooked meatballs with chopped onions, placed on a wood surface.

Scoop

Shape mixture into small, round balls using a medium cookie scoop

A baking tray filled with rows of uncooked meatballs mixed with chopped onions.

Refrigerate

Place on a clean cookie sheet or a plate, cover and store in the fridge for 2 hours.

Close-up of several browned meatballs cooking in a black skillet, following an authentic IKEA Swedish meatballs recipe.

Sear

After 2 hours remove the meatballs from the refrigerator and in a cast-iron pan or heavy-bottom pan heat olive oil over medium heat.

A cast-iron skillet filled with cooked meatballs, browned on the outside and appearing to be well-seasoned, reminiscent of an IKEA Swedish meatballs recipe.

Brown on all sides

When hot, gently add your meatballs and brown on all sides, in two or three batches depending on the size of your pan. I tested crowding a full batch into a 12 inch cast iron pan at once and the meatballs steamed instead of browning; working in batches keeps the pan hot enough for a real sear, and it's what gives the drippings you need for the one-pan sauce.

Cook through fully

When browned, add to an ovenproof dish and cover. Place in a 350 oven and cook for 30 minutes.

OR if you are doing the one-pan method, leave the meatballs in the pan, cover with an oven safe lid and cook at 350 for 30 minutes.

How do you make IKEA meatball sauce?

A close-up of a whisk stirring browned butter in a black skillet, reminiscent of the first step in creating the perfect IKEA Swedish meatballs recipe.

Make a roux

Whisk in the flour and cook, stirring continuously, for 2 minutes, until it bubbles and smells toasted, not raw. Skip this step and your gravy will taste like paste instead of sauce.

If using the one-pan method, no butter is needed as the drippings from the meatballs will serve in place of the butter. Remove the cooked meatballs from the frying pan and place on a clean plate while you make the sauce in the pan you pulled from the oven.

A close-up of a whisk stirring a pot of cream sauce, creating a swirled pattern, reminiscent of preparing an IKEA Swedish meatballs recipe.

Add the liquids

Add the vegetable stock and beef stock to the pan and continue to stir.

Pour in the heavy cream, soy sauce and Dijon mustard, whisking to combine.

A metal whisk stirs a pan of light brown gravy with visible specks of seasoning, reminiscent of the savory goodness in an IKEA Swedish meatballs recipe.

Simmer

Bring to a simmer and allow the sauce to thicken.

A skillet filled with browned meatballs simmering in a creamy sauce, garnished with chopped parsley, reminiscent of an IKEA Swedish meatballs recipe.

Add cooked meatballs

Continue to stir until the sauce reaches your desired consistency.

Add the cooked meatballs back into the creamy gravy and serve.

What to serve with Swedish meatballs

swedish meatballs with gravy on a plate

Ikea suggests mashed potatoes or roasted potatoes. Personally I love them over egg noodles and served with a bit of lingonberry jam. If you have a sous vide machine you can make my sous vide potatoes. Crispy on the outside, creamy and velvety on the inside.

If you haven't had lingonberry jam you need to try it with this recipe at least once! The sweetness of the jam along with the tartness of the berries is the perfect finish to an amazing bite of swedish meatballs with gravy.

Seasonal Favorite

Baked lattice top crust on an apple pie made with the Crisco pie crust recipe, showing flaky layers in the fluted edge.

This is my award-winning Crisco pie crust recipe; flaky, tender, and made with simple ingredients you already have.

Crisco Pie Crust
Swedish Meatballs in sauce

Creamy Swedish Ikea Meatballs

Swedish meatballs in creamy gravy sauce were first introduced to me at Ikea. This is my variation of the authentic Ikea recipe that was released in 2020.
No ratings yet
Print Pin Rate
Course: Beef Recipes
Cuisine: Swedish
Keyword: ikea swedish meatball recipe, swedish meatball recipe
Prep Time: 2 hours hours 15 minutes minutes
Cook Time: 40 minutes minutes
Total Time: 2 hours hours 55 minutes minutes
Servings: 36 meatballs
Calories: 869
Author: Sarah Mock

Ingredients

  • A white foam tray filled with raw ground beef, arranged in loose, squiggly strands.1 pound Ground Beef
  •  
    ½ pound ground pork
  • A single whole yellow onion with dry, papery skin, photographed against a white background-the perfect flavorful addition to your next Crockpot Hash brown Casserole.1 onion finely chopped
  • Whole garlic bulb with white papery skin, lying on its side against a plain white background-a perfect aromatic addition to your next slowcooker sausage casserole.1 clove Garlic minced
  •  
    ¾ Cup bread crumbs
  • A single brown chicken egg, perfect for making Chicken Cordon Bleu, stands upright on a white background.1 Egg
  • A white milk carton with a blue label reading 5 Tablespoon Whole Milk
  • Two clear acrylic mills-one filled with coarse salt, the other with whole black peppercorns, both topped with metal knobs-stand side by side on a white background, ready to season your favorite dishes like Shrimp Avocado Salad.Salt and pepper

Creamy Gravy Ingredients

  • A 500ml bottle of California Olive Ranch Global Blend Extra Virgin Olive Oil with green and blue labeling, indicating a blend from Argentina, Portugal, Chile, and California-perfect for drizzling over your favorite shrimp avocado salad.Olive oil
  • A rectangular 8 oz package of Kerrygold Pure Irish Butter, unsalted, with a green and gold label and Irish grass-fed cow branding-perfect for creating delicious Saint Patrick's Day cupcakes.3 Tablespoon Butter
  • A 5-pound bag of King Arthur Baking Company unbleached bread flour with 12.7% protein content, labeled for ideal use in bread, pizza crust, and rolls-perfect for creating hearty sides like homemade loaves to serve alongside a comforting slowcooker sausage casserole.3 Tablespoon Flour, All Purpose all purpose
  •  
    ⅔ Cup vegetable stock
  •  
    ⅔ Cup beef stock
  • heavy cream bottle.⅔ Cup Heavy Cream
  •  
    2 Teaspoons soy sauce
  •  
    1 Teaspoon dijon mustard
US Customary - Metric
Follow Savoring The Good On PinterestFollow @SavoringTheGood or tag #STGRecipes!

Instructions

  • Gently combine the ground beef and pork in a bowl using your fingers to break up any lumps.
    1 pound Ground Beef, ½ pound ground pork
    A mixing bowl containing ground meat, chopped onions, breadcrumbs, minced garlic, and a cracked egg - the perfect base for an IKEA Swedish meatballs recipe.
  • Add finely chopped onion, garlic, breadcrumbs, egg gently fold in to mix together.
    1 onion, ¾ Cup bread crumbs, 1 Egg
    A bowl containing chopped onions, minced garlic, and raw ground meat, great for perfecting your own IKEA Swedish meatballs recipe.
  • Add milk and season well with salt and pepper.
    5 Tablespoon Whole Milk, Salt and pepper
    Close-up of a hand mixing ground meat, chopped onions, and breadcrumbs in a metal bowl, reminiscent of preparing homemade IKEA Swedish meatballs.
  • Shape mixture into small, round balls using a medium cookie scoop.
    A baking sheet with rows of uncooked meatballs with chopped onions, placed on a wood surface.
  • Place on a clean cookie sheet or a plate, cover and store in the fridge for 2 hours.
    A baking tray filled with rows of uncooked meatballs mixed with chopped onions.
  • After 2 hours remove the meatballs from the refrigerator and in a cast-iron pan or heavy-bottom pan heat olive oil over medium heat.
    Olive oil
    a smoking hot cast iron pan.
  • When hot, gently add your meatballs and brown on all sides, in two or three batches depending on the size of your pan. I tested crowding a full batch into a 12 inch cast iron pan at once and the meatballs steamed instead of browning; working in batches keeps the pan hot enough for a real sear, and it's what gives the drippings you need for the one-pan sauce.
    Close-up of several browned meatballs cooking in a black skillet, following an authentic IKEA Swedish meatballs recipe.
  • When browned, add to an ovenproof dish and cover. Place in a 350 oven and cook for 30 minutes.
    A cast-iron skillet filled with cooked meatballs, browned on the outside and appearing to be well-seasoned, reminiscent of an IKEA Swedish meatballs recipe.
  • OR if you are doing the one-pan method, leave the meatballs in the pan, cover with an oven safe lid and cook at 350 for 30 minutes.
  • How to make the sauce
  • In a heavy-bottomed frying pan, melt the butter over medium heat.( if not using the pan you cooked the meatballs in.
    If using the one-pan method, no butter is needed as the drippings from the meatballs will serve in place of the butter.
    Remove the cooked meatballs from the frying pan and place on a clean plate while you make the sauce in the pan you pulled from the oven.
    3 Tablespoon Butter
    A close-up of a whisk stirring browned butter in a black skillet, reminiscent of the first step in creating the perfect IKEA Swedish meatballs recipe.
  • Whisk in the flour and continue cooking, stirring continuously, for 2 minutes, allowing the flour to cook and bubble.
    3 Tablespoon Flour, All Purpose
    A close-up of a whisk stirring a pot of cream sauce, creating a swirled pattern, reminiscent of preparing an IKEA Swedish meatballs recipe.
  • Add the vegetable stock and beef stock to the pan and continue to stir.
    ⅔ Cup vegetable stock, ⅔ Cup beef stock
    A close-up of a whisk stirring a pot of cream sauce, creating a swirled pattern, reminiscent of preparing an IKEA Swedish meatballs recipe.
  • Pour in the heavy cream, soy sauce and Dijon mustard, whisking to combine. Bring to a simmer and allow the sauce to thicken.
    ⅔ Cup Heavy Cream, 2 Teaspoons soy sauce, 1 Teaspoon dijon mustard
    A metal whisk stirs a pan of light brown gravy with visible specks of seasoning, reminiscent of the savory goodness in an IKEA Swedish meatballs recipe.
  • Continue to stir until the sauce reaches your desired consistency.
    A close-up of a whisk stirring a pot of cream sauce, creating a swirled pattern, reminiscent of preparing an IKEA Swedish meatballs recipe.
  • Add the cooked meatballs back into the creamy gravy and serve.
    A skillet filled with browned meatballs simmering in a creamy sauce, garnished with chopped parsley, reminiscent of an IKEA Swedish meatballs recipe.

Notes

Ikea suggests mashed potatoes or roasted potatoes. Personally, I love them over egg noodles and served with a bit of lingonberry jam. If you have a sous vide machine you can make my sous vide potatoes. Crispy on the outside, creamy and velvety on the inside.
If you haven't had lingonberry jam you need to try it with this recipe at least once! The sweetness of the jam along with the tartness of the berries is the perfect finish to an amazing bite of swedish meatballs with gravy.
Want to share when you made this recipe?Follow @SavoringTheGood & tag #STGRecipes!
Nutrition Facts
Creamy Swedish Ikea Meatballs
Serving Size
 
1
Amount per Serving
Calories
869
% Daily Value*
Fat
 
61
g
94
%
Saturated Fat
 
28
g
175
%
Trans Fat
 
2
g
Polyunsaturated Fat
 
27
g
Cholesterol
 
271
mg
90
%
Sodium
 
844
mg
37
%
Carbohydrates
 
25
g
8
%
Sugar
 
5
g
6
%
Protein
 
53
g
106
%
* Percent Daily Values are based on a 2000 calorie diet.
**Nutritional facts are just estimates. Please utilize your own brand nutritional values to double check against our estimates.
Like this recipe card? Want one for your site?Check out WP Recipe Maker!

Make-Ahead Instructions

Swedish meatballs are one of those dishes that reward a little advance work. Here's how I prep mine ahead of time.

  1. Shape the meatballs and place them on a parchment-lined tray, then cover and refrigerate for up to 24 hours before searing. The chill firms them up and makes searing easier, on top of the 2 hour chill already built into the recipe.
  2. You can also fully cook the meatballs and gravy up to 2 days ahead. Store covered in the refrigerator and reheat gently on the stovetop before serving.
  3. If you're feeding a crowd, make the gravy a day ahead and keep it separate from the meatballs; combine and reheat together just before serving so the meatballs don't overcook.

Storage Instructions

Leftover Swedish meatballs keep well and reheat nicely, so don't hesitate to make a double batch.

  1. Let the meatballs and gravy cool to room temperature, about 30 minutes, before storing.
  2. Transfer to an airtight container and refrigerate for up to 4 days.
  3. Reheat on the stovetop over low heat, stirring occasionally, until warmed through. Add a splash of beef stock if the gravy has thickened too much.
  4. To freeze, cool completely and store the meatballs and gravy together in a freezer-safe container for up to 3 months. Thaw overnight in the refrigerator, then reheat on the stovetop.

Frequently asked questions, answers and tips:

While I try to share all the information you need to make this recipe in your home with restaurant-quality results, there still may be a question or two. Or these are questions I have received from the community about this recipe. I do my best to answer them as clearly as I can. I hope this helps.

Can I freeze IKEA Swedish meatballs?

Yes. Freeze the cooked meatballs and gravy together in an airtight container for up to 3 months. Thaw overnight in the refrigerator, then reheat gently on the stovetop over low heat, stirring occasionally so the gravy doesn't separate.

Can I make the sauce without a roux?

The roux is what gives this gravy its body, so I don't recommend skipping it. If you're cooking gluten free, substitute an equal amount of cornstarch for the flour and whisk it into the stock instead of cooking it in the fat first.

What's the difference between this sauce and a regular brown gravy?

Regular brown gravy typically relies on drippings and stock alone. This sauce adds heavy cream, soy sauce, and Dijon mustard, which is what gives IKEA's version its rounder, slightly tangy flavor instead of a straight meat gravy taste.

Can I bake the meatballs instead of searing them in a pan?

I don't recommend it for this recipe. Searing builds a browned crust on the outside of the meatballs that adds real flavor to both the meatball and the gravy; baking alone skips that step entirely.

Do I have to chill the meatballs for 2 hours before cooking?

Yes, don't skip this step. The chill firms up the fat in the meat, which keeps the meatballs from falling apart when they hit the hot pan.


Sarah Mock of savoringthegood.com headshot 2022

I am Sarah Mock. Welcome!

Sarah Mock is a classically trained Chef and a graduate of Johnson & Wales University. A culinary blogger for 17 years, Sarah helps the home cook prepare her recipes with professional results.

Get to know me

as seen in:

Logos of Hersheyland, ABC News, and Good Day PA are showcased in a seamless row, providing a snapshot of popular brands.

Hersheyland Nightline Good Day Pa!

The vibrant design showcases the iconic logos of Pinterest, Rachael Ray, and Jell-O set against a bold red background. Sorry, the provided description doesn't offer enough detail to suggest important SEO keywords.

Pinterest Rachael JELL-O

Best Zoom Backgrounds & Teams Backgrounds

free zoom backgrounds graphic

Download one of hundreds of free zoom backgrounds to use during your video conference call or online meeting. These can also be used as Microsoft Teams background. Here is a huge collection of the best zoom backgrounds and wallpapers, all free to download and use.

free zoom backgrounds graphic

I am saving some of these so I can have them at my disposal whenever the mood strikes me to switch up my video conference call background. No need for people to see a white wall behind me to the mess in the living room!

If you are binge-watching as much Disney+ as my family and I are, you are welcome to print out the free Disney+ coloring pages and activity sheets to help keep people busy. If you have a Universal Remote you will probably want to get a Universal remote code.

When we have been stuck at home so many people have learned new things. How to make a sourdough starter, strawberry jam or even make a DIY cocktail smoker. What a way we are going to remember this time in history!

Pixar Zoom backgrounds collage

How to change your zoom background on mobile:

  1. Download the Zoom app for Mac or Windows
  2. Open the app and sign in
  3. In the upper right corner, click your profile picture and then click on "Settings"
  4. In the left menu, click "Virtual Background" (if you don't see this, log in to the Zoom website, go to "Settings" and toggle on "Virtual Background")
  5. In the "Virtual Background" menu, click the (+) icon
  6. Select and upload your new background.

How to download background via desktop:

  1. Find an image you would like to download.
  2. Right click the image.
  3. Select Save Image.
  4. In the left menu, click "Virtual Background" (if you don't see this, log in to the Zoom website, go to "Settings" and toggle on "Virtual Background")
  5. In the "Virtual Background" menu, click the (+) icon
  6. Select and upload your new background.
How to change your background for Microsoft Teams:


Disney/Pixar Themed Zoom Backgrounds

Disney/Pixar zoom backgrounds graphic
  • A Bugs LifeMeadow
  • AladinCastle at Agrabah
  • Castel Garden View
  • Beauty & The Beast The Library
  • BraveBrave Zoom 1
  • Brave Zoom 2
  • Brave Forrest
  • CarsLightning McQueen
  • Coco
    • City Street At Night
  • Finding Nemo
  • Frozen On Broadway
    • Frozen Zoom 1
    • Frozen Zoom 2
    • Frozen Zoom 3
    • Frozen Zoom 4
  • Incredibles -
    • Parr Family Living Room
  • Inside Out
    • Console
  • Moana
    • Beach Front
  • Monsters Inc.
    • Original Scare Floor 
    • Scare Floor
  • Onward
    • New Mushroomton
    • Guinevere
    • Manticore's Tavern
  • Pocohantas
    • Forrest View
    • Colors of the Wind
  • Ratatouille
    • Kitchen Counter
  • Tangled
    • The Lanterns
  • Toy Story
    • Cloud Wallpaper 
  • Up
    • Ellie & Carl's Living Room
  • Sleeping Beauty
    • Castle 1
    • Castle 2
    • Forrest House
  • Snow White
    • Snow White Cottage
  • Wall-e
    • Command Center

Disney Parks and Resorts Zoom Backgrounds

Disney Parks and Resorts Zoom Backgrounds collage
  • Shanghai Disney Resort
  • Tokyo Disney Resort
  • Aulani Disney Resort
  • Hong Kong Disneyland

The Best Star Wars Zoom Backgrounds

Star Wars Zoom Backgrounds

The Millennium Falcon Zoom Backgrounds

  • Millennium Falcon Driver's Seat
  • Millennium Falcon Hallway
  • Millennium Falcon Main Hold 1
  • Millennium Falcon Main Hold 2
The Rebel Alliance Backgrounds (Light Side)

The Light Side

  • Poe Dameron's X-Wing
  • Intersystem Transport Ship
  • X-wing Starfighters Soar Above Star Wars: Galaxy's Edge
  • Asteroid Field
  • Corusant
  • Hoth 1 (With TaunTaun!)
  • Hoth 2
  • Hoth 3
  • Jakku
  • Pasaana
  • Rebel Base 1
  • Rebel Base 2
  • Rebel Base 3
  • Resistance Base 1
  • Resistance Base 2 
  • Tatooine 1
  • Tatooine 2 
The Dark Side zoom backgrounds

The Dark Side

  • Death Star (view from the control room)
  • Death Star Ruins 1
  • Death Star Ruins 2
  • Death Star Ruins 3
  • The Emperor's Throne on Exegol
  • Imperial Star Destroyer Bridge
  • Lightspeed
  • Kylo Ren's Star Destroyer
  • Scarif Imperial Vault
  • Snoke's Star Destroyer 
  • Starfield
  • Starkiller Base
  • Stormtroopers

Pandora: The World of Avatar Backgrounds

Free Pandora: The World of Avatar Backgrounds For Zoom graphic
  • Pandora World of Avatar Floating Mountains
  • Pandora World of Avatar Floating Mountains 2
  • Pandora The World of Avatar waterfall wallpaper background
  • Pandora World of Avatar, bioluminescent wall and bench wallpaper
  • Red handprints and initials
  • Pandora The World of Avatar, Pandora Utility Suit
  • Pandora The World of Avatar Alpha Centauri Expeditions (ACE) Security Door

The Best Zoom Backgrounds From the MCU

The best Zoom backgrounds from the MCU collage
  • Wakanda
  • Asguard
  • Dr. Strange
  • Hulk Stadium 1
  • Hulk Stadium 2
  • Avengers Symbol Silver
  • Avengers Symbol Blue
  • Avengers Symbol Endgame
  • Avengers Symbol Glowing Blue
Marvel Backgrounds
  • Stark Tower
  • Avengers Cartoon Symbols
  • Avengers Comic Collage
  • Stark Labs
  • Spiderman
  • Baby Groot
  • Cartoon Iron Man
  • Antman
  • Thanos
  • Cartoon Captain Marvel

The Best Zoom Backgrounds for Harry Potter

A collection of Hogwarts house-themed Zoom and Teams backgrounds featuring stunning collage of pictures.
  • Quidditch Field Zoom Background
  • 4 Privet Drive
  • Hogwarts School Of Witchcraft and Wizardry
  • Gringotts
  • Hogsmeade Cityscape 

The BEST Zoom Backgrounds For Kids

zoom backgrounds for kids graphic
  • Nick Jr.
  • Hulk Stadium
  • Paw Patrol 
  • Blues Clues
  • Sponge Bob Square Pants Pineapple Under The Sea

Here are even more zoom backgrounds for kids and teachers.

Sesame Street Zoom Backgrounds

Sesame Street Backgrounds for zoom graphic
  • Mr. Hoopers Store
  • Sesame Street
  • Garden at Sesame Street
  • Cookie Monster Wall Paper
  • Elmo and Friends

Nickelodeon Wall Papers for Zoom and Microsoft Teams

Nickelodeon Wall Papers for Zoom and Microsoft Teams graphic
  • Zoey 101
  • Peppa Pig Wallpaper
  • Victorious Lockers Wallpaper
  • Hey Arnold Wallpaper
  • Drake and Josh Zoom background
  • Loud House Lincoln
  • Return of the teenage mutant ninja turtles
  • Henry Danger
  • Paw Patrol 
  • Blues Clues
  • Sponge Bob Square Pants Pineapple Under The Sea

Ocean Themed Zoom Backgrounds

Ocean Themed Zoom Backgrounds graphic
  • sea turtle in coral reef
  • coral reef zoom
  • under the ocean
  • shark fish
  • great white shark
  • sea turtle zoom
  • boy looking at an aquarium
  • wall of bubbles
  • sunken ship zoom

Power Rangers Zoom Backgrounds

power ranger zoom background
  • Red Power Ranger background
  • Green Power Ranger background
  • Pink Power Ranger background
  • Purple Power Ranger background
  • Blue Power Ranger background
  • Yellow Power Ranger background

Trolls Zoom Backgrounds

Tolls Zoom Backgrounds
  • Rainbow trolls background
  • Western Trolls Zoom background
  • Green and blue trolls zoom background 

Star Trek Zoom Backgrounds

star trek zoom backgrounds collage
  • Star Trek 1
  • Star Trek 2
  • Star Trek 3
  • Star Trek 4
  • Star Trek 5
  • Star Trek 6
  • Star Trek 7

Throwback Zoom Backgrounds

  • 80's Class Photo Backdrop for Zoom Grey
  • 80's Class Photo Backdrop for Zoom Blue

The Office Zoom Backgrounds

  • Interview Wall

The BEST Zoom Backgrounds from Broadway

Broadway Zoom Backgrounds collage

Frozen On Broadway Zoom Backgrounds

  • Frozen Zoom 1
  • Frozen Zoom 2
  • Frozen Zoom 3
  • Frozen Zoom 4

Radio City Zoom Backgrounds

  • Radio City Zoom 1
  • Radio City Zoom 2
  • Radio City Zoom 3 
  • Radio City Zoom 4 

Golden Gate Theatre

hamilton stage zoom background

Hamilton Zoom Backgrounds

  • Hamilton stage

Moulin Rouge on Broadway Zoom

  • Moulin Rouge 1
  • Moulin Rouge 2
  • Moulin Rouge 3
  • Moulin Rouge 4

Hersheypark Rollercoaster Backgrounds

Hersheypark Rollercoaster Backgrounds for zoom image
  • Fahrenheit
  • Hersheypark sooperdooperlooper
  • skyrush
  • Comet
  • Fahrenheit POV
  • storm runner
  • Hersheypark in the snow
  • Lightning Racer
  • Canymonium 
  • Boardwalk 
  • Boardwalk Birds Eye View
  • Sidewinder 
  • Wildcat

Hersheypark is my favorite local theme park and I am sad to have missed Hersheypark Springtime in the park this year due to the virus. But the park is looking forward to opening Chocolatetown this year at a yet to be determined start date.

Missouri Botanical Garden Backgrounds

Missouri Botanical Garden Backgrounds graphic
  • MO Gardens Background 1
  • MO Gardens Background 2
  • MO Gardens Background 3
  • MO Gardens Background 4

The Best Zoom Backgrounds for Sports Teams

Major League Baseball Zoom Backgrounds

Major League Baseball Backgrounds for zoom

Orioles Zoom Backgrounds 

  • Oriole Bird 
  • Water Splash
  • Oriole Park at Camden Yard
  • Boogs BBQ
  • Oriole Bird with flag
  • Opening Day
  • Sunset at the park
  • Victory shower

Colorado Rockies Zoom Backgrounds

Minnesota Twins

Major League Soccer Zoom Backgrounds

  • Columbus SC
  • FC Dallas
  • Seattle Sounders

NBA Zoom Backgrounds

  • Dallas Mavericks
  • New Orleans Pelicans
  • Oklahoma City Thunder

NFL Backgrounds for zoom

Baltimore Ravens Zoom Backgrounds

  • Press Conference logo wall
  • Lamar Jackson
  • Purple Pride
  • Entering The Stadium

Buffalo Bills

Carolina Panthers Zoom Backgrounds

  • Out of the tunnel
  • Catch CMC
  • On The Field
  • Stunned
  • Inside The Locker Room 

Chicago Bears Zoom Backgrounds

  • Bears Zoom 1
  • Bears Zoom 2
  • Bears Zoom 3
  • Bears Zoom 4

Cincinnati Bengals Zoom Backgrounds

  • Cincinnati Bengals 1
  • Cincinnati Bengals 2
  • Cincinnati Bengals 3
  • Cincinnati Bengals 4

Detroit Lions Zoom Backgrounds

  • Detroit 1
  • Detroit 2
  • Detroit 3
  • Detroit 4

Minnesota Vikings Zoom Backgrounds

  • Minnesota 1
  • Minnesota 2
  • Minnesota 3
  • Minnesota 4

NASCAR Zoom Backgrounds

NASCAR zoom backgrounds collage
  • Texas Motor Speedway
  • Texas Motor Speedway 2
  • Texas Motor Speedway 3
  • Texas Motor Speedway 4

Monster Mile

  • Dover Speedway
  • Dover Speedway 1
  • Dover Speedway 2

Travel Themed Zoom Backgrounds

airstream classic virtual backgorund
Airstream.com
  • Airstream-themed backgrounds - Take your zoom call from your favorite Airstream...virtually.
  • Picnic on a beach
  • Camping Site
  • Greenhouse
  • Travel + Leasure
  • Smart Traveler 
    • Palm trees
    • Sandy beach
    • Bungalow at sunset
    • Madrid at Sunset
    • Amalfi Coast
    • Santorini 
    • Shanghai at night
    • Golden Gate Bridge
    • NYC at sunset

Pop Culture Zoom Backgrounds

  • This is fine
  • Distracted Boyfriend
  • iCarly
  • Wall Of Toilet Paper
  • NPR Music 

Oscars Zoom Backgrounds

Oscars Zoom Backgrounds
  • Red carpet
  • Velvet Rope
  • Theater
  • Statue

Netflix Zoom Backgrounds

Schitt's Creek Zoom Backgrounds

  • Cafe Tropical
  • Bob's Garage
  • Schitt's Creek Creek

DC Universe Zoom Backgrounds

DC Universe Zoom Backgrounds graphic
  • Bat Cave
    • Bat Cave 1
    • Bat Cave 2
    • Bat Cave 3
  • Gotham City
    • Gotham City 1
    • Gotham City 2
  • Arkham Asylum
  • The Daily Planet
    • The Daily Planet
    • The Daily Planet
  • The Fortress of Solitude
    • The Fortress of Solitude 1
    • The Fortress of Solitude 2
  • Hall of Justice
  • Central City
  • STAR Labs
  • Themyscira
    • Themyscira 1
    • Themyscira 2
  • Atlantis
  • Gorilla City
  • Cosmic
    • Cosmic 1
    • Cosmic 2
    • Cosmic 3

Movie Themed Zoom Backgrounds

  • Top Gun Thank You Military.com
    • Top Gun Zoom Background 1
    • Top Gun Zoom Background 2
    • Top Gun Zoom Background 3
  • Finding Nemo
  • Up - Ellie & Carl's Living Room
  • Incredibles - Parr Family Living Room
  • Cars - Lightning McQueen
  • Inside Out - Console
  • Toy Story - Cloud Wallpaper 

John Wick Wallpaper Backgrounds for Zoom

john wick 3 zoom backgrounds
  • John Wick Zoom Background 1
  • John Wick Zoom Background 2
  • John Wick Zoom Background 3
  • John Wick Zoom Background 4

La La Land Wallpaper Background for Zoom

La La Land Wallpaper Background for Zoom
  • La La Land 1
  • La La Land 2
  • La La Land 3
  • La La Land 4

Television Show Themed Zoom Backgrounds

  • iCarly
  • Sponge Bob
  • Bob's Burgers
  • Seinfeld Zoom Backgrounds 
    • Seinfeld 1
    • Seinfeld 2
    • Seinfeld 3
    • Seinfeld 4
  • General Hospital Zoom Backgrounds

  • General Hospital 1
    • General Hospital 2
    • General Hospital 3
    • General Hospital 4

ABC Zoom Backgrounds

ABC Backgrounds graphic
  • American Idol
  • The Connors
  • Modern Family
  • Who Wants To Be A Millionaire
  • Greys Anatomy
  • The Goldbergs
  • Shark Tank
  • Dancing With The Stars
  • Bachelor: Listen To Your Heart
  • Bachelor In Paradise
  • Bachelorette
  • Single Parents
  • Bachelor
  • Holey Moley
  • Mixedish
  • Blackish
  • Bless This Mess
  • American Housewife
  • Schooled
  • Station 19
  • How To Get Away With


ABC Gameshows

  • Tell The Truth
  • Match Game
  • Family Feud
  • Card Shark
  • Press Your Luck

CBS Backgrounds

CBS Backgrounds for zoom and teams graphics
  • Bold and Beautiful Backgrounds
    • Bold and Beautiful 1
    • Bold and Beautiful 2
    • Bold and Beautiful 3
    • Bold and Beautiful 4
  • Hawaii Five-0 Backgrounds
    • Hawaii Five-0
    • Hawaii Five-0
    • Hawaii Five-0
  • Mom
    • Mom background 1
    • Mom background 2
    • Mom background 3
    • Mom background 4
  • Young Sheldon backgrounds
    • Young Sheldon 1
    • Young Sheldon 2
    • Young Sheldon 3
    • Young Sheldon 4
  • NCIS Backgrounds
  • The Price Is Right Background
  • 2 Broke Girls

NBC Backgrounds

  • Tommy Zoom Background
  • The Voice Judges Chairs
  • The Voice Knock Outs
  • Tina Fey 30 Rock
  • 30 Rock 
  • 30 Rock
  • Tracy Jordan 30 Rock
  • AGT Stage
  • Chicago PD
  • Chicago Fire

Steven Universe Zoom Backgrounds

  • Steven Universe zoom 1
  • Steven Universe zoom 2
  • Steven Universe zoom 3
  • Steven Universe zoom 4
  • Steven Universe zoom 5

FOX Animation Wallpapers

FOX Animation Wallpapers for zoom
  • Bless The Harts
  • Bless The Harts 2
  • Duncanville
  • Duncanville 2
  • Family Guy Couch
  • Family Guy
  • Bob's Burgers
  • Bob's Burgers 2
  • Simpsons
  • Simpsons Couch

The Golden Girls Zoom Backgrounds

The Golden Girls Wallpapers for zoom
  • The Golden Girls 1
  • The Golden Girls 2
  • The Golden Girls 3
  • The Golden Girls 4

RuPaul's Drag Race Zoom Backgrounds

RuPaul's Drag Race Zoom Backgrounds collage
  • RuPaul's Drag Race 1
  • RuPaul's Drag Race 2
  • RuPaul's Drag Race 3
  • RuPaul's Drag Race 4

West Elm Zoom Backgrounds

  • Mid-Century Living Room
  • NYC Waterfront Views
  • Chic & Modern City Kitchen
  • Brooklyn Pad with Lots of Light
  • Work Hard, Play Hard HQ
  • Industrial-Glam Loft Space
  • Keeping Calm in the Bedroom
  • Pretend You Have a Dog
  • Bright & Airy Living Room

Sarah Mock of savoringthegood.com headshot 2022

I am Sarah Mock. Welcome!

Sarah Mock is a classically trained Chef and graduate of Johnson & Wales University. A culinary blogger for 16 years Sarah helps the home cook prepare her recipes with professional results.

Get to know me

as seen in:

Logos of Hersheyland, ABC News, and Good Day PA are showcased in a seamless row, providing a snapshot of popular brands.

Hersheyland Nightline Good Day Pa!

The vibrant design showcases the iconic logos of Pinterest, Rachael Ray, and Jell-O set against a bold red background. Sorry, the provided description doesn't offer enough detail to suggest important SEO keywords.

Pinterest Rachael JELL-O

Best Sous Vide Prime Rib Roast

sous vide prime rib on a white platter sliced to show the inside of the meat

Sous vide prime rib takes all the guesswork out of cooking the perfect and delicious prime rib roast.

prime rib sliced on a cutting board

Herb crust surrounds the most succulent and juicy roast beef, cooked to your desired doneness.

Prime rib is known as a standing rib roast, boneless rib roast or ribeye roast this amazing cut of meat is usually reserved for special occasions such as Christmas dinner or an anniversary meal but any occasion is a good occasion to have a perfectly cooked prime rib.

Sous Vide Prime Rib Roast Ingredients:

boneless rib roast on a cutting board

Recipe Card?

To find the full printable recipe with specific measurements and directions CLICK HERE to go to the recipe card.

  • 1 Prime rib 4-6 pounds

Herbed butter

  • butter softened
  • rosemary
  • kosher salt
  • black pepper
  • garlic powder
A sous vide prime rib roast in a plastic container, placed on a table.

The beauty of sous vide is you are able to find the right combination of temperature and time combined with the cut of meat prepared how YOU like to enjoy it. 18 hours is probably too long for some people but I had the time to spend waiting.

If I was short on time I would have gone with a shorter cook time such as 8 hours but there would have been more fat in the meat. My family doesn't enjoy the fat in meat but loves what the meat tastes like when it is sous vide in the renderings. As the kids say.... you do you.

Seasonal Favorite

Baked lattice top crust on an apple pie made with the Crisco pie crust recipe, showing flaky layers in the fluted edge.

This is my award-winning Crisco pie crust recipe; flaky, tender, and made with simple ingredients you already have.

Crisco Pie Crust

Sous Vide Equipment

  • Breville Joule Sous Vide - This is the sous vide immersion circulator that I use. I love the wifi feature!
  • Anova Culinary Sous Vide Precision Cooker - Another popular brand of sous vide circulator. I don't have one but many people do and love this brand.
  • Sous Vide Container (3.0 Gallon) - ny container that can tolerate heat will work but I use this sous vide container.
  • Sous Vide Lid for LIPAVI C10 Container - Use with Anova Precision / Nano / Pro, Joule, Instant Pot, Wancle or virtually all other models. Do not accept a bad fit! The smart silicone sleeve on our lid will ensure a snug fit, with NO GAP. Up to a diameter of 2.755 inches
  • Cast Iron Skillet - got to get that HIGH HEAT for an amazing sear and cast iron is the best pan to get that sear.
Using an Anova sous vide machine, a person precisely cooks vacuum-sealed salmon fillets submerged in water, ensuring perfect results right on the countertop.

Let's go shopping!

ANOVA

This third generation sous vide circulator includes dual-band WiFi and a two-line touchscreen display.

Buy it here

Cooking the Prime Rib Sous Vide Time and Temperature

How long does it take to sous vide prime rib?

A plastic bag with a ruler next to it.

Choosing how long to sous vide prime rib will depend on the size of your roast. Measure the thickest part of the meat and account for an hour for each thickness, at a minimum. Keep in mind, length of a piece of meat is not the same as thickness. See photo above.

I say a minimum because the beauty of cooking with sous vide, is you don't lose any moisture from the beef because of cooking in a food-safe bag and the longer you cook it, the more tender the meat becomes.

This is a 4-inch thick boneless prime rib roast. I cooked it for 18 hours so that the connective tissues would have a longer time to break down and the fat could render out more fully. If you love the meat to have more marbling and the fat ring to be defined, I would recommend cooking the prime rib 6 hours.

What temperature do you sous vide the best prime rib?

The temperature you set your sous vide will determine the doneness of your piece of beef from edge to edge, no matter the thickness. My family likes prime rib cooked to 135.

According to the sous vide supreme cooking guide this is on the high side of medium rare.

Doneness for Prime RibF C
Rare12049
Medium Rare13456.5
Medium14060
Medium Well15065.5
Well Done160 and up71 and up

How to pre sear the roast to make prime rib for sous vide

I am a big fan of pre-searing beef before dropping it in the sous vide bath. The searing gives the meat a bit of a crust to hold it together instead of trussing the meat. The caramelization of the proteins will give added flavor to the meat as it cooks in its own juices in the sous vide bag. This step is completely optional but I suggest you try it at least once so you know the difference of pre sear and not pre-searing.

In a small bowl, combine :

  • softened butter
  • salt
  • pepper
  • garlic powder
  • rosemary

The exact measurements are in the recipe card below.

  1. Allow the meat to come to room temperature for an hour.
  2. Pat the meat dry with paper towels to remove excess moisture.
  3. Spread the seasoned butter mixture over all sides of the beef.
  4. Heat a heavy bottom or cast iron pan to the point of smoking.
  5. Place the roast cut side down in the screaming hot pan, allowing it to sear for 2-3 minutes or until it takes on a deep golden brown caramel color.
  6. Flip the meat and sear on all sides, rotating the searing side 90 degrees with each flip.

How to cook prime rib sous vide

prime rib sliced on a cutting board
herb butter covered rib roast

Herb Butter

Coat the entire roast with herbed butter.

searing a piece of prime rib in a screaming hot cast iron skillet, smoke covers the meat

Sear

Pre sear the prime rib in a cast-iron skillet.

Heat sous vide water

Set the sous vide machine to desired temperature.

A Sous Vide prime rib roast wrapped in plastic on a wooden table.

Vac and Seal

Using a vacuum sealer, vacuum and seal the beef in a sous vide container or use the water displacement method to force the air out of the bag.

A sous vide prime rib roast in a plastic container, placed on a table.

Secure

Secure the bag to the side of the container with a clip if the bag is not heat sealed.

Cook

  1. Sous vide the prime rib for 6 - 18 hours, depending on the desired tenderness.
  2. After the cook, remove the prime rib from the water bath.
  3. Open the bag and pour the juices from the bag into a clean container. Save to make a sauce.

Heat Cast Iron

Reheat the cast iron skillet to smoking.

close shot of the texture of the herbs on the crust of sous vide prime rib

Dry the beef

Pat the roast dry with paper towels.

herb crusted prime rib resting on a bamboo cutting board vertical image

Sear

Sear on all sides for 1-2 minutes to give the meat a crust.

sliced prime rib on a white serving plater, serving fork and carving knife off to the side

Serve

Serve sliced.

Did you make this recipe?

Do you have feedback that would be helpful to others? If so can help this small business owner by leaving a rating and a review in the comments section? Thank you for being part of the Savoring The Good Community. ~ Sarah

How to reheat the best sous vide prime rib

The best way to reheat the smoked prime rib without overcooking it or drying it out is to heat it slowly. If you remember be sure to save some of the juices from the cooking bag for reheating the meat. If you can help it, don't slice all the prime rib if you are planning on reheating leftovers.

Sous Viding

  1. Using a gallon-sized ziploc bag, place the leftover roast along with any saved au jus in the bag and lower the bag into the sous vide water bath allowing the pressure of the water to press out the air in the bag.
  2. Secure the bag to the side of the container. Make sure the container of water holds enough water to submerge the meat by 1 inch.
  3. Set your temperature to your original sous vide temperature. Allow the cold water to come up to temperature slowly and the internal temperature of the meat will rise with it.
  4. Once the water has come to temperature heat for an additional 30 minutes.

Oven Method

Place the roast in the oven that's preheated to 300 degrees for approximately 20 to 30 minutes, depending on the size of the piece. To keep the moisture in the meat wrap a piece of foil over the meat and give it a splash of au ju or beef broth.

Making Sous Vide Prime Rib FAQ's and Tips

What cut of meat is the prime rib?

A prime rib is a cut of beef from the primal rib of a steer in the front forequarter. A full rib section will be ribs numbered six through 12, a standing rib roast may contain anywhere from two to seven of those rib bones. A boneless rib roast has the rib portion removed.

What is a reverse sear?

When you hear me talk about reverse sear it is when you sear the meat after it has been cooked using the sous vide method. Traditionally a steak is seared over high heat and then allowed to cook until the desired internal temperature is reached. But with reverse searing, the meat is cooked to your desired exact temperature with sous vide cooking and then the meat is seared on super high heat for an amazing crust on the surface of the meat. You may choose to reverse sear your rib eye roast or double sear like I do. I think the double sear is the best bet to get not only depth of flavor but an amazing finish to the outside of the roast.

Is cooking a prime rib in the oven better than sous vide cooking?

Cooking a prime rib in the oven is traditional, but for optimal results, the prime rib needs to sous vide before putting it in the oven. Sous vide is better as it ensures precise temperature control

  • Sous Vide Beef Tenderloin - Edge-to-edge consistent doneness, with no chance of overcooking, will take the fear out of cooking this expensive cut of beef.
  • Sous Vide Prime Rib - Sous vide a prime rib and enjoy a herb crust that surrounds the most succulent and juicy roast beef, cooked to your desired doneness.
  • Sous Vide Guinness Stew - Full of deep, rich comforting flavors the Guinness Beer is the star of this tender beef stew. 
  • Sous Vide Beef Stroganoff - fall apart in your mouth beef while maintaining a medium rare center to the steak bites. The stroganoff sauce is creamy, silky and full of layers of flavor. 
  • Sous Vide Beef Burgundy - Combining the techniques and flavors of a traditional beef burgundy with the advanced technology of sous vide cooking will make you change the way you cook beef burgundy forever.
  • Sous Vide Roast Beef -the most delicious roast beef turning an inexpensive cut of beef into a memorable meal.
  • Sous Vide Beef Brisket -take the guesswork out of achieving the perfect brisket. Finish the brisket on your grill, smoker or in the oven for the flavorful, deep-colored bark that you love.

Appetizer Recipes

  • A white bowl filled with finely chopped cranberry salsa, garnished with cilantro, sits next to crackers on a white surface-a vibrant and refreshing twist for your next appetizer spread.
    Cranberry Salsa
  • A buffet table with assorted appetizers, including sliders, bruschetta, skewers, shrimp, and vegetable cups, arranged neatly on wooden boards and trays.
    How Many Appetizers Per Person: Serving Guide & Easy Recipes
  • A hand holds a slice of bread topped with a cheesy caramelized onion dip with bacon, with more of the savory dip visible in a dish in the background.
    Caramelized Onion Dip with Bacon
See more Appetizer Recipes →
sous vide prime rib on a white platter sliced to show the inside of the meat

Prime Rib Recipe - Sous Vide

Sous vide prime rib takes all the guesswork out of cooking the perfect prime rib roast. Herb crust surrounds the most succulent and juicy roast beef, cooked to your desired doneness.
4.75 from 8 votes
Print Pin Rate
Course: Beef Recipes
Cuisine: American
Prep Time: 10 minutes minutes
Cook Time: 6 hours hours
Additional Time: 8 minutes minutes
Total Time: 6 hours hours 18 minutes minutes
Servings: 6
Calories: 53
Author: Sarah Mock

Ingredients

  •  
    1 Prime rib 4-6 pounds

Herbed butter

  • A rectangular 8 oz package of Kerrygold Pure Irish Butter, unsalted, with a green and gold label and Irish grass-fed cow branding-perfect for creating delicious Saint Patrick's Day cupcakes.3 Tablespoon Butter softened
  • A clear bottle of McCormick rosemary leaves with a red cap and beige label, filled with dried rosemary-perfect for adding aromatic flavor to dishes like turkey shepherd's pie.1 Teaspoon Rosemary
  • A Morton Salt container with a blue label featuring a girl in a yellow dress holding an umbrella, with salt pouring out of a container-an essential ingredient for perfectly seasoning dishes like Chicken Cordon Bleu.1 Teaspoon salt
  • A 6 oz container of McCormick Pure Ground Black Pepper with a red lid and a 1 Teaspoon Black Pepper
  • A bottle of McCormick Garlic Powder with a red lid and green label, featuring the brand logo and 1 Teaspoon Garlic Powder
Follow Savoring The Good On PinterestFollow @SavoringTheGood or tag #STGRecipes!

Instructions

  • Coat the meat with herbed butter.
    1 Prime rib, 3 Tablespoon Butter, 1 Teaspoon Rosemary, 1 Teaspoon salt, 1 Teaspoon Black Pepper, 1 Teaspoon Garlic Powder
  • Pre sear the meat in a cast iron skillet.
  • Heat the sous vide water bath to desired temperature.
  • Vacuum and seal the beef in a sous vide bag or use the water displacement method to force the air out of the bag.
  • Secure the bag to the side of the container with a clip if the bag is not heat sealed.
  • Cook for 6 - 18 hours, depending on the desired tenderness.
  • After the cook, remove from the water bath.
  • Open the bag and pour the juices from the bag into a clean container. Save to make a sauce.
  • Reheat the cast iron skillet to smoking.
  • Pat the meat dry with paper towels.
  • Sear on all sides for 1-2 minutes to give the meat a crust.
  • Serve sliced.

Notes

How to presear

  1. Allow the meat to come to room temperature for an hour.
  2. Pat the meat dry with paper towels to remove excess moisture.
  3. Spread the seasoned butter mixture over all sides of the beef.
  4. Heat a heavy bottom or cast iron pan to the point of smoking.
  5. Place the roast cut side down in the pan, allowing it to sear for 2-3 minutes or until it takes on a deep caramel color.
  6. Flip the meat and sear on all sides, rotating the searing side 90 degrees with each flip.
Want to share when you made this recipe?Follow @SavoringTheGood & tag #STGRecipes!
Nutrition Facts
Prime Rib Recipe - Sous Vide
Serving Size
 
1 serving
Amount per Serving
Calories
53
% Daily Value*
Fat
 
6
g
9
%
Saturated Fat
 
4
g
25
%
Trans Fat
 
1
g
Cholesterol
 
15
mg
5
%
Sodium
 
438
mg
19
%
Potassium
 
13
mg
0
%
Carbohydrates
 
1
g
0
%
Sugar
 
1
g
1
%
Protein
 
1
g
2
%
* Percent Daily Values are based on a 2000 calorie diet.
**Nutritional facts are just estimates. Please utilize your own brand nutritional values to double check against our estimates.
Like this recipe card? Want one for your site?Check out WP Recipe Maker!

Sarah Mock of savoringthegood.com headshot 2022

I am Sarah Mock. Welcome!

Sarah Mock is a classically trained Chef and graduate of Johnson & Wales University. A culinary blogger for 15 years Sarah helps the home cook prepare her recipes with professional results.
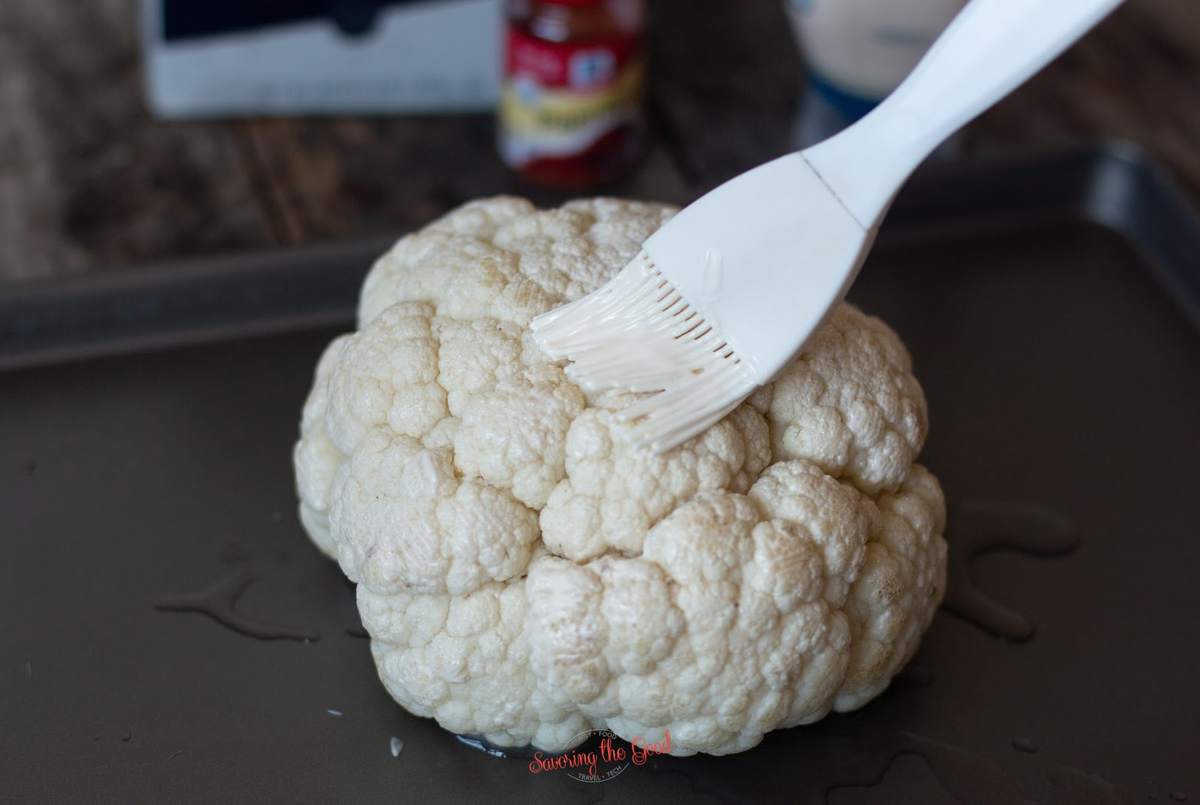
Get to know me

Ricotta Gnudi Recipe (Not Gnocchi!)

Golden brown Gnudi topped with crispy sage leaves, arranged elegantly on a white plate.

Ricotta gnudi are pillowy Italian dumplings made from drained ricotta cheese, egg yolks, flour, and salt; think of them as gnocchi's lighter cousin, since there's no potato involved at all. The technique comes down to one thing I learned early in my training: pull as much moisture out of the ricotta as you possibly can before the flour ever touches the bowl.

Ricotta Gnudi Recipe (Ricotta Gnocchi)

Ready in about 45 minutes total, with roughly 30 of those minutes spent draining the ricotta hands-off and just 2 minutes of simmering per batch.

What I Want You To Learn

  • My method for shaping tender ricotta gnudi from scratch, from draining the cheese to folding the dough.
  • The specific reasons gnudi fall apart in the pot, and how to stop it before it happens.
  • The best way to freeze gnudi so you always have a batch ready to cook.
  • My favorite sauces and serving ideas so your homemade gnudi has somewhere good to land.

Also known as ricotta gnocchi, gnudi can be made gluten-free with almost no change to the method; I cover exactly how below. Toss the cooked dumplings with your favorite marinara or saute them in brown butter and sage, and you have a meal on the table in well under 30 minutes. If you are building out a full Italian spread, my marinated mozzarella balls make a nice cold starter while the gnudi cook.

Sarah Mock of savoringthegood.com headshot 2022

What I Learned Testing This Recipe

  • Draining matters more than people expect. Every batch I have pressed for less than 30 minutes turns sticky and hard to shape; a full 30 minutes gets you dough that holds a clean edge when you cut it.
  • The dough nearly doubles once it hits boiling water. If you shape your gnudi bigger than a large marble, expect a dumpling closer to a golf ball by the time it floats.
  • Piping gives you a more consistent shape than rolling by hand, but hand-rolled gnudi have more texture and character on the plate; I switch between the two depending on whether I am cooking for guests or my own kitchen table.
  • A half cup of fresh grated parmesan folded into the dough adds real depth without making the gnudi heavy. More than that and the dough gets harder to shape.
  • Overworking the dough is the number one reason gnudi fall apart in the pot. The dough should look barely combined, almost shaggy, before you stop folding.

Gnudi come out of the same tradition as gnocchi, but they skip the boiled potato and lean entirely on ricotta for that pillowy texture. I like teaching this recipe because it is a lesson in restraint: the fewer things you do to the dough, the better the dumpling. Once you have the draining step down, gnudi come together faster than almost any other shaped pasta in my recipe box.

Ingredients for Ricotta Gnudi

This is a four-ingredient dough, so every ingredient is doing real work. Here is what each one brings to the bowl.

gnudi ingredients in bowls on a wooden surface
  • Ricotta cheese is the entire structure of this dough, so buy whole milk ricotta and skip the low-fat versions; the fat is what keeps the gnudi tender instead of rubbery. Look at the ingredient label before you buy: brands that list milk and whey first.
  • Fresh ricotta from an Italian specialty shop or cheese counter has better flavor and less added moisture than most tubs from the regular dairy case, so use it when you can find it.
  • Egg yolks bind the dough and add richness without adding the extra liquid a whole egg would bring; that liquid is exactly what you spent 30 minutes draining out of the ricotta, so save the whites for another recipe.
  • Flour holds the dough together, and the type you choose changes the texture more than any other ingredient here. I get into the specifics in the substitutions section below, since it is worth understanding before you start measuring.
  • Salt seasons the dough itself, not just the boiling water; a pinch mixed into the ricotta and egg yolks before you add the flour makes sure every bite is seasoned, not just the outside.

Recipe Card?

To find the full printable recipe with specific measurements and directions CLICK HERE to go to the recipe card.

Substitutions for Ricotta Gnudi

Gnudi dough is forgiving in a few places and unforgiving in others. Here is what I have found actually works.

Cake Flour Instead of All-Purpose
Cake flour runs 6 to 8 percent protein, which is exactly why it makes the most tender gnudi of any flour I have tried; less protein means less gluten development, and less gluten development means a more tender bite. If you already keep 00 flour on hand for homemade pasta, that is a solid middle ground at roughly 9 to 10 percent protein.

All-purpose flour runs 10 to 12 percent protein, almost double cake flour, and you will feel the difference in a firmer, slightly chewier gnudi. I would rather eat all-purpose flour gnudi than no gnudi at all, so do not let this stop you if cake flour is not in your pantry.

Gluten-Free Flour Instead of Wheat Flour
A cup-for-cup gluten-free blend swaps into this dough in equal parts with no other changes needed. My gluten-free readers point to Cup4Cup most often, and tapioca flour works too, the same way I use it in my pão de queijo. Either option keeps the dumpling structure intact.

Part-Skim Ricotta Instead of Whole Milk Ricotta
You gain nothing here and lose richness; part-skim ricotta carries more water relative to fat, which means a longer drain time and a gnudi that is closer to dense than pillowy. This is the one swap on this list I would skip if you can help it.

My Best Substitution Tip

If whole milk ricotta is not available, drain the part-skim version longer than 30 minutes, closer to an hour, before you mix the dough.

What type of gluten-free flour can be used?

I would use your preferred gluten-free flour blend or substitute. If you are unsure, I would suggest tapioca flour just like you would use in Pão de queijo.

Preparing the Ricotta for Pillowy Gnudi

Ricotta holds a surprising amount of whey, and that moisture is the enemy of a good gnudi. Press it out first and the rest of the recipe comes together in minutes. Here is exactly how I do it.

Line a dinner plate with 3-4 layers of paper towels.

whole milk ricotta cheese resting on a paper towel to drain.

Spread

Spread the ricotta over the towels in an even layer, then add a second layer of 3-4 paper towels on top.

pressing ricotta for gnudi

Stack

Place another dinner plate on the stack, then set something with real weight to it, such as a jar of sauce, on top of the second plate. You want steady pressure, not just the weight of the plate alone.

Wait 30 minutes

Wait 30 minutes, up to overnight, for the moisture to press out of the cheese. Thirty minutes on the counter is fine, but if you are draining longer than that, move the whole stack to the refrigerator; dairy should not sit out at room temperature for more than about two hours.

paper towel being puilled back to reveal drained ricotta cheese for gnudi.

Check

Peel back the damp paper towels and use the pressed ricotta right away. In my kitchen, a 30-minute press pulled about 4 ounces of whey out of the cheese; the ricotta should feel noticeably firmer and less wet than when you started, almost like softened cream cheese.

How to Make Ricotta Gnudi (Ricotta Gnocchi)

Once the ricotta is drained, the dough itself takes about ten minutes to bring together. Work gently here; this is not a bread dough you need to develop; it is the opposite.

Ricotta Gnudi Recipe (Ricotta Gnocchi) on a white plate
A close-up of homemade ricotta cheese wrapped in a white cloth, partially uncovered, resting on a flat surface.

 Press the Ricotta

Drain the ricotta using the paper towel method above, then transfer it to a large bowl with 3 egg yolks. The ricotta should look thick and hold its shape on the spoon, not slump like yogurt.

A metal bowl containing ricotta cheese and three raw egg yolks, with a hand holding the rim of the bowl.

Mix the Ricotta and Egg Yolks

Using a rubber scraper or wooden spoon, stir the egg yolks into the drained ricotta until the mixture is smooth and pale yellow throughout, with no streaks of egg remaining.

Add the Salt and Flour

Sprinkle the salt over the ricotta mixture first, then add the flour.

A hand mixes flour and other baking ingredients in a metal bowl with a red spatula.

Fold the Dough Together

Using gentle folds, not stirring, work the flour and salt into the ricotta and egg mixture just until you no longer see dry flour. This is the step where most people overwork the dough without realizing it; a shaggy, slightly uneven dough is exactly what you want, and skipping this warning is one of the biggest reasons gnudi fall apart in the pot.

A red spatula sits in a metal bowl containing a yellow, creamy mixture, partially scraped from the sides.

Stop Before It Looks Smooth

The dough will be sticky, and that is correct; do not add flour to the bowl to make it easier to handle. Keep extra flour on your work surface instead, and dust your hands and the dough as you shape it.

Shape the Gnudi

You have two ways to shape the dumplings: rolling by hand or piping with a bag. Both give you the same dough, just a different look on the plate. I reach for a piping bag fitted with a coupler or a large open round tip most of the time because the shapes come out even without much effort, but hand-rolled gnudi are the more traditional route if you want that rustic, homemade shape.

Move on to rolling the dough by hand or piping it, whichever method you prefer; both are covered below.

Seasonal Favorite

Baked lattice top crust on an apple pie made with the Crisco pie crust recipe, showing flaky layers in the fluted edge.

This is my award-winning Crisco pie crust recipe; flaky, tender, and made with simple ingredients you already have.

Crisco Pie Crust

How to hand roll gnudi:

hand rollling gnudi in a floured hand

Roll the Dough into a Log

With floured hands on a floured surface, gently roll the dough into a log about 12 inches long and roughly ¾ inch thick.

Cut the Log into Strips

Using a knife, divide the dough in half lengthwise, then slice each half in half again; you will end up with 4 long ropes of dough.

Uncooked gnocchi pieces dusted with flour are spread out on a floured surface, ready for cooking.

Cut Bite-Sized Pieces

Using a quick chopping motion, slice each rope into pieces about an inch long.

A hand holds a small, oval piece of uncooked gnudi dough, with flour on the fingers and scattered on the surface below.

Round Each Piece

Flour your hands and the dough pieces again, then roll each one gently between your palms into a small dumpling. A little unevenness here is normal, and traditional.

How to Pipe Gnudi Dumplings:

Fit the Piping Bag

 Fit a piping bag with a wide, open round tip, or just use the coupler alone in the bottom of the bag.

Flour Your Surface

Dust a cookie sheet or work surface generously with flour.

Small balls of dough are arranged on a floured dark surface, ready for baking or further preparation.

Pipe the Dough

Pipe the dough into 1-inch dollops. For larger dumplings, press harder and hold slightly longer to build a ball closer to golf-ball size; remember the dough nearly doubles once it hits boiling water, so shape smaller than you think you want.

A baking sheet is covered with floured, uncooked gnocchi dough pieces, ready to be cooked.

Dust and Shape

Dust your hands with more flour and sprinkle each dollop with a little more flour, then pick up one piece at a time and shape it gently in your hand. Shaking it lightly in your palm, almost like you are shaking a die, rounds it out nicely; flour your hand between each piece so the dough does not stick.

Transfer to a Floured Sheet

Set each finished gnudi on a well-floured cookie sheet until you are ready to cook them.

How to cook gnudi

Boil and Salt the Water

Bring a large pot of water to a rolling boil and salt it generously, the same way you would for pasta.

Cook in Batches

Drop the gnudi into the water in small batches so they have room to float freely; overcrowding the pot is the other common reason gnudi fall apart, since they need space to firm up without bumping into each other.

Yellow gnocchi pieces boiling in a pot of water, with bubbles rising to the surface.

Watch for Floating

The gnudi are done rising when they float to the surface, usually within a minute or two. Once they float, let them simmer for 2 more minutes; you are looking for a dumpling that holds its shape but gives easily when pressed with the back of a spoon.

A white plate of pillowy gnocchi and delicate gnudi topped with red tomato sauce, grated Parmesan cheese, and a basil leaf sits on a wooden table.

Remove and Serve

Lift the cooked gnudi out with a slotted spoon and move them straight into your sauce or serving dish.

Pro Tip

Do not let the cooked gnudi sit in the empty pot, or they will stick to each other and to the bottom. Ask me, how I know!!?

Can I freeze gnudi?

Gnudi freeze well, and it is the best way to get ahead on this recipe if you are meal planning or cooking for a crowd. Dust a baking sheet with flour, space the uncooked gnudi out so they are not touching, and freeze until firm, about 2 to 3 hours depending on size.

gnudi on a sheet tray ready to be frozen

Once they are solid, transfer them to a zip-top bag or airtight container, pressing out as much air as you can; they will hold in the freezer for up to a month without any real change in texture.

How to Cook Frozen Gnudi

  1. Boil and Salt the Water. Bring a large pot of water to a boil and salt it well.
  2. Cook from Frozen. Drop the frozen gnudi directly into the boiling water; there is no need to thaw them first, and thawing actually makes them more likely to fall apart.
  3. Simmer After Floating. Once they float, let them simmer for 1 to 3 minutes longer than you would for fresh gnudi, since they are starting from frozen instead of room temperature.
  4. Drain and Serve. Remove with a slotted spoon, drain briefly, and serve right away.

Top Tips For Making Gnudi

  • Drain the ricotta fully before you start. The less moisture left in the cheese, the less sticky your dough will be and the easier it is to shape.
  • Fold in ½ cup of fresh grated parmesan for extra flavor if you want it; start there before adding more, since too much makes the dough harder to shape.
  • Remember the dough nearly doubles once it hits boiling water, so shape your gnudi a little smaller than you think you want them.
  • Do not overwork the dough. Fold gently until it just comes together; if it feels too sticky to shape, flour your hands and work surface rather than adding more flour to the bowl.
  • Cook a single test gnudi before you shape the whole batch. Drop it in the water first; if it falls apart, fold a tablespoon more flour into the remaining dough before shaping the rest.

Serving Suggestions

Gnudi are simple enough to dress up or down depending on the night. Here are the pairings I come back to most.

Ricotta Gnudi Recipe (Ricotta Gnocchi)
  • Saute the cooked gnudi in brown butter until the butter smells nutty, then finish with fresh sage leaves; the sage crisps slightly in the hot butter and adds a savory crunch against the soft dumpling.
  • Top a bowl with a generous scoop of bolognese and a shower of parmesan for a heartier, meat-forward plate.
  • Toss the gnudi with butter and sage, then finish with torn fresh mozzarella, cracked black pepper, and fresh basil for a lighter, summer-leaning plate.

Your favorite jarred or homemade marinara works too, and it is the fastest route to the table on a weeknight.

Frequently asked questions, answers and tips:

What is the difference between gnocchi and gnudi?

Gnocchi is made with cooked, riced potato as its base, while gnudi is made with drained ricotta cheese instead. Both are shaped into small dumplings and boiled, but gnudi has a softer, more delicate texture since there is no starchy potato involved.

What does gnudi mean, and how do you pronounce it?

Gnudi is pronounced "NOO-dee." It translates roughly to "naked" in Italian, since these dumplings are essentially ravioli filling without the pasta wrapped around it.

Why is my gnudi falling apart in the water?

This almost always comes down to one of three things: the ricotta was not drained long enough, the dough was overworked until it turned smooth instead of staying slightly shaggy, or too many gnudi went into the pot at once and they broke against each other. Drain fully, fold gently, and cook in small batches, and this should not happen.

Can I make gnudi dough ahead of time?

Yes. Shape the gnudi and refrigerate them on a floured tray, covered loosely, for up to a few hours before cooking. For anything longer than that, freeze them using the method above; freezing holds the texture better than refrigerating the raw dough for a full day.

Do I need any special equipment to make gnudi?

No. A large bowl, a rubber spatula, and a knife will get you through hand-rolled gnudi. A piping bag with a wide round tip makes shaping faster if you have one, but it is not required.

Why does the type of flour matter so much?

Flour protein content controls how tender or chewy the finished gnudi is; lower-protein flours like cake flour make a more tender dumpling. I break down the exact percentages and my recommendation in the substitutions section above.

Ricotta gnudi are dumplings of ricotta cheese, flour, egg yolk and salt, similar to their cousin gnocchi but made with ricotta cheese instead of potato.

Ricotta Gnudi

Gnudi are delicate, pillowy dumplings of ricotta cheese, flour, egg yolk and salt, similar to their cousin gnocchi but made with ricotta cheese instead of cooked potato.
No ratings yet
Print Pin Rate
Course: Easy Recipes
Cuisine: Italian
Keyword: ricotta gnocchi recipe
Prep Time: 12 minutes minutes
Cook Time: 3 minutes minutes
Additional Time: 30 minutes minutes
Total Time: 45 minutes minutes
Servings: 100 pieces
Calories: 281
Author: Sarah Mock

Ingredients

  •  
    16 ounces Ricotta Cheese
  •  
    3 egg yolks
  •  
    ⅔ Cups cake flour
  • A Morton Salt container with a blue label featuring a girl in a yellow dress holding an umbrella, with salt pouring out of a container-an essential ingredient for perfectly seasoning dishes like Chicken Cordon Bleu.1 Teaspoon salt
Follow Savoring The Good On PinterestFollow @SavoringTheGood or tag #STGRecipes!

Instructions

  • Press the moisture out of the ricotta. See notes for detailed instructions.
    A close-up of homemade ricotta cheese wrapped in a white cloth, partially uncovered, resting on a flat surface.
  • In a large bowl, using a rubber scraper or wooden spoon, mix together the egg yolks and the drained ricotta cheese.
    A metal bowl containing ricotta cheese and three raw egg yolks, with a hand holding the rim of the bowl.
  • Sprinkle in the salt and the flour.
  • Using gentle folds, incorporate the flour and salt into the ricotta and egg mixture. 
    A hand mixes flour and other baking ingredients in a metal bowl with a red spatula.
  • Do not overwork the dough. It will be sticky. Extra flour can be used as you roll out the gnudi.
    A red spatula sits in a metal bowl containing a yellow, creamy mixture, partially scraped from the sides.
  • Continue on to rolling or piping out the gnudi.

How to hand roll gnudi:

  • Gather the dough and with floured hands on a floured surface, gently roll the dough into a log about 12 inches in length.
  • Using a knife, divide the dough in half lengthwise and then slice each half in half again. You will now have 4 long ¼ logs.
  • Using a quick chopping motion, slice each log into bite-sized pieces, about an inch in length.
    Uncooked gnocchi pieces dusted with flour are spread out on a floured surface, ready for cooking.
  • Flour your hands and the pieces of dough again to roll them into little dumplings.

How to pipe out gnudi dumplings:

  • Fit a piping bag with a wide open, round tip or just the coupler in the bottom of the bag.
  • Dust a cookie sheet or surface with flour.
  • Pipe out 1 inch dollops of dough. For larger dumplings press harder and longer to make a golf ball sized dumpling.
    Small balls of dough are arranged on a floured dark surface, ready for baking or further preparation.
  • Dust your hands with more flour and sprinkle the dollops with more flour. 
  • Pick up each gnudi and form it gently in your hand. I found that shaking them in your hand as if you were shaking dice works well. Just be sure to do one at a time and flour your hand frequently.
    A hand holds a small, oval piece of uncooked gnudi dough, with flour on the fingers and scattered on the surface below.
  • Place on a well-floured cookie sheet until ready to boil.

How To Cook Gnudi

  • Bring a large pot of water to boil and salt the water.
  • Drop the gnudi in the water and wait for them to float to the top.
    Sliced plantains boiling in water inside a white pot on a stove, resembling the preparation of gnudi with their soft and tender texture.
  • Simmer for 2 minutes and remove them from the pot with a slotted spoon.
  • Serve with the sauce of your choice.
    A white plate of pillowy gnocchi and delicate gnudi topped with red tomato sauce, grated Parmesan cheese, and a basil leaf sits on a wooden table.
Want to share when you made this recipe?Follow @SavoringTheGood & tag #STGRecipes!
Nutrition Facts
Ricotta Gnudi
Serving Size
 
25
Amount per Serving
Calories
281
% Daily Value*
Fat
 
13
g
20
%
Saturated Fat
 
7
g
44
%
Polyunsaturated Fat
 
5
g
Cholesterol
 
173
mg
58
%
Sodium
 
648
mg
28
%
Carbohydrates
 
24
g
8
%
Protein
 
17
g
34
%
* Percent Daily Values are based on a 2000 calorie diet.
**Nutritional facts are just estimates. Please utilize your own brand nutritional values to double check against our estimates.
Like this recipe card? Want one for your site?Check out WP Recipe Maker!


Sarah Mock of savoringthegood.com headshot 2022

I am Sarah Mock. Welcome!

Sarah Mock is a classically trained Chef and a graduate of Johnson & Wales University. A culinary blogger for 17 years, Sarah helps the home cook prepare her recipes with professional results.

Get to know me

as seen in:

Logos of Hersheyland, ABC News, and Good Day PA are showcased in a seamless row, providing a snapshot of popular brands.

Hersheyland Nightline Good Day Pa!

The vibrant design showcases the iconic logos of Pinterest, Rachael Ray, and Jell-O set against a bold red background. Sorry, the provided description doesn't offer enough detail to suggest important SEO keywords.

Pinterest Rachael JELL-O

DoubleTree Cookie Recipe (Just Like the Hotel!)

doubletree cookies in a stack

The DoubleTree Hotel's famous chocolate chip cookies are legendary for their warm, soft, and chewy texture, with a hint of oatmeal and a generous amount of walnuts.

Stack of 6 Double Tree Cookies on a plate with a glass of milk in the background, tray of baked cookies behind that

This copycat recipe, shared by DoubleTree during the 2020 event, brings the taste of vacation right to your kitchen. Perfect for cookie lovers who enjoy a thick, bakery-style treat! New to my cookie tray this year will be Biscoff Butter Cookies.

  • DoubleTree cookies are the most amazing warm, soft chocolate chip cookies that are thick and chewy.
  • The cookies are bigger than a typical chocolate chip cookie and have a touch of oatmeal and are full of walnuts.
  • My family likes for me to substitute in pecans for the walnuts but both variations are equally delicious.
  • My son loves when I freeze the dough so he can bake fresh cookies anytime!
A zip-top bag filled with multiple balls of chocolate chip cookie dough, inspired by the famous DoubleTree cookie recipe, sits on a dark granite countertop.

Best chocolate chip cookie recipe ever!

Have made these many times, always a favorite. These i decided to freeze so my son and family can bake when the want fresh warm cookies.

Pinterest: Sylvia M

Ingredients needed:

Use room-temperature ingredients for even mixing. Don't over mix the dough-this keeps the cookies tender.

doubletree cookies ingredients

Wet Ingredients

  • 1 cup (2 sticks) unsalted butter, room temperature
  • ¾ cup granulated sugar
  • ¾ cup packed brown sugar
  • 2 large eggs, room temperature
  • 1 ½ teaspoons vanilla extract
  • ¼ teaspoon lemon juice

Dry Ingredients

  • 2 ¼ cups all-purpose flour (270g)
  • ½ cup rolled oats
  • 1 teaspoon baking soda
  • 1 teaspoon salt
  • ¼ teaspoon cinnamon

Mix-Ins

  • 2 ½ cups semi-sweet chocolate chips
  • 1 ½ cups chopped walnuts (or pecans)

Recipe Card?

To find the full printable recipe with specific measurements and directions CLICK HERE to go to the recipe card.

Substitute Options

Can I use quick oats instead of old-fashioned oats? - Yes, but the texture may be slightly different.

Can I omit the nuts? - Yes, but the cookies will lack the signature DoubleTree flavor and texture.

How to make the doubletree cookie recipe

doubletree cookies stacked 5 high on a grey rectangle plate, glass of milk in the background

Preheat the oven

Preheat to 300°F (150°C). Line baking sheets with parchment paper.

A mixing bowl containing freshly mixed dough, with a paddle attachment still in place, held at an angle by a hand.

Cream The Butter And Sugar

In a stand mixer or large bowl, cream the butter, granulated sugar, and brown sugar on medium speed for 2 minutes, until light and fluffy.

A hand holds a mixing bowl with a paddle attachment, containing partially mixed dough with visible ingredients, such as eggs. Various baking ingredients are seen on a wooden surface in the background.

Add wet ingredients

Add the eggs, vanilla extract, and lemon juice. Mix on low speed until combined.

A hand holds a mixing bowl containing partially mixed dough and a paddle attachment.

Add dry ingredients

In a separate bowl, whisk together the flour, oats, baking soda, salt, and cinnamon. Gradually add to the wet ingredients, mixing on low speed until just combined.

A wooden spoon stirs a bowl of cookie dough mixed with chocolate chips and nuts, resting on a wooden table.

Fold in mix-ins

Stir in the chocolate chips and walnuts by hand until evenly distributed.

Six scoops of cookie dough placed on a green silicone baking mat on a large metal baking sheet.

Scoop the dough

Use a ¼-cup measuring cup or large cookie scoop to portion the dough onto the prepared baking sheets, spacing them about 2 inches apart.

A baking tray with nine freshly baked chocolate chip cookies resting on it.

Bake

Bake for 20-25 minutes, or until the edges are golden brown and the centers are still soft.

Cool

Let the cookies cool on the baking sheet for 10 minutes, then transfer to a wire rack to cool completely.

The recipe was originally found at DoubleTree by Hilton.

Did you make this recipe?

Do you have feedback that would be helpful to others? If so can help this small business owner by leaving a rating and a review in the comments section? Thank you for being part of the Savoring The Good Community. ~ Sarah

Freezing Instructions

scoops of raw cookie dough tightly packed together in a single layer on a sheet tray for freezing
  • To freeze unbaked cookies, scoop the dough onto a baking sheet and freeze until firm. Transfer to an airtight container or freezer bag. Bake from frozen at 300°F for 22-28 minutes.
  • To freeze baked cookies, store in an airtight container or freezer bag for up to 3 months. Thaw at room temperature or warm in the oven.

Tips for Success

  • Use room-temperature ingredients for even mixing.
  • Don't over mix the dough-this keeps the cookies tender.
  • For softer cookies, bake for the shorter time in the range.

Seasonal Favorite

Baked lattice top crust on an apple pie made with the Crisco pie crust recipe, showing flaky layers in the fluted edge.

This is my award-winning Crisco pie crust recipe; flaky, tender, and made with simple ingredients you already have.

Crisco Pie Crust

FAQ's and Tips

Can this recipe be doubled?

Yes, but the dough will be very thick, so you may need to mix in the chocolate chips and nuts by hand.

doubletree cookies in a stack

DoubleTree Chocolate Chip Cookies (Official Copycat Recipe)

Make DoubleTree Hotel's famous chocolate chip cookies at home with this official copycat recipe! Soft, chewy, and loaded with chocolate chips and walnuts.
4.78 from 35 votes
Print Pin Rate
Course: Cookie Recipes
Cuisine: American
Keyword: DoubleTree Cookie recipe, DoubleTree Cookies
Prep Time: 10 minutes minutes
Cook Time: 25 minutes minutes
Additional Time: 1 hour hour
Total Time: 1 hour hour 35 minutes minutes
Servings: 26
Calories: 549
Author: Sarah Mock

Ingredients

  • A rectangular 8 oz package of Kerrygold Pure Irish Butter, unsalted, with a green and gold label and Irish grass-fed cow branding-perfect for creating delicious Saint Patrick's Day cupcakes.½ pound Butter softened (2 sticks)
  •  
    ¾ Cup + 1 tablespoon granulated sugar
  • Domino Light Brown Sugar box, 16 oz, featuring a slice of Blackberry Dump Cake topped with whipped cream and berries, and a Non-GMO Project Verified label in the bottom right corner.¾ Cup Brown Sugar lightly packed
  • A single brown chicken egg, perfect for making Chicken Cordon Bleu, stands upright on a white background.2 Egg
  • easy sous vide vanilla extract1 ¼ teaspoons Vanilla Extract
  •  
    ¼ Teaspoon freshly squeezed lemon juice
  • A 5-pound bag of King Arthur Baking Company unbleached bread flour with 12.7% protein content, labeled for ideal use in bread, pizza crust, and rolls-perfect for creating hearty sides like homemade loaves to serve alongside a comforting slowcooker sausage casserole.2 ¼ Cups Flour, All Purpose
  •  
    ½ Cup rolled oats
  • Arm & Hammer Pure Baking Soda box, 8 oz size, with text promoting it as America's #1 trusted brand and stating 1 Teaspoon Baking Soda
  • A Morton Salt container with a blue label featuring a girl in a yellow dress holding an umbrella, with salt pouring out of a container-an essential ingredient for perfectly seasoning dishes like Chicken Cordon Bleu.1 Teaspoon salt
  • A plastic container of McCormick Ground Cinnamon with a red lid and label showing product details in English and Spanish-perfect for adding warm flavor to your favorite recipes, including Keto Granola.Pinch cinnamon
  •  
    2 ⅔ Cups Nestle Tollhouse semi-sweet chocolate chips
  •  
    1 ¾ Cup chopped walnuts
Follow Savoring The Good On PinterestFollow @SavoringTheGood or tag #STGRecipes!

Instructions

  • Preheat oven to 300°F
  • Cream butter, sugar and brown sugar in the bowl of a stand mixer on medium speed for about 2 minutes. 
  • Add eggs, vanilla and lemon juice, blending with mixer on low speed for 30 seconds, then medium speed for about 2 minutes, or until light and fluffy, scraping down bowl. 
  • With mixer on low speed, add flour, oats, baking soda, salt and cinnamon, blending for about 45 seconds. Don't overmix. 
  • Remove bowl from mixer and stir in chocolate chips and walnuts.
  • Portion dough with a scoop (about 3 tablespoons) onto a baking sheet lined with parchment paper about 2 inches apart. 
  • Bake for 20 to 23 minutes, or until edges are golden brown and center is still soft. 
  • Remove from oven and cool on baking sheet for about 1 hour.

Notes

Recipe originally found at DoubleTree by Hilton.
Make sure the butter is room temperature. Room temperature butter is best for creaming.
Use a ¼ cup cookie scoop for large cookies. 
Allow the cookies to rest and cool on the cookies sheet until they are room temperature. The heat from the tray will continue to slowly cook them without over drying them.
Fold in the chocolate chips and buts by hand. The dough is thick and a mixer may not be up to the task. 
Bake the cookies at 300 for a longer time to keep them soft.
 
This recipe can be doubled but I don't have a mixer big enough to hold a double batch. Also the cookie batter is very thick and hand mixing is needed to fold in the chocolate chips and the nuts. My Kitchen Aid Mixer was crying when I tried to add the chips and nuts, so folding them by hand was needed.
Want to share when you made this recipe?Follow @SavoringTheGood & tag #STGRecipes!
Nutrition Facts
DoubleTree Chocolate Chip Cookies (Official Copycat Recipe)
Serving Size
 
2
Amount per Serving
Calories
549
% Daily Value*
Fat
 
37
g
57
%
Saturated Fat
 
17
g
106
%
Trans Fat
 
1
g
Polyunsaturated Fat
 
18
g
Cholesterol
 
66
mg
22
%
Sodium
 
390
mg
17
%
Carbohydrates
 
55
g
18
%
Sugar
 
31
g
34
%
Protein
 
8
g
16
%
* Percent Daily Values are based on a 2000 calorie diet.
**Nutritional facts are just estimates. Please utilize your own brand nutritional values to double check against our estimates.
Like this recipe card? Want one for your site?Check out WP Recipe Maker!

Sarah Mock of savoringthegood.com headshot 2022

I am Sarah Mock. Welcome!

Sarah Mock is a classically trained Chef and graduate of Johnson & Wales University. A culinary blogger for 15 years Sarah helps the home cook prepare her recipes with professional results.
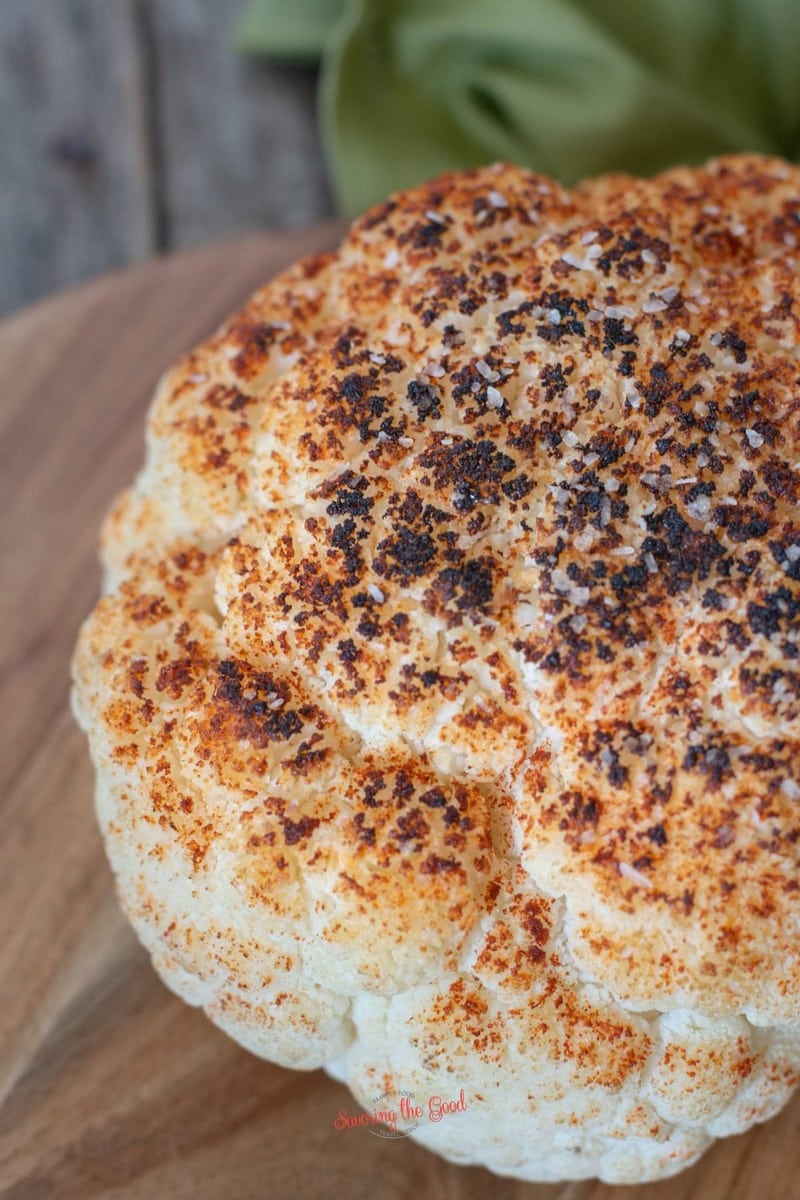
Get to know me

Free Disney Zoom Backgrounds To Download

Disney Zoom Backgrounds 4 examples

These Disney zoom backgrounds will bring a little bit of extra magic to your video conference. Choose your one from your favorite Disney Resort, Disney Theme park or Disney film and you are no longer in your virtual meeting!Disney Castle Zoom Backgrounds 4 examplesThis post is a companion piece to my other Zoom backgrounds piece, Pandora: The World of Avatar Backgrounds and the Zoom backgrounds for kids post. If you are not finding what you want here, one of those other posts is sure to have something that will work for you.

Disney Castle Zoom Backgrounds

  • Cinderella Castle at sunrise
  • Disneyland Paris Firework Spectacular
  • Shanghai Disney Castle 
  • Sleeping Beauty Castle, Disneyland Resort 2020
  • Tokyo Disney Resort
  • Shanghai Disney Resort in the morning

Star Wars Galaxy's Edge Backgrounds 4 on the page

Star Wars: Galaxy's Edge Backgrounds

  • Stormtroopers
  • Poe Dameron's X-Wing
  • Intersystem Transport Ship
  • X-wing Starfighters Soar Above Star Wars: Galaxy's Edge
  • A-wing Starfighter at sunrise
  • A-Wing Starfighter at night
  • Millennium Falcon
  • Millennium Falcon: Smugglers Run
  • Millennium Falcon: Smugglers Run 2

Disney Parks Backgrounds

Disney Parks Backgrounds:

  • Disney Springs
  • Pandora
  • Tokyo DisneySea Zoom Background
  • Hong Kong Disneyland Resort Entrance
  • Epcot Zoom Background
  • Pixar Pier Zoom Background
  • Pandora at sunrise
  • Alani Resort

How to change your zoom background on mobile:

  1. Download the Zoom app for Mac or Windows
  2. Open the app and sign in
  3. In the upper right corner, click your profile picture and then click on "Settings"
  4. In the left menu, click "Virtual Background" (if you don't see this, log in to the Zoom website, go to "Settings" and toggle on "Virtual Background")
  5. In the "Virtual Background" menu, click the (+) icon
  6. Select and upload your new background.

How to download background via desktop:

  1. Find an image you would like to download.
  2. Right click the image.
  3. Select Save Image.
  4. In the left menu, click "Virtual Background" (if you don't see this, log in to the Zoom website, go to "Settings" and toggle on "Virtual Background")
  5. In the "Virtual Background" menu, click the (+) icon
  6. Select and upload your new background.

Disney/Pixar zoom backgrounds graphic

Disney Movie Zoom Backgrounds:

  • A Bugs Life
    • Meadow
  • Aladin
    • Castle at Agrabah
    • Castel Garden View
  • Beauty & The Beast 
    • The Library
  • Brave
    • Brave Zoom 1
    • Brave Zoom 2
    • Brave Forrest
  • Cars
    • Lightning McQueen
  • Coco
    • City Street At Night
  • Finding Nemo
  • Frozen On Broadway
    • Frozen Zoom 1
    • Frozen Zoom 2
    • Frozen Zoom 3
    • Frozen Zoom 4
  • Incredibles -
    • Parr Family Living Room
  • Inside Out
    • Console
  • Moana
    • Beach Front
  • Monsters Inc.
    • Original Scare Floor 
    • Scare Floor
  • Onward
    • New Mushroomton
    • Guinevere
    • Manticore's Tavern
  • Pocohantas
    • Forrest View
    • Colors of the Wind
  • Ratatouille
    • Kitchen Counter
  • Tangled
    • The Lanterns
  • Toy Story
    • Cloud Wallpaper
  • Up
    • Ellie & Carl's Living Room
  • Sleeping Beauty
    • Castle 1
    • Castle 2
    • Forrest House
  • Snow White
    • Snow White Cottage
  • Wall-e
    • Command Center

Easy Steps To Make A Homemade Sourdough Starter From Scratch

Sourdough Starter in a glass mason jar after 4 day

Making a sourdough starter from scratch is easily made with just 3 ingredients and time. Follow my simple sourdough starter maintenance schedule so you can enjoy a fresh loaf of homemade sourdough bread whenever you want. 

Easy Homemade Sourdough Starter in a mason jar.

What is a sourdough starter?

Sourdough is the oldest leavener known in baking. Before we could purchase dry or cake yeast in the grocery store, bakers would create a sourdough starter consisting of flour water and wild yeast to leaven bread. This mixture was maintained and fed on a daily basis, shared with the community and passed on through generations. 

Wild yeast is found in the air of most bakeries and home where flour is used but you can also see wild yeast in the form of the whiteish film on the surface of grapes. Using organic, fresh ground flour will also yield a higher percentage of wild yeast as these products are not stripped down, bromated, de-braned and enriched.

But do not worry if you are not sure if there is yeast in your environment. A pinch and I mean a pinch, of dry or cake yeast will go a long way. It will give the starter the jump that it needs to get growing and then the natural yeasts in your environment will take over. 

½ an onion studded with cloves and a bay leaf

Bonus flavors for making a starter

One of the greatest tips I got from my Chef instructor at Johnson & Wales University when it comes to making a flavorful sourdough is to add a piece of an onion studded with cloves and a bay leaf. Just cut a piece of onion, as seen above, lay a bay leaf on it and press a few cloves into the bay leaf. 

The onion will give an extra layer of tang and the cloves and bay leaf will give it layers of savory flavor. This step is completely optional but I wanted to share my little sourdough starter secret with you. Also, you will be seeing the onion in the following photos. 

4 day progression of sourdough starter in glass jars and dark grey lids

How to make a fermented sourdough starter from scratch

Recipe Card?

To find the full printable recipe with specific measurements and directions CLICK HERE to go to the recipe card.

Baking is a science and ingredients should be weighted, including water, for best results. But I know that every home baker does not own a scale so I will include both the weigh amounts as well as the dry measure amounts. This is such a small scale recipe that it will be very forgiving. 

Day 1 of starter

day 1 of Sourdough Starter in a jar
  1. In a quart jar with a lid whisk together:
    • ½ cup spring water (4 ounces)
    • ⅔ cup flour (3 ounces)
    • Pinch of dry yeast (less than 1/16 of a teaspoon) told you it was just a pinch!
  2. Using a rubber spatula, scrape down the sides and place the lid on the jar.
  3. Store in a moderately warm place for 24 hours (74-80 F is ideal but countertop or on top of the refrigerator will also work)

Day 2 of starter

day 2 of Sourdough Starter in a jar

Open your container and observe the starter. It should show some signs of growth and have a sweet yet musty smell. You are welcome to take a little taste to see if it is starting to take on a tangy taste that sourdough is known for.

  1. To the jar whisk in:
    • ½ cup spring water (4 ounces)
    • ⅔ cup flour (3 ounces)
  2. Stir vigorously to incorporate fresh oxygen, the water and flour. 
  3. Using a rubber spatula, scrape down the sides and place the lid on the jar.
  4. Store in a moderately warm place for 24 hours (74-80 F is ideal but countertop or on top of the refrigerator will also work)

Day 3 of starter

day 3 of Sourdough Starter in a jar

There should be BIG changes in the jar when you look at it. You will be able to see bubbles on the surface and if you are using a clear container, you should be able to observe different sizes of bubbles in the starter.  The starter is now alive and thriving. If you would like to see more, insert a spoon into the mass, pull up and you should see short glutenous strands sticking to the spoon.

  1. Time to feed the starter:
    • Add ½ cup spring water (4 ounces)
    • ⅔ cup flour (3 ounces)
  2. Stir vigorously to incorporate fresh oxygen, the water and flour. 
  3. Using a rubber spatula, scrape down the sides and place the lid on the jar.
  4. Store in a moderately warm place for 24 hours (74-80 F is ideal but countertop or on top of the refrigerator will also work)

Seasonal Favorite

Baked lattice top crust on an apple pie made with the Crisco pie crust recipe, showing flaky layers in the fluted edge.

This is my award-winning Crisco pie crust recipe; flaky, tender, and made with simple ingredients you already have.

Crisco Pie Crust

Day 4 of starter

Day 4 of Sourdough Starter in a jar

On day 4 of the starter fermentation, the sourdough starter is just about ready to be used to make a sourdough loaf of bread. Day 4 will also have the starter double in size from day 3. This is why you need at least a quart-sized container. The starter will have a well-established honeycomb structure of large and small bubbles. If you taste the starter, it will have a tangy, sour flavor but it should not be bitter.

  1. One last time add:
    • ½ cup spring water (4 ounces)
    • ⅔ cup flour (3 ounces)
  2. Stir vigorously to incorporate fresh oxygen, the water and flour. 
  3. Using a rubber spatula, scrape down the sides and place the lid on the jar.
  4. Allow the starter to mature 8 more hours.
  5. If not using right away, store in the refrigerator for up to 3 days, until you are ready to make bread.

Frequently asked questions, answers and tips:

How do you start a sourdough starter?

Start a sourdough starter by combining flour, water and a pinch of yeast. Stir vigorously, cover and let set in a room temperature place for 24 hours. 

How long does it take to start a new sourdough starter?

Allow yourself 4 days to propagate a proper sourdough starter, longer if you want a more developed flavor profile but 4 days will get you started. In keeping with the old saying 'good things come to those who wait', waiting on a starter will be well worth the wait. There are approximately  40 BILLION cells in 2 ounces of yeast.

When undisturbed in a moist environment and kept at a temperature of 75-80 degrees they will continually eat and reproduce every half hour. As they reproduce they will produce carbon dioxide and alcohol. Basically they are eating sugar (the protein in the flour) and 'farting' and getting drunk. It is a party in the starter. 

Does the type of flour matter?

You will want to use a grain-based flour for your starter. Bread flour, rye flour, whole wheat flour, barley flour, all-purpose flour and unbleached flour all are good choices. As stated above, organic is great if you want to try and develop your starter from wild yeast. 

Do you stir sourdough starter before using?

You may notice that there is a bit of liquid laying on top of your starter. I stir it back in for a more intense flavor. You are welcome to pour it off before feeding the starter, but in truth, there is no reason for this extra step. 

What is the best container to keep the sourdough starter in?

I like to keep my starter in a glass mason jar with a screw-top lid, but with the lid placed, not screwed ontop. But any nonreactive container with a lid will work. Glass, ceramic or stainless steel are all options.

Does the type of water make a difference in the starter?

I suggest spending a dollar or two to purchase a gallon of spring water from the grocery store. Note that spring water is different than distilled water. Your tap water may have been treated with fluoride and purifiers and while these treatments can be good for human consumption, they can be bad for yeast propagation. 

Should the jar be airtight?

The jar should not be airtight. Simply place the lid on the jar or even cover it with a clean towel to keep stuff out of the starter. Starters need to 'breathe' and will be doubling in volume each day. There is a slight chance of a jar cracking if the lid is too tight due to the pressure of the carbon dioxide build-up. 

  • A serving of lazy lasagna is being lifted from a slow cooker with a metal spatula. The cheesy lasagna is topped with melted cheese and sprinkled parsley.
    Lazy Lasagna with Frozen Ravioli
  • Slow cooker chicken tikka masala in a white bowl over rice, garnished with cilantro
    Slow Cooker Chicken Tikka Masala
  • Trays of microgreens at various growth stages, with green and pink stems, are growing densely in soil indoors.
    How to Grow Microgreens at Home
Sourdough Starter in a glass mason jar after 4 day

Homemade Sourdough Starter

Making a sourdough starter from scratch is easily made with just 3 ingredients and time.
4.67 from 15 votes
Print Pin Rate
Course: Bread Recipes
Cuisine: American
Keyword: how to make sourdough starter, sourdough starter, sourdough starter recipe
Prep Time: 5 minutes minutes
Cook Time: 0 minutes minutes
Additional Time: 4 days days
Total Time: 4 days days 5 minutes minutes
Servings: 2 cups
Calories: 608
Author: Sarah Mock

Ingredients

  •  
    1/16 Teaspoon dry yeast
  •  
    4 Cups spring water divided
  • A 5-pound bag of King Arthur Baking Company unbleached bread flour with 12.7% protein content, labeled for ideal use in bread, pizza crust, and rolls-perfect for creating hearty sides like homemade loaves to serve alongside a comforting slowcooker sausage casserole.2 ⅔ Cups Flour, All Purpose divided
Follow Savoring The Good On PinterestFollow @SavoringTheGood or tag #STGRecipes!

Instructions

Day 1 of starterIn a quart jar with a lid whisk together:

  • ½ cup spring water (4 ounces)
    4 Cups spring water
  • ⅔ cup flour (3 ounces)
    2 ⅔ Cups Flour, All Purpose
  • Pinch of dry yeast (less than 1/16 of a teaspoon).
    1/16 Teaspoon dry yeast
  • Using a rubber spatula, scrape down the sides and place the lid on the jar.
  • Store in a moderately warm place for 24 hours (74-80 F is ideal but countertop or on top of the refrigerator will also work)
  • Day 2 of starterOpen your container and observe the starter. It should show some signs of growth and have a sweet yet musty smell. You are welcome to take a little taste to see if it is starting to take on a tangy taste that sourdough is known for.

To the jar whisk in:

  • ½ cup spring water (4 ounces)
  • ⅔ cup flour (3 ounces)
  • Stir vigorously to incorporate fresh oxygen, the water and flour. 
  • Using a rubber spatula, scrape down the sides and place the lid on the jar.
  • Store in a moderately warm place for 24 hours (74-80 F is ideal but countertop or on top of the refrigerator will also work)
  • Day 3 of starterThere should be BIG changes in the jar when you look at it. You will be able to see bubbles on the surface and if you are using a clear container, you should be able to observe different sizes of bubbles in the starter.  The starter is now alive and thriving. If you would like to see more, insert a spoon into the mass, pull up and you should see short glutenous strands sticking to the spoon.

Time to feed the starter:

  • Add ½ cup spring water (4 ounces)
  • ⅔ cup flour (3 ounces)
  • Stir vigorously to incorporate fresh oxygen, the water and flour. 
  • Using a rubber spatula, scrape down the sides and place the lid on the jar.
  • Store in a moderately warm place for 24 hours (74-80 F is ideal but countertop or on top of the refrigerator will also work)
  • Day 4 of starterOn day 4 of the starter fermentation, the sourdough starter is just about ready to be used to make a sourdough loaf of bread. Day 4 will also have the starter double in size from day 3. This is why you need at least a quart-sized container. The starter will have a well-established honeycomb structure of large and small bubbles. If you taste the starter, it will have a tangy, sour flavor but it should not be bitter.

One last time add:

  • ½ cup spring water (4 ounces)
  • ⅔ cup flour (3 ounces)
  • Stir vigorously to incorporate fresh oxygen, the water and flour. 
  • Using a rubber spatula, scrape down the sides and place the lid on the jar.
  • Allow the starter to mature 8 more hours.
  • If not using right away, store in the refrigerator for up to 3 days, until you are ready to make bread.

Notes

Sourdough starter tips:

  • Do you stir sourdough starter before using?
You may notice that there is a bit of liquid laying on top of your starter. I stir it back in for a more intense flavor. You are welcome to pour it off before feeding the starter, but in truth, there is no reason for this extra step. 
  • What is the best container to keep the sourdough starter in?
I like to keep my starter in a glass mason jar with a screw-top lid, but with the lid placed, not screwed ontop. But any nonreactive container with a lid will work. Glass, ceramic or stainless steel are all options.
  • Does the type of water make a difference in the starter?
I suggest spending a dollar or two to purchase a gallon of spring water from the grocery store. Note that spring water is different than distilled water. Your tap water may have been treated with fluoride and purifiers and while these treatments can be good for human consumption, they can be bad for yeast propagation. 
  • Should the jar be airtight?
The jar should not be airtight. Simply place the lid on the jar or even cover it with a clean towel to keep stuff out of the starter. Starters need to 'breathe' and will be doubling in volume each day. There is a slight chance of a jar cracking if the lid is too tight due to the pressure of the carbon dioxide build-up. 
Want to share when you made this recipe?Follow @SavoringTheGood & tag #STGRecipes!
Nutrition Facts
Homemade Sourdough Starter
Serving Size
 
0 ½ cup
Amount per Serving
Calories
608
% Daily Value*
Fat
 
2
g
3
%
Saturated Fat
 
1
g
6
%
Sodium
 
27
mg
1
%
Potassium
 
182
mg
5
%
Carbohydrates
 
127
g
42
%
Sugar
 
1
g
1
%
Protein
 
17
g
34
%
* Percent Daily Values are based on a 2000 calorie diet.
**Nutritional facts are just estimates. Please utilize your own brand nutritional values to double check against our estimates.
Like this recipe card? Want one for your site?Check out WP Recipe Maker!


Sarah Mock of savoringthegood.com headshot 2022

I am Sarah Mock. Welcome!

Sarah Mock is a classically trained Chef and graduate of Johnson & Wales University. A culinary blogger for 15 years Sarah helps the home cook prepare her recipes with professional results.
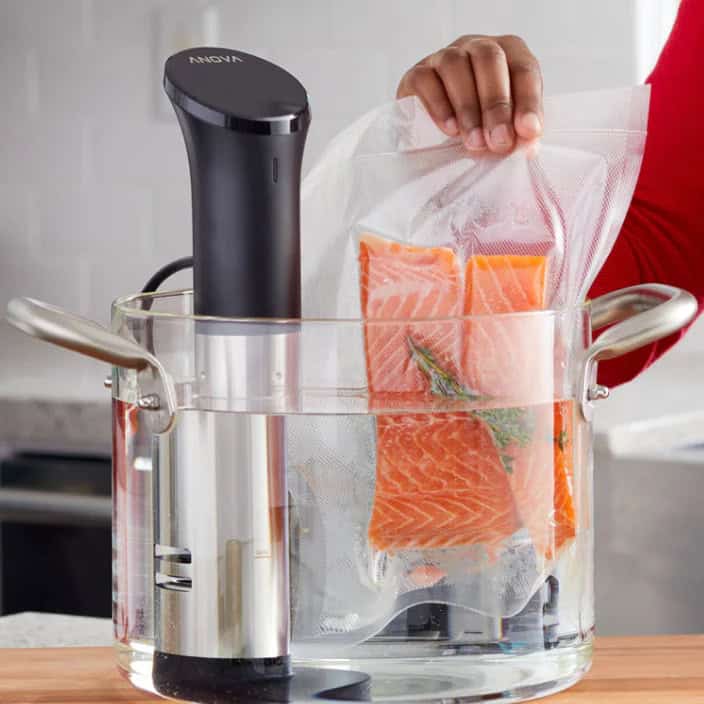
Get to know me

as seen in:

Logos of Hersheyland, ABC News, and Good Day PA are showcased in a seamless row, providing a snapshot of popular brands.

Hersheyland Nightline Good Day Pa!

The vibrant design showcases the iconic logos of Pinterest, Rachael Ray, and Jell-O set against a bold red background. Sorry, the provided description doesn't offer enough detail to suggest important SEO keywords.

Pinterest Rachael JELL-O

Sous Vide Chicken Breast Recipe

sous vide chicken breasts sliced and fanned out on a white platter

When you cook chicken breast using a sous vide machine you will have the juiciest chicken breast you have ever eaten.

sous vide chicken breast sliced on a white rectangle serving plate with a serving fork

The controlled time and lower temperature of sous vide cooking will give you tender, juicy chicken that is easily adapted to so many chicken breast recipes. Slice chicken breasts in half lengthwise, sous vide and you are set to pan fry them to make smothered chicken in a skillet!

Not only can you sous vide chicken but you can also sous vide a turkey breast. Say goodbye to dry Thanksgiving turkey!! Speaking of turkey don't forget to learn how I carve a turkey breast.

I will make a loaded baked potato casserole and make a tray of smashed Brussels sprouts to make a delicious meal.

Recipe Card?

To find the full printable recipe with specific measurements and directions CLICK HERE to go to the recipe card.

chicken breasts in a bag with olive oil, salt and peper

Different ways to season

I like to season with just a bit of salt, pepper and olive oil in the bag but you are welcome to season up your chicken as you like. Keep in mind you just need about a tablespoon of marinade or a pinch of herbs per chicken breast. Here are some suggestions:

  • Lemon slices and thyme
  • Salsa
  • Thyme, rosemary and lemon slice
  • Poultry seasoning mix
  • Roasted garlic or garlic confit
  • Italian seasoning
  • Lemon Pepper
  • Ranch Dressing powder (Check out my seasoned ranch cheese crackers if you love ranch as much as I do)

Instructions

  1. Preheat sous vide precision cooker to 150º Fahrenheit. 2 raw chicken breasts on a cutting board seasoned with salt and pepper in preparation to be sous vide
  2. Season chicken with salt and pepper on both sides. searing a chicken breast in a screaming hot cast iron pan
  3. If searing the chicken, now is the time to sear on a screaming hot pan.3 ways of bagging up chicken breast for sous vide cooking
  4. Place chicken breasts in a Ziptop bag along with olive oil and/or other seasonings in the bag. chicken breasts in ziploc bag in a sous vide waterbath
  5. Vacuum seal or use the water displacement method to force out the air in the bag as you lower it into the water bath. pre seared chicken breast in a small zip top bag, post sous vide cooking with purge in the bag
  6. Cook for 1 -4 hours. After cook time, remove the bag from the bath and discard the purge and the bag. patting a sous vide chicken breast dry with a paper towel after cooking in preparation of searing
  7. Remove chicken breasts and pat very dry with paper towels.
  8. Heat a cast-iron skillet over high heat until smoking hot.
  9. Sear 1 minute per side or until nicely browned. 
Using an Anova sous vide machine, a person precisely cooks vacuum-sealed salmon fillets submerged in water, ensuring perfect results right on the countertop.

Let's go shopping!

ANOVA

This third generation sous vide circulator includes dual-band WiFi and a two-line touchscreen display.

Buy it here

🔺Can we talk about food safety?

We all know that it is best to cook chicken breast to an internal temperature of 165°F (74°C). When the temperature hits 165 foodborne bacteria are killed within 3 seconds. But if you hold chicken at 155 for 60 seconds it will kill the same food-borne bacteria. SOOOO if you cook the chicken to 150 for a minimum of 1 hour the same foodborne bacteria dies but it is a slow death. 

When cooking chicken to an internal temperature of 165 the outer layers of the breast will have to reach a temperature higher than 165. The higher temperature will make the meat tough and dry. Sous vide cooking solves all these problems. Check out this chicken safe temperature chart.

⚙️ Equipment and accessories

  • Sous vide immersion circulator such as a Joule or an Anova
  • Heat safe container such as a pot or a sous vide container with lid
  • Cast iron pan
  • Gallon Zip top bag, freezer safe
  • Tongs

Storage Tips

Once the chicken breasts are done in the sous vide cooker, you are going to want to plunge them into an ice bath so you are able to store them in the refrigerator until you are ready to use them in other chicken recipes.

🔥 Reheating

To reheat the chicken breast you are going to want to return the meat to a clean ziplock bag and submerge it in the sous vide water bath, allowing the pressure of the water to force out all the air. I start with cold water and set the temperature on the sous vide device to just under what I originally cooked the chicken to.

As the water warms it is raising the temperature of the meat at the same time. Allow the chicken to warm in the water for about 15 minutes once the water has reached the desired temperature.

FAQ's and Tips

Advantages of using sous vide to cook chicken breasts?

When you sous vide boneless skinless chicken breasts the meat will be amazingly moist, tender and texture that you can't get with any other cooking method. There is no loss of flavor and you can cook without any fat if you are looking for a truly fat-free chicken breast. Meal prepping has never been simpler when you batch cook chicken breasts with sous vide.

Cooking sous vide chicken breasts is a totally hands-off approach to cooking. No need to tend to a hot skillet or babysit a grill. Set the temperature of the cooking water and your chicken breast will be ready when you are ready to eat. 

How long do you cook chicken breast in sous vide?

Cook chicken breast in the sous vide for a minimum of 1 hour. The beauty of sous Cook chicken breast in the sous vide for a minimum of 1 hour. The beauty of sous vide cooking is there is not only wiggle room in the cooking time but there are hours of wiggle room in the cooking time.

Cook chicken breasts for up to 4 hours. When you see a cook time listed as 1-4 hours, it means just that. Cook it for 1 hour but up to 4 hours. After 4 hours the meat will become so tender it will start to mush. 

What is the best sous vide chicken breast temperature?

For me, I like 150 for 1 hour. But other people like 145 for 2 hours. What is the difference? The difference is texture. 150 will give you a super juicy piece of meat, juicier than a piece cooked to 165, but closer to the texture of a 165 cook.

The 145 will give you a softer, yet juicier piece of meat. If you are used to the chicken being cooked at 165, I would start out at 150 and then ease yourself down to 145.

Do I have to defrost chicken breasts before cooking them sous vide?

Another advantage of cooking chicken breast sous vide is that there is no need to thaw a frozen chicken breast before cooking it. The only thing you will have to adjust is your cooking time. Add an additional hour of cook time for frozen chicken. 

Do you have to use a vacuum sealer?

Chicken breasts are one of those food items that are fine not to use vacuum bags before lowering into the water bath. As long as you remove as much air as possible, keeping the chicken breasts in a single layer the pressure of the water should force out the rest of the air if you leave a corner of the ziploc bag open as you lower it into the water. Close the top of the bag as the air is forced completely out. This technique is also known as the Archimedes principle.

But if you are more comfortable using a vacuum bag, go right ahead. This is a personal preference.

Is it safe to cook in the original plastic packaging?

This is totally my opinion but I would not be cooking individually wrapped chicken breast in their original plastic packaging. I have trust issues and I don't trust those seals. It is safer to repackage those chicken breasts into another sous vide safe plastic bag that you can vacuum seal or just use the water displacement method to get the air out of the bag. 

Pre sear, post sear or no sear?

Once again the answer is, it is up to you! Pre searing is when you sear the chicken in a hot pan to give it a bit of color before it goes into the sous vide bag. In my opinion, pre searing adds another layer of flavor for the chicken to cook in. Post searing is when you remove the chicken from the cooking bag, pat it dry with a paper towel and sear it in a hot pan to give it color and crisp the outside. 

Recipes that use sous vide chicken breast:

  • Sour Cream Chicken Enchiladas (use shredded sous vide chicken breasts)
  • Dorito Chicken Casserole (sous vide the chicken and add it to the recipe)
  • Cheesy Chicken Casserole (batch cook the chicken in the beginning of the week for this recipe)
  • Crockpot Chicken Tortilla Soup
sous vide chicken breasts sliced and fanned out on a white platter

Sous Vide Chicken Breast

Sous vide chicken breast will give you the juiciest chicken breast you have ever eaten. The controlled time and temperature of sous vide cooking will give you tender chicken that is easily adapted to so many chicken breast recipes. 
4.72 from 14 votes
Print Pin Rate
Course: Chicken Recipes
Cuisine: French
Keyword: sous vide chicken breast, sous vide chicken breast recipe
Prep Time: 2 minutes minutes
Cook Time: 1 hour hour
Additional Time: 2 minutes minutes
Total Time: 1 hour hour 4 minutes minutes
Servings: 2
Calories: 261
Author: Sarah Mock

Ingredients

  •  
    2 chicken breasts
  • A Morton Salt container with a blue label featuring a girl in a yellow dress holding an umbrella, with salt pouring out of a container-an essential ingredient for perfectly seasoning dishes like Chicken Cordon Bleu.salt
  • A 6 oz container of McCormick Pure Ground Black Pepper with a red lid and a Black Pepper
  • A 500ml bottle of California Olive Ranch Global Blend Extra Virgin Olive Oil with green and blue labeling, indicating a blend from Argentina, Portugal, Chile, and California-perfect for drizzling over your favorite shrimp avocado salad.1 Tablespoon olive oil
Follow Savoring The Good On PinterestFollow @SavoringTheGood or tag #STGRecipes!

Instructions

  • Preheat sous vide precision cooker to 150º Fahrenheit.
  • Season chicken with salt and pepper on both sides.
  • Place chicken breasts in a Ziptop or food saver bag along with olive oil and/or other seasonings in the bag.
  • Vacuum seal or use the water displacement method to force out the air in the bag as you lower it into the water bath.
  • Cook for 1 -4 hours. (see notes)
  • After cook time, remove the bag from the bath and discard the purge and the bag.
  • Remove chicken breasts and pat very dry with paper towels.
  • Heat a cast-iron skillet over high heat until smoking hot.
  • Sear 1 minute per side or until nicely browned.

Notes

Cook chicken breast in the sous vide for a minimum of 1 hour. The beauty of sous Cook chicken breast in the sous vide for a minimum of 1 hour. The beauty of sous vide cooking is there is not only wiggle room in the cooking time but there are hours of wiggle room in the cooking time.
Cook chicken breasts for up to 4 hours. When you see a cook time listed as 1-4 hours, it means just that. Cook it for 1 hour but up to 4 hours. After 4 hours the meat will become so tender it will start to mush.
Pre searing is when you sear the chicken in a hot pan to give it a bit of color before it goes into the sous vide bag. In my opinion, pre searing adds another layer of flavor for the chicken to cook in. Post searing is when you remove the chicken from the cooking bag, pat it dry with paper towels and sear it in a hot pan to give it color and crisp the outside. 
 
Want to share when you made this recipe?Follow @SavoringTheGood & tag #STGRecipes!
Nutrition Facts
Sous Vide Chicken Breast
Serving Size
 
1
Amount per Serving
Calories
261
% Daily Value*
Fat
 
11
g
17
%
Saturated Fat
 
2
g
13
%
Polyunsaturated Fat
 
8
g
Cholesterol
 
102
mg
34
%
Sodium
 
380
mg
17
%
Carbohydrates
 
1
g
0
%
Protein
 
37
g
74
%
* Percent Daily Values are based on a 2000 calorie diet.
**Nutritional facts are just estimates. Please utilize your own brand nutritional values to double check against our estimates.
Like this recipe card? Want one for your site?Check out WP Recipe Maker!

Sarah Mock of savoringthegood.com headshot 2022

I am Sarah Mock. Welcome!

Sarah Mock is a classically trained Chef and graduate of Johnson & Wales University. A culinary blogger for 16 years Sarah helps the home cook prepare her recipes with professional results.

Get to know me

as seen in:

Logos of Hersheyland, ABC News, and Good Day PA are showcased in a seamless row, providing a snapshot of popular brands.

Hersheyland Nightline Good Day Pa!

The vibrant design showcases the iconic logos of Pinterest, Rachael Ray, and Jell-O set against a bold red background. Sorry, the provided description doesn't offer enough detail to suggest important SEO keywords.

Pinterest Rachael JELL-O

Lasagna Soup Recipe

One Pot Lasagna Soup in a white bowl. square image close shot

Lasagna soup is a hearty, one-pot dinner made with ground beef, jarred pasta sauce, broken lasagna noodles, and a finish of heavy cream and mozzarella; no ricotta, no layering, no oven. I built it this way on purpose; it means one less cheese to buy and one less bowl to dirty, and you still get every flavor lasagna is known for. It's on the table in about 30 minutes, and it's the soup my kids request by name once the weather turns.

One Pot Lasagna Soup in a white bowl. square image close shot

This soup is in heavy rotation in my house every fall and winter. My kids ask for it almost as much as they ask for Italian stuffed shells or taco stuffed shells.
If you want more lasagna and less soup, try lasagna roll ups or crockpot lasagna. A little prep and dinner is waiting for you when you get home.

Ingredients you need for lasagna soup:

The full ingredient list with amounts is in the recipe card below. Here's why a few of them matter.

  • Ground beef: I brown it and leave the fat in the pot; that fat carries flavor into the onion and garlic in the next step. Ground sausage or a mix with ground pork works too, and I cover that swap below.
  • Pasta sauce: Use your favorite jarred marinara here. This isn't the place to make your own sauce from scratch; a good jarred sauce is doing exactly what it needs to do.
  • Chicken stock: This is what turns the sauce into soup. Start with the amount in the recipe card and add more at the end if you like a thinner broth; the noodles will keep drinking up liquid even after you've turned off the heat.
  • Uncooked lasagna noodles, broken: They cook right in the soup, so timing matters more than it looks like it would. Pull the pot off the heat the moment they're tender; a few extra minutes in that much hot liquid and they go soft and start to break apart.
  • Heavy cream and mozzarella: This is what replaces ricotta in this recipe. Stirred in at the very end, they give you the same rich, cheesy pull you'd get from ricotta in a baked lasagna, without the graininess ricotta can leave behind in a broth-based soup. More on that in the Cook's Notes below the recipe card.

Recipe Card?

To find the full printable recipe with specific measurements and directions CLICK HERE to go to the recipe card.

How to make lasagna soup on the stovetop:

This is a true one-pot meal, which means minimal cleanup and leftovers that taste even better the next day.

One Pot Lasagna Soup in a white bowl. square image close shot

Brown the beef

In a Dutch oven or large pot, brown the meat over medium-high heat, breaking it up as it cooks. You want no pink left and an internal temperature of 160F. Do not drain the fat; it carries flavor into the next step, and draining it now means you'll be adding oil back in later to make up for it.

ground beef, onion and garlic sautéing in a pot for Lasagna Soup

Sauté

Add the chopped onion and garlic to the meat and sauté in the drippings until the onion turns soft and translucent, about 3 to 4 minutes. You'll smell the garlic turn fragrant; that's your cue to move on.

tomato sauce added to the pot

Add tomato paste and herbs

Add the tomato paste and dried herbs to the meat and onion mixture. Stir until the paste darkens slightly and coats the meat; that's the paste's raw edge cooking off.

chicken stock added to the pot for Lasagna Soup

Add liquids

Pour in the pasta sauce and the chicken stock. Stir to combine; the mixture will look thin at this point, that's expected before it reduces.

Bring To A Boil

Bring the soup to a boil, then reduce to a simmer and let it go for 10 minutes to reduce the liquid slightly. You'll see it start to deepen in color as it thickens.

dry lasagna noodles added to the soup

Add the noodles

Add the broken, uncooked lasagna noodles to the soup and stir to combine. Simmer for 10 minutes, or until the noodles are just tender; pull the pot off the heat right at that point, since they'll keep softening in the residual heat.

If the soup looks too thick, add more stock.

Lasagna Soup

Stir in cream and cheese

Just before serving, off the heat, stir in the heavy cream and three-quarters of the shredded mozzarella. The broth will turn from red to a soft, rosy pink; that color change is how you know it's ready.

One Pot Lasagna Soup in a white bowl. square image close shot

Serve

Serve in bowls, garnished with the remaining shredded cheese. Serve it hot, right off the stove; the soup will continue to thicken as it cools.

Did you make this recipe?

Do you have feedback that would be helpful to others? If so can help this small business owner by leaving a rating and a review in the comments section? Thank you for being part of the Savoring The Good Community. ~ Sarah

One Pot Lasagna Soup in a white bowl. square image close shot

Lasagna Soup (No Ricotta)

This comforting soup is ready in 30 minutes and has all the classic lasagna flavors you love without turning on the oven.
No ratings yet
Print Pin Rate
Course: Soup
Cuisine: Italian
Keyword: lasagna soup
Prep Time: 5 minutes minutes
Cook Time: 30 minutes minutes
Total Time: 35 minutes minutes
Servings: 6
Calories: 733
Author: Sarah Mock

Ingredients

  • A white foam tray filled with raw ground beef, arranged in loose, squiggly strands.1 pound Ground Beef
  • A single whole yellow onion with dry, papery skin, photographed against a white background-the perfect flavorful addition to your next Crockpot Hash brown Casserole.1 medium onion chopped
  • Whole garlic bulb with white papery skin, lying on its side against a plain white background-a perfect aromatic addition to your next slowcooker sausage casserole.4-5 cloves Garlic
  •  
    1 jar Pasta Sauce 28-32 ounces pasta/spaghetti sauce
  •  
    1 14 oz. can of diced tomatoes
  • A can of Contadina Roma Tomatoes Paste with Italian Herbs, 6 oz, featuring a woman holding tomatoes and countryside imagery on the label-perfect for adding rich, authentic flavor to your favorite recipes like a slowcooker sausage casserole.2 Tablespoons tomato paste
  •  
    1 tablespoon dried basil
  • A bottle of McCormick Oregano Leaves with a red cap and label, containing dried oregano.1 tablespoon oregano
  •  
    1 tablespoon parsley
  • A pile of dried bay leaves on a white background, perfect for adding depth and aroma to your chipotle carnitas recipes.1 bay leaf
  •  
    4-6 Cups chicken stock
  •  
    8 Lasagna Noodles broken into bite-sized pieces
  • heavy cream bottle.½ Cup Heavy Cream
  •  
    1 Cup mozzarella cheese shredded
Follow Savoring The Good On PinterestFollow @SavoringTheGood or tag #STGRecipes!

Instructions

  • In a Dutch oven or large pot, brown the meat over medium-high heat, breaking it up as it cooks. You want no pink left and an internal temperature of 160F. Do not drain the fat; it carries flavor into the next step, and draining it now means you'll be adding oil back in later to make up for it.
    Ground beef browning in a pot with onions, dried herbs, tomato paste, and a bay leaf, stirred with a wooden spoon-an aromatic base for hearty Lasagna Soup.
  • Add the chopped onion and garlic to the meat and sauté in the drippings until the onion turns soft and translucent, about 3 to 4 minutes. You'll smell the garlic turn fragrant; that's your cue to move on.
  • Add the tomato paste and dried herbs to the meat and onion mixture. Stir until the paste darkens slightly and coats the meat; that's the paste's raw edge cooking off.
    A pot of thick, chunky meat sauce with tomatoes and a bay leaf, being stirred with a wooden spoon-the perfect hearty base for Lasagna Soup.
  • Pour in the pasta sauce and the chicken stock. Stir to combine; the mixture will look thin at this point, that's expected before it reduces.
    A wooden spoon rests in a blue pot filled with simmering, tomato-based Lasagna Soup on a stovetop.
  • Bring the soup to a boil, then reduce to a simmer and let it go for 10 minutes to reduce the liquid slightly. You'll see it start to deepen in color as it thickens.
    A wooden spoon rests in a blue pot filled with simmering, tomato-based Lasagna Soup on a stovetop.
  • Add the broken, uncooked lasagna noodles to the soup and stir to combine. Simmer for 10 minutes, or until the noodles are just tender; pull the pot off the heat right at that point, since they'll keep softening in the residual heat.
    dry lasagna noodles added to the soup
  • Just before serving, off the heat, stir in the heavy cream and three-quarters of the shredded mozzarella. The broth will turn from red to a soft, rosy pink; that color change is how you know it's ready.
    Lasagna Soup
  • Serve in bowls, garnished with the remaining shredded cheese. Serve it hot, right off the stove; the soup will continue to thicken as it cools.
    One Pot Lasagna Soup in a white bowl. square image close shot

Notes

  • ground sausage can be substituted for the ground beef or switch out ½ ground pork for ground beef.
  • ground turkey can be substituted for a portion or all of the ground beef.
  • Roasted garlic or garlic confit can be substituted for fresh garlic cloves
    garnish with extra shredded mozzarella cheese and/or ricotta cheese.
  • To reheat the soup, an extra splash of chicken stock can be added to loosen the soup as it heats.
How to make lasagna soup in the crockpot :
  1. The night before: brown the meat, adding the chopped onion and garlic to the meat and sautéing them in the meat and fat drippings. Add the tomato paste and dried herbs to the meat and onion mixture. Cool and store in the refrigerator overnight. Set out the canned goods so you are ready to dump and go in the morning.
  2. In the morning: Dump the container of browned meat, veggies, and spices into a crockpot. Add in the rest of the ingredients, holding out the lasagna noodles, heavy cream and the mozzarella cheese, stir to combine. Cook on low for 6-8 hours. Add the broken noodles and cook for 10-20 minutes. Then add the stir in the heavy cream and ¾ of the shredded mozzarella cheese. Serve in bowls, garnished with remaining shredded cheese. 
Want to share when you made this recipe?Follow @SavoringTheGood & tag #STGRecipes!
Nutrition Facts
Lasagna Soup (No Ricotta)
Serving Size
 
1
Amount per Serving
Calories
733
% Daily Value*
Fat
 
37
g
57
%
Saturated Fat
 
15
g
94
%
Trans Fat
 
1
g
Polyunsaturated Fat
 
18
g
Cholesterol
 
134
mg
45
%
Sodium
 
1746
mg
76
%
Carbohydrates
 
47
g
16
%
Sugar
 
20
g
22
%
Protein
 
51
g
102
%
* Percent Daily Values are based on a 2000 calorie diet.
**Nutritional facts are just estimates. Please utilize your own brand nutritional values to double check against our estimates.
Like this recipe card? Want one for your site?Check out WP Recipe Maker!
Sarah Mock of savoringthegood.com headshot 2022

Sarah's Culinary Insight

A few things I've learned from making this soup more times than I can count!

I built this recipe without ricotta on purpose. Heavy cream and mozzarella, stirred in off the heat, give you that same rich, cheesy pull without the graininess ricotta can leave behind once it's cooked into this much liquid. If you miss ricotta specifically, dollop a spoonful onto each bowl right before serving instead of cooking it into the pot.


Leave the fat in the pot after browning the beef. Drain it and the soup loses body, and you'll end up adding oil back in to sauté the onion and garlic properly.


This soup thickens as it sits, since the noodles keep absorbing broth even off the heat. If you're not serving it right away, hold back a cup of the chicken stock and stir it in when you reheat.


Add the cream and cheese off the heat, not while the soup is still boiling. A rolling boil can make the cream separate instead of blending in smooth.

    Substitutions:

    A few swaps I've tested in my own kitchen, and what they do to the soup.

    • Ground sausage or half ground pork: Swap in Italian sausage for all or half the ground beef and you get a richer, more savory pot; hot sausage adds real heat. I recommend it if you want more depth without adding extra herbs.
    • Ground turkey: This works for part or all of the beef, but turkey brings less fat, which means less flavor carried into the sauté step. If you go this route, add a tablespoon of olive oil when you sauté the onion and garlic so you don't lose that base of flavor.
    • Roasted garlic or garlic confit: Either one swaps in for fresh garlic cloves and gives you a mellower, sweeter garlic flavor instead of a sharp bite. I recommend it any night you have some on hand.

    Adding ricotta back in

    I've tested stirring ricotta directly into the broth, and I don't recommend it; it breaks down and turns grainy in this much liquid. If you want the classic ricotta pockets, dollop it cold onto each bowl at serving instead of cooking it into the pot.

    Crockpot Instrustions:

    This version spreads the work across two days, which makes it an easy weeknight dinner even on your busiest nights.

    The night before: brown the meat, then add the chopped onion and garlic and sauté them in the drippings. Stir in the tomato paste and dried herbs. Cool the mixture and refrigerate it overnight. Set out your canned goods so you're ready to dump everything in the next morning.

    In the morning: add the browned meat mixture to the crockpot along with the rest of the ingredients, holding out the lasagna noodles, heavy cream, and mozzarella. Stir to combine and cook on low for 6 to 8 hours.

    About 20 minutes before serving, stir in the broken noodles and cook until just tender. Turn off the heat, stir in the heavy cream and three-quarters of the mozzarella, and serve garnished with the rest of the cheese.

    Freezer instructions:

    There are two ways you can freeze lasagna soup.

    The first way: combine all the raw ingredients in a freezer-safe bag or container, leaving out the lasagna noodles, heavy cream, and cheese. Press out as much air as possible and freeze flat.

    When you're ready to cook, dump the frozen mixture straight into a crockpot and cook on low for 6 to 8 hours, or high for 2 to 4. Add the broken noodles in the last 20 minutes, then finish with the cream and cheese.

    The second way: brown the meat, sauté the onion and garlic, and stir in the spices and tomato paste, stopping after that step. Cool the mixture completely before adding it to a freezer-safe bag along with the remaining ingredients, again leaving out the noodles, cream, and cheese. Press out the air and freeze flat.

    To reheat, thaw the soup brick in the refrigerator overnight, dump it into a large soup pot, bring it to a simmer, and pick back up at the noodle step.

    A hand uses a teal ladle to serve macaroni and cheese from a pot. Overlaid text highlights features: extensive food safety testing, dishwasher safe, and compatible with Souper Cubes for convenient 1 Cup food storage.

    Souper Cubes

    1 cup portions!

    Perfect for freezing leftovers.(As seen on Shark Tank.)

    Purchase

    Reheating instructions:

    To reheat leftover soup, warm it in a pan over medium-high heat, stirring occasionally, until it's steaming hot all the way through. A splash of chicken stock helps loosen it back up as it heats, since the noodles will have soaked up liquid in the fridge.

    Or microwave at 50% power for 1 minute, stir, then microwave in 30-second bursts at full power until it's hot throughout.

    Seasonal Favorite

    Baked lattice top crust on an apple pie made with the Crisco pie crust recipe, showing flaky layers in the fluted edge.

    This is my award-winning Crisco pie crust recipe; flaky, tender, and made with simple ingredients you already have.

    Crisco Pie Crust

    Frequently asked questions, answers and tips:

    Does lasagna soup need ricotta?

    No. This recipe skips ricotta entirely and uses heavy cream and mozzarella instead, stirred in at the end. You get the same rich, cheesy flavor without the grainy texture ricotta can take on in a broth-based soup. If you love ricotta, dollop it onto your bowl fresh instead of cooking it in.

    What goes with this easy lasagna soup recipe?

    When I serve lasagna soup we usually have crusty garlic bread or fried mozzarella sticks. We love all our carbs when we eat this meal! Green lettuce salad is always a good pairing and for some reason, I always serve steamed broccoli in little side dishes.

    Do I need heavy cream to make this soup?

    The cream is what gives the broth its rich, slightly pink color and smooth texture. You can leave it out for a lighter, more tomato-forward soup, but you'll lose some of that classic creamy lasagna feel.

    Can I make lasagna soup ahead of time?

    Yes. Make everything through the tomato paste and herb step up to a day ahead, cool it, and refrigerate. Reheat to a simmer before adding the stock, noodles, cream, and cheese so the noodles don't sit and go soft in the fridge.

    What's the best pot to use?

    A Dutch oven or any large, heavy-bottomed pot works well; you want enough room for the soup to expand as the noodles cook without crowding.

    What goes with this lasagna soup?

    I usually serve it with crusty garlic bread or fried mozzarella sticks; we love our carbs with this meal. A green salad is always a good pairing too.

    A slice of chocolate lasagna rests on a black plate, boasting creamy layers and a crumbled cookie topping.

    Chocolate Lasagna

    Layered dessert with an Oreo crust, cream cheese layer, chocolate pudding layer, and Cool Whip topping.

    Chocolate Lasagna

    Sarah Mock of savoringthegood.com headshot 2022

    I am Sarah Mock. Welcome!

    Sarah Mock is a classically trained Chef and a graduate of Johnson & Wales University. A culinary blogger for 17 years, Sarah helps the home cook prepare her recipes with professional results.

    Get to know me

    as seen in:

    Logos of Hersheyland, ABC News, and Good Day PA are showcased in a seamless row, providing a snapshot of popular brands.

    Hersheyland Nightline Good Day Pa!

    The vibrant design showcases the iconic logos of Pinterest, Rachael Ray, and Jell-O set against a bold red background. Sorry, the provided description doesn't offer enough detail to suggest important SEO keywords.

    Pinterest Rachael JELL-O

    Chocolate Martini Cocktail Recipe

    chocolate martini in a martini glass with a hershey kiss garnish

    This three-ingredient Chocolate Martini is simple and delicious and the perfect dessert cocktail for girl's night, Valentine's Day dinner, Galentine's Day or to serve as a dessert in a glass at your next dinner party. 

    A delectable Hershey's chocolate martini is elegantly placed on a rustic wooden table.

    Shake up a chocolate martini to turn any night in, into a festive fun night for all the chocolate lovers! This is the same Chocolate Martini recipe that is served at The Hotel Hershey, Hershey Lodge as well as Hershey's Chocolatetown. 

    Why should you make this decadent chocolate martini recipe?

    • You should make this decadent chocolate martini recipe because it offers an exquisite blend of chocolate flavor.
    • By incorporating chocolate liqueur, the recipe adds a rich and sophisticated twist to the classic martini that is sure to satisfy your sweet cravings.

    What are the chocolate martini ingredients?

    horizontal image of chocolate martini ingredients

    Recipe Card?

    To find the full printable recipe with specific measurements and directions CLICK HERE to go to the recipe card.

    Garnishes:

    detail shot of chocolate rimmed martini glass
    • Hershey's chocolate syrup
    • cocoa powder
    • chocolate kiss

    How to garnish the rim of the martini glass using chocolate syrup:

    Indulge in a decadent Chocolate Martini made with Hershey's cioccolato.
    1. Pour a semicircle of Hershey's Chocolate Syrup on a plate.
    2. Press the top edge of the martini glass into the syrup.
    3. Sprinkle cocoa powder on a plate and press the chocolate rimmed martini glass into the powder.

    How to get the Hershey's Kiss to balance on the rim:

    white hershey's kiss balanced on the edge of a martini glass

    This is not a trick, this is not an illusion, no photoshop was used in getting the Hershey's Kiss to balance on the rim of the glass. Here is not to get it to stick.

    a chef knife with white chocolate on it
    1. Use a wide-bladed knife, such as a chef knife, and warm it for 20 seconds over a flame such as a kitchen blow torch, a lighter or even the eye of an electric stove. 
    2. Warm the bottom of the Hershey's Kiss on the warm blade until it starts to melt slightly.
    3. Immediately place it on the rim of the martini glass and hold it there until the chocolate hardens.
    4. If it doesn't adhere to the edge, repeat steps 2 and 3.

    How to make a Chocolate martini:

    chocolate martini in a martini glass with a hershey kiss garnish
    1. Prepare the martini glass with a chocolate rim and Hershey kiss garnish.
    2. Fill a cocktail shaker with ice.
    3. Add the chocolate vodka, vanilla vodka and white creme de cocoa to the shaker. 
    4. Place the lid on the cocktail shaker and shake for 1 minute.
    5. Strain and pour the cocktail into the prepared martini glass.

    Cocktail recipe tips and alternatives:

    • Pressed for time? Place the Hershey's Kiss at the bottom of the glass instead of adhering it to the edge of the glass.
    • Use your favorite flavored Hershey Kiss to garnish the cocktail
    • If vanilla vodka is not on your bar cart, use equal parts of my homemade vanilla extract. I use vodka as the base! 
    • Use dark creme de cacao for a chocolate-colored cocktail instead of a clear cocktail.
    • Use extra chocolate syrup to make a chocolate swirl in the bottom of the cocktail glass. 
    horizontal image of chocolate martini

    Chocolate Martini Recipe (Hotel Hershey Copycat)

    This easy chocolate martini is cool, creamy, and loaded with chocolate flavor, ideal for holidays or girls' night.
    No ratings yet
    Print Pin Rate
    Course: Cocktails
    Cuisine: American
    Keyword: chocolate martini, chocolate martini recipe
    Prep Time: 1 minute minute
    Cook Time: 0 minutes minutes
    Additional Time: 2 minutes minutes
    Total Time: 3 minutes minutes
    Servings: 1
    Calories: 13875
    Author: Sarah Mock

    Ingredients

    • 1 Ounce 360 chocolate vodka
    • 1 Ounce vanilla vodka
    • 2 Ounces white creme de cacao
    Follow Savoring The Good On PinterestFollow @SavoringTheGood or tag #STGRecipes!

    Instructions

    • Prepare the martini glass with a chocolate rim and Hershey kiss garnish.
    • Fill a cocktail shaker with ice.
    • Add the 360 chocolate vodka, vanilla vodka and white creme de cocoa to the shaker. 
    • Place the lid on the cocktail shaker and shake for 1 minute.
    • Strain the cocktail into the prepared martini glass.

    How to get the Hershey's Kiss to balance on the rim:

    • Use a wide-bladed knife, such as a chef knife, and warm it for 20 seconds over a flame such as a kitchen blow torch, a lighter or even the eye of an electric stove.
    • Warm the bottom of the Hershey's Kiss on the warm blade until it starts to melt slightly.
    • Immediately place it on the rim of the martini glass and hold it there until the chocolate hardens.
    • If it doesn't adhere to the edge, repeat steps 2 and 3.

    Notes

    • Pressed for time? Place the Hershey's Kiss at the bottom of the glass instead of adhering it to the edge of the glass.
    • Use your favorite flavored Hershey Kiss to garnish the cocktail
    • If vanilla vodka is not on your bar cart, use equal parts of my homemade vanilla extract. I use vodka as the base! 
    • Use dark creme de cacao for a chocolate-colored cocktail instead of a clear cocktail.
    • Use extra chocolate syrup to make a chocolate swirl in the bottom of the cocktail glass. 
    Want to share when you made this recipe?Follow @SavoringTheGood & tag #STGRecipes!
    Nutrition Facts
    Chocolate Martini Recipe (Hotel Hershey Copycat)
    Serving Size
     
    1
    Amount per Serving
    Calories
    13875
    % Daily Value*
    Fat
     
    753
    g
    1158
    %
    Saturated Fat
     
    466
    g
    2913
    %
    Polyunsaturated Fat
     
    216
    g
    Cholesterol
     
    580
    mg
    193
    %
    Sodium
     
    1991
    mg
    87
    %
    Carbohydrates
     
    1532
    g
    511
    %
    Sugar
     
    1299
    g
    1443
    %
    Protein
     
    204
    g
    408
    %
    * Percent Daily Values are based on a 2000 calorie diet.
    **Nutritional facts are just estimates. Please utilize your own brand nutritional values to double check against our estimates.
    Like this recipe card? Want one for your site?Check out WP Recipe Maker!

    Sarah Mock of savoringthegood.com headshot 2022

    I am Sarah Mock. Welcome!

    Sarah Mock is a classically trained Chef and graduate of Johnson & Wales University. A culinary blogger for 15 years Sarah helps the home cook prepare her recipes with professional results.

    Get to know me

    Roasted Asparagus

    Roasted asparagus recipe on a baking sheet.

    Fresh asparagus roasted at high heat is one of the fastest, most rewarding things you can make in the oven. Three minutes of prep, twelve minutes of roasting, and you have a side dish with tender stalks, slightly charred tips, and a depth of flavor that steaming or sautéing simply cannot match. This is the side dish that I say works on a Tuesday night and holds its own next to an Easter ham.

    oven roasted asparagus on a shite rectangle serving platter with serving fork and spoon

    Spring is here and we are finding fresh asparagus in the farmer's markets and the grocery stores. One of the best ways to enjoy is to oven roast it.

    Pictured on the tray is two pounds of asparagus. Listed in the recipe card are instructions for a pound of asparagus. This recipe can be easily multiplied or divided. Roast an extra pound or two to make cream of asparagus soup. 

    Recipe Card?

    To find the full printable recipe with specific measurements and directions CLICK HERE to go to the recipe card.

    How to trim asparagus:

    A bundle of fresh asparagus spears held together with a purple rubber band, placed on a wooden cutting board.

    Leave them banded

    Place the asparagus on a cutting board and firmly hold the tip end of the asparagus with one hand

    A bundle of fresh asparagus with trimmed ends sits on a wooden cutting board next to a pile of discarded stalk pieces.

    Slice

    Using a sharp knife, use a slicing motion to chop off 1 inch of the woody ends of the asparagus.

    Best way to make this oven roasted asparagus recipe:

    horizontal image of oven roasted asparagus

    Preheat the oven to 425 degrees.

    Trim asparagus. See notes.

    A baking tray filled with raw asparagus spears arranged in a single layer on parchment paper.

    Arrange

    Arrange the asparagus in a single layer on a sheet pan. 

    Drizzle the asparagus spears with olive oil and sprinkle with salt and pepper, gently tossing to coat the asparagus with the oil and seasonings.

    Asparagus on a baking sheet

    Roast

    Cook asparagus in the oven.

    asparagus on a sheet pan for roasting

    Flavor

    Remove the stalks of asparagus from the oven and toss them.

    Return to the oven and roast until the tips of the asparagus turn a bit charred and the stalks are tender. Keep in mind that thick asparagus spears will need slightly longer cooking times.

    oven roasted asparagus on a shite rectangle serving platter with serving fork and spoon

    Serve

    Remove from the oven and serve immediately for the best texture and crispiest tips.

    Why you should cook asparagus with parmesan

    Asparagus is an excellent partner with parmesan since it boosts the flavor profile. Baked asparagus with parmesan creates a combination of crispiness and cheesy goodness. Parmesan asparagus is not only a tasty option but also falls under the category of easy asparagus recipes.

    Other ways to flavor these perfect roasted asparagus:

    asparagus on a sheet pan for roasting
    • add roasted garlic or garlic confit to the pan.
    • After the roasted asparagus in the oven come, add lemon zest or fresh lemon juice over them for a bright, fresh flavor.
    • Olives can be added to the pan to add a bit of savory saltiness. Check out my warm olives to bake alongside the asparagus.
    • Sprinkle a bit of everything but the bagel seasoning when you toss the asparagus with oil. 

    What to serve with roasted asparagus

    Crispy roasted asparagus is best served with roasted brussels sprouts, roasted broccoli, roasted vegetables, and roasted potatoes for a grilled yet varied spread.

    The combination of these roasted veggies will make you love asparagus and its nutty roasted flavor.

    Storage and Reheating

    Store leftover roasted asparagus in an airtight container in the refrigerator for up to 3 days. To reheat, spread on a sheet pan and warm in a 350°F oven for 5 minutes - this keeps the tips from going limp, which microwaving tends to do. Leftover roasted asparagus is excellent chopped and folded into a frittata, tossed into pasta, or stirred into cream of asparagus soup.

    What recipe variations can I try if I have leftover roasted asparagus?

    Roasted asparagus is delicious and versatile. If you have leftover asparagus, you can prepare a variety of recipe variations. Cook thin asparagus into a frittata or quiche or prepare asparagus into a savory tart. Freeze asparagus for later use in soups or stir-fries.

    What temperature is best for roasting asparagus?

    425°F is the sweet spot for oven roasted asparagus. High enough to give the tips a slight char and concentrate the flavor, but not so high that the stalks burn before they are tender. Some recipes go up to 450°F for an even crispier result - that works well for thick spears but can be too aggressive for thin ones. Size matters, this time!

    How long does it take to roast asparagus at 425°F?

    At 425°F, asparagus roasts in 10-15 minutes depending on thickness. Thin pencil asparagus takes 8-10 minutes. Medium spears take the full 12 minutes. Thick spears may need up to 15-18 minutes. Start checking at the 10-minute mark and pull the pan when the tips are just beginning to char and the stalks bend slightly when lifted.

    How do I know when roasted asparagus is done?

    The tips will be lightly charred and the stalks will bend slightly but not droop when lifted with tongs. A fork should pierce the thickest part of the stalk with mild resistance - not crunchy, not mushy. Pull them when they look almost done since they continue cooking from residual heat for a minute or two after leaving the oven.

    Should I snap or cut the asparagus ends?

    Either works - the goal is the same. Snapping lets the asparagus find its own natural breaking point between the tender and woody sections. Cutting gives you more uniform length and less waste since the snap point is not always where the asparagus actually becomes tough. For a large batch, I will snap one and use it as a guide for cutting the rest. Leave the rubber band on and slice all at once.

    Why is my roasted asparagus soggy?

    Two likely causes - overcrowding the pan or excess moisture. Typically, I am an over crowder on the pan. Asparagus needs space to roast rather than steam. If the spears are overlapping on the pan, the moisture they release cannot evaporate and they will steam instead of roast. Use a large enough pan to keep them in a single layer with a little breathing room. Also make sure the asparagus is dry before it goes on the pan - pat it with a paper towel if it was just washed.

    Can I make roasted asparagus ahead of time?

    Roasted asparagus is best fresh from the oven but holds reasonably well. You can roast it up to a day ahead, refrigerate, and reheat on a sheet pan at 350°F for 5 minutes before serving. For Easter or holiday meals where timing is tight, this make-ahead approach works well - roast it while something else is in the oven and reheat just before serving. But if you have the space, I would roast it fresh.

    Seasonal Favorite

    Baked lattice top crust on an apple pie made with the Crisco pie crust recipe, showing flaky layers in the fluted edge.

    This is my award-winning Crisco pie crust recipe; flaky, tender, and made with simple ingredients you already have.

    Crisco Pie Crust
    Roasted asparagus recipe on a baking sheet.

    Roasted Asparagus with Parmesan

    Roasting asparagus is a quick and easy way to enhance the delicate flavors of the asparagus and give the asparagus tips a bit of char.
    5 from 1 vote
    Print Pin Rate
    Course: Side Dishes
    Cuisine: American
    Keyword: asparagus recipe, how to roast asparagus, roasted asparagus
    Prep Time: 3 minutes minutes
    Cook Time: 12 minutes minutes
    Total Time: 15 minutes minutes
    Servings: 1 lb
    Calories: 211
    Author: Sarah Mock

    Ingredients

    •  
      1 lb asparagus fresh
    • A 500ml bottle of California Olive Ranch Global Blend Extra Virgin Olive Oil with green and blue labeling, indicating a blend from Argentina, Portugal, Chile, and California-perfect for drizzling over your favorite shrimp avocado salad.2 Tablespoon olive oil
    •  
      ¼ Cup Parmesan Cheese shredded
    • Two clear acrylic mills-one filled with coarse salt, the other with whole black peppercorns, both topped with metal knobs-stand side by side on a white background, ready to season your favorite dishes like Shrimp Avocado Salad.Salt and pepper
    Follow Savoring The Good On PinterestFollow @SavoringTheGood or tag #STGRecipes!

    Instructions

    • Preheat the oven to 425 degrees.
    • Trim the asparagus of the tough ends.
    • Spread the asparagus in a single layer on a sheet pan. 
      1 lb asparagus
    • Drizzle the asparagus spears with a few tablespoons of olive oil. 
      2 Tablespoon olive oil
    • Sprinkle with salt and pepper.
      Salt and pepper
    • If using parmesan cheese sprinkle the cheese in an even layer.
      ¼ Cup Parmesan Cheese
    • Gently toss the asparagus to evenly coat it with the oil and seasonings.
    • Roast in the oven for 12 minutes.
    • Remove from the oven and toss the asparagus.
    • Return to the oven and roast for another 2-8 minutes until the tips are taking on a bit of char and the stalks are tender.

    Notes

    Other ways to enhance the flavors of roasted asparagus.
    • add roasted garlic or garlic confit to the pan.
    • After the vegetables come out of the oven zest a lemon over them for a bright, fresh flavor.
    • Olives can be added to the pan to add a bit of savory saltiness. Check out my warm olives to bake alongside the asparagus.
    • Sprinkle a bit of everything but the bagel seasoning when you toss the asparagus with oil. 
    Want to share when you made this recipe?Follow @SavoringTheGood & tag #STGRecipes!
    Nutrition Facts
    Roasted Asparagus with Parmesan
    Serving Size
     
    1
    Amount per Serving
    Calories
    211
    % Daily Value*
    Fat
     
    17
    g
    26
    %
    Saturated Fat
     
    4
    g
    25
    %
    Polyunsaturated Fat
     
    12
    g
    Cholesterol
     
    7
    mg
    2
    %
    Sodium
     
    349
    mg
    15
    %
    Carbohydrates
     
    10
    g
    3
    %
    Sugar
     
    3
    g
    3
    %
    Protein
     
    9
    g
    18
    %
    * Percent Daily Values are based on a 2000 calorie diet.
    **Nutritional facts are just estimates. Please utilize your own brand nutritional values to double check against our estimates.
    Like this recipe card? Want one for your site?Check out WP Recipe Maker!

    Sarah Mock of savoringthegood.com headshot 2022

    I am Sarah Mock. Welcome!

    Sarah Mock is a classically trained Chef and a graduate of Johnson & Wales University. A culinary blogger for 17 years, Sarah helps the home cook prepare her recipes with professional results.

    Get to know me

    as seen in:

    Logos of Hersheyland, ABC News, and Good Day PA are showcased in a seamless row, providing a snapshot of popular brands.

    Hersheyland Nightline Good Day Pa!

    The vibrant design showcases the iconic logos of Pinterest, Rachael Ray, and Jell-O set against a bold red background. Sorry, the provided description doesn't offer enough detail to suggest important SEO keywords.

    Pinterest Rachael JELL-O

    Fruity Pebbles Rice Crispy Treats Recipe

    close shot of fruity pebbles treats, out of focus in the background, square image

    Fruity pebbles treats are the rainbow version of your favorite marshmallow cream and rice crispy treats.

    fruity pebbles treats being sliced with a knife

    Perfect for your rainbow party or your bake sale fundraiser, these no-bake treats have 4 simple ingredients and are ready in under 30 minutes.

    WHAT INGREDIENTS DO YOU NEED TO MAKE FRUITY PEBBLES TREATS?

    • Fruity Pebbles cereal - Post Fruity pebbles cereal is naturally gluten-free
    • Marshmallows - most marshmallows are gluten and dairy-free but not naturally vegan.
    • Butter - unsalted butter is what I prefer
    • Vanilla extract

    TOOLS NEEDED TO MAKE THE RICE CRISPY TREATS:

    • large pot - you need a lot of room to stir the treats.
    • silicone spatula - I spray my spatula with nonstick spray to help with easy cleanup.
    • measuring cups - Pyrex cups are what I have on hand but other dry measuring cups will work.
    • 9 x 13 pan - either glass or metal. Be sure to spray with non-stick spray.
    • non-stick pan spray
    • Chef knife or pizza wheel  - once again, spray with non-stick pan spray.

    Fruity Pebbles Rice Crispy Recipes with Marshmallow Fluff:

    fruity pebbles treat square on a bamboo cutting board
    1. First, spray a 9x13-inch pan with nonstick cooking spray.
    2. Then, melt butter in a large pot and drop the heat to medium-low and add the marshmallows and stir until melted.
    3. Remove from heat and stir in vanilla extract.
    4. Add cereal and stir to coat with the marshmallow mixture.
    5. Pour the marshmallow coated cereal into the coated pan, pressing the treats into the prepared pan.
    6. Let cool until firm, turn out of the pan and slice into bars.
    7. Store in an airtight container for up to 3 days. (if they last that long!)

    FRUITY PEBBLES CEREAL TREATS WITH MARSHMALLOW FLUFF

    two hands pulling part a fruity pebbles treat to show how soft and gooey it is.

    Another absolutely delicious option is to add butter and some marshmallow butter and cream and add marshmallow fluff to your treat bars.

    FRUITY PEBBLES TREATS INGREDIENTS:

    • 4 tablespoons butter
    • 8 cups mini marshmallows, divided
    • 1 ½ cups Marshmallow Fluff
    • 3 cups Rice Krispie cereal
    • 3 cups Fruity Pebble cereal

    HOW TO MAKE FRUITY PEBBLES TREATS WITH MARSHMALLOW FLUFF:

    1. Line a 9×13 pan with foil and spray lightly with nonstick spray, set aside.
    2. In a large saucepot over medium-low heat melt the butter.
    3. Once the butter is melted add in 6 cups of the mini marshmallows and salt, stirring constantly until they're melted. Remove the pot from the heat.
    4. Immediately stir in both cereals until coated with the melted marshmallows. Then stir in the Fluff until evenly mixed in. Finally stir in the remaining 2 cups of mini marshmallows.
    5. Spread the mixture into the prepared pan and press evenly.
    6. Allow the bars to cool and set for at least an hour before cutting into squares.

    Microwave instructions

    Perfect for the college dorm room, fruity cocoa pebbles are rice krispie treats that can be made in a microwave!

    • 4 Tablespoons butter or margarine
    • 1 pkg(10 oz) miniature marshmallows (6 cups)
    • 6 cups fruity pebbles cereal
    1. Microwave butter in 4-qt microwaveable bowl on HIGH 45 seconds or until melted. Add marshmallows; toss to coat.
    2. Microwave 1-½ minutes or until marshmallows are completely melted and mixture is well blended, stirring after 45 seconds.
    3. Add cereal; mix well. Press firmly into greased foil-lined 13"x9" pan. Cool and cut into 24 squares.

    Storage Tips

    Store your rice crispy treats bars in an air tight closed container. Do not refrigerate.

    CHEF TIP FOR MAKING RICE KRISPIE TREATS

    • Don't let the marshmallows boil. High heat will crystallize the sugars, making the bars hard instead of chewy. Keep the heat just warm enough to melt the marshmallows.
    • When melting the marshmallows, allow the marshmallows to melt about 95%. The little bits of marshmallow will give the rice crispy treats pockets of marshmallow.
    • Or add 1 cup of mini marshmallows right at the end before stirring in the fruity pebbles.
    • Gently press the warm crispy treats into the pan, do not press hard, or compact them.
    • Don't let the marshmallows over heat and take on color.

    Tips for slicing:

    • Generously spray the pan with nonstick spray before pressing the rice krispie treats into the pan.
    • Use a large chef knife that has been dipped in hot water and dried before each cut.
    • Or spray a chef knife or pizza wheel with non-stick spray before slicing.

    FAQ's and Tips

    Are Fruity Pebbles treats gluten-free?

    Fruity pebbles cereal treats also are gluten-free and dairy-free when a dairy-free butter substitute is used. Post Fruity Pebble cereal is labeled gluten-free.
    This is why fruity pebbles cereal treats are the perfect allergy-friendly treat to send to school and bake sales.

    How many cups are in a box of Fruity Pebbles?

    There are about 8-½ cups of fruity pebbles in each box. That means one box will make a 9x13 pan of sweet treats or grab 2 boxes to make one pan of extra-thick treats or 2 pans of single layer rice crispy treats.

    close shot of fruity pebbles treats, out of focus in the background, square image

    Fruity Pebbles Treat Bars

    Perfect for your rainbow party or your bake sale fundraiser, these no-bake treats have 4 simple ingredients and are ready in under 30 minutes.
    No ratings yet
    Print Pin Rate
    Course: Dessert Recipes
    Cuisine: American
    Keyword: fruity pebbles treats recipe, marshmallo treat recipe, rice cereal treat recipe
    Prep Time: 2 minutes minutes
    Cook Time: 10 minutes minutes
    Additional Time: 10 minutes minutes
    Total Time: 22 minutes minutes
    Servings: 12
    Calories: 182
    Author: Sarah Mock

    Ingredients

    •  
      6 Cups Fruity Pebbles cereal
    •  
      10 ounces Marshmallows 32 large marshmallows
    • A rectangular 8 oz package of Kerrygold Pure Irish Butter, unsalted, with a green and gold label and Irish grass-fed cow branding-perfect for creating delicious Saint Patrick's Day cupcakes.4 tablespoons Butter
    • easy sous vide vanilla extract1 Teaspoon Vanilla Extract
    Follow Savoring The Good On PinterestFollow @SavoringTheGood or tag #STGRecipes!

    Instructions

    • Spray a 9x13-inch pan with nonstick cooking spray.
    • Melt butter in a large pot over medium heat.
    • Drop the heat to medium-low and add the marshmallows and stir until melted.
    • Remove from heat and stir in vanilla extract.
    • Add cereal and stir to coat with the marshmallow mixture.
    • Pour the marshmallow coated cereal into the coated pan.
    • Gently press the treats with the back of a silicone spatula to compact and smooth the surface of the treats.
    • Let set until firm, turn out of the pan and slice into bars.
    • Store in an airtight container for up to 3 days. (if they last that long!)

    Notes

    Tips for getting gooey, soft crispy treats:
    • Don't let the marshmallows boil. High heat will crystallize the sugars, making the bars hard instead of chewy. Keep the heat just warm enough to melt the marshmallows.
    • When melting the marshmallows, allow the marshmallows to melt about 95%. The little bits of marshmallow will give the treats pockets of marshmallow. Or add 1 cup of mini marshmallows right at the end before stirring in the cereal.
    • Gently press the warm crispy treats into the pan, so not press hard, or compact them.
    • Don't let the marshmallows to take on color.
    Want to share when you made this recipe?Follow @SavoringTheGood & tag #STGRecipes!
    Nutrition Facts
    Fruity Pebbles Treat Bars
    Serving Size
     
    1
    Amount per Serving
    Calories
    182
    % Daily Value*
    Fat
     
    5
    g
    8
    %
    Saturated Fat
     
    3
    g
    19
    %
    Polyunsaturated Fat
     
    1
    g
    Cholesterol
     
    10
    mg
    3
    %
    Sodium
     
    145
    mg
    6
    %
    Carbohydrates
     
    35
    g
    12
    %
    Sugar
     
    20
    g
    22
    %
    Protein
     
    1
    g
    2
    %
    * Percent Daily Values are based on a 2000 calorie diet.
    **Nutritional facts are just estimates. Please utilize your own brand nutritional values to double check against our estimates.
    Like this recipe card? Want one for your site?Check out WP Recipe Maker!


    Sarah Mock of savoringthegood.com headshot 2022

    I am Sarah Mock. Welcome!

    Sarah Mock is a classically trained Chef and graduate of Johnson & Wales University. A culinary blogger for 15 years Sarah helps the home cook prepare her recipes with professional results.
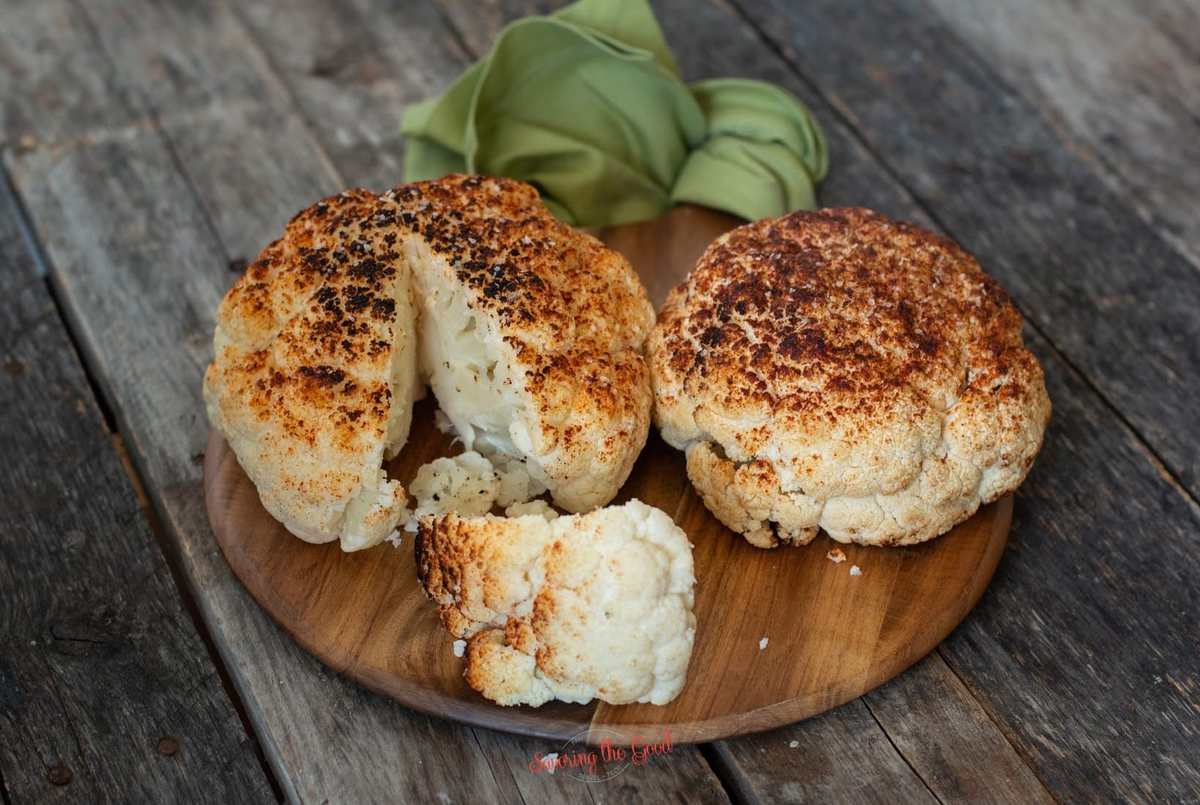
    Get to know me

    as seen in:

    Logos of Hersheyland, ABC News, and Good Day PA are showcased in a seamless row, providing a snapshot of popular brands.

    Hersheyland Nightline Good Day Pa!

    The vibrant design showcases the iconic logos of Pinterest, Rachael Ray, and Jell-O set against a bold red background. Sorry, the provided description doesn't offer enough detail to suggest important SEO keywords.

    Pinterest Rachael JELL-O

    Cream of Asparagus Soup Recipe

    Bowl of creamy green soup, the perfect side dish for shrimp, topped with three asparagus spears on a wooden surface, next to a spoon and napkin.

    This asparagus soup is all about simplicity and flavor. By using fresh asparagus and a touch of cream, you get a rich, velvety texture without overwhelming the natural taste of the asparagus. It is a quick, 30-minute soup, and perfect for busy weeknights or elegant dinners.

    Cream of asparagus soup in a black bowl

    Ingredients:

    • asparagus, trimmed of woody stems
    • onion, chopped
    • garlic, minced or 2 cloves garlic confit or roasted garlic
    • olive oil
    • chicken stock or vegetable broth (vegetarian option)
    • bay leaf
    • heavy cream or sour cream (both optional)
    • Salt and pepper to taste

    Recipe Card?

    To find the full printable recipe with specific measurements and directions CLICK HERE to go to the recipe card.

    Instructions

    showing before and after on how to trim asparagus

    Prepare the Asparagus

    Trim the woody ends and chop into 1-2 inch pieces. Save a few tender tips for garnish.

    Cream of asparagus soup recipe with chopped onions on a cutting board and a knife.

    Sauté the Aromatics

    1. Heat olive oil in a large pot over medium-high heat.
    2. Add the onion and sauté until golden, about 5 minutes.
    3. Stir in the garlic and cook for 30 seconds.
    A pan full of asparagus cooking in a cream of asparagus soup.

    Cook the Asparagus

    1. Add the bay leaf and chopped asparagus to the pot.
    2. Pour in the broth and bring to a simmer.
    3. Cook for 10 minutes, or until the asparagus is fork-tender.
    Cream of asparagus soup being blended in a blentec blender

    Blend the Soup

    • Remove the bay leaf.
    • Using an immersion blender or regular blender (in batches), puree the soup until smooth.
    • For extra silkiness, strain through a fine-mesh sieve (optional).
    A person pouring cream into a pot of soup, specifically an asparagus soup recipe.

    Finish the Soup

    Stir in the heavy cream (if using) and season with salt and pepper to taste.

    Cream of asparagus soup in a black bowl

    Garnish and Serve

    Top with steamed or sautéed asparagus tips and a drizzle of olive oil.

    Did you make this recipe?

    Do you have feedback that would be helpful to others? If so can help this small business owner by leaving a rating and a review in the comments section? Thank you for being part of the Savoring The Good Community. ~ Sarah

    Serving Suggestion

    Serve with crusty bread, a fresh green salad, or alongside grilled chicken for a complete meal.

    Tips and Variations:

    • Vegan/Gluten-Free: Use vegetable broth and skip the cream (or use coconut cream).
    • Make Ahead: This soup can be refrigerated for up to 3 days or frozen for up to 3 months.
    • Garnish Ideas: Try croutons, fresh herbs, or a dollop of yogurt.
    • Blending Hot Soup: Be careful when blending hot soup. Leave the blender lid slightly ajar or cover with a towel to allow steam to escape.
    • Substitutions: Use sour cream, plain yogurt, or crème fraîche instead of heavy cream.

    How to trim the ends from asparagus 

    1. Leave the asparagus bundled in the rubber band.
      A bundle of fresh asparagus stalks is secured with a purple band, placed on a wooden surface.
    2. Place the asparagus on a cutting board and firmly hold the tip end of the asparagus with one hand.
    3. Using a sharp knife, use a slicing motion to chop off 1 inch of asparagus. 
      A bunch of asparagus stalks, destined for a delightful cream of asparagus soup, held together by a blue rubber band with trimmed ends on a wooden surface.
    4. Check to be sure the end of the asparagus is moist.
    5. If the asparagus is dry, slice off another ½ inch.

    How to make this recipe vegan and gluten-free:

    Simply switch out the chicken stock for a vegetable broth and omit the heavy cream completely. Just be sure to have a high powered blender such as a BlendTec blender to ensure you get a velvety smooth, creamy texture. 

    Freezer Instructions 

    Follow these simple instructions, your Cream of Asparagus Soup will stay fresh and delicious in the freezer, ready to enjoy whenever you need a quick and satisfying meal! 

    1. Cool the Soup Completely
      • After cooking, let the soup cool to room temperature.
      • To speed up cooling, transfer the soup to a shallow container or divide it into smaller portions.
      • Avoid placing hot soup directly in the freezer, as it can raise the freezer temperature and affect the quality of other foods.
    2. Portion the Soup
      • Divide the soup into individual or family-sized portions based on how you plan to use it later.
      • Use airtight, freezer-safe containers or heavy-duty freezer bags.
      • Leave about 1 inch of headspace in containers to allow for expansion as the soup freezes.
    3. Label and Date
      • Label each container or bag with the name of the soup and the date it was made.
      • Cream of Asparagus Soup can be frozen for up to 3 months for best quality.
    4. Freeze
      • Place the containers or bags in the freezer in a single layer until fully frozen.
      • If using freezer bags, lay them flat to save space and allow for quicker thawing.

    How to Thaw and Reheat

    Thawing

    • Refrigerator Method: Transfer the soup to the refrigerator and let it thaw overnight.
    • Quick Thaw Method: Place the frozen soup in a bowl of cold water for a few hours, changing the water every 30 minutes.
    • Direct Cooking: You can also reheat the soup directly from frozen (see below).

    Reheating

    • Stovetop: Pour the thawed soup into a pot and heat over medium heat, stirring occasionally, until warmed through. Add a splash of broth or water if the soup seems too thick.
    • Microwave: Transfer the soup to a microwave-safe bowl and heat in 1-minute intervals, stirring in between, until hot.
    • From Frozen: Place the frozen soup in a pot over low heat. Stir occasionally, breaking up the soup as it thaws. Once fully thawed, increase the heat to medium and simmer until heated through.
    A hand uses a teal ladle to serve macaroni and cheese from a pot. Overlaid text highlights features: extensive food safety testing, dishwasher safe, and compatible with Souper Cubes for convenient 1 Cup food storage.

    Souper Cubes

    1 cup portions!

    Perfect for freezing leftovers.(As seen on Shark Tank.)

    Purchase

    Soup Recipes

    • A wooden ladle holds a serving of Crock Pot Cowboy Soup, filled with ground meat, black beans, corn, tomatoes, and green peppers in a thick red sauce.
      Crock Pot Cowboy Soup
    • A bowl of cheesy potato soup topped with shredded cheese, bacon bits, and chopped green onions sits on a white surface.
      Cheesy Potato Soup (Crockpot)
    • A bowl of McCormick white chicken chili topped with grated cheese, cilantro, avocado slices, lime wedges, a tortilla chip, and a dollop of sour cream sits on a wooden table with a spoon and napkin.
      McCormick White Chicken Chili Recipe
    See more Soup Recipes →

    Tips for Freezing Cream of Asparagus Soup

    • Skip the Cream: If possible, freeze the soup without adding the heavy cream or sour cream. Add it when reheating for the best texture.
    • Blend Again After Thawing: If the soup separates during freezing, blend it again after reheating to restore its smooth, velvety texture.
    • Garnish Fresh: Add fresh garnishes like steamed asparagus tips, herbs, or a drizzle of cream after reheating for the best presentation and flavor.
    Bowl of creamy green soup, the perfect side dish for shrimp, topped with three asparagus spears on a wooden surface, next to a spoon and napkin.

    Velvety Cream of Asparagus Soup (Ready in 30 mins)

    This velvety smooth cream of asparagus soup is ready in just 30 minutes! Made with fresh asparagus, onions, and a touch of cream, it's a light yet satisfying soup perfect for any occasion.
    4.91 from 11 votes
    Print Pin Rate
    Course: Soup
    Cuisine: American
    Keyword: Cream of asparagus soup recipe, soup recipe
    Prep Time: 10 minutes minutes
    Cook Time: 20 minutes minutes
    Total Time: 30 minutes minutes
    Servings: 4 cups
    Calories: 226
    Author: Sarah Mock

    Ingredients

    •  
      2 lbs asparagus trimmed of woody stems
    • A single whole yellow onion with dry, papery skin, photographed against a white background-the perfect flavorful addition to your next Crockpot Hash brown Casserole.1 Onion chopped (⅔ cup chopped)
    • Whole garlic bulb with white papery skin, lying on its side against a plain white background-a perfect aromatic addition to your next slowcooker sausage casserole.1 clove Garlic minced or 1 tablespoon minced green garlic
    • A 500ml bottle of California Olive Ranch Global Blend Extra Virgin Olive Oil with green and blue labeling, indicating a blend from Argentina, Portugal, Chile, and California-perfect for drizzling over your favorite shrimp avocado salad.3 tablespoon olive oil
    •  
      4 Cups chicken broth vegetarian option
    • A pile of dried bay leaves on a white background, perfect for adding depth and aroma to your chipotle carnitas recipes.1 bay leaf
    • heavy cream bottle.¼ Cup Heavy Cream or sour cream
    • A 6 oz container of McCormick Pure Ground Black Pepper with a red lid and a ½ Teaspoon Black Pepper more to taste
    • A Morton Salt container with a blue label featuring a girl in a yellow dress holding an umbrella, with salt pouring out of a container-an essential ingredient for perfectly seasoning dishes like Chicken Cordon Bleu.1 Teaspoon salt more to taste
    Follow Savoring The Good On PinterestFollow @SavoringTheGood or tag #STGRecipes!

    Instructions

    • Trim the asparagus and chop into 1-2 inch pieces. Save a few asparagus tips if you would like to garnish the soup.
      2 lbs asparagus
    • Chop the onion and finely grate or chop the garlic if using fresh garlic.
      1 Onion, 1 clove Garlic
    • In a large pot, over medium-high heat, drizzle with a few tablespoons of olive oil and saute the onion until the onion takes on a bit of golden color. 
      3 tablespoon olive oil
    • Add the grated garlic, or confit garlic, if using to the pan. Stir for 30 seconds until heated through. 
    • Add the bay leaf and the chopped asparagus to the pan and stir until the asparagus becomes sauteed and bright green in color. 
      1 bay leaf
    • Pour the chicken stock into the pan and bring to a simmer. 
      4 Cups chicken broth
    • Cook for 10 minutes or until the asparagus is fork-tender. 
    • Working in batches, puree the asparagus and broth in a blender, food processor or use an immersion blender stick. 
    • If the soup is not silky smooth, strain the soup through a fine-mesh strainer, back into the pot. (completely optional)
    • Stir in the heavy cream and serve.
      ¼ Cup Heavy Cream, ½ Teaspoon Black Pepper, 1 Teaspoon salt
    Want to share when you made this recipe?Follow @SavoringTheGood & tag #STGRecipes!
    Nutrition Facts
    Velvety Cream of Asparagus Soup (Ready in 30 mins)
    Serving Size
     
    1 cup
    Amount per Serving
    Calories
    226
    % Daily Value*
    Fat
     
    17
    g
    26
    %
    Saturated Fat
     
    5
    g
    31
    %
    Polyunsaturated Fat
     
    11
    g
    Cholesterol
     
    24
    mg
    8
    %
    Sodium
     
    1657
    mg
    72
    %
    Carbohydrates
     
    14
    g
    5
    %
    Sugar
     
    6
    g
    7
    %
    Protein
     
    8
    g
    16
    %
    * Percent Daily Values are based on a 2000 calorie diet.
    **Nutritional facts are just estimates. Please utilize your own brand nutritional values to double check against our estimates.
    Like this recipe card? Want one for your site?Check out WP Recipe Maker!


    Sarah Mock of savoringthegood.com headshot 2022

    I am Sarah Mock. Welcome!

    Sarah Mock is a classically trained Chef and graduate of Johnson & Wales University. A culinary blogger for 15 years Sarah helps the home cook prepare her recipes with professional results.
    Get to know me

    as seen in:

    Logos of Hersheyland, ABC News, and Good Day PA are showcased in a seamless row, providing a snapshot of popular brands.

    Hersheyland Nightline Good Day Pa!

    The vibrant design showcases the iconic logos of Pinterest, Rachael Ray, and Jell-O set against a bold red background. Sorry, the provided description doesn't offer enough detail to suggest important SEO keywords.

    Pinterest Rachael JELL-O

    Fried Goat Cheese Recipe

    Fried goat cheese makes for an easy appetizer, a delicious topping to a salad or served on your favorite burger. This recipe can be made into fried goat cheese disks or fried goat cheese balls. Both are equally delicious.

    The first time I had fried goat cheese medallions was on a spinach salad with warm bacon dressing. So many good flavors together! If you make a couple of extras you can save them and serve them when you make a charcuterie and cheese board. Warm or cold, fried goat cheese is amazing! Try it garnished with a crumble of dried sage leaves.

    Ingredients Needed

    Recipe Card?

    To find the full printable recipe with specific measurements and directions CLICK HERE to go to the recipe card.

    I made it exactly how the recipe is written as this is something I always do and it was perfect as is....no changes were needed. Thank you so much for sharing!!! so yummy

    ★★★★★ ~ MICHELLE

    How To Fry Goat Cheese:

    goat cheese being sliced into rounds for fried goat cheese
    1. First, slice a log of goat cheese into disks.
    2. Then, season the bread crumbs with a bit of salt, pepper and dried parsley (optional)and toss to combine.
    3. Whisk together the egg with a tablespoon of water to make an egg wash.
    4. Pour the flour on to a clean plate.
    5. Start by pressing the chilled goat cheese into the flour.
    6. Next, dunk the cheese in the egg wash mixture, flipping to coat.
    7. Then, press the goat cheese in the panko bread crumbs.
    8. Heat olive oil in a shallow pan over medium heat.
    9. Fry the goat cheese in the pan flipping every 15-30 seconds until golden brown.
    10. Remove to a paper towel-lined plate and serve immediately for the most delicious results.

    Make Ahead Tip:

    These freeze very well. Make according to directions up to the frying step, place on a baking sheet and freeze for several hours, then put in freezer bag. Then you have them available anytime. Just remove a few from freezer, let thaw for 20m and fry.

    ~ Velenchenko on Pinterest

    Did you make this recipe?

    Do you have feedback that would be helpful to others? If so can help this small business owner by leaving a rating and a review in the comments section? Thank you for being part of the Savoring The Good Community. ~ Sarah

    This Stuff Slapps!

    Don't knock it till you try it, this stuff slaps. If you're afraid of it being too "goaty" in flavor, get some that had a shorter aging time. The flavor gets stronger and the cheese gets harder the more it's aged.

    - Hissity on Pinterest

    Thanksgiving Appetizer Winner!

    Totally delicious & so easy! A big as an appetizer on Thanksgiving. Will make often in the future

    - Debbie (Thanksgiving '24)

    Ways to enjoy fried goat cheese:

    • As an appetizer drizzled with hot honey or topped with something savory such as tomato jam or something sweet such as pear butter.
    • On a spinach salad with strawberries, red onion, and crisp bacon.
    • As part of a cheeseboard.
    • As a topping on a black bean burger
    tight shot of fried goat cheese showing texture of the inside of the round

    Tips on How To Make Fried Goat Cheese

    6 rounds of fried goat cheese on a serving plater
    • Freeze the goat cheese for 15-30 minutes for easier slicing.
    • Freeze the goat cheese balls for easier rolling.
    • Use a knife that was run under hot water to make slicing easier.

    Easy way to slice goat cheese?

    An easy tip for slicing goat cheese: Use unscented dental floss. (A tip from Judy)

    A buffet table with assorted appetizers, including sliders, bruschetta, skewers, shrimp, and vegetable cups, arranged neatly on wooden boards and trays.

    How Many Appetizers Per Person?

    Use my guide will help you nail the numbers every time.

    Appetizers Per Person?

    Air fryer, baby!

    Had a fight with the egg sticking to the flour but clearly I won that round..they came out better than expected and was pretty easy..

    Pinterest: Hallowqueen🧟‍♀️


    Delicious!

    Made without everything seasoning and with garlic salt instead. Topped with bacon, green onions and honey Dijon vinaigrette on spring mix. The sweet-salty-savory-tangy balance was on point.

    Pinterest: Nail Dipaholic


    Delicious!

    Also served on top of a salad.

    Pinterest: Renee

    Frequently asked questions, answers and tips:

    Tips for making fried goat cheese:

    Press the panko bread crumbs firmly into the cheese.
    Add a teaspoon or two of Everything But The Bagel Seasoning to the bread crumbs for an added layer of flavor. 

    What type of goat cheese is best for frying?

    I use a plain 4-ounce log of goat cheese that I find in the cheese case at my grocery store. Feel free to use a flavored goat cheese such as honey goat cheese or goat cheese with herbs.
    If you are making a double or triple batch, get the larger goat cheese log. I like the log because it can easily be scooped out if I am making balls or simply sliced with dental floss to make the goat cheese disks. 4 ounce log of goat cheese on a black slate surface

    Fried Goat Cheese Recipe (Medallions or Balls)

    Fried goat cheese makes for an easy appetizer, a delicious topping to a salad or served on your favorite burger.
    4.59 from 78 votes
    Print Pin Rate
    Course: Appetizer Recipe
    Cuisine: American
    Keyword: fried goat cheese balls
    Prep Time: 5 minutes minutes
    Cook Time: 3 minutes minutes
    Pre Chill Time: 30 minutes minutes
    Total Time: 38 minutes minutes
    Servings: 6 rounds
    Calories: 122
    Author: Sarah Mock

    Ingredients

    •  
      4 Ounces goat cheese
    •  
      ½ Cup panko bread crumbs
    •  
      1 Teaspoon Everything But The Bagel Seasoning optional
    • A single brown chicken egg, perfect for making Chicken Cordon Bleu, stands upright on a white background.1 Egg
    • A 5-pound bag of King Arthur Baking Company unbleached bread flour with 12.7% protein content, labeled for ideal use in bread, pizza crust, and rolls-perfect for creating hearty sides like homemade loaves to serve alongside a comforting slowcooker sausage casserole.⅓ Cup Flour, All Purpose
    Follow Savoring The Good On PinterestFollow @SavoringTheGood or tag #STGRecipes!

    Instructions

    • Slice a 4-ounce log of goat cheese into 6 disks.
      4 Ounces goat cheese
    • Add a teaspoon or two of Everything But The Bagel Seasoning to the bread crumbs and toss to combine.
      ½ Cup panko bread crumbs, 1 Teaspoon Everything But The Bagel Seasoning
    • Whisk the egg together with a tablespoon of water to make an egg wash in a shallow bowl.
      1 Egg
    • Add the flour to a clean plate.
      ⅓ Cup Flour, All Purpose
    • Start by pressing the chilled goat cheese into the flour.
    • Next, dunk the cheese in the egg wash mixture, flipping to coat.
    • Then, press the goat cheese in the panko bread crumbs.
    • Heat olive oil in a shallow pan over medium heat.
    • Fry the goat cheese in the pan flipping every 15-30 seconds until golden brown.
    • Remove to a paper towel-lined plate and serve immediately for the most delicious results.

    Notes

    Tips for making fried goat cheese:

    • Freeze the goat cheese for 15-30 minutes for easier slicing.
    • Freeze the goat cheese balls for easier rolling.
    • Use a knife that was run under hot water to make slicing easier.
    • Press the panko bread crumbs firmly into the cheese.
    • Add a teaspoon or two of Everything But The Bagel Seasoning to the bread crumbs for an added layer of flavor. 
    Want to share when you made this recipe?Follow @SavoringTheGood & tag #STGRecipes!
    Nutrition Facts
    Fried Goat Cheese Recipe (Medallions or Balls)
    Serving Size
     
    1
    Amount per Serving
    Calories
    122
    % Daily Value*
    Fat
     
    5
    g
    8
    %
    Saturated Fat
     
    3
    g
    19
    %
    Polyunsaturated Fat
     
    2
    g
    Cholesterol
     
    40
    mg
    13
    %
    Sodium
     
    165
    mg
    7
    %
    Carbohydrates
     
    12
    g
    4
    %
    Sugar
     
    1
    g
    1
    %
    Protein
     
    6
    g
    12
    %
    * Percent Daily Values are based on a 2000 calorie diet.
    **Nutritional facts are just estimates. Please utilize your own brand nutritional values to double check against our estimates.
    Like this recipe card? Want one for your site?Check out WP Recipe Maker!

    Sarah Mock of savoringthegood.com headshot 2022

    I am Sarah Mock. Welcome!

    Sarah Mock is a classically trained Chef and graduate of Johnson & Wales University. A culinary blogger for 15 years Sarah helps the home cook prepare her recipes with professional results.

    Get to know me

    as seen in:

    Logos of Hersheyland, ABC News, and Good Day PA are showcased in a seamless row, providing a snapshot of popular brands.

    Hersheyland Nightline Good Day Pa!

    The vibrant design showcases the iconic logos of Pinterest, Rachael Ray, and Jell-O set against a bold red background. Sorry, the provided description doesn't offer enough detail to suggest important SEO keywords.

    Pinterest Rachael JELL-O


    Garlic Confit Recipe

    Garlic confit may sound fancy but it is super simple to make. In 45 minutes cloves of garlic go from pungent to silky, spreadable, sweet, caramel garlic cloves by gently heating them in olive oil.

    garlic confit with herbs in a ball canning jar covered in olive oil

    Garlic confit is similar to roasted garlic but the confited garlic is less caramelized than roasted garlic because of the ratio of oil to garlic used. If you love garlic as much as I do you may want to learn how to grow your own garlic and add fermented garlic honey as well as Garlic Compound Butter to the list of garlic recipes you love.

    Ingredients needed:

    raw garlic cloves in a bowl

    Recipe Card?

    To find the full printable recipe with specific measurements and directions CLICK HERE to go to the recipe card.

    How to make garlic confit

    step by step photos on how to make garlic confit

    Follow these easy step-by-step instructions to make the most amazing garlic confit!

    1. If using fresh bulbs of garlic, separate the cloves and peel the skin off of the cloves. If using pre-peeled garlic check for bruised cloves and remove them. Removing the root end is optional but know it won't soften like the rest of the garlic cloves.
      garlic covered in olive oil in a pan to make garlic confit horizontal image
    2. In a clean saucepan, place the garlic and cover with olive oil.
      garlic confit cloves and herbs in oil in a pan, vertical image
    3. If adding herbs, add to the pan.
    4. Heat the oil over medium-low to low heat.
    5. Do not bring the oil to a simmer. Keep on low for 45 minutes, string every 15 minutes to check for the garlic to take on a golden brown color. 
    6. Remove from the heat and cool immediately.
      garlic confit with golden color on a spoon, pan of oil in the background horizontal image
    7. Transfer to a clean, closed container and store in the refrigerator for up to a month.

    Ways To Use Garlic Confit:

    tight shot of garlic confit in a ball canning jar, horizontal image
    • Whole on a grilled pizza
    • Added to mashed potatoes... think Thanksgiving.
    • Spread on a sandwich in addition to mayonnaise, softened butter or avocado.
    • Add the infused oil to a vinaigrette instead of plain oil.
    • Include on charcuterie and/or cheese board to spread on crostini.

    Chef Tip

    • Can be made 1 month ahead.
    • Trim the tough root ends, which don't soften, but I am fine with ends being attached.
    • Keep chilled and completely covered in oil.
    • Always use a clean spoon to remove garlic.

    FAQ's and Tips

    beautifully colored garlic confit in a white bowl with rosemary as garnish, vertical image
    What oil should I use for confit?

    It is common to use duck fat to confit but I don't have duck fat in my cabinet. So alternatively use extra virgin olive oil in lieu of duck fat. Using an entire cup of extra virgin olive oil can get expensive so feel free to use another neutral cooking oil such as canola or a lite vegetable oil if you are able to find it at a good price point for your budget.

    Can you reuse the leftover confit oil?

    The leftover garlic-infused olive oil can be used to add flavor to your dishes, sauces or even used as a dipping oil for bread. I will use a few tablespoons of confit oil in my black bean hummus recipe for an added layer of flavor. 

    Is confit garlic full of botulism?

    Garlic is extremely low in acid. If it is stored improperly in oil (without oxygen) and in warm temperatures (at room temperature), it can produce a toxin that causes botulism. Botulism can be fatal if not treated immediately. It is very important to refrigerate garlic confit, as per the Center for Disease Control. 

    Use a clean jar with a tight seal to store garlic confit; cool the garlic and oil as quickly as possible, and refrigerate it immediately.
    If you store the preserved garlic properly, it should keep for several months, however, to be completely safe, I recommend only storing it for up to three weeks. If you're worried, you can also safely freeze garlic confit for several months.

    Can you reuse the leftover confit oil?

    The leftover garlic-infused olive oil can be used to add flavor to your dishes, sauces or even used as a dipping oil for bread.

    What does confit mean?

    To confit is just like saying you are going to do long slow cooking in oil or fat to preserve the item, in this case, garlic. The confit was one method meant to preserve produce or even meat back before refrigeration was available. 

    Garlic Confit

    Garlic confit may sound fancy but it is super simple to make. In 45 minutes cloves of garlic go from pungent to silky, spreadable, sweet, caramel garlic cloves by gently heating them in olive oil.
    5 from 3 votes
    Print Pin Rate
    Course: Appetizer Recipe
    Cuisine: French
    Keyword: garlic confit recipe, how to make garlic confit
    Prep Time: 1 minute minute
    Cook Time: 45 minutes minutes
    Total Time: 46 minutes minutes
    Servings: 45 cloves
    Calories: 80
    Author: Sarah Mock

    Ingredients

    •  
      4 bulbs garlic Approximately 45 cloves, 6 ounces
    • A 500ml bottle of California Olive Ranch Global Blend Extra Virgin Olive Oil with green and blue labeling, indicating a blend from Argentina, Portugal, Chile, and California-perfect for drizzling over your favorite shrimp avocado salad.1 Cup Olive Oil
    Follow Savoring The Good On PinterestFollow @SavoringTheGood or tag #STGRecipes!

    Instructions

    • If using fresh bulbs of garlic, separate the cloves and peel the skin off of the cloves. If using pre-peeled garlic check for bruised cloves and remove them. Removing the root end is optional but know it won't soften like the rest of the garlic cloves.
      4 bulbs garlic
    • In a clean saucepan, place the garlic and cover with olive oil.
      1 Cup Olive Oil
    • If adding herbs, add to the pan.
    • Heat the oil over medium low to low heat.
    • Do not bring the oil to a simmer. Keep on low for 45 minutes, string every 15 minutes to check for the garlic to take on a golden brown color. 
    • Remove from the heat and cool immediately.
    • Transfer to a clean, closed container and store in the refrigerator for up to a month.

    Notes

    • Can be made 1 month ahead.
    • Trim the tough root ends, which don't soften, but I am fine with ends being attached.
    • Keep chilled and completely covered in oil.
    • Always use clean spoon to remove garlic.
    Garlic confit variations:
    • 1 sprig of rosemary, 2 sprigs of thyme, 1 bay leaf added to the confit
    • Whole chili pepper added to the confit
    Want to share when you made this recipe?Follow @SavoringTheGood & tag #STGRecipes!
    Nutrition Facts
    Garlic Confit
    Serving Size
     
    2 cloves
    Amount per Serving
    Calories
    80
    % Daily Value*
    Fat
     
    9
    g
    14
    %
    Saturated Fat
     
    1
    g
    6
    %
    Polyunsaturated Fat
     
    8
    g
    * Percent Daily Values are based on a 2000 calorie diet.
    **Nutritional facts are just estimates. Please utilize your own brand nutritional values to double check against our estimates.
    Like this recipe card? Want one for your site?Check out WP Recipe Maker!


    Sarah Mock of savoringthegood.com headshot 2022

    I am Sarah Mock. Welcome!

    Sarah Mock is a classically trained Chef and graduate of Johnson & Wales University. A culinary blogger for 15 years Sarah helps the home cook prepare her recipes with professional results.

    Get to know me

    as seen in:

    Logos of Hersheyland, ABC News, and Good Day PA are showcased in a seamless row, providing a snapshot of popular brands.

    Hersheyland Nightline Good Day Pa!

    The vibrant design showcases the iconic logos of Pinterest, Rachael Ray, and Jell-O set against a bold red background. Sorry, the provided description doesn't offer enough detail to suggest important SEO keywords.

    Pinterest Rachael JELL-O

    Honduran Baleadas Recipe

    Three tacos on a wooden board are filled with avocado slices, scrambled eggs, black beans, crumbled cheese, pickled onions, and sour cream. Reminiscent of baleadas, these vibrant tacos capture the essence of Latin flavors. Half an avocado sits invitingly in the background.

    My take on baleadas is inspired by my Chef friend Matt, who spent his off-hours as a private chef in Honduras exploring the local food carts and small kitchens. Baleadas are a popular Honduran street food: thick, hand-formed flour tortillas filled with creamy refried beans, scrambled eggs, and crumbled cheese. This version comes together easily for breakfast, lunch, or dinner, and you can build each one with whatever toppings you like.

    Baleadas square image

    Other comfort foods that my family loves are stuffed cabbage rolls, copycat chipotle carnitas recipe, Bisquick sausage balls, and crockpot ham and potato soup. We are an eclectic bunch around here. 

    My take on baleadas:

    One of the best parts of culinary school is staying connected with chef friends all over the world. When I have a question about a cuisine I didn't grow up with, they're just a message away.

    Thank you to my friend Matt for sharing his insights on baleadas. Matt worked as a private chef in Honduras and spent his time off exploring local food carts and small kitchens for the best street food around.

    Fresh tortilla ingredients:

    • flour
    • shortening
    • salt
    • baking powder
    • water

    Baleada Filling Ingredients:

    Honduras Baleadas
    • refried beans
    • consommé de Pollo
    • scrambled egg per tortilla
    • Honduran cheese crumbles (queso fresco is a good substitute)
    • Crema (sour cream thinned with lime juice)
    • Green avocado slices
    • Pickled onions

    How to Make the Tortillas for Baleadas

    homemade Baleadas shells
    1. Mix the dry ingredients. In a mixing bowl, whisk together the flour, salt, and baking powder.
    2. Cut in the shortening. Use your fingers to work the shortening into the flour mixture until it forms small, pea-sized crumbs.
    3. Add water. Add water ¼ cup at a time, mixing until the dough comes together into a ball. You may not need all of the water.
    4. Knead the dough. Work the dough with the heel of your hand until it's smooth and holds together.
    5. Divide and rest. Roll the dough into a log, then cut it into 12 equal portions. Cover and let the dough rest for at least 1 hour at room temperature.

    Sarah's Chef Tip

    This dough uses the same cut-in technique as pie crust, so these tortillas bake up a little more tender than the thin, chewy tortillas you'd find from a street cart in Honduras. Think of it as a hybrid: easier for a home cook, and just as satisfying

    The dough can be covered and refrigerated for up to 24 hours if you want to make it ahead.

    How to Cook the Tortillas

    1. Heat your pan. Heat a cast-iron or nonstick skillet over medium-high heat.
    2. Shape the tortilla. Using the palms of your hands, flatten one portion of dough into a circle, then continue pressing with your fingertips until it's an even, flat round.
    3. Cook the tortilla. Place the tortilla in the hot pan and cook until it's lightly puffed and cooked through on each side, with light golden spots. Don't let it cook to a crisp; you want it soft enough to fold.

    How to Make the Refried Bean Filling

    Traditionally the beans are started with clean, dry beans, covered with water and cooked until soft. Also add onion, green pepper, cayenne and consommé de pollo in the pan. But I don't always have time to make fresh beans so I make my beans this way:

    1. Warm the beans. Combine a can of refried beans with ½ cube of consommé de pollo in a small saucepan over medium heat, stirring until warmed through.
    2. Adjust the consistency. If the beans seem thick, stir in a splash of water until they reach a spreadable consistency.

    How to Assemble Your Baleadas

    basic Baleadas
    1. Warm the tortilla. Heat a tortilla in a dry skillet over medium heat for about 30 seconds per side, just until warm and pliable.
    2. Add the beans. Spread a layer of warm refried beans across the center of the tortilla.
    3. Add the egg and cheese. Top the beans with scrambled egg and a sprinkle of Honduran cheese crumbles (or queso fresco). Scramble your eggs until fully set with no runny egg remaining; this is the base filling for a simple baleada.
    4. Add your toppings. From here, baleadas are yours to build. A few favorites:
      Sliced avocado for a creamy, cooling bite A drizzle of crema or thinned sour cream My pickled onions for a tangy crunch.
    5. Fold and serve. Fold the tortilla in half and serve warm.

    What Else Can I Add to My Baleadas?

    Baleadas on a wooden serving board with garnishes

    If you want to switch things up, try mantequilla rala (a thin, creamy butter), chorizo, or queso duro (a firm white cheese) as additional fillings.

    Aside from red beans and sour cream, what other fillings can I add to the tortilla?

    To enhance your baleadas, consider incorporating mantequilla rala (creamy butter), chorizo (spiced sausage), and queso duro (hard white cheese) as additional fillings.

    FAQ's and Tips

    How do you pronounce baleadas?

    I'm not a native Spanish speaker, but I pronounce it "bah-lay-AH-dahs." If you say it differently, let me know in the comments.

    What's the difference between a baleada and a quesadilla?

    A quesadilla is typically a folded tortilla heated, broiled, or fried with cheese and other fillings inside. A baleada is a thicker, hand-formed tortilla filled with mashed, seasoned beans as its base, then built up from there.

    Three tacos on a wooden board are filled with avocado slices, scrambled eggs, black beans, crumbled cheese, pickled onions, and sour cream. Reminiscent of baleadas, these vibrant tacos capture the essence of Latin flavors. Half an avocado sits invitingly in the background.

    Honduran Baleadas

    A traditional Honduran street food is the baleadas. Handmade tortillas are filled with fried beans, scrambled eggs and other delicious toppings. Comfort food from Honduras, for sure.
    4.50 from 10 votes
    Print Rate
    Course: Easy Recipes
    Cuisine: Honduran
    Keyword: baleadas
    Prep Time: 25 minutes minutes
    Cook Time: 10 minutes minutes
    Dough resting: 1 hour hour
    Total Time: 1 hour hour 35 minutes minutes
    Servings: 12
    Calories: 262
    Author: Sarah Mock

    Ingredients

    Fresh tortilla ingredients:

    • A 5-pound bag of King Arthur Baking Company unbleached bread flour with 12.7% protein content, labeled for ideal use in bread, pizza crust, and rolls-perfect for creating hearty sides like homemade loaves to serve alongside a comforting slowcooker sausage casserole.2 ¼ Cups Flour, All Purpose
    •  
      2 tablespoons shortening
    • A Morton Salt container with a blue label featuring a girl in a yellow dress holding an umbrella, with salt pouring out of a container-an essential ingredient for perfectly seasoning dishes like Chicken Cordon Bleu.½ Teaspoon Salt
    • A can of Rumford Baking Powder, 8.1 oz (230g), with red label, showing baked goods like Cherry Scones, and a ½ Teaspoon Baking Powder
    •  
      ¾ Cup Water

    Baleadas Filling Ingredients:

    •  
      1 can refried beans
    •  
      ½ square consommé de pollo
    •  
      1 scrambled egg per tortilla
    •  
      Honduran cheese crumbles queso fresco is a substitite
    •  
      Crema sour cream thinned with lime juice
    •  
      Green avocado slices
    •  
      Pickled onions
    Follow Savoring The Good On PinterestFollow @SavoringTheGood or tag #STGRecipes!

    Instructions

    How to make homemade flour tortillas for baleadas:

    • In a mixing bowl, whisk together the flour, salt and baking powder. 
    • Add the shortening and use your fingers to incorporate the shortening into the flour mixture until small balls of flour and fat form.
    • Add water ¼ cup at a time until a ball forms. Not all of the water may be used.
    • Work the ball with the heel of your hand until a ball forms.
    • Roll the dough into a snake.
    • Cut the dough into 12 portions. 
    • Allow the dough to rest for at least an hour.
    • Dough can be stored in the refrigerator for up to 24 hours or until needed.

    How to cook tortillas for baleadas:

    • Heat a cast iron or non stick skillet to medium hight heat. 
    • Using the palms of your hands, press the flour tortilla into a flat circle. 
    • Continue pressing with your hands and fingertips to form a flat tortilla. 
    • Cook the tortilla on the hot pan until it cooked and lightly puffed on each side. Do not cook to a crisp. 

    How to prepare the beans for Baleadas:Traditionally the beans are started with clean, dry beans, covered with water and cooked until soft. Added to the pan is onion, green pepper, cayanne and consommé de pollo. But I don't always have time to make fresh beans so I make my beans this way:

    • Combine a can of refried beans with ½ square of consommé de pollo in a pan until warm.
    • Add a splash of water to loosen the beans if desired. 

    How to make a simple Baleadas:

    • Warm a tortilla on a non stick or cast iron pan.
    • Spread a layer of beans on the warm tortilla.
    • Add a sprinkling of Honduran cheese crumbles and a scrambled egg. 
    • Fold in half and enjoy!

    How to make Baleadas with all the extras:

    • Warm a tortilla on a non stick or cast iron pan.
    • Spread a layer of beans on the warm tortilla.
    • Add a sprinkling of Honduran cheese crumbles and a scrambled egg. 
    • Add a few slices of thin sliced green avocado.
    • Drizzle on crema or thinned sour cream.
    • Fold in half and enjoy!
    Want to share when you made this recipe?Follow @SavoringTheGood & tag #STGRecipes!
    Nutrition Facts
    Honduran Baleadas
    Serving Size
     
    1
    Amount per Serving
    Calories
    262
    % Daily Value*
    Fat
     
    11
    g
    17
    %
    Saturated Fat
     
    4
    g
    25
    %
    Polyunsaturated Fat
     
    6
    g
    Cholesterol
     
    32
    mg
    11
    %
    Sodium
     
    400
    mg
    17
    %
    Carbohydrates
     
    33
    g
    11
    %
    Sugar
     
    1
    g
    1
    %
    Protein
     
    9
    g
    18
    %
    * Percent Daily Values are based on a 2000 calorie diet.
    **Nutritional facts are just estimates. Please utilize your own brand nutritional values to double check against our estimates.
    Like this recipe card? Want one for your site?Check out WP Recipe Maker!

    published March 26, 2019


    Sarah Mock of savoringthegood.com headshot 2022

    I am Sarah Mock. Welcome!

    Sarah Mock is a classically trained Chef and a graduate of Johnson & Wales University. A culinary blogger for 17 years, Sarah helps the home cook prepare her recipes with professional results.

    Get to know me

    as seen in:

    Logos of Hersheyland, ABC News, and Good Day PA are showcased in a seamless row, providing a snapshot of popular brands.

    Hersheyland Nightline Good Day Pa!

    The vibrant design showcases the iconic logos of Pinterest, Rachael Ray, and Jell-O set against a bold red background. Sorry, the provided description doesn't offer enough detail to suggest important SEO keywords.

    Pinterest Rachael JELL-O


    Sous Vide Yogurt Recipe

    Sous Vide Yogurt Recipe

    Did you know you can make homemade yogurt with the help of your sous vide circulator? Sous vide yogurt is an easy way to make your own yogurt while maintaining all the probiotic benefits that come with incredible homemade yogurt.

    Sous Vide Yogurt in a 4 ounce jar with fruit and honey garnish

    Here are my step-by-step instructions that will lead you to sous vide yogurt success. This is a basic plain yogurt recipe but feel free to top it with fresh fruit or a scoop of jam and a drizzle of home.

    Ingredients needed to make yogurt at home:

    Recipe Card?

    To find the full printable recipe with specific measurements and directions CLICK HERE to go to the recipe card.

    What type of milk should I use?

    Sous Vide Yogurt with fresh raspberry garnish

    I use either 2% or skim cow milk to make yogurt for my family. But you are welcome to use whole milk. The higher the fat content the thicker the yogurt will be.

    What is most important about the type of milk you use be either raw or pasteurized. Pasteurized is what I am able to find at my grocery store and raw milk can be found in various states, depending on the raw milk laws. 

    If you find milk that is labeled Ultra pasteurized milk (UP) or ultra-high temperature treatment (UHT) you are going to need to add a starter culture to the milk or the yogurt will not set. With UP or UHT milk, the milk has been heated to 275°F or higher for about one second and has killed any of the good cultures in the milk.

    How to make Sous Vide Yogurt:

    yogurt in canning jars in a sous vide water bath
    1. Use a large gallon Ziploc bag or several quart-size glass jars, heat the milk to 180 F in the sous vide bath.
    2. Set a timer and hold the milk there for 30 minutes. 
    3. Add ice to the water bath to cool it and drop the temperature of the milk to below 110 F. 
    4. Stir in the starter culture yogurt. 
    5. Transfer to clean quart glass mason jars or multiple smaller glass jars.
    6. Reheat the sous vide water bath to 110-115 F
    7. Submerge the jars in the reheated sous vide making sure the water level is above the jars and place on a lid to keep evaporation to a minimum.
    8. Incubate the yogurt for a minimum of 5 hours or up to 24 hours.
    9. Chill in the refrigerator overnight. 
    10. Enjoy the yogurt with your favorite fruit or granola toppings.
    Sous Vide Yogurt with fruit and honey comb horizontal image

    Frequently asked questions

    Why isn't my sous vide yogurt exactly like the flavored yogurt cups I find at the grocery store?

    The yogurt you find in the grocery store is not the same recipe. This sous vide yogurt recipe does not have added thickeners, stabilizers or flavorings.

    What is the difference between 5 hours and the 24 hour incubated yogurt?

    yogurt to have a distinct yogurt tang, incubate it for 24 hours. The longer the incubation the more tangy flavor it will have. Additionally, if you are looking for a firmer set to your yogurt, go with a 115 incubation versus the 110 that will give you a softer, more pourable yogurt. 

    Which yogurt has live and active cultures?

    I have found that most commercially made yogurts at my grocery store will be labeled 'live and active cultures on the side of the container. It may be in small print but it should be there. This is what you are going to be looking for when you are looking to use a yogurt starter or yogurt with live active cultures.

    Chef Tip To Make Thicker Yogurt

    To make the yogurt thicker in consistency without adding thickeners, strain the yogurt in a strainer lined with cheesecloth or several layers of paper towels. 

    Sous Vide Yogurt Recipe

    Sous Vide Yogurt

    Sous vide yogurt is an easy way to make homemade yogurt with your own ingredients. Here are my step by step instructions that will lead you to sous vide yogurt success.
    4.83 from 17 votes
    Print Pin Rate
    Course: Sous Vide
    Cuisine: French
    Keyword: sous vide yogurt recipe
    Prep Time: 30 minutes minutes
    Cook Time: 1 day day
    Total Time: 1 day day 30 minutes minutes
    Servings: 8 cups
    Calories: 67
    Author: Sarah Mock

    Ingredients

    • A white milk carton with a blue label reading ½ gal milk
    •  
      ½ Cup live active yogurt
    Follow Savoring The Good On PinterestFollow @SavoringTheGood or tag #STGRecipes!

    Instructions

    • Warm the milk to 180 F.
    • Hold the milk there for 30 minutes. Sous vide is amazing for this because of the consistent temperature. This is a step that can be skipped but I find I have a better set to my yogurt.
    • Cool milk to bellow 110 F. 
    • Stir in the yogurt with live active cultures. 
    • Transfer to clean quart jars or multiple smaller jars. Secure the with clean lids and bands or the no leak lids.
    • Heat the water to 110-115 F. Submerge the jars in the reheated sous vide. 
    • Incubate the yogurt for a minimum of 5 hours or up to 24 hours. I prefer 24 hours for more of a tang to my yogurt.
    • Once time is up, remove the yogurt from the water bath and chill in the refrigerator over night. 
    • Enjoy the yogurt with your favorite fruit or granola toppings.

    Notes

    To make the yogurt thicker in consistency with out adding thickeners, drain the yogurt in a strainer lined with cheese cloth or several layers of paper towels. 
    Want to share when you made this recipe?Follow @SavoringTheGood & tag #STGRecipes!
    Nutrition Facts
    Sous Vide Yogurt
    Serving Size
     
    1 /2 cup
    Amount per Serving
    Calories
    67
    % Daily Value*
    Fat
     
    2
    g
    3
    %
    Saturated Fat
     
    2
    g
    13
    %
    Polyunsaturated Fat
     
    1
    g
    Cholesterol
     
    10
    mg
    3
    %
    Sodium
     
    69
    mg
    3
    %
    Carbohydrates
     
    7
    g
    2
    %
    Sugar
     
    1
    g
    1
    %
    Protein
     
    5
    g
    10
    %
    * Percent Daily Values are based on a 2000 calorie diet.
    **Nutritional facts are just estimates. Please utilize your own brand nutritional values to double check against our estimates.
    Like this recipe card? Want one for your site?Check out WP Recipe Maker!

    Sarah Mock of savoringthegood.com headshot 2022

    I am Sarah Mock. Welcome!

    Sarah Mock is a classically trained Chef and graduate of Johnson & Wales University. A culinary blogger for 16 years Sarah helps the home cook prepare her recipes with professional results.

    Get to know me

    as seen in:

    Logos of Hersheyland, ABC News, and Good Day PA are showcased in a seamless row, providing a snapshot of popular brands.

    Hersheyland Nightline Good Day Pa!

    The vibrant design showcases the iconic logos of Pinterest, Rachael Ray, and Jell-O set against a bold red background. Sorry, the provided description doesn't offer enough detail to suggest important SEO keywords.

    Pinterest Rachael JELL-O

    Sous Vide Guinness Beef Stew Recipe

    This is the sous vide version of the classic Irish Beef and Guinness Stew. Full of deep, rich comforting flavors the Guinness Beer is the star of this tender beef stew. 

    Sous Vide Guinness Beef Stew served over mashed potatoes in a white bowl, horizontal image

    If you don't have a sous vide, that is fine! I walk you through the stove top, oven and slow cooker instructions. 

    Why do you cook Guinness beef stew in a sous vide?

    As the saying goes, you can... but SHOULD you? This applies to sous vide cooking. There are many instances that sous vide cooking is preferred for speed such as homemade vanilla or picked vegetables. But there are times when the controlled temperature will give you the most amazing poached eggs or sea bass perfection. When cooking your Guinness stew with sous vide the beef is steak like but also falls apart in your mouth as you bite it. But unlike cooking in a crock pot, you are going to need to do some separation if you are wanting a specific doneness for your meat.

    Recipe Card?

    To find the full printable recipe with specific measurements and directions CLICK HERE to go to the recipe card.

    To separate or to combine?

    Guinness Beef Stew in a sous vide bag, top down image

    If you are looking for a medium rare beef in your stew you are going to want to set your water to 135 but when you do that your vegetables will not cook through. That is a problem when you want to eat cooked vegetables. So you can either precook your vegetables in a pan or set up a separate sous vide for the vegetables. 

    If you combine all the veggies, meat and stock in the sous vide bag, you are going to want to set the water to 185. This will ensure the vegetables will cook but the beef will be more done than if the water was lower in temperature. But the 185 is lower than a slow cooker on low. This combined with a 24 hour cook will still give you a tender, fall apart meat but less steak like than if you had cooked the meat separate at 135. 

    So it is up to you. Go low and get a steak like, meat but have to cook the vegetables separately or cook everything at a higher temperature and your meat will be closer to a slow cooker texture.  

    Guinness Beef Stew in a sous vide bag cooking

    How to make Sous Vide Guinness Beef Stew:

    sous vide version of the classic Irish Beef and Guinness Stew.
    1. Trim the beef and cut into cubes. meat trimmed and cubed for Guinness Beef Stew
    2. Season with salt and pepper. meat cubes with salt and pepper
    3. In a dutch oven, working in batches, sear the meat on all sides. meat being seared in a cast iron pot for Guinness Beef Stew
    4. Transfer the meat to a clean plate. seared meat cubes on a clean plate
    5. Saute the carrots, onions garlic, tomato paste, for a few minutes.
    6. Dust them with flour, add the bay leaf and stir to coat everything in the pan. Guinness Beef Stew ingredients in a dutch oven with flour for thickening
    7. Deglaze the pan with a heavy splash of the Guinness beer, scraping up the browned bits.
    8. Add the meat, vegetables, the liquid from the pan, the remaining beer and the beef stock to a gallon freezer zip top bag.
    9. Heat the sous vide water to 185.
    10. Using the water displacement method, lower the bag into the water, forcing the air out of the bag.
    11. Close the bag and cook for 24 hours.
    12. Once the time is up, remove the bag from the water and pour the liquid from the bag into a pan.
    13. Heat on medium high to thicken the sauce. If sauce is not thick enough, add a mixture of ½ cup milk combined with 3 tablespoons of flour. Bring to a simmer. Guinness Beef Stew in a pan with the gravy thickening
    14. Add the sauce back to the meat and vegetables. Stir to combine.
    15. Serve with Irish soda bread and/or mashed potatoes. Guinness Beef Stew on a bed of mashed potatoes in a white bowl

    Stovetop / Oven Guiness Beef Stew Instructions:

    1. Follow steps 1-7 above.
    2. Add the meat, vegetables, the liquid from the pan, the remaining beer and the beef stock back into the dutch oven.
    3. Simmer on medium to medium low on the stove top for 2-3 hours or braise in a 350 oven for 2-3 hours.
    4. Check sauce for consistency and add a flour/milk mixture as instructed above.

    Slow cooker Guinness Stew Instructions:

    1. Follow steps 1-7 above.
    2. Add the meat, vegetables, the liquid from the pan, the remaining beer and the beef stock into a large slow cooker.
    3. Cook on high for 3-4 hours or on low for 6-8.
    4. Check sauce for consistency and add a flour/milk mixture as instructed above.

    Sous Vide Guinness Beef Stew

    This is the sous vide version of the classic Irish Beef and Guinness Stew. Full of deep, rich comforting flavors the Guinness Beer is the star of this tender beef stew. 
    4.63 from 32 votes
    Print Pin Rate
    Course: Sous Vide
    Cuisine: Irish
    Prep Time: 20 minutes minutes
    Cook Time: 1 day day
    Total Time: 1 day day 20 minutes minutes
    Servings: 6
    Calories: 601
    Author: Sarah Mock

    Ingredients

    •  
      3 pounds Beef chuck roast, trimmed
    •  
      8 ounces baby carrots
    •  
      1 Cup of pearl onions
    • Whole garlic bulb with white papery skin, lying on its side against a plain white background-a perfect aromatic addition to your next slowcooker sausage casserole.3 cloves Garlic
    • A can of Contadina Roma Tomatoes Paste with Italian Herbs, 6 oz, featuring a woman holding tomatoes and countryside imagery on the label-perfect for adding rich, authentic flavor to your favorite recipes like a slowcooker sausage casserole.2 t tomato paste
    • A pile of dried bay leaves on a white background, perfect for adding depth and aroma to your chipotle carnitas recipes.2 Bay Leaves
    • A 5-pound bag of King Arthur Baking Company unbleached bread flour with 12.7% protein content, labeled for ideal use in bread, pizza crust, and rolls-perfect for creating hearty sides like homemade loaves to serve alongside a comforting slowcooker sausage casserole.3 T Flour, All Purpose
    •  
      12 ounces Guinness beer
    •  
      4 Cups beef stock
    Follow Savoring The Good On PinterestFollow @SavoringTheGood or tag #STGRecipes!

    Instructions

    • Trim the beef of excess fat and cut into cubes, approximately 2".
    • Pat the meat dry and season with salt and pepper.
    • In a dutch oven, heat 2 tablespoons of olive oil.
    • Working in batches, sear the meat on all sides.
    • Transfer the meat to a clean plate.
    • Saute the carrots, onions garlic, tomato paste, for a few minutes.
    • Dust them with flour, add the bay leaf and stir to coat everything in the pan.
    • Deglaze the pan with a heavy splash of the Guinness beer, scraping up the browned bits.
    • Add the meat, vegetables, the liquid from the pan, the remaining beer and the beef stock to a gallon freezer zip top bag.
    • Heat the sous vide water to 185.
    • Using the water displacement method, lower the bag into the water, forcing the air out of the bag.
    • Close the bag and cook for 24 hours.
    • Once the time is up, remove the bag from the water and pour the liquid from the bag into a pan.
    • Heat on medium high to thicken the sauce. If sauce is not thick enough, add a mixture of ½ cup milk combined with 3 tablespoons of flour. Bring to a simmer.
    • Add the sauce back to the meat and vegetables. Stir to combine.
    • Serve with Irish soda bread and/or mashed potatoes.

    Notes

    Stovetop / Oven Guiness Beef Stew Instructions:

    1. Follow steps 1-7 above.
    2. Add the meat, vegetables, the liquid from the pan, the remaining beer and the beef stock back into the dutch oven.
    3. Simmer on medium to medium low on the stove top for 2-3 hours or braise in a 350 oven for 2-3 hours.
    4. Check sauce for consistency and add a flour/milk mixture as instructed above.
    Slow cooker Guinness Stew Instructions:
    1. Follow steps 1-7 above.
    2. Add the meat, vegetables, the liquid from the pan, the remaining beer and the beef stock into a large slow cooker.
    3. Cook on high for 3-4 hours or on low for 6-8.
    4. Check sauce for consistency and add a flour/milk mixture as instructed above.
    Want to share when you made this recipe?Follow @SavoringTheGood & tag #STGRecipes!
    Nutrition Facts
    Sous Vide Guinness Beef Stew
    Serving Size
     
    1
    Amount per Serving
    Calories
    601
    % Daily Value*
    Fat
     
    35
    g
    54
    %
    Saturated Fat
     
    15
    g
    94
    %
    Trans Fat
     
    2
    g
    Polyunsaturated Fat
     
    18
    g
    Cholesterol
     
    188
    mg
    63
    %
    Sodium
     
    521
    mg
    23
    %
    Carbohydrates
     
    12
    g
    4
    %
    Sugar
     
    4
    g
    4
    %
    Protein
     
    60
    g
    120
    %
    * Percent Daily Values are based on a 2000 calorie diet.
    **Nutritional facts are just estimates. Please utilize your own brand nutritional values to double check against our estimates.
    Like this recipe card? Want one for your site?Check out WP Recipe Maker!

    Sous Vide Pork And Sauerkraut Recipe

    Roast pork with shredded garnish and sauerkraut in an oval dish, beautifully accented with sliced red apples.

    Our traditional New Year's meal is pork and sauerkraut and it is meant to bring good luck in the New Year. This sous vide pork and sauerkraut recipe is amazing because you can choose the doneness of the pork without over cooking it.

    A delicious pork and sauerkraut recipe served on a plate.

    Be sure to add Hoppin' John recipe aka Carolina beans and rice for an added bit of good luck in the New Year.

    If you don't have a sous vide circulator you can make an oven-roasted pork and sauerkraut recipe or even slow cooker pork and sauerkraut recipe with amazing results as well.  There are benefits to each cooking method but the crock pot recipe is super simple and very much a set it and forget it type of meal. 

    Recipe Card?

    To find the full printable recipe with specific measurements and directions CLICK HERE to go to the recipe card.

    Sous Vide Pork and Sauerkraut ingredients:

    • Pork loin
    • Sauerkraut
    • Apple (optional)
    • Onion (optional)
    • Olive oil
    • Salt & pepper

    What cut of pork should be used?

    Raw pork loin on a cutting board

    In this recipe I am using a boneless pork loin. The bone in will give you another layer of flavor but the boneless loin will be easier to carve. The bone in may also puncture a sous vide bag, depending on the quality of the bag and the placement of the bone. Pork tenderloin is not recommended because it will not hold up to the extended cook time in the oven. Save your tenderloin for your pork tenderloin lemon piccata. 

    Seasonal Favorite

    Baked lattice top crust on an apple pie made with the Crisco pie crust recipe, showing flaky layers in the fluted edge.

    This is my award-winning Crisco pie crust recipe; flaky, tender, and made with simple ingredients you already have.

    Crisco Pie Crust

    Should you sear the pork before placing in the sous vide bag?

    seared pork loin

    I recommend searing your pork before cooking it in the sous vide bag. By searing the meat you are caramelizing the outside of the roast giving it color along with flavoring. Be sure your pan is screaming hot before you place me meat face down in the pan. Do not move it or poke it for at least 4 minutes.

    You will know the meat is properly seared when you can easily flip it over with tongs without tugging too much on the meat to get it to release. Also be sure the outside is cooled enough so it won't melt or compromise the integrity of the sous vide bag. 

    More pork recipes:

    • Bacon Jam Recipe
    • Ham Pot Pie 
    • Crockpot Ham & Potato Soup
    • Copycat chipotle carnitas recipe

    Can I leave out the apples and onions in this recipe?

    Apples and onions are completely optional in this recipe and my Grandma is probably fainting right now for suggesting it but hear me out. By caramelizing onions and adding an apple to this recipe will add an element of sweetness to the sauerkraut, cutting the tartness. But if you are a sauerkraut purist, and love the tang of the kraut leave the apple and onion out. But if you are a newbie to pork and sauerkraut I suggest adding them.

    What is the best sauerkraut for this recipe?

    Pork and Sauerkraut in a sous vide bag before it is closed

    I suggest silver floss sauerkraut. It comes in a bag and is usually found in the meat department next to the pork or even in the refrigerator produce section. You are welcome to use canned sauerkraut but I wouldn't recommend it. You do you but if you are asking, I recommend the bagged sauerkraut. 

    How big of a bag should I use?

    sous vide pork and sauerkraut in a bag

    Be sure the bag that you are going to use to sous vide your pork is big enough to handle the size of the piece of meat. The bags that I had were not big enough so I had to pull out my Food Saver roll of bags with the gusset. Just be sure to make the gussets flat before sealing. I also do a double seal, I have trust issues. 

    I also will use my gusset bags when I am making sous vide pork shoulder. 24 hours in the sous vide and then 2 hours on the smoker or in the oven. Pure perfection!

    What temperature should I cook the pork?

    Ah! The question everyone wants to know. I cook my pork at 150 for 12 hours. 150 may be too high and too done for some people. But keep in mind I grew up with pork that was VERY done and the struggle was always to get the pork NOT DRY. So 150 is NOT DRY for me but over done for others.

    Pork checkoff recommends a minimum of 145. See their visual representations of doneness in their pork temperature charts. With sous vide keep in mind that temperature = doneness and time= texture. So the longer the time the more tender the meat. 

    How to cook sous vide pork and sauerkraut:

    A plastic container with a vacuum sealer sitting on top of it, perfect for preserving your pork and sauerkraut recipe.
    1. Pat the meat dry. 
    2. Place the meat, fat side up, into the pan and sear for at least 4 minutes.
    3. Flip the meat to sear on all sides.
    4. Remove the pork and place in the sous vide bag.
    5. Saute the onion and the apple in the pan.
    6. Deglaze the pan, scraping up the pork bits.
    7. Pour the apples, onions and deglaze into the sous vide bag along with the rest of the sauerkraut. 
    8. Sous vide for 12 hours.
    9. Remove from the water bath and place the pork and krout on a serving platter. 

    ***If not using apples and onions in this recipe, still sear the pork and deglaze the pan with sauerkraut juice.

    Appetizer Recipes

    • Boat Dip recipe square image
      Boat Dip Recipe (TikTok-Inspired)
    • A delightful blueberry salsa recipe awaits you, with a colorful bowl of blueberries and chopped red fruit, elegantly garnished with fresh herbs. All this vibrant goodness sits on a rustic wooden surface, patiently waiting beside a spoon for your enjoyment.
      Blueberry Salsa Recipe
    • A baked dish with a creamy, white topping, garnished with chopped green onions and red bits of meat, placed on a wooden surface with a silver spoon on the side.
      Chipped Beef Dip Recipe (Hot Dried Beef Dip)
    • Muhammara Recipe square image
      Classic Muhammara (Roasted Red Pepper Walnut Dip)
    See more Appetizer Recipes →
    Roast pork with shredded garnish and sauerkraut in an oval dish, beautifully accented with sliced red apples.

    Sous Vide Pork and Sauerkraut

    Our traditional New Year's meal is pork and sauerkraut and it is meant to bring good luck in the New Year. This sous vide pork and sauerkraut recipe is amazing because you can choose the doneness of the pork without over cooking it.
    4.74 from 23 votes
    Print Rate
    Course: Crock-Pot Recipes
    Cuisine: American
    Keyword: sous vide pork and sauerkraut
    Prep Time: 15 minutes minutes
    Cook Time: 12 hours hours
    Additional Time: 15 minutes minutes
    Total Time: 12 hours hours 30 minutes minutes
    Servings: 6
    Calories: 71
    Author: Sarah Mock

    Ingredients

    •  
      1 Pork loin 3-4 lbs
    •  
      2 Pounds Sauerkraut
    •  
      1 Apple optional
    • A single whole yellow onion with dry, papery skin, photographed against a white background-the perfect flavorful addition to your next Crockpot Hash brown Casserole.1 Onion optional
    • A 500ml bottle of California Olive Ranch Global Blend Extra Virgin Olive Oil with green and blue labeling, indicating a blend from Argentina, Portugal, Chile, and California-perfect for drizzling over your favorite shrimp avocado salad.Olive Oil drizzle
    • Two clear acrylic mills-one filled with coarse salt, the other with whole black peppercorns, both topped with metal knobs-stand side by side on a white background, ready to season your favorite dishes like Shrimp Avocado Salad.Salt and pepper to taste
    Follow Savoring The Good On PinterestFollow @SavoringTheGood or tag #STGRecipes!

    Instructions

    • Pat the meat dry and season with salt and fresh cracked pepper. 
      1 Pork loin, Salt and pepper
    • Heat a heavy bottom pan to high on the stove top. Add a drizzle of olive oil.
      Olive Oil
    • Place the meat, fat side up, into the pan and sear for at least 4 minutes to get good caramelization on the surface.
    • Flip the meat to sear on all sides.
    • Remove the pork, cool slightly and place in the sous vide bag.
    • Saute the onion and the apple in the pan until they start to take on color.
      1 Apple, 1 Onion
      apples on onions in a dutch oven for Pork and Sauerkraut
    • Use some of the liquid from the sauerkraut to deglaze the pan, scraping up the pork bits.
      2 Pounds Sauerkraut
    • Pour the apples, onions and deglaze into the bag along with the rest of the sauerkraut.
    • Remove the air from the bag and seal. Double seal if desired.
    • Lower the sous vide bag into a 150 bath and cook for 12 hours.
      A plastic container with a vacuum sealer sitting on top of it, perfect for preserving your pork and sauerkraut recipe.
    • Remove from the bath and place the pork and krout on a serving platter.
      A delicious pork and sauerkraut recipe, served in a white bowl.

    Notes

    Use silver floss sauerkraut, found in the meat section of the grocery store.
    Bone in pork loin is another option for the boneless pork loin.
    If not using apples and onions in this recipe, still sear the pork and deglaze the pan with sauerkraut juice.
    Want to share when you made this recipe?Follow @SavoringTheGood & tag #STGRecipes!
    Nutrition Facts
    Sous Vide Pork and Sauerkraut
    Serving Size
     
    1
    Amount per Serving
    Calories
    71
    % Daily Value*
    Fat
     
    3
    g
    5
    %
    Polyunsaturated Fat
     
    2
    g
    Sodium
     
    1049
    mg
    46
    %
    Carbohydrates
     
    12
    g
    4
    %
    Sugar
     
    7
    g
    8
    %
    Protein
     
    2
    g
    4
    %
    * Percent Daily Values are based on a 2000 calorie diet.
    **Nutritional facts are just estimates. Please utilize your own brand nutritional values to double check against our estimates.
    Like this recipe card? Want one for your site?Check out WP Recipe Maker!

    Sarah Mock of savoringthegood.com headshot 2022

    I am Sarah Mock. Welcome!

    Sarah Mock is a classically trained Chef and graduate of Johnson & Wales University. A culinary blogger for 15 years Sarah helps the home cook prepare her recipes with professional results.

    Get to know me

    as seen in:

    Logos of Hersheyland, ABC News, and Good Day PA are showcased in a seamless row, providing a snapshot of popular brands.

    Hersheyland Nightline Good Day Pa!

    The vibrant design showcases the iconic logos of Pinterest, Rachael Ray, and Jell-O set against a bold red background. Sorry, the provided description doesn't offer enough detail to suggest important SEO keywords.

    Pinterest Rachael JELL-O


    Slow Cooker Pork and Sauerkraut Recipe

    Slow Cooker Pork and Sauerkraut square image

    Pork and sauerkraut is my family's traditional New Year's day tradition meant to bring good luck in the New Year. This is my slow cooker pork and sauerkraut recipe that is cooked to perfection with a touch of sweetness with the addition of apples.

    A white bowl with pork and sauerkraut in it.

    If you don't have a crockpot you can make an oven-roasted pork and sauerkraut recipe or even a sous vide pork and sauerkraut. There are benefits to each cooking method but the crockpot recipe is super simple and very much a set-it-and-forget-it type of meal. 

    Be sure to add Hoppin' John recipe aka Carolina beans and rice for an added bit of good luck in the New Year.

    What cut of pork should be used?

    Raw pork loin on a cutting board

    This is the great debate on New Years Day. What cut of pork was used this year to make pork and sauerkraut? Was it the pork loin roast or was it the bone in pork loin. Some families will use a pork butt but I don't know any personally.

    Everyone has their favorite. The bone in will give you another layer of flavor but the boneless pork loin will be easier to carve. Pork tenderloin is not recommended because it will not hold up to the extended cook time in the oven. Save your tenderloin for your pork tenderloin lemon piccata. 

    Recipe Card?

    To find the full printable recipe with specific measurements and directions CLICK HERE to go to the recipe card.

    Crock Pot Pork and Sauerkraut Recipe:

    pork and sauerkraut cooked in a slow cooker, brown and caramelized
    1. Pat the meat dry. 
    2. Place the pork roast, fat side up, into a screaming hot pan and sear for at least 4 minutes.
    3. Flip the meat to sear on all sides until it takes on a lovely brown color. 
    4. Remove the pork and place in the slow cooker.
    5. Saute the onion and the apple in the pan.
    6. Deglaze the pan, scraping up the pork bits. pork and sauerkraut in a slow cooker
    7. Pour the apples, onions and deglaze into the crock pot along with the rest of the sauerkraut on top of the pork. 
    8. Cover and cook 8-12 hours on low or high for 5-7 hours. 
    9. Remove from the crock pot and place the pork and sauerkraut mixture on a serving platter. Allow the meat to rest for 15 minutes before cutting to allow the juices to redistribute throughout the meat.

    ***If not using apples and onions in this recipe, still sear the pork and deglaze the pan with kraut juice.

    Did you make this recipe?

    Do you have feedback that would be helpful to others? If so can help this small business owner by leaving a rating and a review in the comments section? Thank you for being part of the Savoring The Good Community. ~ Sarah

    A large black and silver Crockpot filled with mixed vegetables and sauce is set to the "Low" heating option.

    Sarah's recommendation

    7 qt. Crock-Pot

    Perfect for Chicken, Roasts and Meals for 8+ people.

    Buy on Amazon

    What to serve with pork and sauerkraut

    Choose a side dish

    Pork and Sauerkraut Sides

    Get the recipes

    Mom will have a few hot dogs and apple juice for the kids and some homemade applesauce made with granny smith apples because she knows the kids are not fans of the tangy kraut. Kids know when all things sauerkraut have touched their food.

    For sure we will have corn from the freezer and Aunt Cindy will make Rhodes rolls, because they are so easy! Beyond a simple dish of wide egg noodles smothered in butter, and mashed potatoes the following are traditional sides you can serve with pork and kraut. Here is the full list of what to serve with pork and sauerkraut.

    FAQ's and Tips

    Do I have to use apples and onions in this recipe?

    Apples and onions are completely optional in this recipe and my aunt is probably clutching her pearls right now for suggesting it but hear me out. By caramelizing onions and adding an apple to this recipe will add an element of sweetness to the sauerkraut, cutting the tartness.

    But if you are a kraut purist, and love the tang of the kraut leave the apple and onion out. But if you are a newbie to pork and sauerkraut I suggest adding them.

    Why do Germans eat pork and sauerkraut?

    Pork and sauerkraut have been eaten in Germany since at least the Middle Ages. Pork was an abundant and affordable meat, while sauerkraut was an easy way to preserve cabbage through the winter months. The dish became associated with German identity and tradition.

    Should you sear pork before slow cooking?

    seared pork loin

    I recommend searing your pork before cooking it in your crockpot. By searing the meat you are caramelizing the outside of the roast giving it color along with flavoring. Be sure your pan is screaming hot before you place my meat face down in the pan.

    Do not move it or poke it for at least 4 minutes. You will know the meat is properly seared when you can easily flip it over with tongs without tugging too much on the meat to get it to release. 

    Still not convinced? Make some pulled pork and you still may have luck in the new year. 

    Why is the sauerkraut brown?

    The combination of the sugars from the apples, the caramelized onions and the heat of the crockpot will further caramelize the sauerkraut making it brown. I find it is sweeter and has less tang than other sauerkraut. If you like a bite to the sauerkraut, you can omit the apples and onions or you can add in fresh sauerkraut at the end.

    Canned or bagged sauerkraut?

    I suggest silver floss sauerkraut. It comes in a bag and is usually found in the meat department next to the pork or even in the refrigerator produce section. You are welcome to use canned sauerkraut but I wouldn't recommend it.
    But if you are asking, I recommend the bagged sauerkraut. 

    Slow Cooker Pork and Sauerkraut square image

    Slow Cooker Pork and Sauerkraut

    Pork and sauerkraut is my families traditional New Year's meal meant to bring good luck in the New Year. This is my slow cooker pork and sauerkraut recipe that is cooked to perfection with a touch of sweetness with the addition of apples.
    No ratings yet
    Print Pin Rate
    Course: Crock-Pot Recipes
    Cuisine: American
    Keyword: slow cooker pork and sauerkraut recipe
    Prep Time: 15 minutes minutes
    Cook Time: 10 hours hours
    Additional Time: 15 minutes minutes
    Total Time: 10 hours hours 30 minutes minutes
    Servings: 6
    Calories: 71
    Author: Sarah Mock

    Ingredients

    •  
      1 3-4 lb Pork loin
    •  
      2 Pounds Sauerkraut
    •  
      1 Apple optional
    • A single whole yellow onion with dry, papery skin, photographed against a white background-the perfect flavorful addition to your next Crockpot Hash brown Casserole.1 Onion optional
    •  
      drizzle Olive oil
    • Two clear acrylic mills-one filled with coarse salt, the other with whole black peppercorns, both topped with metal knobs-stand side by side on a white background, ready to season your favorite dishes like Shrimp Avocado Salad.Salt and pepper to taste
    Follow Savoring The Good On PinterestFollow @SavoringTheGood or tag #STGRecipes!

    Instructions

    • Pat the meat dry and season with salt and fresh cracked pepper. 
      A raw slab of pork belly with visible fat layers sits on a wooden cutting board, ready to be transformed into a hearty pork and sauerkraut dish.
    • Heat a heavy bottom pan to high on the stove top. Add a drizzle of olive oil.
    • Place the meat, fat side up, into the pan and sear for at least 4 minutes to get good caramelization on the surface.
    • Flip the meat to sear on all sides.
    • Remove the pork and place in the slow cooker.
    • Sauté the onion and the apple in the pan until they start to take on color. (optional)
      apples on onions in a dutch oven for Pork and Sauerkraut
    • Use some of the liquid from the sauerkraut to deglaze the pan, scraping up the pork bits.
      a dutch oven ready to be deglazed
    • Pour the apples, onions and deglaze into the crock pot along with the rest of the sauerkraut. 
      pork and sauerkraut in a slow cooker
    • Cover and cook on low for 8-12 hours or on high for 5-7 hours.
    • Remove from the crock pot and place the pork and krout on a serving platter. Allow the meat to rest for 15 minutes before cutting to allow the juices to redistribute throughout the meat.
      A delicious pork and sauerkraut recipe, served in a white bowl.

    Notes

    Use silver floss sauerkraut, found in the meat section of the grocery store.
    Bone in pork loin is another option for the boneless pork loin.
    If not using apples and onions in this recipe, still sear the pork and deglaze the pan with sauerkraut juice.
    Want to share when you made this recipe?Follow @SavoringTheGood & tag #STGRecipes!
    Nutrition Facts
    Slow Cooker Pork and Sauerkraut
    Serving Size
     
    1
    Amount per Serving
    Calories
    71
    % Daily Value*
    Fat
     
    3
    g
    5
    %
    Polyunsaturated Fat
     
    2
    g
    Sodium
     
    1049
    mg
    46
    %
    Carbohydrates
     
    12
    g
    4
    %
    Sugar
     
    7
    g
    8
    %
    Protein
     
    2
    g
    4
    %
    * Percent Daily Values are based on a 2000 calorie diet.
    **Nutritional facts are just estimates. Please utilize your own brand nutritional values to double check against our estimates.
    Like this recipe card? Want one for your site?Check out WP Recipe Maker!

    Sarah Mock of savoringthegood.com headshot 2022

    I am Sarah Mock. Welcome!

    Sarah Mock is a classically trained Chef and graduate of Johnson & Wales University. A culinary blogger for 15 years Sarah helps the home cook prepare her recipes with professional results.
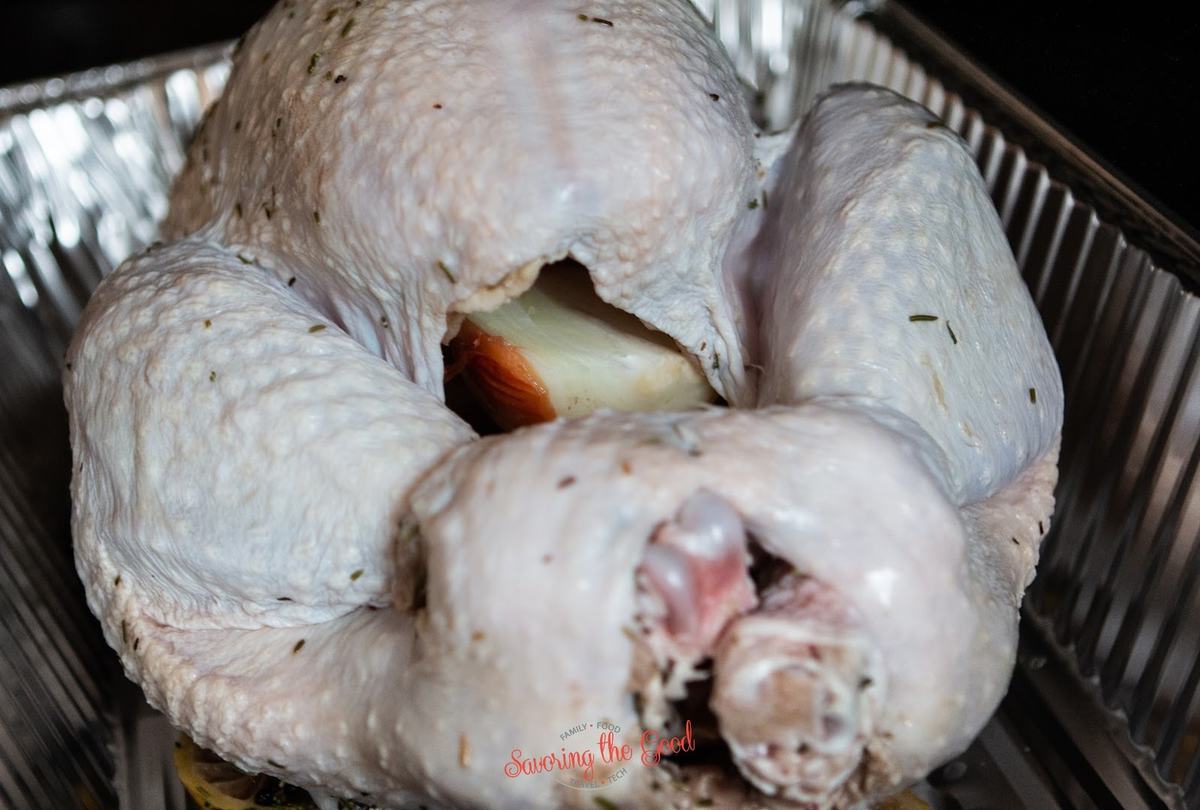
    Get to know me

    as seen in:

    Logos of Hersheyland, ABC News, and Good Day PA are showcased in a seamless row, providing a snapshot of popular brands.

    Hersheyland Nightline Good Day Pa!

    The vibrant design showcases the iconic logos of Pinterest, Rachael Ray, and Jell-O set against a bold red background. Sorry, the provided description doesn't offer enough detail to suggest important SEO keywords.

    Pinterest Rachael JELL-O


    Pork and Sauerkraut Recipe

    Roast pork with shredded garnish and sauerkraut in an oval dish, beautifully accented with sliced red apples.

    Pork and sauerkraut is a traditional New Year's meal meant to bring luck in the New Year. This is my traditional oven-roasted pork and sauerkraut recipe that cooked to perfection without drying out.

    A bowl of chicken and apple risotto on a wooden table, served alongside a delicious pork and sauerkraut recipe.

    Every new year's day we pull out a large dutch oven and cook a pork loin roast nestled amongst tangy sauerkraut to eat as the first dinner on New Years Day.

    Parts of my family are Pennsylvania Dutch and eating pork and sauerkraut is the traditional dish thought to bring good fortune in the coming year. In keeping with my family's German tradition, we will pull out a homemade jar of sauerkraut to serve alongside this traditional meal.

    Be sure to add Hoppin' John recipe aka Carolina beans and rice for an added bit of good luck in the New Year.

    If you are not wanting to take up oven space you can make this recipe for crock pot pork and sauerkraut or even a sous vide pork and sauerkraut.

    Pork and sauerkraut ingredients:

    If you are not a fan of sauerkraut, add a drizzle of maple syrup, a bit of brown sugar or a heavy drizzle of honey to cut the tanginess of the sauerkraut.

    Recipe Card?

    To find the full printable recipe with specific measurements and directions CLICK HERE to go to the recipe card.

    To Get The Best Flavor:

    • Pre-searing the boneless pork loin will ensure the meat has the best flavor.
    • The long cooking time will give you the most delicious, tender pork.
    • Pass a plate full of rolls or homemade biscuits to soak up the sauerkraut juice that has captured that delicious pork flavor.

    I've made pork and sauerkraut for years but never seared it first. I followed your recipe with delicious results. Definitely a keeper. Thanks and happy new year!

    ★★★★★~ Vickie (2020)

    Mom's pork and sauerkraut for New Years:

    Pork and Sauerkraut in a purple dutch oven, top down image
    1. Season the pork with salt and fresh cracked pepper.
    2. Heat a dutch oven or roasting pan on medium-high heat.
    3. Add a drizzle of olive oil to the pan and sear the pork on all sides for at least 4 minutes per side.
    4. Remove the seared pork roast to a clean plate and saute the onion and the apple in the pork drippings in the pan.
    5. Deglaze the pan, with either apple juice or chicken stock being sure you are scraping up the pork browned bits, getting up all those great flavors..
    6. Replace the pork back into the dutch oven or roasting pan, fat side up, adding the rest of the sauerkraut to the pan.
    7. Place in a 350 preheated oven and cover with a lid or aluminum foil if the piece of meat is too tall for the pan. Cook for 2 hours or until a meat thermometer reads at least 145 at the thickest part of the meat.
    8. Remove from the oven and place the pork and kraut on a serving platter. Allow the meat to rest for 15 minutes under a piece of tin foil before cutting to allow the juices to redistribute throughout the meat.
    Slow Cooker Pork and Sauerkraut square image

    Pork Roast and Sauerkraut (Mom's Traditional Recipe)

    Pork and sauerkraut is a traditional New Year's meal meant to bring luck in the New Year. This is my traditional oven roasted pork and sauerkraut recipe that cooked to perfection without drying out. 
    No ratings yet
    Print Pin Rate
    Course: Pork Recipes
    Cuisine: American
    Prep Time: 15 minutes minutes
    Cook Time: 2 hours hours
    Additional Time: 15 minutes minutes
    Total Time: 2 hours hours 30 minutes minutes
    Servings: 6
    Calories: 71
    Author: Sarah Mock

    Ingredients

    •  
      1 3-4 lb Pork loin
    • Two clear acrylic mills-one filled with coarse salt, the other with whole black peppercorns, both topped with metal knobs-stand side by side on a white background, ready to season your favorite dishes like Shrimp Avocado Salad.Salt and pepper to taste
    •  
      drizzle Olive oil
    •  
      1 Apple optional
    • A single whole yellow onion with dry, papery skin, photographed against a white background-the perfect flavorful addition to your next Crockpot Hash brown Casserole.1 Onion optional
    •  
      2 Pounds Sauerkraut
    •  
      ½ Cup apple juice or chicken stock
    US Customary - Metric
    Follow Savoring The Good On PinterestFollow @SavoringTheGood or tag #STGRecipes!

    Instructions

    • Set oven to 350.
    • Pat the meat dry and season with salt and fresh cracked pepper.
      1 3-4 lb Pork loin, Salt and pepper
    • Heat a dutch oven pan to high on the stove top. Add a drizzle of olive oil.
      drizzle Olive oil
    • Place the meat, fat side up, into the pan and sear for at least 4 minutes to get good caramelization on the surface.
    • Flip the meat to sear on all sides.
    • Remove the pork to a clean plate and saute the onion and the apple in the pan until they start to take on color.
      1 Apple, 1 Onion
    • Use some of the liquid from the sauerkraut to deglaze the pan, scraping up the pork bits.
      ½ Cup apple juice
    • Replace the pork back into the pan, adding the rest of the sauerkraut to the pan.
      2 Pounds Sauerkraut
    • Cover and place in the oven for 2 hours or until the internal temperature is at least 145.
    • Remove from the oven and place the pork and krout on a serving platter. Allow the meat to rest for 15 minutes before cutting to allow the juices to redistribute throughout the meat.

    Notes

    A good rule of thumb is to cook the pork for 25 minutes per pound. Adjust accordingly and be sure to check for doneness with a meat thermometer. 
    Use silver floss sauerkraut, found in the meat section of the grocery store.
    Bone in pork loin is another option for the boneless pork loin.
    If not using apples and onions in this recipe, still sear the pork and deglaze the pan with sauerkraut juice.
     
    Want to share when you made this recipe?Follow @SavoringTheGood & tag #STGRecipes!
    Nutrition Facts
    Pork Roast and Sauerkraut (Mom's Traditional Recipe)
    Serving Size
     
    1
    Amount per Serving
    Calories
    71
    % Daily Value*
    Fat
     
    3
    g
    5
    %
    Polyunsaturated Fat
     
    2
    g
    Sodium
     
    1049
    mg
    46
    %
    Carbohydrates
     
    12
    g
    4
    %
    Sugar
     
    7
    g
    8
    %
    Protein
     
    2
    g
    4
    %
    * Percent Daily Values are based on a 2000 calorie diet.
    **Nutritional facts are just estimates. Please utilize your own brand nutritional values to double check against our estimates.
    Like this recipe card? Want one for your site?Check out WP Recipe Maker!

    Adding Amish broccoli salad is an easy and delicious way to make this meal feel complete.

    Chef Tip

    A good rule of thumb is to cook the pork for 25 minutes per pound. Adjust accordingly and be sure to check for doneness with a meat thermometer. 

    What to serve with pork and sauerkraut

    Mom will have a few hot dogs and apple juice for the kids and some homemade applesauce made with granny smith apples because she knows the kids are not fans of the tangy sauerkraut. Kids know when all things sauerkraut have touched their food.

    For sure we will have corn from the freezer and Aunt Cindy will make Rhodes rolls, because they are so easy! Beyond a simple dish of wide egg noodles smothered in butter, the following are traditional sides you can serve with pork and sauerkraut. Here is the full list of what to serve with pork and sauerkraut.

    Frequently asked questions, answers and tips:

    A flavorful pork and sauerkraut recipe served on a plate with a fork.
    What cuts of pork could be used?

    This is the great debate on New Year's day. What cut of pork should we use this year? Should we use the boneless pork loin or should it be the bone in pork loin? Everyone has their favorite. The bone in loin will give you another layer of flavor but the boneless loin will be easier to carve. Pork tenderloin is not recommended because it will not hold up to the extended cook time in the oven. Save your tenderloin for your pork tenderloin lemon piccata. 

    To sear or not to sear?

    I recommend searing your pork loin before roasting it. By searing the meat you are caramelizing the outside of the roast giving it color along with flavoring. Be sure your dutch oven is screaming hot before you place my meat face down in the pan. Do not move it or poke it for at least 4 minutes. You will know the meat is properly seared when you can easily flip it over with tongs without tugging too much on the meat to get it to release. 

    What kind of sauerkraut should I use?

    I suggest silver floss sauerkraut. It comes in a bag and is usually found in the meat department next to the pork or even in the refrigerator produce section. You are welcome to use canned sauerkraut but I wouldn't recommend it. You do you, but if you are asking, I recommend the bagged sauerkraut. 

    Why are the apples and onions optional?

    Apples and onions are completely optional in this recipe and my aunt is probably giving me the side eye for it right now for suggesting it but hear me out. By caramelizing onions and adding an apple to this recipe will add an element of sweetness to the sauerkraut, cutting the tartness. But if you are a sauerkraut purist, and love the tang of the kraut leave the apple and onion out. But if you are a newbie to pork and sauerkraut I suggest adding them.

    Seasonal Favorite

    Baked lattice top crust on an apple pie made with the Crisco pie crust recipe, showing flaky layers in the fluted edge.

    This is my award-winning Crisco pie crust recipe; flaky, tender, and made with simple ingredients you already have.

    Crisco Pie Crust


    Sarah Mock of savoringthegood.com headshot 2022

    I am Sarah Mock. Welcome!

    Sarah Mock is a classically trained Chef and graduate of Johnson & Wales University. A culinary blogger for 15 years Sarah helps the home cook prepare her recipes with professional results.

    Get to know me

    as seen in:

    Logos of Hersheyland, ABC News, and Good Day PA are showcased in a seamless row, providing a snapshot of popular brands.

    Hersheyland Nightline Good Day Pa!

    The vibrant design showcases the iconic logos of Pinterest, Rachael Ray, and Jell-O set against a bold red background. Sorry, the provided description doesn't offer enough detail to suggest important SEO keywords.

    Pinterest Rachael JELL-O

    Luxardo Cherries Recipe

    Luxardo Cherries Recipe. square image.

    Luxardo cherries are the perfect cocktail cherry garnish for many cocktails. But luxardo maraschino cherries are not readily available in my area so I made a homemade recipe so I can enjoy and serve them at home. 

    Luxardo Cherries Recipe. square image.

    Other recipes call for sour cherries, and they can be used but sour cherries are not always available in my grocery store. So in this recipe, I use dried cherries in place of fresh or frozen cherries. They are easily found in the grocery store and they make an amazing luxardo cocktail cherry.

    Homemade Luxardo Cherry Ingredients:

    • Sweetened, dried cherries
    • Luxardo Brand cherry liqueur
    • Sugar
    • Cherry Juice

    Recipe Card?

    To find the full printable recipe with specific measurements and directions CLICK HERE to go to the recipe card.

    How to make homemade luxardo cherries:

    Luxardo cherries in a bowl
    1. Make a simple syrup with sugar and cherry juice.
    2. Add the dried cherries. 
    3. Portion the soaked cherries into jars. 
    4. Add leftover cherry syrup and top each jar with luxardo.
    5. Sous vide for 1 hour for the fastest results.
    6. If sous vide is not available, chill in the refrigerator for 2 weeks. 

    The syrup for these cherries is made with cherry juice and double the portion of sugar. The extra sugar will make a thicker syrup and the cherry juice will infuse more of a sour cherry flavor into the dried cherries. 

    Can Frozen Cherries Be Used?

    I did try this recipe with frozen cherries but I found that they became more watery and not as concentrated with the intense cherry flavor in comparison to the dried cherries. These cherries would be great served on top of sous vide cheesecake.

    What are the best fresh cherries to use for Luxardo Cherries?

    If you are lucky enough to find fresh, sweet, dark cherries, use those to make your recipe. When my grocery store gets in Bing cherries I am grabbing a few pounds because those are my favorite for this recipe. The flavor is amazing, the texture is perfect and the size is right.

    I would not use a sour cherry. They are smaller, and quite frankly...sour. Not what you are looking for when selecting cherries for this recipe. Sour cherries have their place, just not in this recipe.

    Making Luxardo Cherries with fresh cherries

    Traditionally, fresh cherries are used when making your cocktail cherries. I opt for the dried cherries because they are available year-round. But once fresh cherries hit the store shelves, it is time to make a batch with fresh cherries.

    1. Wash, dry and remove the pit and stem from each cherry.
    2. Make the simple syrup with sugar and water. Turn off the heat and add the Luxardo liquor to the simple syrup.
    3. Add the pitted cherries to the syrup and bring to a slight simmer.
    4. Simmer for 10-15 minutes, allowing the cherries to soften slightly, absorbing the syrup.
    5. Turn off the heat and allow to cool completely in the syrup.
    6. Store the cherries along with the cooled syrup in a jar in the refrigerator.

    Sous Vide Instructions:

    A bowl of cherries and a spoon on a wooden table
    1. Prepare the cherry simple syrup.
    2. Soak the dried cherries.
    3. Fill the jars.
    4. Top the jars with 50/50 cherry syrup and Luxardo.
    5. Close the jars and cook for 1 hour in a sous vide bath. 

    Seasonal Favorite

    Baked lattice top crust on an apple pie made with the Crisco pie crust recipe, showing flaky layers in the fluted edge.

    This is my award-winning Crisco pie crust recipe; flaky, tender, and made with simple ingredients you already have.

    Crisco Pie Crust
    Luxardo Cherries Recipe. square image.

    Luxardo Cherries (Using Dried Cherries)

    Luxardo cherries are the perfect cocktail cherry garnish for many cocktails. But luxardo maraschino cherries are not readily available in my area so I made a homemade recipe so I can enjoy and serve them at home.
    No ratings yet
    Print Pin Rate
    Course: Cocktails
    Cuisine: Italian
    Keyword: Luxardo cherries, luzardo cherry recipe
    Prep Time: 1 hour hour
    Cook Time: 1 hour hour
    Total Time: 2 hours hours
    Servings: 3 ½ pints
    Calories: 76
    Author: Sarah Mock

    Ingredients

    •  
      1 pound Sweetened dried cherries
    • A 4-pound bag of Domino granulated pure cane sugar with a yellow and white design, showing nutrition information and branding-perfect for sweetening recipes like rhubarb sour or your favorite desserts.2 Cups Sugar
    •  
      1 Cup Cherry Juice
    •  
      1 Cup Luxardo Brand cherry liqueur as needed
    US Customary - Metric
    Follow Savoring The Good On PinterestFollow @SavoringTheGood or tag #STGRecipes!

    Instructions

    • In a sauce pan make a simple syrup with the sugar and cherry juice.
      2 Cups Sugar, 1 Cup Cherry Juice
    • Add the dried cherries and allow the cherries to soak up the syrup.
      1 pound Sweetened
    • Allow the cherries to cool.
    • Portion the soaked cherries into jars. 
    • Top each jar with luxardo and leftover cherry syrup in a 50/50 ratio.
      1 Cup Luxardo Brand cherry liqueur
    • If sous vide is not available, chill in the refrigerator for 2 weeks. 

    Notes

    To sous vide the cherries:

    Cook the cherries in a 160 water bath for 1 hour.
    This will speed up the marinating process.
    Cherries are ready to eat when the hour is up.
    Want to share when you made this recipe?Follow @SavoringTheGood & tag #STGRecipes!
    Nutrition Facts
    Luxardo Cherries (Using Dried Cherries)
    Serving Size
     
    2 cherries
    Amount per Serving
    Calories
    76
    % Daily Value*
    Sodium
     
    5
    mg
    0
    %
    Carbohydrates
     
    18
    g
    6
    %
    Sugar
     
    17
    g
    19
    %
    * Percent Daily Values are based on a 2000 calorie diet.
    **Nutritional facts are just estimates. Please utilize your own brand nutritional values to double check against our estimates.
    Like this recipe card? Want one for your site?Check out WP Recipe Maker!

    Sarah Mock of savoringthegood.com headshot 2022

    I am Sarah Mock. Welcome!

    Sarah Mock is a classically trained Chef and graduate of Johnson & Wales University. A culinary blogger for 16 years Sarah helps the home cook prepare her recipes with professional results.

    Get to know me

    as seen in:

    Logos of Hersheyland, ABC News, and Good Day PA are showcased in a seamless row, providing a snapshot of popular brands.

    Hersheyland Nightline Good Day Pa!

    The vibrant design showcases the iconic logos of Pinterest, Rachael Ray, and Jell-O set against a bold red background. Sorry, the provided description doesn't offer enough detail to suggest important SEO keywords.

    Pinterest Rachael JELL-O

    Bacon Jam Recipe Without Onions

    bacon jam on a serving knife with bread in the background

    This bacon jam recipe is savory with a touch of sweetness and a hint of thyme, bourbon and espresso! Spread on crostini for a savory appetizer or dollop on a hamburger for a knock out burger bite. 

    bacon jam with thyme garnish, vertical image

    I love bacon jam but sometimes you don't want an overly sticky, sweet jam. This bacon jam is more of a spread and definitely a savory spread.

    Ingredients needed to make bacon jam

    • thick-cut bacon
    • shallots ( ½ cup)
    • garlic, grated
    • thyme (fresh or dried)
    • espresso
    • bourbon
    • honey
    • butter (omit for true Paleo)
    • olive oil

    How do you make bacon jam?

    bacon crisping in a hot cast iron pan
    1. Crisp the bacon.bacon jam ingredients in a hot cast iron pan
    2. Cook the shallot, garlic and thyme in the hot bacon grease. bacon jam ingredients in a blendtec ready to be blended
    3. Add the crisp bacon, the sautéed shallots, garlic and thyme to a blender. butter added to the mixture of bacon jam in a blendtech blender
    4. Add the bourbon, honey, butter, olive oil and bacon fat to the blender. bacon jam pureed in a blender
    5. Pulse to chop the bacon jam.
    6. Taste for seasoning and adjust with salt and pepper.  

    Storage Tips

    Store the jam in an airtight container in the refrigerator. Use within a week. This jam is not shelf-stable, it needs to be refrigerated. Allow the bacon jam to come to room temperature before serving for the most delicious results.

    Chef Tip

    • Switch up bacon and use peppered bacon for a different flavor profile.
    • If shallots are not available in your area, a substitute is red onion.
    • If fresh thyme is not available, substitute in 1 teaspoon dried thyme.
    • A jar filled with marinated mozzarella balls in olive oil, herbs, and spices, placed on a rustic wooden surface.
      Marinated Mozzarella Balls
    • Crockpot meatballs drenched in melted cheese and infused with the rich flavor of French onion soup, a wooden spoon lifting some out.
      French Onion Meatballs in the Crockpot (Simple Recipe)
    • Close-up of Texas Twinkies-bacon-wrapped jalapeños stuffed with cream cheese and shredded meat-stacked invitingly on a plate.
      Texas Twinkies
    bacon jam on a serving knife with bread in the background

    Slammin' Delicious Bacon Jam Recipe with Bourbon and Coffee

    This bacon jam recipe is not only savory but it has a touch of sweetness and a hint of thyme, bourbon and espresso!
    4.88 from 8 votes
    Print Rate
    Course: Appetizer Recipe
    Cuisine: American
    Keyword: bacon jam recipe, paleo bacon jam
    Prep Time: 3 minutes minutes
    Cook Time: 15 minutes minutes
    Additional Time: 1 minute minute
    Total Time: 19 minutes minutes
    Servings: 1 ¼ cups
    Calories: 266
    Author: Sarah Mock

    Ingredients

    •  
      1 lb Bacon
    •  
      2 shallots ½ cup
    •  
      2 gloves garlic
    •  
      1 Tablespoon fresh thyme
    •  
      1 Tablespoon bourbon
    • A 16 oz bottle of Dutch Gold Pure Honey from clover blossoms with a flip-top cap and certification label on the front.3 Tablespoon Honey
    • A rectangular 8 oz package of Kerrygold Pure Irish Butter, unsalted, with a green and gold label and Irish grass-fed cow branding-perfect for creating delicious Saint Patrick's Day cupcakes.2 T Butter
    • A 500ml bottle of California Olive Ranch Global Blend Extra Virgin Olive Oil with green and blue labeling, indicating a blend from Argentina, Portugal, Chile, and California-perfect for drizzling over your favorite shrimp avocado salad.1 Teaspoon olive oil
    Follow Savoring The Good On PinterestFollow @SavoringTheGood or tag #STGRecipes!

    Instructions

    • In a heavy bottom or cast iron pan, crisp the bacon.
      1 lb Bacon
    • Remove the crisp bacon to a plate and cook the shallot, garlic and thyme in the hot bacon grease.
      2 shallots, 2 gloves garlic, 1 Tablespoon fresh thyme
    • Add the crisp bacon, the sautéed shallots, garlic and thyme to a blender.
    • Add the bourbon, honey, butter, olive oil and bacon fat to the blender. (omit butter for Paleo)
      1 Tablespoon bourbon, 3 Tablespoon Honey, 2 T Butter, 1 Teaspoon olive oil
    • Pulse to chop the bacon jam.
    • Taste for seasoning and adjust with salt and pepper. 

    Notes

    Tips for making bacon jam:
    • Freeze the bacon for 30 minutes before chopping to make it easier to slice.
    • Switch up bacon and use peppered bacon for a different flavor profile.
    • If shallots are not available in your area, a substitute is red onion.
    • If fresh thyme is not available, substitute in 1 teaspoon dried thyme.
    Want to share when you made this recipe?Follow @SavoringTheGood & tag #STGRecipes!
    Nutrition Facts
    Slammin' Delicious Bacon Jam Recipe with Bourbon and Coffee
    Serving Size
     
    2 tablespoons
    Amount per Serving
    Calories
    266
    % Daily Value*
    Fat
     
    19
    g
    29
    %
    Saturated Fat
     
    7
    g
    44
    %
    Polyunsaturated Fat
     
    11
    g
    Cholesterol
     
    51
    mg
    17
    %
    Sodium
     
    784
    mg
    34
    %
    Carbohydrates
     
    8
    g
    3
    %
    Sugar
     
    6
    g
    7
    %
    Protein
     
    16
    g
    32
    %
    * Percent Daily Values are based on a 2000 calorie diet.
    **Nutritional facts are just estimates. Please utilize your own brand nutritional values to double check against our estimates.
    Like this recipe card? Want one for your site?Check out WP Recipe Maker!

    Sarah Mock of savoringthegood.com headshot 2022

    I am Sarah Mock. Welcome!

    Sarah Mock is a classically trained Chef and graduate of Johnson & Wales University. A culinary blogger for 16 years Sarah helps the home cook prepare her recipes with professional results.

    Get to know me

    as seen in:

    Logos of Hersheyland, ABC News, and Good Day PA are showcased in a seamless row, providing a snapshot of popular brands.

    Hersheyland Nightline Good Day Pa!

    The vibrant design showcases the iconic logos of Pinterest, Rachael Ray, and Jell-O set against a bold red background. Sorry, the provided description doesn't offer enough detail to suggest important SEO keywords.

    Pinterest Rachael JELL-O

    Pineapple Cheese Ball Recipe

    pineapple cheeseball with pecans square image

    Pineapple cheese ball is a vintage recipe from my childhood. Whenever we would have a holiday party or needed a cheese ball for a special occasion my mom would make this pineapple cheese ball recipe.

    pineapple cheeseball with pecans square image

    The combination of the sweet pineapple and the tang of the green pepper is an unexpectedly delightful combination. Balanced out with seasoned salt and my favorite, pecans! Pecans always meant the holidays for my family. If you are not a fan of pecans you can always substitute in chopped walnuts. Just be sure to toast the walnuts in a dry pan, just like you do the pecans.

    Pineapple Cheese Ball Ingredients:

    green pepper, cream cheese and pineapple in a bowl

    Recipe Card?

    To find the full printable recipe with specific measurements and directions CLICK HERE to go to the recipe card.

    Notes on the ingredients

    • cream cheese- I use whole fat cream cheese. It is the holidays! Go full flavor.
    • seasoned salt - not to be confused with season-all. Two different spice blends.
    • pecans, toasted and finely chopped  - PLEASE toast the pecans. You will thank you. 

    How Can I Make This Cheese Ball Spicy?

    • Add jalapeños: You can finely chop some fresh jalapeño peppers (seeds and membranes removed) and mix them into the cheese ball along with the other ingredients. Start with half a pepper and add more according to your desired level of spiciness.
    • Cayenne pepper: Add ¼ teaspoon or more of cayenne pepper to the cheese mixture before shaping it into a ball. This will give it a nice kick of heat.
    • Add hot sauce: Mix in your favorite hot sauce (such as Tabasco or Sriracha) to the cheese ball mixture for added spice.
    • Red pepper flakes: Add a pinch or two of crushed red pepper flakes to the cheese mixture before forming it into a ball for some extra heat.
    • Try chipotle powder: Chipotle powder is made from smoked jalapeño peppers and adds both smoky flavor and heat to dishes. Adding it to the pineapple cheeseball can give it an extra depth of flavor that complements the sweetness of the pineapple.

    Remember that when adding any type of spice, start with small amounts and gradually increase until you reach your desired level of spiciness, as some people have a lower tolerance for spicy food than others.

    How to make a pineapple Hawaiian cheese ball with pecans:

    crushed pineapple draining
    1. Drain the pineapple. toasted pecans being chopped
    2. Warm pecans in a dry pan until they become fragrant. Chop and measure out 1 ½ cups. chopped onion
    3. While the pecans cool, finely dice the onion and the green pepper.
    4. In a mixing bowl with the paddle attachment, cream together the cream cheese and the seasoned salt.
    5. Scrape down the sides of the bowl and add the drained pineapple, onions, peppers, and 1 cup of the toasted, cooled pecans. pineapple cheeseball wrapped in plastic wrap before nuts added
    6. Wrap the cheese ball in plastic wrap, forming a ball.
    7. Refrigerate for 2 hours to firm up.
    8. Unwrap the cheeseball and press the pecans onto the outside of the cheeseball.
    9. Serve with crackers.

    Can a pineapple cheese ball be frozen?

    It's worth noting that freezing may affect the texture of the pineapple cheese ball slightly, but if stored properly, it should still taste delicious! The texture may be a bit more grainy in texture and more apt to crumble.  If you do decide to freeze a pineapple cheese ball, it's best not to add the pecans onto the outside of the cheese ball before freezing it. If you find yourself needing to freeze the cheeseball, for whatever reason, here are some tips to help you have freezer success:

    1. Shape the cheese mixture into a ball.
    2. Wrap the cheese ball tightly with plastic wrap or aluminum foil.
    3. Place the wrapped cheese ball in an airtight container or freezer-safe ziplock bag.
    4. Label each packet with the date and contents, so you know what it is and when you made it.
    5. Freeze for up to 1 month.

    When ready to serve again, remove the pineapple cheese ball from the freezer and let it thaw in the refrigerator overnight. Once thawed, roll the cheese ball in chopped pecans if desired before serving.

    Top Tip

    • make sure the cream cheese is at room temperature
    • press on the crushed pineapple to remove as much moisture as possible
    A buffet table with assorted appetizers, including sliders, bruschetta, skewers, shrimp, and vegetable cups, arranged neatly on wooden boards and trays.

    How Many Appetizers Per Person?

    Use my guide will help you nail the numbers every time.

    Appetizers Per Person?

    Chef Tips

    • toast the pecans in a dry pan for the best flavor
    • chill the cheeseball in the refrigerator for at least an hour before pressing the chopped pecans on the outside
    pineapple cheeseball with pecans square image

    Pineapple Cheese Ball with Pecans

    Pineapple cheeseball is a vintage recipe from my childhood. Whenever we would have a holiday party or needed a cheeseball for a special occasion my mom would make this pineapple cheeseball recipe.
    4.46 from 31 votes
    Print Pin Rate
    Course: Appetizer Recipe
    Cuisine: American
    Keyword: pineapple cheeseball recipe, vintage cheeseball recipe
    Prep Time: 10 minutes minutes
    Cook Time: 0 minutes minutes
    Additional Time: 2 hours hours
    Total Time: 2 hours hours 10 minutes minutes
    Servings: 1 cheeseball
    Calories: 59
    Author: Sarah Mock

    Ingredients

    • Box of Kraft Philadelphia Original Cream Cheese, 8 oz (226g), silver packaging with blue and white logo, and renewable energy label on the left-perfect for making delicious Lemon Cheesecake Bars.2 packages Cream Cheese 8 ounce each
    •  
      1 8 ounce can crushed pineapple drained
    • A single whole yellow onion with dry, papery skin, photographed against a white background-the perfect flavorful addition to your next Crockpot Hash brown Casserole.2 Teaspoons onions chopped
    •  
      ½ Cup green pepper chopped
    •  
      1-2 Teaspoon seasoned salt
    •  
      1 ½ Cup pecans finely chopped
    Follow Savoring The Good On PinterestFollow @SavoringTheGood or tag #STGRecipes!

    Instructions

    • Drain the crushed pineapple.
      1 8 ounce can crushed pineapple
    • Warm pecans in a dry pan until they become fragrant. Chop and measure out 1 ½ cups.
      1 ½ Cup pecans
    • While the pecans cool, finely dice the onion and the green pepper.
      2 Teaspoons onions, ½ Cup green pepper
    • In a mixing bowl with the paddle attachment, cream together the cream cheese and the seasoned salt.
      2 packages Cream Cheese, 1-2 Teaspoon seasoned salt
    • Scrape down the sides of the bowl and add the drained pineapple, onions, green peppers, and 1 cup of the toasted, cooled pecans.
      1 8 ounce can crushed pineapple
    • Wrap the cheeseball in plastic wrap, forming a ball.
    • Chill in the refrigerator for 2 hours to firm up.
    • Un wrap the cheeseball and press the pecans onto the outside of the cheeseball.
    • Serve with your favorite crackers.

    Notes

    • make sure the cream cheese is room temperature
    • press on the crushed pineapple to remove as much moisture as possible
    • toast the pecans in a dry pan for the best flavor
    • chill the cheeseball in the refrigerator for at least an hour before pressing the chopped pecans on the outside
    Want to share when you made this recipe?Follow @SavoringTheGood & tag #STGRecipes!
    Nutrition Facts
    Pineapple Cheese Ball with Pecans
    Serving Size
     
    1 tablespoon
    Amount per Serving
    Calories
    59
    % Daily Value*
    Fat
     
    6
    g
    9
    %
    Saturated Fat
     
    1
    g
    6
    %
    Polyunsaturated Fat
     
    4
    g
    Cholesterol
     
    5
    mg
    2
    %
    Sodium
     
    112
    mg
    5
    %
    Carbohydrates
     
    2
    g
    1
    %
    Sugar
     
    2
    g
    2
    %
    Protein
     
    1
    g
    2
    %
    * Percent Daily Values are based on a 2000 calorie diet.
    **Nutritional facts are just estimates. Please utilize your own brand nutritional values to double check against our estimates.
    Like this recipe card? Want one for your site?Check out WP Recipe Maker!

    Sarah Mock of savoringthegood.com headshot 2022

    I am Sarah Mock. Welcome!

    Sarah Mock is a classically trained Chef and graduate of Johnson & Wales University. A culinary blogger for 15 years Sarah helps the home cook prepare her recipes with professional results.
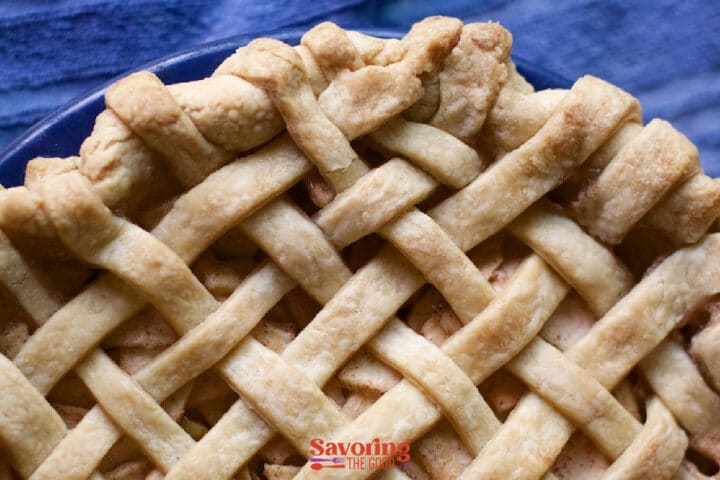
    Get to know me

    • « Previous Page
    • 1
    • …
    • 5
    • 6
    • 7
    • 8
    • 9
    • …
    • 11
    • Next Page »
    Sarah Mock of savoringthegood.com headshot 2022

    I'm Sarah Mock, Welcome!

    Sarah Mock is a classically trained Chef and graduate of Johnson & Wales University. A culinary blogger for 17 years Sarah helps the home cook prepare her recipes with professional results.

    Get to know me

    Trending Recipes:

    • A close-up of grilled chicken wings stacked on a plate, garnished with parsley, with a side of dipping sauce in the background.
      Grilled Chicken Wings
    • A bowl of taco salad with ground beef, lettuce, tomatoes, black olives, jalapeños, corn, shredded cheese, crushed tortilla chips, red onions, lime wedges, and a dollop of sour cream.
      Dorito Taco Salad
    • A bowl of chili pie topped with shredded cheese, chopped onions, and green onions, surrounded by crunchy Fritos corn chips on a white plate.
      Frito Pie Recipe
    • A stack of crispy cereal bars with a light brown color and a textured surface, reminiscent of cinnamon toast crunch bars.
      Cinnamon Toast Crunch Bars
    See more Football Food →

    Footer

    Sharing this recipe on social media is both encouraged and appreciated. Please share the direct link back to the recipe. Copy/Paste and/or screenshots of the recipe to any social media is strictly prohibited. Content and photographs are copyright-protected. SavoringTheGood®
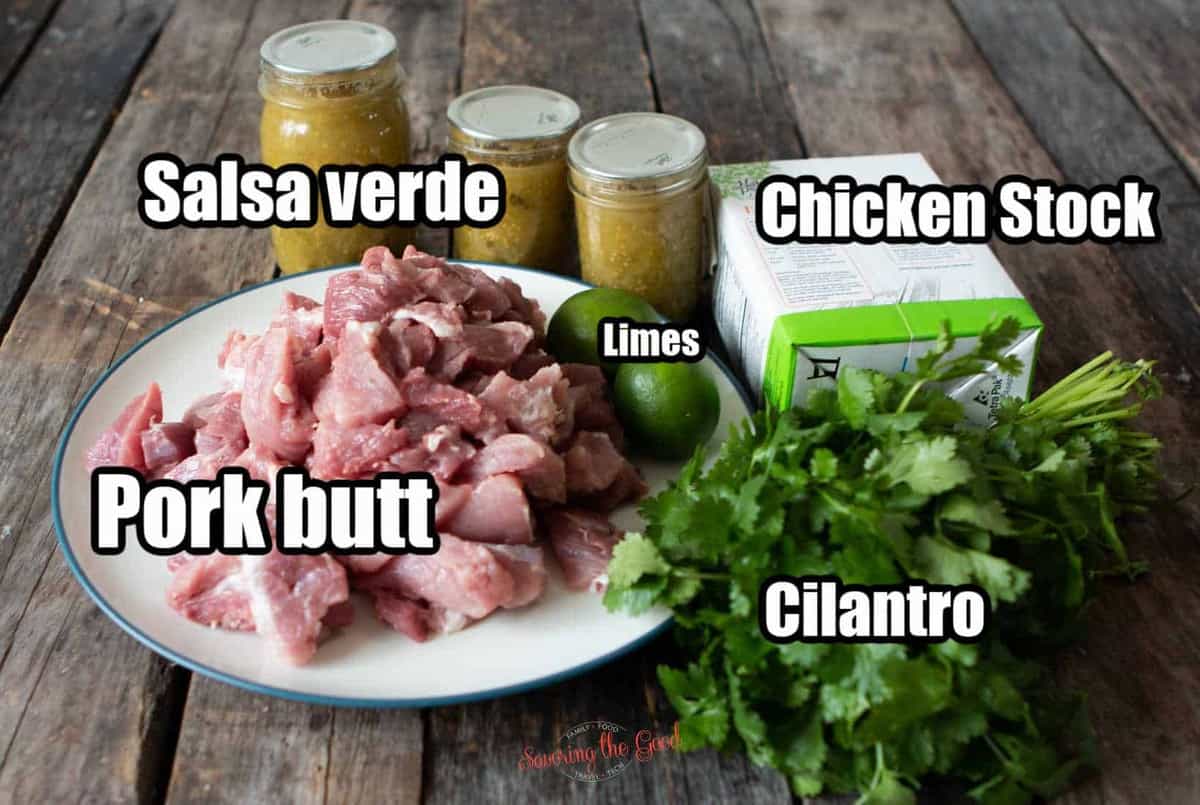
    As an Amazon Associate, I earn from qualifying purchases.

    ©2026 Savoring The Good® All rights reserved.
    Privacy Policy | Accessibility Policy | About Sarah Mock | About Savoring The Good | Terms Of Service

    Rate This Recipe

    Your vote:



    Let me know what you thought of this recipe to leave your stars. Stuck for what to say? Click one of these inspiration prompts to get you started:

    This worked exactly as written, thanks!
    My family loved this! I just had to share.
    This recipe is delicious but I have a suggestion...
    Could you clarify for me...
    Here is how I included this recipe in m celebration of...
    This recipe was wonderful but can you point me to a recipe for...

    As always, I appreciate you and what you bring to the Savoring The Good community!

    A rating is required
    A name is required
    An email is required