Savoring The Good®

  • All Recipes
  • Football Food
  • Crock-Pot
  • About Sarah
    • About Savoring The Good®
menu icon
go to homepage
  • All Recipes
  • Football Food
  • Crock-Pot
  • About Sarah
    • About Savoring The Good®
subscribe
search icon
Homepage link
  • All Recipes
  • Football Food
  • Crock-Pot
  • About Sarah
    • About Savoring The Good®
×
Savoring The Good > Uncategorized

Bourbon Lemonade Recipe (Buzzfeed Featured)

Blackberry Bourbon Lemonade Recipe in a mason jar glass

Bourbon lemonade cocktail with blackberries is a delicious combination of muddled blackberries and lemons, brown sugar syrup and your favorite bourbon. Use fresh blackberries when they are in season but substitute frozen to enjoy this handcrafted cocktail all year long.

simple Blackberry Bourbon Lemonade recipe

If you love bourbon cocktails you are going to want to try my recipe for spicy peach bourbon smash and bourbon-soaked cherries to take your cocktails to the next level. Welcome to all the Buzzfeed viewers!

Bourbon Lemonade with muddled blackberries

One of my favorite things to do is to pick blackberries, fresh from the vine. They are a bit of work but worth every minute spent to pluck the juicy, sun-ripened berries for this cocktail. With a few handfuls of these berries, I am able to make a few cocktails for my husband and myself or invite the neighbors to share a pitcher of blackberry bourbon lemonade.

Can I use frozen blackberries to make blackberry bourbon lemonade?

As always, fresh and in season is best but when fresh blackberries are out of season or out of your price range frozen blackberries can be substituted to make your cocktails.

What materials are needed to make a bourbon lemonade cocktail?

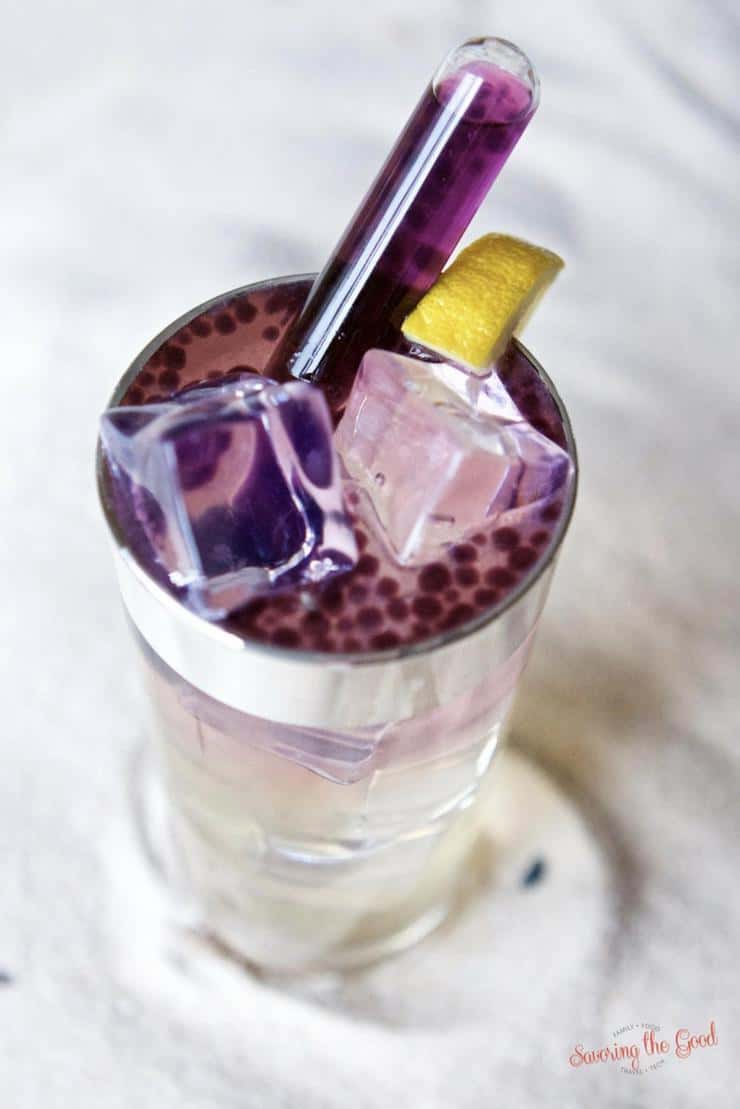
horizontal image of Blackberry Bourbon Lemonade on a marble surface

Just a few cocktail basics are needed for this recipe. The only thing that you might not have in your collection would be a small mesh strainer. I find this gets the seeds out of the cocktail better than just pouring through the strainer on the cocktail shaker. If you don't already have one, a muddler will help in releasing the juice from the berries and if you want to have a fancy garnish of torched lemon wheels you will need a kitchen torch.

What ingredients are in a blackberry bourbon lemonade cocktail?

There are different variations on blackberry bourbon lemonade. But I found this to be the best combination of ingredients for my favorite blackberry bourbon lemonade. Feel free to switch them up and make this recipe your own.

  • Blackberries
  • lemon wheel slice
  • lemon juice
  • brown sugar syrup
  • bourbon
  • bitters 

Blackberry bourbon lemonade garnish.
torched lemon garnish for Blackberry Bourbon Lemonade

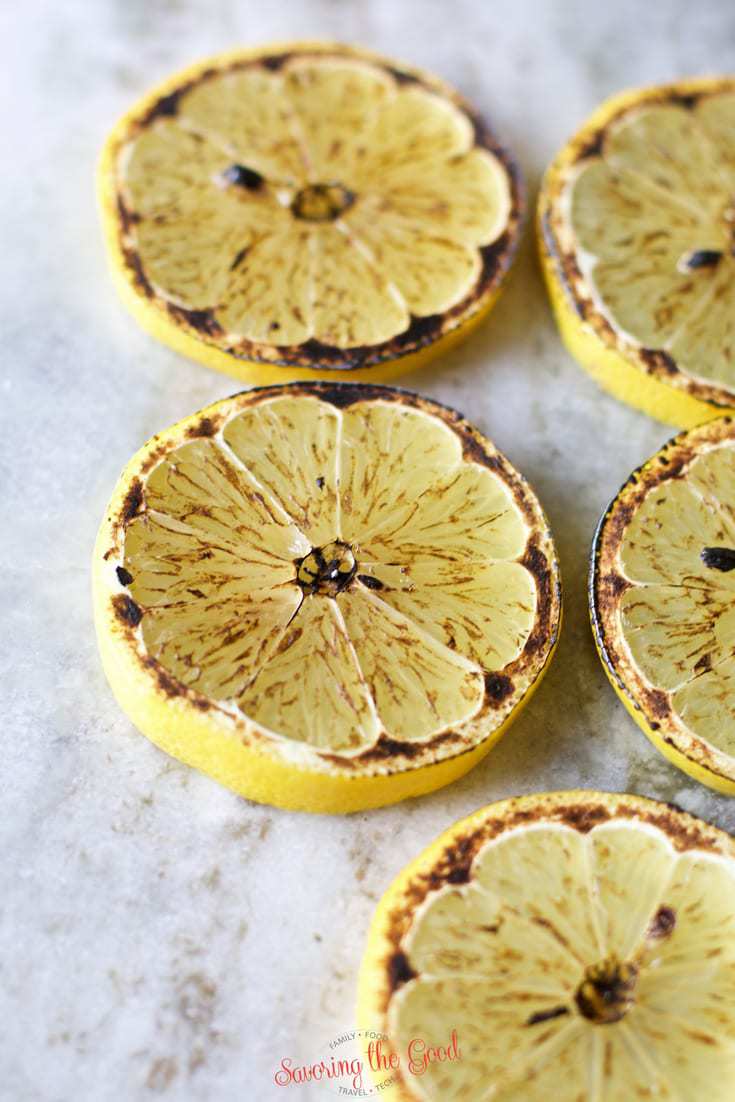
For this cocktail, I am torching a lemon wheel with a kitchen torch to bring a toasted lemon flavor to the garnish. Also a fresh blackberry and a sprig of basil or mine for a touch of green. I slice the lemon wheels on the thick size and on a heat-tolerant surface, set the torch to high and with a sweeping motion torch the lemons until they blacken.

Brown Sugar Syrup Ingredients

  • 1 cup brown sugar
  • 1 cup water
  • OR equal parts of brown sugar and water for larger or smaller batches.

How to make brown sugar syrup.

  1. In a heavy bottom pot, over high heat, combine the brown sugar and water.
  2. Stir and bring to a rolling boil.
  3. Reduce by half.
  4. Cool and store for a week in the refrigerator.

Can I substitute simple syrup for brown sugar syrup?

Yes! You definitely can substitute white sugar simple syrup for the brown sugar syrup. I like the caramel flavor the brown sugar brings to this drink so I encourage you to try it at least once.

How do you make a bourbon lemonade cocktail?

top down image of Blackberry Bourbon Lemonade with garnish
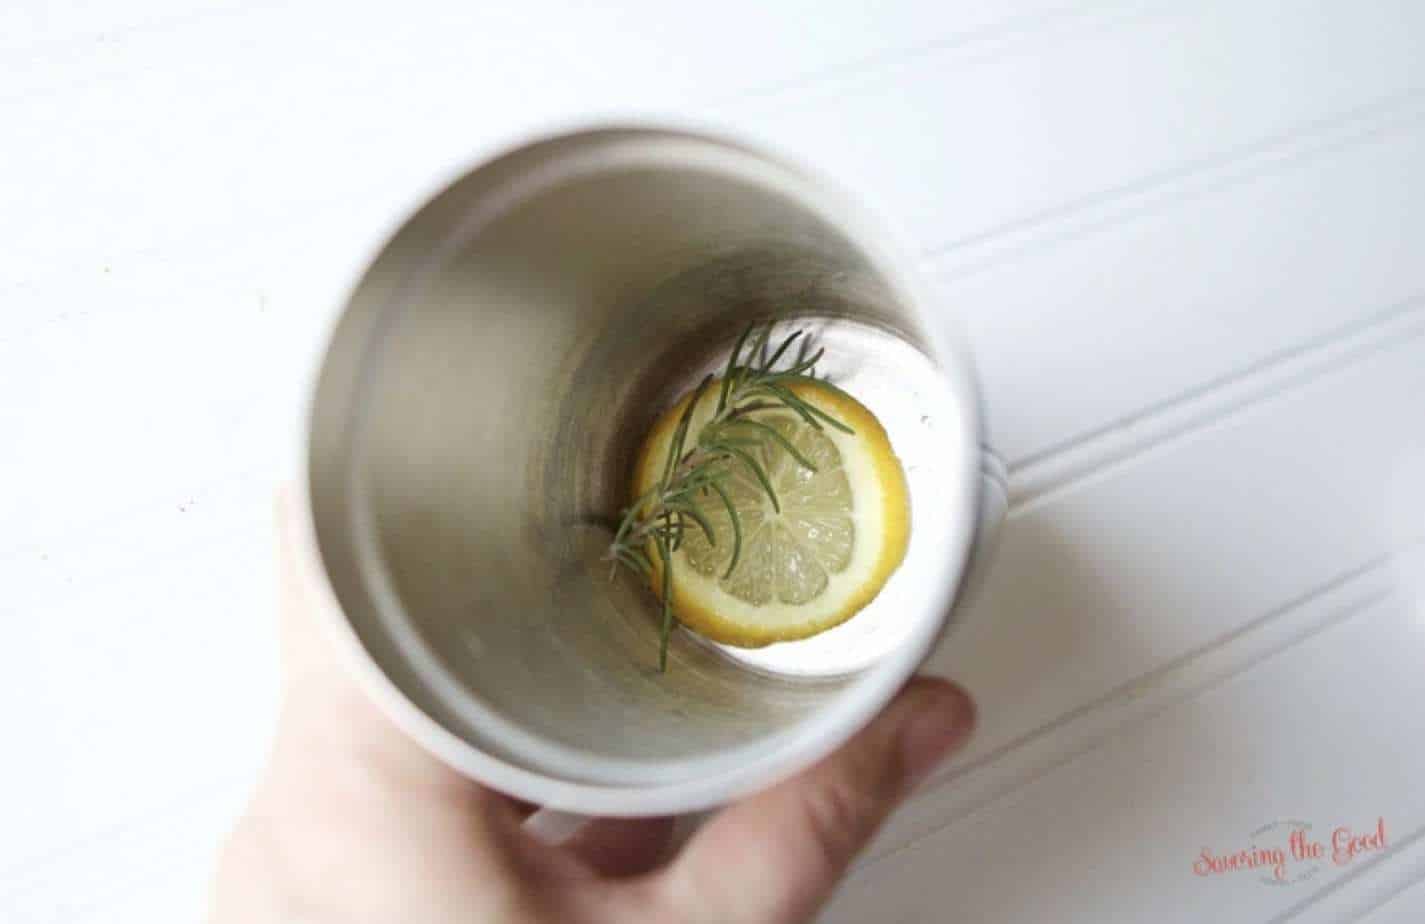
  1. In the bottom of a cocktail shaker, muddle the blackberries, lemon wheel and the brown sugar syrup.
  2. Fill the shaker ½ way with ice.
  3. Add the lemon juice, bourbon and 2 drops of bitters.
  4. Close the cocktail shaker and shake for a full minute.
  5. Strain the cocktail through a cocktail mesh strainer. (optional but this easily removes the seeds)
  6. Pour over ice and garnish with a torched lemon wheel, blackberry and basil.

Can this recipe be made for a crowd?

strained blackberry seeds removed from Blackberry Bourbon Lemonade

Yes this recipe can easily be made for a crowd. This recipe is for a single cocktail. See the full pitcher recipe below. 

easy Blackberry Bourbon Lemonade

Bourbon Lemonade pitcher recipe

  • 1 lemon sliced into wheels
  • 1 pound raspberries
  • 6 ounce brown sugar syrup
  • 12 ounce lemon juice
  • 12 ounce bourbon
  • 3 shakes bitters

Easy Blackberry Bourbon Lemonade pitcher directions

  1. In a pitcher, muddle the blackberries, lemon wheels and brown sugar.
  2. Add the lemon juice, bourbon, bitters and stir vigorously.
  3. Add ice to the pitcher and stir vigorously again.
  4. Pour over ice and garnish.

Appetizer Recipes

  • A white bowl filled with finely chopped cranberry salsa, garnished with cilantro, sits next to crackers on a white surface-a vibrant and refreshing twist for your next appetizer spread.
    Cranberry Salsa
  • A buffet table with assorted appetizers, including sliders, bruschetta, skewers, shrimp, and vegetable cups, arranged neatly on wooden boards and trays.
    How Many Appetizers Per Person: Serving Guide & Easy Recipes
  • A hand holds a slice of bread topped with a cheesy caramelized onion dip with bacon, with more of the savory dip visible in a dish in the background.
    Caramelized Onion Dip with Bacon
See more Appetizer Recipes →
A vibrant collection of images showcasing colorful rainbow cocktails.

Get my RAINBOW COCKTAILS eBook!

Drink the Rainbow! Here are 6 cocktails that have you sipping a hand-crafted adult drink in each color of the rainbow.

Purchase

Don't lose this recipe! Enter your email below and we will email this recipe to you, plus more yummy recipes weekly.
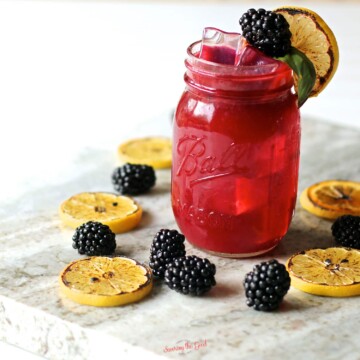
Blackberry Bourbon Lemonade Recipe in a mason jar glass

Blackberry Bourbon Lemonade

A delicious combinations of muddles blackberries and lemons, brown sugar syrup and your favorite bourbon make the best blackberry bourbon lemonade cocktail. Use fresh blackberries when they are in season but substitute frozen to enjoy this hand crafted cocktail all year long.
4.86 from 21 votes
Print Pin Rate
Course: Drinks - Non Alcoholic
Cuisine: American
Keyword: blackberry, bourbon, cocktail
Prep Time: 3 minutes minutes
Cook Time: 3 minutes minutes
Total Time: 6 minutes minutes
Servings: 1 cocktail
Calories: 642
Author: Sarah Mock

Ingredients

  •  
    6 Blackberries
  •  
    1 lemon wheel slice
  • A plastic bottle of ReaLemon 100% Lemon Juice with a yellow cap, a lemon-shaped top, and images of lemons on a green label-perfect for adding a burst of citrus flavor to your favorite recipes like Lemon Cheesecake Bars.2 Ounces Lemon Juice
  •  
    1 Ounce brown sugar syrup
  •  
    2 Ounces bourbon
  •  
    2 drops bitters
Follow Savoring The Good On PinterestFollow @SavoringTheGood or tag #STGRecipes!

Instructions

  • In the bottom of a cocktail shaker, muddle the blackberries, lemon wheel and the brown sugar syrup.
  • Fill the shaker ½ way with ice.
  • Add the lemon juice, bourbon and 2 drops of bitters.
  • Close the cocktail shaker and shake for a full minute.
  • Strain the cocktail through a cocktail mesh strainer. (optional but this easily removes the seeds)
  • Pour over ice and garnish with a torched lemon wheel, blackberry and basil.

Notes

Blackberry Bourbon Lemonade pitcher recipe

  • 1 lemon sliced into wheels
  • 1 pound raspberries
  • 6 ounce brown sugar syrup
  • 12 ounce lemon juice
  • 12 ounce bourbon
  • 3 shakes bitters
Want to share when you made this recipe?Follow @SavoringTheGood & tag #STGRecipes!
Nutrition Facts
Blackberry Bourbon Lemonade
Serving Size
 
1
Amount per Serving
Calories
642
% Daily Value*
Sodium
 
75
mg
3
%
Carbohydrates
 
98
g
33
%
Sugar
 
70
g
78
%
Protein
 
1
g
2
%
* Percent Daily Values are based on a 2000 calorie diet.
**Nutritional facts are just estimates. Please utilize your own brand nutritional values to double check against our estimates.
Like this recipe card? Want one for your site?Check out WP Recipe Maker!

Sarah Mock of savoringthegood.com headshot 2022

I am Sarah Mock. Welcome!

Sarah Mock is a classically trained Chef and graduate of Johnson & Wales University. A culinary blogger for 16 years Sarah helps the home cook prepare her recipes with professional results.

Get to know me

as seen in:

Logos of Hersheyland, ABC News, and Good Day PA are showcased in a seamless row, providing a snapshot of popular brands.

Hersheyland Nightline Good Day Pa!

The vibrant design showcases the iconic logos of Pinterest, Rachael Ray, and Jell-O set against a bold red background. Sorry, the provided description doesn't offer enough detail to suggest important SEO keywords.

Pinterest Rachael JELL-O

Chilled Strawberry Soup Recipe

strawberry soup in a white bowl.

You don't have to go to the Grand Floridian Resort in Disney World to enjoy a yummy strawberry soup.

Strawberry soup is a tasty summer soup made with fresh strawberries, vanilla yogurt, sour cream, and fresh lime juice blended to make an easy, delicious cold summer soup.

Not only does it taste good, it also looks delicious. It's so good that you'll want to post it on Instagram and tag your family and friends.

Strawberry Soup

Another cold soup recipe you could incorporate into lunches is peach gazpacho. I have even sent my oven roasted tomato soup with grilled cheese croutons.

🍓 Ingredients for Chilled Strawberry soup:

  • strawberries - using fresh or frozen strawberries works when you make strawberry soup. If you want to learn how to freeze strawberries, I can teach you!
  • sour cream - for once I am going to say that you can use low fat sour cream. I am usually an advocate for full fat but this recipe will work with a lower fat sour cream.
  • Vanilla yogurt - vanilla yogurt gives the recipe another layer of flavor and creaminess. But plain yogurt will work as well.
  • lime juice - fresh is best but use bottled if that is what you have on hand.
  • salt - even in sweet dishes salt is good. Salt enhances sweetness.
  • sugar - just a bit, especially if your strawberries are out of season and need an extra hint of sweetness.
  • heavy cream - this is why we can use a low-fat sour cream! heavy cream is coming in to help balance the soup.

🥄 How to make this chilled strawberry soup recipe:

  1. If the strawberries are frozen, thaw them and keep the juices.
  2. In a food processor puree the strawberries, sour cream, yogurt and the rest of the ingredients listed.
  3. If a food processor is not available an immersion blender or blender will work.
  4. Chill for at least an hour.

🌿 Garnishes

Strawberry Soup with silver spoon

While the strawberry soup is lovely on its own you may want to offer a few garnishes to the recipe to give a bit of decoration, added flavors and contrast in texture. I would suggest:

  • Diced fresh strawberries
  • Whipped cream
  • Vanilla yogurt dollop
  • Granola
  • Toasted angel food cake
  • Pound cake squares
  • Sliced mint
  • Lime zest

Storage Tips

Freezing strawberry soup is a great way of enjoying it at a later date if you make a large batch or want to prepare it ahead of time. Fill freezer safe airtight containers with soup, leaving a bit of space at the top for freezing expansion and don't forget to mark the date on them. Allow to thaw in the refrigerator.

What strawberry recipes can I make using frozen strawberries?

Here are some new recipes you can make using frozen strawberries:

  • Strawberry Dessert Smoothie: Blend frozen strawberries with a banana, a handful of spinach, and almond milk.
  • Strawberry Fruit Salad: Thaw frozen strawberries and mix them with fresh fruits like blueberries, kiwi, and grapes.
  • Creamy Strawberry Yogurt: Mix thawed frozen strawberries into Greek yogurt.
  • Strawberry Chia Pudding: Puree thawed frozen strawberries and mix them with chia seeds and almond milk.
  • Strawberry Chop Salad: Thaw frozen strawberries and chop them finely. Toss them with mixed greens, nuts, and a light vinaigrette.

I want to make chilled fruit soup made with other fruits. What can I use?

Chilled soups are easy to make and delicious recipes that can be made with other fruits.

If you're craving something refreshing on a hot summer day, you can try making a chilled soup recipe using berries like raspberries, blackberries, or blueberries. It only takes 5 minutes to prepare, and you can add a little honey or citrus juice for extra taste.

Are chilled fruit soups low in calorie?

These soups often contain a high proportion of water from the fruits, which can help to fill you up without adding excess calories. They dissolve hunger and are also made refreshing.

🥣 Soup recipes for lunches:

  • Oven roasted tomato soup
  • Maryland Crab Soup
  • Mexican corn soup
  • Black Bean Soup
  • Restaurant Style Autumn Squash Soup
  • Crockpot Chicken Corn Soup
  • Crockpot Chicken Tortilla Soup

📝 Frequently asked questions, answers and tips:

Can strawberry soup be sent in a school lunch?

Strawberry soup can easily be sent in a school lunch. Pour the soup into an insulated container so it will stay chilled until lunch. If an insulated container is unavailable, freeze the soup overnight and pack in the lunch box in the morning. By lunchtime, the soup will be thawed and still chilled.Planet box with bento food

Chef Tip

For a silky smooth soup, strain the soup through a fine mesh strainer or a single layer of cheesecloth to remove the strawberry seeds and any unpureed bits of strawberry.

strawberry soup in a white bowl.

Strawberry Soup

Strawberry soup is a summer soup made with fresh strawberries, vanilla yogurt, sour cream, and fresh lime juice blended to make an easy, delicious cold summer soup.
4.68 from 28 votes
Print Pin Rate
Course: Soup
Cuisine: American
Keyword: cold soup, crab soup, strawberry
Prep Time: 5 minutes minutes
Cook Time: 5 minutes minutes
Chill: 1 hour hour
Total Time: 1 hour hour 10 minutes minutes
Servings: 3 cups
Calories: 492
Author: Sarah Mock

Ingredients

  •  
    16 Ounces Strawberries frozen or fresh
  • sour cream.8 Ounces Sour Cream
  •  
    8 Ounces Vanilla yogurt
  • A green plastic bottle of Realime 100% lime juice with images of limes on the label and a green cap.¼ Cup lime juice
  • A Morton Salt container with a blue label featuring a girl in a yellow dress holding an umbrella, with salt pouring out of a container-an essential ingredient for perfectly seasoning dishes like Chicken Cordon Bleu.½ Teaspoon salt
  • A 4-pound bag of Domino granulated pure cane sugar with a yellow and white design, showing nutrition information and branding-perfect for sweetening recipes like rhubarb sour or your favorite desserts.⅓ Cup Sugar
  • heavy cream bottle.4 Ounces Heavy Cream
US Customary - Metric
Follow Savoring The Good On PinterestFollow @SavoringTheGood or tag #STGRecipes!

Instructions

  • If the strawberries are frozen, thaw them and keep the juices.
  • In a food processor puree the strawberries, sour cream, yogurt and the rest of the ingredients listed.
    16 Ounces Strawberries, 8 Ounces Sour Cream, 8 Ounces Vanilla yogurt, ¼ Cup lime juice, ½ Teaspoon salt, ⅓ Cup Sugar, 4 Ounces Heavy Cream
  • Chill for at least an hour.

Notes

If a food processor is not available an immersion blender or blender will work.
Want to share when you made this recipe?Follow @SavoringTheGood & tag #STGRecipes!
Nutrition Facts
Strawberry Soup
Serving Size
 
1 cup
Amount per Serving
Calories
492
% Daily Value*
Fat
 
30
g
46
%
Saturated Fat
 
17
g
106
%
Trans Fat
 
1
g
Polyunsaturated Fat
 
9
g
Cholesterol
 
93
mg
31
%
Sodium
 
1498
mg
65
%
Carbohydrates
 
53
g
18
%
Sugar
 
43
g
48
%
Protein
 
7
g
14
%
* Percent Daily Values are based on a 2000 calorie diet.
**Nutritional facts are just estimates. Please utilize your own brand nutritional values to double check against our estimates.
Like this recipe card? Want one for your site?Check out WP Recipe Maker!

Published August 31, 2018


Sarah Mock of savoringthegood.com headshot 2022

I am Sarah Mock. Welcome!

Sarah Mock is a classically trained Chef and graduate of Johnson & Wales University. A culinary blogger for 16 years Sarah helps the home cook prepare her recipes with professional results.

Get to know me

as seen in:

Logos of Hersheyland, ABC News, and Good Day PA are showcased in a seamless row, providing a snapshot of popular brands.

Hersheyland Nightline Good Day Pa!

The vibrant design showcases the iconic logos of Pinterest, Rachael Ray, and Jell-O set against a bold red background. Sorry, the provided description doesn't offer enough detail to suggest important SEO keywords.

Pinterest Rachael JELL-O

Savory Zucchini Bread (Cheddar Zucchini Quick Bread)

whole wheat Savory Zucchini Bread

This savory zucchini bread recipe is an updated version of a traditional zucchini bread recipe.

easy Savory Zucchini Bread

The addition of cheese and savory ingredients complement the nuttiness of the whole wheat flour in this easy quick bread recipe. This will quickly become your favorite zucchini bread recipe.

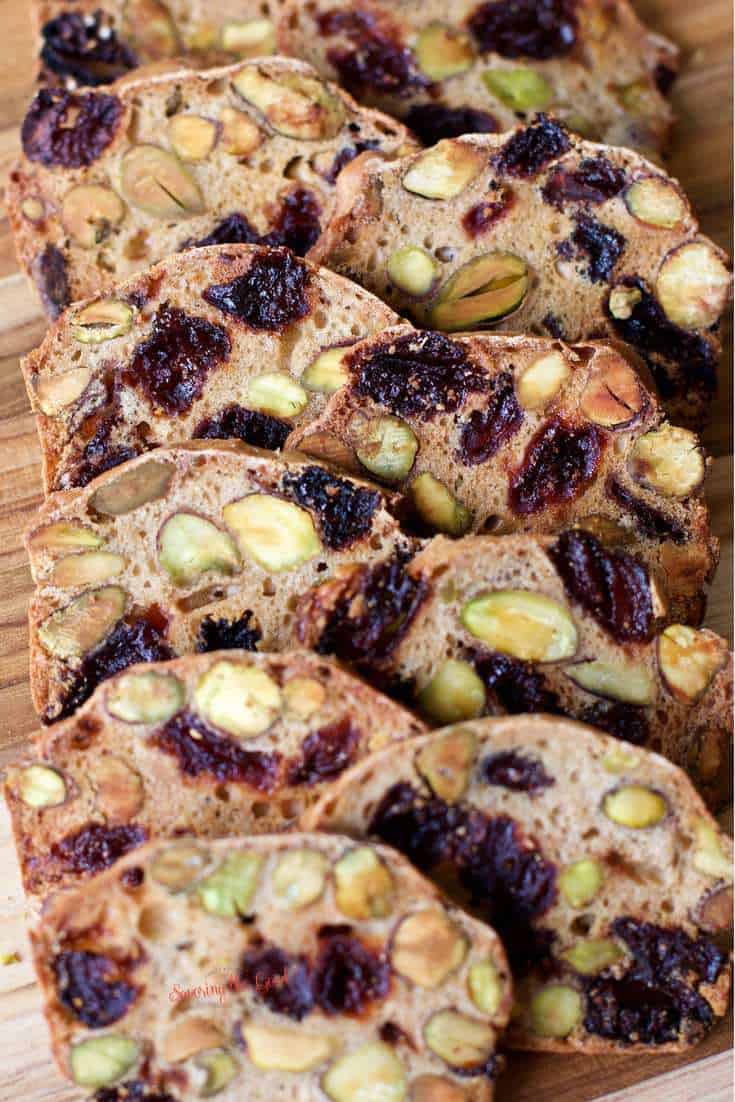
If you are going to make this recipe you are going also to want to make my recipes for almondina pistachio and dried cherry crisp thins, almondina mixed nut raisin thin cookie crisp, easy cherry pie bars, peanut butter blossom cookies and serve everything with sous vide cold brew coffee.

What is a quick bread?

Just because bread is called quick does not mean that it comes together quickly or is baked quickly. Quick bread is called 'quick'  because it does not require kneading or rising time. The leven in quick bread is usually baking powder or baking soda, which, when combined with moisture, starts the rising process immediately. In the case of double-acting baking powder, oven heat caused a second burst of rising. Eggs can also be used to leaven quick breads. *source: The New Food Lover's Companion. Second Addition. Sharon Tyler Herbst

Savory zucchini bread ingredients

Savory Zucchini Bread

  • whole wheat flour
  • baking powder
  • salt
  • baking soda
  • garlic powder
  • zucchini
  • cheddar cheese
  • red onion
  • eggs
  • buttermilk
  • butter, melted

How do you make zucchini quick bread?

whole wheat Savory Zucchini Bread
  1. Preheat oven to 350 degrees. Spray a bread pan (9x5 inch) or 4 small loaf pans with nonstick spray.
  2. In a large bowl whisk together the whole wheat flour, baking powder, salt, baking soda and garlic powder.
  3. Stir in the shredded zucchini, cheddar cheese, and red onions.
  4. In a separate bowl, whisk together the eggs, buttermilk, and melted butter.
  5. Pour the wet ingredients into the dry ingredients in the large bowl. Gently mix together just until moistened.
  6. Spoon into prepared loaf pan and bake.
  7. The large loaf will bake for about 50 minutes or until a knife inserted into the center comes out clean.
  8. Or bake 4 mini loaves for about 20-25 minutes or until a knife comes out clean.
  9. Cool for 10 minutes. Remove from pan to cool completely.
sliced Savory Zucchini Bread with butter spread on cut piece

What do you serve with cheesy zucchini bread?

If you can wait for it to cool enough to cut it, I love to serve this bread warm and sliced thickly. I am a big fan of slathering butter, cream cheese, apple butter or and combination of the three on the bread. Another treat is to pop thick slices of bread in a toaster or toaster oven and get a nice crust on the slice.

sliced Savory Zucchini Bread with cheese garnish

Storage Tips

If there is enough bread left over to store wrap the bread in plastic wrap, place in a zip-top bag or a closed airtight container, and store in the refrigerator for up to a week. If you are freezing your bread be sure to do a double wrap of plastic, foil or use a vacuum seal system before you freeze the bread. Use within 6 months.

FAQ's and Tips

Can you freeze zucchini bread batter?

Sometimes you get so far in your day and the baking of the bread is not in the cards for the day. The answer is to freeze your zucchini bread batter to bake at a later date. To freeze zucchini batter, liberally grease a loaf pan and fill as you would for baking. Freeze solid. Pop the frozen brick out, wrap in plastic wrap and a zip-top bag. To thaw, remove the wrapping and place back in the loaf pan. Allow thawing overnight in the refrigerator.

Can you grate zucchini ahead of time?

It can be a time-saver to grate zucchini ahead of making the zucchini bread. Store in one cup portions in a zip-top bag or a sealed container in the refrigerator for 3-5 days. Drain off any excess moisture before using in the recipe.

Do you have to peel zucchini for zucchini bread?

There is no need to peel the zucchini for zucchini bread. I do remove the seeds before grating the zucchini. For a single batch of zucchini bread, a box grater or hand grater could be used. But for large batches, I recommend a food processor with a grating disk attachment.

whole wheat Savory Zucchini Bread

Whole Wheat Savory Zucchini Bread

This savory zucchini bread recipe is an updated version of a traditional zucchini bread recipe. The addition of cheese and savory ingredients compliment the nuttiness of the wholewheat flour in this easy quick bread recipe. This will quickly become your favorite zucchini bread recipe.
4.93 from 14 votes
Print Pin Rate
Course: Breakfast Recipes
Cuisine: American
Keyword: bread, zucchini
Prep Time: 15 minutes minutes
Cook Time: 45 minutes minutes
Total Time: 1 hour hour
Servings: 14 slices
Calories: 177
Author: Sarah Mock

Ingredients

  •  
    3 Cups whole wheat flour
  • A can of Rumford Baking Powder, 8.1 oz (230g), with red label, showing baked goods like Cherry Scones, and a 4 Teaspoon Baking Powder
  • A Morton Salt container with a blue label featuring a girl in a yellow dress holding an umbrella, with salt pouring out of a container-an essential ingredient for perfectly seasoning dishes like Chicken Cordon Bleu.1 Teaspoon salt
  • Arm & Hammer Pure Baking Soda box, 8 oz size, with text promoting it as America's #1 trusted brand and stating ½ Teaspoon Baking Soda
  • A bottle of McCormick Garlic Powder with a red lid and green label, featuring the brand logo and ½ Teaspoon Garlic Powder
  •  
    1 Cup shredded zucchini
  •  
    1 Cup shredded cheddar cheese
  •  
    ¼ Cup of finely chopped red onion
  • A single brown chicken egg, perfect for making Chicken Cordon Bleu, stands upright on a white background.2 Egg
  •  
    1 Cup buttermilk
  •  
    4 tablespoons ½ stick of butter melted
Follow Savoring The Good On PinterestFollow @SavoringTheGood or tag #STGRecipes!

Instructions

  • Preheat oven to 350 degrees. Spray a loaf pan (9x5 inch) or 4 small loaf pans with non stick spray.
  • In a large bowl whisk together the whole wheat flour, baking powder, salt, baking soda and garlic powder.
    3 Cups whole wheat flour, 4 Teaspoon Baking Powder, 1 Teaspoon salt, ½ Teaspoon Baking Soda, ½ Teaspoon Garlic Powder
  • Stir in the zucchini, cheddar cheese and red onions.
    1 Cup shredded zucchini, 1 Cup shredded cheddar cheese, ¼ Cup of finely chopped red onion
  • In separate bowl, whisk together the eggs, buttermilk, and melted butter.
    2 Egg, 1 Cup buttermilk, 4 tablespoons ½ stick of butter
  • Pour the wet ingredients into the dry ingredients in the large bowl. Gently stir together just until moistened.
  • Spoon into prepared loaf pans and bake.
  • The large loaf will bake about 50 minutes or until a knife inserted comes out clean.
  • Or bake 4 mini loaves for about 20-25 minutes or until a knife comes out clean. Cool for 10 minutes. Remove from pan to cool completely.
Want to share when you made this recipe?Follow @SavoringTheGood & tag #STGRecipes!
Nutrition Facts
Whole Wheat Savory Zucchini Bread
Serving Size
 
1 slice
Amount per Serving
Calories
177
% Daily Value*
Fat
 
8
g
12
%
Saturated Fat
 
4
g
25
%
Polyunsaturated Fat
 
3
g
Cholesterol
 
44
mg
15
%
Sodium
 
459
mg
20
%
Carbohydrates
 
22
g
7
%
Sugar
 
2
g
2
%
Protein
 
7
g
14
%
* Percent Daily Values are based on a 2000 calorie diet.
**Nutritional facts are just estimates. Please utilize your own brand nutritional values to double check against our estimates.
Like this recipe card? Want one for your site?Check out WP Recipe Maker!

Sarah Mock of savoringthegood.com headshot 2022

I am Sarah Mock. Welcome!

Sarah Mock is a classically trained Chef and graduate of Johnson & Wales University. A culinary blogger for 16 years Sarah helps the home cook prepare her recipes with professional results.

Get to know me

as seen in:

Logos of Hersheyland, ABC News, and Good Day PA are showcased in a seamless row, providing a snapshot of popular brands.

Hersheyland Nightline Good Day Pa!

The vibrant design showcases the iconic logos of Pinterest, Rachael Ray, and Jell-O set against a bold red background. Sorry, the provided description doesn't offer enough detail to suggest important SEO keywords.

Pinterest Rachael JELL-O


Easy Peach Gazpacho Recipe

Peach Gazpacho

Peach gazpacho is a refreshing cold summer soup that is a twist on the traditional tomato gazpacho soup. Simple ingredients make for a delicious cold soup that is sweet and satisfying for summer. Peach gazpacho is going to be your next favorite recipe.

Peach Gazpacho

If you can't get enough of peaches you will want to try my spicy peach bourbon smash cocktail recipe, learn how to freeze peaches or make peach jam.

Peach gazpacho ingredients:

  • sweet peaches
  • yellow tomato
  • yellow bell pepper
  • cucumber
  • lime juice
  • balsamic vinegar
  • sugar
  • Salt, to taste.

How do you make peach gazpacho?

  1. Puree the peaches, yellow tomato, yellow bell pepper, cucumber, lime juice, balsamic vinegar and sugar in a food processor.
  2. Process in batches, if needed.
  3. Season with salt.
  4. Chill in the refrigerator for 2 hours.
  5. For a more textured gazpacho leave the soup as is.
  6. For a smoother soup, sieve soup through a mesh strainer.

What is Gazpacho Soup?

Gazpacho pronounced gahz-PAH-choh is a delicious and refreshing summertime soup from Andalusia region in southern Spain. This uncooked soup is usually made from a pureed mixture of fresh tomatoes, sweet bell peppers, onions, celery, cucumber, bread crumbs, garlic, olive oil, vinegar and sometimes lemon juice. Gazpacho can be a meal in itself, particularly when extra fresh vegetables such as sliced celery, green onions, cucumber and a green pepper are added. Popular garnishes include croutons and diced hard-cooked eggs. * source.The New Food Lover's Companion, second edition.

This peach gazpacho recipe is a twist on the traditional tomato gazpacho made with peaches.

Garnishes for peach gazpacho

Peach Gazpacho with silver spoon and white napkin
  • chopped peaches
  • grilled peaches
  • grilled angel food cake cubes
  • pound cake cubes
  • minced red onion
  • poached shrimp
  • diced cucumber
  • basil oil drizzle
    • chopped basil leaves

What do you serve with peach gazpacho?

easy summer Peach Gazpacho

While gazpacho can be a meal on its own, you might want to have other recipes to serve with this cool and refreshing soup to get the best flavor. Just a few suggestions:

  • Sous vide asparagus
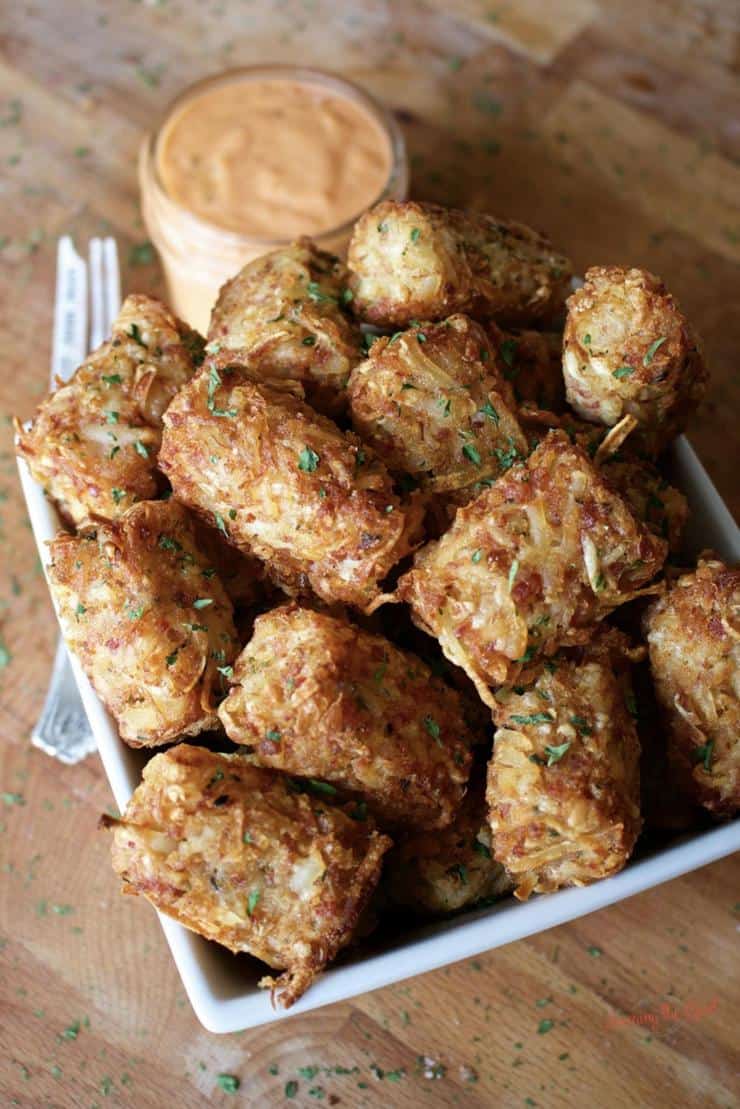
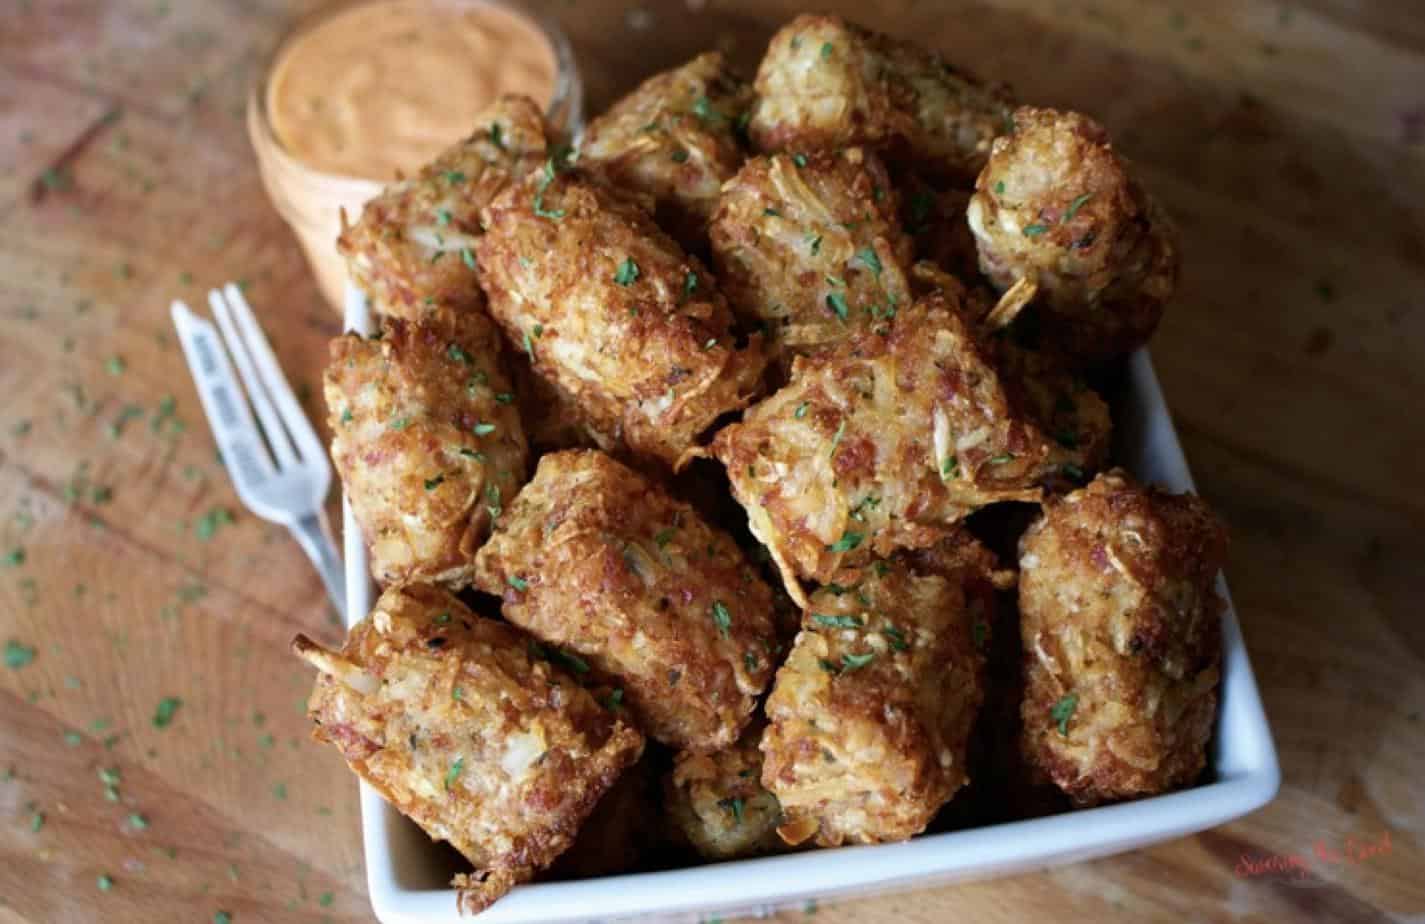
  • Reuben Tater Tots
  • Mexican Shrimp Cocktail 
  • Croque-Monsieur Egg Roll 
  • Tempura Deep Fried Dill Pickles Recipe

More gazpacho recipes:

  • Refreshing Gazpacho
  • Strawberry Melon Gazpacho
  • 21 Day Fix gazpacho soup

Peach gazpacho soup recipe FAQs

Can I freeze peach soup?

This gazpacho soup is able to be frozen to be enjoyed year round. Portion into single serve freezer containers for convenience. Store in freezer canning jars, the ones with out the shoulders, or freeze in Vac and Seal bags.

Why is gazpacho served cold?

Gazpacho is served cold because traditionally it is made of summer fresh produce and to keep the full fresh flavors the soup is served chilled and raw. By making and serving the soup cold it keeps the kitchen cooler in the summer heat.

A bowl of peach gazpacho soup with a spoon on top.

Peach Gazpacho

Peach gazpacho is a refreshing cold summer soup that is a twist on the traditional tomato gazpacho soup. Simple ingredients make for a delicious cold soup that is sweet and satisfying for summer.
4.86 from 21 votes
Print Pin Rate
Course: Soup
Cuisine: American
Keyword: gazpacho, peach
Prep Time: 5 minutes minutes
Cook Time: 5 minutes minutes
Additional Time: 1 hour hour
Total Time: 1 hour hour 10 minutes minutes
Servings: 3 cups
Calories: 126
Author: Sarah Mock

Ingredients

  •  
    3 large peaches
  •  
    1 large yellow tomato
  •  
    1 yellow bell pepper
  •  
    1 Cucumber
  • A green plastic bottle of Realime 100% lime juice with images of limes on the label and a green cap.⅓ Cup lime juice
  •  
    2 teaspoons balsamic vinegar
  • A 4-pound bag of Domino granulated pure cane sugar with a yellow and white design, showing nutrition information and branding-perfect for sweetening recipes like rhubarb sour or your favorite desserts.1 Tablespoon Sugar
  • A Morton Salt container with a blue label featuring a girl in a yellow dress holding an umbrella, with salt pouring out of a container-an essential ingredient for perfectly seasoning dishes like Chicken Cordon Bleu.Salt to taste.
Follow Savoring The Good On PinterestFollow @SavoringTheGood or tag #STGRecipes!

Instructions

  • Puree the peaches, yellow tomato, yellow bell pepper, cucumber, lime juice, balsamic vinegar and sugar in a food processor.
  • Process in batches, if needed.
  • Season with salt.
  • Chill in the refrigerator for 2 hours.
  • For a more textured gazpacho leave the soup as is.
  • For a smoother soup, strain soup through a mesh strainer.

Notes

  • diced peaches
  • grilled peaches
  • grilled angel food cake cubes
  • pound cake cubes
  • minced red onion
  • poached shrimp
  • diced cucumber
  • basil oil drizzle
  • chopped basil
Want to share when you made this recipe?Follow @SavoringTheGood & tag #STGRecipes!
Nutrition Facts
Peach Gazpacho
Amount per Serving
Calories
126
% Daily Value*
Fat
 
1
g
2
%
Sodium
 
200
mg
9
%
Carbohydrates
 
31
g
10
%
Sugar
 
24
g
27
%
Protein
 
3
g
6
%
* Percent Daily Values are based on a 2000 calorie diet.
**Nutritional facts are just estimates. Please utilize your own brand nutritional values to double check against our estimates.
Like this recipe card? Want one for your site?Check out WP Recipe Maker!

Sarah Mock of savoringthegood.com headshot 2022

I am Sarah Mock. Welcome!

Sarah Mock is a classically trained Chef and graduate of Johnson & Wales University. A culinary blogger for 16 years Sarah helps the home cook prepare her recipes with professional results.

Get to know me

as seen in:

Logos of Hersheyland, ABC News, and Good Day PA are showcased in a seamless row, providing a snapshot of popular brands.

Hersheyland Nightline Good Day Pa!

The vibrant design showcases the iconic logos of Pinterest, Rachael Ray, and Jell-O set against a bold red background. Sorry, the provided description doesn't offer enough detail to suggest important SEO keywords.

Pinterest Rachael JELL-O

Easy Tomato Jam Recipe

A wooden board with bread and cranberry jam, topped with tomato jam.

This recipe for tomato jam has the warmth of the flavors of cinnamon and ginger balanced with the sweetness of peaches.

Simple Savory Tomato Jam

Make this recipe and serve it on crostini, alongside roasted pork, beef, chicken or curry dishes.

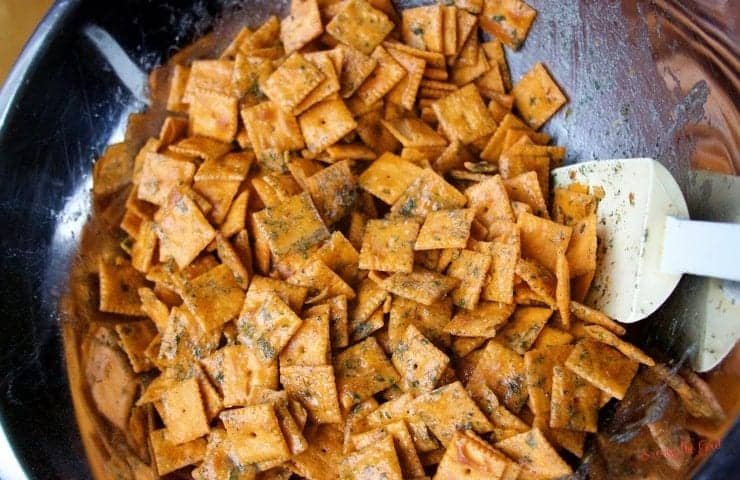
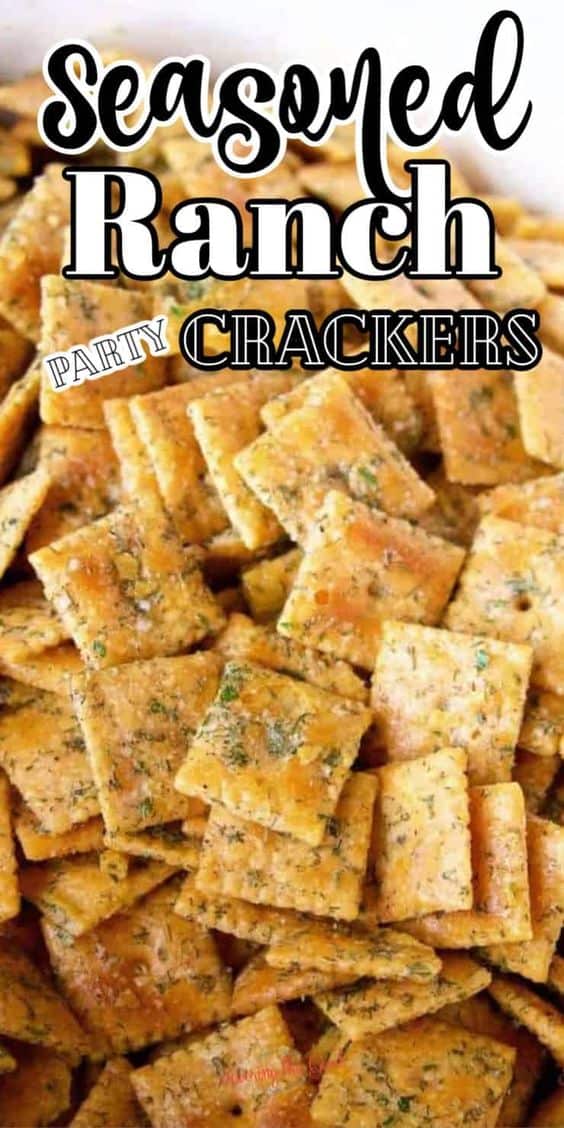
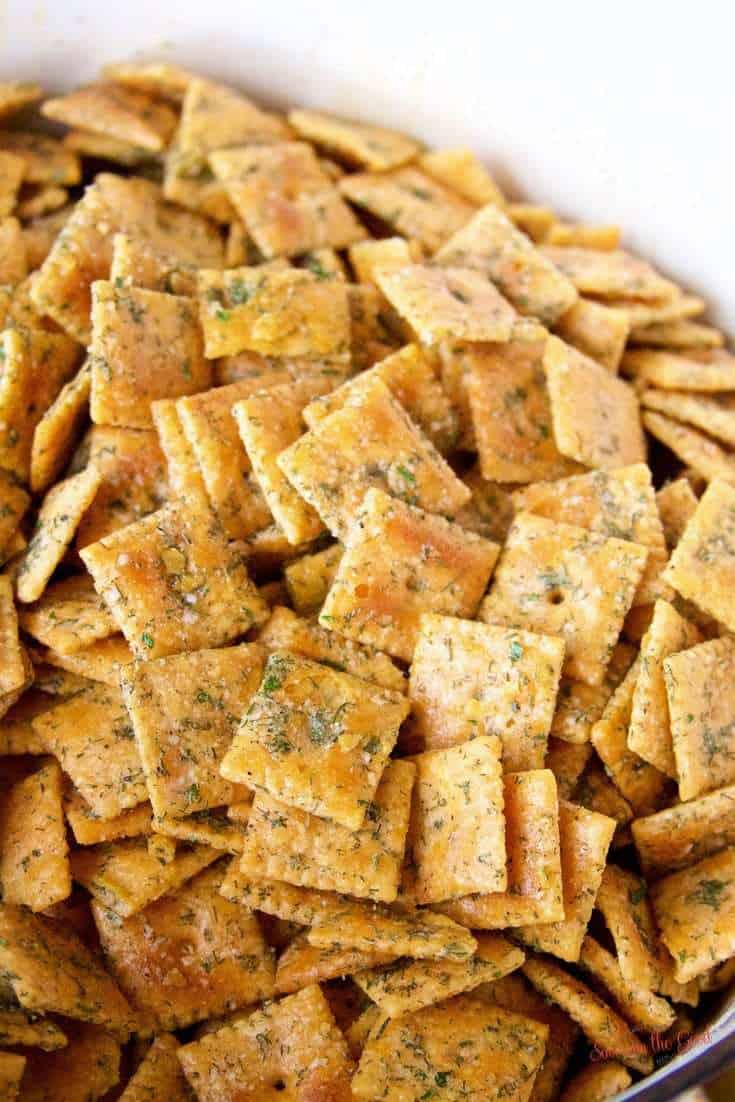
I will be serving this jam when I put together a charcuterie board. If you are looking for more items to accompany your charcuterie board, I would be sure to add  Sriracha Roasted Pumpkin Seeds, Balsamic Roasted Strawberries or seasoned ranch cheese crackers. So many tasty choices!

Easy Tomato Jam Ingredients:

  • ripe tomatoes - seeded and roughly chopped
  • peaches - pitted and diced
  • onion - white or yellow onion, diced
  • brown sugar
  • sugar - white sugar
  • salt - table salt or kosher is what I use
  • coriander seeds - toasted in a dry pan
  • cumin
  • cinnamon stick
  • raisins - I use traditional dark raisin but golden raisins would be delicious if you have them
  • piece of ginger, freshly grated
  • cider vinegar
  • lemon juice - fresh is best but bottled will work if bottles lemon juice is all you have.

How to Make Tomato Jam

Savory Tomato Jam
  1. In a dry saute pan, toast the coriander seeds and cumin until they are fragrant, 1-2 minutes
  2. Combine the tomatoes, peaches, onion, brown sugar, sugar, salt, toasted coriander seeds, cumin, cinnamon stick, raisins, grated ginger, cider vinegar, and lemon juice in a wide, deep skillet and bring to a boil.
  3. Stir every few minutes so the jam does not stick to the bottom of the skillet.
  4. Heat and simmer on low for 1 hour or until the tomato jam had thickened or has a jammy consistency.
  5. The homemade jam will be thick enough when the jam does not easily run back together when a spoon is drawn along the bottom of the pan.
  6. Remove cinnamon stick, cool and serve.
  7. Store in the refrigerator for 1 week.

5 Days To Canning Confidence

Why You'll Love this Tomato Jam Recipe

Simple Savory Tomato Jam

You'll love this tangy tomato jam recipe for its perfect balance of sweet and savory flavors, making it an ideal condiment for burgers, grilled cheese, and crackers.

The use of fresh tomatoes enhances the overall taste, and the simplicity of the easy recipe ensures a quick and delicious addition to your culinary repertoire.

Is there a substitute for the peaches in this savory tomato jam recipe?

If you do not have peaches on hand for this super simple recipe I would substitute granny smith apples, bosc pears, 4 apricots or even a cup of pineapple. Fresh is preferred but use canned if that is what you have on hand.

What can you serve tomato jam on?

Savory Tomato Jam in small blue bowl with bread

I love to serve tomato jam on crostini with cream cheese but a variety of different cheeses would be good. Also this savory tomato jam can be served alongside sous vide boneless pork chops, roasted chicken, or with curry dishes. I love this recipe more because I can put the jam on top of sandwiches.

Can I Use Cherry Tomatoes or Green Tomatoes to Make Tomato Jam?

Yes, you can use cherry tomatoes, green tomatoes, or a variety of tomatoes, including plum tomatoes, to make the sweet and spicy tomato jam featured in the recipe.

Feel free to experiment with different tomato varieties to make this jam.

Is It Possible to Create Ketchup and Other Condiments with this Recipe?

While the jam is fantastic and offers a perfect recipe for a blend of sweet, sugar, and spices, it may not align with the typical taste and texture of commercial ketchup.

How to Store Tomato Jam

  1. Sterilize the jars through a canning process.
  2. When the jam is done, pour it into hot, sterile jars, leaving ¼-inch headspace.
  3. Wipe rims of jars with a dampened clean paper towel; adjust two-piece metal canning lids.
  4. Process 15 minutes in a boiling water bath. Adjust for altitude above 1000 ft.
  5. Remove from water bath and cool completely before storing in a cool place.
A wooden board with bread and cranberry jam, topped with tomato jam.

Savory Tomato Jam

When garden tomatoes are in abundance it is time to make homemade tomato jam. This recipe for savory tomato jam has the warmth of the flavors of cinnamon and ginger balanced with the sweetness of peaches. Perfect to be served on crostini, alongside roasted pork, beef, chicken or curry dishes.
4.95 from 20 votes
Print Rate
Course: Canning Recipes
Cuisine: American
Prep Time: 15 minutes minutes
Cook Time: 1 hour hour
Total Time: 1 hour hour 15 minutes minutes
Servings: 2 cups
Calories: 996
Author: Sarah Mock

Ingredients

  •  
    2 Pounds tomatoes seeded and rough chopped
  •  
    2 medium peaches pitted and diced
  • A single whole yellow onion with dry, papery skin, photographed against a white background-the perfect flavorful addition to your next Crockpot Hash brown Casserole.1 Medium onion diced
  • Domino Light Brown Sugar box, 16 oz, featuring a slice of Blackberry Dump Cake topped with whipped cream and berries, and a Non-GMO Project Verified label in the bottom right corner.⅔ Cup Brown Sugar
  • A 4-pound bag of Domino granulated pure cane sugar with a yellow and white design, showing nutrition information and branding-perfect for sweetening recipes like rhubarb sour or your favorite desserts.1 Cup Sugar
  • A Morton Salt container with a blue label featuring a girl in a yellow dress holding an umbrella, with salt pouring out of a container-an essential ingredient for perfectly seasoning dishes like Chicken Cordon Bleu.¾ teaspoon salt
  •  
    2 teaspoon coriander seeds toasted
  •  
    ½ teaspoon cumin toasted with the coriander seeds
  •  
    1 cinnamon stick
  •  
    ½ Cup raisins
  •  
    2 inch piece of ginger freshly grated
  •  
    ¼ Cup cider vinegar
  • A plastic bottle of ReaLemon 100% Lemon Juice with a yellow cap, a lemon-shaped top, and images of lemons on a green label-perfect for adding a burst of citrus flavor to your favorite recipes like Lemon Cheesecake Bars.3 tablespoon Lemon Juice
Follow Savoring The Good On PinterestFollow @SavoringTheGood or tag #STGRecipes!

Instructions

  • In a dry saute pan, toast the coriander seeds and cumin until they are fragrant. 1-2 minutes
  • Combine the tomatoes, peaches, onion, brown sugar, sugar, salt, toasted coriander seeds, cumin, cinnamon stick, raisins, grated ginger, cinder vinegar and lemon juice in a wide, deep skillet and bring to a boil.
  • Stir every few minutes so the jam does not stick to the bottom of the skillet.
  • Simmer on low for 1 hour or until the tomato jam had thickened.
  • The jam will be thick enough when the jam does not easily run back together when a spoon is drawn along the bottom of the pan.
  • Remove cinnamon stick, cool and serve.
  • Store in the refrigerator for 1 week.

Notes

Tomato Jam Canning Instructions 1. Sterilize canning jars. 2. Pour hot jam into hot, sterile jars, leaving ¼-inch headspace. 3. Wipe rims of jars with a dampened clean paper towel; adjust two-piece metal canning lids. 4. Process 15 minutes in a boiling water bath. Adjust for altitude above 1000 ft. 5. Remove from water bath and cool completely before storing in a cool place.
Want to share when you made this recipe?Follow @SavoringTheGood & tag #STGRecipes!
Nutrition Facts
Savory Tomato Jam
Amount per Serving
Calories
996
% Daily Value*
Sodium
 
781
mg
34
%
Carbohydrates
 
250
g
83
%
Sugar
 
204
g
227
%
Protein
 
8
g
16
%
* Percent Daily Values are based on a 2000 calorie diet.
**Nutritional facts are just estimates. Please utilize your own brand nutritional values to double check against our estimates.
Like this recipe card? Want one for your site?Check out WP Recipe Maker!

Sarah Mock of savoringthegood.com headshot 2022

I am Sarah Mock. Welcome!

Sarah Mock is a classically trained Chef and graduate of Johnson & Wales University. A culinary blogger for 16 years Sarah helps the home cook prepare her recipes with professional results.

Get to know me

as seen in:

Logos of Hersheyland, ABC News, and Good Day PA are showcased in a seamless row, providing a snapshot of popular brands.

Hersheyland Nightline Good Day Pa!

The vibrant design showcases the iconic logos of Pinterest, Rachael Ray, and Jell-O set against a bold red background. Sorry, the provided description doesn't offer enough detail to suggest important SEO keywords.

Pinterest Rachael JELL-O

Crab Fritters

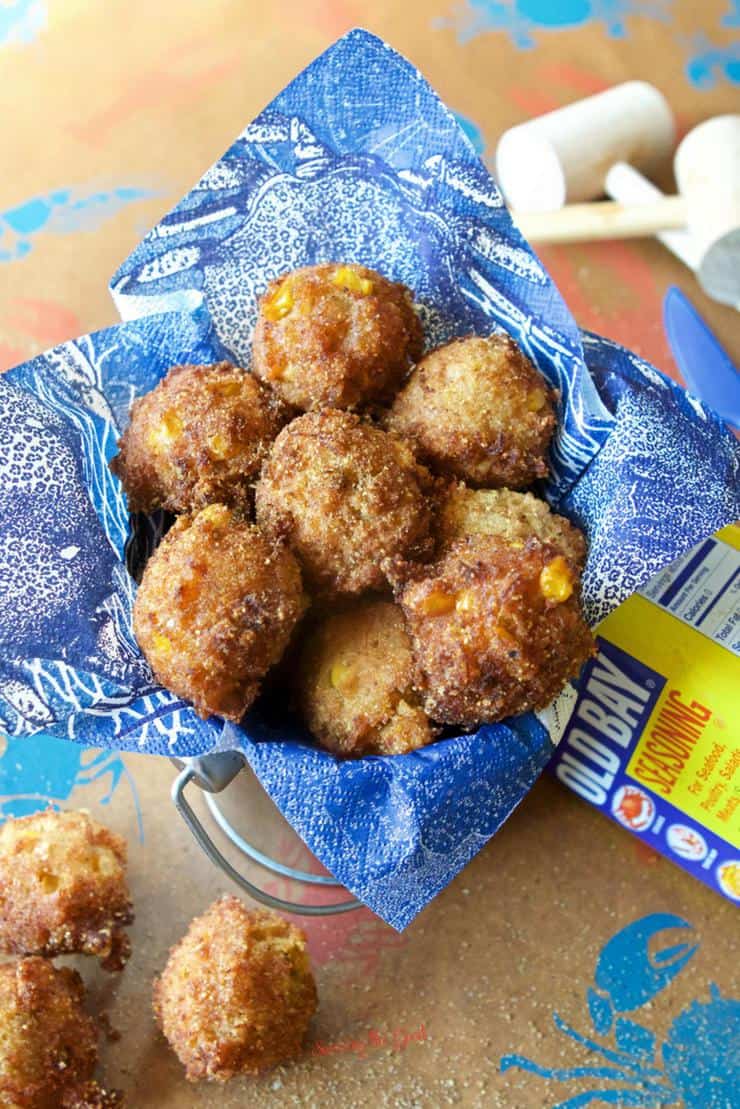
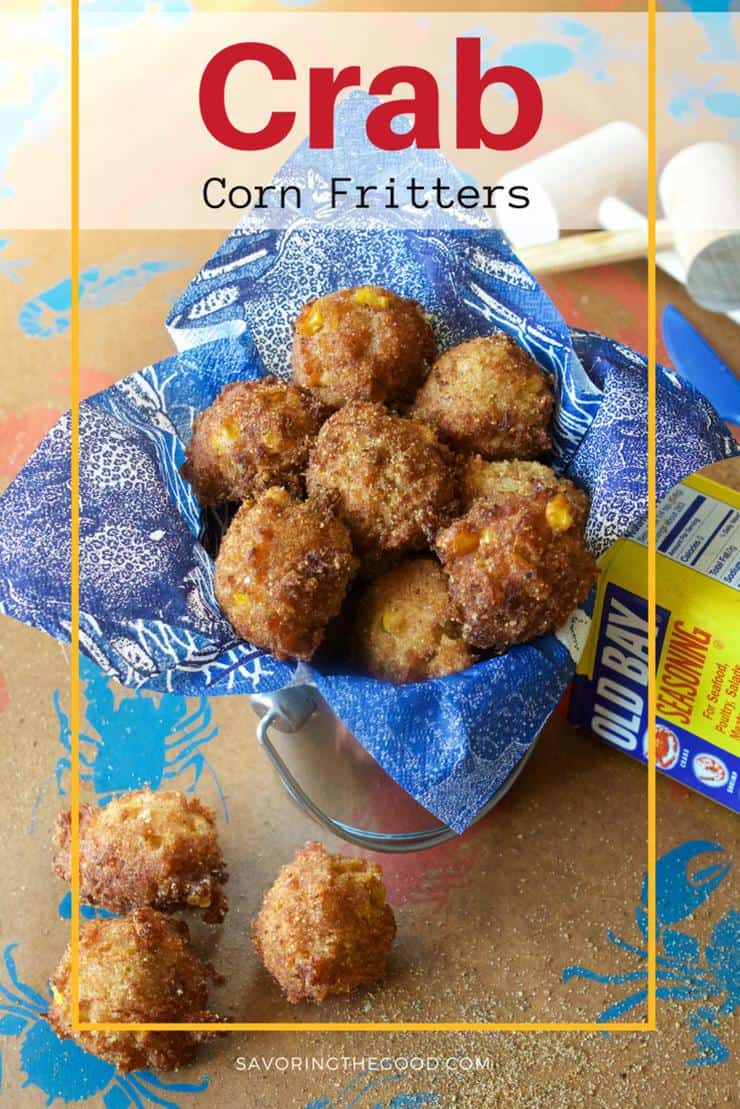
Crab Fritters Recipe (corn fritters with crab) in a basket lined with a blue paper napkin

This is the easiest crab corn fritters recipe ever! With the help of a box of jiffy corn muffin mix this delicious corn fritter recipe is ready for summer parties, backyard barbecues or even game day!

the best Crab Corn Fritters

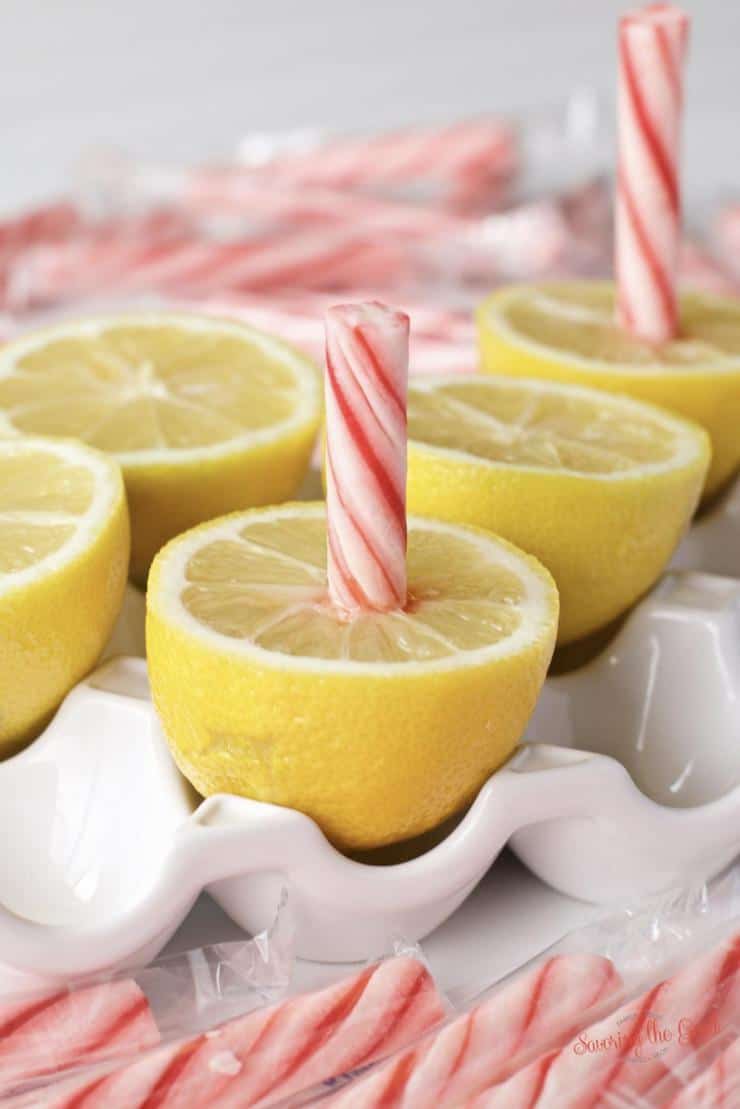
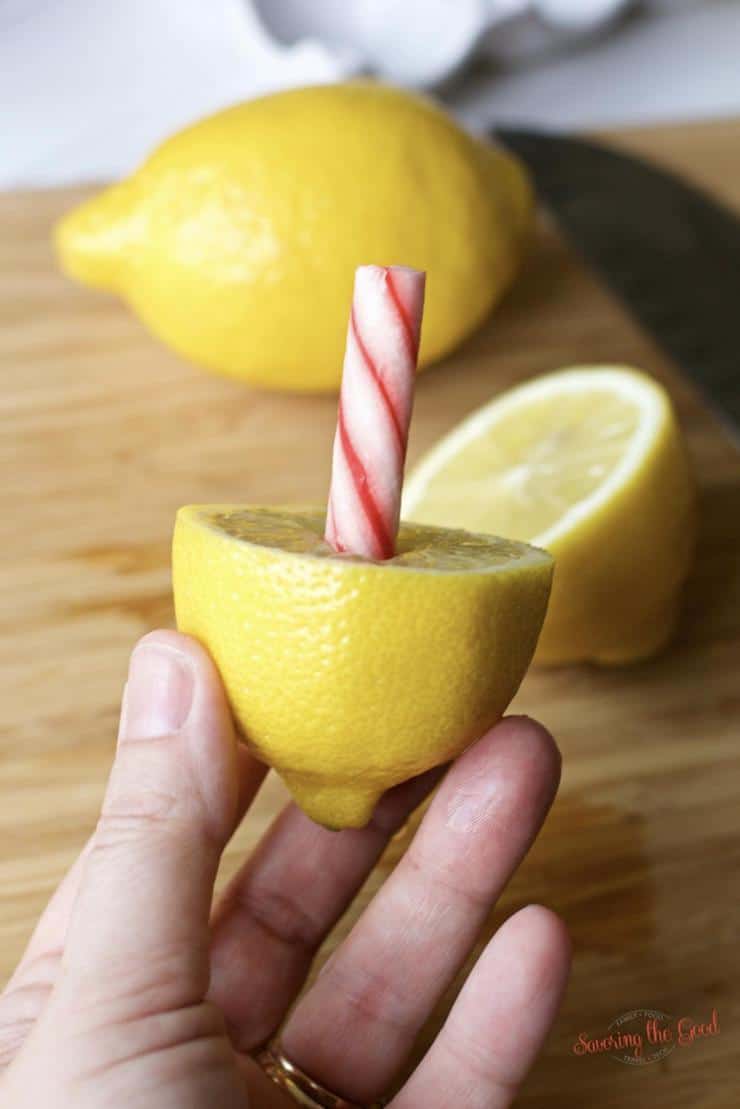
If you are having a crab party you will also want to make Maryland Crab soup and if you are having a Baltimore themed crab party you must have a Lemon peppermint stick to share with your guests.

Crab Corn Fritters

What dips can you serve with the fritters?

I like the fritters fresh out of the fryer with a heavy sprinkling of Old bay but here are some other suggestions.

  • Honey
  • Sriracha mayonnaise
  • Ayoli
  • Sour Cream
  • Melted butter
  • Ketchup - this was my kids suggestion... not mine.
amish white corn peeled back showing white corn kernels

Ingredients to make crab corn fritters:

  • cornbread mix (Jiffy used in this recipe)
  • flour - app pourpose works for this recipe.
  • whole kernel corn, drained
  • Old Bay Seasoning
  • egg
  • tonic water
  • Oil for frying

How to make the Fritters

  1. Preheat 2" of vegetable oil or a deep fryer to 350.
  2. Blend the corn bread mix, flour, Old Bay seasoning.
  3. Beat the egg and add it to the dry ingredients.
  4. Add to the tonic water and fold into the batter
  5. Gently fold in the crab.
  6. Using a small cookie scoop, drop the fritters into deep fryer or skillet.
  7. Cook 1 - 2minutes on both sides.
  8. Drain on paper towel. Dust with additional old bay seasoning to serve.

Pin to Pinterest:

easy Crab Corn Fritters in a basket with a blue napkin

Printable Corn Crab Fritter Recipe:

the best Crab Corn Fritters horizontal image

Crab Corn Fritters

This is the easiest crab corn fritters recipe ever! With the help of a box of jiffy corn muffin mix this delicious corn fritter recipe is ready for summer parties, backyard barbecues or even game day!
5 from 7 votes
Print Pin Rate
Course: Appetizer Recipe
Cuisine: American
Keyword: corn, corn fritter, crab
Prep Time: 10 minutes minutes
Cook Time: 20 minutes minutes
Total Time: 30 minutes minutes
Servings: 3 Fritters
Calories: 148
Author: Sarah Mock

Ingredients

  •  
    1 8.5 oz box Box corn bread mix (Jiffy used in this recipe)
  •  
    1 can 8-¾ oz. whole kernel corn, drained
  •  
    1 Tablespoon Old Bay Seasoning
  • A single brown chicken egg, perfect for making Chicken Cordon Bleu, stands upright on a white background.2 Egg
  • sour cream.¼ Cup Sour Cream
  •  
    8 ounces crab meat picked clean
  •  
    Oil for frying
Follow Savoring The Good On PinterestFollow @SavoringTheGood or tag #STGRecipes!

Instructions

  • Preheat 2" of vegetable oil or a deep fryer to 350.
    Oil for frying
  • Blend the corn bread mix, flour, Old Bay seasoning.
    1 8.5 oz box Box corn bread mix (Jiffy used in this recipe), 1 Tablespoon Old Bay Seasoning
  • Beat the egg and add it to the dry ingredients.
    2 Egg
  • Add to the tonic water and fold into the batter
  • Gently fold in the crab.
    8 ounces crab meat
  • Using a small cookie scoop, into deep fryer or skillet.
  • Cook 1 - 2minutes on both sides.
  • Drain on paper towel. Dust with additional old bay seasoning to serve.

Notes

How to reheat crab corn fritters.
On the off chance that you have leftover crab fritters, I have found the best way to reheat crab corn fritters is in an air fryer. Set the heat of your air fryer to 400 and reheat the crab corn fritters for 3-4 minutes. I would not recommend reheating crab corn fritters in the microwave. I find that microwaving them makes them too hard for my taste.
 
Do I have to use canned corn in crab corn fritters?
You do not have to use canned corn in this crab corn fritter recipe. The canned corn is just for convenience. Feel free to use corn freshly cut off of the cob or even freezer corn will work well. Follow my easy instructions on how to freeze corn.
Want to share when you made this recipe?Follow @SavoringTheGood & tag #STGRecipes!
Nutrition Facts
Crab Corn Fritters
Serving Size
 
3 fritters
Amount per Serving
Calories
148
% Daily Value*
Fat
 
7
g
11
%
Saturated Fat
 
3
g
19
%
Trans Fat
 
1
g
Polyunsaturated Fat
 
1
g
Monounsaturated Fat
 
2
g
Cholesterol
 
151
mg
50
%
Sodium
 
693
mg
30
%
Potassium
 
232
mg
7
%
Carbohydrates
 
2
g
1
%
Sugar
 
1
g
1
%
Protein
 
18
g
36
%
* Percent Daily Values are based on a 2000 calorie diet.
**Nutritional facts are just estimates. Please utilize your own brand nutritional values to double check against our estimates.
Like this recipe card? Want one for your site?Check out WP Recipe Maker!

Cranberry Apple Chutney

easy cranberry chutney

Perfect for your Thanksgiving table my recipe for cranberry apple chutney also has freshly grated ginger, brown sugar, orange zest and an optional kick of heat. By choosing to use fresh cranberries or frozen cranberries you will be making this easy cranberry chutney to go along with your charcuterie and cheese board beyond Thanksgiving. 

cranberry chutney in a jar

If you are looking for a cranberry sauce instead of a chutney you are going to want to make my 3 ingredient cranberry sauce. It comes together in 5 minutes. If you still can't get enough cranberries, you will want to make my cranberry apple pie. A family favorite!

Cranberry Chutney Ingredients:

  • olive oil
  • onion, minced
  • fresh ginger, grated
  • cranberries, frozen or fresh
  • granny smith apple, peeled, cored, fine dice
  • cider vinegar
  • zest and juice of 1 orange
  • light brown sugar, packed
  • whole grain mustard
  • alt
  • red pepper flakes, optional

Directions:

  1. Heat the oil over medium heat in a medium saute pan. Add the minced onion, grated ginger, diced apple and saute until golden.
  2. Add the remaining ingredients to the saucepan and cook until the cranberries pop, about 10 mins. Remove from the heat and cool.
  3. The chutney can be stored in the refrigerator for several days.
cranberry apple chutney with ginger

What do you eat cranberry chutney with, besides turkey?

  • Warm a round of brie, pour the cranberry chutney over it and serve with crackers
  • Have it on a sandwich instead of mayo.
  • Puree it and use as a dipping sauce for egg rolls or any fried food.
  • Serve it alongside a cheese and charcuterie board.
  • Mix it into ground beef or pork and use for meatloaf or sausage roll filling
  • Serve it on the side of a meat pie or and empanada
  • Serve it with grilled sausages
  • With roasted chicken or or fish.
  • Puree it and glaze meat, roasted sweet potatoes, butternut squash, etc.
  • Serve it alongside a grilled cheese sandwich.
  • On a burger, especially veggie burger.

easy cranberry chutney

📝 Frequently asked questions, answers and tips:

What is chutney made out of?

Chutney is usually made from a mixture of fruit, spices, sugar, vinegar, a bit of spice and cooked down. The reduction will intensify the flavors, thicken the mixture and the sugar will balance out the tartness. Chutney is great served alongside a cheese and charcuterie board, accompany roasted meats or compliment cheeses.

What is the difference between a chutney and relish?

Traditionally, a relish is made with grated or cut up vegetables or fruit, whereas chutney is traditionally made with fruit as the main ingredient. Chutney is a spicy, aromatic condiment that contains fruit, sugar, vinegar and a variety of spices depending on the recipe.

Chef Tip

I don't let all the cranberries completely cook down. I allow some of them to stay plump giving the chutney more texture.

cranberry apple chutney with ginger

Cranberry Apple Chutney Recipe

Perfect for your Thanksgiving table my recipe for cranberry apple chutney also has freshly grated ginger, brown sugar, orange zest and an optional kick of heat. By choosing to use fresh cranberries or frozen cranberries you will be making this easy cranberry chutney to go along with your charcuterie and cheese board beyond Thanksgiving.
4.70 from 10 votes
Print Pin Rate
Course: Side Dishes
Cuisine: American
Prep Time: 10 minutes minutes
Cook Time: 10 minutes minutes
Total Time: 20 minutes minutes
Servings: 4
Calories: 230
Author: Sarah Mock

Ingredients

  • A 500ml bottle of California Olive Ranch Global Blend Extra Virgin Olive Oil with green and blue labeling, indicating a blend from Argentina, Portugal, Chile, and California-perfect for drizzling over your favorite shrimp avocado salad.1 tablespoon olive oil
  • A single whole yellow onion with dry, papery skin, photographed against a white background-the perfect flavorful addition to your next Crockpot Hash brown Casserole.½ onion minced
  •  
    1 inch fresh ginger grated
  •  
    12 Ounces cranberries frozen or fresh
  •  
    1 granny smith apple peeled, cored, fine dice
  •  
    ¼ Cup cider vinegar
  •  
    zest and juice of 1 orange
  • Domino Light Brown Sugar box, 16 oz, featuring a slice of Blackberry Dump Cake topped with whipped cream and berries, and a Non-GMO Project Verified label in the bottom right corner.½ Cup Brown Sugar packed
  •  
    1 Teaspoon whole grain mustard
  • A Morton Salt container with a blue label featuring a girl in a yellow dress holding an umbrella, with salt pouring out of a container-an essential ingredient for perfectly seasoning dishes like Chicken Cordon Bleu.½ teaspoon salt
  • A 6.2 oz plastic container of McCormick Crushed Red Pepper with a red cap and yellow label stating dash of red pepper flakes optional
Follow Savoring The Good On PinterestFollow @SavoringTheGood or tag #STGRecipes!

Instructions

  • Heat the oil over medium heat in a medium saute pan. Add the minced onion, grated ginger, diced apple and saute until golden.
  • Add the remaining ingredients to the saucepan and cook until the cranberries pop, about 10 mins. Remove from the heat and cool.
  • The chutney can be stored in the refrigerator for several days.

Notes

I don't let all the cranberries completely cook down. I allow some of them to stay plump giving the chutney more texture.
Want to share when you made this recipe?Follow @SavoringTheGood & tag #STGRecipes!
Nutrition Facts
Cranberry Apple Chutney Recipe
Serving Size
 
1
Amount per Serving
Calories
230
% Daily Value*
Fat
 
4
g
6
%
Polyunsaturated Fat
 
3
g
Sodium
 
351
mg
15
%
Carbohydrates
 
50
g
17
%
Sugar
 
39
g
43
%
Protein
 
1
g
2
%
* Percent Daily Values are based on a 2000 calorie diet.
**Nutritional facts are just estimates. Please utilize your own brand nutritional values to double check against our estimates.
Like this recipe card? Want one for your site?Check out WP Recipe Maker!

published august 15 2018


Sarah Mock of savoringthegood.com headshot 2022

I am Sarah Mock. Welcome!

Sarah Mock is a classically trained Chef and graduate of Johnson & Wales University. A culinary blogger for 16 years Sarah helps the home cook prepare her recipes with professional results.

Get to know me

as seen in:

Logos of Hersheyland, ABC News, and Good Day PA are showcased in a seamless row, providing a snapshot of popular brands.

Hersheyland Nightline Good Day Pa!

The vibrant design showcases the iconic logos of Pinterest, Rachael Ray, and Jell-O set against a bold red background. Sorry, the provided description doesn't offer enough detail to suggest important SEO keywords.

Pinterest Rachael JELL-O

Bourbon Cherries

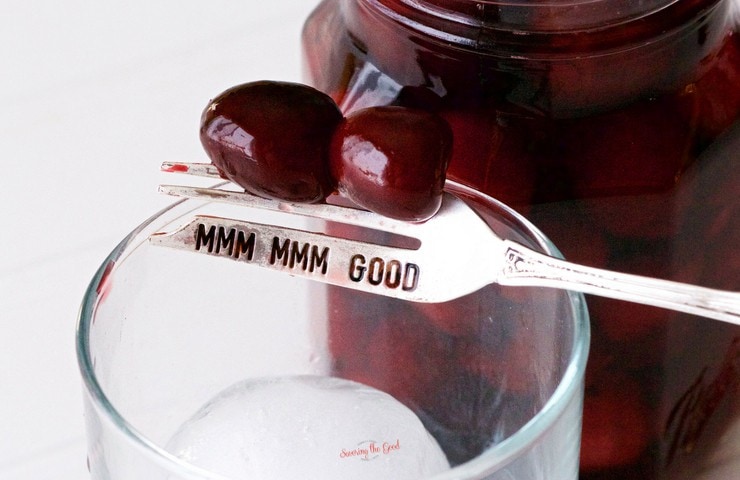
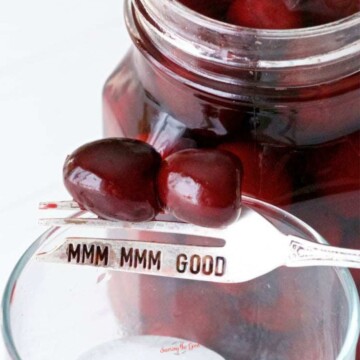
Bourbon Cherries on a fork

These are the best bourbon cherries and you can make them at home! This is a simple recipe that uses fresh cherries instead of dried ones. These are also known as manhattan cherries but whatever you call them, don't forget to make an extra batch to share with friends.

Bourbon Cherries on a fork

This recipe uses fresh bing cherries but feel free to use whatever variety of fresh cherry you have available. You might just find a new favorite.

If fresh cherries are not in season you can make a batch of drunken bourbon soaked cherries with sweetened dried cherries.

🍒 Ingredients:

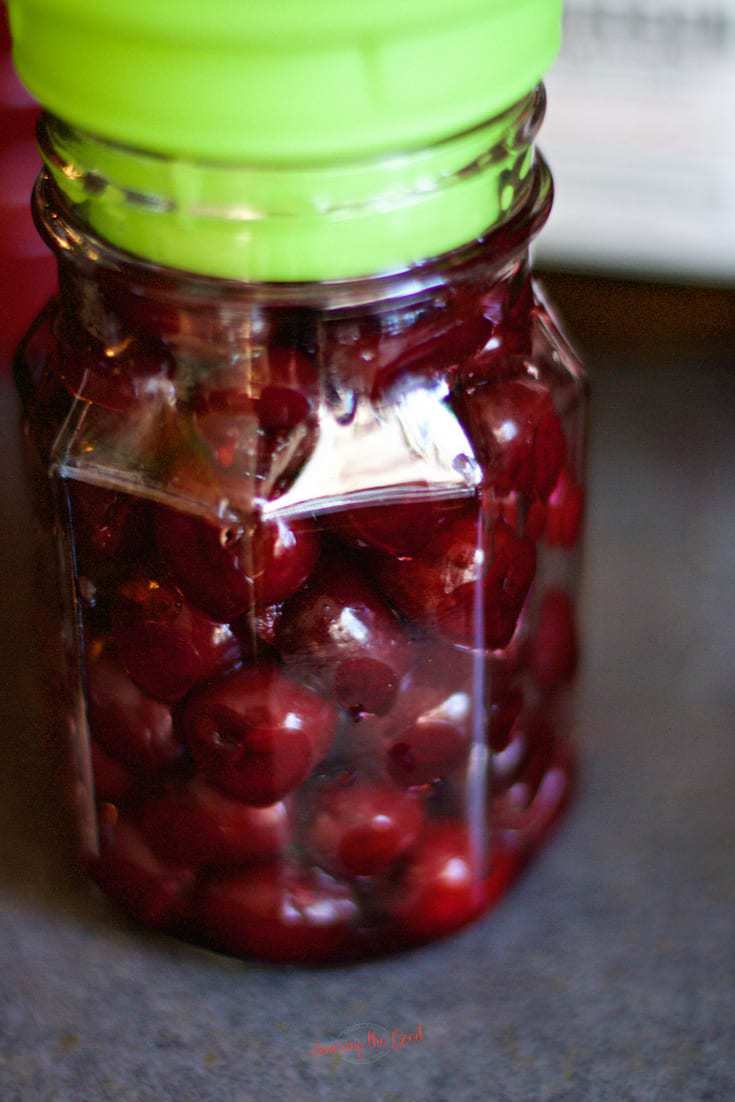
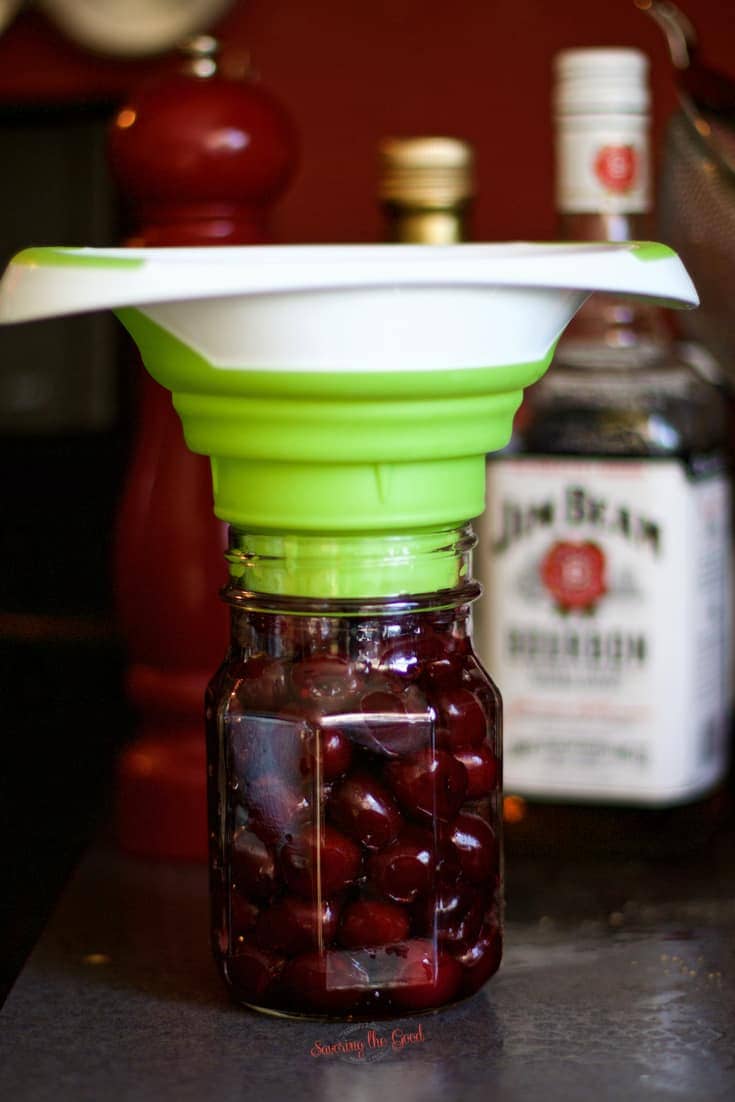
Bing cherries in a canning jar with a green funnel.
  • Fresh bing cherries, stems removed and pitted
  • Simple syrup - a syrup made of equal parts sugar and water, brought to a boil, and cooled
  • Vanilla extract (make your own vanilla extract. SO EASY!)
  • Bourbon - I like Jim Beam bourbon.

💧 What is simple syrup?

Simple syrup, also known as sugar syrup is a solution of sugar and water that is cooked over low heat until clear, then boiled for one minute. Simple syrup can be made in various densities

  • Thin- 3 parts water, 2 part sugar
  • Medium - 2 parts water, 1 part sugar
  • Heavy - equal parts waster and sugar.

Depending on the thickness, sugar syrups have various uses including soaking cakes, glazing backed goods, poaching or preserving fruit, adding to frostings, etc. Source: The New Food Lover's Companion, Second Edition, Sharon Tyler Herbst, Author

🫙 Bourbon Cherries Canning Instructions:

bourbon soaked cherries on a silver fork
  1. Heat canning jars in a large canning pot to a simmer.
  2. Add cherries to the jars as instructed.
  3. Heat the simple syrup to a simmer.
  4. Remove from heat and carefully add the vanilla and the bourbon. Stir to combine.
  5. Fill jars by ladling hot syrup into hot jars.
  6. Wipe the rim of the jar to remove any syrup.
  7. Place a clean, new lid on the jar.
  8. Place a canning ring/bad and finger tighten.
  9. Using a jar lifter, place the jars back into the canning pot.
  10. Bring to a boil.
  11. Boil for 10 minutes.
  12. Using a jar lifter, remove the jars and rest them on kitchen towel, wooden cutting board or cooking rack with at least 2 inches of space around them for the air to circulate.
  13. 12 hours later, check to see that the lids do not flex when pressed.
  14. Wipe clean and store in a cool, dry, dark place for a year.

🧊 How to make bourbon cherries: (refrigerator instructions)

bing cherries in a canning jar with a funnel on top. Jim Beam bourbon in the background
  1. Clean, remove stems and pit the cherries and put them in two clean pint-sized mason jars (or one large quart-sized mason jar). Do your best to minimize space between the cherries.
  2. Combine the simple syrup, vanilla extract and bourbon.
  3. Pour the bourbon mixture over the cherries.
  4. Secure the lids on the mason jars, give them a shake, and refrigerate for at least 3 days before using.
  5. The recipe should last for up to 3 months.

Storage Tips

I have two sets of instructions for making your bourbon-soaked cherries using fresh cherries. The first is for storing in the refrigerator and the second is for water bath canning making the bourbon cherries shelf-stable. If you are lucky enough to pick your own cherries for this recipe, pick a few more pounds and make cherry syrup, easy cherry pie bars, cherry clafoutis and sour cherry pie filling. Cherry season is so short so pick and make!

🥃 How to use bourbon cherries:

homemade bourbon soaked fresh cherries
  • Serve as a garnish for a Manhattan cocktail
  • Garnish an Old Fashioned.
  • Chop and add to icing and use for the filling of a cake.
  • Add to sangria.
  • Eat a few just because.
Bourbon Cherries on a fork

Bourbon Cherries

Did you know you can make bourbon soaked cherries for manhattans at home? This is a simple recipe for bourbon soaked cherries using fresh cherries instead of dried. These are also known as manhattan cherries but what ever you call them, don't forget to make an extra batch to share with friends.
4.63 from 24 votes
Print Pin Rate
Course: Drinks - Non Alcoholic
Cuisine: American
Keyword: bourbon, Cherry, cocktail, garnish
Prep Time: 15 minutes minutes
Cook Time: 25 minutes minutes
Total Time: 40 minutes minutes
Servings: 80 cherries
Calories: 16
Author: Sarah Mock

Ingredients

  •  
    1 lb bing cherries stems removed and pitted
  •  
    1 Cup simple syrup
  • easy sous vide vanilla extract1 Tablespoon Vanilla Extract make your own vanilla extract. SO EASY!
  •  
    1 Cup bourbon
Follow Savoring The Good On PinterestFollow @SavoringTheGood or tag #STGRecipes!

Instructions

Bourbon Soaked Cherries Instructions:

  • Clean, remove stems and pit the cherries and put them in two clean pint-sized mason jars (or one large quart-sized mason jar). Do your best to minimize space between the cherries.
  • Combine the simple syrup, vanilla extract and bourbon.
  • Pour the bourbon mixture over the cherries.
  • Secure the lids on the mason jars, give them a shake, and refrigerate for at least 3 days before using.
  • The recipe should last for up to 3 months.

Bourbon Soaked Cherries Canning Instructions

  • Heat canning jars in a large canning pot to a simmer.
  • Add cherries to the jars as instructed.
  • Heat the simple syrup to a simmer.
  • Remove from heat and carefully add the vanilla and the bourbon. Stir to combine.
  • Fill jars by ladling hot syrup into hot jars.
  • Wipe the rim of the jar to remove any syrup.
  • Place a clean, new lid on the jar.
  • Place a canning ring/bad and finger tighten.
  • Using a jar lifter, place the jars back into the canning pot.
  • Bring to a boil.
  • Boil for 10 minutes.
  • Using a jar lifter, remove the jars and rest them on kitchen towel, wooden cutting board or cooking rack with at least 2 inches of space around them for the air to circulate.
  • 12 hours later, check to see that the lids do not flex when pressed.
  • Wipe clean and store in a cool, dry, dark place for a year.

Notes

I have two sets of instructions for making your bourbon soaked cherries using fresh cherries. The first is for storing in the refrigerator and the second is for water bath canning making the bourbon cherries shelf stable.
Want to share when you made this recipe?Follow @SavoringTheGood & tag #STGRecipes!
Nutrition Facts
Bourbon Cherries
Serving Size
 
1
Amount per Serving
Calories
16
% Daily Value*
Carbohydrates
 
3
g
1
%
Sugar
 
3
g
3
%
* Percent Daily Values are based on a 2000 calorie diet.
**Nutritional facts are just estimates. Please utilize your own brand nutritional values to double check against our estimates.
Like this recipe card? Want one for your site?Check out WP Recipe Maker!

Sarah Mock of savoringthegood.com headshot 2022

I am Sarah Mock. Welcome!

Sarah Mock is a classically trained Chef and graduate of Johnson & Wales University. A culinary blogger for 16 years Sarah helps the home cook prepare her recipes with professional results.

Get to know me

as seen in:

Logos of Hersheyland, ABC News, and Good Day PA are showcased in a seamless row, providing a snapshot of popular brands.

Hersheyland Nightline Good Day Pa!

The vibrant design showcases the iconic logos of Pinterest, Rachael Ray, and Jell-O set against a bold red background. Sorry, the provided description doesn't offer enough detail to suggest important SEO keywords.

Pinterest Rachael JELL-O

Asian Ramen Noodle Salad (Brussels Sprouts)

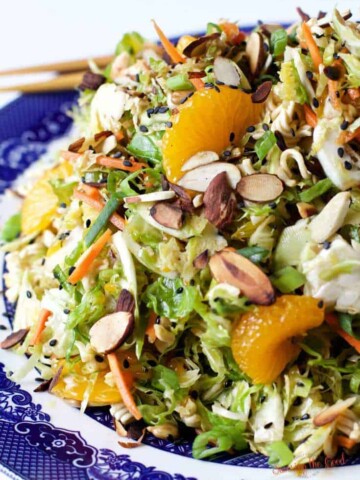
An Asian ramen noodle salad with oranges and almonds.

You will love this updated Asian ramen noodle salad with the addition of shaved brussels sprouts in place of coleslaw mix. Another delicious way to incorporate Brussels sprouts into your recipe rotation. Asian ramen noodle salad with shaved brussels sprouts is the perfect side dish for summer parties, potlucks, and family gatherings.

Asian Ramen Noodle Salad

Do you love this cold salad recipe? Oranges and almonds add sweetness and crunch to this twist on coleslaw. This side dish would compliment almond chicken, deliciously!

Asian Ramen Noodle Salad

I can't tell you how much I love this salad. There is just something about the crunch of the shaved brussels sprouts, the sesame oil, the toasted almonds and then the pop of the sweetness of the mandarin oranges. The longer the salad sits in the refrigerator the softer the crunchy ramen noodles will become.If you like a crunchier noodle, don't let the salad rest too long.

Ingredients:

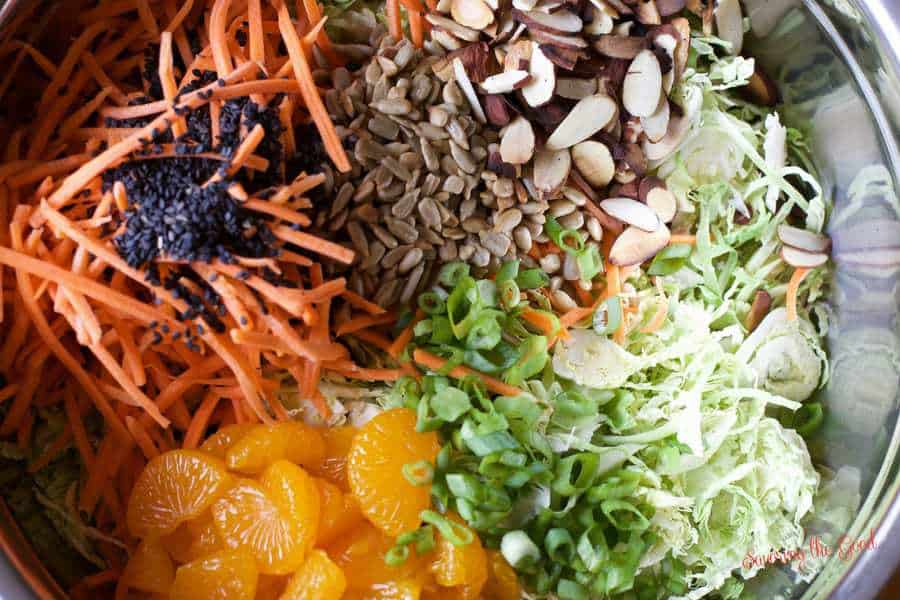
Asian Ramen Noodle Salad with Shaved Brussels Sprouts ingredients
  • Brussels sprouts, shaved
  • shredded carrots
  • Mandarin oranges, drained, juice reserved
  • scallions, greens julienne
  • sliced almonds, toasted
  • rice vinegar
  • mandarin orange juice
  • soy sauce
  • sesame oil
  • sugar
  • black sesame seeds, optional
  • sunflower seeds - learn how to roast sunflower seeds
  • ramen noodles, oriental flavor

Directions:

easy Asian Ramen Noodle Salad
  1. Combine the shaved brussels sprouts, shredded carrots, scallions, sliced almonds, black sesame seeds and sunflower seeds in a large salad bowl.
  2. Whisk together or shake in a closed mason jar the rice vinegar, mandarin orange juice, soy sauce, sesame oil, sugar and the packet from the ramen noodles.
  3. Crush the ramen noodles.
  4. Combine the brussles sprouts salad, the dressing, mandarin oranges and the crushed ramen noodles.
  5. Allow the salad to marinate for at least an hour.
  6. Stir before serving.
updated Asian Ramen Noodle Salad

Asian Ramen Noodle Salad with Shaved Brussels Sprouts

You will love this updated asian ramen noodle salad with the addition of  shaved brussels sprouts in place of coleslaw mix. Another delicious way to incorporate brussel sprouts into your recipe rotation. Asian ramen noodle salad with shaved brussels sprouts is the prefect side dish for summer parties, potlucks and family gatherings.
5 from 2 votes
Print Pin Rate
Course: Side Dish
Cuisine: American
Keyword: ramen noodle salad, ramen noodle salad recipe, shaved brussels sprout slaw recipe
Prep Time: 10 minutes minutes
Cook Time: 10 minutes minutes
Additional Time: 1 hour hour
Total Time: 1 hour hour 20 minutes minutes
Servings: 6
Calories: 305
Author: Sarah Mock

Ingredients

  •  
    1 ½ pounds Brussels sprouts shaved
  •  
    ¾ Cup shredded carrots
  •  
    1 11 oz. can Mandarin oranges drained, juice reserved
  •  
    3 scallions greens julienne
  •  
    ¼ Cup sliced almonds toasted
  • A bottle of Marukan Genuine Brewed Rice Vinegar, 12 fl oz, with a green cap and label indicating sodium-free, sugar-free, and all natural.3 Tablespoon rice vinegar
  •  
    5 Tablespoon reserved mandarin orange juice
  •  
    1 Tablespoon soy sauce
  •  
    2 Tablespoon sesame oil
  • A 4-pound bag of Domino granulated pure cane sugar with a yellow and white design, showing nutrition information and branding-perfect for sweetening recipes like rhubarb sour or your favorite desserts.1 Tablespoon Sugar
  •  
    2 Tablespoon black sesame seeds optional
  •  
    3 Tablespoon sunflower seeds
  •  
    1 package ramen noodles oriental flavor
Follow Savoring The Good On PinterestFollow @SavoringTheGood or tag #STGRecipes!

Instructions

  • Combined the shaved brussels sprouts, shredded carrots, scallions, sliced almonds, black sesame seeds and sunflower seeds in a large salad bowl.
  • Whisk together or shake in a closed mason jar the rice vinegar, mandarin orange juice, soy sauce, sesame oil, sugar and the packet from the ramen noodles.
  • Crush the ramen noodles.
  • Combine the brussles sprouts salad, the dressing, mandarin oranges and the crushed ramen noodles.
  • Allow the salad to marinate for at least an hour.
  • Stir before serving.
Want to share when you made this recipe?Follow @SavoringTheGood & tag #STGRecipes!
Nutrition Facts
Asian Ramen Noodle Salad with Shaved Brussels Sprouts
Serving Size
 
1
Amount per Serving
Calories
305
% Daily Value*
Fat
 
13
g
20
%
Saturated Fat
 
2
g
13
%
Polyunsaturated Fat
 
10
g
Sodium
 
749
mg
33
%
Carbohydrates
 
42
g
14
%
Sugar
 
20
g
22
%
Protein
 
9
g
18
%
* Percent Daily Values are based on a 2000 calorie diet.
**Nutritional facts are just estimates. Please utilize your own brand nutritional values to double check against our estimates.
Like this recipe card? Want one for your site?Check out WP Recipe Maker!

Sarah Mock of savoringthegood.com headshot 2022

I am Sarah Mock. Welcome!

Sarah Mock is a classically trained Chef and a graduate of Johnson & Wales University. A culinary blogger for 17 years, Sarah helps the home cook prepare her recipes with professional results.

Get to know me

as seen in:

Logos of Hersheyland, ABC News, and Good Day PA are showcased in a seamless row, providing a snapshot of popular brands.

Hersheyland Nightline Good Day Pa!

The vibrant design showcases the iconic logos of Pinterest, Rachael Ray, and Jell-O set against a bold red background. Sorry, the provided description doesn't offer enough detail to suggest important SEO keywords.

Pinterest Rachael JELL-O

Cleaning Sticky Wooden Banisters

Cleaning Sticky Wooden Bannisters

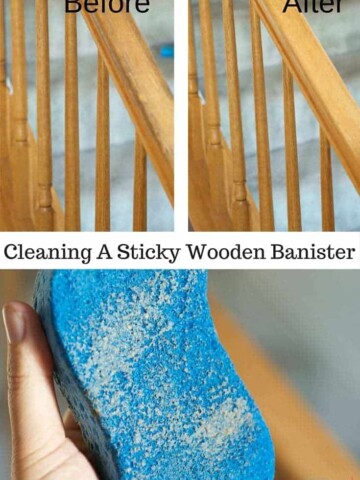
Cleaning sticky wooden banisters is easier than you think! Just a bit of wiping with the right product and you have clean, fresh banisters in no time!

Cleaning sticky wooden banisters with Murphy's oil soap is easier than I thought. Here are instructions on how to clean staircase railing and how to clean grime off wooden banisters. There is nothing worse than having sticky wood on your railings and wooden banisters.

What causes wooden banisters to get sticky?

It is summer and the humidity is currently at about 75% so that means the air is trying to give you a hug and wants to make you feel like you are in a sauna. You may not like the sauna but humidity doesn't care and wants to make everything around it miserable. It even makes the banisters in my house miserable. Yes. The banisters are so miserable that they are sticky.

The humidity combined with the dirt, oils, and dust on wooden railings will make them sticky.

Cleaning sticky wooden banisters with Murphy's oil soap is easier than I thought. Here are instructions on how to clean staircase railing and how to clean grime off wooden banisters. There is nothing worse than having sticky wood on your railings and wooden banisters.

Motivation To Clean A Sticky Wooden Banister

I will be the first to tell you that I am not very good at keeping a clean house. Dishes sit stacked in the sink, they spill over onto the countertop and sometimes the large pots have to sit on the floor waiting for someone to pick them up and put them in the sink to be washed.

Laundry is NEVER done. Or if it gets washed and dried it sits in laundry baskets for days and sometimes weeks. Putting the clean stuff away is my breaking point. I just can't seem to take that one last step.

Clutter is everywhere in my house from the kitchen table to the half wall in the family room to go up the steps to the second floor. Don't even get me started on the space I call my 'desk'. I have one. And I can see about 8 square inches of it at any one time.

So it will come to no surprise to you that the banisters in my house have never been deep cleaned in the 14 years that we have lived here. (pick your jaw up)

They get dusted before every Christmas when the stockings are hung on them (no fireplace at our house) so I know that once a year they will be wiped down and the spindles will be vacuumed. This cleaning process might happen one more time in the year but that is about it. (see a post I wrote about making your own Class Photo Ornament....super easy!) The other day I had HAD IT.

It took me this long to get grossed out enough to deep clean the wooden banisters in our house.

Cleaning Sticky Wooden Banisters

Cleaning Sticky Wooden Banisters

Cleaning Grime Off Of Wooden Banisters

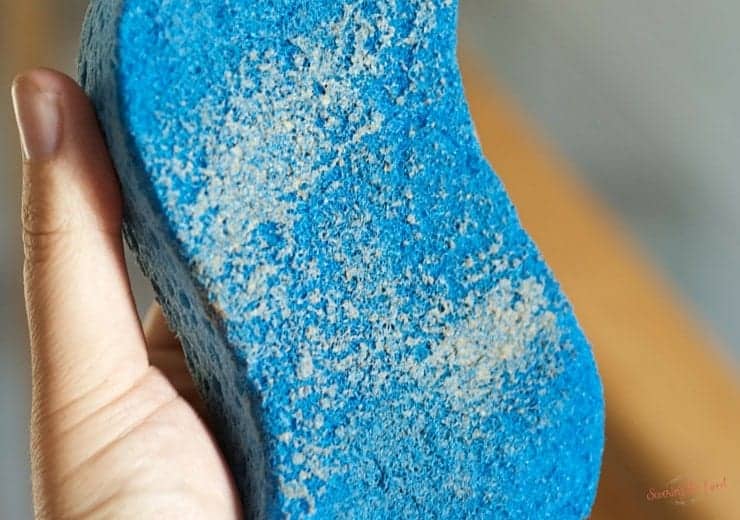
Have you ever had a pedicure where the dead skin just ROLLS off your feet? Not to be gross, but that is exactly what it was like cleaning this banister. The gunk was ROLLING off the wood.

It was oddly satisfying how easy it cleaned up.

Now, the banister did have a different 'feel' when I was all done. But I had just taken off all the gunk and oils from our hands over the last 14 years so of course, it was going to feel different.

I didn't add any other treatment to the wood after I was finished.

I just let it go natural. Let's all cross our fingers that it doesn't take me another 14 years to clean it again.

Cleaning Sticky Wooden Bannisters

Murphy Oil Soap is best for sticky banisters

So we were at Target and I grabbed a bottle of Murphy Oil Soap and thought if this didn't do the trick, nothing would.

I followed the directions on the back of the bottle and diluted it in about a half-gallon of warm to hot water.

It said I could dilute it in a gallon of water but I KNEW we needed all the concentrations we could get on this project.

Cleaning sticky wooden banisters with Murphy's oil soap is easier than I thought. Here are instructions on how to clean staircase railing and how to clean grime off wooden banisters. There is nothing worse than having sticky wood on your railings and wooden banisters.

Steps for cleaning sticky wood

  1. Wipe down the banisters of loose dirt.
  2. Use a Scotch-Brite pad with the scrubby on the one side because I knew this banister needed HELP. No wussy sponge was going to do the job. Now, if I did this every 6 months or even every year a regular sponge might do the trick.
  3. Use a small drizzle of Murphy Oil Soap on the rough side of the sponge and rub on the sticky wood.
  4. Using small circles, scrub and wipe off the stickiness.
  5. Wipe down with the soft side of the sponge.
  6. You are done!

Published July 16, 2018

Sous Vide Corned Beef

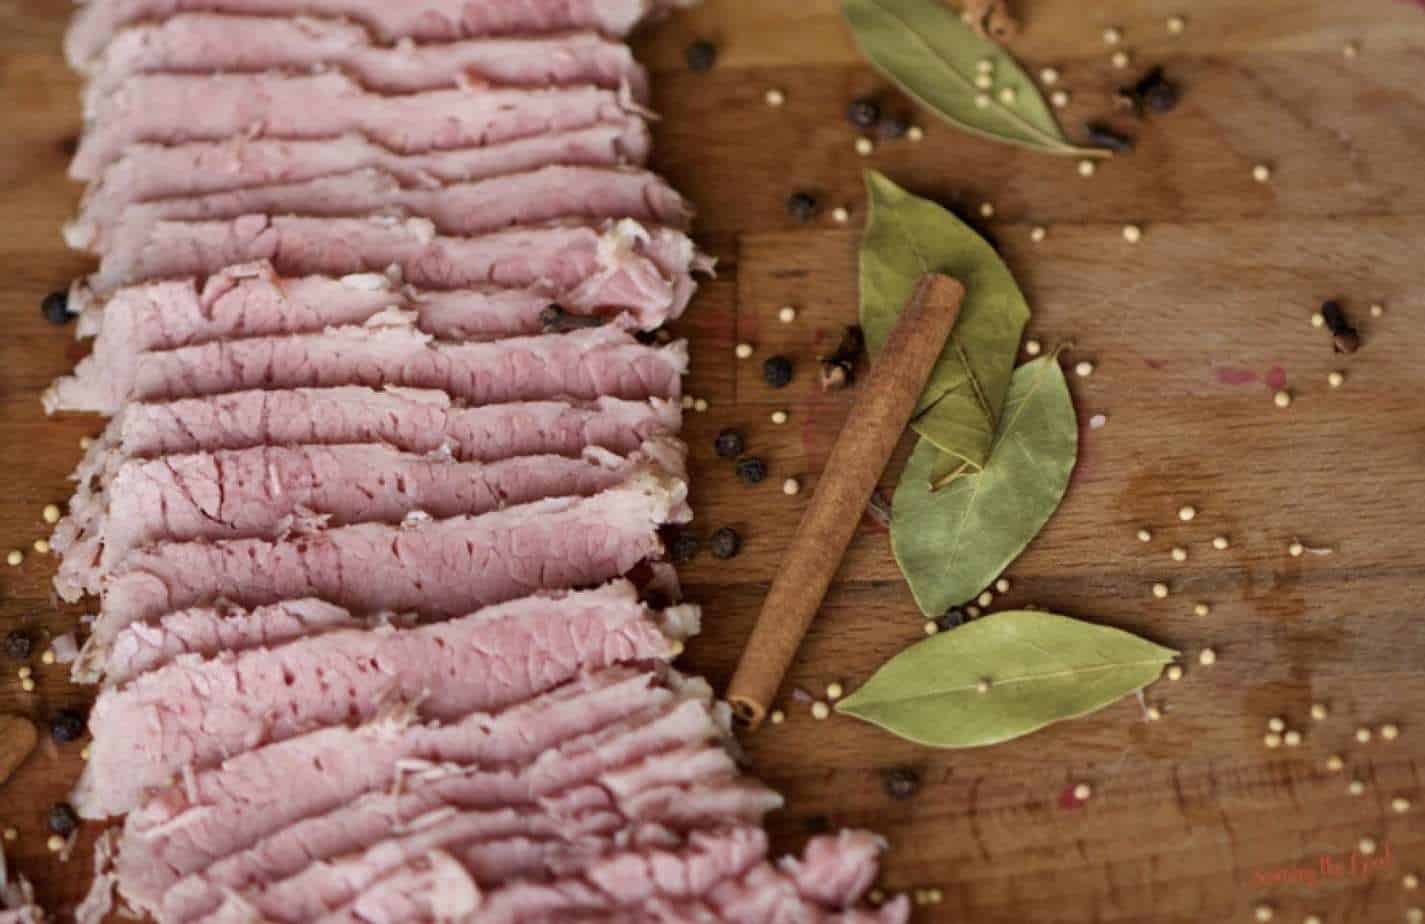
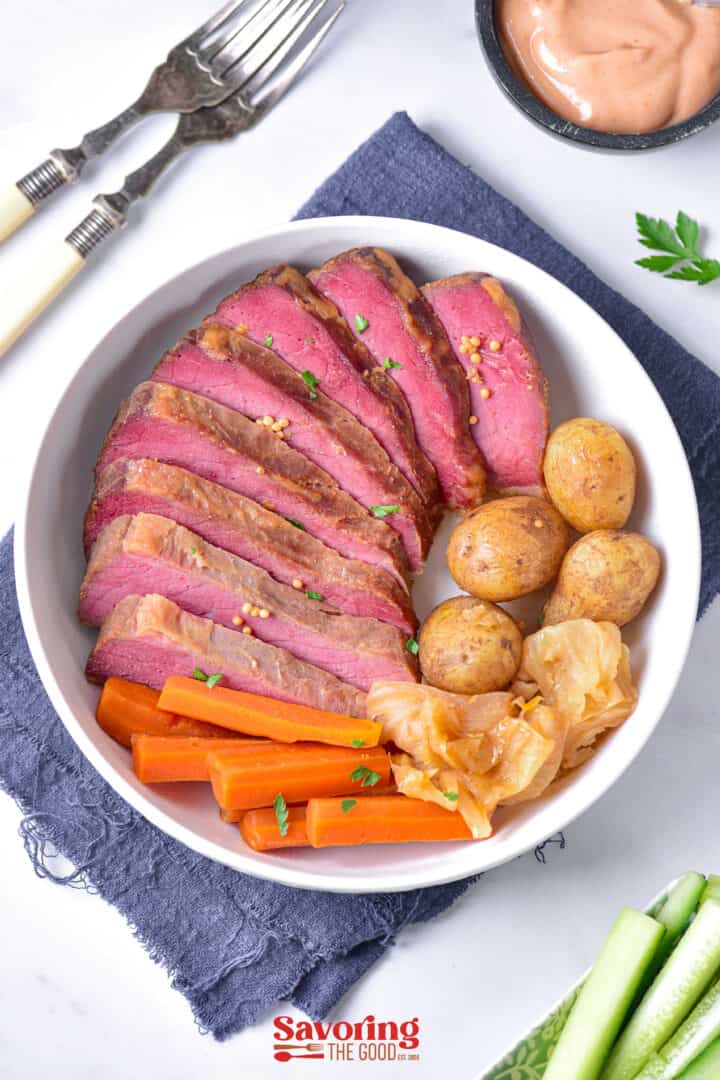
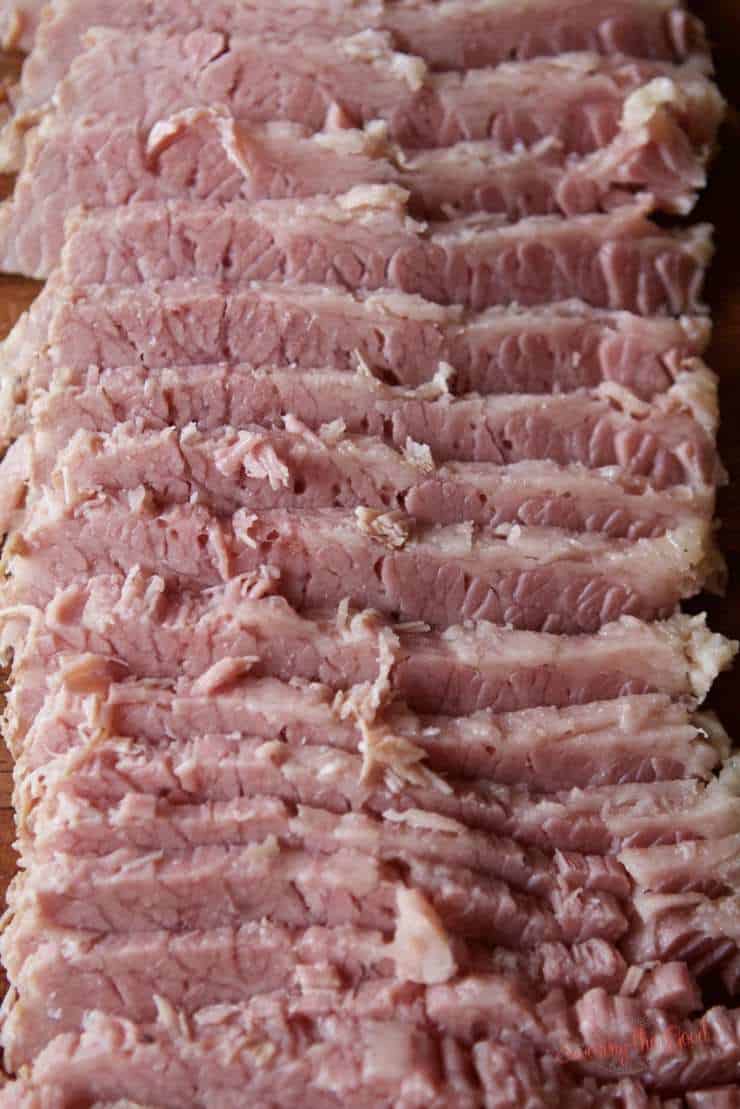
sous vide corned beef on a cutting board

The sous vide cooking method also helps retain the meat's moisture, resulting in a juicy and flavorful finished product. Plus, the hands-off cooking method allows for easy multitasking in the kitchen.

sous vide corned beef on a cutting board

Sous vide corned beef is the best recipe because it allows for precise temperature control, resulting in perfectly cooked and tender corned beef every time.

If you are looking for the best corned beef for St. Patrick's Day, you need to try my sous vide corned beef recipe. No longer do you need to wonder how long to boil corned beef or hope it is going to be the texture you love.

Be sure to check out my recipe for sous vide pork chops Be sure to check out my complete collection of sous vide recipes.

Why this recipe works:

The consistently lower temperature of the sous vide method and long cook time will help break down the connective tissue of the brisket without turning the meat mushy.

New to sous vide? I explain in simple terms everything I know about sous vide cooking.

Corned Beef Brine Recipe Ingredients:

corned beef in a brine

Recipe Card?

To find the full printable recipe with specific measurements and directions CLICK HERE to go to the recipe card.

*This recipe is a variation of the Alton Brown corned beef recipe. He adds a few other ingredients that were hard for me to find, so I left them out.

📝 Notes on the ingredients

When selecting your brisket from the meat counter at your local butcher or grocery store, they may ask you what cut of brisket you would like to purchase. You can ask for a flat cut or a point cut.

The flat cut is the preferred cut for corned beef, but the whole slab of brisket is used often as well. The pointcut (also known as the second cut or deckle) will have less muscle and more fat than the flat cut.

Some people argue that the fat makes the point cut more flavorful than the flat cut so pick what is best for you.

How to Sous Vide Corned Beef

I walk you through how to make the corned beef brine and use the sous vide cooking technique to make the best homemade corned beef.

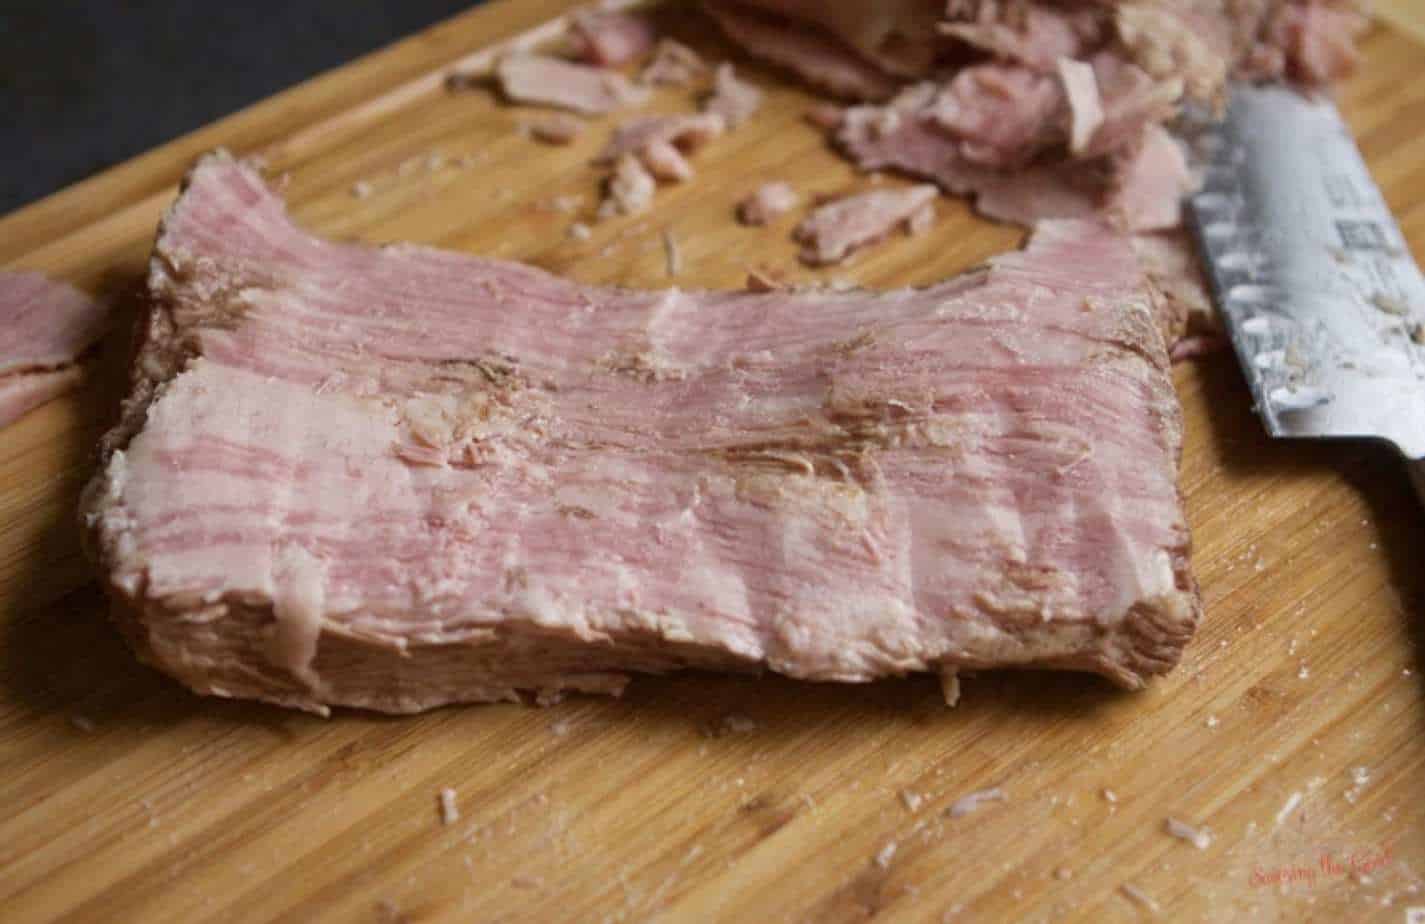
Sliced ham on a cutting board with spices, sous vide.

Prepare the brine

  1. Place the water into a large pot along with salt, sugar, cinnamon stick, mustard seeds, peppercorns, cloves, allspice, bay leaves, and ginger OR the spice packet that is included with your beef brisket.
  2. Cook over high heat until the salt and sugar have dissolved.
  3. Remove from the heat and add the ice.
  4. Stir until the ice has melted. If necessary, place the brine into the refrigerator until it reaches a temperature of 45 degrees F. A refrigerator with an abundance of food, including sous vide corned beef.
  5. Once it has cooled, place the brisket in a ziploc freezer bag or an airtight container and add the brine. Remove as much air as possible, seal and lay flat inside a container, cover, and place in the refrigerator for 10 days. (yes, I said 10 days) beef brisket in a brine
  6. Check daily to make sure the beef is completely submerged and shake the sealed bag or container at least once a day.
  7. After 10 days, remove from the brine and rinse well under cool water.

Cook

corned beef brisket in a sous vide bag
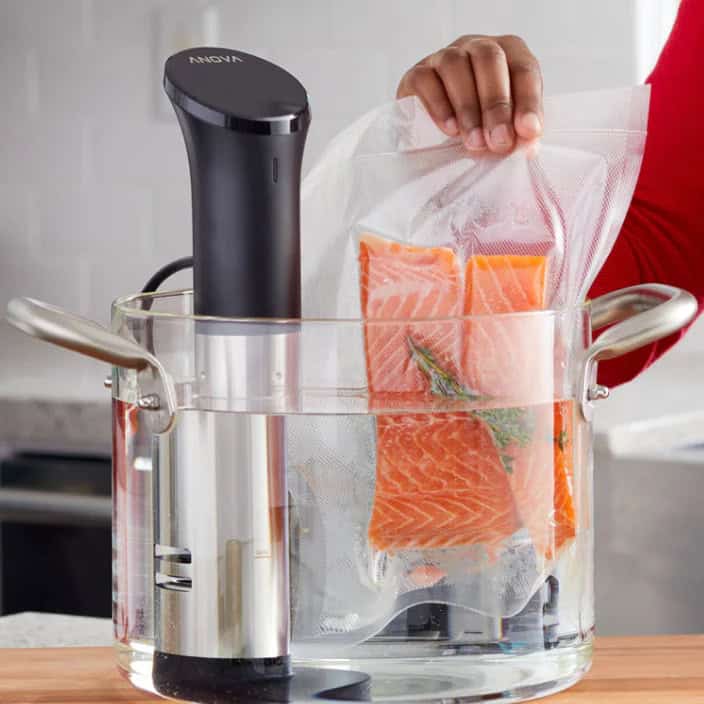
  1. Set your sous vide immersion circulator to 180F.
  2. After rinsing off the brine, place the beef in a vacuum bag and using your vacuum sealer, remove as much air as possible. It is optional but I lay some of the extra spices from the brine over the beef before sealing. I want to get EVERY piece of goodness out of those spices.
  3. Another option is to place the brined corned beef brisket in a gallon size ziploc bag and use the water displacement method to press all the air out of the bag keeping the whole brisket under the water level.
  4. Vacuum and seal the corned beef. Cook at 180F for 10 hours.
  5. Remove the sous vide corned beef brisket from the sous vide bag and blot off the excess moisture with clean paper towels.
  6. Once you have finished the cook, remove the corned beef from the water and plunge into an ice water bath to stop the cooking.
  7. Trim the fat off of the corned beef. (optional but encouraged)
  8. Slice across the grain meaning, across the short width, in this case.

Did you make this recipe?

Do you have feedback that would be helpful to others? If so can help this small business owner by leaving a rating and a review in the comments section? Thank you for being part of the Savoring The Good Community. ~ Sarah

Using an Anova sous vide machine, a person precisely cooks vacuum-sealed salmon fillets submerged in water, ensuring perfect results right on the countertop.

Let's go shopping!

ANOVA

This third generation sous vide circulator includes dual-band WiFi and a two-line touchscreen display.

Buy it here
A bowl with sliced rare beef, baby potatoes, cooked carrots, and cabbage. Forks and a dipping sauce are on the side.

Another option

Crock Pot Corned Beef and Cabbage

Get the recipe

Trim the corned beef before slicing

A perfectly cooked sous vide corned beef resting on a cutting board.

You might not do this BUT I am not a fan of fat.

I trimmed the fat off of the corned beef. Scrape and trim and it fell right off. Feel free to leave some on if that is what you like.

sous vide corned beef with extra fat removed

How to slice corned beef

Slice across the grain meaning, across the short width, in this case.

sous vide corned beef the best corned beef

Don't you just want to pick up a piece or make a few Reuben sandwiches?

What to serve with corned beef

  • sous vide potatoes
  • Braised cabbage
  • Biscuits

What to make with leftover corned beef:

  • Reuben tater tots

Chef Tip

I did a 180F cook for 10 hours. There, I said it. It worked for me and the corned beef was not mushy, sliced lovely and had amazing flavor. Perfect for my taste.

Saint Patrick's Day cupcakes with green hats and orange frosting are beautifully decorated with shamrocks and gold buttons, all elegantly arranged on a vibrant green surface.

St. Patrick's Day Cupcakes

Leprechaun Irish Cream Buttercream Cupcakes feature a rich and creamy Irish cream buttercream topped with adorable marshmallow leprechaun hats.

St. Patrick's Day Cupcakes
sous vide corned beef on a cutting board

Sous Vide Corned Beef Recipe

If you are looking for the best corned beef for St. Patrick's Day, you need to try my sous vide corned beef recipe. No longer do you need to wonder how long to boil corned beef or hope it is going to be the texture you love.
4.80 from 63 votes
Print Pin Rate
Course: Sous Vide
Cuisine: American
Keyword: corned beef, sous vide corned beef, sous vide corned beef recipe
Prep Time: 1 day day 16 hours hours
Cook Time: 10 hours hours
Additional Time: 10 days days
Total Time: 12 days days 2 hours hours
Servings: 6 people
Calories: 121
Author: Sarah Mock

Ingredients

  •  
    2 quarts Water
  •  
    1 Cup kosher salt
  • Domino Light Brown Sugar box, 16 oz, featuring a slice of Blackberry Dump Cake topped with whipped cream and berries, and a Non-GMO Project Verified label in the bottom right corner.½ Cup Brown Sugar
  •  
    1 cinnamon stick broken into several pieces
  •  
    1 Teaspoon mustard seeds
  • Close-up view of many whole black peppercorns densely packed together, showing their varied textures and natural brown to black coloring-an essential spice often featured in sous vide pickled vegetables for added depth and aroma.1 Teaspoon black peppercorns
  •  
    8 whole cloves
  •  
    8 whole allspice berries
  • A pile of dried bay leaves on a white background, perfect for adding depth and aroma to your chipotle carnitas recipes.4 Bay Leaves crumbled
  •  
    1 inch fresh ginger grated
  •  
    2 Pounds Ice
  •  
    1 medium beef brisket trimmed
Follow Savoring The Good On PinterestFollow @SavoringTheGood or tag #STGRecipes!

Instructions

Sous Vide Corned Beef Technique

  • After rinsing off the brine, place the beef in a vacuum bag. It is optional but I lay on some of the extra spices from the brine. I want to get out EVERY piece of goodness out of those spices.

Sous Vide Time and Temperature

  • I did a 180F cook for 10 hours.
  • It worked for me and the corned beef was not mushy, sliced lovely and had amazing flavor. Perfect for my taste.
  • Once you have finished the cook, remove the corned beef from the water and plunge into a ice water bath to stop the cooking.

Notes

Corned Beef Brine
  1. Place the water into a large 6 to 8 quart stockpot along with salt, sugar, cinnamon stick, mustard seeds, peppercorns, cloves, allspice, bay leaves and ginger.
  2. Cook over high heat until the salt and sugar have dissolved.
  3. Remove from the heat and add the ice. Stir until the ice has melted. If necessary, place the brine into the refrigerator until it reaches a temperature of 45 degrees F.
  4. Once it has cooled, place the brisket in a zip top bag or a air tight container and add the brine. Seal and lay flat inside a container, cover and place in the refrigerator for 10 days. (yes, I said 10 days)
  5. Check daily to make sure the beef is completely submerged and shake the bag or container at least once a day.
  6. After 10 days, remove from the brine and rinse well under cool water.

Here is where using sous vide to cook your corned beef is different from boiling corned beef.

  1. Set your sous vide to 180F.
  2. After rinsing off the brine, place the beef in a vacuum bag. It is optional but I lay on some of the extra spices from the brine. I want to get out EVERY piece of goodness out of those spices.
  3. Vacum and seal the corned beef. Cook at 180F for 10 hours.
  4. Once you have finished the cook, remove the corned beef from the water and plunge into an ice water bath to stop the cooking.
  5. Trim the fat off of the corned beef. (optional but encouraged)
  6. Slice across the grain meaning, across the short width, in this case.
 
Want to share when you made this recipe?Follow @SavoringTheGood & tag #STGRecipes!
Nutrition Facts
Sous Vide Corned Beef Recipe
Serving Size
 
1
Amount per Serving
Calories
121
% Daily Value*
Fat
 
3
g
5
%
Saturated Fat
 
1
g
6
%
Polyunsaturated Fat
 
2
g
Cholesterol
 
15
mg
5
%
Sodium
 
18890
mg
821
%
Carbohydrates
 
20
g
7
%
Sugar
 
16
g
18
%
Protein
 
5
g
10
%
* Percent Daily Values are based on a 2000 calorie diet.
**Nutritional facts are just estimates. Please utilize your own brand nutritional values to double check against our estimates.
Like this recipe card? Want one for your site?Check out WP Recipe Maker!

published July 2018


Sarah Mock of savoringthegood.com headshot 2022

I am Sarah Mock. Welcome!

Sarah Mock is a classically trained Chef and graduate of Johnson & Wales University. A culinary blogger for 15 years Sarah helps the home cook prepare her recipes with professional results.

Get to know me

as seen in:

Logos of Hersheyland, ABC News, and Good Day PA are showcased in a seamless row, providing a snapshot of popular brands.

Hersheyland Nightline Good Day Pa!

The vibrant design showcases the iconic logos of Pinterest, Rachael Ray, and Jell-O set against a bold red background. Sorry, the provided description doesn't offer enough detail to suggest important SEO keywords.

Pinterest Rachael JELL-O


Almondina Recipe (Trader Joes Copycat)

Almondina Pistachio and Dried Cherry Crisp on a bamboo cutting board shingled out for display.

This almondina cookie recipe has savory pistachios and plump dried cherries. Everyone will be asking for this copycat Trader Joe's Almondina cookie recipe. Don't forget to make my recipe for almondina mixed nut raisin thin cookie crisp or Almondina Hazelnut Date Thins.

Almondina Pistachio and Dried Cherry Crisp with text for Pinterest

If you like this biscotti toast crips recipe try my traditional biscotti recipes: Orange Chocolate Almond Biscotti , Cranberry almond biscotti recipe and serve them with my fast cold brew coffee recipe.

Ingredients needed:

Recipe Card?

To find the full printable recipe with specific measurements and directions CLICK HERE to go to the recipe card.

How to make this recipe:

Almondina Pistachio and Dried Cherry Crisp on a bamboo cutting board shingled out for display.
  1. Heat oven to 350 degrees F.
  2. Spray bottom and sides of loaf pan with cooking spray.
  3. In large bowl, combine flour, pistachios, brown sugar, dried cherries, salt and baking soda.
  4. Stir in milk. Spoon batter evenly into prepared pan. The mixture will be thick.
  5. Bake 60 minutes until golden brown.
  6. After 30 minutes, remove from the pan.
  7. Cool completely on cooling rack.

How to make the Almondia thins, crispy.

Almondina Pistachio and Dried Cherry Crisp Thins in the left hand of a woman showing the detail of the crips
  1. Transfer to freezer and freeze at least 1 hour, but no more than 3 hours.
  2. Heat oven to 400 degrees F.
  3. Use sharp serrated knife to cut loaf into ⅛-inch thick slices. The semi frozen state of the loaf will help keep the cookie from crumbling while being sliced so thinly.
  4. Arrange slices in single layer on a cookie sheet.
  5. Bake 15 to 20 minutes until golden brown, flipping halfway through baking. Transfer to cooling rack to cool completely.
  6. Store at room temperature in airtight container up to 1 week.

Frequently asked questions, answers and tips:

How big do I make mini Almondina crips?

There are two options when it comes to the size of your Almondina thins. Use a traditional 9x5 loaf pan to make long fruit and nut crips. Or if you like to make mini almondina fruit and nut thins, use 3 mini loaf pans.

Almondina Pistachio and Dried Cherry Crisp on a bamboo cutting board shingled out for display.

Almondina Cookie Crisp Recipe

This almondina pistachio and dried cherry thin cookie crisp recipe has savory pistachios and plump dried cherries. Fruit and nut crostini are wonderful served with coffee, as a simple snack or alongside a cheese and charcuterie board. Everyone will be asking for this copycat Trader Joe's Almondina cookie recipe.
4.70 from 13 votes
Print Pin Rate
Course: Cookie Recipes, Dessert
Cuisine: American
Prep Time: 10 minutes minutes
Cook Time: 1 hour hour 20 minutes minutes
freeze time: 1 hour hour
Total Time: 1 hour hour 30 minutes minutes
Servings: 48 cookies
Calories: 51
Author: Sarah Mock

Ingredients

  • A 5-pound bag of King Arthur Baking Company unbleached bread flour with 12.7% protein content, labeled for ideal use in bread, pizza crust, and rolls-perfect for creating hearty sides like homemade loaves to serve alongside a comforting slowcooker sausage casserole.1 Cup Flour, All Purpose
  •  
    1 Cup pistachios shells removed
  •  
    ¼ Cup brown sugar
  •  
    1 Cup dried cherries
  • Arm & Hammer Pure Baking Soda box, 8 oz size, with text promoting it as America's #1 trusted brand and stating ¼ Teaspoon Baking Soda
  • A Morton Salt container with a blue label featuring a girl in a yellow dress holding an umbrella, with salt pouring out of a container-an essential ingredient for perfectly seasoning dishes like Chicken Cordon Bleu.½ Teaspoon salt
  •  
    ¾ Cup milk
Follow Savoring The Good On PinterestFollow @SavoringTheGood or tag #STGRecipes!

Instructions

  • Heat oven to 350 degrees F.
  • Spray bottom and sides of loaf pan with cooking spray.
  • In large bowl, combine flour, pistachios, brown sugar, dried cherries, salt and baking soda.
  • Stir in milk. Spoon batter evenly into prepared pan. The mixture will be thick.
  • Bake 60 minutes until golden brown.
  • After 30 minutes, remove from the pan.
  • Cool completely on cooling rack.
  • Transfer to freezer and freeze at least 1 hour, but no more than 3 hours.
  • Heat oven to 400 degrees F.
  • Use sharp serrated knife to cut loaf into ⅛-inch thick slices. The semi frozen state of the loaf will help keep the cookie from crumbling while being sliced so thinly.
  • Arrange slices in single layer on a cookie sheet.
  • Bake 15 to 20 minutes until golden brown, flipping halfway through baking. Transfer to cooling rack to cool completely.
  • Store at room temperature in airtight container up to 1 week.
Want to share when you made this recipe?Follow @SavoringTheGood & tag #STGRecipes!
Nutrition Facts
Almondina Cookie Crisp Recipe
Serving Size
 
0
Amount per Serving
Calories
51
% Daily Value*
Fat
 
1
g
2
%
Saturated Fat
 
0
g
0
%
Cholesterol
 
9
mg
3
%
Sodium
 
38
mg
2
%
Potassium
 
82
mg
2
%
Carbohydrates
 
4
g
1
%
Sugar
 
1
g
1
%
Protein
 
4
g
8
%
* Percent Daily Values are based on a 2000 calorie diet.
**Nutritional facts are just estimates. Please utilize your own brand nutritional values to double check against our estimates.
Like this recipe card? Want one for your site?Check out WP Recipe Maker!

published July 2, 2018


Sarah Mock of savoringthegood.com headshot 2022

I am Sarah Mock. Welcome!

Sarah Mock is a classically trained Chef and graduate of Johnson & Wales University. A culinary blogger for 16 years Sarah helps the home cook prepare her recipes with professional results.

Get to know me

as seen in:

Logos of Hersheyland, ABC News, and Good Day PA are showcased in a seamless row, providing a snapshot of popular brands.

Hersheyland Nightline Good Day Pa!

The vibrant design showcases the iconic logos of Pinterest, Rachael Ray, and Jell-O set against a bold red background. Sorry, the provided description doesn't offer enough detail to suggest important SEO keywords.

Pinterest Rachael JELL-O

Almondina Mixed Nut Raisin Thins

Almondina Mixed Nut Raisin Thin Crips

This almondina mixed nut raisin thin cookie crisp recipe has your favorite mix of nuts along with golden raisins. Fruit and nut crostini are wonderful served with coffee, as a simple snack or alongside a cheese and charcuterie board.

Almondina Mixed Nut Raisin Thins

Everyone will be asking for this copycat Trader Joe's Almondina cookie recipe. Don't forget to make my recipe for Almondina Hazelnut Date Thins.

If you like this biscotti toast crips recipe try my traditional biscotti recipes: Orange Chocolate Almond Biscotti , Cranberry almond biscotti recipe and serve them with my fast cold brew coffee recipe.

Ingredients:

Recipe Card?

To find the full printable recipe with specific measurements and directions CLICK HERE to go to the recipe card.

Directions:

full almondina loaf cakes cooking on a bamboo cutting board
  1. Heat oven to 350 degrees F.
  2. Spray bottom and sides of loaf pan with cooking spray.
  3. In large bowl, combine flour, mixed nuts, brown sugar, golden raisins, pepitas, sunflower seeds, salt and baking soda.
  4. Stir in milk. Spoon batter evenly into prepared pan. The mixture will be thick.
  5. Bake 60 minutes until golden brown.
  6. After 30 minutes, remove from the pan.
  7. Cool completely on cooling rack.

How to make the Almondia thin and crisp.

partially sliced Almondina mixed nut fruit crips
  1. Transfer to freezer and freeze at least 1 hour, but no more than 3 hours.
  2. Heat oven to 400 degrees F.
  3. Use sharp serrated knife to cut loaf into ⅛-inch thick slices. The semi frozen state of the loaf will help keep the cookie from crumbling while being sliced so thinly.
  4. Arrange slices in single layer on a cookie sheet.
  5. Bake 15 to 20 minutes until golden brown, flipping halfway through baking. Transfer to cooling rack to cool completely.
  6. Store at room temperature in airtight container up to 1 week.

How do I make mini Almondina crips?

close up of a almondina mixed nut fruit crips

There are two options when it comes to the size of your Almondina thins. Use a traditional 9x5 loaf pan to make long fruit and nut crips. Or if you like to make mini almondina fruit and nut thins, use 3 mini loaf pans.

More sweet recipes:

  • Peanut Butter Blossom Cookie Recipe
  • Rhubarb Cake
  • Sous Vide Oreo Cheesecake
  • Sous Vide Lemon Curd
  • Apple Cranberry Pie Recipe
  • 4 Ingredient Apple Dump Cake Recipe
close up of a almondina mixed nut fruit crips

Almondina Mixed Nut Raisin Thin Recipe

This almondina mixed nut raisin thin cookie crisp recipe has your favorite mix of nuts along with golden raisins.
4.68 from 40 votes
Print Pin Rate
Course: Cookie Recipes
Cuisine: American
Keyword: almondia recipe, trader joe copycat
Prep Time: 10 minutes minutes
Cook Time: 1 hour hour 20 minutes minutes
Additional Time: 1 hour hour
Total Time: 2 hours hours 30 minutes minutes
Servings: 48 cookies
Calories: 52
Author: Sarah Mock

Ingredients

  • A 5-pound bag of King Arthur Baking Company unbleached bread flour with 12.7% protein content, labeled for ideal use in bread, pizza crust, and rolls-perfect for creating hearty sides like homemade loaves to serve alongside a comforting slowcooker sausage casserole.1 Cup Flour, All Purpose
  •  
    1 Cup mixed nuts shells removed
  •  
    ¼ Cup pepitas
  •  
    ¼ Cup sunflower seeds shelled
  •  
    ¼ Cup brown sugar
  •  
    1 Cup golden raisins
  • Arm & Hammer Pure Baking Soda box, 8 oz size, with text promoting it as America's #1 trusted brand and stating ¼ Teaspoon Baking Soda
  • A Morton Salt container with a blue label featuring a girl in a yellow dress holding an umbrella, with salt pouring out of a container-an essential ingredient for perfectly seasoning dishes like Chicken Cordon Bleu.½ Teaspoon salt
  •  
    ¾ Cup milk
Follow Savoring The Good On PinterestFollow @SavoringTheGood or tag #STGRecipes!

Instructions

  • Heat oven to 350 degrees F.
  • Spray bottom and sides of loaf pan with cooking spray.
  • In large bowl, combine flour, mixed nuts, brown sugar, golden raisins, salt and baking soda.
  • Stir in milk. Spoon batter evenly into prepared pan. The mixture will be thick.
  • Bake 60 minutes until golden brown.
  • After 30 minutes, remove from the pan.
  • Cool completely on cooling rack.
  • Transfer to freezer and freeze at least 1 hour, but no more than 3 hours.
  • Heat oven to 400 degrees F.
  • Use sharp serrated knife to cut loaf into ⅛-inch thick slices. The semi frozen state of the loaf will help keep the cookie from crumbling while being sliced so thinly.
  • Arrange slices in single layer on a cookie sheet.
  • Bake 15 to 20 minutes until golden brown, flipping halfway through baking. Transfer to cooling rack to cool completely.
  • Store at room temperature in airtight container up to 1 week.
Want to share when you made this recipe?Follow @SavoringTheGood & tag #STGRecipes!
Nutrition Facts
Almondina Mixed Nut Raisin Thin Recipe
Serving Size
 
2
Amount per Serving
Calories
52
% Daily Value*
Fat
 
2
g
3
%
Polyunsaturated Fat
 
2
g
Sodium
 
81
mg
4
%
Carbohydrates
 
7
g
2
%
Sugar
 
3
g
3
%
Protein
 
1
g
2
%
* Percent Daily Values are based on a 2000 calorie diet.
**Nutritional facts are just estimates. Please utilize your own brand nutritional values to double check against our estimates.
Like this recipe card? Want one for your site?Check out WP Recipe Maker!

Sarah Mock of savoringthegood.com headshot 2022

I am Sarah Mock. Welcome!

Sarah Mock is a classically trained Chef and graduate of Johnson & Wales University. A culinary blogger for 16 years Sarah helps the home cook prepare her recipes with professional results.

Get to know me

as seen in:

Logos of Hersheyland, ABC News, and Good Day PA are showcased in a seamless row, providing a snapshot of popular brands.

Hersheyland Nightline Good Day Pa!

The vibrant design showcases the iconic logos of Pinterest, Rachael Ray, and Jell-O set against a bold red background. Sorry, the provided description doesn't offer enough detail to suggest important SEO keywords.

Pinterest Rachael JELL-O

Sous Vide Crème Brûlée (How to make sous vide creme brulee)

Sous Vide Creme Brulee cups on a wooden board topped with torched raspberries.

This perfect Crème Brûlée Recipe using the sous vide method is practically foolproof. There are four ingredients in this easy creme brulee recipe.

Sous Vide Creme Brulee cups on a wooden board topped with torched raspberries.

Also, you can make ahead. Using the sous vide technique, follow these simple instructions for the creamiest creme brulee ever.

If you love this sous vide recipe you are going to want to try my sous vide cheesecake recipe, how to make sous vide mascarpone cheese as well as how to make homemade clotted cream. Be sure to check out my complete collection of sous vide recipes.

New to sous vide? I explain in simple terms everything I know about sous vide cooking.

woman in a purple shirt pouring heavy cream into a bowl.

Sous Vide Crème Brûlée Ingredients:

  • heavy cream -
  • egg yolks
  • sugar
  • vanilla bean split and scraped*
  • Additional granular sugar

*1 teaspoon of vanilla extract can be substituted

** Whisking the ingredients until smooth is also an option if an immersion blender is not available. Just be sure the ingredients are well combined.

Optional Garnish

  • Fresh raspberries
Creme brulee dessert in jars with whipped cream and raspberries.

How to make sous vide creme brulee:

  1. Heat sous vide to 176 °F / 80 °C
  2. In a large bowl, combine the heavy cream, egg yolks, sugar and seeds of the vanilla bean*.
  3. Use an immersion blender to blend until smooth. **
  4. Strain the egg and cream mixture to help disperse any air bubbles.
  5. Slowly pour into 4-ounce mason jars stopping just before the threads on the jar.
  6. Allow to rest for 20-30 minutes or until the majority of the bubbles have popped. This step can be skipped but to ensure a silky smooth top to your creme brulee for the sugar to be caramelized on, I highly suggest resting the cups.
  7. Place a lid and a ring on the mason jar and finger tighten the jars.
  8. Place the jars in the heated sous vide. Submerge the jars and cook for 1 hour.
  9. Remove the jars from the water bath and allow to rest on room temperature until cool to the touch.
  10. Once the jars are cool, completely cool them down in an ice water bath.
  11. Once completely cool, remove from the ice water bath and store the jars to the fridge until ready for Brulee.
Using an Anova sous vide machine, a person precisely cooks vacuum-sealed salmon fillets submerged in water, ensuring perfect results right on the countertop.

Let's go shopping!

ANOVA

This third generation sous vide circulator includes dual-band WiFi and a two-line touchscreen display.

Buy it here
Sous Vide Creme Brulee with caramelized sugar

What sous vide container can I use if I don't have a mason jar?

If you don't have a mason jar for sous vide, you can use canning jars or ramekins with a wide mouth for perfect results. Make sure the jars are heat-resistant and suitable for sous vide temperatures.

How to caramelize the sugar on top on sous vide creme brûlée?

  1. Open the creme brulee jars and use a dry paper towel to absorb any condensation off the top of the custard.
  2. Sprinkle a thin layer of granular sugar over the custard.
  3. Using a kitchen torch with a sweeping motion bring the flame 1-2 inches away from the sugar.
  4. Sweep back and forth until you see the sugar start to melt.
  5. As the sugar starts to melt, add a second layer of sugar and repeat.
  6. This can be repeated as many times as you like. The more sugar layers, the crunchier the topping will be.
  7. Allow to rest and cool for optimal cracking.

How to make creme brulee with torched raspberries

This is optional but makes for a lovely presentation. The taste of the torched raspberries compliments the caramelized sugar with a smokiness of a campfire. Warm and sweet pairs lovely with the crunch of the sugar and the creaminess of the creme.

  1. Place fresh raspberries on a heat-safe surface such as a cookie sheet.
  2. With a sweeping, circling motion, torch the raspberries until they take on color.
  3. Allow to cool to the touch and place on the creme brulee.
Sous Vide Creme Brulee mini mason jars with carmalized raspberries on a wooden board

More sous vide dessert recipes that are surprisingly easy to make:

  • Sous vide oreo cheesecake
  • Sous vide peanut butter cheesecake in jars
  • Turtle cheesecake
  • Grasshopper cheesecake
  • Homemade clotted cream
Why Sous Vide Classic Crème Brûlée?

By using the sous vide cooking method you are ensured that the custard of the creme brulee does not curdle, crack or dry out. The precession of the temperature of the water will cook the dairy ingredients to a smooth, consistent custard that is a challenge to achieve with the traditional oven baking technique. 

What ingredients are in Crème Brûlée?

Crème Brûlée is a creamy custard mixture with simple ingredients. Combine heavy cream, egg yolks sugar and a flavoring of your choice and gently cook in a moisture-filled environment for the smoothest, silkiest custard ever. The Brulee is crunchy caramelized sugar topping. The combination of the rich custard with the crunch and sweetness of the sugar Brulee is a treat for your mouth.

Is creme brûlée gluten-free?

If you are looking for a gluten-free dessert, creme brûlée is for you! This recipe for creme brûlée is gluten-free. This dairy dessert is full of protein from the heavy cream.

How do you get the sugar to caramelize on creme brûlée?

There are different ways you can get the sugar to caramelize on creme brulee. When I was in the culinary industry, twenty years ago, we would caramelize the sugars under a salamander or a broiler. I was never happy with the lack of control of the flame so using a kitchen blowtorch has become my preferred method.

Creme brulee dessert in jars with whipped cream and raspberries.

Sous Vide Creme Brulee

This sous vide creme brulee recipe is practically foolproof. There are four creme brulee ingredients in this easy creme brulee recipe. Follow these simple instructions for the creamiest creme brulee ever.
4.10 from 41 votes
Print Pin Rate
Course: Sous Vide
Cuisine: American
Keyword: dairy, dessert, gluten free dessert
Prep Time: 5 minutes minutes
Cook Time: 1 hour hour
Total Time: 1 hour hour 5 minutes minutes
Servings: 12 portions
Calories: 296
Author: Sarah Mock

Ingredients

  • heavy cream bottle.3 Cups Heavy Cream
  •  
    6 egg yolks
  • A 4-pound bag of Domino granulated pure cane sugar with a yellow and white design, showing nutrition information and branding-perfect for sweetening recipes like rhubarb sour or your favorite desserts.1 Cup Sugar
  • Three dried vanilla beans are arranged on a white background.1 vanilla bean split and scraped*
  •  
    Additional granular sugar

Optional Garnish

  •  
    Fresh raspberries
Follow Savoring The Good On PinterestFollow @SavoringTheGood or tag #STGRecipes!

Instructions

  • Heat sous vide to 176 °F / 80 °C
  • In a large bowl, combine the heavy cream, egg yolks, sugar and seeds of the vanilla bean*.
  • Use an immersion blender to blend until smooth. **
  • Strain the egg and cream mixture to help disperse any air bubbles.
  • Slowly pour into 4 ounce mason jars stopping just before the threads on the jar.
  • Allow to rest for 20-30 minutes or until the majority of the bubbles have popped. This step can be skipped but to ensure a silky smooth top to your creme brulee for the sugar to be caramelized on, I highly suggest resting the cups.
  • Place a lid and a ring on the mason jar and finger tighten.
  • Submerge in the heated sous vide and cook for 1 hour.
  • Remove from the water bath and allow to rest on the counter until cool to the touch.
  • Once the jars are cool, completely cool them down in an ice water bath.
  • Once completely cool, remove from the ice water bath and store in the refrigerator until ready for brulee.

How do you get the sugar to caramelize on creme brulee?

  • Open the creme brulee jars and use a dry paper towel to absorb any condensation off the top of the custard.
  • Sprinkle a thin layer of granular sugar over the custard.
  • Using a kitchen torch with a sweeping motion bring the flame 1-2 inches away from the sugar.
  • Sweep back and forth until you see the sugar start to melt.
  • As the sugar starts to melt, add a second layer of sugar and repeat.
  • This can be repeated as many times as you like. The more sugar layers, the crunchier the topping will be.
  • Allow to rest and cool for optimal cracking.

Notes

Why Sous Vide Crème Brûlée?
By using the sous vide cooking method you are ensured that the custard of the creme brulee does not curdle, crack or dry out. The precession of the temperature of the water will cook the dairy ingredients to a smooth, consistent custard that is a challenge to achieve with the traditional oven baking technique. 
Want to share when you made this recipe?Follow @SavoringTheGood & tag #STGRecipes!
Nutrition Facts
Sous Vide Creme Brulee
Serving Size
 
1
Amount per Serving
Calories
296
% Daily Value*
Fat
 
24
g
37
%
Saturated Fat
 
15
g
94
%
Trans Fat
 
1
g
Polyunsaturated Fat
 
8
g
Cholesterol
 
159
mg
53
%
Sodium
 
20
mg
1
%
Carbohydrates
 
19
g
6
%
Sugar
 
19
g
21
%
Protein
 
3
g
6
%
* Percent Daily Values are based on a 2000 calorie diet.
**Nutritional facts are just estimates. Please utilize your own brand nutritional values to double check against our estimates.
Like this recipe card? Want one for your site?Check out WP Recipe Maker!

Published June 16, 2018


Sarah Mock of savoringthegood.com headshot 2022

I am Sarah Mock. Welcome!

Sarah Mock is a classically trained Chef and graduate of Johnson & Wales University. A culinary blogger for 15 years Sarah helps the home cook prepare her recipes with professional results.

Get to know me

Rhubarb Basil Smash

Rhubarb Basil Smash with basil garnish

This rhubarb basil smash is a refreshing summer smash cocktail. Tart rhubarb is balanced out with the sweet syrup and the muddling of basil gives the cocktail a brightness of flavor.

Rhubarb Basil Smash with large basil leaf

This rhubarb smash is an easy summer cocktail that will have you sipping all summer.

Start with my rhubarb syrup to make this recipe. Once you have a batch of syrup made you are going to want to also make a strawberry rhubarb margarita and a rhubarb sour cocktail. If you can't get enough rhubarb, be sure to make rhubarb cake, rhubarb curd and don't forget I can show you how to plant rhubarb in your garden.

Rhubarb Basil Smash Ingredients:

  • Rhubarb syrup
  • lemon juice, fresh
  • basil leaves
  • Gin

Rhubarb Smash Instructions:

Rhubarb Basil Smash in a rocks class, top down photo
  1. Fold a fresh basil leaf over the rim of a rocks glass and rub to flavor the rim of the glass.
  2. In the bottom of a cocktail shaker muddle 6 basil leaves with ¾ oz. fresh lemon juice.
  3. Add 1 ounce of rhubarb syrup and 2 ounces of gin.
  4. Fill the cocktail shaker ¾ full with ice.
  5. Close shaker and shake vigorously.
  6. Strain the rhubarb basil smash into a ice filled rocks glass.
  7. Garnish with a fresh basil leaf and/or a strip of rhubarb.

What is a smash cocktail?

A smash cocktail is an alcoholic beverage that contains an alcoholic spirit such as, but not limited to gin or vodka. A smash cocktail will also have a sweetener such as honey, sugar, simple syrup or a flavored syrup. Also there is a herb and fresh fruit that is muddled. Served over ice and garnished with the featured flavors.

Variations:

Rhubarb Smash with three sweet basil leaves

Rhubarb Basil Vodka Smash Ingredients:

  • Rhubarb syrup
  • lemon juice, fresh
  • basil leaves
  • Vodka

Seasonal Favorite

Baked lattice top crust on an apple pie made with the Crisco pie crust recipe, showing flaky layers in the fluted edge.

This is my award-winning Crisco pie crust recipe; flaky, tender, and made with simple ingredients you already have.

Crisco Pie Crust

Strawberry Basil Smash Ingredients:

  • 1 oz. Rhubarb syrup
  • 1 Strawberry
  • ¾ oz. lemon juice, fresh
  • 6-7 basil leaves
  • 2 oz. Gin

More summer cocktails:

  • Lilac Bee's Knees
  • Spicy Peach Bourbon Smash
  • Homemade limoncello
  • Cucumber infused gin
  • Homemade strawberry vodka
Rhubarb Basil Smash in a rocks class, top down photo

Rhubarb Basil Smash

This rhubarb basil smash is a refreshing summer smash cocktail. Tart rhubarb is balanced out with the sweet syrup and the muddling of basil gives the cocktail a brightness of flavor. This is an easy summer cocktail that will have you sipping all summer.
4.80 from 5 votes
Print Rate
Course: Drinks - Non Alcoholic
Cuisine: American
Keyword: cocktail, rhubarb, smash cocktail, summer cocktail
Prep Time: 2 minutes minutes
Cook Time: 1 minute minute
Total Time: 3 minutes minutes
Servings: 1 cocktail
Calories: 136
Author: Sarah Mock

Ingredients

Rhubarb Basil Smash Ingredients:

  •  
    1 Ounce Rhubarb syrup
  • A plastic bottle of ReaLemon 100% Lemon Juice with a yellow cap, a lemon-shaped top, and images of lemons on a green label-perfect for adding a burst of citrus flavor to your favorite recipes like Lemon Cheesecake Bars.¾ Ounces Lemon Juice fresh
  •  
    6-7 basil leaves
  •  
    2 Ounces Gin
Follow Savoring The Good On PinterestFollow @SavoringTheGood or tag #STGRecipes!

Instructions

  • Fold a fresh basil leaf over the rim of a rocks glass and rub to flavor the rim of the glass.
  • In the bottom of a cocktail shaker muddle 6 basil leaves with ¾ oz. fresh lemon juice.
  • Add 1 ounce of rhubarb syrup and 2 ounces of gin.
  • Fill the cocktail shaker ¾ full with ice.
  • Close shaker and shake vigorously.
  • Strain the rhubarb basil smash into a ice filled rocks glass.
  • Garnish with a fresh basil leaf and/or a strip of rhubarb.
Want to share when you made this recipe?Follow @SavoringTheGood & tag #STGRecipes!
Nutrition Facts
Rhubarb Basil Smash
Amount per Serving
Calories
136
% Daily Value*
Carbohydrates
 
1
g
0
%
* Percent Daily Values are based on a 2000 calorie diet.
**Nutritional facts are just estimates. Please utilize your own brand nutritional values to double check against our estimates.
Like this recipe card? Want one for your site?Check out WP Recipe Maker!

Sarah Mock of savoringthegood.com headshot 2022

I am Sarah Mock. Welcome!

Sarah Mock is a classically trained Chef and graduate of Johnson & Wales University. A culinary blogger for 15 years Sarah helps the home cook prepare her recipes with professional results.

Get to know me

as seen in:

Logos of Hersheyland, ABC News, and Good Day PA are showcased in a seamless row, providing a snapshot of popular brands.

Hersheyland Nightline Good Day Pa!

The vibrant design showcases the iconic logos of Pinterest, Rachael Ray, and Jell-O set against a bold red background. Sorry, the provided description doesn't offer enough detail to suggest important SEO keywords.

Pinterest Rachael JELL-O


Easy 3-Ingredient Rhubarb Syrup (For Cocktails, Lemonade & More!)

A bottle of pink liquid, known as rhubarb syrup, rests gracefully on large green leaves beside a fresh rhubarb stalk.

When the garden is overflowing with rhubarb make this three ingredient rhubarb syrup. Perfect for adding to lemonade, iced tea, margaritas or cocktails.

A glass measuring cup filled with red rhubarb syrup up to the 8-ounce mark, placed on a wooden surface.

This rhubarb syrup is perfect for a rhubarb sour cocktail, strawberry rhubarb margarita or even in iced tea. Don't forget to make rhubarb cake to serve with your rhubarb beverages.

Ingredients

  • 4 cups rhubarb (about 4-5 stalks), leaves removed* and chopped into 1-inch pieces
  • 1 cup water
  • ⅓ cup granulated sugar (or adjust to taste)

*Rhubarb leaves are toxic-use only the stalks!

Recipe Card?

To find the full printable recipe with specific measurements and directions CLICK HERE to go to the recipe card.

Rhubarb Syrup Instructions

fresh rhubarb on a kitchen scale
Rhubarb Iced Tea Recipe

Prep rhubarb

Wash stalks thoroughly and chop into 1-inch pieces.

Simmer

  • In a medium saucepan, combine rhubarb, water, and sugar. Bring to a boil over medium-high heat, then reduce to medium.
  • Simmer for 15 minutes, stirring occasionally to prevent scorching, until rhubarb is soft and broken down.
Rhubarb Iced Tea Recipe

Strain

  • Pour mixture through a fine-mesh strainer (or cheesecloth for clearer syrup) into a bowl.
  • Press gently on the pulp to extract all the liquid.
Rhubarb Iced Tea Recipe

Store

Transfer syrup to a clean jar or bottle. Cool completely before refrigerating. Keeps for 2 weeks (or freeze for up to 3 months).

Tips & Variations

  • For cocktails: Pair with gin, vodka, or sparkling wine (try 1 oz syrup + 2 oz spirit + lemon juice).
  • Too thick? Thin with a splash of hot water.
  • Zero waste: Save the strained pulp for muffins or compote!
A bottle of pink liquid, known as rhubarb syrup, rests gracefully on large green leaves beside a fresh rhubarb stalk.

How To Make Rhubarb Syrup

Perfect for adding to lemonade, iced tea, margaritas or cocktails.This rhubarb syrup is perfect for a rhubarb sour cocktail, strawberry rhubarb margarita or even in iced tea.
4.65 from 14 votes
Print Pin Rate
Course: Drinks - Non Alcoholic
Cuisine: American
Keyword: rhubarb syrup recipe
Prep Time: 10 minutes minutes
Cook Time: 15 minutes minutes
Total Time: 25 minutes minutes
Servings: 8 2 oz servings
Calories: 44
Author: Sarah Mock

Ingredients

  •  
    1 Pound rhubarb leaves removes, stalks chopped
  •  
    1 Cup Water
  • A 4-pound bag of Domino granulated pure cane sugar with a yellow and white design, showing nutrition information and branding-perfect for sweetening recipes like rhubarb sour or your favorite desserts.⅓ Cup Sugar
Follow Savoring The Good On PinterestFollow @SavoringTheGood or tag #STGRecipes!

Instructions

Rhubarb Syrup Instructions

  • Remove the large green leaves, if they are still attached, and wash the stalk thoroughly.
  • Chop the rhubarb into pieces. Try and get the pieces to be less than one inch wide.
  • Add the rhubarb to a pot.
  • Add 1 cup of water and ⅓ cup of sugar.
  • Bring the mixture to a boil over medium high heat and then drop the heat back to medium.
  • Simmer for 15 minutes.
  • Stir occasionally because the bottom tends to want to scorch.
  • Once the rhubarb is cooked down, strain it through a fine mesh strainer.The finer your strainer the more clear the syrup will become.
  • Pour the rhubarb syrup into a glass jar and store it in the refrigerator
  • Use within 2 weeks.
Want to share when you made this recipe?Follow @SavoringTheGood & tag #STGRecipes!
Nutrition Facts
How To Make Rhubarb Syrup
Amount per Serving
Calories
44
% Daily Value*
Sodium
 
3
mg
0
%
Carbohydrates
 
10
g
3
%
Sugar
 
8
g
9
%
* Percent Daily Values are based on a 2000 calorie diet.
**Nutritional facts are just estimates. Please utilize your own brand nutritional values to double check against our estimates.
Like this recipe card? Want one for your site?Check out WP Recipe Maker!

Sarah Mock of savoringthegood.com headshot 2022

I am Sarah Mock. Welcome!

Sarah Mock is a classically trained Chef and graduate of Johnson & Wales University. A culinary blogger for 16 years Sarah helps the home cook prepare her recipes with professional results.

Get to know me

as seen in:

Logos of Hersheyland, ABC News, and Good Day PA are showcased in a seamless row, providing a snapshot of popular brands.

Hersheyland Nightline Good Day Pa!

The vibrant design showcases the iconic logos of Pinterest, Rachael Ray, and Jell-O set against a bold red background. Sorry, the provided description doesn't offer enough detail to suggest important SEO keywords.

Pinterest Rachael JELL-O

Maryland Crab Soup Recipe

maryland crab soup with lump crab meat, carrot, broth, tomatoes, peppers in a bowl.

Summertime in Maryland means picking crabs and making Maryland Crab soup. Maryland crab soup is a vegetable-based crab soup recipe instead of a cream-based crab soup. This is my family's recipe for the best Maryland crab soup.

maryland crab soup with lump crab meat, carrot, broth, tomatoes, peppers in a bowl.

Another Maryland classic is the Lemon Peppermint Stick. The perfect combination for a sweet summertime treat. If you love this soup you are going to want to try the rest of the soup recipes I have here on the site.

Seafood lovers are going to want to make seared scallops in addition to this soup.

Maryland Crab Soup Ingredients:

Maryland Crab Soup ingredients

This soup is packed with veggies and flavor and it all starts with a rich combo of chicken and beef stock. The chicken stock keeps it light while the beef adds depth you don't always get in crab soup.

Old Bay is non-negotiable. It's what gives this soup its bold, unmistakably Maryland flavor. Don't substitute it...trust me.

I use a mix of fresh and pantry staples like diced tomatoes, frozen peas, and canned or frozen corn. It's flexible, so use what you've got.

For the crab, fresh-picked Maryland blue crab meat is ideal, but refrigerated lump crab meat works great too. Just avoid the imitation stuff here...it won't hold up.

Optional add-ins like green beans, shredded cabbage, or lima beans are traditional in some versions. I skip them, but feel free to toss them in with a little extra stock.

Recipe Card?

To find the full printable recipe with specific measurements and directions CLICK HERE to go to the recipe card.

Old Bay Seasoning is a MUST

Old Bay

Old Bay isn't just seasoning...it's a Maryland birthright. I grew up just outside Baltimore and remember driving past the McCormick plant as a kid, trying to guess what they were packaging that day based on the scent in the air. When it comes to crab soup, there is no substitute. Old Bay is what gives this recipe its signature kick, and if you leave it out… well, we can't be friends.

How to pick crab meat:

picked crab meat
  1. Flip the crab on its shell and remove all the legs by twisting and pulling the legs off. The little legs will not have a lot of meat in them.
  2. Remove the claws with the same twist and pulling motion.
  3. Pull the 'tab' of the crab back, it is going to look like a pencil, and this will reveal a small opening for a butter knife.
  4. Insert the butter knife into the shell of the crab and using the knife for to keep the shell on the table, pull the body of the crab away from the shell.
  5. Scrape the 'yellow mustard' out of the crab. The yellow paste in the crab is part of the digestion system of the crab. 
  6. Remove the gills or lungs of the crab. They are the small triangle, sponge looking par of the crab.
  7. Crack the crab body in half and separate into two portions.
  8. Fold and bend each section of the crab body that was attached to a leg and remove it.
  9. Peel back the shell with a small knife and remove the crab meat.
  10. Do your best to keep the crab meat in one piece as you remove it from each section. 
  11. The crab meat is white and soft. Be aware of the cartilage, it is hard and inedible. 

Seasonal Favorite

Baked lattice top crust on an apple pie made with the Crisco pie crust recipe, showing flaky layers in the fluted edge.

This is my award-winning Crisco pie crust recipe; flaky, tender, and made with simple ingredients you already have.

Crisco Pie Crust

How to make Maryland Crab Soup:

maryland crab soup in a pot
  1. Bring the beef and chicken stock to a boil in a large stockpot.
  2. Add the Old Bay, Worcestershire sauce, bay leaves and sugar.
  3. Add the tomatoes, carrots, celery, corn, peas, and onion, bring to a low simmer, reduce heat to medium and cook for 10 minutes.
  4. Add the potatoes and cook until tender.
  5. Add the crabmeat and cook for and additional 10 minutes.
  6. Season with salt and black pepper.
  7. Serve garnished with chopped parsley.

Maryland Crab Soup Made With Old Bay

Maryland crab soup with ladle

Being from Maryland, I grew up picking blue crabs every summer...it's just what we do. We host a crab feast every year, and when we're lucky enough to have leftovers, I turn them into a big pot of crab soup the next day. It's a tradition that tastes like home, especially when it's loaded with Old Bay and fresh-picked crab meat.

I know everyone has their own take on Maryland crab soup. This is mine. I hope you love it as much as I do.

What goes with Maryland crab soup?

Maryland crab soup pairs well with a variety of sides and dishes that complement its bold, savory flavors. These sides keep the focus on the star of the meal-your Maryland crab soup-while providing a mix of textures and flavors!

  • Crusty Bread or Rolls -A loaf of crusty bread or soft dinner rolls is perfect for soaking up the flavorful broth. Consider a warm baguette, sourdough, or cornbread for a Southern touch.
  • Oyster Crackers - These are a classic pairing with any seafood-based soup, adding a nice crunch to the meal without overpowering the flavor.
  • Salad - A simple green salad with a light vinaigrette can add freshness to balance out the rich soup. A cucumber, tomato, and red onion salad or a tangy coleslaw works nicely too.
  • Corn on the Cob - Since your soup already has corn, serving corn on the cob brings out a nice sweetness and enhances the corn flavor in the dish. Slather it with butter and a sprinkle of Old Bay for a true Maryland vibe.
  • Grilled Cheese -A melty grilled cheese sandwich is always a hit with soups. You could even add a twist by making crab melt sandwiches with extra crab meat, cheese, and a slice of tomato.
  • Steamed Vegetables - Lightly steamed or roasted veggies like asparagus, green beans, or Brussels sprouts bring extra color and nutrition to the meal.
  • Coleslaw - A creamy, tangy coleslaw complements the soup's rich flavors without being too heavy. It's a great way to add crunch and balance to your meal.
  • Deviled Eggs - For a true Maryland-inspired spread, deviled eggs with a sprinkle of Old Bay seasoning will be a hit alongside the soup.
  • Crab Cakes - Why not go all out with crab? Mini crab cakes served as a side will please any seafood lover and add a fun, indulgent twist.
maryland crab soup with lump crab meat, carrot, broth, tomatoes, peppers in a bowl.

Maryland Crab Soup Recipe

Maryland crab soup is a vegetable based crab soup recipe instead of a cream based crab soup.
5 from 5 votes
Print Pin Rate
Course: Soup Recipes
Cuisine: American
Keyword: crab soup, maryland crab soup, soup
Prep Time: 15 minutes minutes
Cook Time: 15 minutes minutes
Total Time: 30 minutes minutes
Servings: 10 people
Calories: 304
Author: Sarah Mock

Ingredients

  •  
    32 ounces Chicken Stock
  •  
    32 ounces Beef Stock
  •  
    2 Tablespoons Old Bay
  • A 10-ounce bottle of Lea & Perrins The Original Worcestershire Sauce with a beige label and cap.¼ Cup Worcestershire Sauce
  • A pile of dried bay leaves on a white background, perfect for adding depth and aroma to your chipotle carnitas recipes.2 Bay Leaves
  • A 4-pound bag of Domino granulated pure cane sugar with a yellow and white design, showing nutrition information and branding-perfect for sweetening recipes like rhubarb sour or your favorite desserts.2 Teaspoons Sugar
  •  
    12 Large Maryland blue crabs steamed, cooled and picked (or 1 pound crab meat)
  •  
    3 15 oz. petite diced tomatoes
  •  
    1 ½ Cup diced carrots
  •  
    1 ½ Cup diced celery
  •  
    1 ½ Cup frozen peas
  •  
    1 ½ Cup corn 1 15 oz can
  •  
    1 Cup Potatoes diced
  • A single whole yellow onion with dry, papery skin, photographed against a white background-the perfect flavorful addition to your next Crockpot Hash brown Casserole.1 Onion Diced
US Customary - Metric
Follow Savoring The Good On PinterestFollow @SavoringTheGood or tag #STGRecipes!

Instructions

  • Bring the beef and chicken stock to a boil in a large stockpot, then add the Old Bay, Worcestershire sauce, bay leaves and sugar.
    32 ounces Chicken Stock, 32 ounces Beef Stock, 2 Tablespoons Old Bay, ¼ Cup Worcestershire Sauce, 2 Bay Leaves, 2 Teaspoons Sugar
  • Add the tomatoes, carrots, celery, corn, peas, and onion, bring to a low boil, and cook for 10 minutes.
    3 15 oz. petite diced tomatoes, 1 ½ Cup diced carrots, 1 ½ Cup diced celery, 1 ½ Cup frozen peas, 1 Onion, 1 ½ Cup corn
  • Add the potatoes and cook until tender.
    1 Cup Potatoes
  • Add the crabmeat and cook for 10 minutes.
    12 Large Maryland blue crabs
  • Season with salt and pepper.
  • Serve garnished with chopped parsley.
Want to share when you made this recipe?Follow @SavoringTheGood & tag #STGRecipes!
Nutrition Facts
Maryland Crab Soup Recipe
Serving Size
 
1 serving
Amount per Serving
Calories
304
% Daily Value*
Fat
 
4
g
6
%
Saturated Fat
 
1
g
6
%
Polyunsaturated Fat
 
2
g
Cholesterol
 
184
mg
61
%
Sodium
 
1691
mg
74
%
Carbohydrates
 
27
g
9
%
Sugar
 
11
g
12
%
Protein
 
42
g
84
%
* Percent Daily Values are based on a 2000 calorie diet.
**Nutritional facts are just estimates. Please utilize your own brand nutritional values to double check against our estimates.
Like this recipe card? Want one for your site?Check out WP Recipe Maker!


Sarah Mock of savoringthegood.com headshot 2022

I am Sarah Mock. Welcome!

Sarah Mock is a classically trained Chef and graduate of Johnson & Wales University. A culinary blogger for 15 years Sarah helps the home cook prepare her recipes with professional results.

Get to know me

as seen in:

Logos of Hersheyland, ABC News, and Good Day PA are showcased in a seamless row, providing a snapshot of popular brands.

Hersheyland Nightline Good Day Pa!

The vibrant design showcases the iconic logos of Pinterest, Rachael Ray, and Jell-O set against a bold red background. Sorry, the provided description doesn't offer enough detail to suggest important SEO keywords.

Pinterest Rachael JELL-O

June 2, 2018

Strawberry Rhubarb Margarita

A Strawberry Rhubarb Margarita with lime and strawberries.

Summer isn't complete unless you are sipping on the best strawberry rhubarb margarita.

Strawberry Rhubarb Margarita Recipe SQUARE IMAGE

This margarita recipe includes homemade rhubarb syrup, freshly squeezed lime juice, tequila, Grand Marnier and crushed strawberries.

I serve this margarita on the rocks and include the strawberry rhubarb margarita pitcher recipe.

You are going to want to share this easy margarita recipe with friends. I would serve these margaritas with Mexican shrimp cocktail or black bean corn mango salsa.

Strawberry Rhubarb Margarita Ingredients:

Strawberry Rhubarb Margarita in a salt rimmed glass with garnish

Recipe Card?

To find the full printable recipe with specific measurements and directions CLICK HERE to go to the recipe card.

Instructions

  1. In a cocktail shaker crush a strawberry.
  2. Add the lime juice, rhubarb syrup, tequila and grand marnier.
  3. Fill the shaker half way with ice.
  4. Close the shaker and shake vigorously.
  5. Strain over ice in a rocks glass with a salt rim.
  6. Garnish with a lime, strawberry and rhubarb curl.

Seasonal Favorite

Baked lattice top crust on an apple pie made with the Crisco pie crust recipe, showing flaky layers in the fluted edge.

This is my award-winning Crisco pie crust recipe; flaky, tender, and made with simple ingredients you already have.

Crisco Pie Crust

Pitcher Ingredients

Strawberry Rhubarb Margarita with pitcher of Strawberry Rhubarb Margarita
  • lime juice
  • rhubarb syrup
  • tequila
  • Grand Marnier
  • strawberries, crushed

Pitcher Instructions

  • Crush the strawberries in the bottom of the pitcher.
  • Add the rest of the margarita ingredients.
  • Stir and add ice to the pitcher

Pour into prepared glasses, garnish with lime wedges and rhubarb ribbons; serve.

More Rhubarb Recipes:

  • Strawberry Rhubarb Jam - This strawberry rhubarb jam recipe can be made with fresh or frozen rhubarb and your choice of fresh or frozen strawberries. 
  • Strawberry Rhubarb Cast Iron Crisp - My mouth-watering strawberry rhubarb crisp recipe is easily made with minimum clean-up in a cast-iron skillet. 
  • Rhubarb Chutney - The perfect addition to any charcuterie board this easy chutney recipe is a delicious balance of savory, sweet and spice.
  • Rhubarb Crumble - Rhubarb crumble is the one dish dessert that is delightfully tart, sweet with a crunchy topping that is delicious served warm with ice cream or chilled with a hot cup of coffee.
  • Rhubarb Basil Smash - Tart rhubarb is balanced out with the sweet syrup and the muddling of basil gives the cocktail a brightness of flavor. 
  • Blackberry Dump Cake - Crunchy, sweet cobbler-like topping over blackberries is a delicious dessert.
  • Rhubarb Jam - Rhubarb jam is so simple to make and a great jam recipe for beginners. The perfect balance of tart and sweet, this is the easiest homemade jam.
  • Rhubarb Syrup
  • Rhubarb Basil Smash Cocktail
A Strawberry Rhubarb Margarita with lime and strawberries.

Strawberry Rhubarb Margarita

This strawberry rhubarb margarita recipe includes homemade rhubarb syrup, fresh squeezed lime juice, tequila, grand marnier and crushed strawberries. I serve this margarita on the rocks and include the strawberry rhubarb margarita pitcher recipe.
4.60 from 5 votes
Print Pin Rate
Course: Cocktails
Cuisine: American
Keyword: margarita
Prep Time: 3 minutes minutes
Cook Time: 0 minutes minutes
Total Time: 3 minutes minutes
Servings: 1 cocktail
Calories: 347
Author: Sarah Mock

Ingredients

Strawberry Rhubarb Margarita Ingredients

  • A whole, uncut green lime with a textured peel on a white background-the perfect citrus for crafting a classic Gimlet.2 Ounces fresh lime juice
  •  
    2 Ounces rhubarb syrup
  •  
    1 ½ Ounce tequila
  •  
    1 Strawberry
  •  
    1 Ounce orange liqueur such as Grand Marnier
  • A Morton Salt container with a blue label featuring a girl in a yellow dress holding an umbrella, with salt pouring out of a container-an essential ingredient for perfectly seasoning dishes like Chicken Cordon Bleu.salt rhubarb stalks, strawberry and lime wedges for garnish

Strawberry Rhubarb Margarita Pitcher Ingredients

  •  
    1 Cup 8 ounces lime juice
  •  
    1 Cup 8 ounces rhubarb syrup
  •  
    ¾ Cup 6 ounces tequila
  •  
    ½ Cup 4 ounces Grand Marnier
  •  
    6 Strawberries crushed
Follow Savoring The Good On PinterestFollow @SavoringTheGood or tag #STGRecipes!

Instructions

Strawberry Rhubarb Margarita Instructions

  • In a cocktail shaker crush a strawberry.
  • Add the lime juice, rhubarb syrup, tequila and grand marnier.
  • Fill the shaker half way with ice.
  • Close the shaker and shake vigorously.
  • Strain over ice in a rocks glass with a salt rim.
  • Garnish with a lime, strawberry and rhubarb curl.

Rhubarb Margarita Pitcher Instructions

  • Crush the strawberries in the bottom of the pitcher.
  • Add the rest of the margarita ingredients.
  • Stir and add ice to the pitcher
  • Pour into prepared glasses, garnish with lime wedges and rhubarb ribbons; serve.

Notes

Pour into prepared glasses, garnish with lime wedges and rhubarb ribbons; serve.
Want to share when you made this recipe?Follow @SavoringTheGood & tag #STGRecipes!
Nutrition Facts
Strawberry Rhubarb Margarita
Serving Size
 
1
Amount per Serving
Calories
347
% Daily Value*
Fat
 
2
g
3
%
Polyunsaturated Fat
 
1
g
Sodium
 
708
mg
31
%
Carbohydrates
 
187
g
62
%
Sugar
 
97
g
108
%
Protein
 
6
g
12
%
* Percent Daily Values are based on a 2000 calorie diet.
**Nutritional facts are just estimates. Please utilize your own brand nutritional values to double check against our estimates.
Like this recipe card? Want one for your site?Check out WP Recipe Maker!


Sarah Mock of savoringthegood.com headshot 2022

I am Sarah Mock. Welcome!

Sarah Mock is a classically trained Chef and graduate of Johnson & Wales University. A culinary blogger for 15 years Sarah helps the home cook prepare her recipes with professional results.

Get to know me

as seen in:

Logos of Hersheyland, ABC News, and Good Day PA are showcased in a seamless row, providing a snapshot of popular brands.

Hersheyland Nightline Good Day Pa!

The vibrant design showcases the iconic logos of Pinterest, Rachael Ray, and Jell-O set against a bold red background. Sorry, the provided description doesn't offer enough detail to suggest important SEO keywords.

Pinterest Rachael JELL-O

Rhubarb Bread With Orange Icing

rhubarb bread with icing.

This easy rhubarb bread recipe does not have strawberries but the orange zest and orange icing bring a delicious sweetness to balance the tart rhubarb. This is sure to be a popular recipe in your rhubarb recipes collection.

rhubarb bread with icing.

If your garden is overflowing with rhubarb you are going to want to try some of my other rhubarb recipes.  You can't go wrong with Strawberry rhubarb crips or strawberry rhubarb jam. And who can't love a rhubarb sour cocktail?

Recipe Card?

To find the full printable recipe with specific measurements and directions CLICK HERE to go to the recipe card.

  • powdered sugar, sifted
  • fresh orange juice
  • pinch of salt

Can I use frozen rhubarb when making this bread?

Yes, you can use frozen rhubarb when making this easy bread recipe, however, there are a few things you should keep in mind:

  1. Thaw the rhubarb before using it in the recipe. You can thaw it overnight in the refrigerator or microwave it until it's thawed but not cooked.
  2. Frozen tends to release more liquid than fresh rhubarb, so you may need to adjust the amount of liquid in the recipe. You can do this by reducing the amount of milk or adding a bit more flour.
  3. Frozen may not have the same texture as fresh rhubarb, so the final product may be slightly different in texture.

How to make Rhubarb bread recipe:

rhubarb cake sliced close up view detailed shot
  1. Preheat oven to 375 F.
  2. Spray a 9x5x3" loaf pan with cooking spray and set aside.
  3. Whisk together the flour, baking powder, baking soda and salt in a medium bowl.
  4. Cream the butter and sugar together until fluffy.
  5. Add the eggs one at a time mixing well after each.
  6. Add the vanilla and the orange zest.
  7. Alternatively add the flour with the sour cream, starting and finishing with the flour.
  8. Fold in the diced rhubarb.
  9. Pour the batter into the prepared loaf pan, smooth top and bake for 60­ minutes or until a toothpick comes out clean.
  10. Let cool 10 minutes
  11. Remove from pan and complete the cooling on a wire rack.
  12. Store in an air tight container for a few days if needed.

Orange icing instructions

rhubarb cake with orange icing
  1. Sift the powdered sugar.
  2. Combine the fresh orange juice and sifted powdered sugar until a thick icing forms.
  3. If the icing is too thin, add more powdered sugar.
  4. If the icing is too thick, add orange juice, a few drops at a time.
  5. The icing should not flow freely, it should be thick so it forms a nice layer on the cake.

Can you freeze rhubarb bread?

To do so, first, make sure the bread has cooled completely. Then, wrap the bread tightly in plastic wrap or aluminum foil to prevent freezer burn. Place the wrapped bread in an airtight container or freezer bag and label it with the date.

When you're ready to eat the bread, remove it from the freezer and let it thaw at room temperature or in the fridge. You can also reheat the bread in the oven or microwave if you prefer it warm.

Just a heads up that freezing can sometimes affect the texture of baked goods, so the rhubarb bread may not be exactly the same as when it was fresh.

More fresh rhubarb recipes:

  • Strawberry rhubarb crips
  • Rhubarb sour cocktail

What do you serve with rhubarb bread?

I love a good latte with this rhubarb bread. Or if you are a tea person, that would be delicious as well. The cake is sweet with pops of tart from the rhubarb so I would choose a beverage that is not on the sweeter side.

Frequently asked questions, answers and tips:

Does this rhubarb bread have strawberries?

Often you will see strawberry and rhubarb paired together in recipes. I am not including strawberries in this recipe because I think that orange is another delicious partner to rhubarb. But you can always add a dollop of strawberry jam.

Why is rhubarb bread baked in a loaf pan?

This is a dense cake, baked in a loaf pan at a higher temperature than other recipes. The added heat gives the outside of the cake a lovely golden crust to the cake. The sugars caramelize faster and seal in the moisture of the eggs and sour cream leaving a dense, moist, delicious loaf cake.

rhubarb bread with icing.

Rhubarb Bread with Orange Icing

This easy rhubarb cake recipe does not have strawberries but the orange zest and orange icing bring a delicious sweetness to balance the tart rhubarb. This is sure to be a popular recipe in your rhubarb recipes collection.
4.75 from 4 votes
Print Pin Rate
Course: Dessert Recipes
Cuisine: American
Prep Time: 10 minutes minutes
Cook Time: 1 hour hour
Total Time: 1 hour hour 10 minutes minutes
Servings: 10 slices
Calories: 343
Author: Sarah Mock

Ingredients

Rhubarb cake ingredients

  • A rectangular 8 oz package of Kerrygold Pure Irish Butter, unsalted, with a green and gold label and Irish grass-fed cow branding-perfect for creating delicious Saint Patrick's Day cupcakes.½ Cup Butter softened
  • A 4-pound bag of Domino granulated pure cane sugar with a yellow and white design, showing nutrition information and branding-perfect for sweetening recipes like rhubarb sour or your favorite desserts.1 Cup Sugar
  • A single brown chicken egg, perfect for making Chicken Cordon Bleu, stands upright on a white background.2 Egg
  • A 5-pound bag of King Arthur Baking Company unbleached bread flour with 12.7% protein content, labeled for ideal use in bread, pizza crust, and rolls-perfect for creating hearty sides like homemade loaves to serve alongside a comforting slowcooker sausage casserole.2 Cups Flour, All Purpose
  • A can of Rumford Baking Powder, 8.1 oz (230g), with red label, showing baked goods like Cherry Scones, and a ½ teaspoon Baking Powder
  • Arm & Hammer Pure Baking Soda box, 8 oz size, with text promoting it as America's #1 trusted brand and stating ½ teaspoon Baking Soda
  • A Morton Salt container with a blue label featuring a girl in a yellow dress holding an umbrella, with salt pouring out of a container-an essential ingredient for perfectly seasoning dishes like Chicken Cordon Bleu.½ teaspoon salt
  • sour cream.½ Cup Sour Cream
  • easy sous vide vanilla extract1 teaspoon Vanilla Extract
  •  
    zest 1 orange
  •  
    1 ½ Cup rhubarb small dice

Rhubarb Cake Orange Icing Ingredients

  • A 4-pound bag of Domino Confectioners Sugar labeled as 10-X powdered pure cane sugar in yellow and blue packaging-perfect for creating festive Saint Patrick's Day cupcakes.1 Cup Powdered Sugar sifted
  •  
    2 tablespoon orange juice fresh
  • A Morton Salt container with a blue label featuring a girl in a yellow dress holding an umbrella, with salt pouring out of a container-an essential ingredient for perfectly seasoning dishes like Chicken Cordon Bleu.pinch of salt
Follow Savoring The Good On PinterestFollow @SavoringTheGood or tag #STGRecipes!

Instructions

Cake Instructions

  • Preheat oven to 375 F.
  • Spray a 9x5x3" loaf pan with cooking spray and set aside.
  • Whisk together the flour, baking powder, baking soda and salt in a medium bowl.
  • Cream the butter and sugar together until fluffy.
  • Add the eggs one at a time mixing well after each.
  • Add the vanilla and the orange zest.
  • Alternatively add the flour with the sour cream, starting and finishing with the flour.
  • Fold in the rhubarb.
  • Pour into the prepared loaf pan, smooth top and bake for 60­ minutes or until a cake tester comes out clean.
  • Let cool 10 minutes
  • Remove from pan and complete the cooling on a wire rack.
  • Store in an air tight container for a few days if needed.

Orange icing instructions

  • Sift the powdered sugar.
  • Combine the fresh orange juice and sifted powdered sugar until a thick icing forms.
  • If the icing is too thin, add more powdered sugar.
  • If the icing is too thick, add orange juice, a few drops at a time.
  • The icing should not flow freely, it should be thick so it forms a nice layer on the cake.

Notes

When do you put on the icing?

I like to wait until the cake is completely cooled before icing the cake with the orange icing. Thanks to reader Maura for asking this question.
Want to share when you made this recipe?Follow @SavoringTheGood & tag #STGRecipes!
Nutrition Facts
Rhubarb Bread with Orange Icing
Serving Size
 
1 slice
Amount per Serving
Calories
343
% Daily Value*
Fat
 
13
g
20
%
Saturated Fat
 
7
g
44
%
Polyunsaturated Fat
 
4
g
Cholesterol
 
68
mg
23
%
Sodium
 
309
mg
13
%
Carbohydrates
 
54
g
18
%
Sugar
 
33
g
37
%
Protein
 
5
g
10
%
* Percent Daily Values are based on a 2000 calorie diet.
**Nutritional facts are just estimates. Please utilize your own brand nutritional values to double check against our estimates.
Like this recipe card? Want one for your site?Check out WP Recipe Maker!

published may 30, 2018


Sarah Mock of savoringthegood.com headshot 2022

I am Sarah Mock. Welcome!

Sarah Mock is a classically trained Chef and graduate of Johnson & Wales University. A culinary blogger for 16 years Sarah helps the home cook prepare her recipes with professional results.

Get to know me

as seen in:

Logos of Hersheyland, ABC News, and Good Day PA are showcased in a seamless row, providing a snapshot of popular brands.

Hersheyland Nightline Good Day Pa!

The vibrant design showcases the iconic logos of Pinterest, Rachael Ray, and Jell-O set against a bold red background. Sorry, the provided description doesn't offer enough detail to suggest important SEO keywords.

Pinterest Rachael JELL-O

Sous Vide Vanilla Extract Recipe

easy sous vide vanilla extract

Making this sous vide vanilla extract recipe will give you homemade vanilla extract in less time.

Sous Vide Vanilla Extract in glass jar

This easy vanilla recipe is perfect as a homemade gift to give, a foodie gift or even as a hostess gift. Always have homemade vanilla or vanilla paste in your cabinet for all your baking recipes.

If you are looking for more sous vide recipes to make infusions in less time be sure to make sous vide grapefruit infused gin, sous vide limoncello, cold brew coffee and lilac infused alcohol. Be sure to check out my complete collection of sous vide recipes.

Why is sous vide the fastest way to make vanilla extract?

Using the sous vide method of cooking to infuse your alcohol to make homemade vanilla extract not only cuts your infusion time from weeks to hours, in my opinion, it gives it a deeper depth of flavor.

By gently warming the alcohol, the flavors and colors of the vanilla beans are quickly drawn into the infusion.

What kind of alcohol is used to make vanilla extract?

There are a few alcohols that can be used to make vanilla extract. Vodka has the most neutral flavor and can be the most cost-effective, but bourbon, brandy, or rum would be different alternatives to vodka.
Each different alcohol will give your homemade vanilla extract a unique flavor profile. Leave the top-shelf or high-proof alcohol on the shelf when choosing your alcohol for making vanilla extract.

A simple 40% (80 proof) alcohol will do the job.

DIY Vanilla Extract ingredients

  • 2 cups vodka
  • 4 split vanilla beans

How to make sous vide vanilla extract:

  1. In a mason jar place 2 cups of your chosen alcohol and 4 split vanilla beans,
  2. Secure them with clean lids and bands.
  3. Heat your sous vide to 130 degrees Fahrenheit.
  4. Carefully submerge the jars in the heated water, ensuring they covered by at least an inch of water.
  5. Process for a minimum of 1 hour.
  6. The longer you sous vide the vanilla extract, the richer and deeper the flavor will become.
  7. I sous vide for 4 hours to achieve the vanilla in this photos.
  8. Remove from the sous vide bath and allow to cool completely before storage.
Using an Anova sous vide machine, a person precisely cooks vacuum-sealed salmon fillets submerged in water, ensuring perfect results right on the countertop.

Let's go shopping!

ANOVA

This third generation sous vide circulator includes dual-band WiFi and a two-line touchscreen display.

Buy it here

How do you make traditional vanilla extract?

  1. To make vanilla extract combine 2 cups of vodka and 4 vanilla beans that have been split to reveal the vanilla bean seeds inside the pod.
  2. In a closed canning jar, submerge the vanilla in your chosen alcohol.
  3. Close the container and wait 3-4 weeks until the infusion is complete.

How will I know the vanilla extract is ready?

Your homemade vanilla extract will be ready when the fragrance of the alcohol no longer smells of alcohol and smells strongly of vanilla. The color of the alcohol will be golden to amber in color.

Sous vide drink recipes:

  • The best eggnog recipe
  • Sous Vide Cold Brew Coffee
  • Sous Vide Grapefruit Infused Gin
  • Homemade cucumber infused gin
  • Sous Vide Homemade Limoncello Recipe
  • Lilac Infused Alcohol

Sous vide dessert recipes:

  • Sous Vide Creme Brulee
  • Sous Vide Oreo Cheesecake
  • Sous Vide Lemon Curd
  • Sous Vide Mascarpone Cheese
Sous Vide Vanilla Extract with fresh vanilla beans

Why use amber jars for homemade vanilla extract?

I have started to use amber jars when making my homemade vanilla extract because the amber canning jar provides excellent UV protection for the vanilla extract. This is important because UV rays can sometimes change the components of the vanilla infusion. By blocking the UV rays your DIY vanilla extract will retain the gorgeous amber flavor and color. This is not due to the color of the canning jar but due to the fact that the color amber blocks out the damaging UV rays.

Seafood sous vide recipes:

  • Sea Bass with roasted tomatoes, corn, olives and capers
  • How to perfectly cook shrimp
  • Mahi Mahi tacos
Sous Vide Vanilla Extract in amber jars

Can you get drunk off of vanilla extract?

It is possible to get drunk off of of this recipe for vanilla extract. With the high alcohol content it is possible if you drank the right serving for your body mass. I do not recommend trying to get drunk off of this vanilla extract or any alcohol, for that matter. Drunkenness is not one of the things I savor. Keep this vanilla extract out of reach of children and use it in appropriate proportions in recipes and cocktails.

Meat sous vide recipes:

  • Sous Vide Stuffed Flank Steak
  • Boneless pork chops
  • Sous vide beef burgundy 
  • Sous Vide Turkey Breast
  • Bacon sous vide
  • Corned Beef

Pin to Pinterest:

Sous Vide Vanilla Extract
Sous Vide Vanilla Extract in amber jars

Sous Vide Vanilla Extract

Making this sous vide vanilla extract recipe will give you homemade vanilla extract in less time. This easy vanilla recipe is perfect as a homemade gifts to give, a foodie gift or even as a hostess gift. Always have homemade vanilla in your cabinet for all your baking recipes.
5 from 13 votes
Print Pin Rate
Course: Drinks - Non Alcoholic
Cuisine: American
Keyword: diy vanilla extract, homemade vanilla, sous vide recipe, vanilla
Prep Time: 3 minutes minutes
Cook Time: 1 hour hour
Total Time: 1 hour hour 3 minutes minutes
Servings: 96 teaspoons
Calories: 11
Author: Sarah Mock

Ingredients

  • 2 Cups vodka
  • 4 split vanilla beans
Follow Savoring The Good On PinterestFollow @SavoringTheGood or tag #STGRecipes!

Instructions

Sous vide vanilla extract recipe

  • In a mason jar place 2 cups of your chosen alcohol and 4 split vanilla beans,
  • Secure them with clean lids and bands.
  • Heat your sous vide to 130 degrees Fahrenheit.
  • Carefully submerge the jars in the heated water, ensuring they covered by at least an inch of water.
  • Process for a minimum of 1 hour.
  • The longer you sous vide the vanilla extract, the richer and deeper the flavor will become.
  • I sous vide for 4 hours to achieve the vanilla in this photos.
  • Remove from the sous vide bath and allow to cool completely before storage.
Want to share when you made this recipe?Follow @SavoringTheGood & tag #STGRecipes!
Nutrition Facts
Sous Vide Vanilla Extract
Serving Size
 
1
Amount per Serving
Calories
11
% Daily Value*
* Percent Daily Values are based on a 2000 calorie diet.
**Nutritional facts are just estimates. Please utilize your own brand nutritional values to double check against our estimates.
Like this recipe card? Want one for your site?Check out WP Recipe Maker!

Sarah Mock of savoringthegood.com headshot 2022

I am Sarah Mock. Welcome!

Sarah Mock is a classically trained Chef and graduate of Johnson & Wales University. A culinary blogger for 15 years Sarah helps the home cook prepare her recipes with professional results.

Get to know me

Lilac Lemonade Recipe with Fresh Lilacs

Lilac Lemonade in a glass pitcher

Make a batch of my homemade lilac syrup and add it to your favorite lemonade. I won't pass judgment if you poured in a little lilac infused alcohol either! Gin would be my choice but vodka would be delicious as well.

Lilac Lemonade in a glass pitcher

Lilac Lemonade Recipe Ingredients

  • 1 part lilac syrup
  • 4 parts lemonade

How Do You Make Lilac Lemonade?

This recipe proportions are completely up to you. I like the 1 part lilac syrup to 4 parts lemonade but you are welcome to mix it to your liking. Like a little more lilac? Pour in more lilac syrup. Like a little more tart? Add some more lemonade.

I am trying to make this the easiest lemonade recipe possible. If you have a favorite homemade lemonade recipe, use it! If you like to use the powder mix, use it! The start of this recipe is the lilac syrup.

Storage Tips

Lilac Lemonade with lemon garnish

Remember that homemade drinks like this don't have preservatives like store-bought options do, so they won't last as long. It's always best to consume them within a few days for maximum freshness and flavor!

  • Refrigerator: You can store the lilac lemonade in an airtight container in the refrigerator for up to 5 days. Be sure to give it a good stir or shake before serving, as some of the ingredients may settle or separate over time.
  • Freezer: If you want to store the lilac lemonade for longer than 5 days, you can freeze it in an airtight container for up to 3 months. When you're ready to serve it, simply thaw it in the refrigerator and give it a good stir or shake before serving. Keep in mind that some of the texture and flavor may be slightly altered after freezing and thawing.
  • Glass jars: Another option is to store the lilac lemonade in glass jars with tight-fitting lids. This is ideal if you're planning on taking the lemonade on-the-go or need individual servings for an event. Be sure to chill them thoroughly before packing them up, and place them in an insulated cooler if possible.

FREQUENTLY ASKED QUESTIONS, ANSWERS AND TIPS:

Does lilac lemonade have real lilacs in it?

Lilac lemonade is a refreshing floral twist on summer lemonade. By adding lilac simple syrup made with real lilac blossoms to a glass of fresh lemonade you have added another lovely layer of flavor and fragrance to a refreshing summer beverage.

What does lilac lemonade taste like?

The flavor can be described as floral and slightly sweet, with a subtle hint of citrus from the lemonade base.

Lilacs have a delicate floral scent that adds a pleasant fragrance to the lemonade, making it not only delicious but also refreshing for the senses. The color of lilac lemonade is usually a pale pink or purple, depending on how much lilac is used.

The lemonade has a unique flavor profile that's unlike any other type of lemonade. It's perfect for those who enjoy floral flavors and want to try something new and refreshing during hot weather.

Lilac Lemonade in a glass pitcher

Lilac Lemonade Recipe

This is a two ingredients summer lemonade recipe. The addition of lilac syrup to your lemonade will change the way you enjoy lemonade this summer.
5 from 9 votes
Print Pin Rate
Course: Drinks - Non Alcoholic
Cuisine: American
Keyword: easy lemonade, lemonade, lilac
Prep Time: 5 minutes minutes
Cook Time: 0 minutes minutes
Total Time: 5 minutes minutes
Servings: 10 oz.
Calories: 62
Author: Sarah Mock

Ingredients

  • 1 part lilac syrup
  • 4 parts lemonade
Follow Savoring The Good On PinterestFollow @SavoringTheGood or tag #STGRecipes!

Instructions

  • I like the 1 part lilac syrup to 4 parts lemonade but you are welcome to mix it to your liking.
  • Like a little more lilac? Pour in more lilac syrup.
  • Like a little more tart? Add some more lemonade.
Want to share when you made this recipe?Follow @SavoringTheGood & tag #STGRecipes!
Nutrition Facts
Lilac Lemonade Recipe
Serving Size
 
1
Amount per Serving
Calories
62
% Daily Value*
Sodium
 
9
mg
0
%
Carbohydrates
 
16
g
5
%
Sugar
 
13
g
14
%
* Percent Daily Values are based on a 2000 calorie diet.
**Nutritional facts are just estimates. Please utilize your own brand nutritional values to double check against our estimates.
Like this recipe card? Want one for your site?Check out WP Recipe Maker!

Lilac Cocktail

lilac bee's knees cocktail in glass

Enjoy this recipe for Lilac bee's knees cocktail at Mother's Day brunch, bridal showers or on cool spring evenings. The addition of fresh lilacs is a lovely addition to this Bee's knees cocktail recipe.

lilac bee's knees cocktail in glass

This recipe has both lilac infused alcohol and lilac syrup in it. I love the floral essence in this bees knees cocktail. Such a refreshing difference in a cocktail.

What is a Bee's knees cocktail?

Bees Knees cocktail (or Bee's Knees cocktail ) is a prohibition era cocktail made with gin, fresh lemon juice, and honey. It is served shaken over ice, strained and often with a lemon twist.The name comes from prohibition-era slang meaning "the best. This lilac bee's knees cocktail has lilac infused gin and the addition of lilac syrup. The garnish is lilac blossoms instead of a lemon twist.

Lilac Bees Knees Cocktail Ingredients:

lilac bees knees cocktail with garnish
  • 2 ounces Lilac infused gin
  • 1 ounce Lilac syrup
  • ¾ oz. Lemon Juice, fresh squeezed
  • ¾ oz Honey Syrup

Honey syrup ingredients:

  • 1 cup honey
  • ⅓ cup warm water
  • Combine honey and warm water to make honey syrup.

Making the Lilac Bee's Knees Cocktail.

  1. In a cocktail shaker filled ¾ full with ice, add the lilac infused gin, lilac syrup, fresh lemon juice and honey syrup.
  2. Shake well to chill the cocktail.
  3. Strain the drink into a cocktail glass.
  4. Garnish with lilac flowers.

More cocktail recipes:

  • Rhubarb sour
  • Spicy peach bourbon smash
  • Black Panther cocktail
  • Mandarin mochatini cocktail
lilac bee's knees cocktail in glass

Lilac Bee's Knees Cocktail

Enjoy this recipes for Lilac bee's knees cocktail at Mother's Day brunch, bridal showers or on cool spring evenings. The addition of fresh lilacs is a lovely addition to this Bee's knees cocktail recipe.
5 from 1 vote
Print Pin Rate
Course: Drinks - Non Alcoholic
Cuisine: American
Prep Time: 1 minute minute
Cook Time: 3 minutes minutes
Total Time: 4 minutes minutes
Servings: 1 cocktail
Calories: 1870
Author: Sarah Mock

Ingredients

Lilac Bee's Knees Cocktail Ingredients:

  •  
    2 Ounces Lilac infused gin
  •  
    1 Ounce Lilac syrup
  • A plastic bottle of ReaLemon 100% Lemon Juice with a yellow cap, a lemon-shaped top, and images of lemons on a green label-perfect for adding a burst of citrus flavor to your favorite recipes like Lemon Cheesecake Bars.¾ oz. Lemon Juice fresh squeezed
  •  
    ¾ oz Honey Syrup

Honey syrup ingredients:

  • A 16 oz bottle of Dutch Gold Pure Honey from clover blossoms with a flip-top cap and certification label on the front.1 Cup Honey
  •  
    ⅓ Cup warm water
  •  
    Combine honey and warm water to make honey syrup.
Follow Savoring The Good On PinterestFollow @SavoringTheGood or tag #STGRecipes!

Instructions

Making the Lilac Bee's Knees Cocktail.

  • In a cocktail shaker filled ¾ full with ice, add the lilac infused gin, lilac syrup, fresh lemon juice and honey syrup.
  • Shake well to chill the cocktail.
  • Strain the drink into a cocktail glass.
  • Garnish with lilac flowers.
Want to share when you made this recipe?Follow @SavoringTheGood & tag #STGRecipes!
Nutrition Facts
Lilac Bee's Knees Cocktail
Serving Size
 
1
Amount per Serving
Calories
1870
% Daily Value*
Sodium
 
153
mg
7
%
Carbohydrates
 
468
g
156
%
Sugar
 
412
g
458
%
Protein
 
1
g
2
%
* Percent Daily Values are based on a 2000 calorie diet.
**Nutritional facts are just estimates. Please utilize your own brand nutritional values to double check against our estimates.
Like this recipe card? Want one for your site?Check out WP Recipe Maker!

Sarah Mock of savoringthegood.com headshot 2022

I am Sarah Mock. Welcome!

Sarah Mock is a classically trained Chef and graduate of Johnson & Wales University. A culinary blogger for 16 years Sarah helps the home cook prepare her recipes with professional results.

Get to know me

as seen in:

Logos of Hersheyland, ABC News, and Good Day PA are showcased in a seamless row, providing a snapshot of popular brands.

Hersheyland Nightline Good Day Pa!

The vibrant design showcases the iconic logos of Pinterest, Rachael Ray, and Jell-O set against a bold red background. Sorry, the provided description doesn't offer enough detail to suggest important SEO keywords.

Pinterest Rachael JELL-O

Delicious Lilac Syrup Recipe

A glass of lilac syrup with lilac flowers.

Lilac syrup is a lovely addition to your favorite summer cocktail or non alcoholic beverage. This floral simple syrup is perfect for wedding showers, baby showers or summer parties.

A glass of lilac syrup with lilac flowers.

If you are looking for a way to use lilac syrup for your beverages, make a batch of lilac infused alcohol. This recipe is for vodka but feel free to switch it out for gin, or an alcohol of your choice.

Delicious Lilac Syrup

Lilac syrup

Making a simple syrup of fresh lilacs, water and sugar will make your summer drinks have that little 'something' that no other drink will. Lilac syrup tastes just like it sounds. A syrup that tastes like the fragrance of lilacs. The recipe card below will show you how simple it is.

Why you'll love this recipe

lilac syrup in a shot glass

Making lilac syrup recipe allows you to create an edible and fragrant syrup using fresh lilac blossoms, to sweeten and enhance the aroma of beverages like lilac lemonade and baked goods.

Simple lilac syrup ingredients

  • 2 cups water
  • 2 cups sugar
  • 1 cup lilac flowers
  • 4 blackberries, fresh or frozen

Preparing lilacs for simple syrup

  • Make sure the lilacs were not treated or sprayed with pesticides.
  • Harvest the lilacs first thing in the morning while the temperatures are cooler and the blossoms are at peak moisture content.
  • Shake off any dead blossoms.
  • Remove just the blossom, leaving behind the stems, leaves and the green bits.
  • Don't freak out if you have bits of green stems.

How to Make Lilac syrup:

  • Add lilac flowers, water, sugar, and blackberries in a small saucepan on medium heat.
  • Bring to a boil and make sure that the sugar is dissolved.
  • Turn off the heat, steep the syrup, and cool completely.
  • Strain the syrup using a fine mesh strainer, removing the lilac florets and the blackberries.
  • Store in a closed jar or bottle and refrigerate the lilac syrup for up to 10 days.

Lilac color in the lilac simple syrup recipe

The natural color of lilacs, when boiled is a pale yellow. But with the addition of a few black berries, fresh or frozen, the lovely lilac color to the syrup. If you don't have black berries on hand, a drop or two of food coloring will work as well but I was going very all natural for this recipe. The color of the syrup is just as good if you don't add any color. But when we eat and drink with our eyes first, I add the purple color to the syrup to call it out as lilac syrup.

Recipe FAQs

How to use lilac syrup?

The syrup can be used in many ways:

  • Flavorful Drinks and Cocktails - Lilac syrup adds a spring flavor to your beverages. Mix it with water, sparkling water, or ginger ale for a refreshing lilac-infused drink. Use it to make a lilac lemonade by combining sparkling water or regular water, lilac syrup and lemon juice a 1:1:2 ratio.
  • Sweet Toppings - Drizzle lilac syrup over pancakes, waffles, or ice cream for a unique and floral twist. The lilac petals infuse the syrup with their heavenly fragrance, making it a delightful addition to your favorite desserts.

Are all varieties of lilacs edible?

Not all varieties of lilacs are edible, with some having potential bitterness, lack of flavor, or other factors. If you decide to consume the edible ones, remember to rinse them thoroughly before use. Depending on the variety, other kinds of lilacs can make the syrup bitter.

What recipe can I make with lilac syrup and blueberries?

You can create a refreshing lilac blueberry lemonade with lilac syrup, blueberries, and a few blueberries in a blender. Using a fine-mesh strainer, strain the mixture, pour it into ice cube trays, and freeze; then serve the lilac-infused blueberry ice cubes in a glass of lemonade for a beverage reminiscent of a full bloom garden.

lilac syrup in a glass pitcher

Lilac syrup

Lilac syrup is a lovely addition to your favorite summer cocktail or non alcoholic beverage. This floral simple syrup is perfect for wedding showers, baby showers or summer parties.
4.88 from 8 votes
Print Pin Rate
Course: Cocktails
Cuisine: American
Prep Time: 15 minutes minutes
Cook Time: 10 minutes minutes
Total Time: 25 minutes minutes
Servings: 16 ounces
Calories: 195
Author: Sarah Mock

Ingredients

  •  
    2 Cups Water
  • A 4-pound bag of Domino granulated pure cane sugar with a yellow and white design, showing nutrition information and branding-perfect for sweetening recipes like rhubarb sour or your favorite desserts.2 Cups Sugar
  •  
    1 Cup lilac flowers
  •  
    4 blackberries fresh or frozen
Follow Savoring The Good On PinterestFollow @SavoringTheGood or tag #STGRecipes!

Instructions

  • Combine the water, sugar, lilac flowers and blackberries.
  • Bring to a boil and completely dissolve the sugar.
  • Turn off the heat and allow to steep and cool completely.
  • Strain the syrup, removing the flowers and the blackberries.
  • Store in a closed container in the refrigerator for up to 10 days.

Notes

Lilac color in the simple syrup The natural color of lilacs, when boiled is a pale yellow. But with the addition of a few black berries, fresh or frozen, the lovely lilac color to the syrup. If you don't have black berries on hand, a drop or two of food coloring will work as well but I was going very all natural for this recipe. The lilac syrup is just as good if you don't add any color. But when we eat and drink with our eyes first, I add the purple color to the syrup to call it out as lilac syrup.
Want to share when you made this recipe?Follow @SavoringTheGood & tag #STGRecipes!
Nutrition Facts
Lilac syrup
Serving Size
 
2 ounce
Amount per Serving
Calories
195
% Daily Value*
Sodium
 
3
mg
0
%
Carbohydrates
 
50
g
17
%
Sugar
 
50
g
56
%
* Percent Daily Values are based on a 2000 calorie diet.
**Nutritional facts are just estimates. Please utilize your own brand nutritional values to double check against our estimates.
Like this recipe card? Want one for your site?Check out WP Recipe Maker!

Brussels Sprout Slaw

brussel sprout slaw

Brussels sprouts slaw is a delicious alternative to a traditional cabbage coleslaw. This recipe uses dried cranberries, orange zest, orange juice and toasted pecans for added crunch. Brussels sprout coleslaw will be sure to be the hit at your next picnic, pot luck dinner or family gathering.

quick Brussels Sprout Slaw

Even if you are not a fan of brussels sprouts, you NEED to try my recipe for sheet pan roasted brussels sprouts.  The caramelization on the vegetable completely changes the taste and will turn you into a brussel sprout lover. Speaking of roasting, garlic is incredible roasted. See how I easily roast garlic and store it in olive oil.

Cranberry Orange Brussels Sprout Slaw Ingredients:

  • Brussels sprouts, cleaned and finely shredded
  • cranberries, dried
  • pecans, chopped and toasted
  • honey
  • whole grain mustard
  • mayonnaise
  • plain yogurt
  • apple cider vinegar
  • Zest & Juice of 1 orange
  • salt
  • pepper

Recipe Card?

To find the full printable recipe with specific measurements and directions CLICK HERE to go to the recipe card.

Brussels Sprout Slaw Directions:

Brussels Sprout Slaw in a bowl
  1. Trim excess leaves and ends off of the Brussels sprouts.
  2. Finely shred in a food processor, on a mandolin or with a sharp knife.
  3. Combine the shredded Brussels sprouts, cranberries, toasted pecans, orange zest.
  4. Whisk together the honey, whole grain mustard, mayonnaise, orange juice, plain yogurt, apple cider vinegar, salt and pepper to taste.
  5. Thoroughly mix the dressing with the shredded Brussels sprouts mixture.
  6. Refrigerate until ready to serve.
A bowl of Brussels sprout slaw with cranberries and nuts.

Cranberry Orange Brussels Sprout Slaw

Brussels sprouts slaw is a delicious alternative to a traditional cabbage coleslaw. This recipe uses dried cranberries, orange zest, orange juice and toasted pecans for added crunch.
4.86 from 7 votes
Print Pin Rate
Course: Side Dishes
Cuisine: American
Prep Time: 10 minutes minutes
Cook Time: 10 minutes minutes
Total Time: 20 minutes minutes
Servings: 10 people
Calories: 152
Author: Sarah Mock

Ingredients

  •  
    1 ½ Pound Brussels sprouts cleaned and finely shredded
  •  
    ¾ Cup dried cranberries
  •  
    ⅓ Cup pecans chopped and toasted
  • A 16 oz bottle of Dutch Gold Pure Honey from clover blossoms with a flip-top cap and certification label on the front.2 Tablespoon Honey
  •  
    3 Tablespoon whole grain mustard
  • A jar of Hellmann's Real Mayonnaise with a blue lid, labeled 3 Tablespoon mayonaise
  •  
    3 Tablespoon pain yogurt
  •  
    2 Tablespoon apple cider vinegar
  •  
    Zest & Juice of 1 orange
  • A Morton Salt container with a blue label featuring a girl in a yellow dress holding an umbrella, with salt pouring out of a container-an essential ingredient for perfectly seasoning dishes like Chicken Cordon Bleu.salt
  • A 6 oz container of McCormick Pure Ground Black Pepper with a red lid and a Black Pepper
Follow Savoring The Good On PinterestFollow @SavoringTheGood or tag #STGRecipes!

Instructions

  • Trim excess leaves and ends off of the Brussels sprouts.
  • Finely shred in a food processor, on a mandolin or with a sharp knife.
  • Combine the shredded Brussels sprouts, cranberries, toasted pecans, orange zest.
  • Whisk together the honey, whole grain mustard, mayonnaise, orange juice, plain yogurt, apple cider vinegar, salt and pepper to taste.
  • Thoroughly mix the dressing with the shredded Brussels sprouts mixture.
  • Refrigerate until ready to serve.
Want to share when you made this recipe?Follow @SavoringTheGood & tag #STGRecipes!
Nutrition Facts
Cranberry Orange Brussels Sprout Slaw
Serving Size
 
1
Amount per Serving
Calories
152
% Daily Value*
Fat
 
6
g
9
%
Saturated Fat
 
1
g
6
%
Polyunsaturated Fat
 
5
g
Cholesterol
 
2
mg
1
%
Sodium
 
168
mg
7
%
Carbohydrates
 
24
g
8
%
Sugar
 
18
g
20
%
Protein
 
3
g
6
%
* Percent Daily Values are based on a 2000 calorie diet.
**Nutritional facts are just estimates. Please utilize your own brand nutritional values to double check against our estimates.
Like this recipe card? Want one for your site?Check out WP Recipe Maker!

Sarah Mock of savoringthegood.com headshot 2022

I am Sarah Mock. Welcome!

Sarah Mock is a classically trained Chef and graduate of Johnson & Wales University. A culinary blogger for 15 years Sarah helps the home cook prepare her recipes with professional results.

Get to know me

as seen in:

Logos of Hersheyland, ABC News, and Good Day PA are showcased in a seamless row, providing a snapshot of popular brands.

Hersheyland Nightline Good Day Pa!

The vibrant design showcases the iconic logos of Pinterest, Rachael Ray, and Jell-O set against a bold red background. Sorry, the provided description doesn't offer enough detail to suggest important SEO keywords.

Pinterest Rachael JELL-O


How To Make A Collector Pin Shadow Box

After collecting Disney pins you are probably wondering how to make a Disney pin board. Alternate to a Disney cork board for displaying your collector pins, I show you how to make a DIY Disney pin shadow box. A simple DIY Disney pin display case for any room in your home. Disney pin trading on display as a work of art.

After collecting Disney pins, you are probably wondering how to make a Disney pin board. Alternative to a Disney cork board for displaying your collector pins, I show you how to make a DIY Disney pin shadow box.

After collecting Disney pins you are probably wondering how to make a Disney pin board. Alternate to a Disney cork board for displaying your collector pins, I show you how to make a DIY Disney pin shadow box. A simple DIY Disney pin display case for any room in your home. Disney pin trading on display as a work of art.

Disney Pin Board

Instead of leaving your Disney collector pins in a bag, on a lanyard or stuffed in a drawer, often people will make a Disney Pin board. Often it is made out of cork or other creative methods. I am going to be showing you how to make your own pin trader display case with a shadow box.

Disney pin trading

Disney pin trading is one of our favorite activities to do as a family while we are visiting Disney Parks and Disney Cruise Line. Trade pins with cast members, off of the Disney Pin Board in hotels and in retail locations or even trade with people while waiting in line for rides or shows.

Cast members won't deny a child a pin trade but there is a limit of 2 trades per person.

We have a pile of 'traders' that we take with us to trade for ones to complete a collection. We seek out the hidden mickey pins that only cast members can trade. We also try to complete collections that we love such as the apples, Orange Bird or the Epcot ride collections. Getting a complete set, with the chaser pin, if available, is always the goal.

Pin Board Materials:

disney pin display case
  • Shadow box
  • Glue gun
  • hot glue sticks
  • corks
  • sharp knife
  • cutting board
  • rotary cutter or scissors
  • black felt or velvet

How to make a pin display board

After collecting Disney pins you are probably wondering how to make a Disney pin board. Alternate to a Disney cork board for displaying your collector pins, I show you how to make a DIY Disney pin shadow box. A simple DIY Disney pin display case for any room in your home. Disney pin trading on display as a work of art.
  1. Remove the backing from the shadow box and open it to flatten it.
  2. Cut ⅓ inch slices of cork with your sharp knife.
  3. Cut a piece of black felt or velvet to be the same size as the backing of the shadow box.
  4. Cut a piece of cardboard to be ¼" smaller than the inside of the shadow box backing.
    Two pieces of paper arranged to make a collector pin shadow box
  5. Arrange the corks on the smaller square in the approximate placement of your pins.
  6. Hot glue the corks into place on the smaller square of card board.
    pin board
  7. Sandwich the corks between the shadow box back and the smaller square.
  8. Hot glue the black piece of felt to the now back, of the small square of cardboard.
  9. Fold the side of the back of the shadow box back into place and secure with tape.
  10. Hot glue the sides of the back of the shadow box.
  11. Trim the excess felt off.
  12. Arrange your pin collection into the corks.
  13. Fit the shadow box back over the pins.

How to display pins

how to make a pin display board

I did some measuring and arranged my pinboard shadowboxes above my desk. They are centered on the wall and I did my best to get equal spacing between the boxes.

My goal is to have completed sets of trader pins in each box. Currently, I have 4 completed sets but I have many more started! I guess it is time to book another trip to Disney!


Sarah Mock of savoringthegood.com headshot 2022

I am Sarah Mock. Welcome!

Sarah Mock is a classically trained Chef and graduate of Johnson & Wales University. A culinary blogger for 16 years Sarah helps the home cook prepare her recipes with professional results.

Get to know me

as seen in:

Logos of Hersheyland, ABC News, and Good Day PA are showcased in a seamless row, providing a snapshot of popular brands.

Hersheyland Nightline Good Day Pa!

The vibrant design showcases the iconic logos of Pinterest, Rachael Ray, and Jell-O set against a bold red background. Sorry, the provided description doesn't offer enough detail to suggest important SEO keywords.

Pinterest Rachael JELL-O

Ruben Tater Tots

After St. Patrick's Day there is leftover corned beef. This is an easy recipe to use up leftover corned beef. Rueben tater tots have all the flavors of a classic reuben sandwich in tater tot form. Follow easy steps to make your own tater tots.

Ruben tater tots have all the flavors of a classic Ruben sandwich in tater tot form. Follow easy steps to make your own tater tots. After St. Patrick's Day there is leftover corned beef. This is an easy recipe to use up leftover corned beef.

leftover corned beef tots

If you would like to make your own corned beef you need to make my sous vide corned beef recipe.

This recipe makes a LOT of tater tots, upwards of 60 tots. This would be a wonderful recipe for Super Bowl parties, summer picnics or large gatherings. Feel free to cut this recipe in half for a smaller event or dinner.

Ingredients:

reuben tater tots ingredients
  • Corned beef, finely diced
  • hash brown potatoes, thawed
  • Swiss Cheese, shredded
  • Sauerkraut, well-drained
  • Egg
  • bread crumbs
  • Parsley
  • Garlic powder
  • Oil for frying
  • 1000 island dressing, for dipping

Ingredient Notes:

Leftover Corned Beef

sous vide corned beef

After St. Patrick's day there is usually leftover corned beef. Do you make your own corned beef? Check out my recipe for Sous Vide Corned Beef. You are going to need approximately 2 cups of finely diced or finely chopped corned beef. If you have any smoked corned beef, that would be amazing!

Drained Sauerkraut

drained sauerkraut

Well drain the 2 pounds of sauerkraut. The excess moisture is not needed in this recipe. Some people will drink the juice for gut.

I used a fine-mesh strainer over a bowl. The draining took about an hour so I was sure it was well-drained.

Chopped Corned Beef

Use a sharp knife or a food processor to finely chop the leftover corned beef. You are going to want 2 cups of chopped corned beef for this recipe.

Frozen Hash Browns

shredded swiss cheese

I did a little 'cheat' and bought a 32 ounce bag of shredded hash brown potatoes. These do not have the added peppers, onions or other seasonings. If you like them with the extras in them, you are welcome to give them a try. Also if you have leftover mashed potatoes or want to cook and shred your own potatoes, that is an option too.

Make sure the potatoes are thawed and any extra moisture has drained away. If you have freshly cooked and shredded potatoes, be sure to squeeze out any extra moisture. You will have a crispier tot with less moisture from the potatoes.

Swiss Cheese

I am using the classic Reuben sandwich ingredient of swiss cheese but you are welcome to use what you like. I used a bag of pre shredded swiss cheese but you are welcome to shred your own.

in a bowl making sure all the ingredients are combined.

rueben tater tot mix in a scoop

Tater Tot Portion

I am using a medium cookie scoop to portion out the tater tots. A small cookie scoop could be used if you wanted to make a mini version of these reuben tater tots.

hand made tater tot

Hand Formed Tater Tots

Form your tater tots by squeezing the reuben tot mixture into a firm cylinder. It take a bit of pressure and bit of patience but when you are hand crafting great food, it take time and love.

More Snack and Party Recipes:

  • Deep Fried Dill Pickles
  • Croque-Monsieur Egg Roll
  • Homemade Seasoned Ranch Cheese Crackers
  • Mexican Corn Dip Recipe
reuben tater tots

Baking Tater Tots

Line a baking sheet with a silicone baking mat.

Heat oven to 425 F.

Lay the tater tots in rows with a bit of space between them. They will not spread like cookies so there is not need to large spacing.

reuben tater tots

Crips Tater Tots

Give each tater tot a drizzle of olive oil before you place them in the 425 oven. The oil will help make them crips.

reuben tater tots baked

Fresh out of the oven!

A baking sheet with ham and cheese tots topped with ruben tater tots.

See how crispy!?

Freezer Tater Tots

If you are prepping ahead, cool the tots and freeze them on a sheet pan and then store in an air tight bag or container.

Pop into a 425 oven for 15 minutes at a later date to heat up.

reuben tater tots fried

Extra Crispy Tater Tots

If you love extra crispy tater tots, like I do, fry them is 400 degree oil for about 20 seconds.

tater tot fail

Tater Tot Mistakes

It IS important to pre-bake this recipe of home made tater tots before frying them to a crisp. This is what happened when I tried to fry a tot with out pre baking. Not very tot like.

rueben tater tots in a white square bowl with silver display fork

Corned Beef Tater Tots

Here you go! Crispy, delicious reuben tater tots have all the delicious flavors of your favorite reuben sandwich, in a tasty tot.

rueben tater tots on a silver fork
reuben tater tots with thousand island dressing for serving

Homemade Tater Tots

Serve your tots with 1000 island dressing. I am using bottled dressing but you are welcome to make your own.

rueben tater tots close up in a white bowl
After St. Patrick's Day there is leftover corned beef. This is an easy recipe to use up leftover corned beef. Rueben tater tots have all the flavors of a classic reuben sandwich in tater tot form. Follow easy steps to make your own tater tots.

Reuben Tater Tot

Rueben tater tots have all the flavors of a classic reuben sandwich in tater tot form. Follow easy steps to make your own tater tots.
4.70 from 10 votes
Print Pin Rate
Course: Side Dishes
Cuisine: American
Prep Time: 20 minutes minutes
Cook Time: 20 minutes minutes
Total Time: 40 minutes minutes
Servings: 48 tots
Calories: 205
Author: Sarah Mock

Ingredients

  •  
    2 Cups Corned beef finely diced
  •  
    1 bag frozen shredded hash brown potatoes thawed
  •  
    1 ½ Cup Swiss Cheese shredded
  •  
    2 pounds Sauerkraut well drained
  • A single brown chicken egg, perfect for making Chicken Cordon Bleu, stands upright on a white background.1 Egg
  •  
    ⅓ Cup bread crumbs
  •  
    1 Tablespoon dried parsley
  • A bottle of McCormick Garlic Powder with a red lid and green label, featuring the brand logo and 1 Teaspoon Garlic Powder
  •  
    Oil for frying
  •  
    1000 island dressing for dipping
Follow Savoring The Good On PinterestFollow @SavoringTheGood or tag #STGRecipes!

Instructions

  • You are going to need approximately 2 cups of finely diced or finely chopped corned beef.
  • Well drain the 2 pounds of sauerkraut.
  • Use a sharp knife or a food processor to finely chop the leftover corned beef. You are going to want 2 cups of chopped corned beef for this recipe.
  • Make sure the potatoes are thawed and any extra moisture has drained away. If you have freshly cooked and shredded potatoes, be sure to squeeze out any extra moisture. You will have a crispier tot with less moisture from the potatoes.
  • Combine the Corned beef, finely diced, frozen shredded hash brown potatoes, thawed, 1 ½ Cup Swiss Cheese, shredded, 2 pounds Sauerkraut, well drained, 1 egg, ⅓ cup bread crumbs, 1 Tablespoon dried parsley, 1 teaspoon garlic powder in a large bowl making sure all the ingredients are combined.
  • I am using a medium cookie scoop to portion out the tater tots. A small cookie scoop could be used if you wanted to make a mini version of these reuben tater tots.
  • Form your tater tots by squeezing the reuben tot mixture into a firm cylinder.
  • Line a baking sheet with a silicone baking mat.
  • Heat oven to 425 F.
  • Give each tater tot a drizzle of olive oil before you place them in the 425 oven. The oil will help make them crips.
  • If you love extra crispy tater tots, like I do, fry them is 400 degree oil for about 20 seconds.
Want to share when you made this recipe?Follow @SavoringTheGood & tag #STGRecipes!
Nutrition Facts
Reuben Tater Tot
Serving Size
 
4
Amount per Serving
Calories
205
% Daily Value*
Fat
 
14
g
22
%
Saturated Fat
 
5
g
31
%
Polyunsaturated Fat
 
7
g
Cholesterol
 
66
mg
22
%
Sodium
 
953
mg
41
%
Carbohydrates
 
8
g
3
%
Sugar
 
2
g
2
%
Protein
 
12
g
24
%
* Percent Daily Values are based on a 2000 calorie diet.
**Nutritional facts are just estimates. Please utilize your own brand nutritional values to double check against our estimates.
Like this recipe card? Want one for your site?Check out WP Recipe Maker!

Sarah Mock of savoringthegood.com headshot 2022

I am Sarah Mock. Welcome!

Sarah Mock is a classically trained Chef and graduate of Johnson & Wales University. A culinary blogger for 15 years Sarah helps the home cook prepare her recipes with professional results.

Get to know me

as seen in:

Logos of Hersheyland, ABC News, and Good Day PA are showcased in a seamless row, providing a snapshot of popular brands.

Hersheyland Nightline Good Day Pa!

The vibrant design showcases the iconic logos of Pinterest, Rachael Ray, and Jell-O set against a bold red background. Sorry, the provided description doesn't offer enough detail to suggest important SEO keywords.

Pinterest Rachael JELL-O

Sous Vide Coffee (Cold Brew Coffee Recipe)

Sous Vide cold brew coffee base is perfect for when you want cold brew coffee with out the wait. I have shown you how to make cold brew coffee in the past but this cold brew coffee recipe uses the sous vide technique to speed up the cold brew coffee process.

Sous Vide cold brew coffee base is perfect for when you want iced coffee without the wait. 

Sous Vide cold brew coffee

Another advantage of this method is you can make multiple jars of the cold brew base at one time without taking up precious refrigerator space. Refrigerator space is always at a premium in my house.

In the fall and winter months, I will add Gingerbread Syrup to my cup and for all the fall festive feels.

Once you have fallen in love with sous vide cold brew you will want to try homemade limoncello using the sous vide method as well as sous vide eggnog. The eggnog recipe will give you the confidence to serve eggnog to your guests without fearing to serve them scrambled eggs in their nog. Be sure to check out my complete collection of sous vide recipes.

Advantages to make cold brew with sous vide

Sous vide coffee provides a convenient and consistent way to brew coffee with enhanced flavor and reduced bitterness.

  • Consistency: With sous vide coffee, you can precisely control the temperature and time, resulting in consistent brews every time.
  • Enhanced flavor: The sealed environment in which the coffee is brewed helps to extract more flavor from the coffee grounds, resulting in a richer, fuller flavor profile.
  • Reduced bitterness: Because the coffee is brewed at a lower temperature than traditional brewing methods, it reduces the risk of over-extraction, which can lead to bitter-tasting coffee.
  • Easy to clean up: The sealed bags or containers used in sous vide coffee make for easy clean-up compared to traditional brewing methods, which require cleaning of multiple components.
  • Convenience: Sous vide coffee can be brewed overnight or while you're away, meaning you can wake up to a freshly brewed cup of coffee without having to wait for it to brew in the morning.

How to make sous vide coffee base

sous vide cold brew coffee in water bath
  1. Measure out the coffee grounds and water into a closed container.
  2. Set the sous vide water bath temperature. 
  3. Steep for two hours. Cool completely.
  4. Strain the mixture through a coffee filter and enjoy!

Is it possible to cold brew coffee with sous vide?

A jar of coffee sitting on a wooden table.

Sous vide coffee, also known as immersion brewing or precision brewing, involves using a sous vide machine to heat water to a precise temperature and then brewing coffee in a sealed bag or closed container for a shorter period of time versus a regular cold brew cooking technique.

The sous vide cooking tecnhique calls for 2 hours instead of the typical 12 to 24 hours called for in other homemade cold brew drink recipes.

Using an Anova sous vide machine, a person precisely cooks vacuum-sealed salmon fillets submerged in water, ensuring perfect results right on the countertop.

Let's go shopping!

ANOVA

This third generation sous vide circulator includes dual-band WiFi and a two-line touchscreen display.

Buy it here

I know what you are thinking, sous vide uses hot water and when you cold brew coffee you are supposed to use cold water, right. Sort of. I am going to call this a compromise technique. The water does not get as high as a drip coffee brew but is not as cold as refrigeration.

The heat is consistent and low enough to pull the flavor from the coffee grounds without making the coffee bitter. PLUS coffee is cold brewed in two hours and not overnight! Perfect for when you forgot to make it the night before!

Sous Vide cold brew coffee base

Your sous vide cold brew coffee is now ready to serve over ice or with your favorite cream and flavors.

FAQ's and Tips

Can I use a resealable plastic bag to make sous vide coffee?

You are definitely able to use a food-safe zip-top bag to make your cold brew coffee instead of a mason jar. You will have the same results. I just like to suggest using the water displacement method to remove the air from the bag before completely closing it.

What type of grind for cold brew?

I like to do a course grind with I make my cold-brew coffee. The flavor is able to be extracted beautifully and there is not a grittiness to the coffee that you sometimes get with you use a fine grind.A jar filled with coffee powder on a wooden table.

Can you sous vide on the stove?

The technical answer is yes. The practical answer is no. It is possible to cook using the sous vide method on a stovetop but maintaining a consistent water temperature without an immersion circulator is very hard, if not impossible to do.

Stovetop method: use a large pot or Dutch oven filled with water and a thermometer to monitor the temperature. Heat the water on the stove and adjust the heat to maintain the desired temperature. You will need to periodically check the temperature with the thermometer and adjust the heat as needed, stirring the water to help maintain a consistent water temperature.

What type of grind for cold brew?

Medium coarse ground coffee is the best grind for cold brew concentrate. The length of time that the ground beans are in contact with the water to make cold brew is such an extended amount of time versus the amount of time a regular cup of coffee is brewed, a smaller grind would be overpowering in taste with the end results.

Sous Vide cold brew coffee base is perfect for when you want cold brew coffee with out the wait. I have shown you how to make cold brew coffee in the past but this cold brew coffee recipe uses the sous vide technique to speed up the cold brew coffee process.

Sous Vide Coffee Recipe

Sous Vide cold brew coffee base is perfect for when you want cold brew coffee with out the wait.
5 from 2 votes
Print Rate
Course: Drinks - Non Alcoholic
Cuisine: French
Keyword: cold brew coffee, sous vide cold brew
Prep Time: 1 minute minute
Cook Time: 2 hours hours
Total Time: 2 hours hours 1 minute minute
Servings: 28 ounces
Calories: 13
Author: Sarah Mock

Ingredients

  • ½ Cup ground coffee
  • 32 Ounces Water
Follow Savoring The Good On PinterestFollow @SavoringTheGood or tag #STGRecipes!

Instructions

  • Set up your Sous Vide to 150 F and be sure the water covers the top of the jar.
  • In a 32 ounce (1 quart) mason jar, fill the jar with 32 ounces of fresh water and top with the coffee grounds.
  • Place a lid and a ring on the jar and give it a good shake. Make sure the lid is finger tight.
  • Brew for 2 hours.
  • Strain out the grounds and use them in your compost bin or around your flower beds.
  • Store in the refrigerator for up to two weeks.

Notes

This is so much faster than the 12-24 hours that traditional refrigerator cold brew takes!
Another advantage of this method is you can make multiple jars of the cold brew base at one time without taking up precious refrigerator space. Refrigerator space is always at a premium in my house.
Want to share when you made this recipe?Follow @SavoringTheGood & tag #STGRecipes!
Nutrition Facts
Sous Vide Coffee Recipe
Serving Size
 
4 ounces
Amount per Serving
Calories
13
% Daily Value*
Sodium
 
2
mg
0
%
* Percent Daily Values are based on a 2000 calorie diet.
**Nutritional facts are just estimates. Please utilize your own brand nutritional values to double check against our estimates.
Like this recipe card? Want one for your site?Check out WP Recipe Maker!

First published 2018.


Sarah Mock of savoringthegood.com headshot 2022

I am Sarah Mock. Welcome!

Sarah Mock is a classically trained Chef and graduate of Johnson & Wales University. A culinary blogger for 16 years Sarah helps the home cook prepare her recipes with professional results.
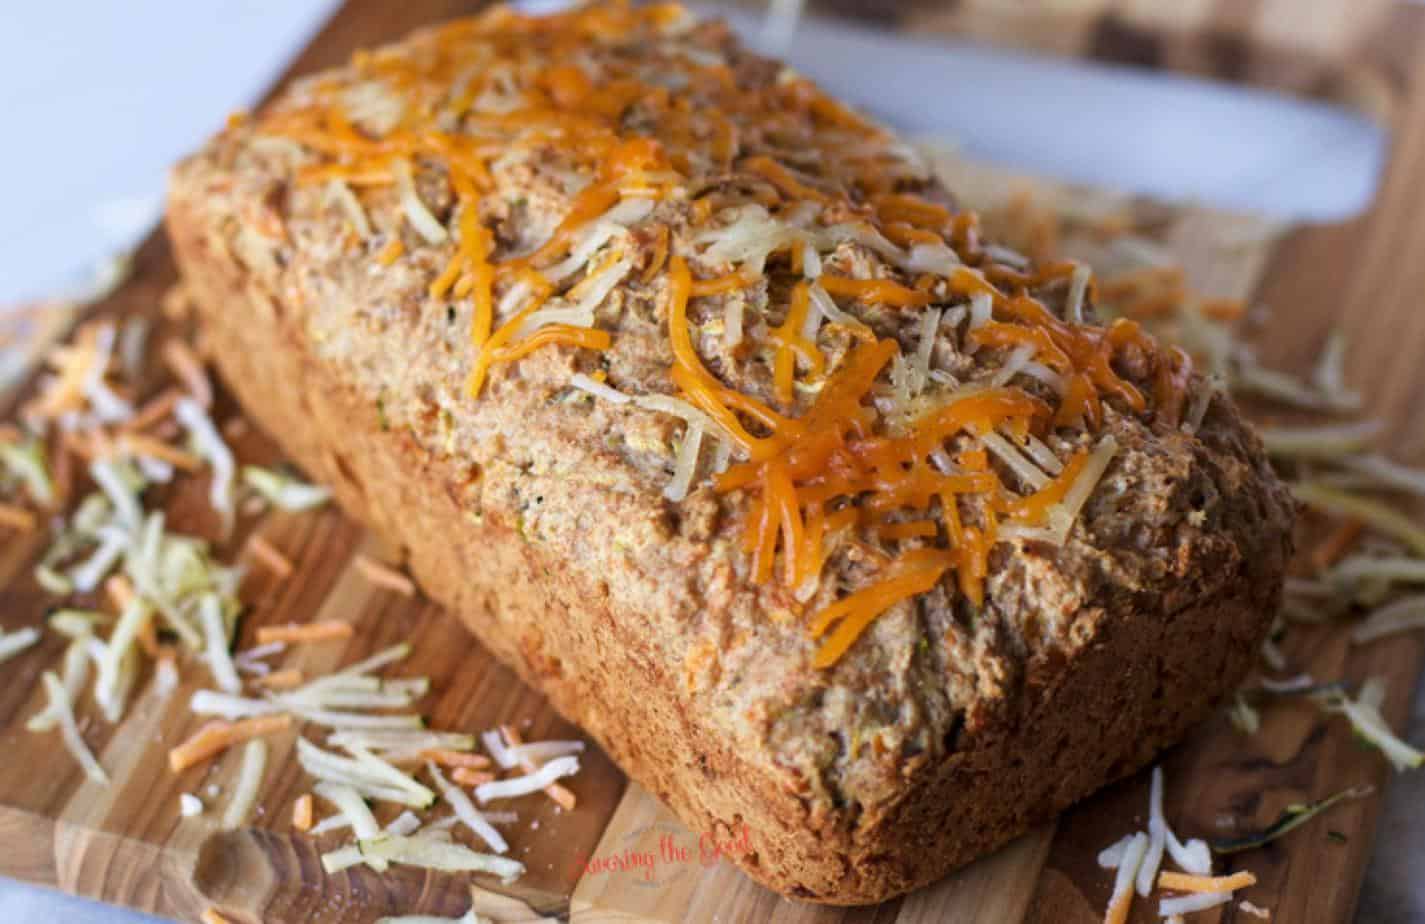
Get to know me

as seen in:

Logos of Hersheyland, ABC News, and Good Day PA are showcased in a seamless row, providing a snapshot of popular brands.

Hersheyland Nightline Good Day Pa!

The vibrant design showcases the iconic logos of Pinterest, Rachael Ray, and Jell-O set against a bold red background. Sorry, the provided description doesn't offer enough detail to suggest important SEO keywords.

Pinterest Rachael JELL-O

Black Panther Cocktail 💜

Inspired by the advanced technology of Wakanda and the flavors of the region of Uganda, my Black Panther Cocktail inspiration will have you toasting Wakanda Forever. The Black Panther cocktail introduces you to molecular gastronomy, a culinary technique the residence of Wakanda were sure to embrace. 

Inspired by the advanced technology of Wakanda and the flavors of the region of Uganda, my Black Panther Cocktail inspiration will have you toasting Wakanda Forever. The Black Panther cocktail introduces you to molecular gastronomy, a culinary technique the residence of Wakanda were sure to embrace.

Panther Cocktail inspiration will have you toasting Wakanda Forever.

If you love this cocktail as much as I do you will want to try my spicy peach bourbon smash cocktail. While you sip read up on Thor: Ragnarok easter eggs and fun facts.

Inspired by the advanced technology of Wakanda and the flavors of the region of Uganda, my Black Panther Cocktail inspiration will have you toasting Wakanda Forever. The Black Panther cocktail introduces you to molecular gastronomy, a culinary technique the residence of Wakanda were sure to embrace. 

 Molecular Gastronomy Spherification

We are going to use molecular gastronomy to turn Gin into pearls. Yes, eadible pearls of Gin that pop in your mouth. I believe that THIS is how the mixologists of Wakanda would be garnishing their cocktails. Using science to go beyond what was being done.

As with any scientific procedure, exact measurements are important. So for this part of the procedure we are going to weigh the ingredients. Yes, with a scale. Preferably a scale that can be set to grams

Measure out:

  • 2g sodium alginate
  • 125g (about ½ C) water
  1. Blend it with an immersion blender until completely incorporated.
  2. Allow to rest for an hour or until the bubbles have dispersed and the liquid is clear.
Inspired by the advanced technology of Wakanda and the flavors of the region of Uganda, my Black Panther Cocktail inspiration will have you toasting Wakanda Forever. The Black Panther cocktail introduces you to molecular gastronomy, a culinary technique the residence of Wakanda were sure to embrace. 
Note: this photo is just after the emulsification.
Inspired by the advanced technology of Wakanda and the flavors of the region of Uganda, my Black Panther Cocktail inspiration will have you toasting Wakanda Forever. The Black Panther cocktail introduces you to molecular gastronomy, a culinary technique the residence of Wakanda were sure to embrace. 

Coloring the spheres:

For a 2 color option, Blue for Vibranium and Purple for Purple for the Heart-Shaped Herb.

In this case I am using ¼ cup of gin with blue food coloring in one bowl and ¼ cup in Gin with purple food coloring.

Inspired by the advanced technology of Wakanda and the flavors of the region of Uganda, my Black Panther Cocktail inspiration will have you toasting Wakanda Forever. The Black Panther cocktail introduces you to molecular gastronomy, a culinary technique the residence of Wakanda were sure to embrace. 

Calcium Chloride Bath

  • 3g calcium chloride
  • 2 cups water

Combine the calcium chloride and the water until the calcium chloride is dissolved.

Inspired by the advanced technology of Wakanda and the flavors of the region of Uganda, my Black Panther Cocktail inspiration will have you toasting Wakanda Forever. The Black Panther cocktail introduces you to molecular gastronomy, a culinary technique the residence of Wakanda were sure to embrace. 

Spheres

After most of the bubbles have dispersed from the sodium alginate mixture, add a small quantity (perhaps ⅛th - ¼) to the tinted Gin.

Mix with a spoon or small whisk.

In my opinion it should look like Jello that has not fully set.

Inspired by the advanced technology of Wakanda and the flavors of the region of Uganda, my Black Panther Cocktail inspiration will have you toasting Wakanda Forever. The Black Panther cocktail introduces you to molecular gastronomy, a culinary technique the residence of Wakanda were sure to embrace. 

Gin Spheres

Load some of the Gin mixture into a dropper, test.

If the drop disperses on the surface of the bath, clean it off the surface, add more of the alginate mixture to the tinted Gin and try again.

Once the spheres start to hold together, you are good to go. The longer the sphere sits in the bath, the more the alginate and calcium will react so you'll get thicker walls.

purple gin spheres

Allow them to set for 1-3 minutes, depending on how thick you want the outer membrane.

Looking for another Marvel inspired cocktail? Try this Marvel Avengers Chambord cocktail, or leave it non-alcoholic!

Inspired by the advanced technology of Wakanda and the flavors of the region of Uganda, my Black Panther Cocktail inspiration will have you toasting Wakanda Forever. The Black Panther cocktail introduces you to molecular gastronomy, a culinary technique the residence of Wakanda were sure to embrace. 

Remove from the bath with a strainer or a slotted spoon.

Inspired by the advanced technology of Wakanda and the flavors of the region of Uganda, my Black Panther Cocktail inspiration will have you toasting Wakanda Forever. The Black Panther cocktail introduces you to molecular gastronomy, a culinary technique the residence of Wakanda were sure to embrace. 

Wash them off in clean water.

Inspired by the advanced technology of Wakanda and the flavors of the region of Uganda, my Black Panther Cocktail inspiration will have you toasting Wakanda Forever. The Black Panther cocktail introduces you to molecular gastronomy, a culinary technique the residence of Wakanda were sure to embrace. 

Here are the blue Vibranium gin spheres.

Inspired by the advanced technology of Wakanda and the flavors of the region of Uganda, my Black Panther Cocktail inspiration will have you toasting Wakanda Forever. The Black Panther cocktail introduces you to molecular gastronomy, a culinary technique the residence of Wakanda were sure to embrace. 

Looks like caviar!

The spheres can be made ahead of time but are best made at time of cocktail creation.

Looking for a meal inspired  by The Black Panther movie? Check out what Media Medusa put together.  The Purr-fect Black Panther Dinner Menu and Recipes.

lemon and rosemary in a cocktail shaker

Black Panther Cocktail Ingredients:

  • Rosemary sprig
  • Lemon slice
  • 2 ounces Limoncello
  • 2 ounces Gin
  • Ginger beer
  • Ice
  • Vibranium spheres
  • PurpleHeart-Shaped Herb spheres
  • Test Tube

How to make at Black Panther Cocktail:

  1. Muddle a slice of lemon and a sprig of rosemary in the bottom of a cocktail shaker.
  2. Fill the shaker ½ way with ice.
  3. Add 2 ounces of Limoncello and 2 ounces of Gin.
  4. Shake, hard.
  5. Strain over ice.
  6. Top with Ginger Beer and garnish with a slice of lemon and a test tube filled with gin spheres.
  7. Garnish with a spoonful of spheres

Test Tubes

I found that filling the test tube ½ with gin spheres and ½ with gin or ginger beer will help release the spheres from the test tube.

Enjoy and toast to Wakanda Forever!

A vibrant collection of images showcasing colorful rainbow cocktails.

Get my RAINBOW COCKTAILS eBook!

Drink the Rainbow! Here are 6 cocktails that have you sipping a hand-crafted adult drink in each color of the rainbow.

Purchase

Don't lose this recipe! Enter your email below and we will email this recipe to you, plus more yummy recipes weekly.

Inspired by the advanced technology of Wakanda and the flavors of the region of Uganda, my Black Panther Cocktail inspiration will have you toasting Wakanda Forever. The Black Panther cocktail introduces you to molecular gastronomy, a culinary technique the residence of Wakanda were sure to embrace. 

Black Panther Cocktail

Inspired by the advanced technology of Wakanda and the flavors of the region of Uganda, my Black Panther Cocktail inspiration will have you toasting Wakanda Forever. The Black Panther cocktail introduces you to molecular gastronomy, a culinary technique the residence of Wakanda were sure to embrace
5 from 3 votes
Print Rate
Course: Drinks - Non Alcoholic
Cuisine: American
Prep Time: 1 hour hour
Cook Time: 5 minutes minutes
Total Time: 1 hour hour 5 minutes minutes
Servings: 1
Calories: 614
Author: Sarah Mock

Ingredients

125g (about ½ C) water

  • ½ Cup Gin

Lemon slice

  • 2 Ounces Limoncello
  • 2 Ounces Gin
Follow Savoring The Good On PinterestFollow @SavoringTheGood or tag #STGRecipes!

Instructions

  • Blend it with an immersion blender until completely incorporated. Allow to rest for an hour or until the bubbles have dispersed and the liquid is clear.
  • For a 2 color option, Blue for Vibranium and Purple for Purple for the Heart-Shaped Herb. In this case I am using ¼ cup of gin with blue food coloring in one bowl and ¼ cup in Gin with purple food coloring.
  • Combine the calcium chloride and the water until the calcium chloride is dissolved.
  • After most of the bubbles have dispersed from the sodium alginate mixture, add a small quantity (perhaps ⅛th - ¼) to the tinted Gin. Mix with a spoon or small whisk. In my opinion it should look like Jello that has not fully set.
  • Load some of the Gin mixture into a dropper, test. If the drop disperses on the surface of the bath, clean it off the surface, add more of the alginate mixture to the tinted Gin and try again. Once the spheres start to hold together, you are good to go. The longer the sphere sits in the bath, the more the alginate and calcium will react so you'll get thicker walls.
  • Remove from the bath with a strainer or a slotted spoon.
  • Wash them off in clean water.
  • Muddle a slice of lemon and a sprig of rosemary in the bottom of a cocktail shaker.
  • Fill the shaker ½ way with ice. Add 2 ounces of Limoncello and 2 ounces of Gin. Shake, hard.
  • Strain over ice. Top with Ginger Beer and garnish with a slice of lemon and a test tube filled with gin spheres. Garnish with a spoonful of spheres
  • I found that filling the test tube ½ with gin spheres and ½ with gin or ginger beer will help release the spheres from the test tube.
Want to share when you made this recipe?Follow @SavoringTheGood & tag #STGRecipes!
Nutrition Facts
Black Panther Cocktail
Serving Size
 
1
Amount per Serving
Calories
614
% Daily Value*
Sodium
 
2
mg
0
%
Potassium
 
4
mg
0
%
Carbohydrates
 
22
g
7
%
Sugar
 
22
g
24
%
* Percent Daily Values are based on a 2000 calorie diet.
**Nutritional facts are just estimates. Please utilize your own brand nutritional values to double check against our estimates.
Like this recipe card? Want one for your site?Check out WP Recipe Maker!

Sarah Mock of savoringthegood.com headshot 2022

I am Sarah Mock. Welcome!

Sarah Mock is a classically trained Chef and a graduate of Johnson & Wales University. A culinary blogger for 17 years, Sarah helps the home cook prepare her recipes with professional results.

Get to know me

as seen in:

Logos of Hersheyland, ABC News, and Good Day PA are showcased in a seamless row, providing a snapshot of popular brands.

Hersheyland Nightline Good Day Pa!

The vibrant design showcases the iconic logos of Pinterest, Rachael Ray, and Jell-O set against a bold red background. Sorry, the provided description doesn't offer enough detail to suggest important SEO keywords.

Pinterest Rachael JELL-O

How to Make a Lemon Peppermint Stick

Lemon peppermint stick is a tart, sweet treat made by pushing a soft, semi-porous peppermint candy into a halved lemon and sipping the juice up through it like a straw. Also called a Baltimore lemon stick or Flower Mart lemon peppermint stick, this is a Baltimore tradition I have put together for summer fairs, fundraisers, and block parties more times than I can count. It takes less than five minutes to assemble, needs zero cooking, and it is one of the easiest treats you can sell at a fundraiser table for real profit.

Lemon peppermint stick

This treat is tied to Baltimore's Flower Mart, an outdoor festival in Mount Vernon that dates back to 1911. The earliest mentions of the lemon stick go back to the 1920s, and the mart has sold thousands of them every spring since; early versions used a thin, candy-cane style stick before vendors switched to the thick, soft peppermint stick we use today. Around Baltimore, you will hear this treat called a lemon peppermint stick, a Baltimore lemon stick, or just a lemon stick, no "peppermint" required, at church fairs, block parties, and school fundraisers all summer long.

Speaking of summer, you are going to want to check out these easy crockpot meals to make your beach vacation easier.

lemons and king leo peppermint sticks

Ingredients:

This is about as short an ingredient list as you will find on this site: two items, and one of them has a couple of brand options worth knowing about before you buy.

Recipe Card?

To find the full printable recipe with specific measurements and directions CLICK HERE to go to the recipe card.

king leo peppermint sticks in blue tin container
  • Soft Peppermint stick King Leo Tin, King Leo Box, Bob's Sweet Stripes (bag)
  • Lemon - whole

Soft peppermint stick, this needs to be the semi-porous, soft style of peppermint candy, not a hard candy cane. The porous body is what lets the stick pull lemon juice up like a straw; a hard candy cane will just sit there.

Lemon, pick one that feels heavy for its size. A heavier lemon has more juice inside it, and more juice means your lemon stick lasts longer before it dries out at the fair table.

Where to find soft peppermint sticks

I buy the King Leo soft peppermint sticks on Amazon because I cannot find them locally. Here is what changes if you swap the packaging or the brand.

  • King Leo Tin vs. King Leo Box: the candy inside is identical; only the packaging changes. The box is usually cheaper, but I have had boxes ship in July with at least one stick snapped in half. I buy the tin specifically because the individually wrapped sticks survive shipping and summer humidity far better than a box does. If you are buying these in person at a local shop instead of having them mailed, the box is fine and saves you a couple of dollars.
  • Bob's Sweet Stripes (bag): this is the other widely available soft peppermint stick, sold in a bag rather than a tin or box. The candy itself is very similar in softness and porosity. I have used both, and the brand does not change your result here; buy whichever one you can actually get your hands on.
  • A regular candy cane: I get asked this every summer, and the answer is no. A traditional hard candy cane is not porous enough to pull juice up through it, no matter how long you leave it sitting in the lemon. You need the soft, semi-porous stick style for this to work at all.

How to Make a Lemon Peppermint Stick

Four steps, no cooking, and you can be sipping in under five minutes.

lemons sliced in half on a bamboo cutting board
  1. Slice the lemon in half. Cut a whole lemon in half around its circumference, not top to bottom. A short peppermint stick sits better in a full half-lemon than in a thin top slice, and if you are making these for a fundraiser, two halves means two treats to sell instead of one.
  2. Cut a small X in the center. Use a paring knife to cut a small X, about half an inch deep, into the flesh at the center of each lemon half. You are opening a pocket for the candy, not juicing the lemon, so keep the cut shallow and centered.
  3. Press the peppermint stick into the lemon. Push the peppermint stick straight down into the X. You will feel it sink into the pulp as the lemon segments give slightly around it; that resistance is normal and means it is seated well.
  4. Sip. Suck the juice up through the peppermint stick like a straw. The porous candy pulls the lemon juice up as you drink, and you will watch the stick turn from white to pink to red as the coating dissolves. If nothing is coming up after a few tries, bite off the very tip of the stick; that opens the porous center enough to start the pull, and the rest works on its own from there.

Frequently asked questions, answers and tips:

While I try to share all the information you need to make this recipe in your home with restaurant-quality results, there still may be a question or two. Or these are questions I have received from the community about this recipe. I do my best to answer them as clearly as I can. I hope this helps.

king leo peppermint stick in a cut lemon
Why is the juice not going up the peppermint stick?

Occasionally you might have to bit the tip off of the peppermint stick.The juice from the lemon will start to flow and you are able to suck it up the peppermint stick.

What kind of peppermint stick is used?

The peppermint sticks are not a traditional candy cane peppermint stick. This candy stick is semi-porous.

Sarah Mock of savoringthegood.com headshot 2022

Sarah's Culinary Insight

  • I have shipped and sold both the King Leo tin and the King Leo box for our neighborhood's summer fundraiser more summers than I can count, and the tin is the one that survives a July shipment. Boxes have arrived with a broken stick almost every time.
  • The peppermint stick has to be the soft, semi-porous style. A hard candy cane will not pull juice, no matter how long you leave it sitting in the lemon.
  • Skip the bite-the-tip trick and you can end up sucking on a sealed stick for a full minute wondering why nothing is happening. Bite it, and the juice starts moving in seconds.
  • A lemon that feels heavy for its size has more juice packed inside, which means a lemon stick that lasts longer before it dries out at the table.
  • These do not hold well once assembled. Cut and insert the stick right before serving; a lemon stick that sits more than an hour gets mushy at the cut and the candy starts bleeding color into the lemon before anyone takes a sip.

Lemon Peppermint Stick

Lemon peppermint stick also known as Baltimore lemon stick or FlowerMart lemon peppermint stick. Lemon peppermint stick is a Baltimore tradition that a must for summer fairs, fundraisers, backyard and block parties.
No ratings yet
Print Pin Rate
Course: Snacks
Cuisine: American
Prep Time: 2 minutes minutes
Cook Time: 1 minute minute
Total Time: 3 minutes minutes
Servings: 1
Calories: 72
Author: Sarah Mock

Ingredients

  •  
    1 whole Lemon cut in half
  • Blue King Leo tin with a lion logo and 2 Soft peppermint stick
US Customary - Metric
Follow Savoring The Good On PinterestFollow @SavoringTheGood or tag #STGRecipes!

Instructions

  • Slice a lemon in half around the circumference. Some people cut the top third off but I find that the short sticks do better in half a lemon. Also, if this is a fundraiser you have a better profit margin if you can sell 1 vs. the one.
    1 whole Lemon
  • Use a little knife to make a small X in the center of the lemon and press the soft peppermint stick into the center.
    2 Soft peppermint stick

Notes

My tip if you are preparing them for a crowd: slice the lemons and let everyone place their own peppermint stick into the lemon.
Why is the juice not going up the peppermint stick?
Occasionally you might have to bit the tip off of the peppermint stick.The juice from the lemon will start to flow and you are able to suck it up the peppermint stick.
  •  
Want to share when you made this recipe?Follow @SavoringTheGood & tag #STGRecipes!
Nutrition Facts
Lemon Peppermint Stick
Serving Size
 
2
Amount per Serving
Calories
72
% Daily Value*
Fat
 
1
g
2
%
Saturated Fat
 
1
g
6
%
Sodium
 
2
mg
0
%
Potassium
 
149
mg
4
%
Carbohydrates
 
20
g
7
%
Sugar
 
9
g
10
%
Protein
 
1
g
2
%
* Percent Daily Values are based on a 2000 calorie diet.
**Nutritional facts are just estimates. Please utilize your own brand nutritional values to double check against our estimates.
Like this recipe card? Want one for your site?Check out WP Recipe Maker!

Sarah Mock of savoringthegood.com headshot 2022

I am Sarah Mock. Welcome!

Sarah Mock is a classically trained Chef and a graduate of Johnson & Wales University. A culinary blogger for 17 years, Sarah helps the home cook prepare her recipes with professional results.

Get to know me

as seen in:

Logos of Hersheyland, ABC News, and Good Day PA are showcased in a seamless row, providing a snapshot of popular brands.

Hersheyland Nightline Good Day Pa!

The vibrant design showcases the iconic logos of Pinterest, Rachael Ray, and Jell-O set against a bold red background. Sorry, the provided description doesn't offer enough detail to suggest important SEO keywords.

Pinterest Rachael JELL-O

Slow Cooker Cilantro Lime Chicken Recipe

cilantro lime chicken slow cooker with rice and lime garnishes on a plate

This is an easy and delicious chicken recipe if you love cilantro. With just 10 minutes of prep, this recipe is perfect for weeknight dinners is full of slow-cooked creamy chicken flavors your family will love.

cilantro lime chicken slow cooker with rice and lime garnishes on a plate

Serve this meal with Roasted Chili-Corn Salsa and chips, or some salsa verde and don't forget a beverage! Adults would love a strawberry rhubarb margarita or my spicy peach bourbon smash.

Slow Cooker Cilantro Lime Chicken Ingredients:

cilantro lime chicken ingredients in bowls with text overlays

Recipe Card?

To find the full printable recipe with specific measurements and directions CLICK HERE to go to the recipe card.

Notes on the ingredients

This easy slow cooker recipe calls for boneless, skinless chicken thighs. I like to use bone-in dark meat chicken because they are full of flavor and often they can be found on sale at my local grocery store. Other cuts of meat such as chicken breasts can be used but I find the greatest depths of flavor come from using dark meat chicken. If you find chicken breasts on sale this week grab some to make my crockpot chicken enchilada casserole .

serving of cilantro lime chicken, shredded on a bed of white rice sauce on the side , cilantro and lime garnish

Crockpot Cilantro Lime Chicken Instructions:

  1. Make a dry rub with the chili powder, cumin, and salt. spices covering skinless boneless chicken thighs
  2. Rub the chicken with the spice mixture. searing chicken thighs in a skillet
  3. Add the olive oil to a heavy bottom pan and sear the chicken seasoned, seared chicken thighs in a small slow cooker with chicken stock added
  4. Place the chicken in the crockpot/slow cooker.
  5. Add the 2 cups of chicken broth and lime juice.
  6. Cook on high for 3-4 hours or on low for 6-8.
  7. Remove chicken (be careful not to let it fall apart!) It is so tender!!!!
  8. Mix together the heavy cream, cornstarch and water.
  9. Add the chopped cilantro to the slow cooker.
  10. Add the cream/cornstarch mixture to the slow cooker. Slow Cooker Cilantro Lime Chicken
  11. Replace the chicken back to the slow cooker.
  12. Allow the sauce to thicken for 20 minutes.
  13. Serve over rice or starch of your choosing!

Did you make this recipe?

Do you have feedback that would be helpful to others? If so can help this small business owner by leaving a rating and a review in the comments section? Thank you for being part of the Savoring The Good Community. ~ Sarah

A large black and silver Crockpot filled with mixed vegetables and sauce is set to the "Low" heating option.

Sarah's recommendation

7 qt. Crock-Pot

Perfect for Chicken, Roasts and Meals for 8+ people.

Buy on Amazon

Oven Instructions:

horizontal image of cilantro lime chicken on a bed of rice with sauce
  1. Preheat your oven to 350.
  2. Make a dry rub with the chili powder, cumin, and salt.
  3. Rub the chicken with the spice mixture.
  4. Add the olive oil to a heavy bottom dutch oven or cast iron pan and sear the chicken
  5. Add the 2 cups of chicken broth and lime juice.
  6. Bake for 60 minutes, with the cover on the pot. 
  7. Remove the pot from the oven.
  8. Transfer the chicken to a clean plate. 
  9. Mix together the heavy cream, cornstarch and water.
  10. Add the chopped cilantro to the pot.
  11. Add the cream/cornstarch mixture to the pot.
  12. Replace the chicken back to the pot.
  13. Place the pot on the stove over medium heat and allow the sauce to thicken.
  14. Serve over rice or starch of your choosing!

Why you should make slow cooker cilantro lime chicken:

  • With just a few minutes of prep and then a few hours in the crock pot slow cooker your slow cooker cilantro lime chicken dinner is ready for you and your family.
  • A little bit of prep in the morning will give you a delicious meal when you get home.
  • I was never a fan of chicken thighs until this recipe. I know that the thighs are full of flavor and are a favorite for a lot of people but I was just not that into them. Until this recipe. If any recipe is going to make me go from the light side to the dark side of meat this is the recipe that is going to do that.

What do you serve with cilantro lime chicken?

I will serve cilantro lime chicken over white rice but other delicious options would be spaetzle, gnocchi, wide noodles or even cauliflower rice. Serve with Roasted Chili-Corn Salsa and chips, or some salsa verde and don't forget a beverage! Adults would love a strawberry rhubarb margarita or my spicy peach bourbon smash.

What can I make with this instant pot cilantro lime chicken recipe for a delicious dinner?

You can make super delicious cilantro lime chicken burrito bowl.

For a refreshing twist, whip up a cilantro lime chicken salad, incorporating the chicken with fresh greens and a zesty dressing.

If you're looking to diversify, try cilantro lime chicken tacos with all the fixings, and don't forget to add a dollop of sour cream for that perfect finishing touch.

Cilantro lime chicken taco recipe

  1. Shred the chicken using two forks.
  2. Season shredded chicken with taco seasoning.
  3. In warm tortillas, assemble the chicken tacos with the seasoned chicken, black beans, sliced avocado, and a drizzle of cilantro lime sauce.

Can I use chicken breast when I make cilantro lime chicken?

You can use boneless skinless chicken breasts for your cilantro lime chicken if you can't use chicken thighs.

As a meal prep option, consider trying the instant pot version. Just ensure to adjust cooking times accordingly when using chicken breasts instead of thighs.

Can I put crock pot cilantro lime chicken in the freezer?

Yes, you can freeze cilantro lime chicken by placing it in a freezer bag. Ensure the chicken is properly sealed in the bag before freezing. When ready to use, thaw the frozen chicken in the refrigerator before reheating.

Recipe FAQs and tips

Can cilantro lime chicken be cooked in the oven?

See the instructions above. If you do not have a slow cooker, this recipe will work well in the oven. You just need a dutch oven or a large pot with an oven safe lid. A cast-iron pot will work well. 

Should I slow cook chicken on high or low?

It is generally recommended to slow cook chicken on the low setting. Cooking on low gives you evenly-cooked and tender chicken without the risk of drying out.

horizontal image of cilantro lime chicken on a bed of rice with sauce

Cilantro Lime Chicken

This is an easy and delicious cilantro lime chicken recipe. Perfect for weeknight dinners, my cilantro lime chicken crockpot recipe has simple ingredients and is full of flavors your family will love.
4.87 from 15 votes
Print Pin Rate
Course: Crock-Pot Recipes
Cuisine: American
Prep Time: 10 minutes minutes
Cook Time: 4 hours hours
Total Time: 4 hours hours 10 minutes minutes
Servings: 4
Calories: 560
Author: Sarah Mock

Ingredients

  •  
    2 pounds boneless skinless chicken thighs
  • A 7.5 oz container of McCormick Dark Chili Powder with a red lid and a label stating 1 Tablespoon chili powder
  • A plastic container of McCormick ground cumin with a red lid, featuring a yellow label that says 1 Teaspoon cumin
  • A bottle of McCormick smoked paprika with a red cap and label, featuring images of paprika peppers and text highlighting its rich, sweet flavor and non-GMO status-a perfect spice to add smoky depth to your favorite slowcooker sausage casserole.½ Teaspoon Paprika
  • A Morton Salt container with a blue label featuring a girl in a yellow dress holding an umbrella, with salt pouring out of a container-an essential ingredient for perfectly seasoning dishes like Chicken Cordon Bleu.2 Teaspoon salt
  • A 500ml bottle of California Olive Ranch Global Blend Extra Virgin Olive Oil with green and blue labeling, indicating a blend from Argentina, Portugal, Chile, and California-perfect for drizzling over your favorite shrimp avocado salad.2 Tablespoons olive oil
  •  
    2 Cups chicken broth
  • A green plastic bottle of Realime 100% lime juice with images of limes on the label and a green cap.¼ Cup lime juice
  • heavy cream bottle.½ Cup Heavy Cream
  • A yellow canister of Rumford Corn Starch with a red lid, labeled non-GMO, gluten free, 6.5 oz (184g), and featuring the Non-GMO Project Verified logo.1 tablespoon cornstarch mixed
  •  
    1 tablespoon cold water
  •  
    2 Tablespoons Cilantro chopped
Follow Savoring The Good On PinterestFollow @SavoringTheGood or tag #STGRecipes!

Instructions

  • Make a dry rub with the chili powder, cumin, and salt.
  • Rub the chicken with the spice mixture.
  • Add the olive oil to a heavy bottom pan and sear the chicken
  • Place the chicken in the crockpot/slow cooker.
  • Add the 2 cups of chicken broth and lime juice.
  • Cook on high for 3-4 hours or on low for 6-8.
  • Remove the chicken (be careful not to let it fall apart!) It is so tender!!!!
  • Mix together the heavy cream, cornstarch and water.
  • Add the chopped cilantro to the slow cooker.
  • Add the cream/cornstarch mixture to the slow cooker.
  • Replace the chicken back to the slow cooker.
  • Allow the sauce to thicken for 20 minutes.
Want to share when you made this recipe?Follow @SavoringTheGood & tag #STGRecipes!
Nutrition Facts
Cilantro Lime Chicken
Serving Size
 
1
Amount per Serving
Calories
560
% Daily Value*
Fat
 
36
g
55
%
Saturated Fat
 
13
g
81
%
Polyunsaturated Fat
 
21
g
Cholesterol
 
313
mg
104
%
Sodium
 
1989
mg
86
%
Carbohydrates
 
6
g
2
%
Sugar
 
2
g
2
%
Protein
 
57
g
114
%
* Percent Daily Values are based on a 2000 calorie diet.
**Nutritional facts are just estimates. Please utilize your own brand nutritional values to double check against our estimates.
Like this recipe card? Want one for your site?Check out WP Recipe Maker!

Originally published on Apr 15, 2016.


Sarah Mock of savoringthegood.com headshot 2022

I am Sarah Mock. Welcome!

Sarah Mock is a classically trained Chef and graduate of Johnson & Wales University. A culinary blogger for 15 years Sarah helps the home cook prepare her recipes with professional results.

Get to know me

as seen in:

Logos of Hersheyland, ABC News, and Good Day PA are showcased in a seamless row, providing a snapshot of popular brands.

Hersheyland Nightline Good Day Pa!

The vibrant design showcases the iconic logos of Pinterest, Rachael Ray, and Jell-O set against a bold red background. Sorry, the provided description doesn't offer enough detail to suggest important SEO keywords.

Pinterest Rachael JELL-O


Mexican Corn Dip Recipe

Easy Mexican Corn Dip in a red rimmed bowl with chips

Mexican corn dip has all the flavors of Mexican street corn, is a family favorite and usually disappears faster than it should. It's perfect for picnics, game day, and potlucks. This easy appetizer features Mexicorn, roasted green chilies as well as shredded cheese.

Easy Mexican Corn Dip in a red rimmed bowl with chips

I serve my Mexican corn dip with Fritos but any scoop-able chip will work.  If you like a dip appetizer or snack, you will want to make pizza dip on the grill! If you want to dip more chips scoop up my favorite black bean salsa recipe.

This dip is great for not only football games and potlucks but for munching on while watching Netflix.

Mexicorn Dip Ingredients

chives cut on a bamboo board with knife

Recipe Card?

To find the full printable recipe with specific measurements and directions CLICK HERE to go to the recipe card.

How to make Mexican Corn dip

Easy Mexican Corn Dip Recipe ingredients in a bowl
  1. Open and drain the Mexi-corn.
  2. In a large bowl, combine all the ingredients. The jalapeno pepper is completely optional, but I highly recommend it.

Tips for making savory Mexican corn dip:

Easy Mexican Corn Dip on a frito
  • The Mexi-corn is found next to the regular canned corn in the canned vegetable aisle. 
  • Don't forget to drain the water off of the Mexi-corn. The dip will be too 'loose' if you don't drain the water off of the corn.
  • Refrigerate the dip for at least an hour. Overnight is best but it is rare I can wait that long.

What chips are best with Mexican Corn dip?

mexican corn dip in a bowl surrounded by frito corn chips

I am a huge fan of the Fritos Scoops! The shape is perfect and the corn crunch is the perfect complement to this dip. Also...get the party size bag....you will need it. But if you can't find Fritos Scoops! go for a cup-shaped corn chip. I have done traditional tortilla chips and while they taste good, and will work in a pinch, a corn chip is NEEDED for this recipe.

Truth be told, I don't normally garnish this yummy fiesta corn dip with shredded cheese and extra sliced green onions BUT for the sake of pretty pictures, I did just this once.

Can this dip be made in advance?

When you are prepping for a party or a family event it is always nice to do as much work ahead of time so you can enjoy your guests. Making appetizers, including dips in advance is always a good idea.

It's a great idea to prep this dip in advance to help save you time. I make this dip the night before storing in the refrigerator in a closed container and then giving it a quick stir before placing it in my favorite serving bowl.

Garnish with extra shredded cheese and sliced green onions if you want. 

How long can this dip sit out?

Safe food handling practices are always imperative. Keeping foods chilled is always recommended but there are occasions that room temperature serving is needed.

Dairy based food, such as this dip, can be room temperature for a maximum of 4 hours in its lifetime. If it takes you 10 minutes to make this dip, and the ingredients are room temperature, you now have 3 hours 50 minutes this dip can sit out at room temperature before it can be thrown out. 

If your dip is out at room temperature for more than the recommended time, placing it back in the refrigerator to chill down will not extend the time it can be out in the open. Time does not start over if you rechill the food. 

Is a spicy Mexican corn dip delicious?

Yes, a spicy Mexican corn dip made with Mexican-style corn, hot sauce, red and green peppers, and cayenne pepper can be incredibly delicious.

What can I do with leftover Mexicorn dip?

You can transform your leftover Mexicorn dip into a delightful new dish by incorporating sweet corn, mayo, and bacon. Try looking for a recipe that complements these ingredients.

How can I make a creamy corn dip using this recipe?

For a creamy corn dip that's easy to make, try this appetizer recipe for a perfect creamy texture.

Begin by combining corn kernels with cream cheese, sour cream, and mayonnaise. Season with your favorite herbs and spices, then mix thoroughly to make the dip.

This creamy dip is perfect for serving with tortilla chips, crackers, or veggies.

Easy Mexican Corn Dip in a red rimmed bowl with chips

Easy Mexican Corn Dip Recipe

Mexican corn dip is a family favorite and usually disappears faster than it should. My easy Mexican corn dip recipe features Mexicorn, roasted green chilies as well as shredded cheese.
4.48 from 17 votes
Print Pin Rate
Course: Appetizer Recipe
Cuisine: American
Keyword: mexican corn dip. mexican corn dip recipe
Prep Time: 10 minutes minutes
Cook Time: 1 hour hour
Total Time: 1 hour hour 10 minutes minutes
Servings: 5 cups
Calories: 180
Author: Sarah Mock

Ingredients

  • sour cream.1 Cup Sour Cream
  • A jar of Hellmann's Real Mayonnaise with a blue lid, labeled 1 Cup Mayonnaise
  •  
    2 Cups Shredded Cheddar Cheese
  •  
    5-6 Green Onions chopped
  •  
    1 Jalapeno Pepper minced (optional)
  •  
    1 4 oz. can Roasted Green Chillies chopped
  •  
    2 12 oz. can Mexi-Corn drained
  • A plastic container of McCormick ground cumin with a red lid, featuring a yellow label that says ¾ Teaspoon cumin
  • A bottle of McCormick Garlic Powder with a red lid and green label, featuring the brand logo and ¾ Garlic Powder
  •  
    ¾ creole seasoning
Follow Savoring The Good On PinterestFollow @SavoringTheGood or tag #STGRecipes!

Instructions

  • In a large bowl, combine all the ingredients.
    1 Cup Sour Cream, 1 Cup Mayonnaise, 2 Cups Shredded Cheddar Cheese, 5-6 Green Onions, 1 Jalapeno Pepper, 1 4 oz. can Roasted Green Chillies, 2 12 oz. can Mexi-Corn, ¾ Teaspoon cumin, ¾ Garlic Powder, ¾ creole seasoning
  • The jalapeno pepper is completely optional, but I highly recommend it.
  • The Mexi-corn in found next to the regular canned corn. Don't forget to drain the water off of the Mexi-corn. The dip will be too 'loose' if you don't drain the water off of the corn
  • Allow the dip to chill out in the refrigerator for at least an hour. Over night is best but it is rare I can wait that long.

Notes

Mexican Shrimp Cocktail Garnishes, Optional

  • Hot Sauce
  • Jalapeno, finely diced
  • Tomato, finely diced
Want to share when you made this recipe?Follow @SavoringTheGood & tag #STGRecipes!
Nutrition Facts
Easy Mexican Corn Dip Recipe
Serving Size
 
1 /4 cup
Amount per Serving
Calories
180
% Daily Value*
Fat
 
15
g
23
%
Saturated Fat
 
5
g
31
%
Polyunsaturated Fat
 
9
g
Cholesterol
 
23
mg
8
%
Sodium
 
271
mg
12
%
Carbohydrates
 
9
g
3
%
Sugar
 
2
g
2
%
Protein
 
4
g
8
%
* Percent Daily Values are based on a 2000 calorie diet.
**Nutritional facts are just estimates. Please utilize your own brand nutritional values to double check against our estimates.
Like this recipe card? Want one for your site?Check out WP Recipe Maker!

published Feb 14, 2018


Sarah Mock of savoringthegood.com headshot 2022

I am Sarah Mock. Welcome!

Sarah Mock is a classically trained Chef and graduate of Johnson & Wales University. A culinary blogger for 16 years Sarah helps the home cook prepare her recipes with professional results.
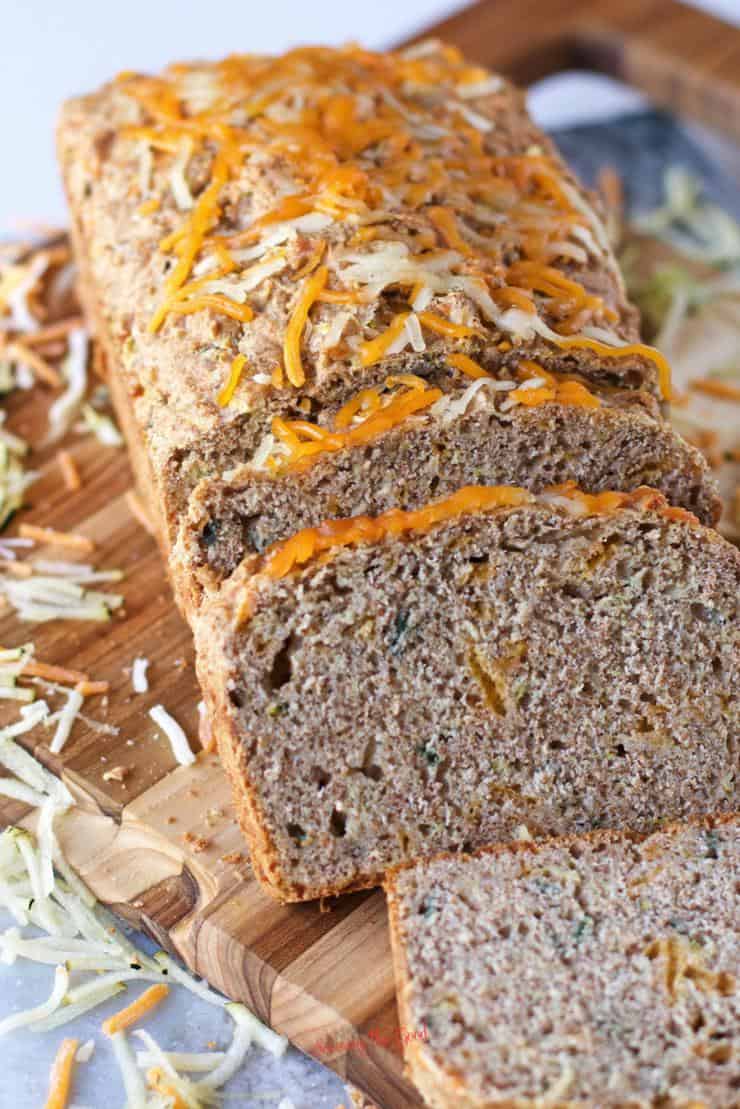
Get to know me

as seen in:

Logos of Hersheyland, ABC News, and Good Day PA are showcased in a seamless row, providing a snapshot of popular brands.

Hersheyland Nightline Good Day Pa!

The vibrant design showcases the iconic logos of Pinterest, Rachael Ray, and Jell-O set against a bold red background. Sorry, the provided description doesn't offer enough detail to suggest important SEO keywords.

Pinterest Rachael JELL-O


Mexican Corn and Chicken Soup (Crockpot Recipe)

crockpot mexican corn soup

This crockpot Mexican corn soup has layers of flavor that include shredded chicken, black beans, creamed corn, Mexican spices as well as a creamy broth. Top this easy slow cooker soup with your choice of fresh squeezed lime, avocado, cilantro, sour cream and jalapeño.

Crockpot Mexican Corn and Chicken Soup

Crockpot Mexican corn and chicken soup is sure to bring your favorite fiesta flavors to your table.

My family loves this soup because it is full of the flavors they love from their favorite Mexican restaurant. Each of my children can customize their soup to their liking with additional topping such as extra cheese, sour cream and avocado. This recipe makes enough to serve my family of five with a serving or two perfect for leftovers or school lunches.

A bowl of crockpot Mexican corn and chicken soup with avocado, cilantro and lime.

Ingredients:

Recipe Card?

To find the full printable recipe with specific measurements and directions CLICK HERE to go to the recipe card.

This crockpot Mexican corn soup has layers of flavor that include shredded chicken, black beans, creamed corn, Mexican spices as well as a creamy broth. Top this easy slow cooker soup with your choice of fresh squeezed lime, avocado, cilantro, sour cream and jalapeño. Crockpot Mexican corn and chicken soup is sure to bring your favorite fiesta flavors to your table. #crockpot #slowcooker #crockpotsoup #mexicanstreetcornchowder #slowcookersoup #soup

How To Make Crockpot Mexican Corn Soup:

This crockpot Mexican corn soup has layers of flavor that include shredded chicken, black beans, creamed corn, Mexican spices as well as a creamy broth. Top this easy slow cooker soup with your choice of fresh squeezed lime, avocado, cilantro, sour cream and jalapeño. Crockpot Mexican corn and chicken soup is sure to bring your favorite fiesta flavors to your table. #crockpot #slowcooker #crockpotsoup #mexicanstreetcornchowder #slowcookersoup #soup
  1. Use a large crockpot for this recipe. Mine is 6 quarts.
  2. Trim the fat off of the breasts.
  3. Add the trimmed chicken, garlic, chicken broth, creamed cans of corn, Mexicorn, drained and rinsed black beans, undrained diced green chiles, chili powder, paprika, and cumin to the crockpot.
  4. Stir well. Cover and cook on high for 3-5 hours or low for 4-6 hours or until the chicken shreds easily.
  5. Remove the chicken and shred. See my instructions on easily shredding chicken in 1 minute.
  6. While shredding the chicken add in the freshly grated cheese and the heavy cream.
  7. Return the shredded chicken and mix. Season to taste with salt and pepper.
  8. Serve with desired toppings: fresh lime, fresh cilantro,  sour cream, or fresh avocado.
crockpot mexican corn soup

Crockpot Mexican Corn and Chicken Soup

This crockpot Mexican corn soup has layers of flavor that include shredded chicken, black beans, creamed corn, Mexican spices as well as a creamy broth. Top this easy slow cooker soup with your choice of fresh squeezed lime, avocado, cilantro, sour cream and jalapeño. Crockpot Mexican corn and chicken soup is sure to bring your favorite fiesta flavors to your table.
4.31 from 13 votes
Print Pin Rate
Course: Soup
Cuisine: Mexican
Keyword: soup
Prep Time: 10 minutes minutes
Cook Time: 4 hours hours
Total Time: 4 hours hours 10 minutes minutes
Servings: 10 servings
Calories: 441
Author: Sarah Mock

Ingredients

  •  
    1 pound boneless skinless chicken breasts
  •  
    2 cloves garlic minced
  •  
    1 Cup Chicken broth
  •  
    2 cans small can creamed corn 14.75 ounces EACH
  •  
    1 can Mexicorn 14.75 ounces
  •  
    1 can black beans 15.5 ounces, drained and rinsed
  •  
    1 can green chiles
  • A 7.5 oz container of McCormick Dark Chili Powder with a red lid and a label stating 2 teaspoons chili powder
  • A bottle of McCormick smoked paprika with a red cap and label, featuring images of paprika peppers and text highlighting its rich, sweet flavor and non-GMO status-a perfect spice to add smoky depth to your favorite slowcooker sausage casserole.½ Teaspoon Paprika
  •  
    1 ¼ Teaspoon ground cumin
  •  
    2 Cups Monterey Jack Cheese freshly grated
  • heavy cream bottle.2 Cups Heavy Cream
  • Two clear acrylic mills-one filled with coarse salt, the other with whole black peppercorns, both topped with metal knobs-stand side by side on a white background, ready to season your favorite dishes like Shrimp Avocado Salad.Salt and pepper
  • A whole, uncut green lime with a textured peel on a white background-the perfect citrus for crafting a classic Gimlet.Optional additions: fresh lime fresh cilantro, sour cream, avocado
Follow Savoring The Good On PinterestFollow @SavoringTheGood or tag #STGRecipes!

Instructions

  • Use a large crockpot for this recipe. Mine is 6 quarts.
  • Trim the fat off of the breasts.
  • Add the trimmed chicken, garlic, chicken broth, creamed cans of corn, Mexicorn, drained and rinsed black beans, undrained diced green chiles, chili powder, paprika, and cumin to the crockpot.
  • Stir well. Cover and cook on high for 3-5 hours or low for 4-6 hours or until the chicken shreds easily.
  • Remove the chicken and shred. See my instructions on easily shredding chicken in 1 minute.
  • While shredding the chicken add in the freshly grated cheese and the heavy cream.
  • Return the shredded chicken and mix. Season to taste with salt and pepper.
  • Serve with desired toppings: fresh lime, fresh cilantro, sour cream, or fresh avocado.
Want to share when you made this recipe?Follow @SavoringTheGood & tag #STGRecipes!
Nutrition Facts
Crockpot Mexican Corn and Chicken Soup
Serving Size
 
1
Amount per Serving
Calories
441
% Daily Value*
Fat
 
29
g
45
%
Saturated Fat
 
17
g
106
%
Trans Fat
 
1
g
Polyunsaturated Fat
 
10
g
Cholesterol
 
115
mg
38
%
Sodium
 
401
mg
17
%
Carbohydrates
 
20
g
7
%
Sugar
 
3
g
3
%
Protein
 
27
g
54
%
* Percent Daily Values are based on a 2000 calorie diet.
**Nutritional facts are just estimates. Please utilize your own brand nutritional values to double check against our estimates.
Like this recipe card? Want one for your site?Check out WP Recipe Maker!

Sarah Mock of savoringthegood.com headshot 2022

I am Sarah Mock. Welcome!

Sarah Mock is a classically trained Chef and graduate of Johnson & Wales University. A culinary blogger for 16 years Sarah helps the home cook prepare her recipes with professional results.
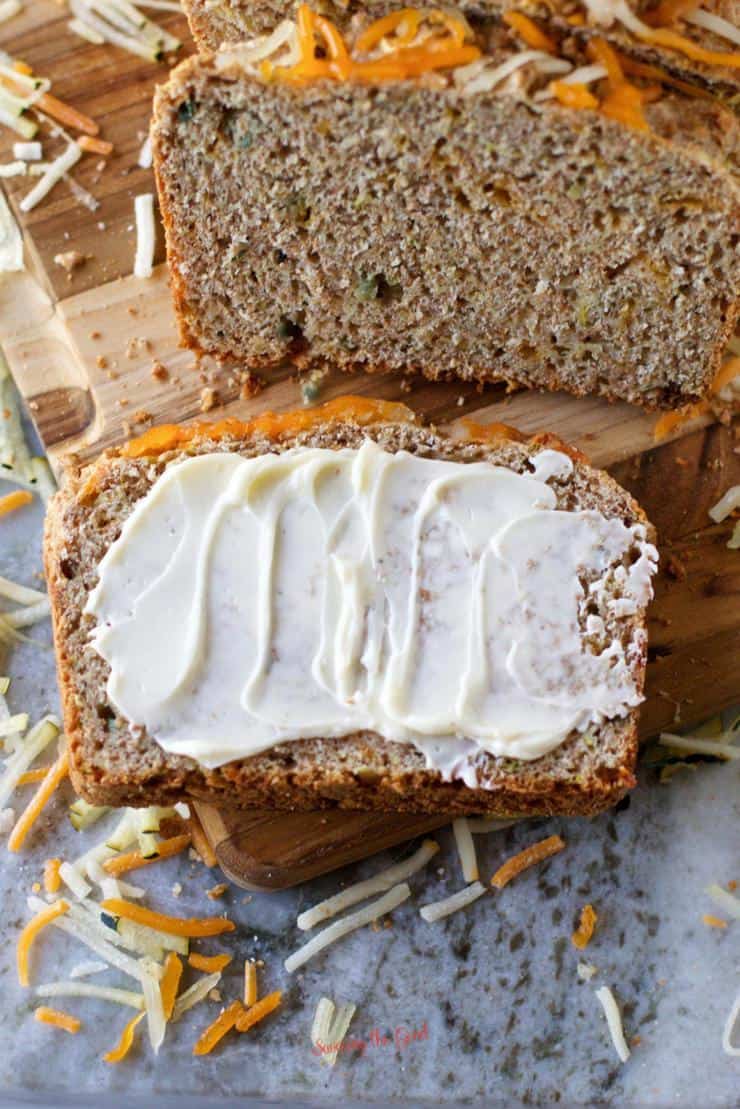
Get to know me

as seen in:

Logos of Hersheyland, ABC News, and Good Day PA are showcased in a seamless row, providing a snapshot of popular brands.

Hersheyland Nightline Good Day Pa!

The vibrant design showcases the iconic logos of Pinterest, Rachael Ray, and Jell-O set against a bold red background. Sorry, the provided description doesn't offer enough detail to suggest important SEO keywords.

Pinterest Rachael JELL-O

Homemade Clotted Cream Recipe Using Sous Vide

Homemade clotted cream is not out of reach in the US. Using non ultra-pasteurized heavy cream and a precision temperature you can achieve thick and creamy, delicious homemade clotted cream. This recipe is a sous vide clotted cream recipe but keep reading to learn how to make homemade clotted cream using the oven method. #sousvide #sousviderecipe #clottedcream #teatime 

Homemade clotted cream is not out of reach in the US. Using non ultra-pasteurized heavy cream and a precision temperature you can achieve thick and creamy, delicious homemade clotted cream. This recipe is a sous vide clotted cream recipe.

Homemade clotted cream

Once you have tried this sous vide recipe you are going to want to try my sous vide recipes for homemade mascarpone cheese and vanilla bean honey. Be sure to check out my complete collection of sous vide recipes.

Homemade Clotted Cream

Keep reading to learn how to make homemade clotted cream using the oven method.

We enjoyed clotted cream for the first time when we took the kids to London this past summer. We stopped by a tea house outside of Windsor Castle so we could have a true tea time. Outside of a castle, how perfect could that be? We were very American and asked way to many questions and I am sure we broke a thousand rules but we enjoyed ourselves and did our best to learn about what tea time in London is about.

The one piece of the tea time that my youngest daughter loved the most, beyond the lemon ginger tea, was the clotted cream. I knew it was hard to find in the US because of the way we pasteurize our dairy products but I was determined to find a way to bring a bit of our trip to London home.

Clotted Cream Ingredients:

  • Non Ultra-Pasteurized Heavy Cream
sous vide Homemade clotted cream

Sous Vide Set Up

This is my sous vide set up. It is a large, wide pot with a rectangle glass dish inside. The dish is resting on water filled mason jars and the water is above the heavy cream line but not over the top of the glass dish.

Everything is covered in plastic wrap to keep evaporation down.

Homemade Clotted Cream Sous Vide

In a large, open dish, pour in 1 pint of non ultra-pasteurized heavy cream. You NEED to read the label and make sure it DOES NOT SAY Ultra-Pasteurized. Depending on your area this might prove to be difficult to find. If you have a local dairy, go see them. Chances are they will have what you are looking for and you are supporting local dairy farms! If you are in a more populated area, go to the fanciest grocery store you can find. They have all the hard to find things.

If you use ultra- pasteurized cream this will NOT work. One more time for the people in the back. If you use ultra- pasteurized cream this will NOT work.

sous vide clotted cream cooking

Set your sous vide to 180 F 82.2 C and place your glass dish in the bath.

I tried to do this in mason jars and it did not produce the yield I was looking for.

The more surface area you have, the better your yields will be.

Set your timer for 12 hours.

YES.

12 hours.

I am sure one upon a time, long ago this was done in a brick oven as it cooled over night or on top of a stove with residual heat. BUT I don't have either of those. I have Sous Vide and this is what is working for me.

clotted cream ready to be cooled

After the 12 hours in the sous vide bath, remove the clotted cream pan and place in the refrigerator to chill completely.

I found an additional 12 hours is needed for the crust of clotted cream to form and chill completely.

clotted cream on a spoon

Homemade Clotted Cream

Here we are almost 24 hours later and when the crust is pulled back.

The yellow bits are much like the texture of butter.

under side of clotted cream

The back side is super creamy.

I found that 1 pint of heavy cream yielded about 4 ounces of homemade clotted cream. I am sure results vary.

Homemade clotted cream is not out of reach in the US. Using non ultra-pasteurized heavy cream and a precision temperature you can achieve thick and creamy, delicious homemade clotted cream. This recipe is a sous vide clotted cream recipe but keep reading to learn how to make homemade clotted cream using the oven method. #sousvide #sousviderecipe #clottedcream #teatime 

Buttermilk

Don't toss this!!! No. Don't do it. Use the leftover buttermilk to make scones. MMM. Yummy scones with homemade clotted cream.

Homemade clotted cream on a gold spoon

Clotted cream in the oven

The entire process CAN be done in your oven. Set the temperature as low as possible, 180 if at all possible.

Place the wide pan, preferably a 9x12 pan in the oven and cook for 12 hours.

Proceed as above.

The benefit of using sous vide is that there is less energy used and your kitchen is not as hot.

Homemade clotted cream is not out of reach in the US. Using non ultra-pasteurized heavy cream and a precision temperature you can achieve thick and creamy, delicious homemade clotted cream. This recipe is a sous vide clotted cream recipe but keep reading to learn how to make homemade clotted cream using the oven method. #sousvide #sousviderecipe #clottedcream #teatime 

Homemade Clotted Cream Recipe Using Sous Vide

Homemade clotted cream is not out of reach in the US. Using non ultra-pasteurized heavy cream and a precision temperature you can achieve thick and creamy, delicious homemade clotted cream. This recipe is a sous vide clotted cream recipe but keep reading to learn how to make homemade clotted cream using the oven method.
4.48 from 21 votes
Print Rate
Course: Sous Vide
Cuisine: French
Keyword: clotted cream
Prep Time: 5 minutes minutes
Cook Time: 12 hours hours
Total Time: 12 hours hours 5 minutes minutes
Servings: 1
Calories: 271
Author: Sarah Mock

Ingredients

  • 1 pint non ultra pasteurized heavy cream
Follow Savoring The Good On PinterestFollow @SavoringTheGood or tag #STGRecipes!

Instructions

  • Set your sous vide to 180 F 82.2 C
  • Set your timer for 12 hours.
  • After the 12 hours in the sous vide bath, remove the clotted cream pan and place in the refrigerator to chill completely.
Want to share when you made this recipe?Follow @SavoringTheGood & tag #STGRecipes!
Nutrition Facts
Homemade Clotted Cream Recipe Using Sous Vide
Serving Size
 
1
Amount per Serving
Calories
271
% Daily Value*
Fat
 
29
g
45
%
Saturated Fat
 
18
g
113
%
Trans Fat
 
1
g
Polyunsaturated Fat
 
8
g
Cholesterol
 
90
mg
30
%
Sodium
 
21
mg
1
%
Carbohydrates
 
2
g
1
%
Sugar
 
2
g
2
%
Protein
 
2
g
4
%
* Percent Daily Values are based on a 2000 calorie diet.
**Nutritional facts are just estimates. Please utilize your own brand nutritional values to double check against our estimates.
Like this recipe card? Want one for your site?Check out WP Recipe Maker!

Sarah Mock of savoringthegood.com headshot 2022

I am Sarah Mock. Welcome!

Sarah Mock is a classically trained Chef and graduate of Johnson & Wales University. A culinary blogger for 16 years Sarah helps the home cook prepare her recipes with professional results.

Get to know me

as seen in:

Logos of Hersheyland, ABC News, and Good Day PA are showcased in a seamless row, providing a snapshot of popular brands.

Hersheyland Nightline Good Day Pa!

The vibrant design showcases the iconic logos of Pinterest, Rachael Ray, and Jell-O set against a bold red background. Sorry, the provided description doesn't offer enough detail to suggest important SEO keywords.

Pinterest Rachael JELL-O

Sous Vide Cheesecake in Jars

Small glass jars filled with cheesecake layered over Oreo crust, topped with a whole Oreo cookie.

Portion control your dessert with this easy sous vide cheesecake in mini mason jars. With a Double Stuf Oreo crust and a foolproof sous vide method, you'll never worry about cracked or uneven cheesecakes again!

Small glass jars filled with cheesecake layered over Oreo crust, topped with a whole Oreo cookie.

Ingredients:

Recipe Card?

To find the full printable recipe with specific measurements and directions CLICK HERE to go to the recipe card.

New to sous vide? I explain in simple terms everything I know about sous vide cooking.

Instructions

sous vide set up.

Set Up Sous Vide

Place your sous vide machine in a large pot of water and set the temperature to 176°F (80°C).

A wooden spoon is being used to stir Oreo cheesecake into jars.

Make the Crust

  • In a food processor, pulse the Oreos until fine crumbs form.
  • Press 1 tablespoon of crumbs into the bottom of each mason jar.

Prepare the Filling

  • In the food processor, blend the cream cheese and sugar until smooth.
  • Add the sour cream and lemon zest, then blend again.
  • Add the eggs one at a time, blending after each addition.
  • Scrape down the sides and blend until fully combined.

Assemble the Cheesecakes

  • Pour the cheesecake mixture into the jars, filling just below the threads.
  • Wipe the rims clean and seal with lids.

Tip for no bubbles

Tap the jars gently on the counter to remove air bubbles before cooking.

Sous Vide Peanut Butter Cheesecake in a water bath

Cook Sous Vide

Lower the jars into the water bath and cook for 60-90 minutes (60 minutes for a lighter texture, 90 minutes for a denser cheesecake).

60 or 90 minutes?

Cook the cheesecakes for 60 minutes for a lighter texture or 90 minutes for a denser cheesecake. Both times work well, so choose based on your preference

Four mason jars filled with Oreo cheesecake desserts.

Chill and Serve

  • Remove the jars from the water bath and let them cool to room temperature.
  • Refrigerate for at least 4 hours before serving.

Did you make this recipe?

Do you have feedback that would be helpful to others? If so can help this small business owner by leaving a rating and a review in the comments section? Thank you for being part of the Savoring The Good Community. ~ Sarah

Variations

How can I make sous vide cheesecake with blueberries?

Swap the Oreo crust for a graham cracker crust and mix fresh or frozen blueberries into the cheesecake filling before cooking.

Which is better, a sous vide water bath or steam oven?

A sous vide water bath is recommended for precise temperature control and consistent results.

Freezing and Storage

Can I freeze sous vide Oreo cheesecake?

Yes, after cooling for at least 4 hours, you can freeze the cheesecakes for up to 1 month. Be sure the jars you use are freezer safe.

easy oreo cheesecake in mason jars sous vide method

Easy Sous Vide Oreo Cheesecake in Mason Jars

Portion control your dessert with a sous vide cheesecake in a mini mason jar. Once you have sous vide cheesecake you may never bake a cheesecake again.
4.74 from 42 votes
Print Pin Rate
Course: Dessert Recipes
Cuisine: American
Keyword: oreo cheesecake, sous vide cheesecake
Prep Time: 10 minutes minutes
Cook Time: 1 hour hour
Total Time: 1 hour hour 10 minutes minutes
Servings: 6
Calories: 255
Author: Sarah Mock

Ingredients

  • Box of Kraft Philadelphia Original Cream Cheese, 8 oz (226g), silver packaging with blue and white logo, and renewable energy label on the left-perfect for making delicious Lemon Cheesecake Bars.8 Ounces Cream Cheese room temperature
  • A 4-pound bag of Domino granulated pure cane sugar with a yellow and white design, showing nutrition information and branding-perfect for sweetening recipes like rhubarb sour or your favorite desserts.½ Cup Sugar
  • sour cream.½ Cup Sour Cream 4 oz.
  •  
    Zest of 1 lemon
  • A single brown chicken egg, perfect for making Chicken Cordon Bleu, stands upright on a white background.2 Egg
  •  
    6 Double Stuff Oreos
Follow Savoring The Good On PinterestFollow @SavoringTheGood or tag #STGRecipes!

Instructions

  • Set the sous vide to 176 F / 80 C.
  • Make the double stuf Oreo crust
  • In a food processor, blend the 6 double stuf Oreos. Pulse until the Oreos make a crust that forms when squeezed.
  • The extra filling will make the crust the correct consistency.
  • If you don't have the double stuf Oreos, just add a few tablespoons of melted butter.
  • Make the cheesecake batter
  • In a food processor, blend the cream cheese and the sugar.
  • Add the sour cream and blend again.
  • Add the zest of the lemon
  • Add the eggs one at a time and blend after each addition
  • Scrape down the bowl and blend one more time.
  • Press a tablespoon of the Oreo crust into the bottom of a 4 ounce mason jar.
  • Pour the cheesecake batter into each jar and stop just below the threads of the jar.
  • Wipe down the rim and place on a lid and a ring.
  • Lower into the sous vide water and set the timer to cook.
  • Make sure there is enough water in the pot to fully cover the jars.
  • Sous vide the cheesecake jarsCook the cheesecake for 60 or 90 minutes.
  • Remove from the water and refrigerate until chilled.
Want to share when you made this recipe?Follow @SavoringTheGood & tag #STGRecipes!
Nutrition Facts
Easy Sous Vide Oreo Cheesecake in Mason Jars
Serving Size
 
1
Amount per Serving
Calories
255
% Daily Value*
Fat
 
18
g
28
%
Saturated Fat
 
10
g
63
%
Trans Fat
 
0.01
g
Polyunsaturated Fat
 
1
g
Monounsaturated Fat
 
5
g
Cholesterol
 
104
mg
35
%
Sodium
 
146
mg
6
%
Potassium
 
94
mg
3
%
Carbohydrates
 
20
g
7
%
Sugar
 
19
g
21
%
Protein
 
5
g
10
%
* Percent Daily Values are based on a 2000 calorie diet.
**Nutritional facts are just estimates. Please utilize your own brand nutritional values to double check against our estimates.
Like this recipe card? Want one for your site?Check out WP Recipe Maker!

originally posted Jan 25, 2018


Sarah Mock of savoringthegood.com headshot 2022

I am Sarah Mock. Welcome!

Sarah Mock is a classically trained Chef and a graduate of Johnson & Wales University. A culinary blogger for 17 years, Sarah helps the home cook prepare her recipes with professional results.

Get to know me

as seen in:

Logos of Hersheyland, ABC News, and Good Day PA are showcased in a seamless row, providing a snapshot of popular brands.

Hersheyland Nightline Good Day Pa!

The vibrant design showcases the iconic logos of Pinterest, Rachael Ray, and Jell-O set against a bold red background. Sorry, the provided description doesn't offer enough detail to suggest important SEO keywords.

Pinterest Rachael JELL-O

Sous Vide Lemon Curd

A glass jar filled with smooth, yellow sous vide lemon curd sits on a white surface.

Lemon curd is a custard-like mixture made from fresh lemon juice, sugar, butter, and egg yolks and used as a filling or spread. With this sous vide lemon curd recipe there is no stirring, straining or arm cramps.

When Life give you lemons, make lemon curd

Be sure to check out my complete collection of sous vide recipes.

This recipe is outstanding….a great lemon flavor & smooth texture..
This was my first attempt at making lemon curd and it went well.

★★★★★ ~ Ann

Recipe Card?

To find the full printable recipe with specific measurements and directions CLICK HERE to go to the recipe card.

How to make lemon curd using sous vide.

This lemon curd recipe is cooked in mason jars. Seriously the silkiest lemon curd I have ever made. There was no need to pass this through a fine-mesh strainer to get our any coagulated egg bits.

Heat Sous Vide

Heat the sous vide to 167 °F / 75 °C.

12 egg yolks, separated from the white and placed in a bowl.

Separate Yolks

Separate the yolks from the whites and save the whites for another recipe.

6 zested lemons, lemon zest in a white bowl, microplane zester with lemon zest

Zest Lemons

Zest 6 lemons and measure out ¼ cup of zest.

lemon zest blended in a food processor with shite sugar to make a lemon sugar for curd.

Blend Sugar

In a food processor, blend the sugar and the lemon zest until the sugar is a fine powder and the zest has infused the sugar.

Add Lemon Juice

With the food processor running, pour in the 1 cup of fresh lemon juice.

Add Yolks

Add the egg yolks, one at a time, allowing each one to incorporate fully.

Add Melted Butter

While the food processor is still running, pour the melted and cooled butter into the yolk/lemon juice mixture.

Strain

Strain the mixture through a super fine mesh strainer to help remove any foam.

green funnel on a canning jar filled with lemon curd

Fill

  • Fill half pint jelly jars with the lemon curd mixture.
  • Place a lid and ring on top of the jars and make the ring finger tight.
Lemon curd is a custard-like mixture made from fresh lemon juice, sugar, butter, and egg yolks and used as a filling or spread. With the help of  sous vide, you can make smooth as silk lemon curd. My sous vide lemon curd recipe is cooked in mason jars.

Cook For 1 Hour

Once heated, carefully lower the jars into the water with a jar lifter. Make sure there is water completely surrounding the jars.

Lemon curd is a custard-like mixture made from fresh lemon juice, sugar, butter, and egg yolks and used as a filling or spread. With the help of  sous vide, you can make smooth as silk lemon curd. My sous vide lemon curd recipe is cooked in mason jars.

Cool

Carefully remove from the water and allow to rest to cool to room temperature and then store in the refrigerator for up to 2 weeks.

Freezing Tip:

I've made lemon curd before and froze whatever I didn't give away. It kept for months in the freezer and was easy to scoop out while still frozen. The remainder was returned to the freezer.

★★★★★ ~ Kathy

Did you make this recipe?

Do you have feedback that would be helpful to others? If so can help this small business owner by leaving a rating and a review in the comments section? Thank you for being part of the Savoring The Good Community. ~ Sarah

Why is the sous vide method better than the traditional cooking method?

The sous vide cooking method will keep the ingredients at a constant temperature, cooking the curd smooth as silk. Plus there will not be overcooking of the egg yolks because the water is kept at a constant temperature.

What can I do about the foam that forms on the curd when it is in the food processor?

If there is still a bit of foam or bubbles on the top of the lemon curd, and it bothers you, firmly rap the jars on the counter to pop the bubbles. Or you can use a kitchen torch to quickly remove them. Neither of these options is necessary, it is more about getting a smooth texture from top to bottom.

What is lemon curd used for?

Lemon curd is known as being served at tea time with scones, in tarts, or in the filling of layer cakes. But don't forget to use lemon curd as a filling for crepes, on top of pancakes or waffles or even used to fill cookies. 

What is the difference between lemon curd and lemon pie filling?

Lemon pie filling is usually thickened with flour or cornstarch while lemon curd is thickened by tempering egg yolks, lemon juice, and zest.  Lemon curd is similar to pie filling but the texture is smoother, thicker and the lemon flavor is more intense. 

Using an Anova sous vide machine, a person precisely cooks vacuum-sealed salmon fillets submerged in water, ensuring perfect results right on the countertop.

Let's go shopping!

ANOVA

This third generation sous vide circulator includes dual-band WiFi and a two-line touchscreen display.

Buy it here
A glass jar filled with smooth, yellow sous vide lemon curd sits on a white surface.

Sous Vide Lemon Curd

With the help of sous vide, you can make smooth as silk lemon curd. My sous vide lemon curd recipe is cooked in mason jars.
5 from 3 votes
Print Pin Rate
Course: Sous Vide
Cuisine: French
Prep Time: 5 minutes minutes
Cook Time: 1 hour hour
Total Time: 1 hour hour 5 minutes minutes
Servings: 3 servings
Calories: 1064
Author: Sarah Mock

Ingredients

  •  
    10 Egg Yolks
  •  
    6 whole Lemons zested & juiced
  •  
    1 Cup Fresh Lemon Juice
  • A 4-pound bag of Domino granulated pure cane sugar with a yellow and white design, showing nutrition information and branding-perfect for sweetening recipes like rhubarb sour or your favorite desserts.1 ½ Cup Sugar
  • A rectangular 8 oz package of Kerrygold Pure Irish Butter, unsalted, with a green and gold label and Irish grass-fed cow branding-perfect for creating delicious Saint Patrick's Day cupcakes.1 ½ sticks Butter melted and cooled
Follow Savoring The Good On PinterestFollow @SavoringTheGood or tag #STGRecipes!

Instructions

  • Separate the yolks from the whites and save the whites for another recipe.
    10 Egg Yolks
  • Zest 6 lemons and measure out ¼ cup of zest.
    6 whole Lemons
  • In a food processor, blend the sugar and the lemon zest until the sugar is a fine powder and the zest has infused the sugar.
    1 ½ Cup Sugar
  • With the food processor running, pour in the 1 cup of fresh lemon juice
    1 Cup Fresh Lemon Juice
  • Add the egg yolks, one at a time, allowing each one to incorporate fully.
  • While the food processor is still running, pour the melted and cooled butter into the yolk/lemon juice mixture.
    1 ½ sticks Butter
  • Strain the mixture through a super fine mesh strainer to help remove any foam.
  • Fill half pint jelly jars with the lemon curd mixture.
  • Place a lid and ring on top of the jars and make the ring finger tight.
  • Heat the sous vide to 167 °F / 75 °C.
  • Once heated, carefully lower the jars into the water with a jar lifter. Make sure there is water completely surrounding the jars.
  • Cook for 1 hour.
  • Carefully remove from the water and allow to rest to cool to room temperature and then store in the refrigerator for up to 2 weeks.
Want to share when you made this recipe?Follow @SavoringTheGood & tag #STGRecipes!
Nutrition Facts
Sous Vide Lemon Curd
Serving Size
 
0.5 cup
Amount per Serving
Calories
1064
% Daily Value*
Fat
 
63
g
97
%
Saturated Fat
 
35
g
219
%
Trans Fat
 
2
g
Polyunsaturated Fat
 
4
g
Monounsaturated Fat
 
19
g
Cholesterol
 
769
mg
256
%
Sodium
 
398
mg
17
%
Potassium
 
463
mg
13
%
Carbohydrates
 
128
g
43
%
Sugar
 
108
g
120
%
Protein
 
13
g
26
%
* Percent Daily Values are based on a 2000 calorie diet.
**Nutritional facts are just estimates. Please utilize your own brand nutritional values to double check against our estimates.
Like this recipe card? Want one for your site?Check out WP Recipe Maker!

published Jan 18, 2018


Sarah Mock of savoringthegood.com headshot 2022

I am Sarah Mock. Welcome!

Sarah Mock is a classically trained Chef and graduate of Johnson & Wales University. A culinary blogger for 16 years Sarah helps the home cook prepare her recipes with professional results.

Get to know me

as seen in:

Logos of Hersheyland, ABC News, and Good Day PA are showcased in a seamless row, providing a snapshot of popular brands.

Hersheyland Nightline Good Day Pa!

The vibrant design showcases the iconic logos of Pinterest, Rachael Ray, and Jell-O set against a bold red background. Sorry, the provided description doesn't offer enough detail to suggest important SEO keywords.

Pinterest Rachael JELL-O

How to Cook Sous Vide Boneless Pork Chop Recipe

Sous vide boneless pork chops with rosemary garnish.

Sous vide boneless pork chops are juicy and tender perfection from edge to edge. Adjust the the water temperature to achieve your favorite doneness on your pork chops. Get the color, flavor and crust that you love on pork chops with a quick sear in a hot skillet. 

Sous vide boneless pork chops on a plate with cream suace

Sous vide cooking is wonderful for so much more than meat! Sous vide egg bites in jars, sous vide fajita vegetables, pickled banana peppers, and cold brewed coffee are all fabulous using the sous vide cooking method.  Be sure to check out my complete collection of sous vide recipes.

If you love this recipe you are going to want to try cucumber infused gin and homemade clotted cream both are easy sous vide recipes!

Sous Vide Boneless Pork Chop Recipe

Finish off your sous vide pork chops with a high temperature sear in a cast iron skillet and deglaze the pan with cream to make an incredible rosemary cream sauce.

Boneless pork chops are often on sale at my grocery store and this recipe is delicious to serve any night of the week. No matter the thickness of your pork chops, they will be the same temperature and doneness because of the sous vide. No longer will the outside be tough and the inside is underdone. Perfection from edge to edge.

What is Sous Vide?

I explain in simple terms everything I know about sous vide cooking.

raw pork chops on a plate

Why should you pork chops sous vide?

Fat means flavor and pork chops, especially boneless pork chops, are super lean. Pork chops can be more difficult to cook perfectly because they are lean. But with the sous vide cooking method, it takes all the guesswork out of cooking your favorite pork protein.

Why you should make this recipe:

  • Perfect texture.
  • Set the sous vide and don't worry about under or over cooking the pork
  • Can be made ahead and it's great for meal prep throughout the week.
  • Skip marinating because the pork will marinate and cook at the same time in the bag.

Temperature and Time for Sous Vide Pork Chop:

  • Rare: 130°F / 54°C, 1 to 4 hours - Tender, juicy, and a little slippery.
  • Medium-Rare: 140°F / 60°C, 1 to 4 hours - Tender, juicy, and meaty.
  • Medium-Well: 150°F / 66°C, 1 to 4 hours - Quite firm and just starting to dry out.
  • Well Done: 160°F / 71°C, 1 to 4 hours - Firm, a little dry and tough, but still moist.

Source: AvonaCulinary

Sous vide boneless pork chops are juicy perfection from edge to edge. Adjust the the water temperature to achieve your favorite doneness on your boneless pork chops. Finish off your sous vide boneless pork chops with a high temperature sear in a cast iron skillet and deglaze the pan with cream to make an incredible rosemary cream sauce.

To cook pork chops sous vide, you are going to need these ingredients:

  • Boneless pork chops - trimmed
  • Salt - I use kosher salt but table salt will work
  • Pepper - fresh ground black pepper, if you have it.
  • Rosemary - dry rosemary will do just fine but use fresh rosemary if you have it.
  • Oil - olive oil is my oil of choice for this recipe
  • heavy cream - fro deglazing your pan and making the cream sauce.

How to Sous Vide Boneless Pork Chops:

  1. Season pork chops on both sides with salt, pepper and rosemary.
    Sous vide boneless pork chops are juicy perfection from edge to edge. Adjust the the water temperature to achieve your favorite doneness on your boneless pork chops. Finish off your sous vide boneless pork chops with a high temperature sear in a cast iron skillet and deglaze the pan with cream to make an incredible rosemary cream sauce.
  2. Place in either sous vide bags or in my case, freezer zip top quart bags.
  3. Fill a container or pot with enough water to fully submerge the bags. Be sure to protect the surface your pot will be resting on with a hot pad or trivet
  4. Cook your pork chops on the time and temperature below given for pork chops that are around 1 ½ inches thick. Add 15 minutes to the minimum time for each half inch if you have thicker double-cut chops. (see temperature chart) Sous vide boneless pork chops are juicy perfection from edge to edge. Adjust the the water temperature to achieve your favorite doneness on your boneless pork chops. Finish off your sous vide boneless pork chops with a high temperature sear in a cast iron skillet and deglaze the pan with cream to make an incredible rosemary cream sauce.
  5. With the bag still open, slowly lower the bag into the water. The pressure of the water should force out most all of the air giving good contact of the heated water to the meat. Sous vide boneless pork chops are juicy perfection from edge to edge. Adjust the the water temperature to achieve your favorite doneness on your boneless pork chops. Finish off your sous vide boneless pork chops with a high temperature sear in a cast iron skillet and deglaze the pan with cream to make an incredible rosemary cream sauce.
  6. Once the meat is below the water line and the two sides of the bag have touched from the pressure of the water, close the bag ¾ of the way and clip it to the side of the pot.
  7. Set your timer and walk away.
Using an Anova sous vide machine, a person precisely cooks vacuum-sealed salmon fillets submerged in water, ensuring perfect results right on the countertop.

Let's go shopping!

ANOVA

This third generation sous vide circulator includes dual-band WiFi and a two-line touchscreen display.

Buy it here

How to finish sous vide pork chops.

Sous vide boneless pork chops are juicy perfection from edge to edge. Adjust the the water temperature to achieve your favorite doneness on your boneless pork chops. Finish off your sous vide boneless pork chops with a high temperature sear in a cast iron skillet and deglaze the pan with cream to make an incredible rosemary cream sauce.
  1. Pull the pork chops from the bag and reserve the juices in the bag.
  2. Place them on a clean plate while your heavy bottom pot heat to high.
  3. Drizzle a bit of oil in the bottom of the pan and sear your pork chops in the oil.(see note below)
  4. Add ½ cup of heavy cream along with the extra juices that were in the sous vide bag. Sous vide boneless pork chops are juicy perfection from edge to edge. Adjust the the water temperature to achieve your favorite doneness on your boneless pork chops. Finish off your sous vide boneless pork chops with a high temperature sear in a cast iron skillet and deglaze the pan with cream to make an incredible rosemary cream sauce.
  5. Scrape all the yummy bits off the bottom of the pan to add extra flavor to the sauce. Sous vide boneless pork chops are juicy perfection from edge to edge. Adjust the the water temperature to achieve your favorite doneness on your boneless pork chops. Finish off your sous vide boneless pork chops with a high temperature sear in a cast iron skillet and deglaze the pan with cream to make an incredible rosemary cream sauce.
  6. Allow to reduce down so that the sauce stays in place when a line is drawn through it.
  7. Sauce your sous vide pork chops and serve.

Note: I suggest a vegetable oil as it has a higher smoke point than olive oil. You are welcome to use olive oil, it just might be a bit smoky in your house. Another good alternative is to use a light coating of mayonnaise instead of oil.

Sous vide boneless pork chops are juicy perfection from edge to edge. Adjust the the water temperature to achieve your favorite doneness on your boneless pork chops. Finish off your sous vide boneless pork chops with a high temperature sear in a cast iron skillet and deglaze the pan with cream to make an incredible rosemary cream sauce.

This is what an inch boneless pork chop at 140 for an hour looks like on the inside. Edge to edge perfection.

How should I seal the bag before cooking?

I do not seal my bags of pork chops with a vacuum and seal system. I use the water displacement method. With the bag still open, slowly lower the bag into the water. The pressure of the water should force out most all of the air giving good contact of the heated water to the meat.

What pork recipes can I try when I make sous vide pork chops?

When making sous vide pork chops, one way to cook them is by placing the pork in a vacuum-sealed bag with marinades, herbs, and spices to enhance flavor.

Experiment with different recipes by varying the seasoning and cooking times for a customized experience.

Can I use juicy bone-in pork chops or pork loin chops in this recipe?

Yes, you can use juicy bone-in pork chops or pork loin chops directly in this recipe. Before cooking, pat dry with paper towels, and season with salt and pepper.

Aside from pork, what other sous vide recipes can I make?

You can explore sous vide recipes for various proteins like chicken, beef, or fish by placing them in a sealed bag, then cook for 1 hour or more in a pot of water to achieve precise and evenly cooked results.

What seasonings can I use to make my sous vide pork chops more flavorful?

For a flavorful preparation of your bone-in chops, consider seasoning with herbs such as rosemary and thyme, enhancing the sous vide way to cook pork.

FAQ's and Tips

Sous vide boneless pork chops are juicy perfection from edge to edge. Adjust the the water temperature to achieve your favorite doneness on your boneless pork chops. Finish off your sous vide boneless pork chops with a high temperature sear in a cast iron skillet and deglaze the pan with cream to make an incredible rosemary cream sauce.

Why does the time vary so much with sous vide pork chops?

The reason the timing is one to four hours is that there will not be carryover cooking because the water temperature is constant. The meat can't go over the temperature that the water is set.
Sous Vide pork chops will be ready in an hour but you have up to 4 hours to pull them from the water. That is what the 4 hour mark is for.

Can You Sous Vide Frozen Pork Chops?

If you put the pork chops in frozen, I would add an additional 45 minutes to the initial cooking time. One of the great things about cooking sous vide is that it can accommodate for frozen meat. Additional time, up to an hour depending on the thickeness of the meat, is the only variation you need to consider.

Sous vide boneless pork chops with rosemary garnish.

Sous Vide Boneless Pork Chops With Rosemary Cream Sauce

Sous vide boneless pork chops are juicy perfection from edge to edge. Adjust the the water temperature to achieve your favorite doneness on your boneless pork chops.
4.77 from 13 votes
Print Rate
Course: Sous Vide
Cuisine: French
Keyword: sous vide pork chops
Prep Time: 10 minutes minutes
Cook Time: 1 hour hour
Total Time: 1 hour hour 10 minutes minutes
Servings: 4
Calories: 372
Author: Sarah Mock

Ingredients

  •  
    4 Boneless pork chops
  • A Morton Salt container with a blue label featuring a girl in a yellow dress holding an umbrella, with salt pouring out of a container-an essential ingredient for perfectly seasoning dishes like Chicken Cordon Bleu.Salt
  • A 6 oz container of McCormick Pure Ground Black Pepper with a red lid and a Black Pepper
  • A clear bottle of McCormick rosemary leaves with a red cap and beige label, filled with dried rosemary-perfect for adding aromatic flavor to dishes like turkey shepherd's pie.Rosemary
  • A 24 fl oz bottle of Wesson vegetable oil with a clear plastic body, white cap, and label featuring fried chicken and product details-perfect for preparing delicious dishes like chipotle carnitas or classic fried favorites.2 Tablespoon Vegetable Oil
  • heavy cream bottle.½ Cup Heavy Cream
Follow Savoring The Good On PinterestFollow @SavoringTheGood or tag #STGRecipes!

Instructions

Sous Vide Boneless Pork Chops Directions:

  • Season both sides of the boneless pork chops with salt, pepper and rosemary.
  • Place in either sous vide bags or in my case, freezer zip top quart bags.
  • Fill a container or pot with enough water to fully submerge the bags. Be sure to protect the surface your pot will be resting on with a hot pad or trivet
  • The time and temperature below is given for pork chops that are around 1 ½-inches thick. Add 15 minutes to the minimum time for each half inch if you have thicker double-cut chops. (see temperature chart below)
  • With the bag still open, slowly lower the bag into the water. The pressure of the water should force out most all of the air giving good contact of the heated water to the meat.
  • Once the meat is below the water line and the two sides of the bag have touched from the pressure of the water, close the bag ¾ of the way and clip it to the side of the pot.
  • Set your timer and walk away.

How to make the sauce

  • Pull the pork chops from the bag and reserve the juices in the bag.
  • Place them on a clean plate while your heavy bottom pot heat to high.
  • Drizzle a bit of oil in the bottom of the pan and sear your boneless pork chops in the oil.
  • Add ½ cup of heavy cream along with the extra juices that were in the sous vide bag. 
  • Scrape all the yummy bits off the bottom of the pan to add extra flavor to the sauce. 
  • Allow to reduce down so that the sauce stays in place when a line is drawn through it.
  • Sauce your sous vide pork chops and serve

Notes

Sous Vide Pork Chop Temperature:
  • Rare: 130°F / 54°C, 1 to 4 hours - Tender, juicy, and a little slippery.
  • Medium-Rare: 140°F / 60°C, 1 to 4 hours - Tender, juicy, and meaty.
  • Medium-Well: 150°F / 66°C, 1 to 4 hours - Quite firm and just starting to dry out.
  • Well Done: 160°F / 71°C, 1 to 4 hours - Firm, a little dry and tough, but still moist.
Want to share when you made this recipe?Follow @SavoringTheGood & tag #STGRecipes!
Nutrition Facts
Sous Vide Boneless Pork Chops With Rosemary Cream Sauce
Serving Size
 
1 serving
Amount per Serving
Calories
372
% Daily Value*
Fat
 
27
g
42
%
Saturated Fat
 
11
g
69
%
Trans Fat
 
1
g
Polyunsaturated Fat
 
4
g
Monounsaturated Fat
 
11
g
Cholesterol
 
131
mg
44
%
Sodium
 
76
mg
3
%
Potassium
 
522
mg
15
%
Carbohydrates
 
1
g
0
%
Sugar
 
1
g
1
%
Protein
 
29
g
58
%
* Percent Daily Values are based on a 2000 calorie diet.
**Nutritional facts are just estimates. Please utilize your own brand nutritional values to double check against our estimates.
Like this recipe card? Want one for your site?Check out WP Recipe Maker!

originally published Jan 14, 2018


Sarah Mock of savoringthegood.com headshot 2022

I am Sarah Mock. Welcome!

Sarah Mock is a classically trained Chef and graduate of Johnson & Wales University. A culinary blogger for 16 years Sarah helps the home cook prepare her recipes with professional results.

Get to know me

as seen in:

Logos of Hersheyland, ABC News, and Good Day PA are showcased in a seamless row, providing a snapshot of popular brands.

Hersheyland Nightline Good Day Pa!

The vibrant design showcases the iconic logos of Pinterest, Rachael Ray, and Jell-O set against a bold red background. Sorry, the provided description doesn't offer enough detail to suggest important SEO keywords.

Pinterest Rachael JELL-O

Hershey Kiss Cookie

Hershey Kiss cookies on a cooling rack.

Peanut butter kiss cookies are the classic Christmas cookie that everyone loves! These delicious Hershey kiss cookies go from ingredients to serving plate in less than 30 minutes.

Hershey Kiss cookies on a cooling rack.

New this year I am adding candied orange slices to my holiday cookie trays.

Funny story. When I was a kid I made the peanut butter blossom cookies WITHOUT unwrapping the foil from the kisses. I was 8 so I was still learning so we will call this a teachable moment.

Yes, you DO need to unwrap the foil from the kisses before placing them on the cookie.

★★★★★ Sooo yummy!!! This is the first time I have made this type of cookie and they turned out perfect! Thank you.

- Judy from Pinterest

Close-up of peanut butter blossom cookies topped with chocolate kisses, arranged neatly in rows.

Turned out perfect!

Pinterest: Lisa C

Ingredients needed:

unwrapped hershey kisses in a pile on the table

Recipe Card?

To find the full printable recipe with specific measurements and directions CLICK HERE to go to the recipe card.

Did you make this recipe?

Do you have feedback that would be helpful to others? If so can help this small business owner by leaving a rating and a review in the comments section? Thank you for being part of the Savoring The Good Community. ~ Sarah

Here is why this recipe is amazing:

  • The peanut butter cookie is the perfect foundation for the Hershey Kiss.
  • These cookies disappear first at the cookie exchange.
  • They are the BEST when you eat them when they are still slightly warm.
  • Perfect for making ahead because these kiss cookies are freezer-friendly.

Top Tip

If the chocolate kiss gets glossy, that is fine. It is just the residual heat from the cookie. It will set back up.

How To Make Peanut Butter Blossoms

  1. Preheat oven to 375.
  2. Cream the shortening and peanut butter until well blended.
  3. Add granulated sugar and brown sugar; beat until light and fluffy.
  4. Add egg, milk, and vanilla; beat well.
  5. In a separate bowl, stir together flour, baking soda and salt; gradually add the dry ingredients into the peanut butter mixture.
  6. Portion out the peanut butter dough and shape dough into 1-inch balls. A person is holding a bowl of sugar in their hands, preparing to make Hershey Kiss cookies.
  7. Roll the peanut butter balls in granulated sugar. A baking sheet with Hershey Kiss cookies covered in sugared balls on it.
  8. Place the cookie dough balls on an un-greased cookie sheet, a cookie sheet line with parchment paper OR a sil pat matt. A tray of Hershey Kiss cookies on a baking sheet.
  9. Bake at 375 until slightly brown.
  10. Immediately press an unwrapped Hershey's chocolate kiss into the center of each cookie. full recipe of Peanut Butter Kiss Cookies cooling on a cooling rack
  11. As soon as all the kisses have been pressed into the peanut butter cookie, immediately remove from cookie sheet to wire rack.
  12. Cool completely.

Seasonal Favorite

Baked lattice top crust on an apple pie made with the Crisco pie crust recipe, showing flaky layers in the fluted edge.

This is my award-winning Crisco pie crust recipe; flaky, tender, and made with simple ingredients you already have.

Crisco Pie Crust

Storage tips

When thawing your frozen cookies, allow the cookies to defrost in the container you froze them in to help keep them from drying out as they thaw. By opening the container you rereleasing the moisture that could be reabsorbed by the cookie as it thaws.

Top Tip

  • Cracks are expected when the kiss is pressed into the cookie.
  • Using a cookie scoop to portion out the dough will help keep the cookies uniform.
  • Eat one cookie warm. You are welcome.

Great easy recipe

Made your cookies this year for my Christmas boxes. They are just so cute and very tasty. ~Lisa

Frequently asked questions, answers and tips:

What type of Hershey's kisses are used on peanut butter blossoms?

Personally, I am a fan of the classic milk chocolate kiss but feel free to use your favorite Hershey's kiss. I love to mix it up and add colored sugar instead of white granular sugar to indicate a difference in kiss. For example, red-colored sugar would indicate milk chocolate with almond, green sugar would indicate mint truffle or use one of the Hugs for a different twist on the cookie.

Do peanut butter blossoms freeze well?

One of the things I love about this recipe for Hershey's kiss cookies is that they freeze and thaw beautifully! Store them in single layers with parchment or wax paper between them and freeze in a freezer-safe container for up to a month.

What is the best way to ship peanut butter blossoms in the mail?

Pack them tightly in a plastic container with an air-tight lid. I will line the bottom of the container with cookies, peanut butter cookie side down and then turn the second layer of cookies over, kiss side down, to fill in the negative space. Place the container in a mailing box, surrounded with bubble wrapping so that it's secure and doesn't move around too much. Then, mail it off.

More cookie recipes:

  • Chocolate pizzelle recipe - I share with you the secret to perfect pizzelle cookies and why this is the best cocoa pizzelle recipe. 
  • Anise pizzelle - One of my favorite Christmas cookie recipe is my grandmother's recipe. Golden brown, thin and crispy pizzelles are a MUST for any holiday cookie tray. 
  • New this year: Biscoff Butter Cookies
Hershey Kiss cookies on a cooling rack.

Chocolate Kiss Cookie Recipe

A classic Christmas cookie in my house are the Hershey kiss cookies.
4.74 from 148 votes
Print Pin Rate
Course: Cookie Recipes
Cuisine: American
Keyword: peanut butter blossom cookie recipe
Prep Time: 15 minutes minutes
Cook Time: 12 minutes minutes
Total Time: 27 minutes minutes
Servings: 48
Calories: 95
Author: Sarah Mock

Ingredients

  • 48 Hershey's Kisses
  •  
    ½ Cup shortening
  •  
    ¾ Cup Reese's Creamy Peanut Butter
  • A 4-pound bag of Domino granulated pure cane sugar with a yellow and white design, showing nutrition information and branding-perfect for sweetening recipes like rhubarb sour or your favorite desserts.⅓ Cup Sugar
  • Domino Light Brown Sugar box, 16 oz, featuring a slice of Blackberry Dump Cake topped with whipped cream and berries, and a Non-GMO Project Verified label in the bottom right corner.⅓ Cup Brown Sugar lightly packed
  • A single brown chicken egg, perfect for making Chicken Cordon Bleu, stands upright on a white background.1 Egg
  • A white milk carton with a blue label reading 2 tablespoons milk
  • easy sous vide vanilla extract1 Teaspoon Vanilla Extract
  • A 5-pound bag of King Arthur Baking Company unbleached bread flour with 12.7% protein content, labeled for ideal use in bread, pizza crust, and rolls-perfect for creating hearty sides like homemade loaves to serve alongside a comforting slowcooker sausage casserole.1 ½ Cup Flour, All Purpose
  • Arm & Hammer Pure Baking Soda box, 8 oz size, with text promoting it as America's #1 trusted brand and stating 1 Teaspoon Baking Soda
  • A Morton Salt container with a blue label featuring a girl in a yellow dress holding an umbrella, with salt pouring out of a container-an essential ingredient for perfectly seasoning dishes like Chicken Cordon Bleu.½ Teaspoon salt
  •  
    ⅓ Cup additional granulated sugar for rolling
Follow Savoring The Good On PinterestFollow @SavoringTheGood or tag #STGRecipes!

Instructions

  • Preheat oven to 375°F.
  • In a mixing bowl with the beater attachments, cream the shortening and peanut butter until well blended.
  • Add ⅓ cup granulated sugar and brown sugar; beat until fluffy.
  • Add egg, milk and vanilla; beat well.
  • In a separate bowl, stir together flour, baking soda and salt; gradually add the dry ingredients into the peanut butter mixture.
  • Using a small cookie scoop, portion out the peanut butter dough and shape dough into 1-inch balls.
  • Roll the peanut butter balls in granulated sugar.
  • Place the cookie dough balls on an un-greased cookie sheet, a cookie sheet line with parchment paper OR a sil pat matt. 
  • Bake at 375 for 8-10 minutes or until slightly brown.
  • Immediately press an unwrapped Hershey's chocolate kiss into center of each cookie.
  • As soon as all the kisses have been pressed into the peanut butter cookie, immediately remove from cookie sheet to wire rack.
  • Cool completely.

Notes

  1. Unwrap the foil from the kisses while the cookies are baking. Don't wait until they come out of the oven. The cookies will firm up too fast.
  2. Cracks are expected when the kiss is pressed into the cookie.
  3. Using a cookie scoop to portion out the dough will help keep the cookies uniform.
  4. If the chocolate kiss get glossy, that is fine. It is just the residual heat from the cookie. It will set back up.
  5. Eat one cookie warm. You are welcome.
Can kiss cookies be frozen?
One of the things I love about this recipe for Hershey's kiss cookies is that they freeze and thaw beautifully! Store them in single layers with parchment or wax paper between them and freeze in a freezer safe container for up to a month.
Want to share when you made this recipe?Follow @SavoringTheGood & tag #STGRecipes!
Nutrition Facts
Chocolate Kiss Cookie Recipe
Serving Size
 
1
Amount per Serving
Calories
95
% Daily Value*
Fat
 
5
g
8
%
Saturated Fat
 
2
g
13
%
Polyunsaturated Fat
 
2
g
Cholesterol
 
6
mg
2
%
Sodium
 
70
mg
3
%
Carbohydrates
 
12
g
4
%
Sugar
 
8
g
9
%
Protein
 
1
g
2
%
* Percent Daily Values are based on a 2000 calorie diet.
**Nutritional facts are just estimates. Please utilize your own brand nutritional values to double check against our estimates.
Like this recipe card? Want one for your site?Check out WP Recipe Maker!

first published dec 22 2017


Sarah Mock of savoringthegood.com headshot 2022

I am Sarah Mock. Welcome!

Sarah Mock is a classically trained Chef and graduate of Johnson & Wales University. A culinary blogger for 15 years Sarah helps the home cook prepare her recipes with professional results.

Get to know me

Deep Fried Dill Pickles

Tempura Deep Fried Dill Pickles Recipe

Crunchy, zesty deep fried dill pickles recipe can easily be made at home. The tempura is light and crispy, just like at the restaurant. Perfect for game day, as an appetizer or for snack time.

 the best deep fried dill pickle recipe


  • Pickle shot with mini pickle garnish, seasoned rim.
    Pickle Shot
  • Dill pickle pasta salad in a white bowl.
    Dill Pickle Pasta Salad with Bacon and Cheese
  • easy Dill Pickle Chex Mix in a small blue bowl on a wooden surface
    Dill Pickle Chex Mix Recipe
  • Fried Pickle Spears. Disneyland Fried Pickles square image
    Fried Pickle Spear Recipe

If you love this fried pickles recipe you are going to want to make Tex Mex egg rolls, Thanksgiving turkey egg rolls and my personal favorite, buffalo chicken dip egg roll recipe. Your oil is hot in the pan, might as well fry up some more crispy appetizers!

I discovered deep-fried pickles last year at a restaurant and fell in LOVE with them. There was something about the salty, tangy, crunchy deep-fried tempura pickles that made me want to order a second serving. I knew I wanted to see if I could recreate a recipe at home. I think this is pretty close to the fried dill pickles I had at the restaurant.

Deep Fried Pickle Ingredients:

  • Dill Pickle Chips (flavor of your choice)
  • Flour, sifted
  • Egg Whites
  • Sugar
  • Salt
  • Seltzer

Tempura Batter ingredients:

  • flour, sifted
  • egg whites
  • sugar
  • salt
  • seltzer

How to make tempura batter:

Deep Fried Tempura Dill Pickles in a fry basket
  1. Whip the egg whites with the sugar and salt to a medium peak. The whites should have a bit of a 'give' or a 'slump' to them when you pick up the whip.
  2. Sift the 2 cups of flour over the egg whites. This will help reduce any clumps in the tempura batter.
  3. Gently whisk the flour and the whipped egg whites together.
  4. Add the cup of seltzer water to make the tempura batter. There will be fizzing but the carbonation will help in the frying.

How to deep fry pickles:

deep fried dill pickles
  1. Heat vegetable or peanut oil in a deep pot to about 400 degrees. If you are using a fry basket, drop the basket in the oil.
  2. Drop the tempura dipped pickle chips into the oil.
  3. Fry for several minutes until the pickles reach your desired color. I like a medium golden brown. You make like them deeper or lighter in color.

How to make fried pickles:

  1. Heat vegetable or peanut oil in a deep pot to about 400 degrees. If you are using a fry basket, drop the basket in the oil.
  2. Drain the dill pickle chips and put them in between several layers of paper towels.
  3. Dip the pickles in the batter.I would tell you to allow them to drip and drain a bit but that is not the technique I use. I quickly 'thwack' them back and forth in the bowl. Kind of a flick, kind of a shake. Three thwack or flicks back and forth should be enough. Results may vary....develop your own technique.
  4. Dunk, 'thwack' and drop the tempura dill pickle chips into the oil.
  5. Fry for several minutes until the pickles reach your desired color. I like a medium golden brown. You make like them deeper or lighter in color.

📝 Frequently asked questions, answers and tips:

Why blot the pickles before dipping them in the tempura batter?

By blotting the pickled before dipping them in the tempura pickle batter there is less moisture that will be in the pickles, the better! Water and oil don't mix...., especially in frying. The dill pickle flavor is fully infused in the pickle chips. Don't worry.

Deep Fried zucchini chips in a metal basket on a wooden table.

Tempura Deep Fried Dill Pickles

Crunchy, zesty deep fried dill pickles recipe can easily be made at home. The tempura is light and crispy, just like at the restaurant. Perfect for game day, as an appetizer or for snack time.
5 from 1 vote
Print Pin Rate
Course: Appetizer Recipe
Cuisine: American
Prep Time: 15 minutes minutes
Cook Time: 5 minutes minutes
Total Time: 20 minutes minutes
Servings: 4 servings
Calories: 269
Author: Sarah Mock

Ingredients

  •  
    24 Ounce Dill Pickle Chips flavor of your choice
  • A 5-pound bag of King Arthur Baking Company unbleached bread flour with 12.7% protein content, labeled for ideal use in bread, pizza crust, and rolls-perfect for creating hearty sides like homemade loaves to serve alongside a comforting slowcooker sausage casserole.2 Cups Flour, All Purpose sifted
  •  
    2 Egg Whites
  • A 4-pound bag of Domino granulated pure cane sugar with a yellow and white design, showing nutrition information and branding-perfect for sweetening recipes like rhubarb sour or your favorite desserts.1 Tablespoon Sugar
  • A Morton Salt container with a blue label featuring a girl in a yellow dress holding an umbrella, with salt pouring out of a container-an essential ingredient for perfectly seasoning dishes like Chicken Cordon Bleu.1 Teaspoon Salt
  •  
    1 Cup Seltzer
Follow Savoring The Good On PinterestFollow @SavoringTheGood or tag #STGRecipes!

Instructions

  • Tempura pickle batter
  • Whip the egg whites with the sugar and salt to a medium peak. The whites should have a bit of a 'give' or a 'slump' to them when you pick up the whip.
    2 Egg Whites, 1 Tablespoon Sugar, 1 Teaspoon Salt
  • Sift the 2 cups of flour over the egg whites. This will help reduce any clumps in the tempura batter.
    2 Cups Flour, All Purpose
  • Gently whisk the flour and the whipped egg whites together.
  • Add the cup of seltzer water to make the tempura batter. There will be fizzing but the carbonation will help in the frying.
    1 Cup Seltzer
  • Heat vegetable or peanut oil in a deep pot to about 400 degrees. If you are using a fry basket, drop the basket in the oil.
  • Dip the pickles in the batter.I would tell you to allow them to drip and drain a bit but that is not the technique I use. I quickly 'thwack' them back and forth in the bowl. Results may vary...
    24 Ounce Dill Pickle Chips
  • Dunk, 'thwack' and drop the tempura dill pickle chips into the oil.
  • Drain the dill pickle chips and put them in between several layers of paper towels.
  • Fry for several minutes until the pickles reach your desired color. I like a medium golden brown. You make like them deeper or lighter in color.
Want to share when you made this recipe?Follow @SavoringTheGood & tag #STGRecipes!
Nutrition Facts
Tempura Deep Fried Dill Pickles
Amount per Serving
Calories
269
% Daily Value*
Fat
 
1
g
2
%
Polyunsaturated Fat
 
1
g
Sodium
 
1934
mg
84
%
Carbohydrates
 
55
g
18
%
Sugar
 
5
g
6
%
Protein
 
9
g
18
%
* Percent Daily Values are based on a 2000 calorie diet.
**Nutritional facts are just estimates. Please utilize your own brand nutritional values to double check against our estimates.
Like this recipe card? Want one for your site?Check out WP Recipe Maker!

this post originally published Sep 29, 2017


Sarah Mock of savoringthegood.com headshot 2022

I am Sarah Mock. Welcome!

Sarah Mock is a classically trained Chef and graduate of Johnson & Wales University. A culinary blogger for 16 years Sarah helps the home cook prepare her recipes with professional results.

Get to know me

as seen in:

Logos of Hersheyland, ABC News, and Good Day PA are showcased in a seamless row, providing a snapshot of popular brands.

Hersheyland Nightline Good Day Pa!

The vibrant design showcases the iconic logos of Pinterest, Rachael Ray, and Jell-O set against a bold red background. Sorry, the provided description doesn't offer enough detail to suggest important SEO keywords.

Pinterest Rachael JELL-O

Roasted Broccoli Brussels Sprouts

Sheet Pan Roasted Brussels Sprouts and Broccoli

My favorite way to enjoy vegetables in the fall and winter is to roast them in a hot oven. sheet pan roasted brussels sprouts and broccoli will change the way you eat vegetables.

My favorite way to enjoy vegetables in the fall and winter is to roast them in a hot oven. Sheet pan roasted brussels sprouts and broccoli will change the way you eat vegetables. Did you know that by roasting vegetables it brings out and caramelizes their natural sugars? It is true! Food science. This sheet pan roasting method is amazing in every way.

 Did you know that by roasting vegetables it brings out and caramelizes their natural sugars? It is true! Food science.

I discovered sheet pan roasted brussels sprouts this spring when I was doing one of those cut out the carbs adjustment diets and I am still eating them to this day with this method. And broccoli? Perhaps if this is how broccoli was served to be as a child I would not have an aversion to it, over steamed and grey on the plate. This sheet pan roasting method is amazing in every way.

Sheet Pan Roasted Brussels Sprouts and Broccoli

Recipe Card?

To find the full printable recipe with specific measurements and directions CLICK HERE to go to the recipe card.

How to pan roast brussels sprouts and broccoli:

  1. Preheat your oven to 425 degrees. Sheet Pan Roasted Brussels Sprouts and Broccoli
  2. Line your sheet pan with heavy duty aluminum foil and place the pan in the oven as it heats.
    Sheet Pan Roasted Brussels Sprouts and Broccoli
  3. Remove the base and first few outer leaves of the brussels sprouts and slice them in half from the stem to the top of the sprout. Slice each brocolli floret in half .
    Sheet Sheet Pan Roasted Brussels Sprouts and Broccoli Roasted Brussel Sprouts Broccoli Recipe
  4. Once your oven comes up to the temperature of 425 degrees, remove it from the oven and drizzle it with a light coating of olive oil. The oil will heat up and not smoke and will be ready for the next step. Sheet Pan Roasted Brussels Sprouts and Broccoli
  5. Arrange the sheet pan roasted brussels sprouts cut side down on the olive oil coated pan along with the broccoli. Give the tops of the vegetables a second drizzle of olive oil BUT DO NOT SALT.Sheet Pan Roasted Brussels Sprouts and Broccoli
  6. Place the pan back into the 425 degree oven for 25-30 minutes.
Roasted Brussels Sprouts and Broccoli on a baking sheet.

Roasted Brussels Sprouts and Broccoli

My favorite way to enjoy vegetables in the fall and winter is to roast them in a hot oven. sheet pan roasted brussels sprouts and broccoli will change the way you eat vegetables.
4.38 from 16 votes
Print Rate
Course: Side Dishes
Cuisine: American
Prep Time: 8 minutes minutes
Cook Time: 45 minutes minutes
Total Time: 53 minutes minutes
Servings: 4 servings
Calories: 75
Author: Sarah Mock

Ingredients

  •  
    1 head broccoli
  •  
    2 Cups brussels sprouts
  • A 500ml bottle of California Olive Ranch Global Blend Extra Virgin Olive Oil with green and blue labeling, indicating a blend from Argentina, Portugal, Chile, and California-perfect for drizzling over your favorite shrimp avocado salad.Olive oil drizzle
  • A Morton Salt container with a blue label featuring a girl in a yellow dress holding an umbrella, with salt pouring out of a container-an essential ingredient for perfectly seasoning dishes like Chicken Cordon Bleu.Salt
  •  
    Heluva Good Buttermilk Ranch Dip
Follow Savoring The Good On PinterestFollow @SavoringTheGood or tag #STGRecipes!

Instructions

  • Preheat your oven to 425 degrees.
  • Line your sheet pan with heavy duty aluminum foil and place the pan in the oven as it heats.
  • Remove the base and first few outer leaves of the brussels sprouts and slice them in half from the stem to the top of the sprout.Slice each brocolli floret in half .
  • Once your oven comes up to the temperature of 425 degrees, remove it from the oven and drizzle it with a light coating of olive oil. The oil will heat up and not smoke and will be ready for the next step.
  • Arrange the sheet pan roasted brussels sprouts cut side down on the olive oil coated pan along with the broccoli. Give the tops of the vegetables a second drizzle of olive oil BUT DO NOT SALT.
  • Place the pan back into the 425 degree oven for 25-30 minutes.

Notes

Here is my tip: Preheat your sheet pan WITH the oven. A HOT sheet pan will give you AMAZING results in roasting your vegetables
By placing the brussels sprouts cut side down, they are going to get a lovely sear thanks to your hot pan and they will caramelize deliciously.
Give the tops of the vegetables a second drizzle of olive oil BUT DO NOT SALT.
Salt will pull out the moisture from the vegetables and they will steam instead of roast. We want a roast.
Sprinkle the pan with a light dusting of salt to further enhance all that roasted goodness.
Want to share when you made this recipe?Follow @SavoringTheGood & tag #STGRecipes!
Nutrition Facts
Roasted Brussels Sprouts and Broccoli
Amount per Serving
Calories
75
% Daily Value*
Sodium
 
44
mg
2
%
Carbohydrates
 
15
g
5
%
Sugar
 
3
g
3
%
Protein
 
5
g
10
%
* Percent Daily Values are based on a 2000 calorie diet.
**Nutritional facts are just estimates. Please utilize your own brand nutritional values to double check against our estimates.
Like this recipe card? Want one for your site?Check out WP Recipe Maker!

Sarah Mock of savoringthegood.com headshot 2022

I am Sarah Mock. Welcome!

Sarah Mock is a classically trained Chef and graduate of Johnson & Wales University. A culinary blogger for 16 years Sarah helps the home cook prepare her recipes with professional results.

Get to know me

as seen in:

Logos of Hersheyland, ABC News, and Good Day PA are showcased in a seamless row, providing a snapshot of popular brands.

Hersheyland Nightline Good Day Pa!

The vibrant design showcases the iconic logos of Pinterest, Rachael Ray, and Jell-O set against a bold red background. Sorry, the provided description doesn't offer enough detail to suggest important SEO keywords.

Pinterest Rachael JELL-O

Best Strawberry Jam Recipe with Sure-Jell Pectin

strawberry jam jars stacked.

Homemade strawberry jam made with Sure-Jell is one of my favorite ways to preserve fresh strawberries during strawberry season.

strawberry jam jars stacked.

Whether you're using fresh or frozen strawberries, this thick, spreadable jam is a delicious way to enjoy summer berries all year long. Plus, it makes a thoughtful homemade gift!

Strawberry jam ingredients:

This easy strawberry jam recipe is perfect for beginners, with step-by-step instructions and tips to avoid common problems like runny jam or jars that don't seal.

Close-up of a pile of ripe red strawberries with green leaves, showing their textured surfaces and natural variations in size and shape.

Recipe Card?

To find the full printable recipe with specific measurements and directions CLICK HERE to go to the recipe card.

Can I reduce the sugar in this recipe?

Not with Sure-Jell Original. The sugar is essential for the set and preservation. If you want less sugar, use Sure-Jell for Less or No Sugar Needed pectin and follow that package's specific instructions and ratios.

Super easy to make homemade jam

Was super easy to make, and it tasted amazing. My adult kids are trying to steal the jars of jelly now.🤣

- Jenn M ~ Pinterest

Step-by-Step Instructions

This recipe moves fast once the jam starts cooking - have your jars sterilized, your lids hot, and your canning funnel ready before you start. Read through all the steps first so nothing catches you off guard.

Four empty glass mason jars are placed upside down on a round metal tray in a kitchen, ready to be filled with homemade fig preserves, with a large pot visible in the background.

Sterilize your jars and lids

Place jars and lids in simmering water for at least 10 minutes. Keep them hot until you are ready to fill. Cold jars filled with hot jam can crack.

A hand holds a strawberry with the stem removed, showing a hollow center-perfect for making easy strawberry jam.

Prepare the strawberries

Wash and hull the strawberries.

Freezer strawberry jam made with fresh strawberries using a food processor.

Crush

Crush using a food processor, potato masher, or immersion blender.

A pitcher full of thick strawberry mixture sitting on a table.

Measure

Measure out exactly 5 cups of crushed strawberries - not whole, not estimated. Precision matters here for a proper set

When to add the lemon rind

If using lemon rind for a firmer set, add it now.

Close-up of a metal whisk blending mashed strawberries and a small chunk of butter into a thick strawberry jam.

Cook the fruit and pectin

Add the crushed strawberries to a large, heavy-bottomed saucepan. Stir in 1 package of Sure-Jell Original and ½ teaspoon butter. Bring the mixture to a full rolling boil - one that does not stop when stirred - over high heat, stirring constantly.

A mixture of thick strawberry jam and flour in a bowl.

Add the sugar

Once at a full rolling boil, add all 7 cups of sugar at once. Stir to combine and return to a full rolling boil. Boil for exactly 1 minute, stirring the entire time. Do not guess on the time - set a timer.

A bowl of thick strawberry jam sauce with a whisk in it.

Remove from heat and skim foam

Take the pan off the heat. Skim any foam from the surface with a metal spoon. A small amount of foam is normal - this is purely cosmetic.

How do I know when my jam is ready?

To test if your jam is set, place a small spoonful on a chilled plate. If it wrinkles when pushed with your finger, it's ready.

Two jars of thick strawberry jam with a blue jug.

Fill the jars

Using a canning funnel, ladle hot jam into hot jars, filling to within ¼ inch of the top. Wipe jar rims clean with a damp cloth - any residue will prevent a proper seal.

jars added to the water bath canner

Seal and process

  1. Place a new lid on each jar and screw the ring on until fingertip tight.
  2. Lower jars into the boiling water bath using jar tongs. Make sure jars are covered by 1 to 2 inches of water.
  3. Once the water returns to a full boil, process for 10 minutes.
    Adjust for altitude: add 1 minute for every 1,000 feet above sea level.

Safety First

Always use canning jar tongs to handle hot jars, and be careful to avoid burns.

A row of freezer jars filled with strawberry jam.

Cool and check seals

  1. Remove jars from the canner and place on a towel-lined counter.
    Do not disturb for 12 to 24 hours.
  2. Press the center of each lid once fully cooled - no springback means a good seal.
    Any jar that did not seal should be refrigerated and used within 3 weeks.
A row of freezer jars filled with strawberry jam.

Store

Sealed jars keep in a cool, dry, dark place for up to 1 year. Once opened, refrigerate and use within 3 weeks.

Did you make this recipe?

Do you have feedback that would be helpful to others? If so can help this small business owner by leaving a rating and a review in the comments section? Thank you for being part of the Savoring The Good Community. ~ Sarah

Seasonal Favorite

Baked lattice top crust on an apple pie made with the Crisco pie crust recipe, showing flaky layers in the fluted edge.

This is my award-winning Crisco pie crust recipe; flaky, tender, and made with simple ingredients you already have.

Crisco Pie Crust

Storage Instructions

Properly sealed jars of this strawberry jam are one of the most reliable things in a home pantry.

Here is exactly what to expect:

  • Sealed jars: Up to 1 year in a cool, dry, dark place. Flavor is best within the first 6 months.
  • Opened jars: Refrigerate and use within 3 weeks.
  • Refrigerator jam (no water bath): Up to 3 weeks in the refrigerator.
  • Freezer jam: Up to 1 year in the freezer. Thaw in the refrigerator overnight. Once thawed, use within 3 weeks.

    Did not seal? Do not re-process. Refrigerate immediately and use within 3 weeks.

5 Days To Canning Confidence

Can you put too much pectin in jam?

Too much pectin in jelly or jam can result in a softer texture when making jam. The ratio between sugar acid and pectin can cause distorted and uneven jams and jellies.

Frequently asked questions, answers and tips:

What is the secret to thick strawberry jam?

In my experience, the secret to getting thick strawberry jam is the addition of lemon rind to the jam when it is cooking down. Don't forget to remove the rind before canning.

Why is there lemon rind in this recipe?

The lemon rind is packed with pectin, especially the white pith, which helps thicken the jam. While lemon juice also contains pectin, the rind provides even more!

To use it, simply quarter a freshly scrubbed lemon, remove the flesh, and add the rind to your jam while cooking. Remove the rind before ladling the jam into jars.
(Tip: This is a great way to use organic lemons-save the fruit for lemonade or other recipes!)

When is strawberry season?

Strawberry season varies by location, typically running from January to July. (Lucky Floridians can start picking as early as January, while here in Pennsylvania, we wait until later in the spring!)

No matter when your local season hits, it's the perfect time to make this easy strawberry jam. It's the same recipe my mom used when I was growing up-I loved it so much, I took a peanut butter and jelly sandwich to school every single day!

What is sure Jell made of?

Sure jell is a commercially produced combination of dextrose, citric acid, fruit pectin. It is extracted commercially from left-over orange peels. That tart, sour white part of the orange will help make your jelly gel. This is why I will also use a lemon rind from time to time to increase the firmness of a jam. 

Why didn't my strawberry jam set?

The most common causes are not reaching a full rolling boil before adding the sugar, not boiling for the full minute after adding sugar, or measuring crushed strawberries inaccurately. Make sure you are measuring 5 cups of crushed fruit - not whole berries. If your jam is already made and too soft, it can be recooked. Empty the jars back into a saucepan, bring back to a boil, add another half package of Sure-Jell dissolved in ¼ cup water, boil 1 minute, and re-jar.

Can I use frozen strawberries?

Yes. Thaw completely and drain off any excess liquid before crushing. Measure the crushed amount after thawing. The set and flavor hold up well with frozen fruit - good news for making this recipe outside of strawberry season.

How do I know if my jar sealed correctly?

Once the jars have cooled completely - at least 12 hours - press the center of the lid. A properly sealed lid will be slightly concave and will not flex or spring back when pressed. If it pops up and down, the jar did not seal. Refrigerate it and use it within 3 weeks.

My jam is too thick. What went wrong?

Over-boiling is usually the cause. Boiling past the 1-minute mark after adding sugar causes the pectin to over-activate. Too much pectin can also cause this - make sure you are using one standard package, not more. Very thick jam is still safe to eat. Stir a small amount of warm water into individual servings to loosen it if needed.

How long does Sure-Jell strawberry jam last?

Properly sealed jars keep in a cool, dry, dark place for up to 1 year. Once opened, refrigerate and use within 3 weeks. Freezer jam lasts up to 1 year frozen and 3 weeks once thawed.

What is the processing time for water bath canning this jam?

10 minutes at elevations under 1,000 feet. Add 1 minute for every 1,000 feet above sea level. At 3,001 to 6,000 feet, process for 15 minutes. At 6,001 to 8,000 feet, process for 20 minutes. Begin timing once the water returns to a full boil after the jars are submerged.

strawberry jam jars stacked.

Thick Homemade Strawberry Jam with Sure Jell

This strawberry jam recipe with Sure-Jell pectin sets thick every time. Fresh strawberries, simple steps, and complete water bath canning instructions for beginners.
4.59 from 65 votes
Print Pin Rate
Course: Canning Recipes
Cuisine: American
Keyword: strawberry jam, strawberry jam recipe
Prep Time: 15 minutes minutes
Cook Time: 8 minutes minutes
Additional Time: 10 minutes minutes
Total Time: 33 minutes minutes
Servings: 6 half pints
Calories: 367
Author: Sarah Mock

Ingredients

  •  
    8 Cups Strawberries crushed down to 5 cups
  •  
    1 package Sure Jell Original
  • A rectangular 8 oz package of Kerrygold Pure Irish Butter, unsalted, with a green and gold label and Irish grass-fed cow branding-perfect for creating delicious Saint Patrick's Day cupcakes.½ Teaspoon Butter
  • A 4-pound bag of Domino granulated pure cane sugar with a yellow and white design, showing nutrition information and branding-perfect for sweetening recipes like rhubarb sour or your favorite desserts.7 Cups Sugar
  •  
    lemon rind
Follow Savoring The Good On PinterestFollow @SavoringTheGood or tag #STGRecipes!

Instructions

  • Wash strawberries and remove the stems.
    washing fresh strawberries in water
  • Puree the strawberries in a food processor, crush with a potato masher OR use an emersion blender.
    8 Cups Strawberries
    Thick strawberry sauce made in a food processor.
  • Measure out 5 cups crushed strawberries and place in a large sauce pan.
    A Pyrex measuring cup filled with chopped or crushed tomatoes sits on a wooden surface with a blurred kitchen appliance in the background, evoking the same homemade charm as when preparing freezer strawberry jam.
  • Stir in 1 package of Sure Jell original and ½ a teaspoon butter. The butter will help reduce the foam.
    1 package Sure Jell Original, ½ Teaspoon Butter
    Close-up of a metal whisk blending mashed strawberries and a small chunk of butter into a thick strawberry jam.
  • If using lemon rinds for thicker jam, now is the time to toss in the lemon rinds and stir to dissolve the powdered pectin.
    lemon rind
    A thick strawberry sauce made in a pan with a whisk.
  • Bring the mixture to a full rolling boil that will not stop when stirred.
    A bowl of thick strawberry jam sauce with a whisk in it.
  • Boil for 1 minute.
    A bowl of thick strawberry jam sauce with a whisk in it.
  • Add 7 cups of sugar and return to the rolling boil.
    7 Cups Sugar
    Strawberry jam in a glass bowl on a wooden table.
  • Boil for exactly 1 minute, stirring the entire time.
    A bowl of thick strawberry jam sauce with a whisk in it.
  • Remove from heat and skim off any foam with a metal or wooden spoon.
    Rhubarb Jam at a hard boil
  • Remove lemon rind
  • Ladle jam into containers using a canning funnel, filling to within ¼ inch of the top. Wipe jar rims clean.
    Two glass jars being filled with thick strawberry jam, with a blue funnel in use. A towel is underneath the jars.
  • Add a NEW, clean lid and ring. Finger tighten. For shelf-stable jam, follow the Hot Water Bath Canning Instructions in the Notes section. For refrigerator jam, skip to Step 15.
    A pot filled with metal cans on a stove, used for making cherry jam.
  • Process in a hot water bath for 15 minutes. Remove from the water and allow to cool completely.
    A pot filled with metal cans on a stove, used for making cherry jam.
  • Check that lids sealed after 24 hours.
    Thick Strawberry Jam in a jar being held by a female hand, square image
  • If lids did not seal, refrigerate and use within 3 weeks.
    strawberry jam jars stacked.

Notes

Hot Water Bath Canning Instructions
Sterilize the jars and lids in simmering water for at least 10 minutes while you prepare your strawberry jelly.
  1. Ladle the hot jelly into hot jars, filling each jar to within ¼ inch of the top.
  2. Wipe the jar rims of any jelly.
  3. Cover with a fresh, new lid and screw on a ring. Be CAREFUL! It is going to be hot.
  4. Using jar tongs, lower the jars into the simmering water. Make sure the jars are covered by 1-2 inches of water.
  5. Simmer for 10 minutes.
  6. Remove from the hot water bath and allow to cool completely. Listen for the 'ping' of the lids setting.
  7. Once cooled, check for seals by pressing on the centers of the lids. If there is NOT a spring back the jar is sealed! Congratulations!
  8. If not sealed, refrigerate the jelly and use within 3 weeks.
  9. If sealed the jars should be stored in a cool, dry, dark place for up to a year.
 
Altitude adjustment: Add 1 minute of processing time for every 1,000 feet above sea level. At 3,001–6,000 feet, process 15 minutes. At 6,001–8,000 feet, process 20 minutes.
Want to share when you made this recipe?Follow @SavoringTheGood & tag #STGRecipes!
Nutrition Facts
Thick Homemade Strawberry Jam with Sure Jell
Serving Size
 
1 /4 cup
Amount per Serving
Calories
367
% Daily Value*
Sodium
 
3
mg
0
%
Carbohydrates
 
94
g
31
%
Sugar
 
92
g
102
%
Protein
 
1
g
2
%
* Percent Daily Values are based on a 2000 calorie diet.
**Nutritional facts are just estimates. Please utilize your own brand nutritional values to double check against our estimates.
Like this recipe card? Want one for your site?Check out WP Recipe Maker!

published in May 2017.


Sarah Mock of savoringthegood.com headshot 2022

I am Sarah Mock. Welcome!

Sarah Mock is a classically trained Chef and a graduate of Johnson & Wales University. A culinary blogger for 17 years, Sarah helps the home cook prepare her recipes with professional results.

Get to know me

as seen in:

Logos of Hersheyland, ABC News, and Good Day PA are showcased in a seamless row, providing a snapshot of popular brands.

Hersheyland Nightline Good Day Pa!

The vibrant design showcases the iconic logos of Pinterest, Rachael Ray, and Jell-O set against a bold red background. Sorry, the provided description doesn't offer enough detail to suggest important SEO keywords.

Pinterest Rachael JELL-O


Raisin Bran Muffins Recipe

raisin Bran Muffins on a plate.

Raisin Bran Muffins are a morning staple in our house. Easy to prep, easy to find ingredients, and a breakfast muffin that everyone loves this recipe. Make these muffins your own by adding additional dried fruit and nuts.

raisin Bran Muffins on a plate.

Johnson & Wales University is the culinary college I attended and they held a scholarship for incoming freshmen. It was a recipe creation competition and I can't remember all the categories, because that was over 20 years ago, but I do know that I won second place in the conversion category. This is that recipe. It won me a $6000 scholarship and I am sharing the recipe with you for free!

Classic Raisin Bran Muffins Ingredients:

The ingredients for apple raisin bread in a bowl, including raisins and apples.

How To Make Bran Muffins:

Classic raisin bran muffins are the perfect blend of sweet raisins and wholesome bran flake cereal. Easy, moist breakfast muffins made to start your day!

Refrigerator Apple Raisin Bran Muffins
  1. Preheat the oven to 350 and prepare a muffin pan by spraying each cup with non stick pan spray. Apple Raisin Refrigerator Bran Muffins from Howipinchapenny.com
  2. In an extra large mixing bowl or a stock pot, combine the first 6 ingredients and stir the dry ingredients until combined completely.
  3. In a separate bowl, beat the eggs, buttermilk and applesauce. stirring wet and try ingredients together for raisin bran muffins
  4. Pour the wet ingredients to the dry ingredients.
  5. Add the raisins and chopped apples to the batter. Raisin Bran Muffin batter in a large bowl
  6. Stir until combined completely.
  7. Cover and chill in the refrigerator for 1 hour or even better, overnight. The bran flakes will absorb the moisture of the batter making a delicious muffin mix.
    a-dozen-Raisin-Bran-Muffins-in-a-stoneware-muffin-pan-
  8. Spoon the batter into pan-sprayed muffin tins, or prepared paper muffin liners, filling ⅔ full.
  9. Sprinkle with oatmeal for garnish.
  10. Bake at 350 degrees for 20 minutes and remove from the pan immediately.

Can the muffin batter be stored in the refrigerator?

You can store the batter in the refrigerator for up to 2 weeks. Give it a stir before you scoop the batter into the muffin tins. 

Can these muffins be frozen?

Refrigerator Apple Raisin Bran Muffins

Once baked, these muffins will freeze quite nicely. Be sure to store them in an airtight container or wrap each one individually to keep the air away from them. If adding them to a lunch box, they will be completely thawed by lunchtime.

FAQ's and Tips

What other fruit can be substituted for the diced apples?

I am a huge fan of apples in this recipe but feel free to substitute in diced pears, peaches or even fresh cherries. All would make great substitutions or additions to this recipe. 

raisin Bran Muffins on a plate.

Refrigerator Apple Raisin Bran Muffin Recipe

Refrigerator Apple Raisin Bran Muffins are a morning staple in our house. Easy prep, easy to find ingredients and a breakfast muffin the whole family enjoys.
No ratings yet
Print Pin Rate
Course: Breakfast Recipes
Cuisine: American
Keyword: refrigerator bran muffins recipe
Prep Time: 15 minutes minutes
Cook Time: 20 minutes minutes
Chill Time: 1 hour hour
Total Time: 1 hour hour 35 minutes minutes
Servings: 48 Muffins
Calories: 108
Author: Sarah Mock

Ingredients

  •  
    1 box bran flakes with raisins 20 ounce box
  • A 5-pound bag of King Arthur Baking Company unbleached bread flour with 12.7% protein content, labeled for ideal use in bread, pizza crust, and rolls-perfect for creating hearty sides like homemade loaves to serve alongside a comforting slowcooker sausage casserole.5 Cups Flour, All Purpose
  • A 4-pound bag of Domino granulated pure cane sugar with a yellow and white design, showing nutrition information and branding-perfect for sweetening recipes like rhubarb sour or your favorite desserts.1 1 /2 Cup Sugar
  • Arm & Hammer Pure Baking Soda box, 8 oz size, with text promoting it as America's #1 trusted brand and stating 1 Tablespoon Baking Soda + 2 Teaspoons
  • A plastic container of McCormick Ground Cinnamon with a red lid and label showing product details in English and Spanish-perfect for adding warm flavor to your favorite recipes, including Keto Granola.2 Teaspoons Cinnamon
  • A Morton Salt container with a blue label featuring a girl in a yellow dress holding an umbrella, with salt pouring out of a container-an essential ingredient for perfectly seasoning dishes like Chicken Cordon Bleu.1 Teaspoon Salt
  • A single brown chicken egg, perfect for making Chicken Cordon Bleu, stands upright on a white background.4 Egg beaten
  •  
    1 Quart Buttermilk or 1 quart milk with 2 Tablespoons white vinegar added
  •  
    1 Cup Applesauce
  •  
    2 Apples diced
  •  
    1 Cup raisins
  •  
    Oatmeal for garnish
US Customary - Metric
Follow Savoring The Good On PinterestFollow @SavoringTheGood or tag #STGRecipes!

Instructions

  • Preheat the oven to 350 and prepare a muffin pan by spraying each cup with non stick pan spray.
  • In an extra large bowl or a stock pot, combine the first 6 ingredients and stir the dry ingredients until combined completely.
    1 box bran flakes with raisins, 5 Cups Flour, All Purpose, 1 1 /2 Cup Sugar, 1 Tablespoon Baking Soda, 2 Teaspoons Cinnamon, 1 Teaspoon Salt
  • In a separate bowl, beat the eggs, buttermilk and applesauce,
    4 Egg, 1 Quart Buttermilk, 1 Cup Applesauce
  • Pour the wet ingredients to the dry ingredients.
  • Add the raisins and chopped apples to the batter.
    1 Cup raisins, 2 Apples diced
  • Stir until combined completely.
  • Cover and chill in the refrigerator for 1 hour or even better, overnight. The bran flakes will absorb the moisture of the batter making a delicious muffin mix.
  • Spoon the batter into pan sprayed muffin tins, filling ⅔ full
  • Sprinkle with oatmeal for garnish.
    Oatmeal for garnish
  • Bake at 350 degrees for 20 minutes and remove from the pan immediately.

Notes

Can the muffin batter be stored in the refrigerator? 
You can store the batter in the refrigerator for up to 2 weeks. Give it a stir before you scoop the batter into the muffin tins. 
Want to share when you made this recipe?Follow @SavoringTheGood & tag #STGRecipes!
Nutrition Facts
Refrigerator Apple Raisin Bran Muffin Recipe
Serving Size
 
1
Amount per Serving
Calories
108
% Daily Value*
Fat
 
1
g
2
%
Saturated Fat
 
1
g
6
%
Trans Fat
 
0.001
g
Polyunsaturated Fat
 
0.2
g
Monounsaturated Fat
 
0.3
g
Cholesterol
 
16
mg
5
%
Sodium
 
144
mg
6
%
Potassium
 
75
mg
2
%
Carbohydrates
 
22
g
7
%
Sugar
 
10
g
11
%
Protein
 
3
g
6
%
* Percent Daily Values are based on a 2000 calorie diet.
**Nutritional facts are just estimates. Please utilize your own brand nutritional values to double check against our estimates.
Like this recipe card? Want one for your site?Check out WP Recipe Maker!

Now you can have fresh breakfast muffins every morning!

originally published Apr 22, 2017


Sarah Mock of savoringthegood.com headshot 2022

I am Sarah Mock. Welcome!

Sarah Mock is a classically trained Chef and graduate of Johnson & Wales University. A culinary blogger for 16 years Sarah helps the home cook prepare her recipes with professional results.

Get to know me

as seen in:

Logos of Hersheyland, ABC News, and Good Day PA are showcased in a seamless row, providing a snapshot of popular brands.

Hersheyland Nightline Good Day Pa!

The vibrant design showcases the iconic logos of Pinterest, Rachael Ray, and Jell-O set against a bold red background. Sorry, the provided description doesn't offer enough detail to suggest important SEO keywords.

Pinterest Rachael JELL-O


Almond Biscotti with Cranberries

ALMOND BISCOTTI RECIPE WITH CRANBERRIES.

Almond biscotti with cranberries is perfect for enjoying alongside a cup of espresso or coffee drink. This easy Italian twice-baked cookie is delicious to enjoy at home or package them up and give as a gift.

ALMOND BISCOTTI RECIPE WITH CRANBERRIES.

If you love this biscotti cookie you are going to want to try my recipe for easy peanut butter blossom cookies. New to my cookie tray this year will be Biscoff Butter Cookies.

Ingredients:

Cranberry, Almond Biscotti Recipe ingredients

Recipe Card?

To find the full printable recipe with specific measurements and directions CLICK HERE to go to the recipe card.

How to make biscotti:

  1. In a separate bowl, sift together the flour and baking powder.
A bowl of batter with a whisk in it, ready for preparing an almond biscotti recipe
  1. In a mixing bowl with the paddle attachment, beat the sugar, softened butter, lemon zest, and salt. Beat the mixture until it is creamed together, let the mixer run on medium-high for about 3 minutes. A yellow batter in a mixing bowl with a spatula, preparing an almond biscotti recipe.
  2. Add the eggs, one at a time.
  3. Add the flour mixture to the butter and egg blend. A bowl of cookie dough with cranberries in it, perfect for making almond biscotti recipe.
  4. Just before the batter comes together, add the almonds and cranberries.
  5. Do not over-mix. Almond biscotti cookie dough with cranberries on a baking sheet.
  6. Form the dough into a log about 10-inch long, 4-inch wide log on the prepared baking sheet. I use a silpat mat but parchment paper works as well. An almond biscotti cookie with cranberries on a baking sheet.
  7. Bake at 350 until light golden, about 40 minutes.
  8. Cool at least 30 minutes. A slice of cranberry bread on a cutting board, perfect to pair with the almond biscotti recipe.
  9. Use a long serrated slicing knife and use a pressing/sawing motion to slice the biscotti widthwise into ½ to 1-inch slices.
  10. Line the biscotti up on a metal cooling rack and place the cooling rack on a cookie sheet.
    Cranberry almond biscotti recipe on a cooling rack.
  11. Back into the 350 degree oven they go for another 20-30 minutes. I say 20-30 minutes because it depends on how thick you have sliced your biscotti. The thicker they are, the longer they are going to continue to bake.
ALMOND BISCOTTI RECIPE WITH CRANBERRIES.

Almond Biscotti With Cranberries

Classic almond biscotti with crunchy toasted almonds and dried cranberries, baked to perfection for a crispy, nutty treat loved by coffee lovers.
4.64 from 46 votes
Print Pin Rate
Course: Cookie Recipes
Cuisine: Italian
Prep Time: 20 minutes minutes
Additional Time: 40 minutes minutes
Total Time: 40 minutes minutes
Servings: 24 cookies
Calories: 139
Author: Sarah Mock

Ingredients

  • A 5-pound bag of King Arthur Baking Company unbleached bread flour with 12.7% protein content, labeled for ideal use in bread, pizza crust, and rolls-perfect for creating hearty sides like homemade loaves to serve alongside a comforting slowcooker sausage casserole.2 Cups Flour, All Purpose
  • A can of Rumford Baking Powder, 8.1 oz (230g), with red label, showing baked goods like Cherry Scones, and a 1 ½ teaspoons Baking Powder
  • A 4-pound bag of Domino granulated pure cane sugar with a yellow and white design, showing nutrition information and branding-perfect for sweetening recipes like rhubarb sour or your favorite desserts.¾ Cup Sugar
  •  
    ½ Cup unsalted butter room temperture
  •  
    1 zest of a lemon
  • A Morton Salt container with a blue label featuring a girl in a yellow dress holding an umbrella, with salt pouring out of a container-an essential ingredient for perfectly seasoning dishes like Chicken Cordon Bleu.¼ Teaspoon salt
  • A single brown chicken egg, perfect for making Chicken Cordon Bleu, stands upright on a white background.2 Egg
  •  
    ¾ Cup whole almonds
  •  
    ⅔ Cup dried cranberries
Follow Savoring The Good On PinterestFollow @SavoringTheGood or tag #STGRecipes!

Instructions

  • Sift together the flour and baking powder.
  • In a mixing bowl with the paddle atachment, beat the sugar, softened butter, zest of one lemon and salt.
  • Beat the mixture until it is creamed together, let the mixer run on medium high for about 3 minutes.
  • Add the eggs, one at a time.
  • Add the flour mixture to the butter and egg blend.
  • Just before the batter comes together, add the almonds and cranberries.
  • Do not over mix.
  • Form the dough into a log about 10-inch long, 4-inch wide log on the prepared baking sheet.
  • I use a silpat mat but parchment paper works as well.
  • Bake at 350 until light golden, about 40 minutes.
  • Cool at least 30 minutes.
  • Use a long serrated slicing knife and use a pressing/sawing motion to slice the biscotti widthwise into ½ to 1 inch slices.
  • If the first few slices fall apart you need to let the biscotti cool a bit longer.
  • Line the biscotti up on a metal cooling rack and place the cooling rack on a cookie sheet.
  • Back into the 350 degree oven they go for another 20-30 minutes. I say 20-30 minutes because it depends on how thick you have sliced your biscotti. The thicker they are, the longer they are going to continue to bake.

Notes

  1. If the first few slices fall apart you need to let the biscotti cool a bit longer.
Want to share when you made this recipe?Follow @SavoringTheGood & tag #STGRecipes!
Nutrition Facts
Almond Biscotti With Cranberries
Serving Size
 
1 cookie
Amount per Serving
Calories
139
% Daily Value*
Fat
 
7
g
11
%
Saturated Fat
 
3
g
19
%
Trans Fat
 
1
g
Cholesterol
 
24
mg
8
%
Sodium
 
31
mg
1
%
Potassium
 
82
mg
2
%
Carbohydrates
 
19
g
6
%
Sugar
 
9
g
10
%
Protein
 
3
g
6
%
* Percent Daily Values are based on a 2000 calorie diet.
**Nutritional facts are just estimates. Please utilize your own brand nutritional values to double check against our estimates.
Like this recipe card? Want one for your site?Check out WP Recipe Maker!

Sarah Mock of savoringthegood.com headshot 2022

I am Sarah Mock. Welcome!

Sarah Mock is a classically trained Chef and graduate of Johnson & Wales University. A culinary blogger for 16 years Sarah helps the home cook prepare her recipes with professional results.

Get to know me

as seen in:

Logos of Hersheyland, ABC News, and Good Day PA are showcased in a seamless row, providing a snapshot of popular brands.

Hersheyland Nightline Good Day Pa!

The vibrant design showcases the iconic logos of Pinterest, Rachael Ray, and Jell-O set against a bold red background. Sorry, the provided description doesn't offer enough detail to suggest important SEO keywords.

Pinterest Rachael JELL-O


Thai Iced Tea Recipe (Homemade and Refreshing)

A layered dessert in a glass featuring caramel, vanilla flavors, and a hint of Thai iced tea, topped with small diced pieces. Vanilla pods and star anise rest beside the glass on a dark background.

Refreshing, creamy, and spiced-this homemade Thai Iced Tea is the perfect drink for summer or after a spicy meal!

If you love the warm and spicy flavors with a swirl of creamy sweetness that is Thai Iced tea, you are going to drink up my homemade recipe. It is refreshing on a hot day and cools your palate after a spicy meal. This recipe is a blend of different recipes. Feel free to adjust the spices to make it your own!

This easy Thai iced tea recipe is a blend of different recipes. Feel free to adjust the spices to make it your own!

Thai Iced Tea Recipe Ingredients

Thai Iced Tea Recipe. Easy, Homemade, Refreshing
  • 6 cups water
  • 8 black tea bags
  • ½ cup sugar
  • 2 star anise
  • 1 vanilla bean (or 1 teaspoon vanilla extract)
  • 2 cinnamon sticks
  • 1 teaspoon ground cloves
  • 1 teaspoon cardamom (optional)
  • Sweetened Condensed Milk (Or dairy or dairy alternative of your choosing)

How to make Thai tea concentrate

Thai Iced Tea Recipe. Easy, Homemade, Refreshing
  1. Bring 6 cups of water to a rolling boil in a medium saucepan.
  2. Once boiling, turn off the heat and add the black tea bags, star anise, vanilla bean, cinnamon sticks, ground cloves, and cardamom (if using).
  3. Steep the tea and spices for 15 minutes, allowing the flavors to infuse.
  4. Strain the mixture through a fine mesh strainer lined with a coffee filter to remove all spices and tea leaves.
  5. Let the tea concentrate cool completely, then transfer it to a jar or bottle and refrigerate for up to a week.

How to make Thai iced tea

Easy Thai Iced Tea Recipe

Make the Thai tea concentrate:

  1. Bring water to a boil in a medium saucepan.
  2. Turn off the heat and add tea bags, star anise, vanilla bean, cinnamon sticks, ground cloves, and cardamom.
  3. Steep for 15 minutes, then strain through a coffee filter-lined mesh strainer.
  4. Cool completely and refrigerate for up to a week.

Assemble the Thai iced tea:

  1. Fill a glass ¾ full with the chilled Thai tea concentrate.
  2. Add 2 tablespoons of sweetened condensed milk (or your preferred dairy or dairy-free alternative).
  3. Stir gently to combine, or layer the milk for a visually appealing effect.
  4. Add ice cubes or crushed ice, and enjoy immediately!

Make Ahead Tip

The tea concentrate keeps in the fridge for up to a week.

Chef Tips

  • Adjust sweetness by adding more or less condensed milk.
  • Use dairy-free milk like coconut or almond milk for a vegan version.
  • A glass jar filled with homemade dill pickles, mustard seeds, and spices sits on a wooden surface with more jars and cucumbers in the background.
    Dill Pickle Recipe for Canning
  • Cream cheese and sugar mixture in a stand mixer bowl with a paddle attachment, ready to blend on a wooden surface.
    Cream Cheese Recipes for Appetizers, Dinners, and Desserts
  • A serving of lazy lasagna is being lifted from a slow cooker with a metal spatula. The cheesy lasagna is topped with melted cheese and sprinkled parsley.
    Lazy Lasagna with Frozen Ravioli
Thai Iced Tea: Discover an authentic Thai iced tea recipe that will transport you to the vibrant streets of Thailand. Dive into the rich and creamy flavors of this traditional beverage, made with a unique

Easy Thai Iced Tea Recipe (Cha Yen) - Creamy & Refreshing

This is an easy Thai Iced tea recipe with warm and spicy flavors with a swirl of creamy sweetness.
4 from 2 votes
Print Rate
Course: Drinks - Non Alcoholic
Cuisine: Mediterranean
Prep Time: 10 minutes minutes
Cook Time: 5 minutes minutes
Servings: 6
Calories: 91
Author: Sarah Mock

Ingredients

  •  
    6 Cups Water
  •  
    8 Black Tea Bags
  • A 4-pound bag of Domino granulated pure cane sugar with a yellow and white design, showing nutrition information and branding-perfect for sweetening recipes like rhubarb sour or your favorite desserts.½ Cup Sugar
  •  
    2 Star Anise
  • Three dried vanilla beans are arranged on a white background.1 Vanilla Bean
  •  
    2 Cinnamon Sticks
  •  
    1 Teaspoon Ground Cloves
  •  
    1 Teaspoon Cardamom optional
  • Sweetened Condensed Milk Or dairy or dairy alternative of your choosing
Follow Savoring The Good On PinterestFollow @SavoringTheGood or tag #STGRecipes!

Instructions

  • How to make Thai tea concentrate
  • Bring the water to a rolling boil and turn off the heat.
  • Steep the tea bags and spices in the boiled water for 15 minutes.
  • Strain the spices out of the tea using mesh strainer lined with a coffee filter to separate out the spices.
  • Cool the tea completely and store the tea concentrate in the refrigerator for up to a week.

How to make Thai iced tea:

  • Pour your Thai Ice Tea base to fill the glass until it is ¾ full. (or is it ¼ empty? )
  • Top the tea with 2 large tablespoons of sweetened condensed milk. I like to watch it sink to the bottom of the glass and see the lovely trails of milky deliciousness as it falls.
  • Stir to combine and enjoy!

Notes

  • If you would like the have your tea sweeter, add another spoonful of sweetened condensed milk.
  • Other options for adding milk to your tea would be heavy cream, whole milk, coconut milk or almond milk. You may have to adjust your sweetness if you opt for one of these ingredients.
  • It is best to let the tea cool completely before mixing the tea with the sweetened condensed milk. But if you are like me, and want your delicious drink NOW fill a glass half full with crushed ice.
Want to share when you made this recipe?Follow @SavoringTheGood & tag #STGRecipes!
Nutrition Facts
Easy Thai Iced Tea Recipe (Cha Yen) - Creamy & Refreshing
Serving Size
 
1
Amount per Serving
Calories
91
% Daily Value*
Fat
 
1
g
2
%
Cholesterol
 
2
mg
1
%
Sodium
 
19
mg
1
%
Carbohydrates
 
22
g
7
%
Sugar
 
20
g
22
%
Protein
 
1
g
2
%
* Percent Daily Values are based on a 2000 calorie diet.
**Nutritional facts are just estimates. Please utilize your own brand nutritional values to double check against our estimates.
Like this recipe card? Want one for your site?Check out WP Recipe Maker!

published March 31. 2017


Sarah Mock of savoringthegood.com headshot 2022

I am Sarah Mock. Welcome!

Sarah Mock is a classically trained Chef and graduate of Johnson & Wales University. A culinary blogger for 16 years Sarah helps the home cook prepare her recipes with professional results.
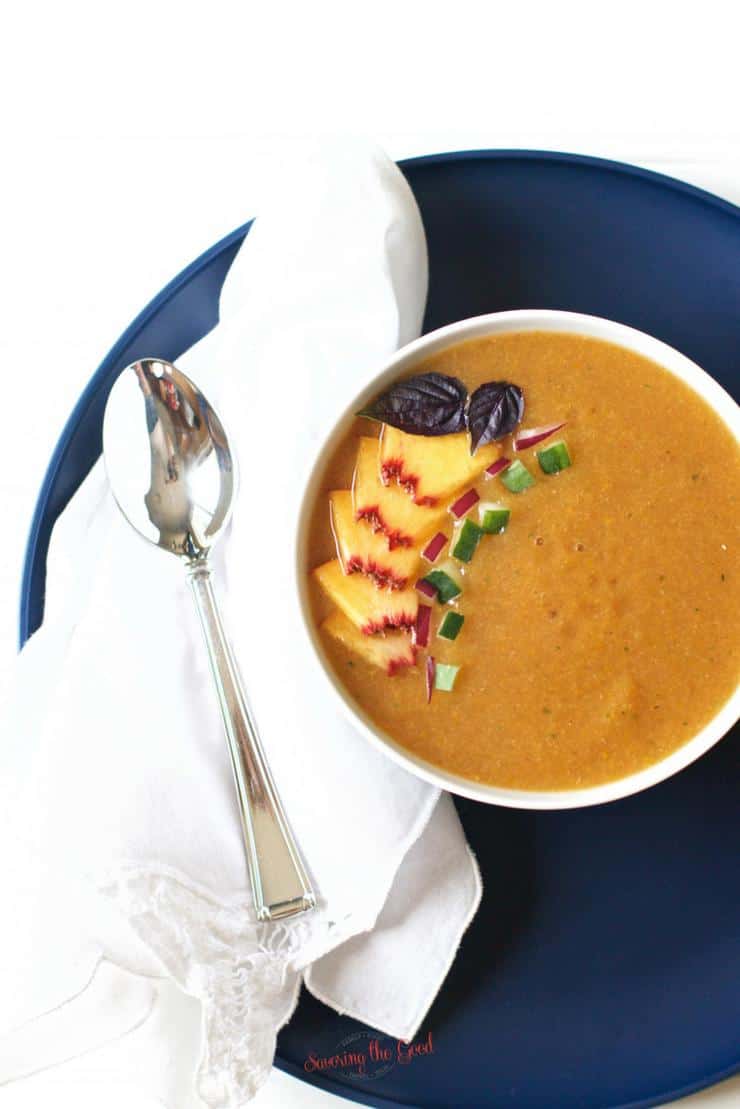
Get to know me

as seen in:

Logos of Hersheyland, ABC News, and Good Day PA are showcased in a seamless row, providing a snapshot of popular brands.

Hersheyland Nightline Good Day Pa!

The vibrant design showcases the iconic logos of Pinterest, Rachael Ray, and Jell-O set against a bold red background. Sorry, the provided description doesn't offer enough detail to suggest important SEO keywords.

Pinterest Rachael JELL-O

4 Super Simple Sweet and Savory Compound Butter Recipes

A stack of sweet and savory compound butters on a cutting board.

Sweet and savory compound butter recipes are the perfect complement to breads, meats, and pastries. Here are 4 Super Simple Sweet and Savory Compound Butter Recipes you can make today that are easy to give as a gift.

Butter is wonderful on my homemade Paska bread, no knead bread or slathered on whole wheat savory zucchini bread. 

In culinary school we were taught 'butter is better' and I couldn't agree more! Except when it comes to compound flavored butters. Sweet and savory compound butter recipes are the perfect complement to breads, meats, and pastries. Here are 4 Super Simple Sweet and Savory Compound Butter Recipes you can make today that are easy to give as a gift.

4 Super Simple Sweet and Savory Compound Butter Recipes

In culinary school we were taught 'butter is better' and I couldn't agree more! Except when it comes to compound flavored butters. I always have compound butters on my Thanksgiving table. They pair very well with my Thanksgiving feast of my juicy roasted turkey, (made with my favorite turkey brine recipe) cranberry sauce.

Be sure to follow my instructions on how to cook asparagus. It is so easy!

Lime slices on a wooden cutting board.

Cilantro Lime Butter Ingredients:

  • 1 stick (½ cup) Real California Butter
  • 1 Tablespoons cilantro, finely chopped
  • ½ teaspoon salt,
  • Zest of ½ a lime
Look for the sweet and savory compound butter recipes featuring california real milk and seals.

How do you know you are purchasing Real California butter?

Look for the seals! When you purchase a dairy product featuring the Real California seal you know that the product is certified as having been made with 100% Real California Milk from Real California Dairy families. Doesn't that feel good? Want to learn more about the Real California Milk seal and California dairy? Visit Real California Milk website at RealCaliforniaMilk.com.

Compound Butter Recipes

How to make cilantro Lime Butter:

  1. Soften the butter and add the cilantro, lime zest and salt. I just used a mini food processor to combine the ingredients but a mixer with a paddle or even a spoon and bowl to mix your ingredients together.
  2. The butter is ready to go but if you would like to portion it off, I do a butter roll.
A bowl of chiffonade is sitting on top of a piece of paper, surrounded by the aroma of sweet and savory compound butter recipes.
In culinary school we were taught 'butter is better' and I couldn't agree more! Here are 4 Super Simple Sweet and Savory Compound Butter Recipes. 2 simple sweet compound butter recipes and 2 simple savory compound butter recipes.
Savory Compound Butter Recipes

How to make a butter log:

  1. Use a piece of parchment paper, wax paper will work in a pinch.
  2. Plop, that is a technical culinary term, the compound butter on the parchment paper.
  3. Fold over the parchment and slide your hand to spread the butter out. It naturally forms a tube. Pretty awesome!
  4. Pop it into the refrigerator, allow it to chill completely and slice.
Savory Compound Butter Recipes

This butter is so good on steak, pork or melted on a savory biscuit.

4 Super Simple Sweet Savory Compound Butter Recipes
Savory Compound Butter Recipes

Roasted Garlic Compound Butter

  • 1 stick (½ cup) Real California Butter
  • 1 Tablespoons flat leaf parsley, finely chopped
  • 3 cloves of roasted garlic (See my recipe for roasted garlic)

Follow the same procedure as above.

Soften the butter, mix the butter, parsley and roasted garlic together in a food processor, mixer or by hand.

A roll of cheese is sitting on top of a piece of paper.

Use a piece of parchment paper and create the butter log.

Chill until firm.

A slice of cheese on a wooden cutting board, perfect for sweet and savory compound butter recipes.


Slice and serve.

My favorite way to enjoy this compound butter is as a snack served on a slice of baguette.

Sweet and savory compound butter recipes on a wooden cutting board.

Brown Sugar and Cinnamon Compound Butter

  • 1 stick (½ cup) Real California Butter
  • 2 Tablespoons Brown Sugar
  • ½ Teaspoon cinnamon
A wooden spoon is placed on a piece of paper, ready to be used for creating sweet and savory compound butter recipes.

Make sure the butter is soft and blend all the ingredients together.

A piece of dough, either sweet or savory, is sitting on top of a piece of paper.

This butter is wonderful on scones, pancakes, waffles and biscuits.

How delicious would this be to give as a hostess gift at the next ladies tea?

A cutting board with oranges, cranberries, nuts and a knife, perfect for creating sweet and savory compound butter recipes.

Cranberry, Walnut, Orange Butter Compound Butter

  • 1 stick (½ cup) Real California Butter
  • 1 tablespoon dried cranberries, chopped
  • 1 tablespoon walnuts, chopped
  • zest of 1 orange
A wooden spatula stirring sweet and savory compound butter recipes on a piece of paper.

This might be my favorite compound butter. The sweetness of the cranberries, orange zest with the crunch of the walnuts is the perfect compliment to the California butter.

My favorite way to enjoy this butter is on a croissant.

A stack of different types of cheese, including compound butter recipes, on a wooden cutting board.

4 Super Simple Sweet and Savory Compound Butter Recipes

Sweet and savory compound butter recipes are the perfect complement to breads, meats, and pastries. Here are 4 Super Simple Sweet and Savory Compound Butter Recipes you can make today that are easy to give as a gift.
4.25 from 4 votes
Print Rate
Course: Side Dishes
Cuisine: American
Prep Time: 10 minutes minutes
Cook Time: 0 minutes minutes
Total Time: 10 minutes minutes
Servings: 1 /2 cup
Calories: 499
Author: Sarah Mock

Ingredients

  •  
    Cilantro Lime Compound Butter
  •  
    1 stick ½ cup Real California Butter
  •  
    2 Tablespoon Cilantro finely chopped
  • A Morton Salt container with a blue label featuring a girl in a yellow dress holding an umbrella, with salt pouring out of a container-an essential ingredient for perfectly seasoning dishes like Chicken Cordon Bleu.½ Teaspoon salt
  • A whole, uncut green lime with a textured peel on a white background-the perfect citrus for crafting a classic Gimlet.Zest of 1 lime
  •  
    Roasted Garlic
  •  
    1 stick ½ cup Real California Butter
  •  
    1 Tablespoon flat leaf parsley finely chopped
  •  
    3 cloves of roasted garlic
  •  
    Brown Sugar and Cinnamon Butter
  •  
    1 stick ½ cup Real California Butter
  • Domino Light Brown Sugar box, 16 oz, featuring a slice of Blackberry Dump Cake topped with whipped cream and berries, and a Non-GMO Project Verified label in the bottom right corner.2 Tablespoon Brown Sugar
  • A plastic container of McCormick Ground Cinnamon with a red lid and label showing product details in English and Spanish-perfect for adding warm flavor to your favorite recipes, including Keto Granola.½ Teaspoon cinnamon
  •  
    Cranberry Walnut, Orange Butter
  •  
    1 stick ½ cup Real California Butter
  •  
    1 Tablespoon dried cranberries chopped
  •  
    1 Tablespoon walnuts chopped
  •  
    zest of 1 orange
Follow Savoring The Good On PinterestFollow @SavoringTheGood or tag #STGRecipes!

Instructions

  • m
Want to share when you made this recipe?Follow @SavoringTheGood & tag #STGRecipes!
Nutrition Facts
4 Super Simple Sweet and Savory Compound Butter Recipes
Serving Size
 
1
Amount per Serving
Calories
499
% Daily Value*
Fat
 
51
g
78
%
Saturated Fat
 
32
g
200
%
Trans Fat
 
2
g
Polyunsaturated Fat
 
16
g
Cholesterol
 
132
mg
44
%
Sodium
 
536
mg
23
%
Carbohydrates
 
14
g
5
%
Sugar
 
8
g
9
%
Protein
 
1
g
2
%
* Percent Daily Values are based on a 2000 calorie diet.
**Nutritional facts are just estimates. Please utilize your own brand nutritional values to double check against our estimates.
Like this recipe card? Want one for your site?Check out WP Recipe Maker!

How To Roast Garlic And Store In Olive Oil

Learn how to roast garlic and effortlessly store it in flavorful olive oil.

Easy instructions on how to roast raw garlic and then how to store the roasted garlic in olive oil. This is the best way to roast a bulb of garlic and enjoy in your favorite savory recipes.

How To Roast Garlic And Store In Olive Oil I love garlic and more specifically, roasted garlic. There is something about the delicious, caramel cloves of garlic that bring my mouth happiness. I have been known to eat an entire bulb, yes a bulb, of garlic in one sitting. Did you know how easy it is to roast and store your garlic in olive oil? SO EASY! You will not be buying roasted garlic in a jar ever again once you know how easy it is.

I wanted to call attention to one of the most popular posts on my site: the Philly cheesesteak eggrolls.

How To Roast Galic and Make Garlic-Infused Olive Oil

I love garlic and more specifically, roast garlic cloves. There is something about the delicious, caramel cloves that bring my mouth happiness. I have been known to eat an entire bulb, yes a bulb, in one sitting.

You will not be buying roasted garlic in a jar ever again once you know how easy it is. This recipe is an update on my original post on Perfectly Roasted Garlic.

How to make roasted garlic

How To Roast Garlic And Store In Olive Oil

You are able to roast as many bulbs at once as you would like. One, three or an entire sheet pan of them!

  1. Start with a piece of aluminum foil.
  2. Place your fresh garlic on the foil.
    3 bulbs of garlic on foil.
  3. Use olive oil to drizzle the whole heads of garlic and a sprinkle of salt. If you want to add pepper that is good as well!
    3 bulbs of garlic with oil.
  4. Close up the foil to form a packet. There is no need to compress the foil tightly around the garlic. In fact, leaving a bit of space for the air to circulate will help in the roasting process.
    foil packet.
  5. Place the garlic in a 400 degree oven for 45 minutes.
    roasted garlic in foil.

The natural sugars will become caramelized and sweet. You know the garlic is ready to come out of the oven when you break the garlic and cloves slide out of their skins when you press on them. If you like your garlic to have a touch more sweetness, keep the garlic to roast for another 10-15 minutes. This is my idea of heaven on earth.

Peeling the cloves

roasted garlic cloves.

The cloves will easily slip out of the skins with a gentle squeeze when they are roasted to perfection.

Popular recipes to try:

  • 10 Easy, Delicious Foil Packet Meals For Camping
  • Homemade Seasoned Ranch Cheese Crackers
  • 18 Crock Pot Recipes To Make Christmas Morning Easier
  • Easy Juicy Oven Roasted Brined Thanksgiving Turkey Recipe
  • Ham pot pie recipe
  • 9 Crock Pot Recipes To Make Your Beach Vacation Easier
  • Philly Cheesesteak Egg Rolls
  • Cranberry, Almond Biscotti Recipe
  • Strawberry Jam Made With Sure Jell

Storing Garlic in Olive Oil

I store the olive oil and garlic in a mason jar.

Allow the cloves to cool completely before you store them.

How To Roast Garlic And Store In Olive Oil

Cover the roasted peeled cloves in olive oil, cover with a lid and ring. Store the garlic in the refrigerator and use within 2 weeks.

Do not leave garlic-infused oil on the counter. You can be at risk of botulism if not stored properly and no one wants botulism. Read this PDF on the safety of preserving and storing garlic.

How to Make Garlic Confit

tight shot of garlic confit in a ball canning jar, horizontal image

I have a whole post on how to make garlic confit. It is more than I can fit here in this space.

What Are Ways to Use Garlic Cloves in Olive Oil?

Garlic lovers often like to make this recipe because of its versatility. One popular application is infusing olive oil with garlic cloves and rosemary for a fragrant and savory oil that can be drizzled over various dishes.

Additionally, incorporating chili flakes into the mixture adds a hint of heat, creating a condiment perfect for dressing salads, making garlic bread, and making pasta dishes.

Is It Okay to Use Avocado Oil or Extra Virgin Olive Oil to Store Roasted Garlic Heads?

Yes, it is acceptable to use either avocado oil or extra virgin olive oil to store roast garlic. Both oils serve as effective mediums to submerge the peeled garlic, preserving its pungent flavor and preventing spoilage.

Learn how to roast garlic and effortlessly store it in flavorful olive oil.

How To Roast Garlic And Store In Olive Oil

Easy instructions on how to roast garlic and then how to store the roasted garlic in olive oil. This is the best way to roast a bulb of garlic and enjoy in your favorite savory recipes.
4.70 from 23 votes
Print Pin Rate
Course: Food Tips
Cuisine: American
Keyword: how to roast garlic, roasted garlic
Prep Time: 2 minutes minutes
Cook Time: 45 minutes minutes
Total Time: 47 minutes minutes
Servings: 1 bulb of garlic
Calories: 128
Author: Sarah Mock

Ingredients

  •  
    1 bulb of garlic
  • A 500ml bottle of California Olive Ranch Global Blend Extra Virgin Olive Oil with green and blue labeling, indicating a blend from Argentina, Portugal, Chile, and California-perfect for drizzling over your favorite shrimp avocado salad.1 Tablespoon olive oil
  • A Morton Salt container with a blue label featuring a girl in a yellow dress holding an umbrella, with salt pouring out of a container-an essential ingredient for perfectly seasoning dishes like Chicken Cordon Bleu.salt
  • A 6 oz container of McCormick Pure Ground Black Pepper with a red lid and a Black Pepper
Follow Savoring The Good On PinterestFollow @SavoringTheGood or tag #STGRecipes!

Instructions

  • You are able to roast as many bulbs at once as you would like. One, three or an entire sheet pan of them!
  • Start with a piece of aluminum foil.
  • Place your garlic on the foil.
  • Drizzle the garlic with a bit of olive oil and a sprinkle of salt. If you want to add pepper that is good as well!
  • Close up the foil to form a packet. There is no need to compress the foil tightly around the garlic. In fact, leaving a bit of space for the air to circulate will help in the roasting process.
  • Place in a 400 degree oven for 45 minutes. The natural sugars will become caramelized and sweet. You know the garlic is ready to come out of the oven when the cloves slide out of their skins when you press on them.
  • If you like your garlic to have a touch more sweetness, allow it to roast for another 10-15 minutes. This is my idea of heaven on earth.
  • The cloves will easily slip out of the skins with a gentle squeeze when they are roasted to perfection.

Notes

I store my roasted garlic in a mason jar.
Allow the cloves to cool completely before you store them. 
Want to share when you made this recipe?Follow @SavoringTheGood & tag #STGRecipes!
Nutrition Facts
How To Roast Garlic And Store In Olive Oil
Serving Size
 
1 clove
Amount per Serving
Calories
128
% Daily Value*
Fat
 
14
g
22
%
Saturated Fat
 
2
g
13
%
Sodium
 
1
mg
0
%
Potassium
 
12
mg
0
%
Carbohydrates
 
1
g
0
%
Sugar
 
1
g
1
%
Protein
 
1
g
2
%
* Percent Daily Values are based on a 2000 calorie diet.
**Nutritional facts are just estimates. Please utilize your own brand nutritional values to double check against our estimates.
Like this recipe card? Want one for your site?Check out WP Recipe Maker!

Sarah Mock of savoringthegood.com headshot 2022

I am Sarah Mock. Welcome!

Sarah Mock is a classically trained Chef and graduate of Johnson & Wales University. A culinary blogger for 16 years Sarah helps the home cook prepare her recipes with professional results.
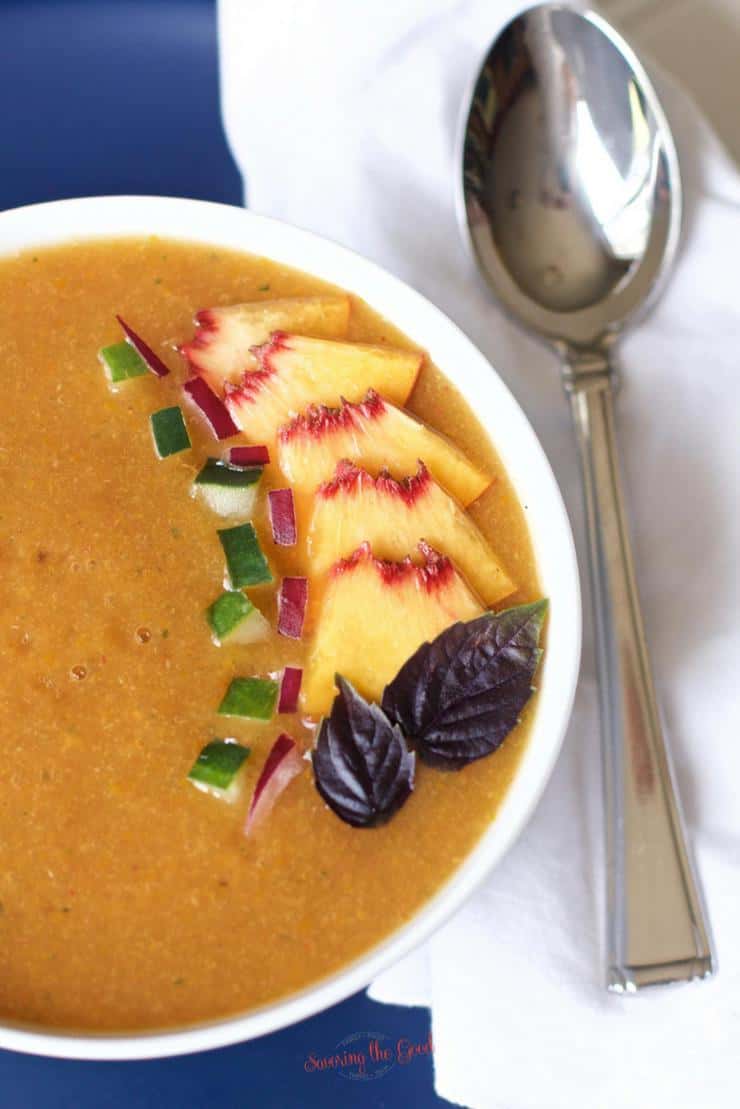
Get to know me

as seen in:

Logos of Hersheyland, ABC News, and Good Day PA are showcased in a seamless row, providing a snapshot of popular brands.

Hersheyland Nightline Good Day Pa!

The vibrant design showcases the iconic logos of Pinterest, Rachael Ray, and Jell-O set against a bold red background. Sorry, the provided description doesn't offer enough detail to suggest important SEO keywords.

Pinterest Rachael JELL-O

Ranch Cheese Crackers Recipe

ranch cheese crackers.

This recipe was even BETTER than the seasoned ranch oyster cracker recipe we had been using. Why? Because I am adding an additional layer of flavor by using cheese-its in place of the oyster cracker. 

ranch cheese crackers.

Welcome, BuzzFeed readers!!

They added one more layer of cheesy goodness to the flavors we had already love. The amazing flavors in this snack cracker will keep you coming back for more. Totally off-topic but I wanted to be sure you know how to carve a turkey breast.

Are you looking for more yummy snacks be sure to make Alabama firecrackers, dill pickle Chex mix, churro Chex mix, . All recipes will satisfy your crunchy snack craving!

Ingredients Needed:

homemade seasoned ranch cheese crackers ingredients on a wooden table

Recipe Card?

To find the full printable recipe with specific measurements and directions CLICK HERE to go to the recipe card.

Directions:

homemade seasoned ranch cheese crackers ingredients
  1. Combine all spices and the oil in a large bowl. Whisk to combine.
  2. Add the cheese crackers and stir until they are coated completely. Be sure to scrape the bottom of the bowl and get all the delicious flavors on the crackers.
  3. Bake the seasoned ranch cheese crackers
  4. I use a large pot to bake my crackers because I find it easier to stir them.
  5. Bake at 325 for 20 minutes, stirring ½ way through.
  6. Cool completely and store in an airtight container.

Did you make this recipe?

Do you have feedback that would be helpful to others? If so can help this small business owner by leaving a rating and a review in the comments section? Thank you for being part of the Savoring The Good Community. ~ Sarah

Homemade Seasoned Ranch Cheese Crackers

homemade seasoned ranch cheese crackers in a clear mason jar

The conception of this recipe started in college with the traditional homemade seasoned ranch crackers. But as most recipes created, this one was also created by mistake. We were out of the oyster crackers but only had cheese crackers in the house. Being in college, we figured...what could go wrong!?

Nothing went wrong! Everything went right!

Seasonal Favorite

Baked lattice top crust on an apple pie made with the Crisco pie crust recipe, showing flaky layers in the fluted edge.

This is my award-winning Crisco pie crust recipe; flaky, tender, and made with simple ingredients you already have.

Crisco Pie Crust

Here are more viral posts you will want to check out: Pineapple dump cake, pork and sauerkraut, and Paska bread. See what all the fuss is about!

homemade seasoned ranch cheese crackers in a bowl
Close-up of seasoned ranch cheese party crackers.

this went viral!!!

29,000 repins on Pinterest!

Just one pin...there are so many more!

Click to Pin

Birth Control Cracker: The explanation

After much discussion, it was decided that these new crackers were going to be called Birth Control crackers. What?! Why?

Because after you eat them, your breath is so pungent with the layers of dill, garlic, and cheese cracker that NO one is getting any lovin'. Birth control. We all had a good laugh about it know that these crackers were not a true form of contraception but just a silly way of referring to our new favorite homemade snack food.

homemade ranch cheese crackers

FAQ's and Tips

How do you store these ranch crackers?

I will store these ranch crackers in a gallon zip-top bag but any airtight container will work. You want to be sure to keep the humidity out of these crackers so that they do not go stale.

Can other crackers be used instead of cheez-it crackers?

Use the oil and the seasonings to make other seasoned crackers. Some of our favorite Cheez-it cracker substitutions is:
pretzel sticks
oyster crackers
saltine crackers
pretzel thins
pretzel nuggets
butter crackers such as Ritz
Asian rice crackers (same crackers I use in my Thai Chex Mix)

Here are some more edible holiday DIY gifts to give: 

  • Nuts and Bolts Snack Mix
  • DIY Williams Sonoma mulling spices
  • Anise Pizzelles
  • Chocolate Pizzelles
  • Dill Pickle Chex Mix
  • Pear Butter
  • Pickeld bannana peppers
ranch cheese crackers.

Homemade Seasoned Ranch Cheese Crackers

This recipe was even BETTER than the seasoned ranch oyster cracker recipe we had been using. Why? Because of the cheese crackers. They added one more layer of cheese goodness to the flavors already love.
5 from 1 vote
Print Pin Rate
Course: Snacks
Cuisine: American
Keyword: ranch crackers, snack food
Prep Time: 5 minutes minutes
Cook Time: 20 minutes minutes
Total Time: 25 minutes minutes
Servings: 21 ounces
Calories: 712
Author: Sarah Mock

Ingredients

  •  
    1 Family size box of Cheese Crackers 21 oz. or 2 small boxes
  •  
    [2 packets Hidden Valley Ranch Salad Dressing Seasoning Mix]
  •  
    ½ Teaspoon Lemon Pepper
  •  
    4 Teaspoons Dill Weed
  • A bottle of McCormick Garlic Powder with a red lid and green label, featuring the brand logo and ½ Teaspoon Garlic Powder
  • A 24 fl oz bottle of Wesson vegetable oil with a clear plastic body, white cap, and label featuring fried chicken and product details-perfect for preparing delicious dishes like chipotle carnitas or classic fried favorites.1 Cup Vegetable Oil
Follow Savoring The Good On PinterestFollow @SavoringTheGood or tag #STGRecipes!

Instructions

  • Combine all spices and the oil in a large bowl. Whisk to combine.
    [2 packets Hidden Valley Ranch Salad Dressing Seasoning Mix], ½ Teaspoon Lemon Pepper, 4 Teaspoons Dill Weed, ½ Teaspoon Garlic Powder, 1 Cup Vegetable Oil
  • Add the cheese crackers and stir until they are coated completely. Be sure to scrape the bottom of the bowl and get all the delicious flavors on the crackers.
    1 Family size box of Cheese Crackers 21 oz.
  • I use a large pot to bake my crackers because I find it easier to stir them.
  • Bake at 325 for 20 minutes, stirring ½ way through.
  • Cool completely and store in an airtight container.

Notes

Five chef hat icons each containing a QR code labeled: Appetizer Recipes, Dessert Recipes, Slow Cooker Recipes, Culinary Skills, and Shop My Kitchen, with SavoringTheGood.com branding.
How do you store these ranch crackers?
I will store these ranch crackers in a gallon zip-top bag but any airtight container will work. You want to be sure to keep the humidity out of these crackers so that they do not go stale.
Can other crackers be used instead of cheez-it crackers?
Use the oil and the seasonings to make other seasoned crackers. Some of our favorite Cheez-it cracker substitutions is:
  • pretzel sticks
  • oyster crackers
  • saltine crackers
  • pretzel thins
  • pretzel nuggets
  • butter crackers such as Ritz
Want to share when you made this recipe?Follow @SavoringTheGood & tag #STGRecipes!
Nutrition Facts
Homemade Seasoned Ranch Cheese Crackers
Serving Size
 
3 ounces
Amount per Serving
Calories
712
% Daily Value*
Fat
 
52
g
80
%
Saturated Fat
 
7
g
44
%
Trans Fat
 
1
g
Polyunsaturated Fat
 
42
g
Cholesterol
 
4
mg
1
%
Sodium
 
986
mg
43
%
Carbohydrates
 
51
g
17
%
Sugar
 
4
g
4
%
Protein
 
9
g
18
%
* Percent Daily Values are based on a 2000 calorie diet.
**Nutritional facts are just estimates. Please utilize your own brand nutritional values to double check against our estimates.
Like this recipe card? Want one for your site?Check out WP Recipe Maker!

published March 2017


Sarah Mock of savoringthegood.com headshot 2022

I am Sarah Mock. Welcome!

Sarah Mock is a classically trained Chef and graduate of Johnson & Wales University. A culinary blogger for 15 years Sarah helps the home cook prepare her recipes with professional results.

Get to know me

Copycat Panera Autumn Squash Soup Recipe

Autumn Squash Soup in a white bowl with pepita garnish in a white bowl

This is a copycat Panera autumn squash soup recipe and while it is not exact (who can replicate Panera anyway?) it is delicious, creamy, and full of fall flavors.

Autumn Squash Soup in a white bowl with pepita garnish in a white bowl

You will be surprised how easy it is made at home. Check the recipe card below and create this yummy autumn soup!

If you love a restaurant copycat recipe as much as I do, be sure to try my copycat chipotle carnitas recipe, Trader Joe's everything but the bagel seasoning and the almondina cookie recipe. Everyone loves a copycat recipe!

Why you should make this easy copycat panera squash soup:

  • Impress friends and family with this delicious homemade version of a favorite restaurant dish.
  • It offers a rich blend of butternut squash.
  • Making this copycat recipe allows you to customize the soup to your liking.

🧅 Ingredients to make copycat panera autumn squash soup:

  • extra virgin olive oil
  • yellow onion, diced
  • butternut squash (about 6 heaping cups)
  • baby carrots
  • curry powder
  • cinnamon
  • vegetable broth
  • apple juice or cider
  • pumpkin puree (NOT pumpkin pie filling)
  • salt to taste
  • heavy cream, optional but encouraged
  • Pumpkin seeds (pepitas) for garnish

🥄 How to make this Panera Autumn Squash Soup Recipe:

panera autumn squash soup with garnish in a white bowl horizontal image
  1. Saute the onion. Allow the onions to take on a little color. Remember, color equals flavor.
  2. Add the spices and allow them to get fragrant.
  3. Add the stock, apple juice, spices, butternut squash, and carrots. soup ingredients simmering in the pot
  4. Cover and bring the soup to a simmer on medium heat.
  5. Simmer until the carrots and the squash is very tender.
  6. Use a fork to test to be sure the vegetables fall apart easily.
  7. Add the canned pumpkin to the soup. immersion blender stick blending the soup
  8. Use a stick or immersion blender to puree the soup. If you don't have an immersion blender, you can blend small batches in your food processor or blender.
  9. I suggest adding the cream at the end and stir until it is incorporated.
  10. Garnish with the pumpkin seeds, serve and enjoy! I also love to have a small loaf of warm, crusty bread.

🥛 Non dairy, vegan copycat Panera copycat butternut squash soup variation:

Make this recipe dairy-free and vegan by omitting the heavy cream and adding your favorite non dairy substitute. My friends at Make It Dairy Free have a dairy alternatives guide to help you choose one that will work for your family.

Can you freeze this Panera autumn squash soup recipe?

Yes, you can freeze Panera autumn squash soup. Freezing it can be a convenient way to preserve the soup for later consumption. However, there are a few things to keep in mind:

  • Cool: Before freezing, make sure the soup has cooled down completely.
  • Container: Transfer the soup in an airtight container or freezer-safe bags. Be sure to leave some space at the top as liquids expand when frozen.
  • Label and date: Before you freeze the soup, clearly label each container with the name of the soup and the date it was frozen. This will help you keep track of its freshness.
  • Consume: While frozen foods can technically last indefinitely, for best quality, try to consume the frozen Panera autumn squash soup within 2-3 months.
  • Thawing and reheating: When ready to enjoy, thaw the soup overnight in the refrigerator before reheating on the stove or microwave until heated through.

What to Serve with Autumn Squash Soup

Serve a hearty autumn salad with roasted vegetables and a crusty bread to complement the flavors of this Panera copycat butternut squash soup recipe. These will enhance the experience of enjoying the fall soup and make the soup a satisfying meal.

I want to try this copycat panera soup. Is it good for me?

Being a creamy soup, panera squash soup may contain higher levels of fat and calories, so it's important to consider it as part of a balanced diet.

Are the Panera squash soup ingredients easy to find?

Yes, the ingredients for Panera's squash soup are generally easy to find, as they consist of common items like squash, onions, carrots, vegetable broth, olive oil, heavy cream, and cinnamon, which are typically available in most grocery stores.

🍲 More Soups

  • Cheddar Cheese Soup from EPCOT
  • Cream of asparagus soup
  • Cabbage Roll Soup
  • Beanless Chili
  • Maryland Crab Soup
  • Panera Autumn Squash Soup
  • Serve soup with Rhodes Rolls
Autumn Squash Soup in a white bowl with pepita garnish in a white bowl

Panera Autumn Squash Soup Copycat Recipe

This is a copycat Panera autumn squash soup recipe and while it is not exact (who can replicate Panera anyway?) it is delicious, creamy and full of fall flavors.
No ratings yet
Print Pin Rate
Course: Soup
Cuisine: American
Prep Time: 10 minutes minutes
Cook Time: 35 minutes minutes
Total Time: 45 minutes minutes
Servings: 8 servings
Calories: 243
Author: Sarah Mock

Ingredients

  • A 500ml bottle of California Olive Ranch Global Blend Extra Virgin Olive Oil with green and blue labeling, indicating a blend from Argentina, Portugal, Chile, and California-perfect for drizzling over your favorite shrimp avocado salad.1 tablespoon Olive Oil
  • A single whole yellow onion with dry, papery skin, photographed against a white background-the perfect flavorful addition to your next Crockpot Hash brown Casserole.1 small Onion Yellow, diced
  •  
    2 pounds butternut squash Chopped, about 6 heaping cups
  •  
    1 Cup Carrots Baby
  •  
    ½ Teaspoon curry powder
  • A plastic container of McCormick Ground Cinnamon with a red lid and label showing product details in English and Spanish-perfect for adding warm flavor to your favorite recipes, including Keto Granola.¼ Teaspoon cinnamon
  •  
    3-4 Cups vegetable broth
  •  
    2 Cups apple juice
  •  
    15 oz. pumpkin puree NOT pumpkin pie filling
  • A Morton Salt container with a blue label featuring a girl in a yellow dress holding an umbrella, with salt pouring out of a container-an essential ingredient for perfectly seasoning dishes like Chicken Cordon Bleu.salt to taste
  • heavy cream bottle.1 Cup Heavy Cream optional but encouraged
  •  
    Pumpkin seeds pepitas for garnish
Follow Savoring The Good On PinterestFollow @SavoringTheGood or tag #STGRecipes!

Instructions

  • In a heavy bottom pot, over medium high heat, heat the oil and saute the onion. Allow the onions to take on a little color. Remember, color equals flavor.
  • Add the spices and allow them to get fragrant. About 30 seconds to a minute.
  • Add the butternut squash, baby carrots, broth, apple juice and spices.
  • Cover and bring to a simmer.
  • Simmer for 15 minutes or until the carrots and the squash is very tender. Use a fork to test to be sure the vegetables fall apart easily.
  • Add the canned pumpkin to the soup.
  • Use a emersion blender to puree the soup.
  • If you don't have an immersions blender, blend the soup in a blender in small batches.
  • Stir in the heavy cream.
  • Serve, garnished with pepitas

Notes

  • I suggest adding the cream at the end and stir until it is incorporated.
  • Make this recipe dairy free and vegan by omitting the heavy cream.
Want to share when you made this recipe?Follow @SavoringTheGood & tag #STGRecipes!
Nutrition Facts
Panera Autumn Squash Soup Copycat Recipe
Serving Size
 
1
Amount per Serving
Calories
243
% Daily Value*
Fat
 
13
g
20
%
Saturated Fat
 
7
g
44
%
Polyunsaturated Fat
 
5
g
Cholesterol
 
34
mg
11
%
Sodium
 
1102
mg
48
%
Carbohydrates
 
31
g
10
%
Sugar
 
14
g
16
%
Protein
 
4
g
8
%
* Percent Daily Values are based on a 2000 calorie diet.
**Nutritional facts are just estimates. Please utilize your own brand nutritional values to double check against our estimates.
Like this recipe card? Want one for your site?Check out WP Recipe Maker!

Jan 2, 2017


Sarah Mock of savoringthegood.com headshot 2022

I am Sarah Mock. Welcome!

Sarah Mock is a classically trained Chef and graduate of Johnson & Wales University. A culinary blogger for 16 years Sarah helps the home cook prepare her recipes with professional results.
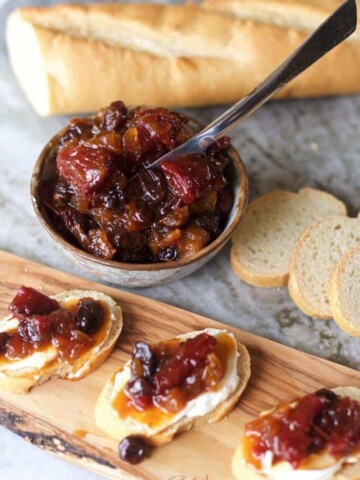
Get to know me

as seen in:

Logos of Hersheyland, ABC News, and Good Day PA are showcased in a seamless row, providing a snapshot of popular brands.

Hersheyland Nightline Good Day Pa!

The vibrant design showcases the iconic logos of Pinterest, Rachael Ray, and Jell-O set against a bold red background. Sorry, the provided description doesn't offer enough detail to suggest important SEO keywords.

Pinterest Rachael JELL-O

Easy Churro Chex Mix Recipe

Churro Chex Mix

I love a crunchy, sweet churro and this churro Chex mix recipe hits the spot! They are a favorite to snack on when we are walking down Main Street USA in Walt Disney World. We can make churros at home but sometimes you don't want to pull out the fryer and all the mess that is involved with that operation.

I love a crunchy, sweet churro and this churro Chex mix recipe hits the spot! They are a favorite to snack on when we are walking down Main Street USA in Walt Disney World. We can make churros at home but sometimes you don't want to pull out the fryer and all the mess that is involved with that operation. This is a super simple snack that combined all the textures and flavors of your beloved churro! One you start snacking you are not going to want to stop! #chexmix #churro #snackmix

This is an interpretation of a Disney Inspired snack. If you love a good Instagram photo you will need to know where all the Disney Walls in Disney California Adventure are to be found! Don't forget to take a screenshot of the checklist.

Churro Chex mix

This is a super simple snack that combined all the textures and flavors of your beloved churro! Once you start snacking you are not going to want to stop!

Churro Chex mix ingredients:

  • Rice Chex cereal
  • Corn Chex cereal
  • brown sugar
  • stick butter
  • light corn syrup
  • baking soda
  • sugar
  • cinnamon

Recipe Card?

To find the full printable recipe with specific measurements and directions CLICK HERE to go to the recipe card.

Churro Chex Snack Mix Instructions:

  1. Combine the granular sugar and cinnamon in a small bowl. Set aside.
  2. In a heavy bottom pot, over medium heat, combine the brown sugar, butter, corn syrup and baking soda.
  3. Turn up the heat and bring the mixture to a rolling boil. Stir continually. Boil, stirring continually one minute.
  4. Place chex cereal in an oven safe dish.
  5. Pour sugar mixture over the cereal and stir to combine.
  6. Sprinkle cinnamon sugar mixture over the cereal.
  7. Bake at 350 for 5 minutes
  8. Remove from oven, stir churro snack mix
  9. Bake for an additional 3 minutes.
  10. Cool completely and store in an air tight container.

Churro Chex Mix add ins:

These ingredients can be added after the churro chex mix comes out of the oven, after it has cooled and before it is place in the air tight containers.

  • Cinnamon chips
  • Chocolate chips
  • Mini Marshmallows
  • White chocolate chips
  • Pretzel sticks

Did you make this recipe?

Do you have feedback that would be helpful to others? If so can help this small business owner by leaving a rating and a review in the comments section? Thank you for being part of the Savoring The Good Community. ~ Sarah

  • Slow cooker chicken tikka masala in a white bowl over rice, garnished with cilantro
    Slow Cooker Chicken Tikka Masala
  • Trays of microgreens at various growth stages, with green and pink stems, are growing densely in soil indoors.
    How to Grow Microgreens at Home
  • A metal spatula lifts a single chocolate brownie from a tray of evenly cut sheet pan brownies.
    Sheet Pan Brownies
Easy Churro Chex Snack Mix Recipe found at savoringthegood.com

Churro Chex Mix Recipe

his is a super simple snack that combined all the textures and flavors of your beloved churro! One you start snacking you are not going to want to stop!
No ratings yet
Print Rate
Course: Snack
Cuisine: American
Prep Time: 5 minutes minutes
Cook Time: 8 minutes minutes
Total Time: 13 minutes minutes
Servings: 10 servings
Calories: 344
Author: Sarah Mock

Ingredients

  •  
    4 ½ Cups Rice Chex cereal
  •  
    4 ½ Cups Corn Chex cereal
  •  
    1 Cup packed brown sugar
  •  
    ½ Cup 1 stick butter
  •  
    ¼ Cup light corn syrup
  • Arm & Hammer Pure Baking Soda box, 8 oz size, with text promoting it as America's #1 trusted brand and stating ¼ Teaspoon Baking Soda
  • A 4-pound bag of Domino granulated pure cane sugar with a yellow and white design, showing nutrition information and branding-perfect for sweetening recipes like rhubarb sour or your favorite desserts.⅔ Cup Sugar
  • A plastic container of McCormick Ground Cinnamon with a red lid and label showing product details in English and Spanish-perfect for adding warm flavor to your favorite recipes, including Keto Granola.2 teaspoons ground cinnamon
Follow Savoring The Good On PinterestFollow @SavoringTheGood or tag #STGRecipes!

Instructions

  • Combine the granular sugar and cinnamon in a small bowl. Set aside.
  • In a heavy bottom pot, over medium heat, combine the brown sugar, butter, corn syrup and baking soda.
  • Turn up the heat and bring the mixture to a rolling boil. Stir continually. Boil, stirring continually one minute.
  • Place chex cereal in an oven save dish.
  • Pour sugar mixture over the cereal and stir to combine.
  • Sprinkle cinnamon sugar mixture over the cereal.
  • Bake at 350 for 5 minutes
  • Remove from oven, stir churro snack mix
  • Bake for an additional 3 minutes.
  • Cool completely and store in an air tight container.

Notes

These ingredients can be added after the churro chex mix comes out of the oven, after it has cooled and before it is place in the air tight containers.
  • Cinnamon chips
  • Chocolate chips
  • Mini Marshmallows
  • White chocolate chips
  • Pretzel sticks
Want to share when you made this recipe?Follow @SavoringTheGood & tag #STGRecipes!
Nutrition Facts
Churro Chex Mix Recipe
Amount per Serving
Calories
344
% Daily Value*
Saturated Fat
 
5
g
31
%
Cholesterol
 
24
mg
8
%
Sodium
 
332
mg
14
%
Carbohydrates
 
65
g
22
%
Sugar
 
44
g
49
%
Protein
 
1
g
2
%
* Percent Daily Values are based on a 2000 calorie diet.
**Nutritional facts are just estimates. Please utilize your own brand nutritional values to double check against our estimates.
Like this recipe card? Want one for your site?Check out WP Recipe Maker!

originally published August 19, 2016


Sarah Mock of savoringthegood.com headshot 2022

I am Sarah Mock. Welcome!

Sarah Mock is a classically trained Chef and graduate of Johnson & Wales University. A culinary blogger for 15 years Sarah helps the home cook prepare her recipes with professional results.

Get to know me

as seen in:

Logos of Hersheyland, ABC News, and Good Day PA are showcased in a seamless row, providing a snapshot of popular brands.

Hersheyland Nightline Good Day Pa!

The vibrant design showcases the iconic logos of Pinterest, Rachael Ray, and Jell-O set against a bold red background. Sorry, the provided description doesn't offer enough detail to suggest important SEO keywords.

Pinterest Rachael JELL-O

Crock Pot Recipes To Make Your Beach Vacation Easier

9 Beach Crockpot Meals To Make Your Beach Vacation Easier. You want to eat delicious food but don't want to spend hours in the kitchen like you do at home. These beach crockpot meals will keep your hand out of the kitchen and your toes in the sand!

A simple list of easy meals to make on vacation. When you are thinking about beach vacation meal planning these crockpot meals will help make your time in the kitchen short when you are trying to put together vacation meals on a budget.

9 Crockpot Recipes to make your beach vacation easier.You want to eat delicious food but don't want to spend hours in the kitchen like you do at home.

Easy Vacation Meals

You want to eat delicious food but don't want to spend hours in the kitchen as you do at home. These beach crockpot meals will keep your hand out of the kitchen and your toes in the sand!

It is vacation time! You have booked that beautiful house, condo or bungalow by the beach and you are planning your meal prep. Vacation should mean eating delicious food but not wanting to spend hours in the kitchen as you do at home.

Beach vacation meal planning

Don't be the person who has to stays back at the vacation rental chopping, cooking and cleaning up while everyone else is basking in the sun, jumping in the waves or reading their favorite novel by the pool.

Pack your trusty Crock-Pot Slow Cooker and grab the ingredients for a few of these recipes and you are all set!

Easy meal to prep on vacation

Fill the crockpot in the morning (or night before depending on the recipe) and you let the crockpot do the work for you! Now go pour yourself a glass of wine, water, beer or cocktail! You deserve it. Be sure to pack a jar or two of homemade strawberry jam for breakfast. Popular recipes to try:

  • 10 Easy, Delicious Foil Packet Meals For Camping
  • Homemade Seasoned Ranch Cheese Crackers
  • 18 Crock Pot Recipes To Make Christmas Morning Easier
  • Easy Juicy Oven Roasted Brined Thanksgiving Turkey Recipe
  • Ham pot pie recipe
  • How To Roast Garlic And Store In Olive Oil
  • Philly Cheesesteak Egg Rolls
  • Cranberry, Almond Biscotti Recipe
  • Strawberry Jam Made With Sure-Jell

Seasonal Favorite

Baked lattice top crust on an apple pie made with the Crisco pie crust recipe, showing flaky layers in the fluted edge.

This is my award-winning Crisco pie crust recipe; flaky, tender, and made with simple ingredients you already have.

Crisco Pie Crust

beach crockpot meals

Beach Crockpot Meals:

  1. Crockpot Hashbrown, Sausage, Egg & Cheese Casserole
  2. Chicken Tortilla Soup
  3. Lasagna In The Crock Pot
  4. Slow Cooker Cilantro Lime Chicken Recipe <--- So good with Chipotle Corn Salsa or Mexican Corn Dip
  5. Crockpot Chicken Corn Soup
  6. Copycat Chipotle Style Carnitas Recipe
  7. Chipotle Copycat Roasted Chili-Corn Salsa
  8. Crock-Pot Slow Black Bean Soup
  9. Crockpot Mexican corn and chicken soup
  10. Crockpot Ham and Potato Soup
  11. Beanless Chili
  12. Beef Stroganoff in the slow cooker
  13. Bolognese served over pasta

Plus you might want to search through these recipes to see if any of them will make your beach vacation a bit tastier!

9 Beach Crockpot Meals


Sarah Mock of savoringthegood.com headshot 2022

I am Sarah Mock. Welcome!

Sarah Mock is a classically trained Chef and a graduate of Johnson & Wales University. A culinary blogger for 17 years, Sarah helps the home cook prepare her recipes with professional results.

Get to know me

as seen in:

Logos of Hersheyland, ABC News, and Good Day PA are showcased in a seamless row, providing a snapshot of popular brands.

Hersheyland Nightline Good Day Pa!

The vibrant design showcases the iconic logos of Pinterest, Rachael Ray, and Jell-O set against a bold red background. Sorry, the provided description doesn't offer enough detail to suggest important SEO keywords.

Pinterest Rachael JELL-O

Fried Green Beans Recipe

fried green beans

One of our favorite restaurant appetizers is fried green beans. Nothing is more satisfying than dipping crunchy coated fried green beans in a wasabi spiked ranch dressing to start off a great meal.

fried green beans

I scoured the internet when I got home to find a copy cat recipe and this is a mashup of about 3 of the recipes that I found. Nothing is like sitting at the restaurant having the server bring you the freed green beans but this recipe is a pretty close second place.

This is my homemade fried green beans recipe that is sure to make you feel like you are eating at your favorite restaurant. 

While you have your fry oil still hot make some other fried appetizers and treats. Fried Pickles, Tex-Mex Egg Rolls, Bang Bang Shrimp, and my favorite to use Thanksgiving leftovers, the Thanksgiving Egg Roll. You will have an appetizer platter to rival any appetizer platter. 

Fried Green Beans Ingredients:

  • fresh green beans
  • flour
  • salt
  • pepper
  • onion powder
  • garlic powder
  • egg
  • cream
  • Panko Italian seasoned bread crumbs.
  • Oil for frying

Seasonal Favorite

Baked lattice top crust on an apple pie made with the Crisco pie crust recipe, showing flaky layers in the fluted edge.

This is my award-winning Crisco pie crust recipe; flaky, tender, and made with simple ingredients you already have.

Crisco Pie Crust

How do you make fried green beans?

fresh green beans on a plate
  1. Trim the stem end off of each fresh green bean.
  2. Blanch them in simmering water for 3-4 minutes, depending on the thickness of the bean.
  3. Do not pat dry. The water will help the flour in the next step to adhere to the bean.
  4. Combine the flour and spices in a mixing bowl.
  5. In a separate bowl, whisk together the egg and cream to make an egg dip.
  6. Dredge the beans in the flour mixture.
    Copy Cat T.G.I. Friday's Green Bean Fries
  7. Dunk them in the egg mixture.
    Copy Cat T.G.I. Friday's Green Bean Fries
  8. Roll them in the bread crumbs.
  9. Fry them in vegetable oil until crisp. It should take about a minute.

Fried Green Beans Dipping Sauce Ingredients:

Copy Cat T.G.I. Friday's Green Bean Fries
  • ½ cup ranch dressing
  • 1 tablespoon wasabi sauce. (in the dressing isle)

How to make an easy fried green bean dipping sauce:

  1. In a small bowl whisk together the ranch dressing and wasabi sauce until combined.
  2. For best results, allow the dip to rest in the refrigerator for at least 1 hour.

Can I use canned green beans to make fried green beans?

You can probably get away with frozen in a pinch but DO NOT use canned. Canned are WAY to soft for this application. You need to crispness of a fresh green bean to make a good fried green bean.

Appetizer Recipes

  • A jar filled with marinated mozzarella balls in olive oil, herbs, and spices, placed on a rustic wooden surface.
    Marinated Mozzarella Balls
  • Crockpot meatballs drenched in melted cheese and infused with the rich flavor of French onion soup, a wooden spoon lifting some out.
    French Onion Meatballs in the Crockpot (Simple Recipe)
  • Close-up of Texas Twinkies-bacon-wrapped jalapeños stuffed with cream cheese and shredded meat-stacked invitingly on a plate.
    Texas Twinkies
  • A bowl of cream cheese and fried dill pickle dip topped with crispy breadcrumbs, accompanied by pretzel chips on the side.
    Fried Pickle Dip Recipe
See more Appetizer Recipes →

Reader Favorites

  • Pear butter in a glass canning jar with spices to the side and a whole pear to the right of the jar
    Pear Sauce Recipe
  • lasagna roll up on a serving fork coming out of the full pan, cheese pulling
    Lasagna Roll Ups Recipe
  • Four tacos filled with shredded meat from a delicious Mojo Pork Recipe, garnished with cilantro, and accompanied by lime wedges on a white plate.
    Mojo Pork Recipe
  • Sous vide eggs on toast, broken to show the runny yolk
    Sous Vide Poached Eggs: 60°C or 63°C
Copy Cat T.G.I. Friday's Green Bean Fries

Fried Green Beans Recipe

This is my homemade fried green beans recipe that is sure to make you feel like you are eating at your favorite restaurant.
4.54 from 13 votes
Print Pin Rate
Course: Appetizer Recipe
Cuisine: American
Keyword: fried green beans
Prep Time: 10 minutes minutes
Cook Time: 8 minutes minutes
Total Time: 18 minutes minutes
Servings: 6 servings
Calories: 386
Author: Sarah Mock

Ingredients

  •  
    1 lb fresh green beans
  • A 5-pound bag of King Arthur Baking Company unbleached bread flour with 12.7% protein content, labeled for ideal use in bread, pizza crust, and rolls-perfect for creating hearty sides like homemade loaves to serve alongside a comforting slowcooker sausage casserole.½ Cup Flour, All Purpose
  • A Morton Salt container with a blue label featuring a girl in a yellow dress holding an umbrella, with salt pouring out of a container-an essential ingredient for perfectly seasoning dishes like Chicken Cordon Bleu.½ Teaspoon salt
  • A 6 oz container of McCormick Pure Ground Black Pepper with a red lid and a ½ Teaspoon Black Pepper
  • A plastic container of McCormick Onion Powder with a red lid and a green label stating ½ Teaspoon Onion Powder
  • A bottle of McCormick Garlic Powder with a red lid and green label, featuring the brand logo and ½ Teaspoon Garlic Powder
  • A single brown chicken egg, perfect for making Chicken Cordon Bleu, stands upright on a white background.1 Egg
  • heavy cream bottle.½ Cup Heavy Cream
  •  
    Panko Italian seasoned bread crumbs.
  •  
    Oil for frying

Fried Green Beans Dipping Sauce Ingredients:

  •  
    ½ Cup ranch dressing
  •  
    1 Tablespoon wasabi sauce. in the dressing isle
Follow Savoring The Good On PinterestFollow @SavoringTheGood or tag #STGRecipes!

Instructions

How to make the fried green beans:

  • Combine the flour and spices in a mixing bowl.
  • In a separate bowl, whisk together the egg and cream to make an egg dip.
  • Dredge the beans in the flour mixture.
  • Dunk them in the egg mixture.
  • Roll them in the bread crumbs.
  • Fry them in vegetable oil until crisp. It should take about a minute.

How to make an easy fried green bean dipping sauce:

  • In a small bowl whisk together the ranch dressing and wasabi sauce until combined.
  • For best results, allow the dip to rest in the refrigerator for at least 1 hour.
Want to share when you made this recipe?Follow @SavoringTheGood & tag #STGRecipes!
Nutrition Facts
Fried Green Beans Recipe
Serving Size
 
1
Amount per Serving
Calories
386
% Daily Value*
Fat
 
24
g
37
%
Saturated Fat
 
7
g
44
%
Polyunsaturated Fat
 
15
g
Cholesterol
 
61
mg
20
%
Sodium
 
933
mg
41
%
Carbohydrates
 
36
g
12
%
Sugar
 
7
g
8
%
Protein
 
8
g
16
%
* Percent Daily Values are based on a 2000 calorie diet.
**Nutritional facts are just estimates. Please utilize your own brand nutritional values to double check against our estimates.
Like this recipe card? Want one for your site?Check out WP Recipe Maker!


Sarah Mock of savoringthegood.com headshot 2022

I am Sarah Mock. Welcome!

Sarah Mock is a classically trained Chef and graduate of Johnson & Wales University. A culinary blogger for 15 years Sarah helps the home cook prepare her recipes with professional results.

Get to know me

as seen in:

Logos of Hersheyland, ABC News, and Good Day PA are showcased in a seamless row, providing a snapshot of popular brands.

Hersheyland Nightline Good Day Pa!

The vibrant design showcases the iconic logos of Pinterest, Rachael Ray, and Jell-O set against a bold red background. Sorry, the provided description doesn't offer enough detail to suggest important SEO keywords.

Pinterest Rachael JELL-O

originally published Jun 3, 2016

  • « Previous Page
  • 1
  • …
  • 8
  • 9
  • 10
  • 11
  • Next Page »
Sarah Mock of savoringthegood.com headshot 2022

I'm Sarah Mock, Welcome!

Sarah Mock is a classically trained Chef and graduate of Johnson & Wales University. A culinary blogger for 17 years Sarah helps the home cook prepare her recipes with professional results.

Get to know me

Trending Recipes:

  • A close-up of grilled chicken wings stacked on a plate, garnished with parsley, with a side of dipping sauce in the background.
    Grilled Chicken Wings
  • A bowl of taco salad with ground beef, lettuce, tomatoes, black olives, jalapeños, corn, shredded cheese, crushed tortilla chips, red onions, lime wedges, and a dollop of sour cream.
    Dorito Taco Salad
  • Buffalo cauliflower bites are roasted florets coated in a tangy red sauce, served on a white plate with a fork and garnished with fresh herbs.
    Buffalo Cauliflower Bites
  • A bowl of chili pie topped with shredded cheese, chopped onions, and green onions, surrounded by crunchy Fritos corn chips on a white plate.
    Frito Pie Recipe
See more Football Food →

Footer

Sharing this recipe on social media is both encouraged and appreciated. Please share the direct link back to the recipe. Copy/Paste and/or screenshots of the recipe to any social media is strictly prohibited. Content and photographs are copyright-protected. SavoringTheGood®

As an Amazon Associate, I earn from qualifying purchases.

©2026 Savoring The Good® All rights reserved.
Privacy Policy | Accessibility Policy | About Sarah Mock | About Savoring The Good | Terms Of Service

Rate This Recipe

Your vote:


Let me know what you thought of this recipe to leave your stars. Stuck for what to say? Click one of these inspiration prompts to get you started:

This worked exactly as written, thanks!
My family loved this! I just had to share.
This recipe is delicious but I have a suggestion...
Could you clarify for me...
Here is how I included this recipe in m celebration of...
This recipe was wonderful but can you point me to a recipe for...

As always, I appreciate you and what you bring to the Savoring The Good community!

A rating is required
A name is required
An email is required